|
|
|
Porsche, and the Porsche crest are registered trademarks of Dr. Ing. h.c. F. Porsche AG.
This site is not affiliated with Porsche in any way. Its only purpose is to provide an online forum for car enthusiasts. All other trademarks are property of their respective owners. |
|
|

  |

| JoeDees |
 Sep 30 2015, 07:40 PM Sep 30 2015, 07:40 PM
Post
#1
|
|
Senior Member  Group: Members Posts: 515 Joined: 10-November 14 From: Northern Kentucky Member No.: 18,106 Region Association: None |
I had every intention of making an introduction video, but I found that I had ruined my wide angle lens trying to film some cool shots of grinding. So while I'm waiting for the new lens to be delivered, I will go with this novel:
I bought the car about a year ago with the shortsighted intention of throwing it back together and having a driver until its turn came for rustoration. I bought the car and a carload of parts from a guy in Dallas who did some really shady work and an incredible job hiding other rust; magician style he distracted with his obvious poor work. The drivetrain was out of the car and registration said it had been sitting for 12 years, so I don’t know what made me think I could get it driving in a month… Soon after buying the car, my daily driver VW went down and needed a bunch of work and Uncle Sam gave me orders to move 800 miles. I fiddled with the 914 now and then, mostly just probing for rust, but focused my attention on prepping my other projects and VW for sale, knowing I could only bring one car with me and it had to be rolling so I couldn’t really tear into it. I’ve been here in the new, much smaller shop since June and have been slowly tearing into the 914 between honey-do new house projects, new job training, and getting the new shop in order. As we sit now, the car is on jackstands with the rotisserie acting as additional bracing, the engine and trans are under a workbench, the bigger pieces of the car are using the extra bedroom (the one my wife says needs to be vacated when we get pregnant) and others in boxes in my closet. Tearing the car down, I’ve found almost everything worse than I expected. The gas tank is pretty nasty with rust, all 4 calipers are locked up and the wheel bearing grease congealed. Removing the bumpers I found some evidence of prior damage and filler. Further probes into the longs found some rust on the driver side, and the passenger side nearly shot. The hellhole was a known problem, and turned into a chasm. I haven’t really dove to much into the floor, but found rust around the firewall and under a seat mount. The good news seems to be in a relatively dry trunk and pedal area. My project’s Big 5 jobs are: 1) Rust repair. 2) Body work and a complete repaint. 3) Complete overhaul of the brake system, bearings, CVs, getting the window to work and stuff like that. 4) Engine rebuild. 5) Customization: wart removal, interior work, and an attempt at making custom made bumper tops. In this build off challenge I face multiple fronts of challenges: 1) I grew up helping my Dad fix VWs, redid a Triumph Spitfire in my early 20s with his help, and have done numerous small projects over the years, but this is my first full rustoration on my own. 2) I have a severely limited budget. I am active duty Army, and everybody knows that NCO paychecks leave much to be desired. 3) I’m often short on time. My current assignment is as an instructor requiring me to work 10-12 hour days and 50-60 hour weeks. 4) I have a bum knee that makes it almost impossible to crouch and am fighting a shoulder issue that makes working overhead painful (praying for no surgery). 5) Nothing but the windshield and fine machine work like the heads and crank will be farmed out, I’m doing this on my own. Well this is where we are starting, and honestly, who knows where we’ll end up. I haven’t really decided on color, engine, or upgrades, though I’m leaning towards keeping the 1.7 Liter Fuel Injection unless a good deal on another engine arises. I’m also thinking of keeping the car black but going minimal chrome, but who knows what the good idea fairy will deliver. I hope you enjoy the journey as much as I do. Attached thumbnail(s) 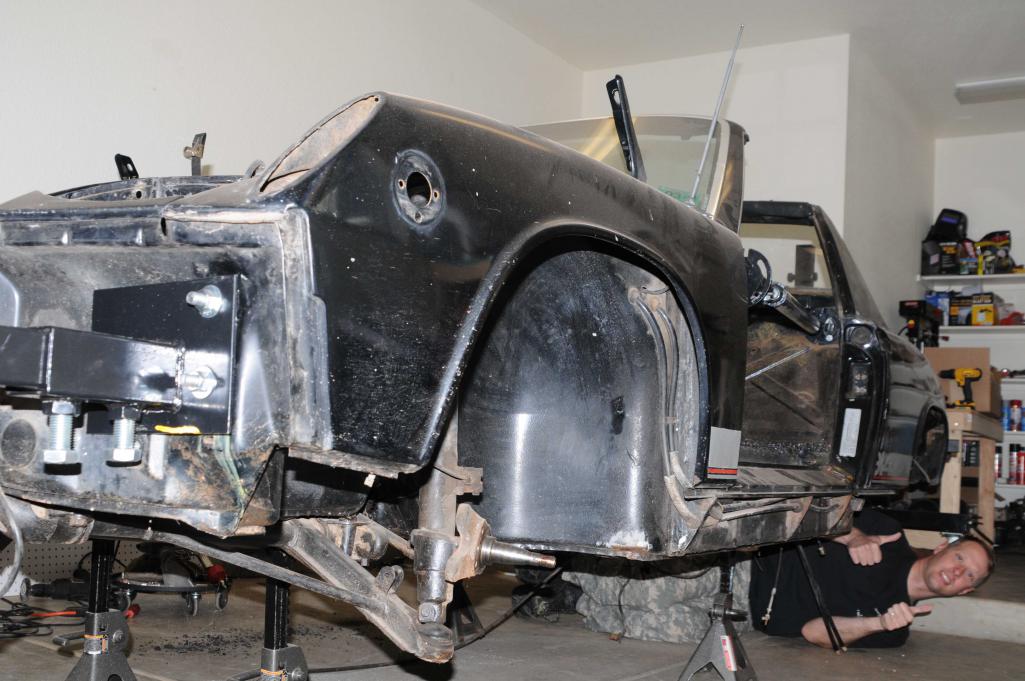 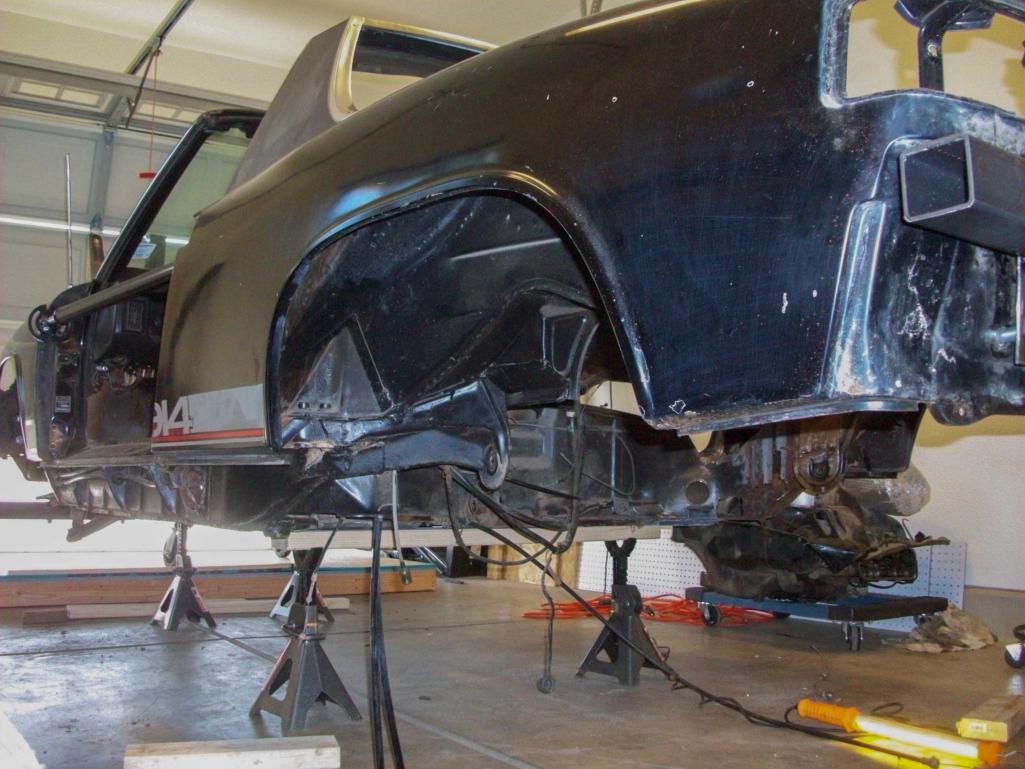 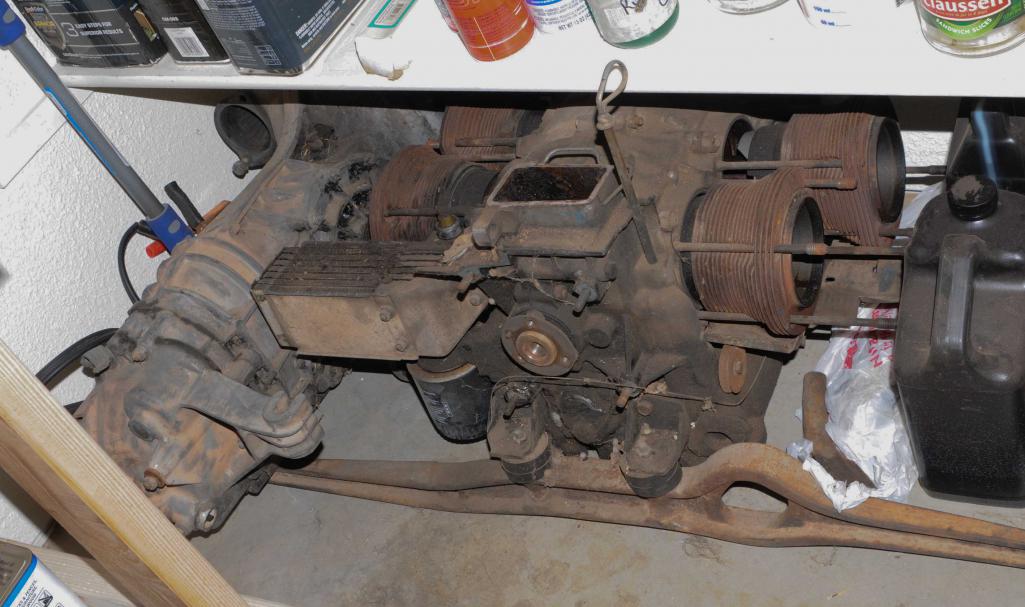 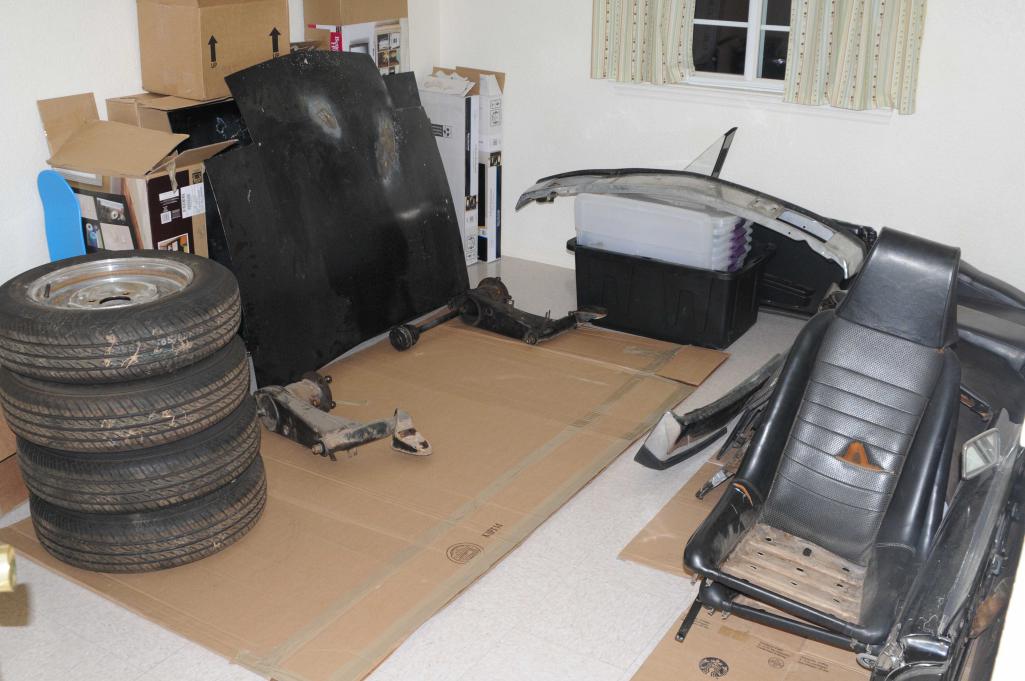 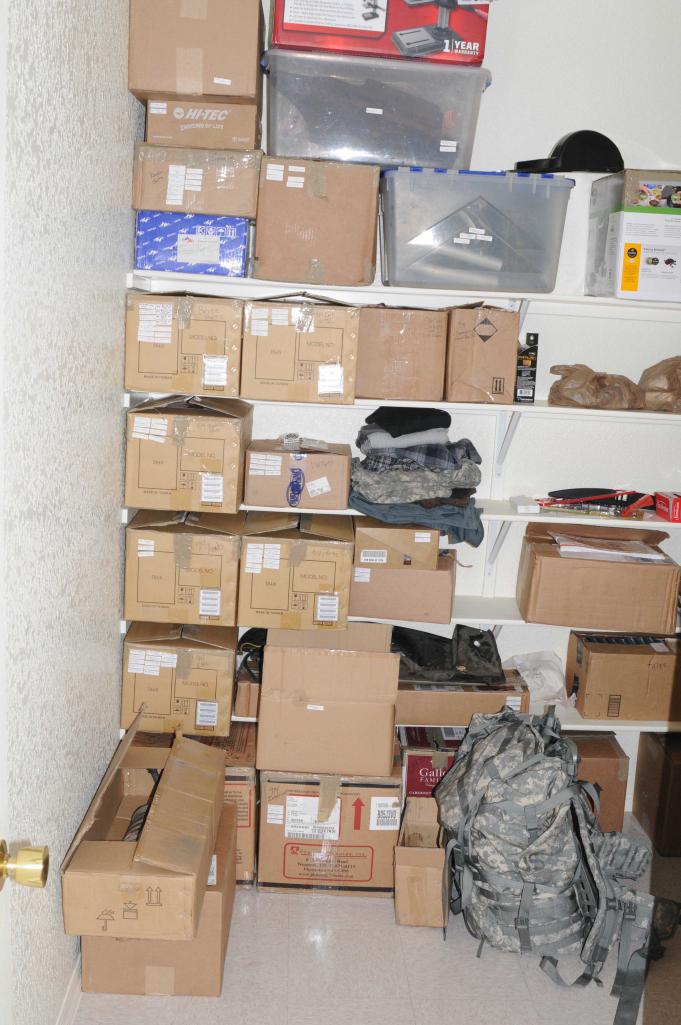 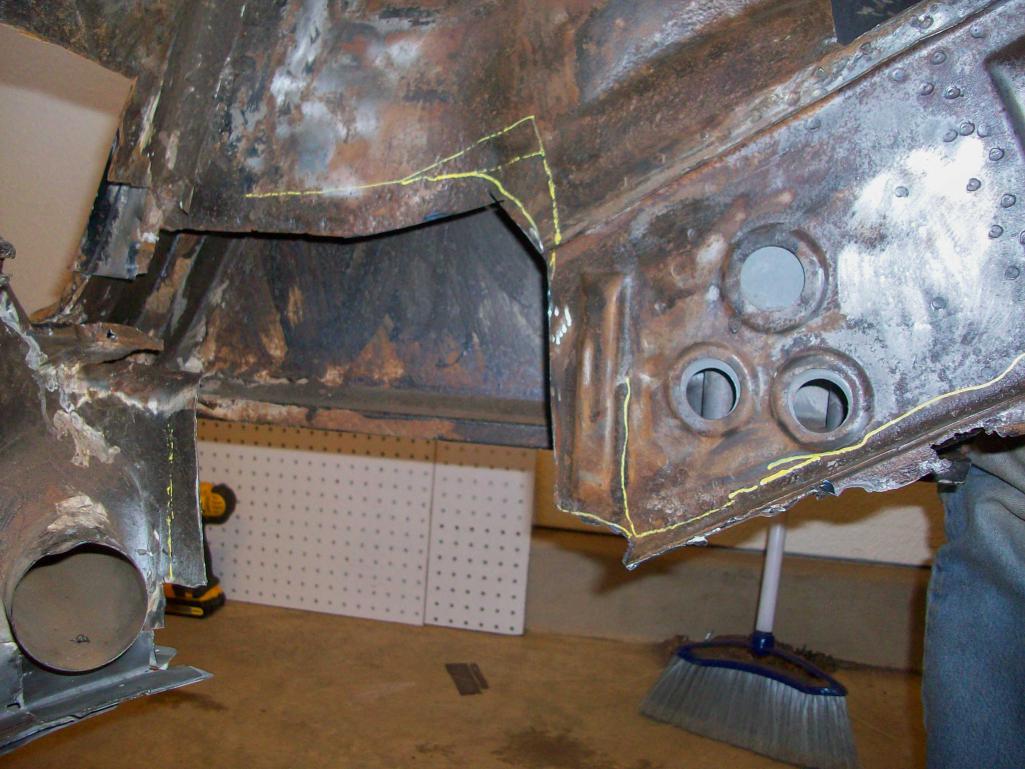 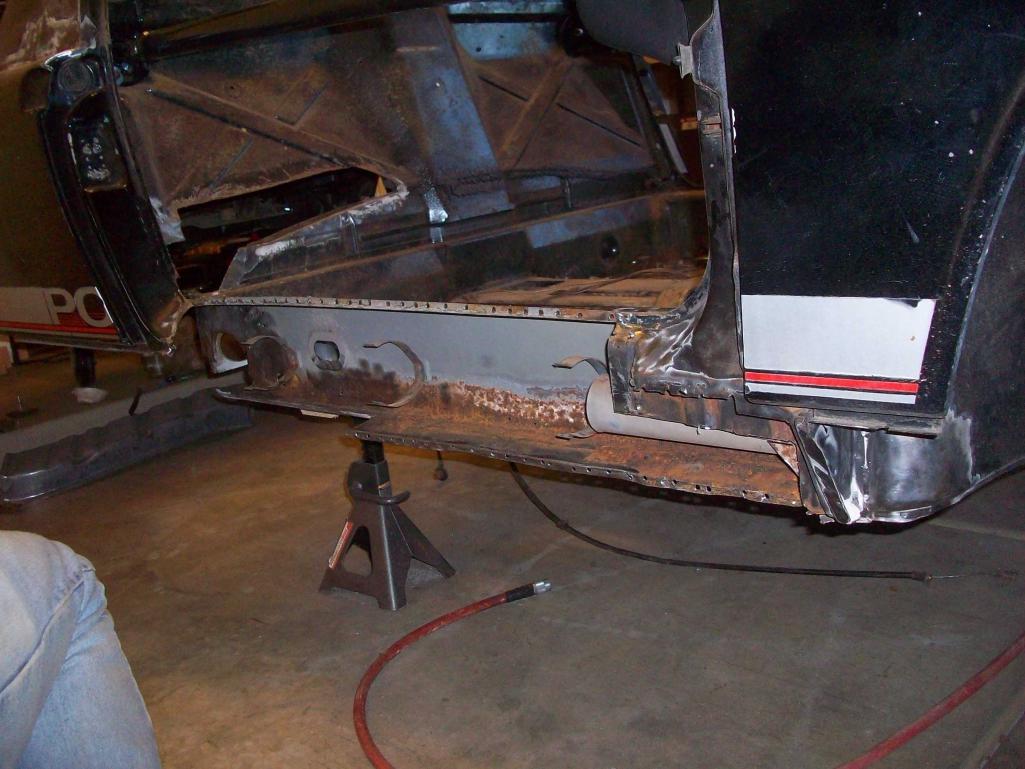
|
   |

 
|
| JoeDees |
Sep 30 2015, 07:44 PM
Post
#2
|
|
Senior Member Group: Members Posts: 515 Joined: 10-November 14 From: Northern Kentucky Member No.: 18,106 Region Association: None |
Some more pics to show where we are starting. Yeah, I have a month's head start on the challenge, but I don't think it'll help. I will also say that if anyone has any requests for photos, stories, explanations, or what not, just let me know and I will do my best to oblige.
Attached thumbnail(s) 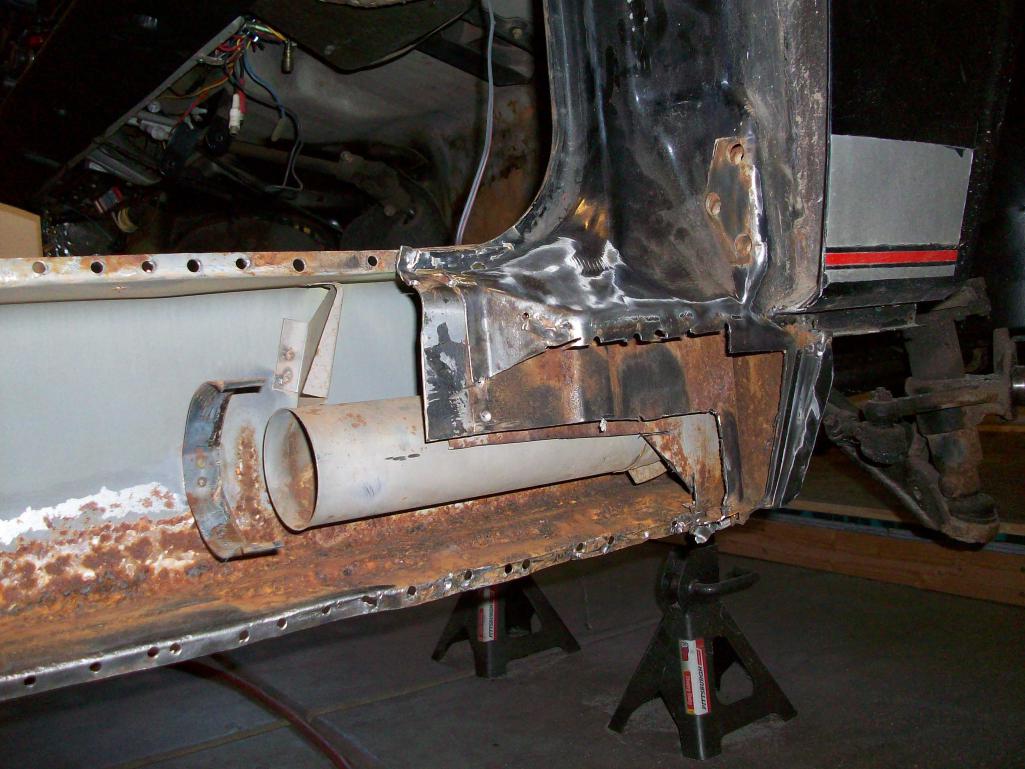 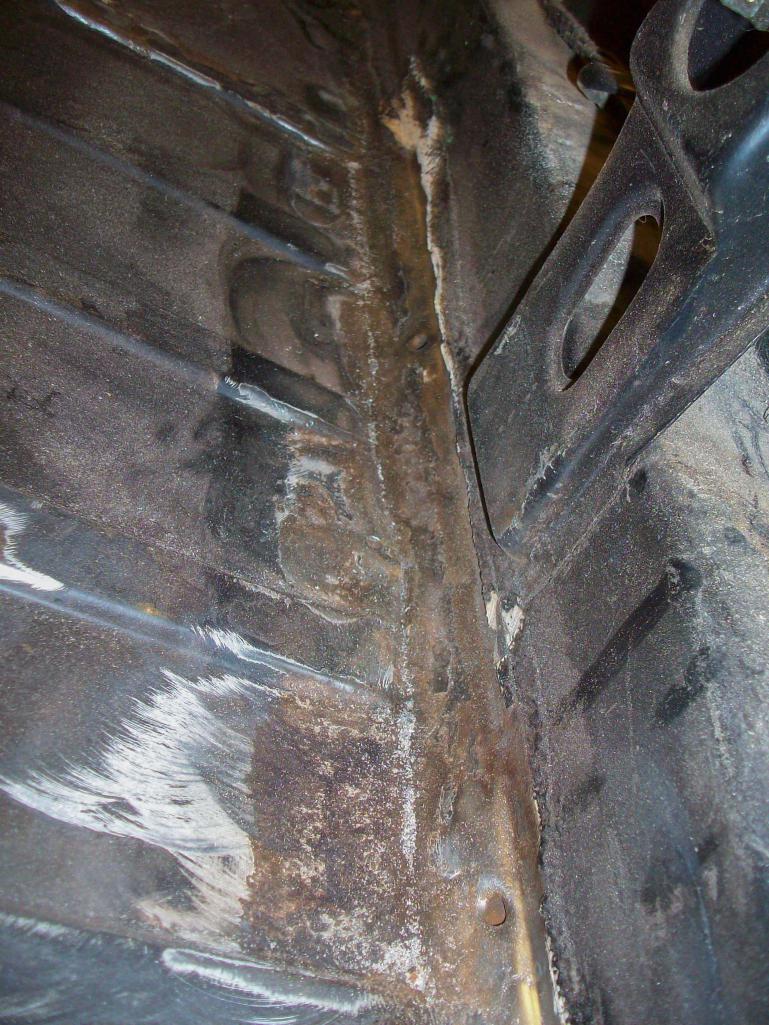 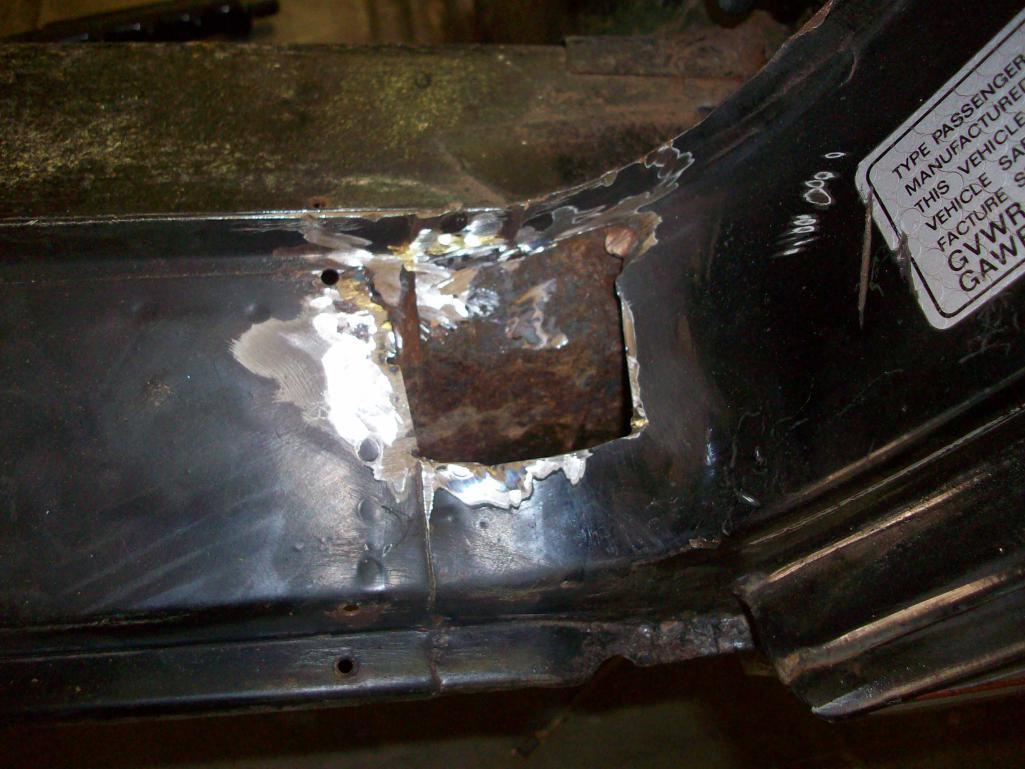 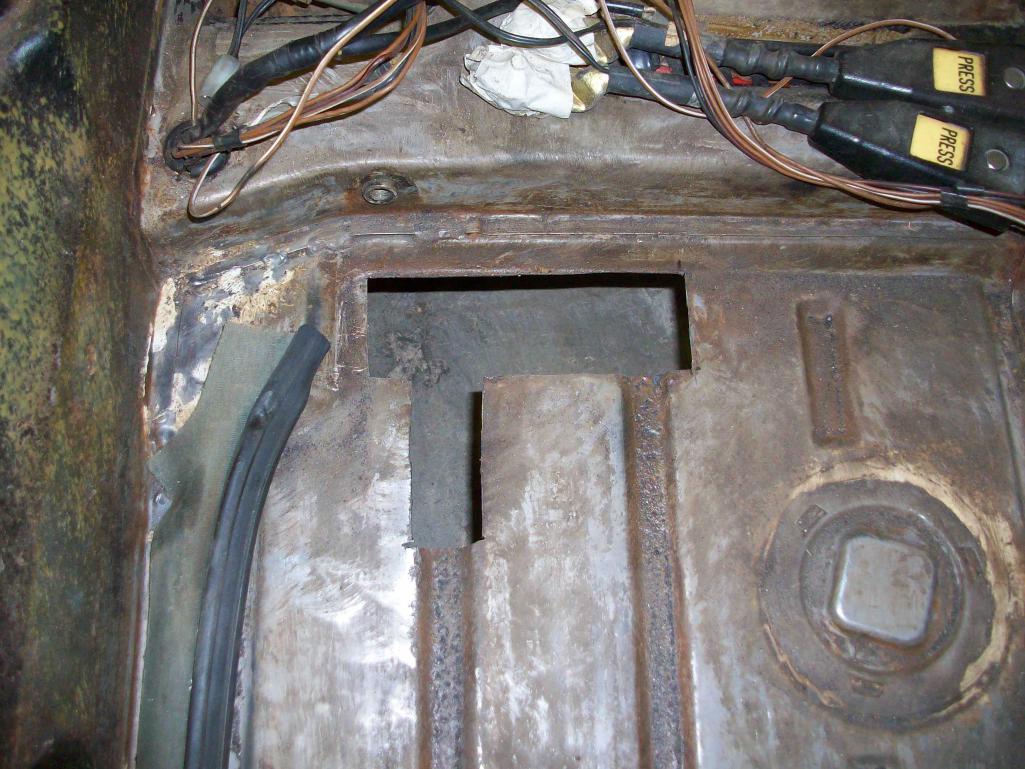 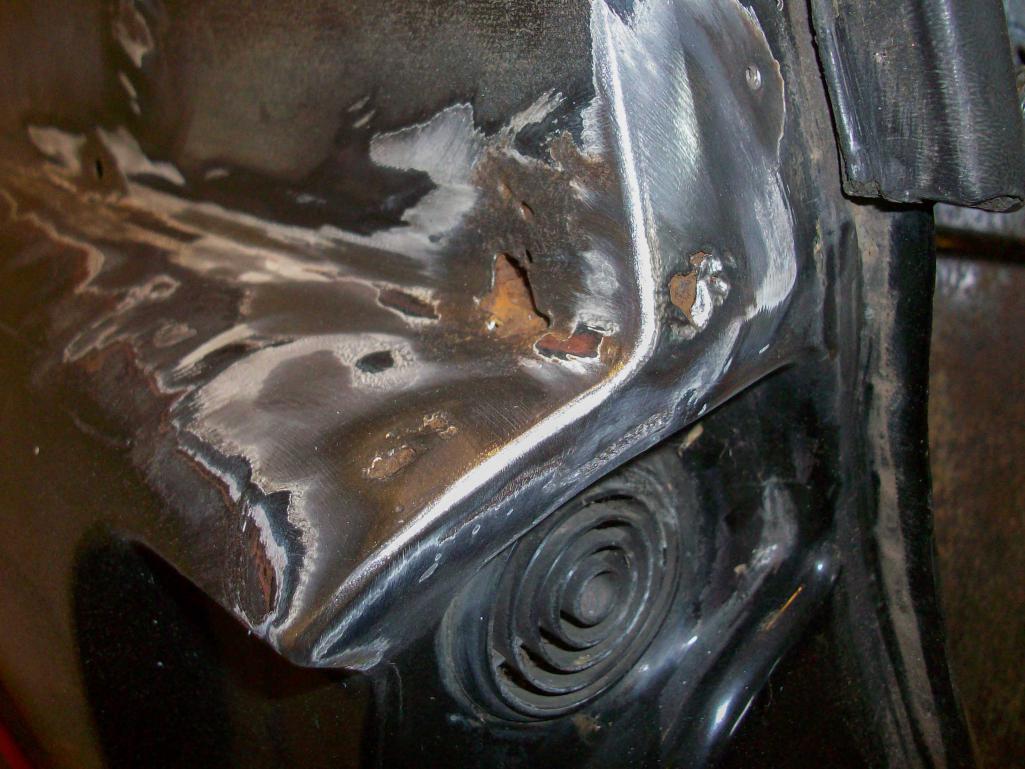
|
|
|
|
| VWTortuga336 |
Sep 30 2015, 08:27 PM
Post
#3
|
|
Member Group: Members Posts: 285 Joined: 5-October 14 From: Kansas City, Missouri Member No.: 17,979 Region Association: None |
First, thank you for your service, it is greatly appreciated!
Hang in there. My car was in similar state when she got dropped off in my driveway. I have put a ton of time into the project so far and I feel like I am far from getting her back on the road. BUT, just gotta take it one step at a time. Looks like you are doing a lot more invasive body/rust repair work than I am - I'm just too impatient and want to get the car back on the road (IMG:style_emoticons/default/driving.gif) Keep up the good work |
|
|
|
| JoeDees |
Sep 30 2015, 09:14 PM
Post
#4
|
|
Senior Member Group: Members Posts: 515 Joined: 10-November 14 From: Northern Kentucky Member No.: 18,106 Region Association: None |
QUOTE(VWTortuga336 @ Sep 30 2015, 09:27 PM)  First, thank you for your service, it is greatly appreciated! Hang in there. My car was in similar state when she got dropped off in my driveway. I have put a ton of time into the project so far and I feel like I am far from getting her back on the road. BUT, just gotta take it one step at a time. Looks like you are doing a lot more invasive body/rust repair work than I am - I'm just too impatient and want to get the car back on the road (IMG:style_emoticons/default/driving.gif) Keep up the good work Thanks! It's a lot more invasive than I ever intended... |
|
|
|
| 914work |
Oct 1 2015, 10:31 AM
Post
#5
|
|
Member Group: Members Posts: 291 Joined: 9-November 11 Member No.: 13,762 Region Association: None |
its unfortunate but true that MANY car's are in similar state as yours (IMG:style_emoticons/default/sad.gif)
the owners dont yet know or arent brave enought to poke around under OE tar and below that "surface rust" (IMG:style_emoticons/default/screwy.gif) (IMG:style_emoticons/default/laugh.gif) Looks like a good start. It can all be fixed. |
|
|
|
| JoeDees |
Oct 1 2015, 02:11 PM
Post
#6
|
|
Senior Member Group: Members Posts: 515 Joined: 10-November 14 From: Northern Kentucky Member No.: 18,106 Region Association: None |
QUOTE(914werke @ Oct 1 2015, 11:31 AM) its unfortunate but true that MANY car's are in similar state as yours (IMG:style_emoticons/default/sad.gif) the owners dont yet know or arent brave enought to poke around under OE tar and below that "surface rust" (IMG:style_emoticons/default/screwy.gif) (IMG:style_emoticons/default/laugh.gif) Looks like a good start. It can all be fixed. This guy filled, undercoated and PORed the shit out of places that were heavily rusted. Not so bad that your quick screwdriver probe poked through, but bad enough to need cut out. |
|
|
|
| Cairo94507 |
Oct 1 2015, 02:59 PM
Post
#7
|
|
Michael Group: Members Posts: 10,678 Joined: 1-November 08 From: Auburn, CA Member No.: 9,712 Region Association: Northern California |
Call me optimistic.... but the rust does not look that bad (IMG:style_emoticons/default/confused24.gif) . It also looks like you have a good start on it.
I like the list you came up with and your priorities seem right. I think you are going to be fine. Keep posting the pictures - we love seeing them come together. |
|
|
|
| JoeDees |
Oct 5 2015, 04:58 PM
Post
#8
|
|
Senior Member Group: Members Posts: 515 Joined: 10-November 14 From: Northern Kentucky Member No.: 18,106 Region Association: None |
QUOTE(Cairo94507 @ Oct 1 2015, 03:59 PM) Call me optimistic.... but the rust does not look that bad (IMG:style_emoticons/default/confused24.gif) . It also looks like you have a good start on it. I like the list you came up with and your priorities seem right. I think you are going to be fine. Keep posting the pictures - we love seeing them come together. I agree, the rust isn't too bad at all. Every time I think the rust is bad, a new thread pops up that makes my car look mint. There are definitely competitors in this build off with way more work ahead of them than I have. And my list of challenges proved accurate this weekend. On Saturday I drilled out 30-50 spotwelds, and on Sunday my right arm was almost nonfunctional... I just need to start using my left hand more and save the right for precision work. |
|
|
|
| cary |
Oct 6 2015, 06:47 AM
Post
#9
|
|
Advanced Member Group: Members Posts: 3,900 Joined: 26-January 04 From: Sherwood Oregon Member No.: 1,608 Region Association: Pacific Northwest |
Subcribe
|
|
|
|
| mbseto |
Oct 6 2015, 07:21 AM
Post
#10
|
|
Senior Member Group: Members Posts: 1,257 Joined: 6-August 14 From: Cincy Member No.: 17,743 Region Association: North East States |
I double up a pair of cheap cotton gloves and a pair of leather gloves over that to help deaden the vibration and keep my hands from going numb. Helps a little. I'll be commiserating with you on this build!
|
|
|
|
| AndyB |
Oct 6 2015, 07:26 AM
Post
#11
|
|
The Governor is watching me Group: Members Posts: 1,115 Joined: 10-April 10 From: Philadelphia New York Member No.: 11,595 Region Association: North East States |
No need to worry about a head start. Just keep leaning forward in your foxhole and you will be fine.
|
|
|
|
| JoeDees |
Oct 11 2015, 06:39 PM
Post
#12
|
|
Senior Member Group: Members Posts: 515 Joined: 10-November 14 From: Northern Kentucky Member No.: 18,106 Region Association: None |
It wasn't the most productive long weekend, though I still have another day... Friday I spent the whole day waiting for UPS, Saturday I taught my wife some of my family's secret recipes and worked on my own kvass recipe. Then today I worked to cut out the rusty parts of the inner long. Getting it detached without destroying the stuff up at the front was way trickier than I thought it would be. I'm trying something tricky up towards the front and hope it works. I'm trying to just move some stuff out of the way so I can slide the segment of the new piece into place and put it all back...
Attached thumbnail(s) 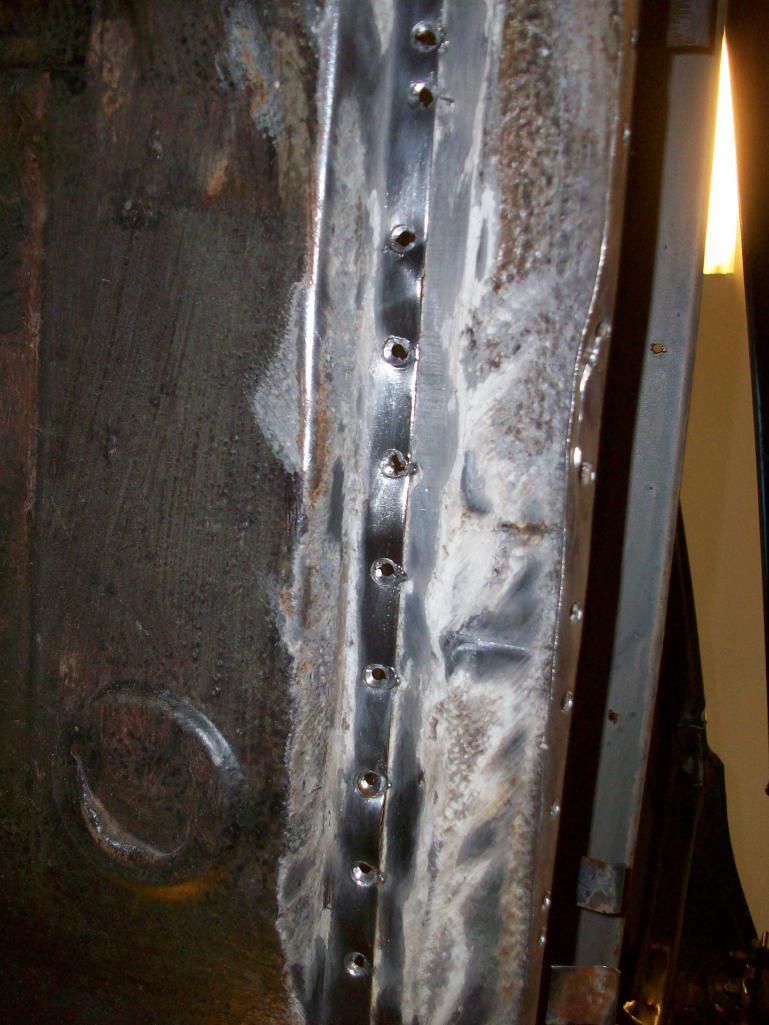 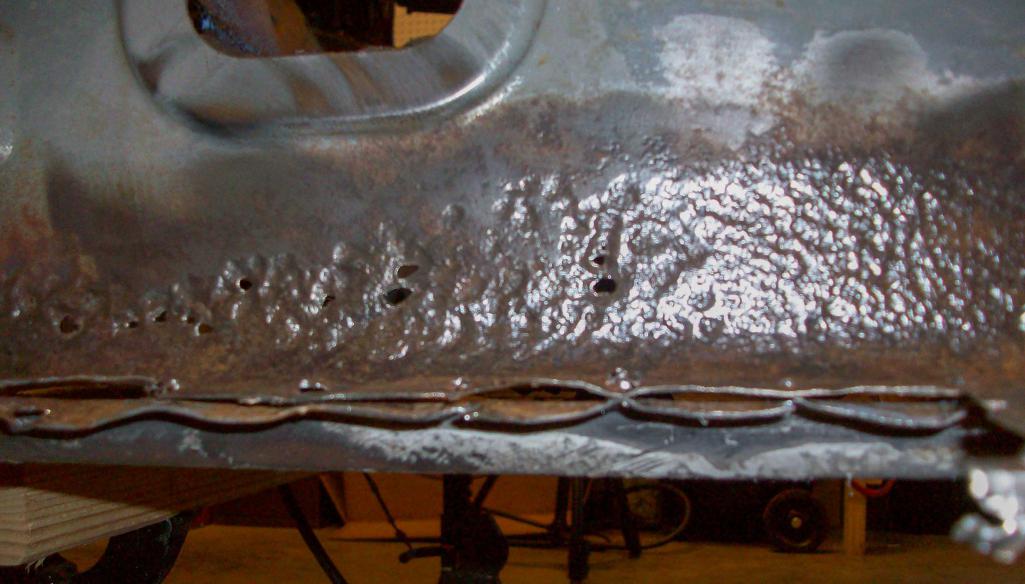 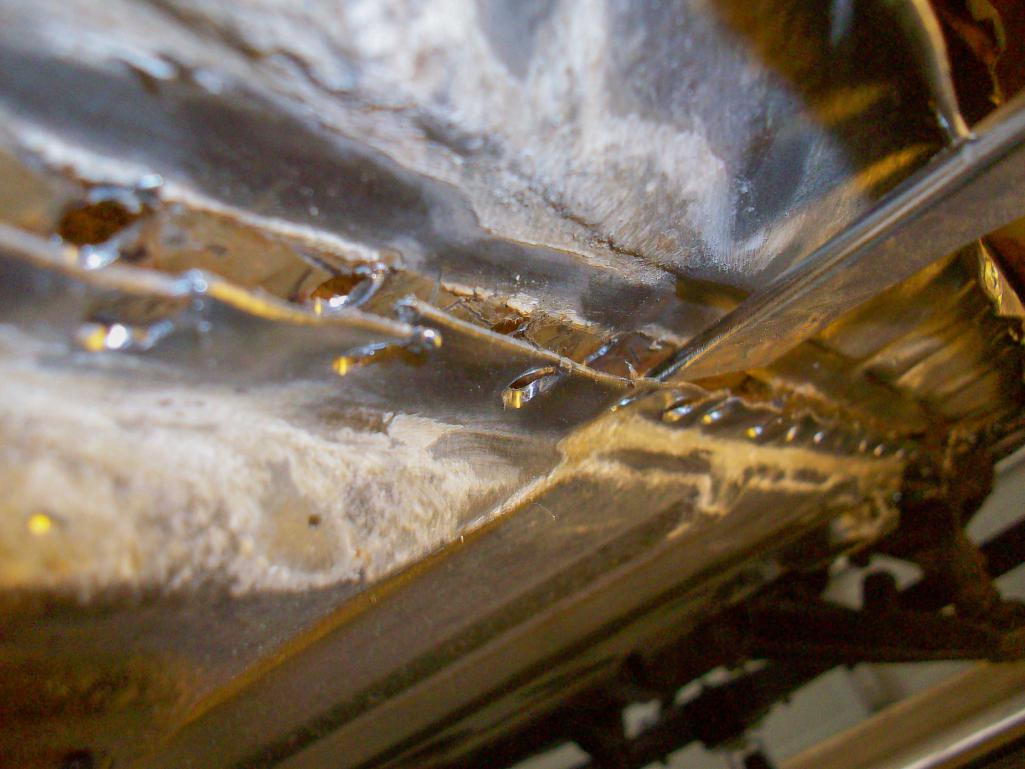 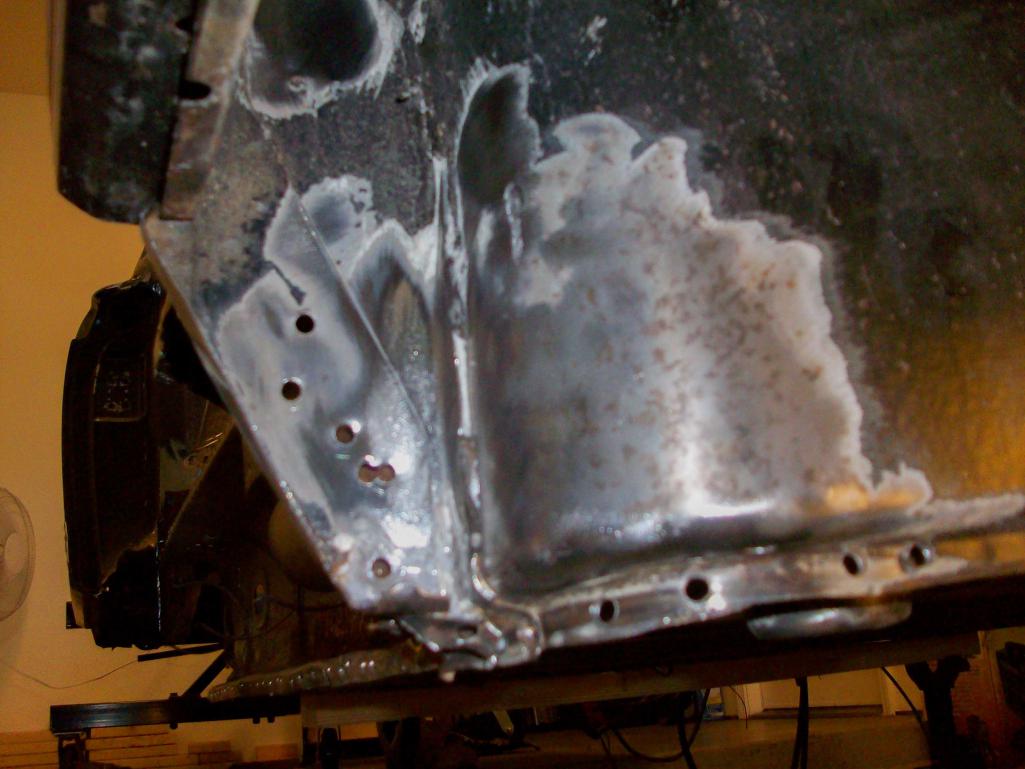 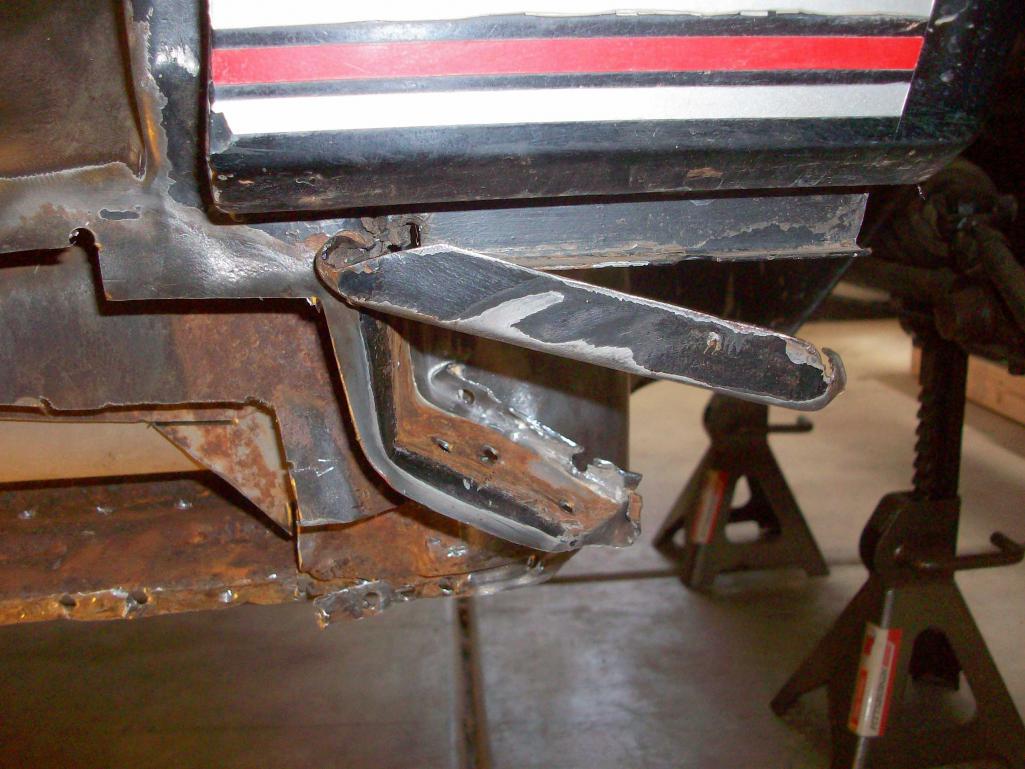 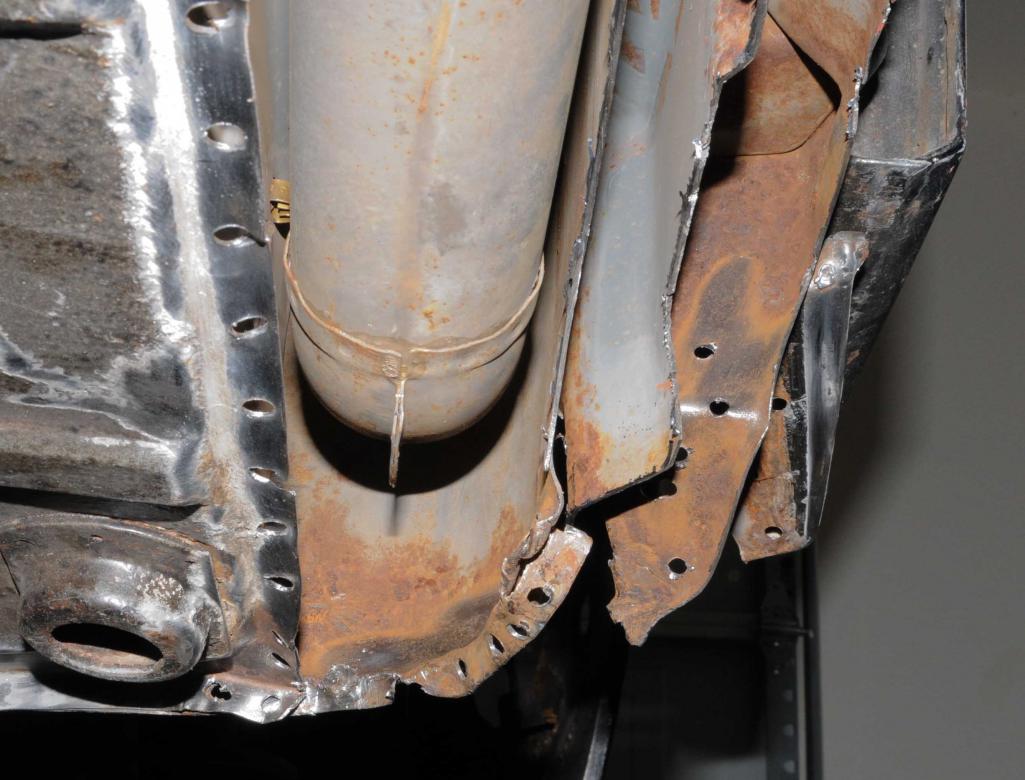 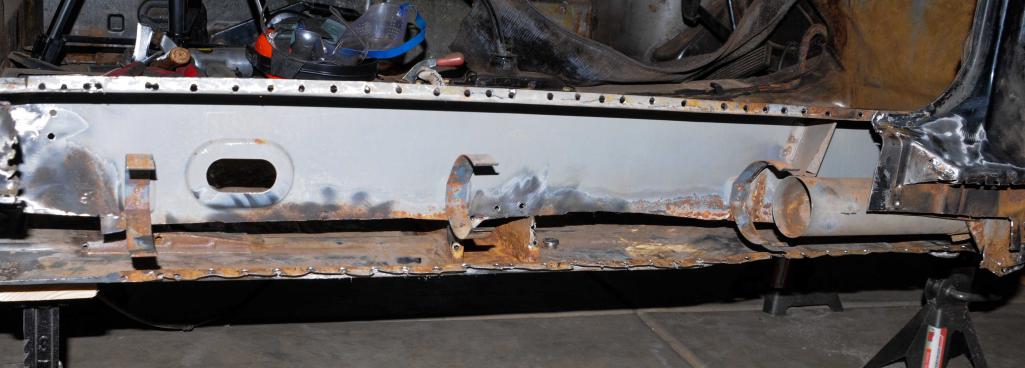
|
|
|
|
| JoeDees |
Oct 11 2015, 06:44 PM
Post
#13
|
|
Senior Member Group: Members Posts: 515 Joined: 10-November 14 From: Northern Kentucky Member No.: 18,106 Region Association: None |
I just noticed in the pictures (then ran out to verify), but it's pretty rusty inside that cross member... what to do...
Tomorrow is wire wheel, some sandblasting, primer and begin to fab the pieces. |
|
|
|
| JoeDees |
Oct 18 2015, 09:27 PM
Post
#14
|
|
Senior Member Group: Members Posts: 515 Joined: 10-November 14 From: Northern Kentucky Member No.: 18,106 Region Association: None |
Felt extremely productive this weekend fabbing and welding in some pieces. I've ordered the internal rocker panel from Restoration Design, but the inner long piece is $300 and would be a huge blow to my budget, not to mention that I really only needed 20% of the panel... So here I am bending, cutting, grinding, and welding some 18 gauge sheet metal. The front piece has more curvature to it than you can see in the pic, but the weekend's biggest trick was the twisty piece that handles the spot where the floorpan has a little slope. I'm a bit concerned about the fabbed area not having the slopes and textures of the stock piece, but I guess even the factory slathered and covered the whole area with sealer...
Random extra info: My old, cheapo digital camera seems to have bought the farm, so I have to use the biggun. Some of these welds had to be done with my left (non-dominant) hand, I'll let you guess which...because I can see no increase/decrease in quality with either hand. I hope to go back and do some stitching this week. And note to others and future self: welding on the inside under the tube makes it impossible to grind... Raw video is currently being uploaded and I hope to make a video of the long's progress soon... Attached thumbnail(s) 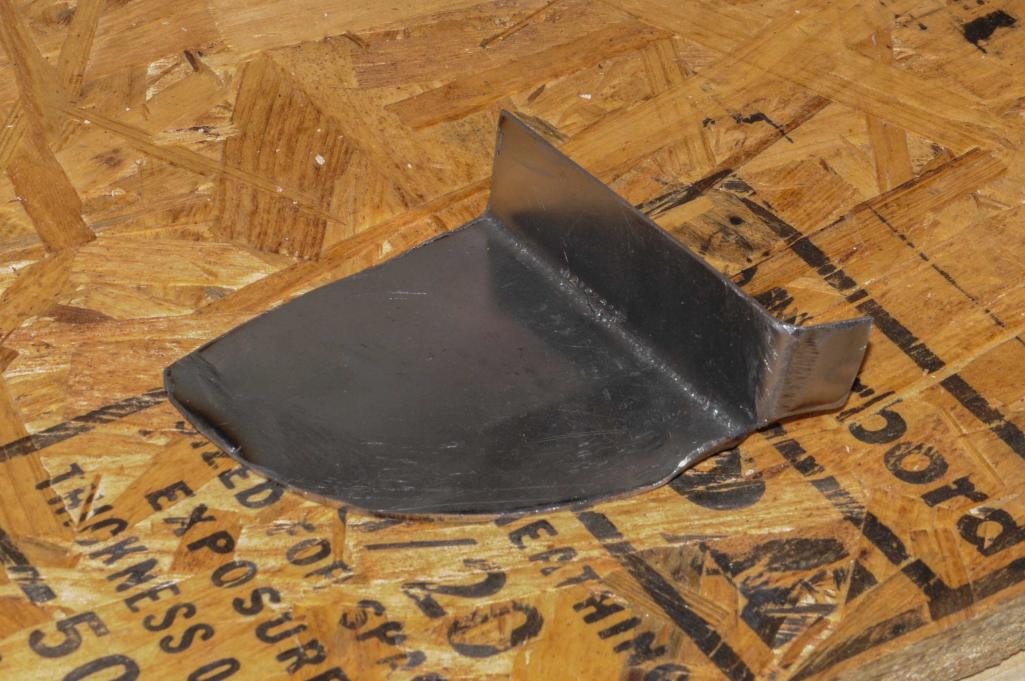 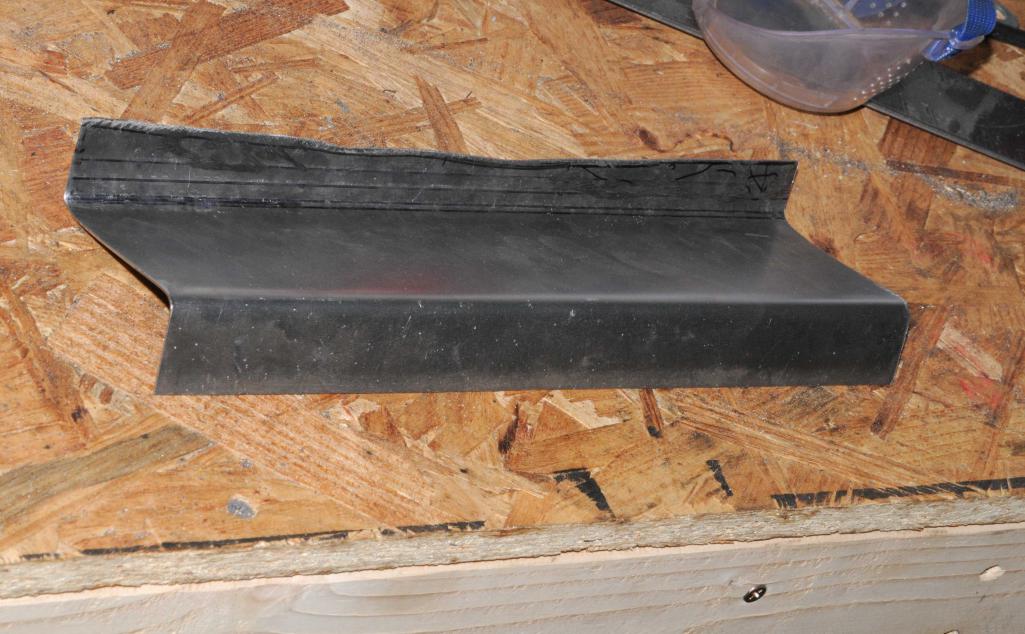 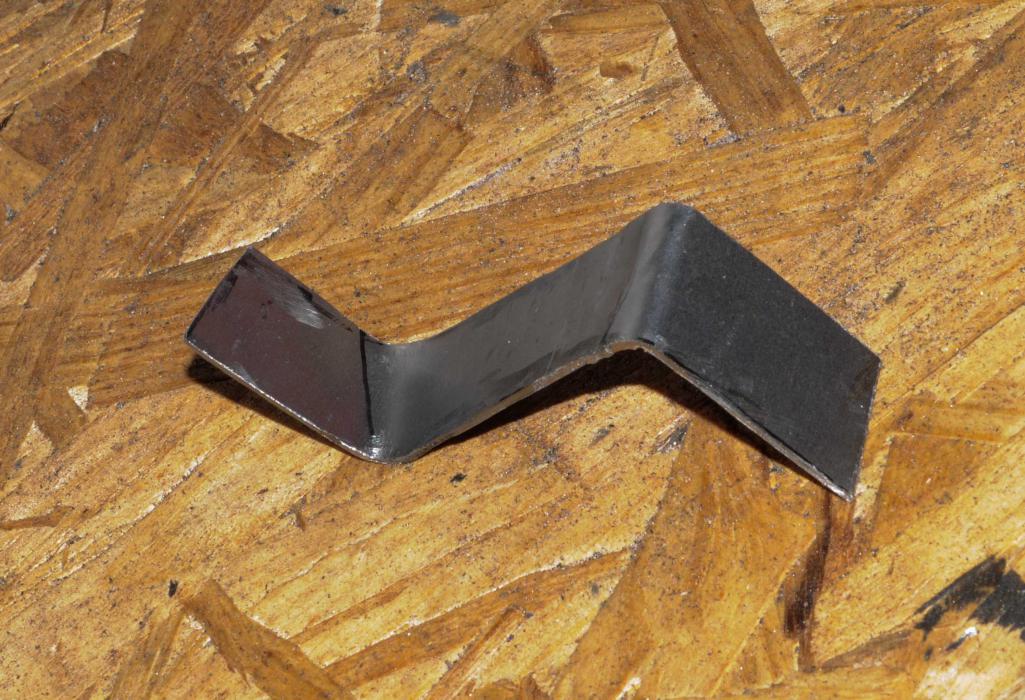 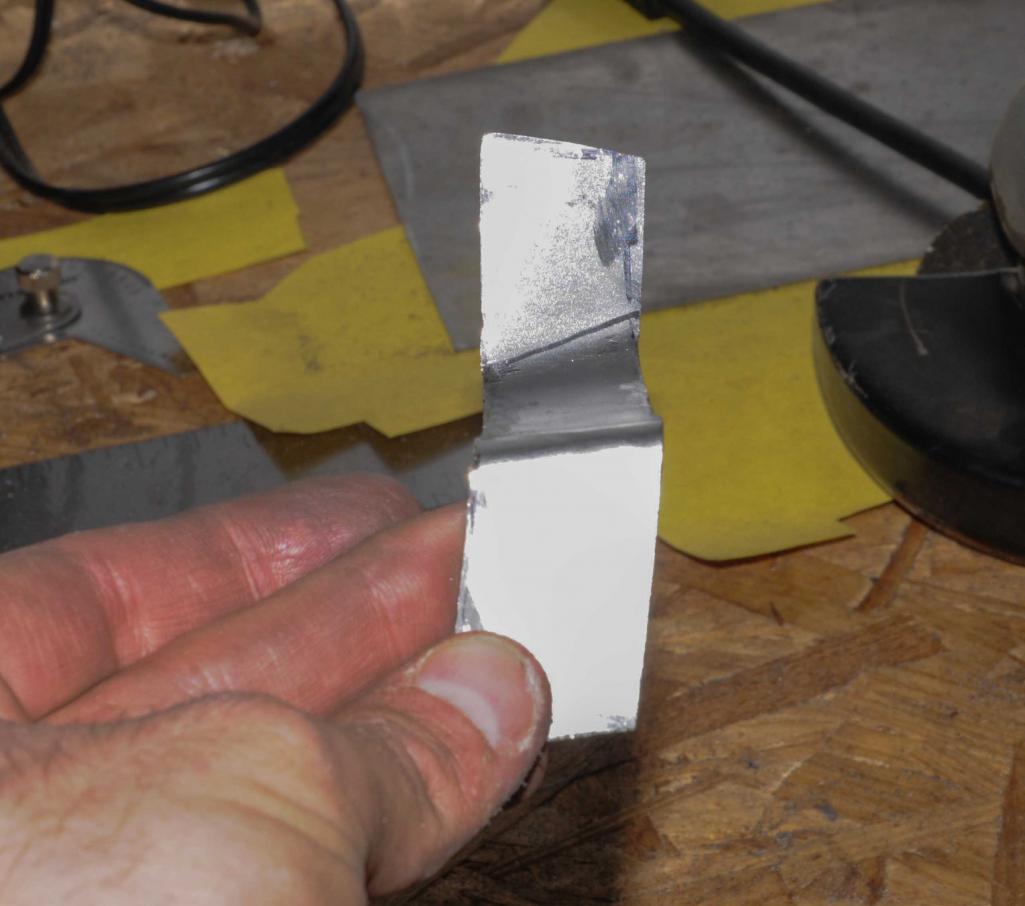 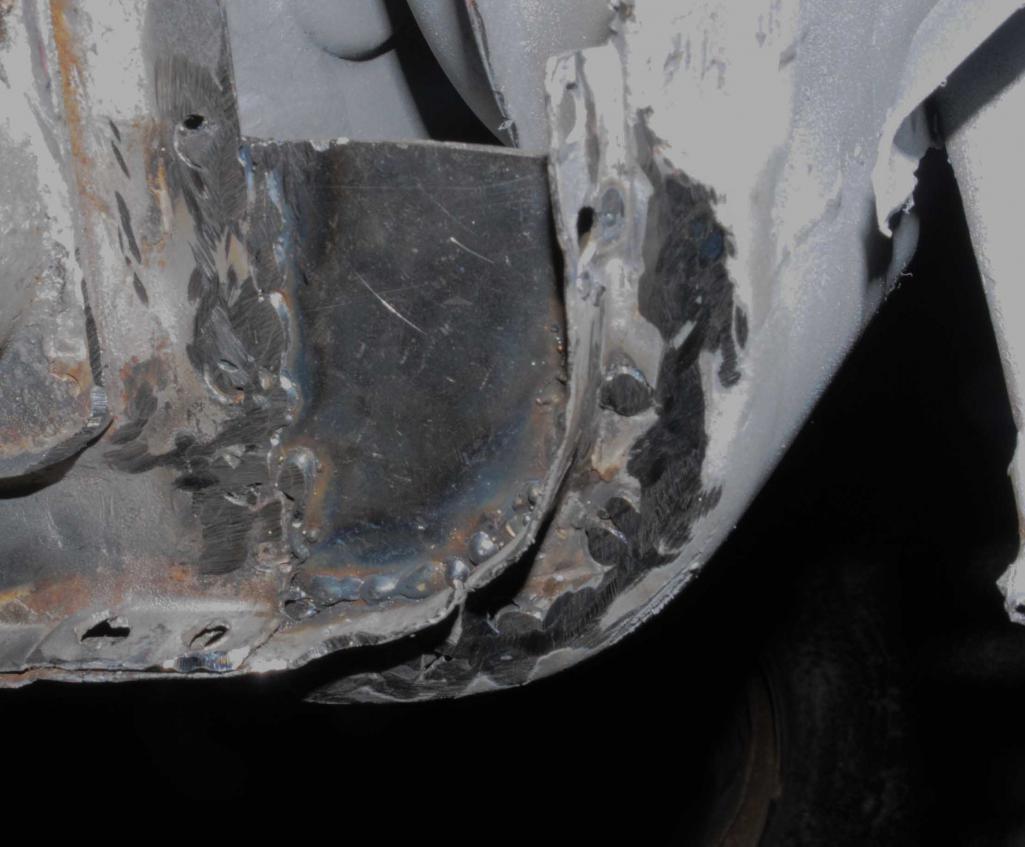 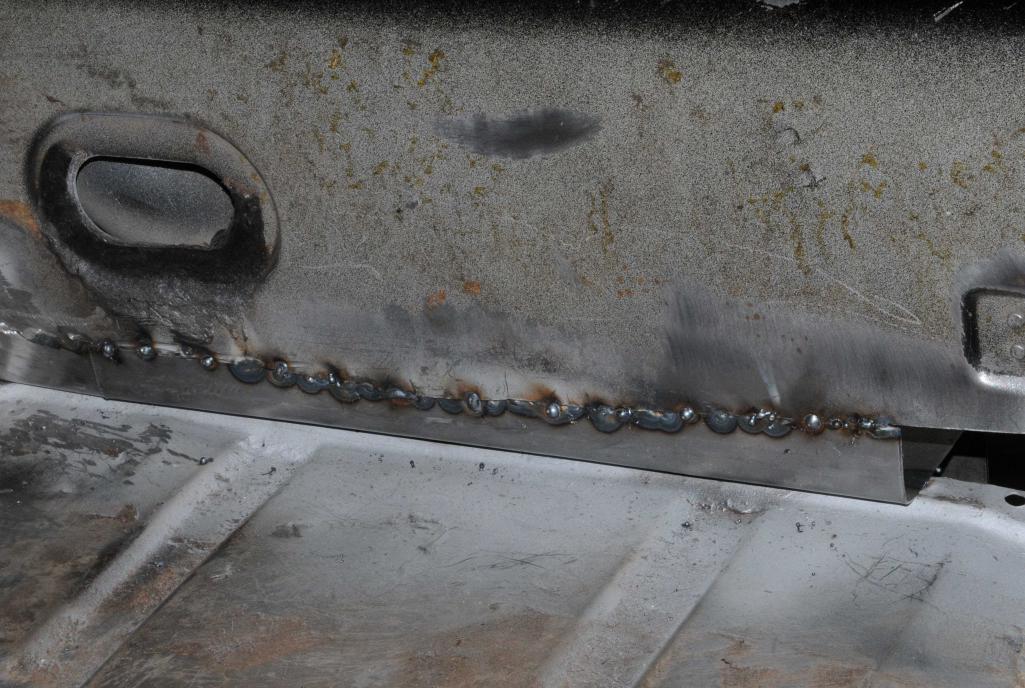  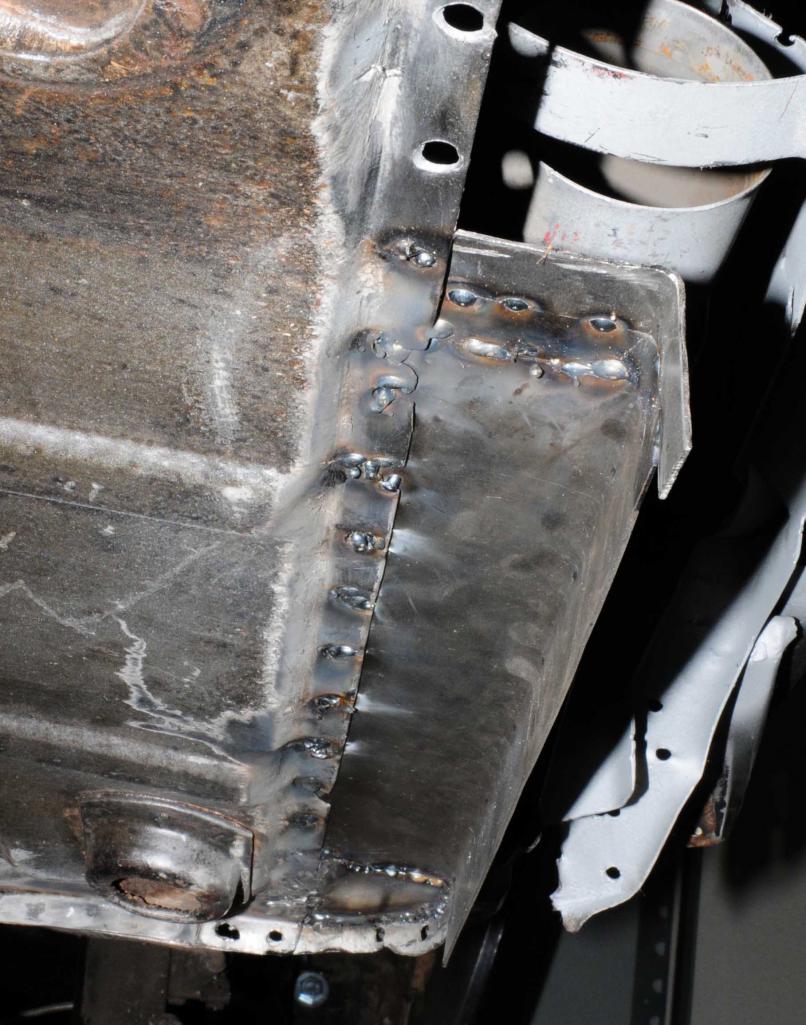
|
|
|
|
| JoeDees |
Oct 18 2015, 09:32 PM
Post
#15
|
|
Senior Member Group: Members Posts: 515 Joined: 10-November 14 From: Northern Kentucky Member No.: 18,106 Region Association: None |
And on the front piece I drilled/ground out the oddly patterned rust that was part of the inner fender and used the subsequent holes to plug weld the new piece. I figured this killed 2 birds with one stone.
|
|
|
|
| JoeDees |
Oct 25 2015, 09:26 PM
Post
#16
|
|
Senior Member Group: Members Posts: 515 Joined: 10-November 14 From: Northern Kentucky Member No.: 18,106 Region Association: None |
I thought I was to the point of putting pieces back on the car, but instead I removed and cut out more stuff! Pulled the cross member and seat mount to clean up some flaky stuff. It made me realize that I will need to buy a floor section from Restoration Design, but I'm going to try and finish up the long first so I can utilize the rotisserie for the floor. You can't see it in the pic, but the floor section where the triangle would be is gone, there are holes under the far right seat mount, and the other passenger seat mount was cut out...so another RD order is forthcoming.
Attached thumbnail(s) 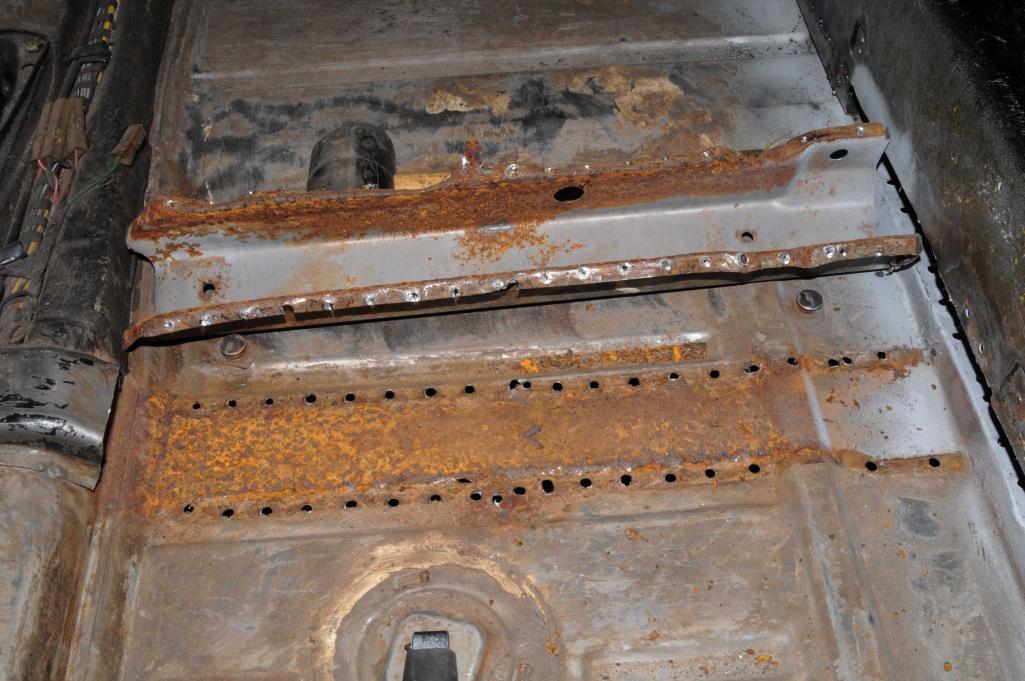 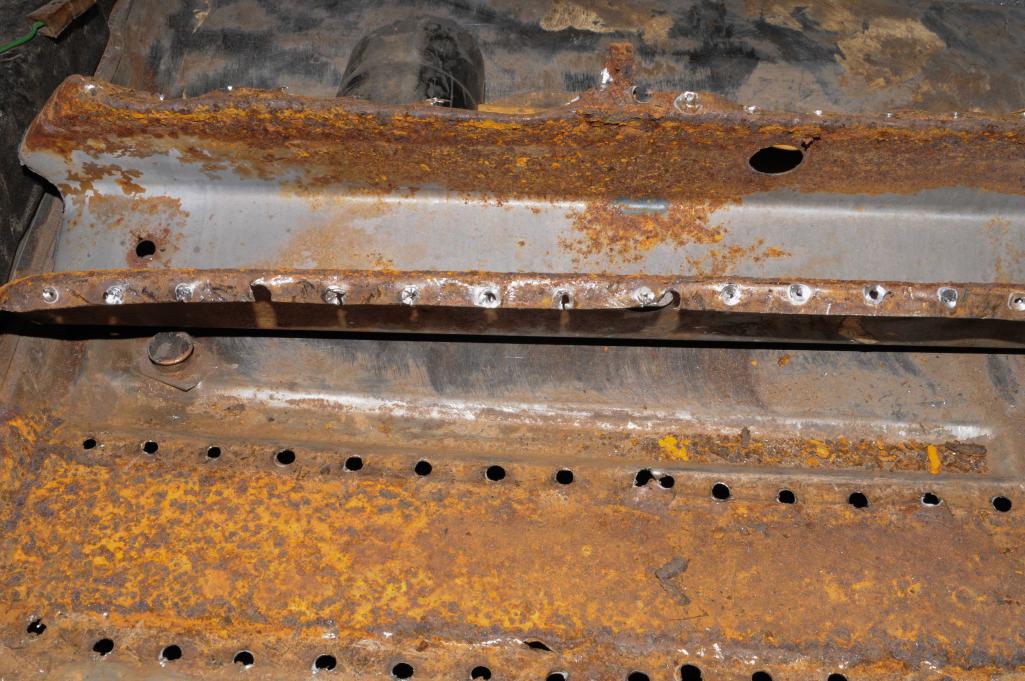 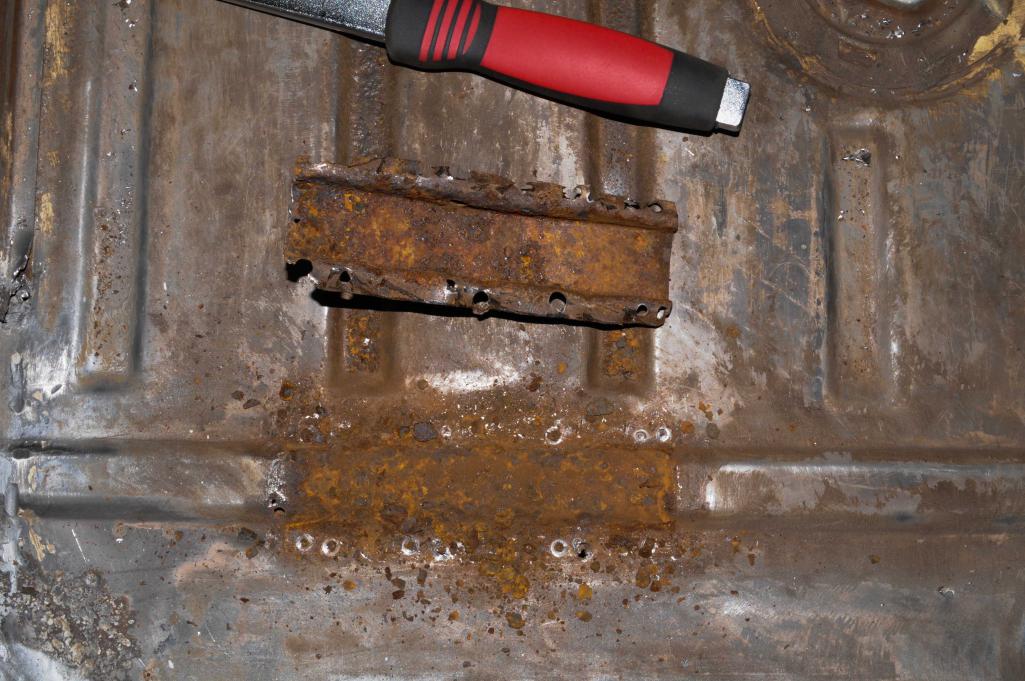 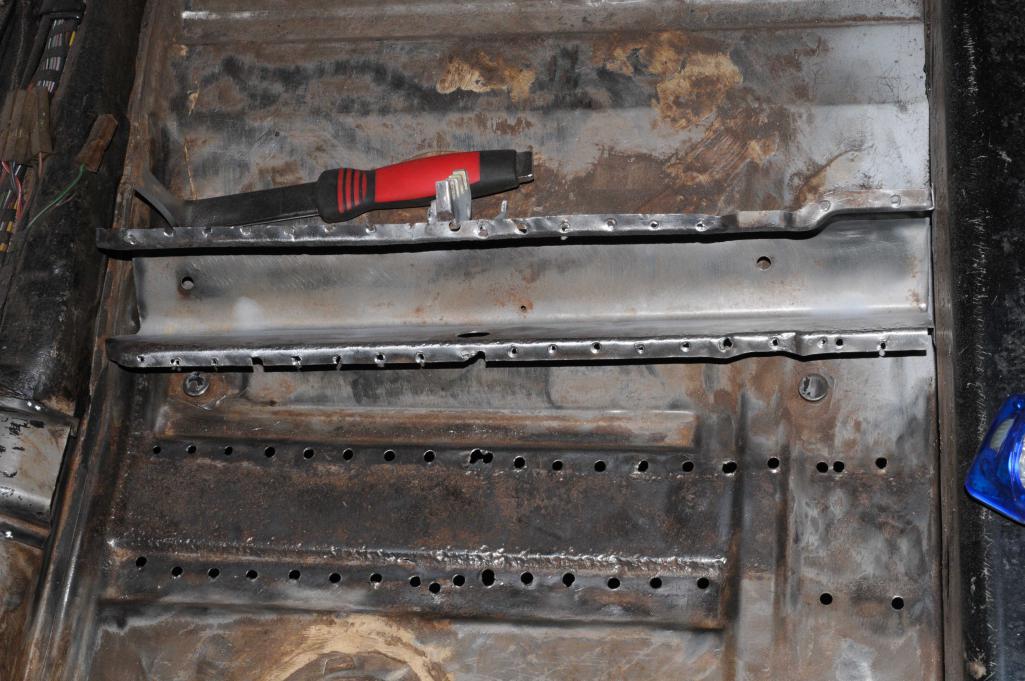
|
|
|
|
| JoeDees |
Oct 25 2015, 09:28 PM
Post
#17
|
|
Senior Member Group: Members Posts: 515 Joined: 10-November 14 From: Northern Kentucky Member No.: 18,106 Region Association: None |
And since I was in the spirit of cutting, grinding, wire-wheeling, and sand-blasting, I worked to prep the wheelhouse area for its replacement next month.
Attached thumbnail(s) 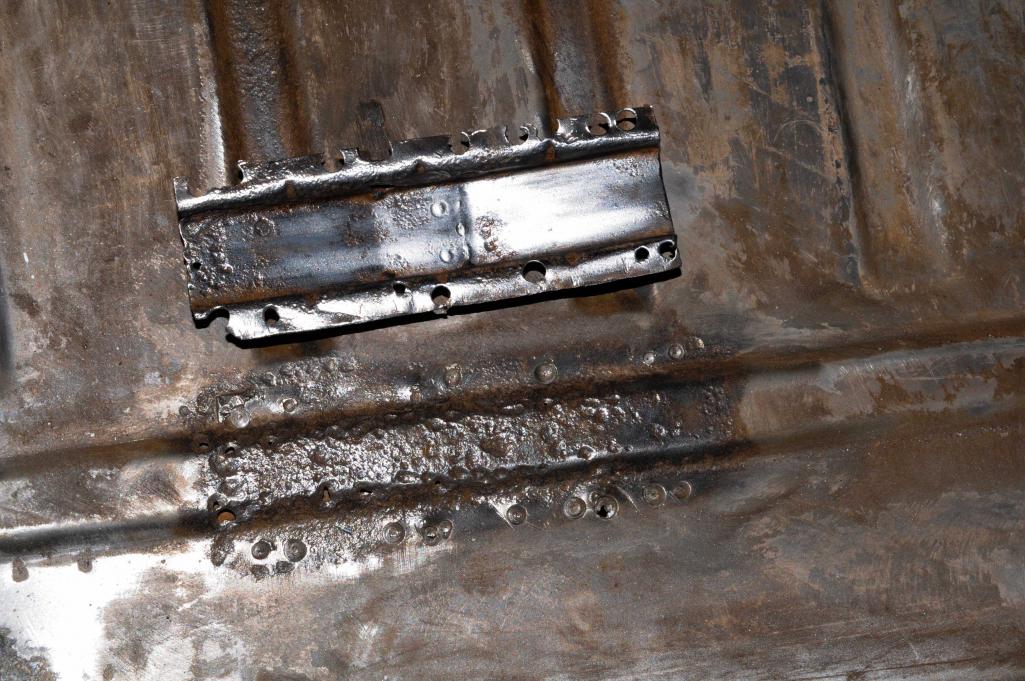 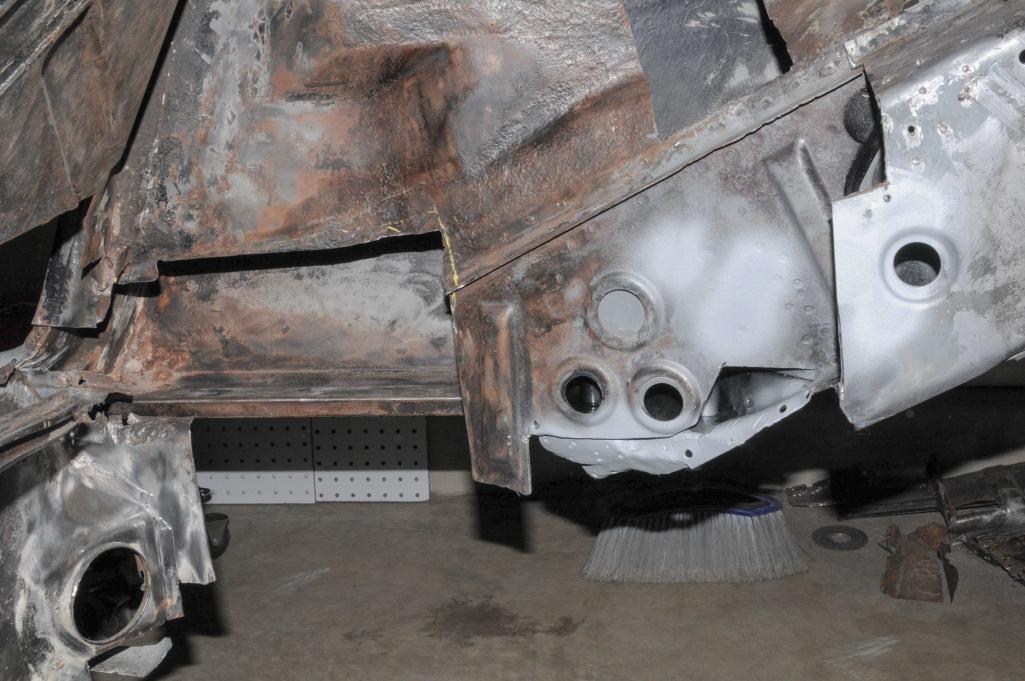
|
|
|
|
| JoeDees |
Nov 15 2015, 07:45 PM
Post
#18
|
|
Senior Member Group: Members Posts: 515 Joined: 10-November 14 From: Northern Kentucky Member No.: 18,106 Region Association: None |
It was one of those tedious weekends of prep work that make you feel like nothing was done. But after looking at the last post I realize that the last 2 weekends were productive, even though my "2nd weekend" (2 days off midweek for Veterans' Day) was spent car shopping (we bought a 2009 Honda Fit with 55k miles for our 2nd, gas-saver, car).
Last weekend was spent getting the last piece of that inner-long made and welded in and some grinding. This whole week had the old seatbelt mount soaking in rust dissolver since I couldn't find the right sized nut. This Saturday was more grinding, some more little welds, trimming and welding in the seatbelt mount, and more grinding before a lot of cleaning. Today involved the panic moment that the cross-member and heater tube thing needed welding in before I could I could seam seal. So the tube got wire brushed and naval jellied before a painting and a hole patched with JB Weld.The cross-member got prepped and tack-welded in (I kept the floor part mostly loose for a future part of the project). I used wait times to seam seal stuff way inside the front part and stuff. The inside of the long isn't pretty, but I figure it doesn't really need to be...The part in the passenger side could have and should have turned out better, but it's not too bad and won't need more than a skim of filler to make smooth. Carpet covers it anyways...right?!? haha Attached thumbnail(s) 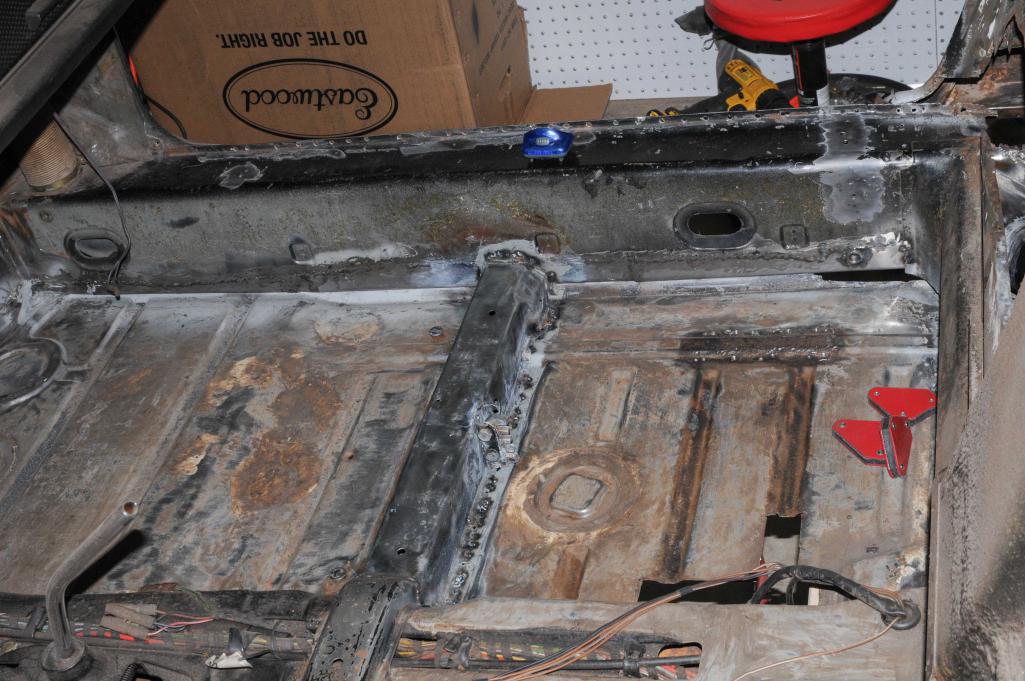 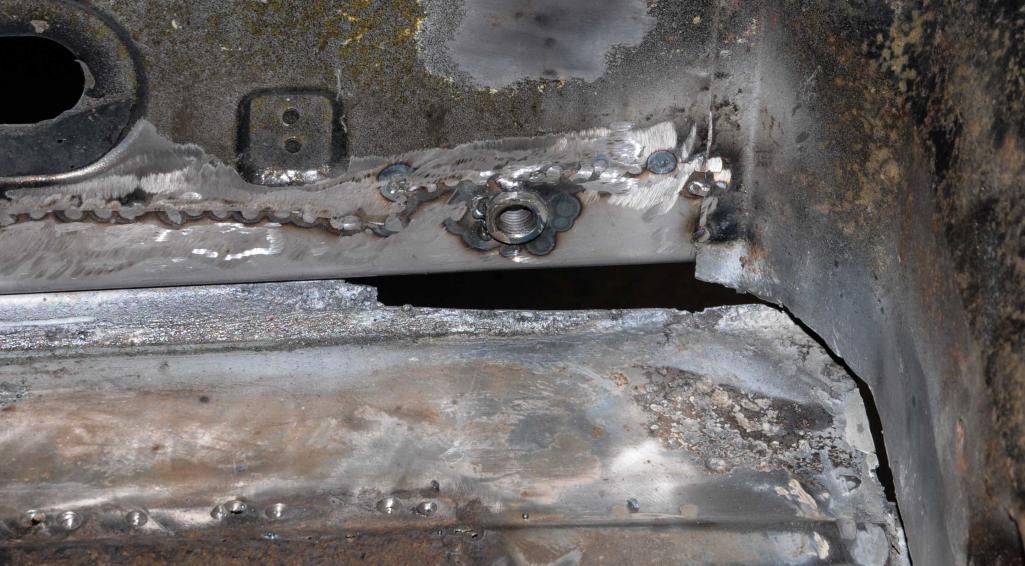 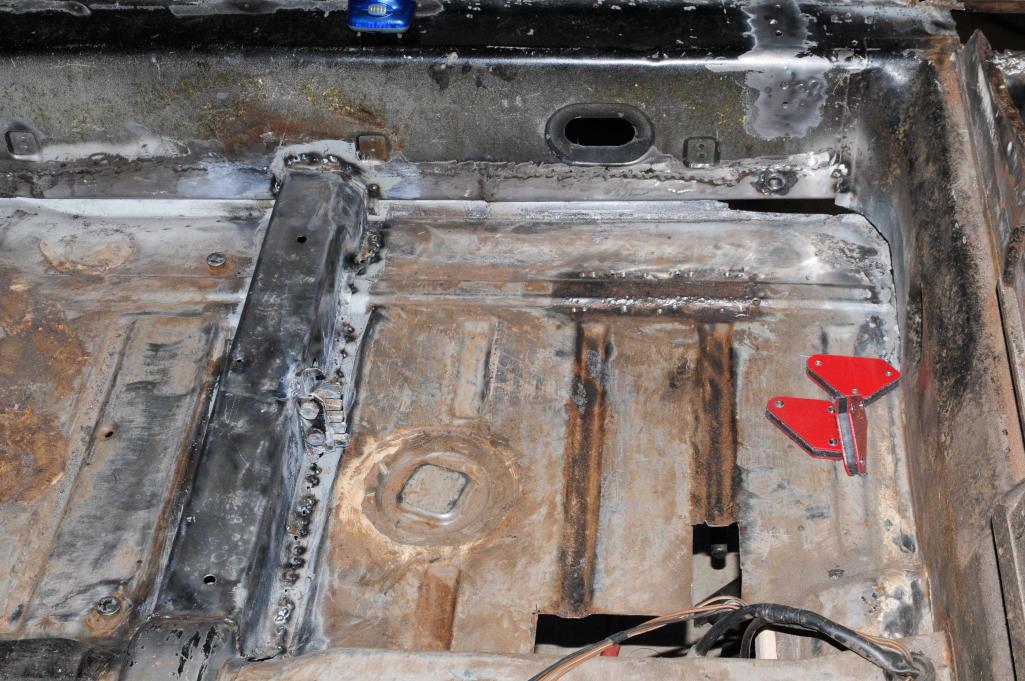 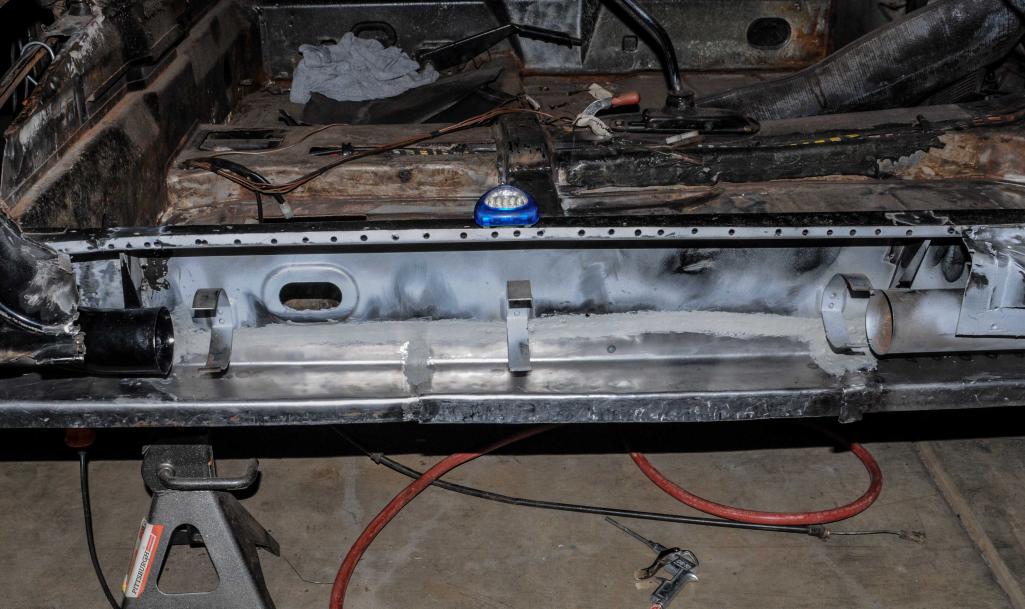
|
|
|
|
| JoeDees |
Nov 15 2015, 07:48 PM
Post
#19
|
|
Senior Member Group: Members Posts: 515 Joined: 10-November 14 From: Northern Kentucky Member No.: 18,106 Region Association: None |
It's weird how parts of the heater tube look like overspray, but it's solid black except in the weldy areas which will need painted later. I also found that it's mounts were kinda weak and thin, so I took some JB Weld to assist the real welds in their job.
Attached thumbnail(s) 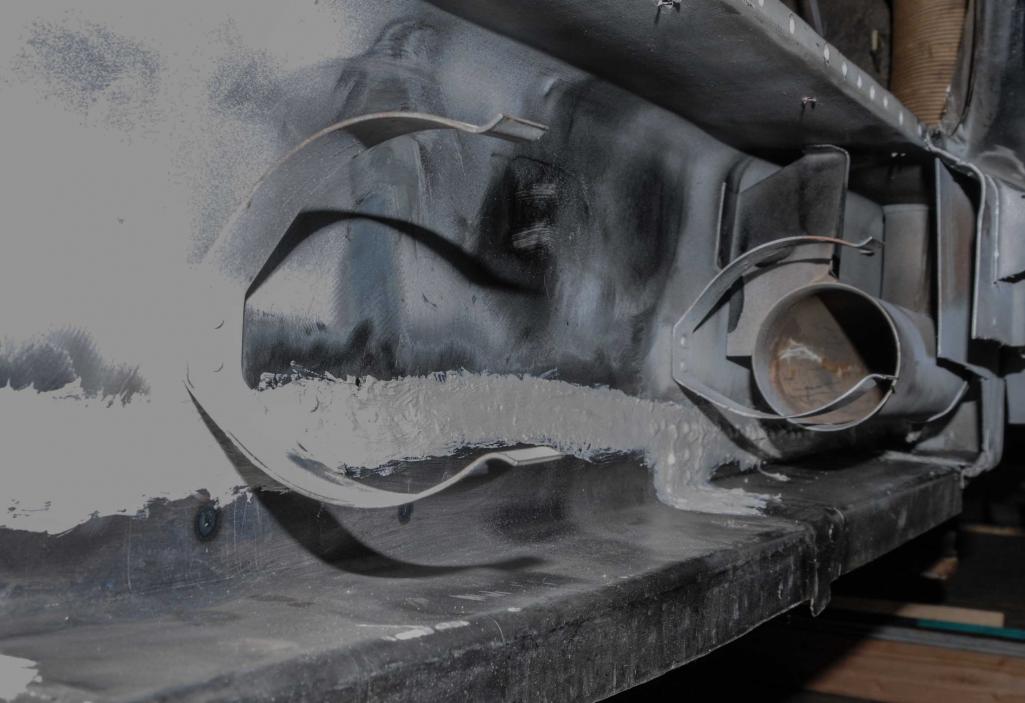 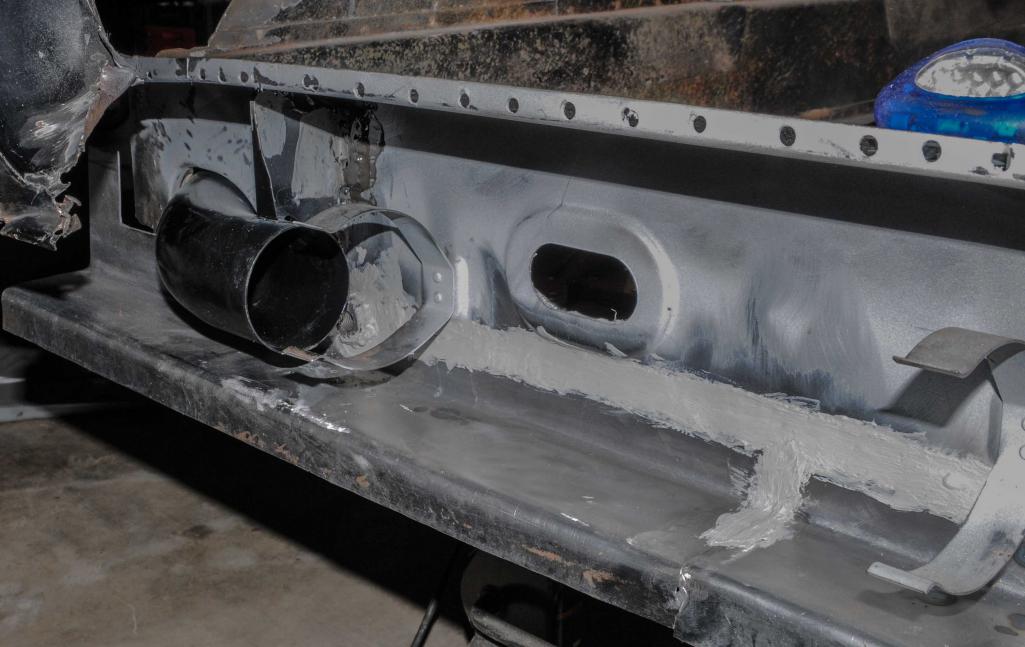 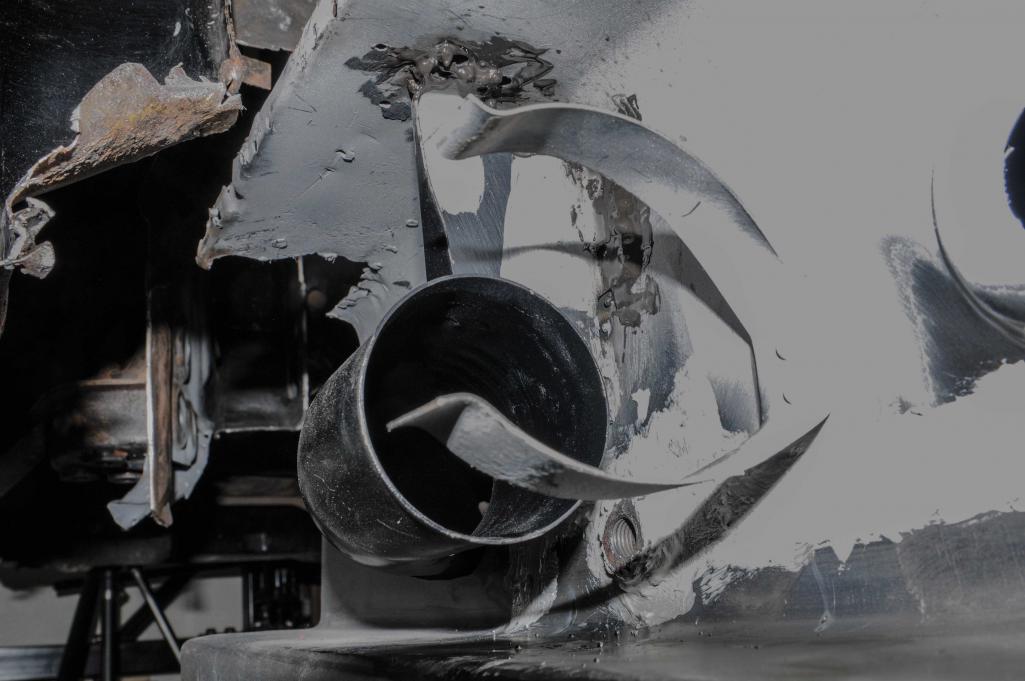
|
|
|
|
| JoeDees |
Nov 15 2015, 07:51 PM
Post
#20
|
|
Senior Member Group: Members Posts: 515 Joined: 10-November 14 From: Northern Kentucky Member No.: 18,106 Region Association: None |
Also, word of advice to future me: Weld the long from inside the car and not inside the long under the front heater tube. You can't grind behind that pipe. Actually, just get a better paying job and just buy that whole piece from RD instead of making your fancy little patch panels.
|
|
|
|
|
2 User(s) are reading this topic (2 Guests and 0 Anonymous Users)
0 Members:

|
Lo-Fi Version | Time is now: 24th June 2026 - 01:15 PM |
Invision Power Board
v9.1.4 © 2026 IPS, Inc.