|
|
|
Porsche, and the Porsche crest are registered trademarks of Dr. Ing. h.c. F. Porsche AG.
This site is not affiliated with Porsche in any way. Its only purpose is to provide an online forum for car enthusiasts. All other trademarks are property of their respective owners. |
|
|


| Vysoc |
 Oct 2 2015, 01:48 PM Oct 2 2015, 01:48 PM
Post
#21
|
|
Vysoc  Group: Members Posts: 589 Joined: 27-August 09 From: NorthWest Arkansas Member No.: 10,737 Region Association: Southwest Region |
Here we go,
I bought this chassis several years ago and have been cutting out sections with rust. This roller was a 1976 with Fiberglas Flares, I like them. There is much work to be done. My 5 Major Project Points are: 1) Repair & Replace all rusted areas and weld in; * - New Floor Pans. *- Repairs to the Hell Hole area. *- Engman Kit. *- Weltmeister Chassis Stiffening Kit. *- McMark's Roll Bar. 2) Install Patrick Six Engine Mount, Install Engine, Have Transmission Rebuilt, Install Patrick Oil Tank and all Lines necessary, Install Oil Cooler, Rewire complete car. Replace and treat inside of Gas Tank, install new CF/ Fuel Lines. 3) Replace Doors, Windshield, Install Spartan Street/DE Interior, Sparco Vintage Seats, New Console, MoMo Wheel. 4) Prep car for Paint, all panels prepped, Hood, Trunk, Doors, Targa Top. 5) Replace & Upgrade all Suspension, Brakes, Bushings, Wheels & Tires. 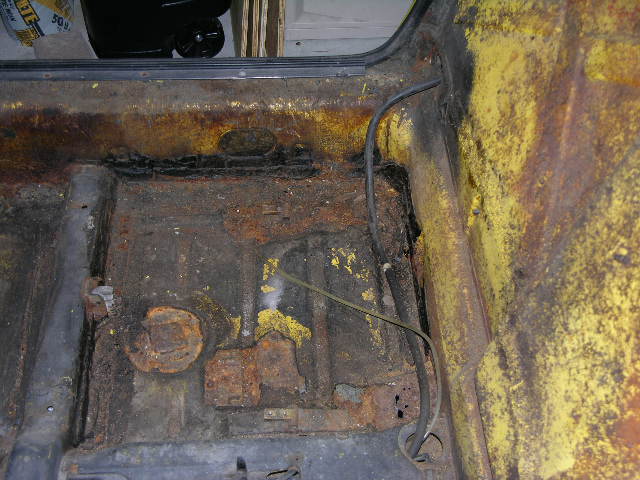 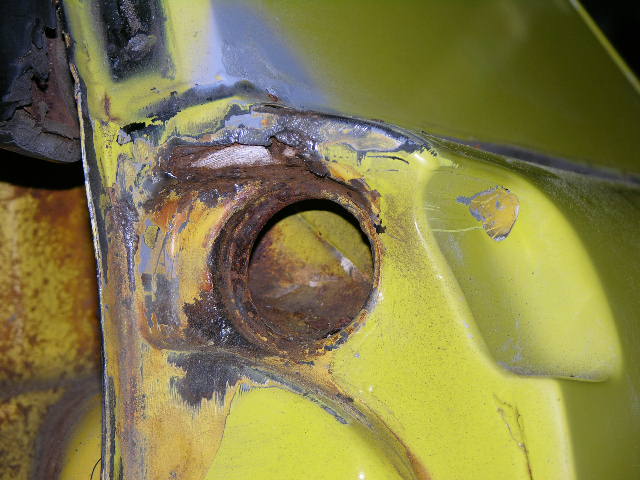 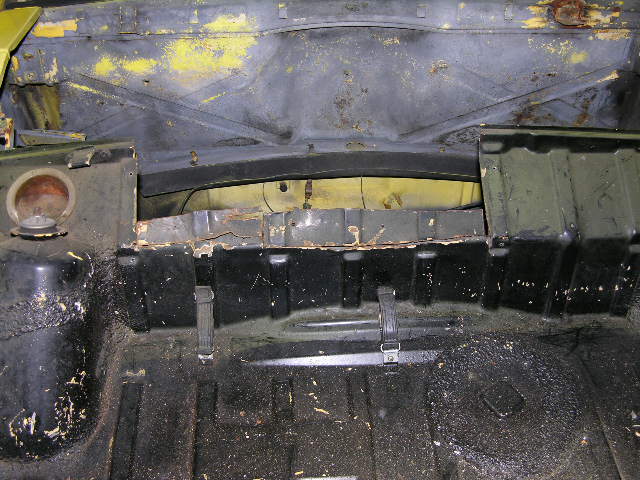 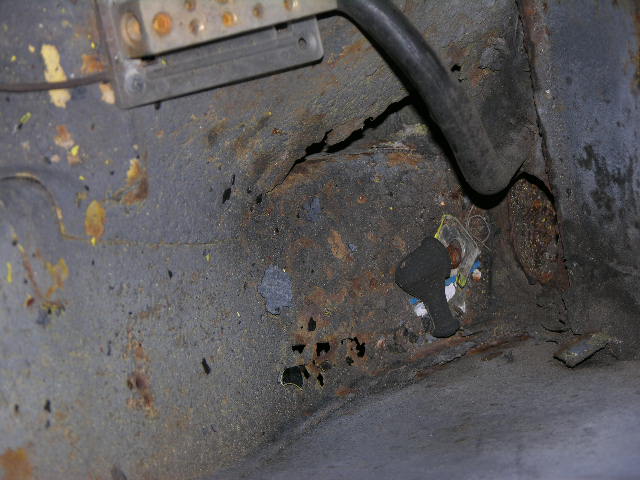 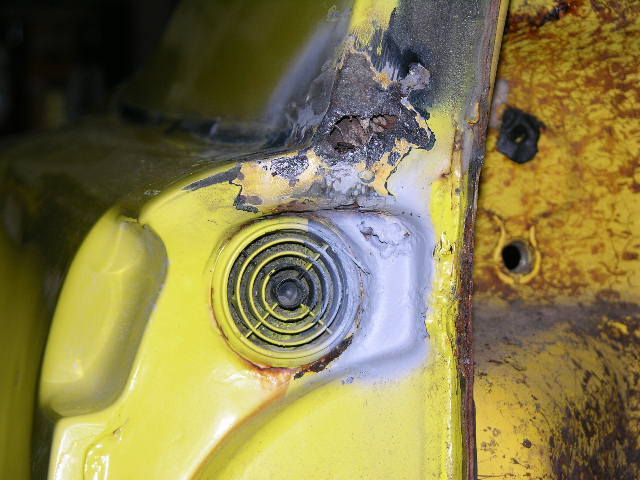 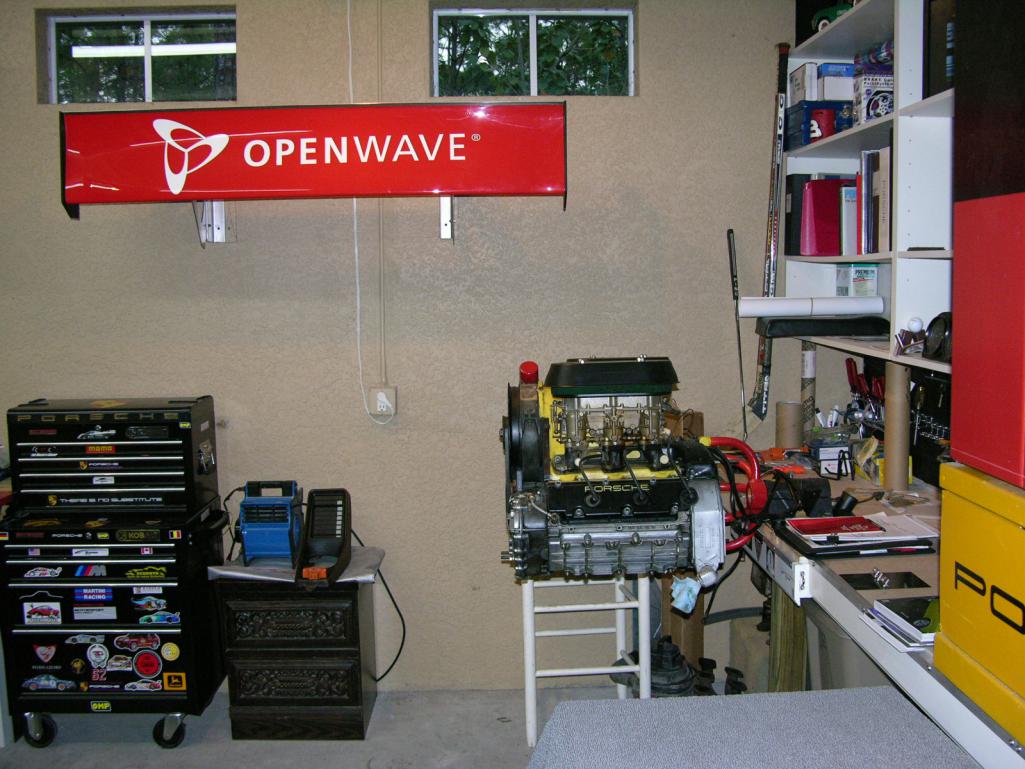 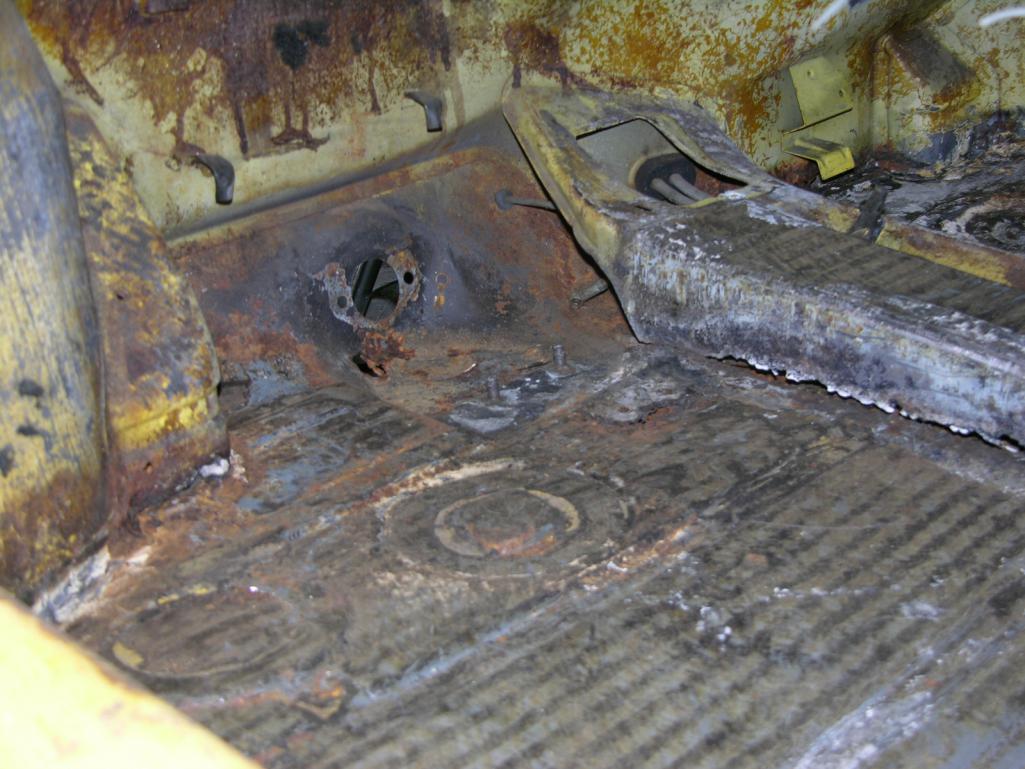 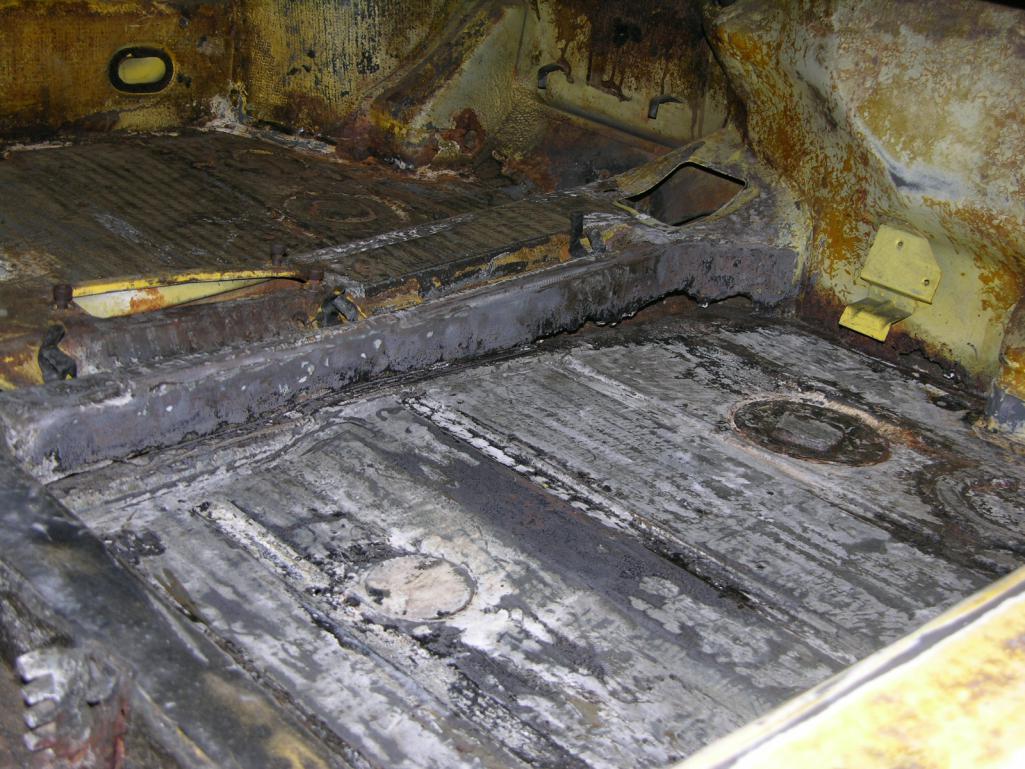 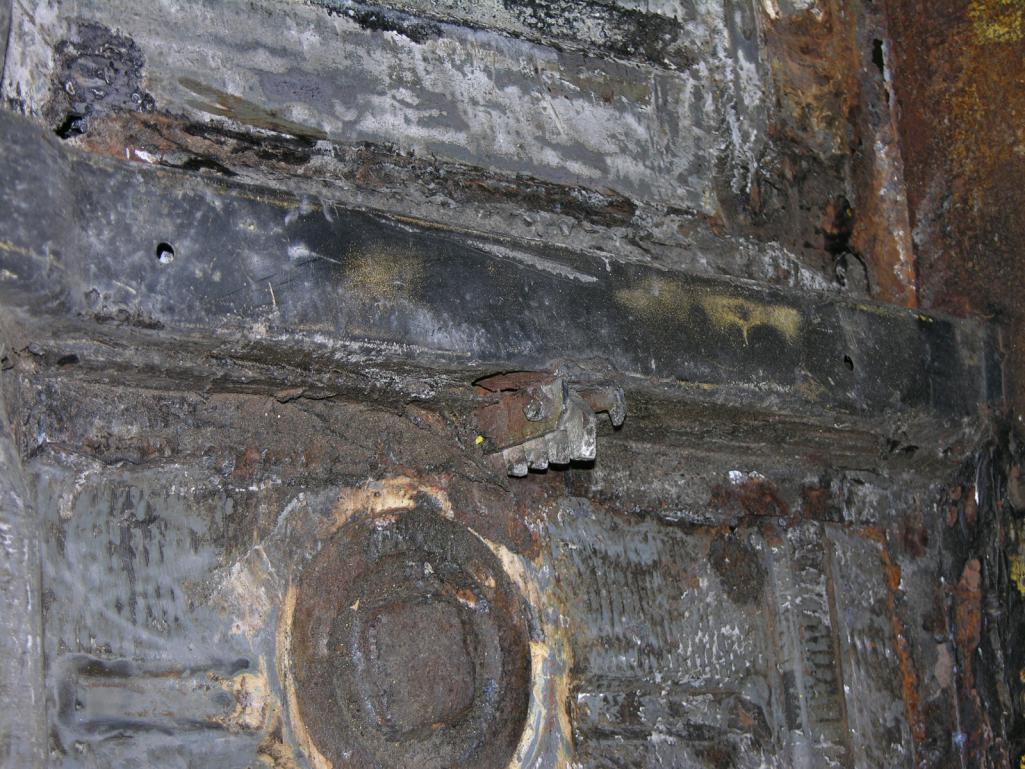  |
   |

 
|
Posts in this topic
 Vysoc BUILD-OFF CHALLENGE: Vysoc / Yellow Sub Oct 2 2015, 01:48 PM
 Vysoc More Pictures
Oct 2 2015, 01:53 PM Vysoc More Pictures
Now the real work mus... Oct 2 2015, 02:02 PM RobW Awesome! You rock. Good luck! Oct 2 2015, 02:09 PM Nutter965 Love that motor ! Very envious as mine is stil... Oct 2 2015, 02:17 PM 914forme :popcorn: I can't wait for this to unfold.
BT... Oct 2 2015, 02:23 PM injunmort I love the color and the engine, good luck with t... Oct 2 2015, 03:17 PM Vysoc Nutter965,
No John Deere influence other than my ... Oct 2 2015, 04:59 PM Vysoc OK,
Day off today, my season is just starting (Gol... Oct 22 2015, 05:27 AM carr914 :D
Oct 22 2015, 05:49 AM Philip W. looking good Peter, you are a glutten for punishme... Oct 22 2015, 07:27 AM Vysoc Nice photo TC, she will look good again with those... Oct 22 2015, 08:27 PM Vysoc TIG TIME only took a full month to get things set ... Nov 29 2015, 03:16 PM Vysoc Update to my regular thread as I put the October u... Dec 4 2015, 01:10 PM Dion Go Vysoc Go! :beer2:
Looking good. Keep at i... Dec 6 2015, 03:35 PM Vysoc Hey Dion,
I am hoping your car won COTM for Decem... Dec 7 2015, 03:21 PM Dion Thanks Vysoc,
I'll be needing an access pl... Dec 7 2015, 10:10 PM Vysoc OK December 2015,
I was able to take advantage of... Dec 13 2015, 10:16 AM Andyrew Thin guage is all about watching the puddle and tr... Dec 16 2015, 08:45 AM mgp4591 Nice to see someone else suffering through replaci... Dec 16 2015, 10:49 AM Vysoc Merry Christmas to all!
Floor Pan question, i... Dec 25 2015, 08:04 AM
Vysoc More Pictures
Oct 2 2015, 01:53 PM Vysoc More Pictures
Now the real work mus... Oct 2 2015, 02:02 PM RobW Awesome! You rock. Good luck! Oct 2 2015, 02:09 PM Nutter965 Love that motor ! Very envious as mine is stil... Oct 2 2015, 02:17 PM 914forme :popcorn: I can't wait for this to unfold.
BT... Oct 2 2015, 02:23 PM injunmort I love the color and the engine, good luck with t... Oct 2 2015, 03:17 PM Vysoc Nutter965,
No John Deere influence other than my ... Oct 2 2015, 04:59 PM Vysoc OK,
Day off today, my season is just starting (Gol... Oct 22 2015, 05:27 AM carr914 :D
Oct 22 2015, 05:49 AM Philip W. looking good Peter, you are a glutten for punishme... Oct 22 2015, 07:27 AM Vysoc Nice photo TC, she will look good again with those... Oct 22 2015, 08:27 PM Vysoc TIG TIME only took a full month to get things set ... Nov 29 2015, 03:16 PM Vysoc Update to my regular thread as I put the October u... Dec 4 2015, 01:10 PM Dion Go Vysoc Go! :beer2:
Looking good. Keep at i... Dec 6 2015, 03:35 PM Vysoc Hey Dion,
I am hoping your car won COTM for Decem... Dec 7 2015, 03:21 PM Dion Thanks Vysoc,
I'll be needing an access pl... Dec 7 2015, 10:10 PM Vysoc OK December 2015,
I was able to take advantage of... Dec 13 2015, 10:16 AM Andyrew Thin guage is all about watching the puddle and tr... Dec 16 2015, 08:45 AM mgp4591 Nice to see someone else suffering through replaci... Dec 16 2015, 10:49 AM Vysoc Merry Christmas to all!
Floor Pan question, i... Dec 25 2015, 08:04 AM stevegm
Merry Christmas to all!
Floor Pan question, ... Dec 25 2015, 08:31 AM
stevegm
Merry Christmas to all!
Floor Pan question, ... Dec 25 2015, 08:31 AM budk
Merry Christmas to all!
Floor Pan question, ... Dec 25 2015, 10:56 AM Vysoc Great information, my seam actually runs from fron... Dec 25 2015, 01:52 PM Vysoc OK the end of December is hear and time for the bi... Dec 31 2015, 02:31 PM Vysoc Close-Up of 16 gauge plates
Initial grinding of t... Dec 31 2015, 02:38 PM Vysoc Master's Sunday, my little white car is sold a... Apr 10 2016, 10:46 AM Philip W. Peter,
any progress on the yellow submarine??, or... Jul 25 2016, 12:15 PM Vysoc Hello Dr. Phil,
Actually worked on strengthening ... Jul 25 2016, 06:47 PM Vysoc Update: June 13, 2017
New storage Unit rented tod... Jun 13 2017, 08:21 PM Dion Nice to hear your back at it Peter. Hope the move... Jun 13 2017, 09:14 PM Vysoc Thanks Dion,
Building new movable workbenches as ... Jun 15 2017, 07:57 PM
budk
Merry Christmas to all!
Floor Pan question, ... Dec 25 2015, 10:56 AM Vysoc Great information, my seam actually runs from fron... Dec 25 2015, 01:52 PM Vysoc OK the end of December is hear and time for the bi... Dec 31 2015, 02:31 PM Vysoc Close-Up of 16 gauge plates
Initial grinding of t... Dec 31 2015, 02:38 PM Vysoc Master's Sunday, my little white car is sold a... Apr 10 2016, 10:46 AM Philip W. Peter,
any progress on the yellow submarine??, or... Jul 25 2016, 12:15 PM Vysoc Hello Dr. Phil,
Actually worked on strengthening ... Jul 25 2016, 06:47 PM Vysoc Update: June 13, 2017
New storage Unit rented tod... Jun 13 2017, 08:21 PM Dion Nice to hear your back at it Peter. Hope the move... Jun 13 2017, 09:14 PM Vysoc Thanks Dion,
Building new movable workbenches as ... Jun 15 2017, 07:57 PM  |
1 User(s) are reading this topic (1 Guests and 0 Anonymous Users)
0 Members:

|
Lo-Fi Version | Time is now: 25th July 2026 - 01:43 AM |
Invision Power Board
v9.1.4 © 2026 IPS, Inc.