|
|

|
Porsche, and the Porsche crest are registered trademarks of Dr. Ing. h.c. F. Porsche AG.
This site is not affiliated with Porsche in any way. Its only purpose is to provide an online forum for car enthusiasts. All other trademarks are property of their respective owners. |
|
|
  |
| Cairo94507 |
 Mar 8 2021, 04:07 PM Mar 8 2021, 04:07 PM
Post
#121
|
|
Michael           Group: Members Posts: 10,511 Joined: 1-November 08 From: Auburn, CA Member No.: 9,712 Region Association: Northern California 
|
Exciting to see clean metal and a flare clamped on. (IMG:style_emoticons/default/beerchug.gif)
|
| Dion |
 Mar 8 2021, 04:13 PM Mar 8 2021, 04:13 PM
Post
#122
|
|
RN     Group: Members Posts: 2,920 Joined: 16-September 04 From: Audubon,PA Member No.: 2,766 Region Association: MidAtlantic Region 

|
Fantastic work Luke. Love the jigs set up.
Amazing to see a NOS piece for this area. Thanks for documenting your progress. Attached image(s) 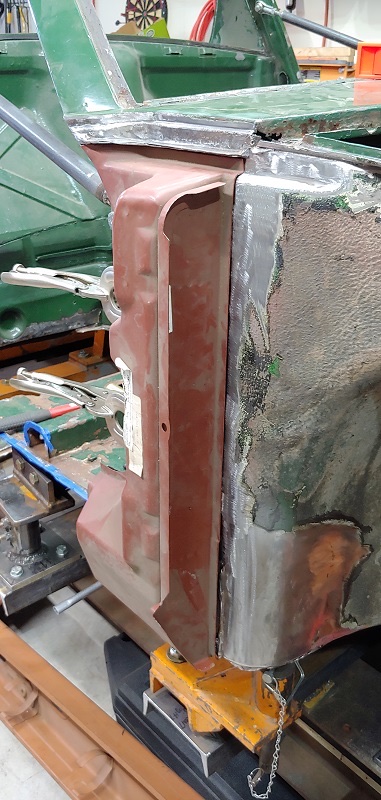
|
| sixnotfour |
 Mar 8 2021, 07:19 PM Mar 8 2021, 07:19 PM
Post
#123
|
|
914 Wizard           Group: Members Posts: 11,060 Joined: 12-September 04 From: Life Elevated..planet UT. Member No.: 2,744 Region Association: Rocky Mountains 

|
Oh My.. You didn't mention , GT flairs...Shouldn't those be NOS Porsche too ??? LMK
(IMG:style_emoticons/default/beer.gif) (IMG:style_emoticons/default/beerchug.gif) |
| Luke M |
 Mar 8 2021, 08:18 PM Mar 8 2021, 08:18 PM
Post
#124
|
|
Senior Member    Group: Members Posts: 1,442 Joined: 8-February 05 From: WNY Member No.: 3,574 Region Association: North East States 
|
Oh My.. You didn't mention , GT flairs...Shouldn't those be NOS Porsche too ??? LMK (IMG:style_emoticons/default/beer.gif) (IMG:style_emoticons/default/beerchug.gif) Fender has some pitting but adding flares takes care of that. Sent you a pm about flares. |
| Luke M |
 Mar 9 2021, 05:01 PM Mar 9 2021, 05:01 PM
Post
#125
|
|
Senior Member    Group: Members Posts: 1,442 Joined: 8-February 05 From: WNY Member No.: 3,574 Region Association: North East States 
|
Blasted the right NOS long today. Prepping all the metal that's to get welded back on.
Hopefully by the end of next week the right side will be back together. (IMG:style_emoticons/default/smash.gif) (IMG:style_emoticons/default/welder.gif) Attached image(s)  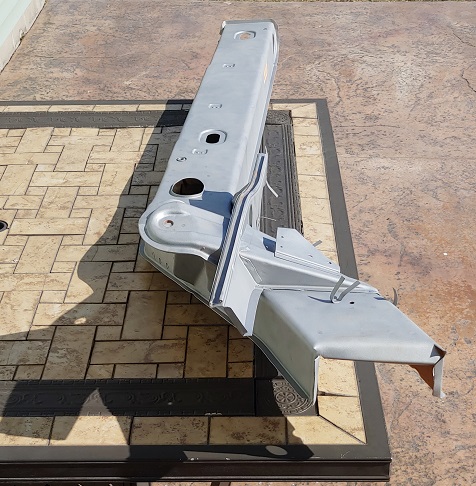 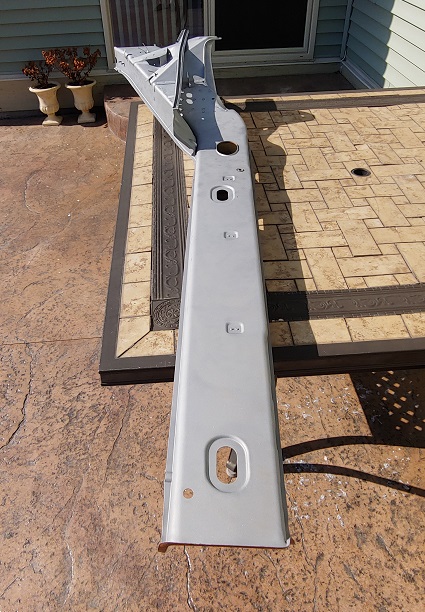
|
| gms |
 Mar 10 2021, 02:01 PM Mar 10 2021, 02:01 PM
Post
#126
|
|
Advanced Member     Group: Members Posts: 2,737 Joined: 12-March 04 From: Chicagoland Member No.: 1,785 Region Association: Upper MidWest 
|
Things are looking great over there Luke
|
| 930cabman |
 Mar 10 2021, 02:09 PM Mar 10 2021, 02:09 PM
Post
#127
|
|
Advanced Member     Group: Members Posts: 4,355 Joined: 12-November 20 From: Buffalo Member No.: 24,877 Region Association: North East States 
|
Luke has a killer supply of NOS stuff
|
| Luke M |
 Mar 11 2021, 07:56 AM Mar 11 2021, 07:56 AM
Post
#128
|
|
Senior Member    Group: Members Posts: 1,442 Joined: 8-February 05 From: WNY Member No.: 3,574 Region Association: North East States 
|
Things are looking great over there Luke Thanks Glenn, Working away here when I can. I have a few section blasted and ready for install. I want to paint the areas where I will not be able to reach once attached to the chassis. I have Eastwood internal frame coating cans, and also picked up a few cans of the epoxy paint too. Anyone have an idea which would be best to use? I'd like to save the internal coating cans for those areas I can't reach. Think the epoxy will be ok to help with future rust? Thinking of using the epoxy for the inside of the long and behind the door post. Any thoughts on this? I have the chassis scheduled to be blasted at the end of April then right into epoxy a few days later. I have a huge list of things to knock out before the blast date. |
| Luke M |
 Mar 13 2021, 06:27 AM Mar 13 2021, 06:27 AM
Post
#129
|
|
Senior Member    Group: Members Posts: 1,442 Joined: 8-February 05 From: WNY Member No.: 3,574 Region Association: North East States 
|
The sections from a Cali 914 parts car have arrived. Thanks Vince.. (IMG:style_emoticons/default/beerchug.gif)
Started to remove any metal I do not need and prep for install. Got the right inner wheel housing section almost done. I just need to blast it before install. Next up is the pass foot section and under the fuel tank. Today we will be working on my brothers 914. Spot welding the rest of the new RD rear panel in along with a new rear trunk pan. Attached image(s) 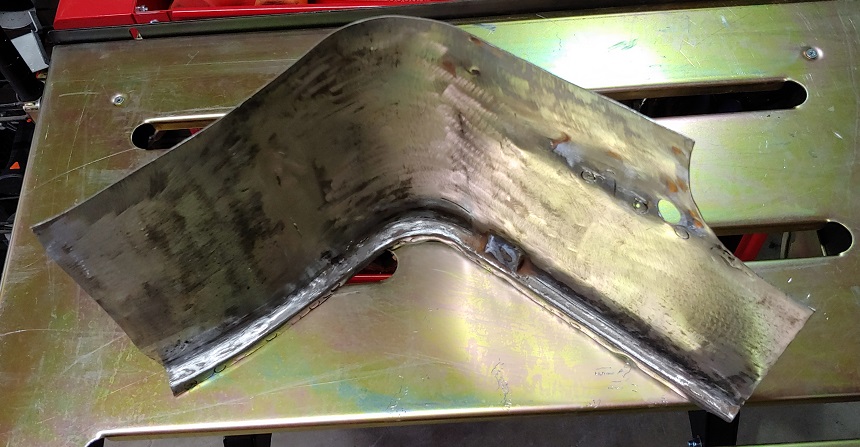 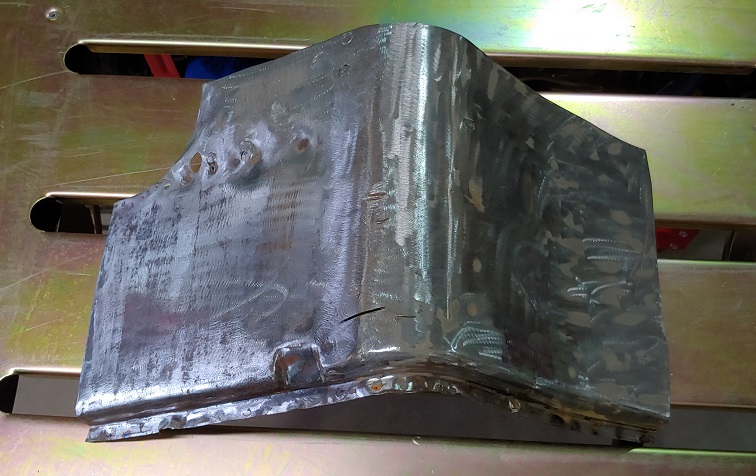 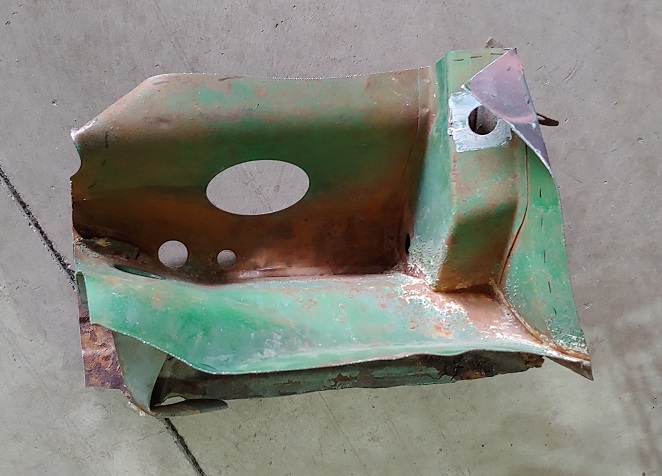 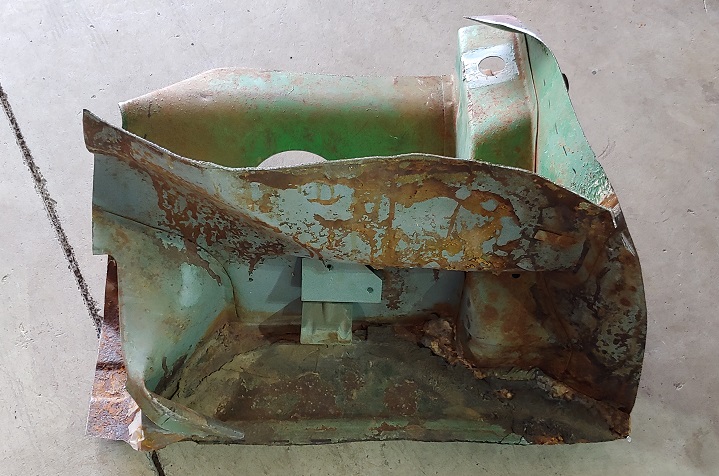 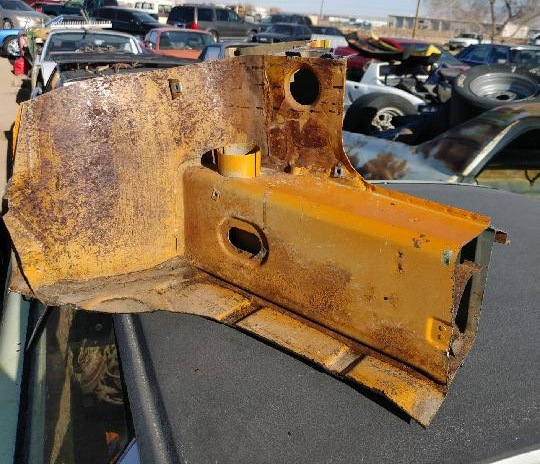
|
| Luke M |
 Mar 16 2021, 05:55 PM Mar 16 2021, 05:55 PM
Post
#130
|
|
Senior Member    Group: Members Posts: 1,442 Joined: 8-February 05 From: WNY Member No.: 3,574 Region Association: North East States 
|
Started cutting and fitting the replacement inner fender section. Also got the right long coated with Eastwood internal frame coating. Man does that stuff make a mess.
I'll see if I can get the new section of metal tacked in on Wed. Attached image(s) 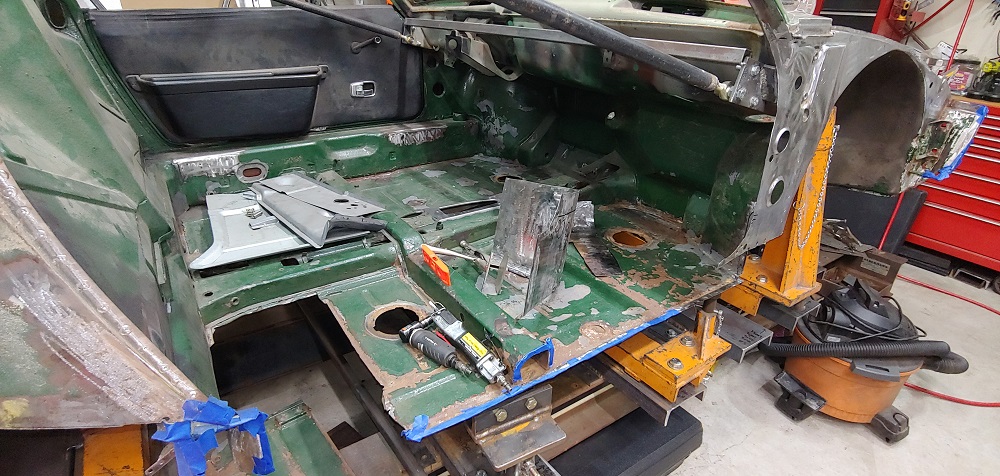 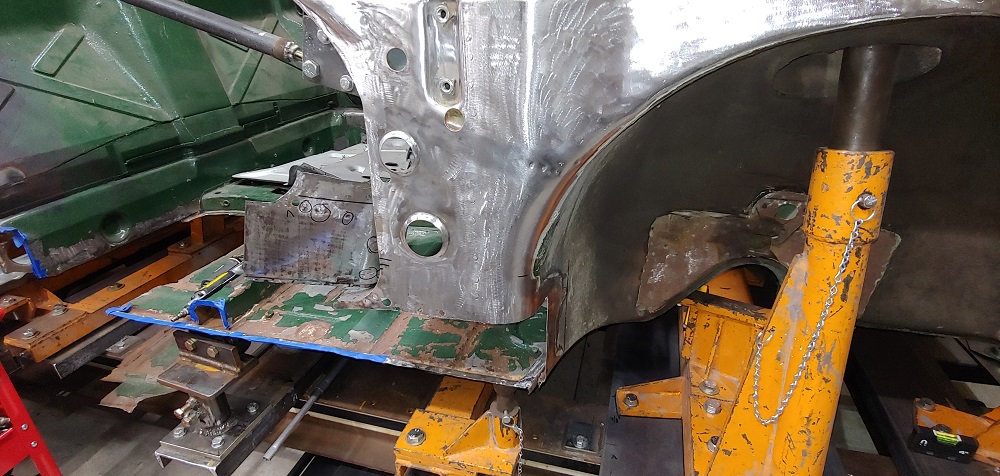 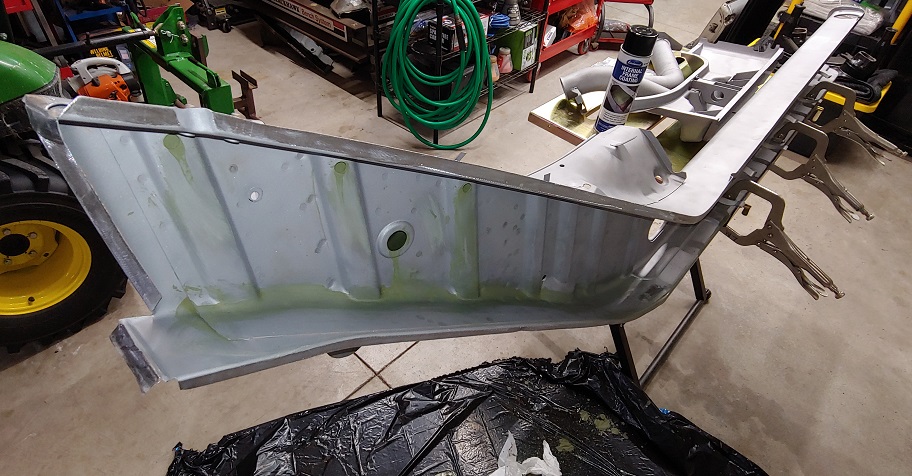 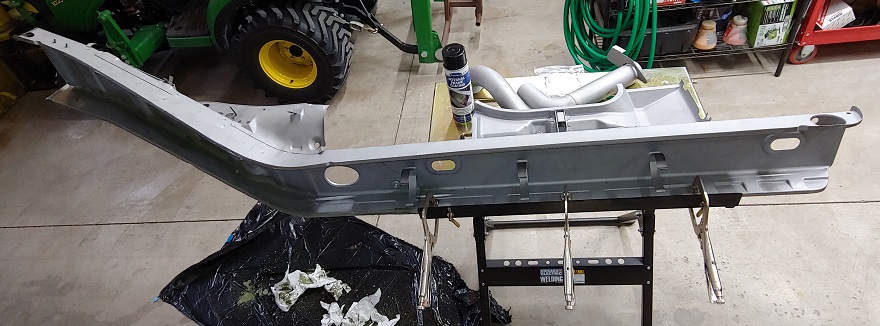
|
| 930cabman |
 Mar 16 2021, 06:05 PM Mar 16 2021, 06:05 PM
Post
#131
|
|
Advanced Member     Group: Members Posts: 4,355 Joined: 12-November 20 From: Buffalo Member No.: 24,877 Region Association: North East States 
|
Now, if we can get RD to manufacture this section, our life would become instantly easier.
Keep up the work, lookin good btw: I have been using a Sherwin Williams industrial primer "Kem Bond" we have used it for years on steel |
| rgalla9146 |
 Mar 16 2021, 07:27 PM Mar 16 2021, 07:27 PM
Post
#132
|
|
Advanced Member     Group: Members Posts: 4,887 Joined: 23-November 05 From: Paramus NJ Member No.: 5,176 Region Association: None 
|
Looking good Luke
'Going deep' is an understatement Great to see your very thorough work. |
| Luke M |
 Mar 17 2021, 09:05 PM Mar 17 2021, 09:05 PM
Post
#133
|
|
Senior Member    Group: Members Posts: 1,442 Joined: 8-February 05 From: WNY Member No.: 3,574 Region Association: North East States 
|
Looking good Luke 'Going deep' is an understatement Great to see your very thorough work. Thanks guys.. It's time consuming getting everything to line up just right. Putting the panels on, test fit then remove. Got the right patch panel ready but didn't have the time to weld it in. I did work on the front trunk floor damage. Pretty much done but need to confirm it's correct. Anyone got a pic of the section I have circled. Early cars if that matters? Attached image(s) 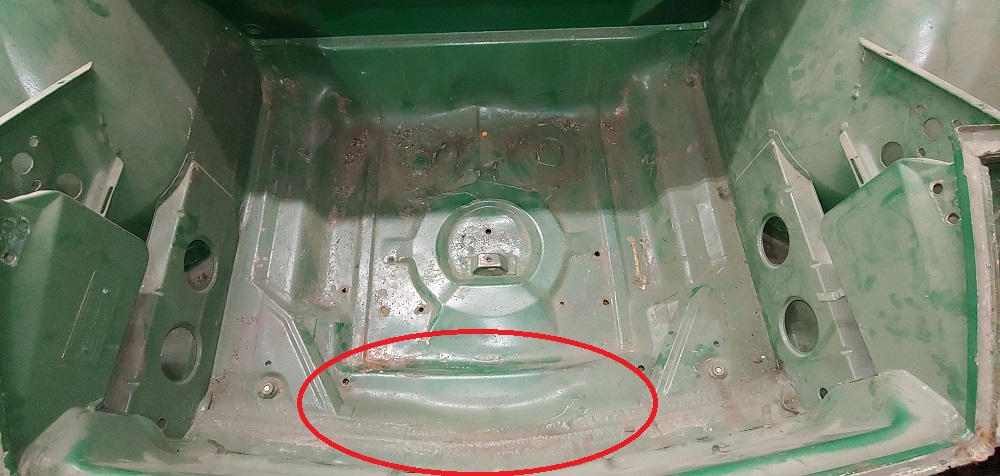 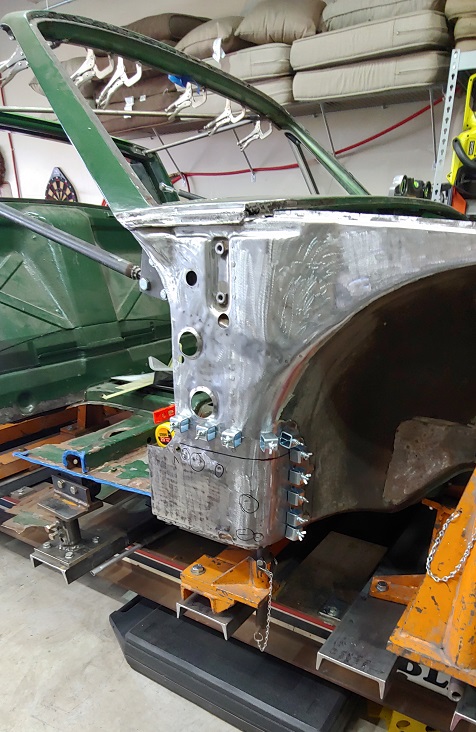 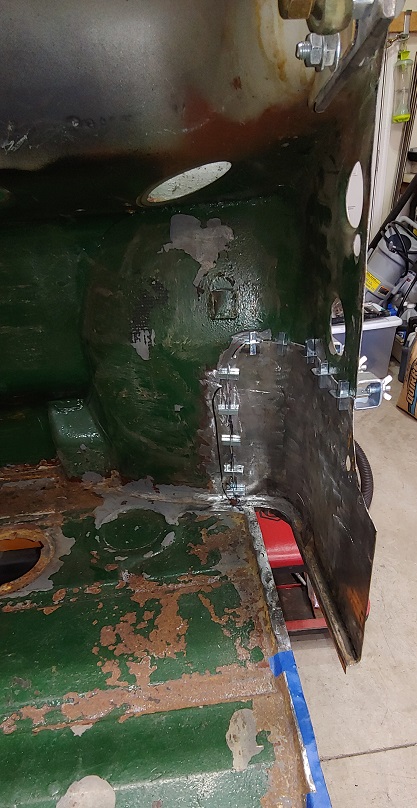 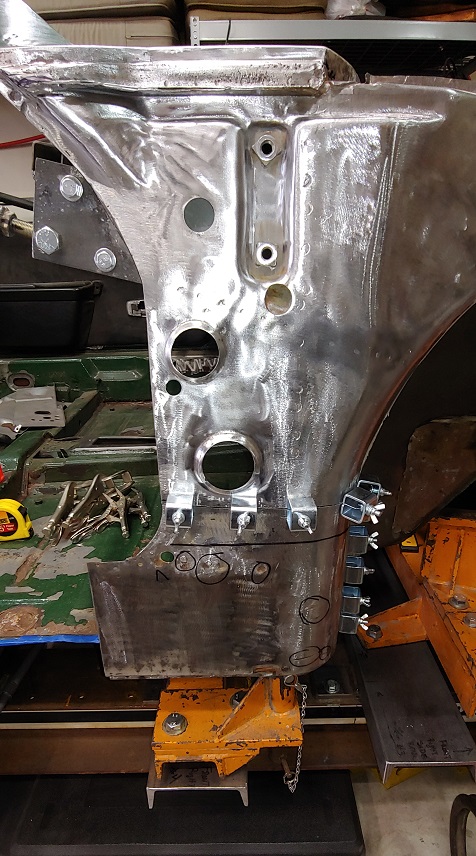
|
| rgalla9146 |
 Mar 17 2021, 10:09 PM Mar 17 2021, 10:09 PM
Post
#134
|
|
Advanced Member     Group: Members Posts: 4,887 Joined: 23-November 05 From: Paramus NJ Member No.: 5,176 Region Association: None 
|
Luke I can get pics of the trunk floor
Day or two |
| pete000 |
 Mar 17 2021, 10:45 PM Mar 17 2021, 10:45 PM
Post
#135
|
|
Senior Member    Group: Members Posts: 1,887 Joined: 23-August 10 From: Bradenton Florida Member No.: 12,094 Region Association: South East States |
Wow, just a little metal touch up...LOL
|
| 914werke |
 Mar 17 2021, 11:16 PM Mar 17 2021, 11:16 PM
Post
#136
|
|
"I got blisters on me fingers"           Group: Members Posts: 11,475 Joined: 22-March 03 From: USofA Member No.: 453 Region Association: Pacific Northwest 
|
DAMN!! (IMG:style_emoticons/default/aktion035.gif)
|
| Luke M |
 Mar 18 2021, 07:41 AM Mar 18 2021, 07:41 AM
Post
#137
|
|
Senior Member    Group: Members Posts: 1,442 Joined: 8-February 05 From: WNY Member No.: 3,574 Region Association: North East States 
|
Luke I can get pics of the trunk floor Day or two Hi Rory, If you could also snap a few from the underside front as well. I'd greatly appreciate it.. Thanks.. (IMG:style_emoticons/default/beerchug.gif) |
| gms |
 Mar 18 2021, 08:36 AM Mar 18 2021, 08:36 AM
Post
#138
|
|
Advanced Member     Group: Members Posts: 2,737 Joined: 12-March 04 From: Chicagoland Member No.: 1,785 Region Association: Upper MidWest 
|
|
| mate914 |
 Mar 18 2021, 09:03 AM Mar 18 2021, 09:03 AM
Post
#139
|
|
Matt    Group: Members Posts: 915 Joined: 27-February 09 From: Eagles mere, PA Member No.: 10,102 Region Association: North East States 
|
I used POR 15 inside all and out side all..... it has something to do with where we live.
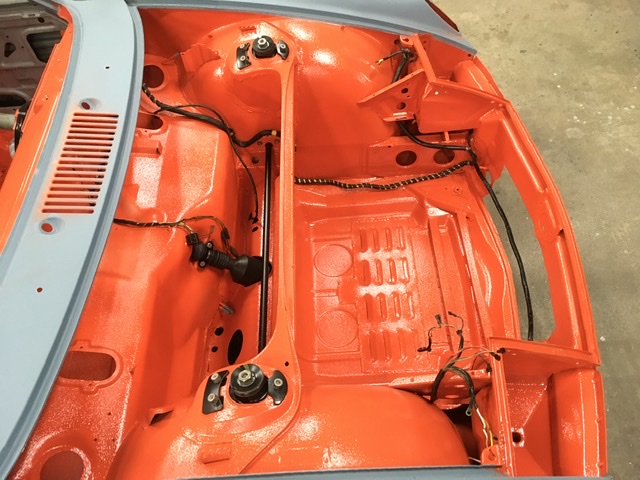 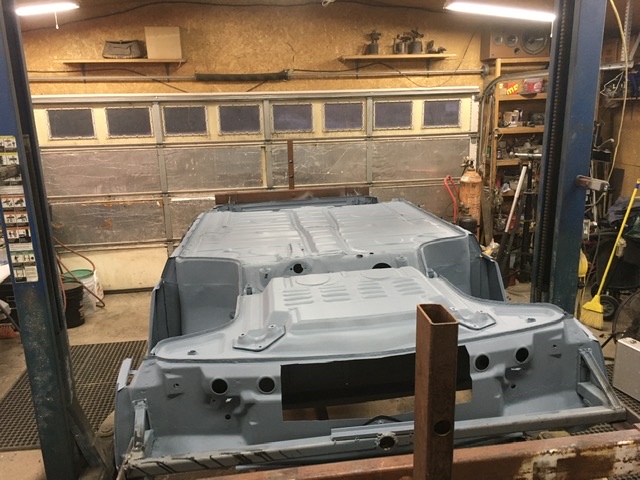 |
| Luke M |
 Mar 18 2021, 09:04 AM Mar 18 2021, 09:04 AM
Post
#140
|
|
Senior Member    Group: Members Posts: 1,442 Joined: 8-February 05 From: WNY Member No.: 3,574 Region Association: North East States 
|
|
  |
4 User(s) are reading this topic (4 Guests and 0 Anonymous Users)
0 Members:

|
Lo-Fi Version | Time is now: 7th December 2025 - 06:56 AM |
Invision Power Board
v9.1.4 © 2025 IPS, Inc.


