|
|
|
Porsche, and the Porsche crest are registered trademarks of Dr. Ing. h.c. F. Porsche AG.
This site is not affiliated with Porsche in any way. Its only purpose is to provide an online forum for car enthusiasts. All other trademarks are property of their respective owners. |
|
|

  |

| 930cabman |
 Mar 6 2026, 06:18 PM Mar 6 2026, 06:18 PM
Post
#281
|
|
Advanced Member  Group: Members Posts: 4,773 Joined: 12-November 20 From: Buffalo Member No.: 24,877 Region Association: North East States |
Hate to be the bearer, but that has to go.
(IMG:style_emoticons/default/sawzall-smiley.gif) (IMG:style_emoticons/default/sawzall-smiley.gif) (IMG:style_emoticons/default/welder.gif) (IMG:style_emoticons/default/welder.gif) |
   |

 
|
| Montreal914 |
Mar 7 2026, 09:10 AM
Post
#282
|
|
Advanced Member Group: Members Posts: 2,179 Joined: 8-August 10 From: Claremont, CA Member No.: 12,023 Region Association: Southern California |
Yeah... (IMG:style_emoticons/default/dry.gif)
But the good news is you have all of these amazing NOS sheetmetal parts to properly fix it! (IMG:style_emoticons/default/smilie_pokal.gif) |
 |
|
| 930cabman |
Mar 7 2026, 04:33 PM
Post
#283
|
|
Advanced Member Group: Members Posts: 4,773 Joined: 12-November 20 From: Buffalo Member No.: 24,877 Region Association: North East States |
QUOTE(Montreal914 @ Mar 7 2026, 10:10 AM)  Yeah... (IMG:style_emoticons/default/dry.gif) But the good news is you have all of these amazing NOS sheetmetal parts to properly fix it! (IMG:style_emoticons/default/smilie_pokal.gif) Exactly, how can one guy have all this cool NOS stuff? more than a bit envious |
|
|
|
| Luke M |
Mar 7 2026, 05:00 PM
Post
#284
|
|
Senior Member Group: Members Posts: 1,564 Joined: 8-February 05 From: WNY Member No.: 3,574 Region Association: North East States |
QUOTE(930cabman @ Mar 7 2026, 03:33 PM) QUOTE(Montreal914 @ Mar 7 2026, 10:10 AM) Yeah... (IMG:style_emoticons/default/dry.gif) But the good news is you have all of these amazing NOS sheetmetal parts to properly fix it! (IMG:style_emoticons/default/smilie_pokal.gif) Exactly, how can one guy have all this cool NOS stuff? more than a bit envious It took years and a lot of work to track down all of these NOS parts. Some parts came from around the States and others from all over the world. As you can see I'm putting them to use and there's nothing better then NOS. I don't want to add up how much money I have invested in these parts but I may once I finish installing them. I did track down a few more NOS item. They're on the way to me and more then likely will end up on this build. Today we got a little break from this winter weather. It got to 70 and sunny for a whole 4 hours. I took advantage of it and blasted the inner fender. I used up all the sand that I had on hand and just in time for the rain storm to roll in. I'll have to get more sand so I can blast the long section. Once I have all my metal prepped I'll start cutting out the bad sections. Attached image(s) 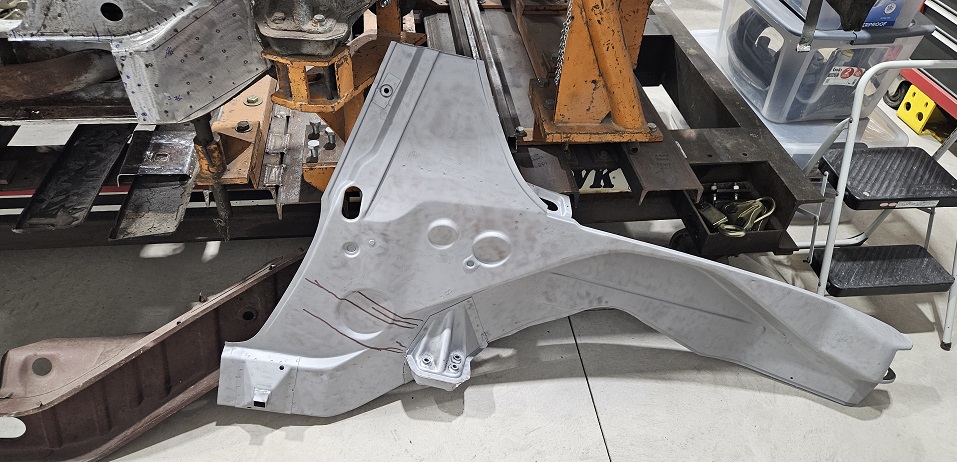
|
|
|
|
| Luke M |
Mar 10 2026, 02:41 PM
Post
#285
|
|
Senior Member Group: Members Posts: 1,564 Joined: 8-February 05 From: WNY Member No.: 3,574 Region Association: North East States |
Since the weather is cooperating here I started to blast all of the new metal. The left long, rear inner fender, door post, and door threshold sill are done. Then moved to making up a new patch for under the door post. I'm almost done with it. I need to trim and make the notch at the bottom for the water drain. I should have it done tomorrow.
Then the fun starts, I'll start cutting into the chassis to remove the left long and rear inner fender. (IMG:style_emoticons/default/sawzall-smiley.gif) (IMG:style_emoticons/default/smash.gif) (IMG:style_emoticons/default/welder.gif) Attached image(s) 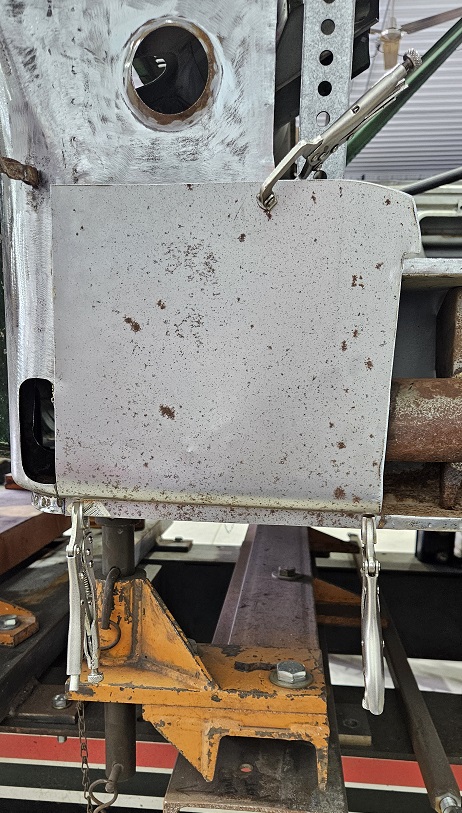 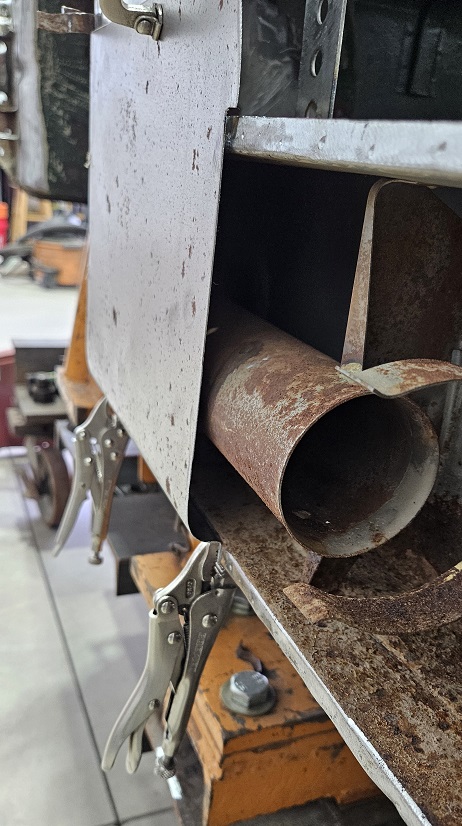 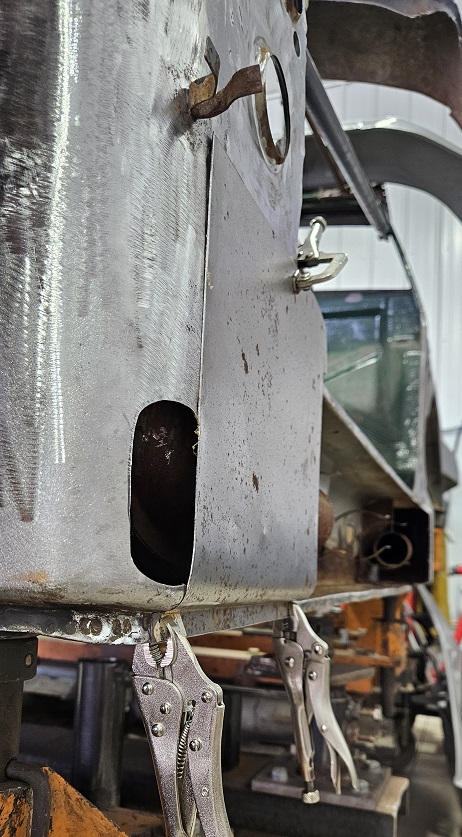
|
|
|
|
| Cairo94507 |
Mar 11 2026, 07:13 AM
Post
#286
|
|
Michael Group: Members Posts: 10,725 Joined: 1-November 08 From: Auburn, CA Member No.: 9,712 Region Association: Northern California |
|
|
|
|
| Luke M |
Mar 11 2026, 02:56 PM
Post
#287
|
|
Senior Member Group: Members Posts: 1,564 Joined: 8-February 05 From: WNY Member No.: 3,574 Region Association: North East States |
Finished the patch for most part. It'll need some fine trimming when it's all installed.
Test fitted with the door post and inner rocker. Then moved on to cutting out the long. I stopped before I hit the firewall. I noticed that once I cut the rear inner fender off I won't have anything supporting the targa cross beam or anything to stabilize the left side of the chassis. I'll have to fab up some braces in the morning before I can continue cutting. I know the chassis jigs hold things together pretty well but a few extra supports never hurts. I have a bunch of other metal on order so that's holding me up a little too. Attached image(s) 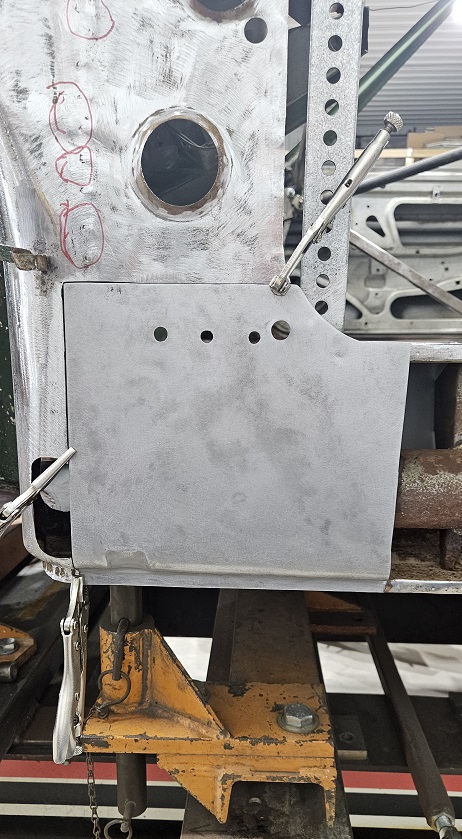 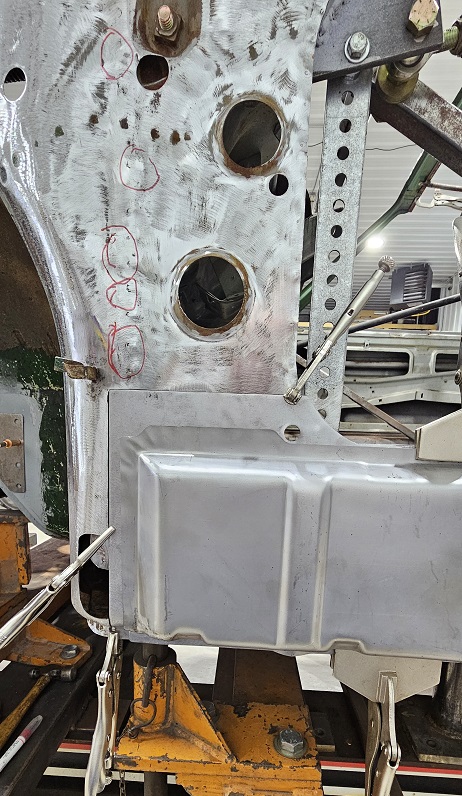 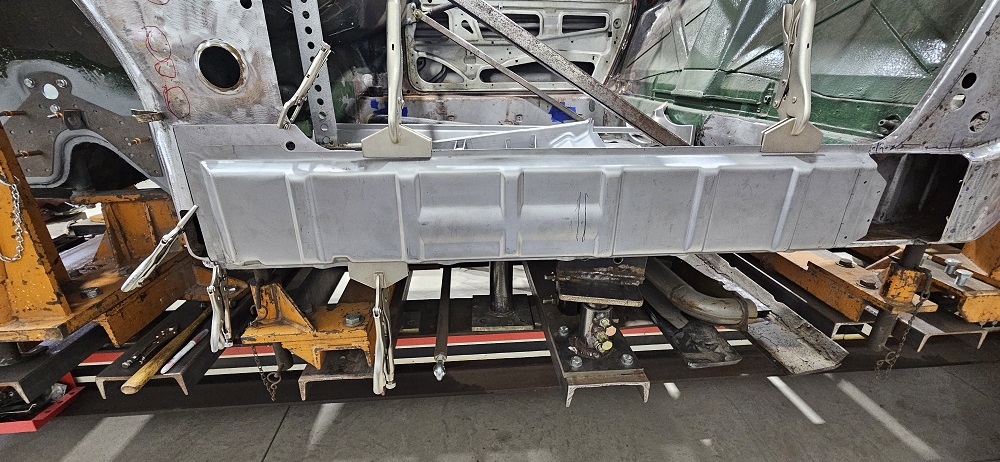 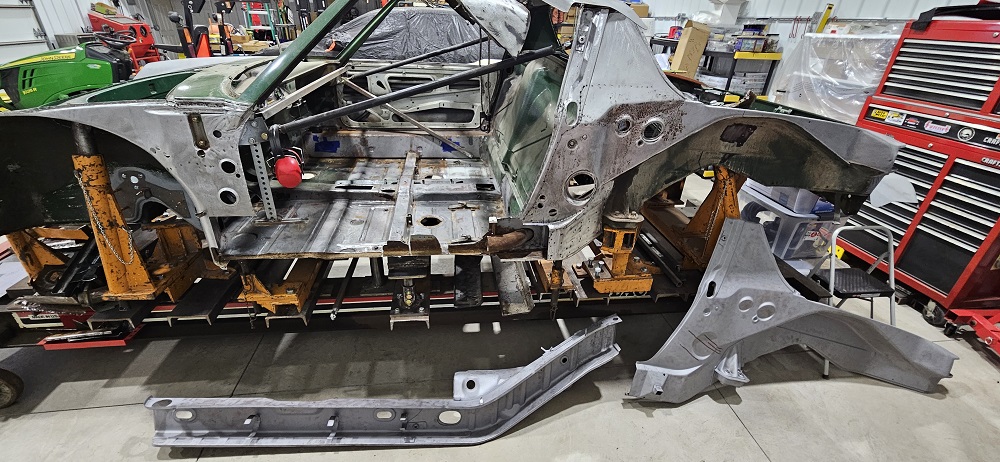
|
|
|
|
| Luke M |
Mar 12 2026, 03:08 PM
Post
#288
|
|
Senior Member Group: Members Posts: 1,564 Joined: 8-February 05 From: WNY Member No.: 3,574 Region Association: North East States |
Made the firewall to trunk brace then installed my old cross brace from when I installed the right long. Ready to start cutting now. (IMG:style_emoticons/default/sawzall-smiley.gif) (IMG:style_emoticons/default/smash.gif)
Attached image(s) 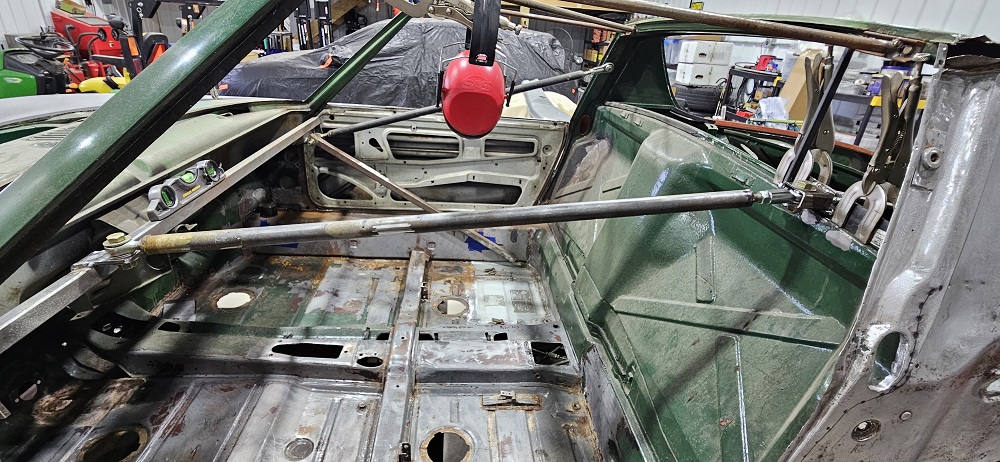 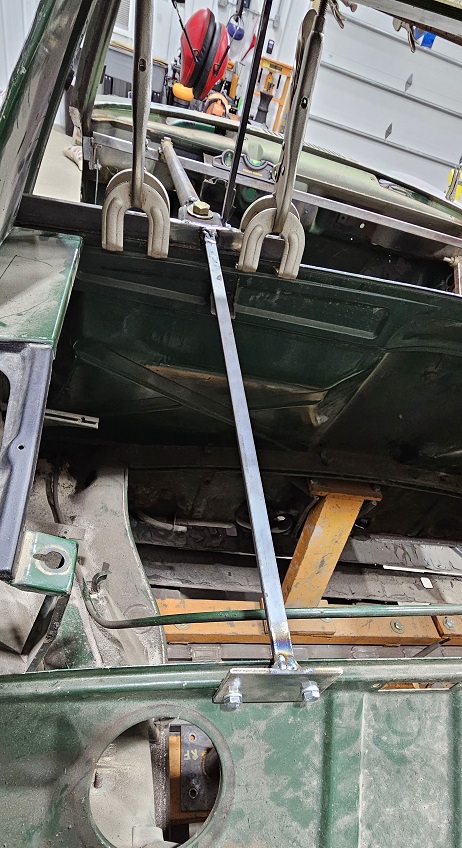 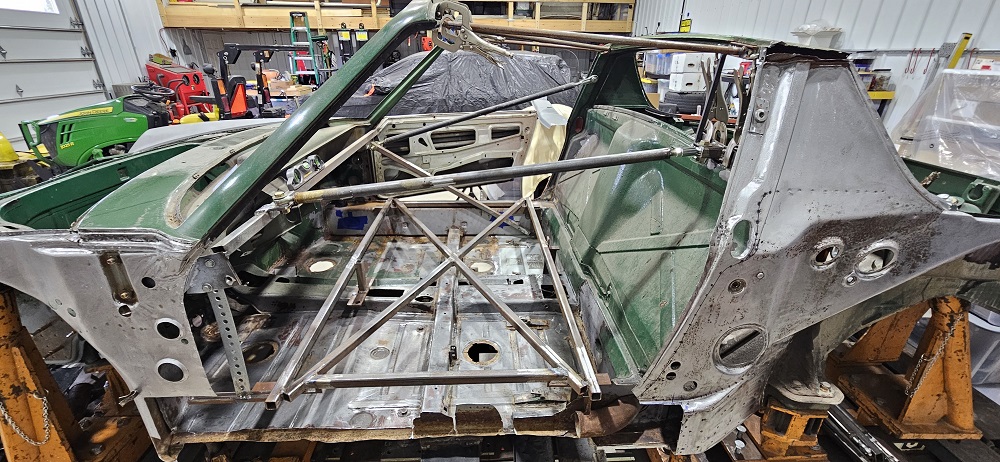
|
|
|
|
| 930cabman |
Mar 12 2026, 03:54 PM
Post
#289
|
|
Advanced Member Group: Members Posts: 4,773 Joined: 12-November 20 From: Buffalo Member No.: 24,877 Region Association: North East States |
|
|
|
|
| Montreal914 |
Mar 12 2026, 04:21 PM
Post
#290
|
|
Advanced Member Group: Members Posts: 2,179 Joined: 8-August 10 From: Claremont, CA Member No.: 12,023 Region Association: Southern California |
Love the “space frame”!
Daily updates, very envious! Let’s get to the clean metal! (IMG:style_emoticons/default/cheer.gif) |
|
|
|
| Luke M |
Mar 13 2026, 03:27 PM
Post
#291
|
|
Senior Member Group: Members Posts: 1,564 Joined: 8-February 05 From: WNY Member No.: 3,574 Region Association: North East States |
Getting there. I'll have to get into the engine bay and work now.
(IMG:style_emoticons/default/sawzall-smiley.gif) (IMG:style_emoticons/default/smash.gif) (IMG:style_emoticons/default/sawzall-smiley.gif) Attached image(s) 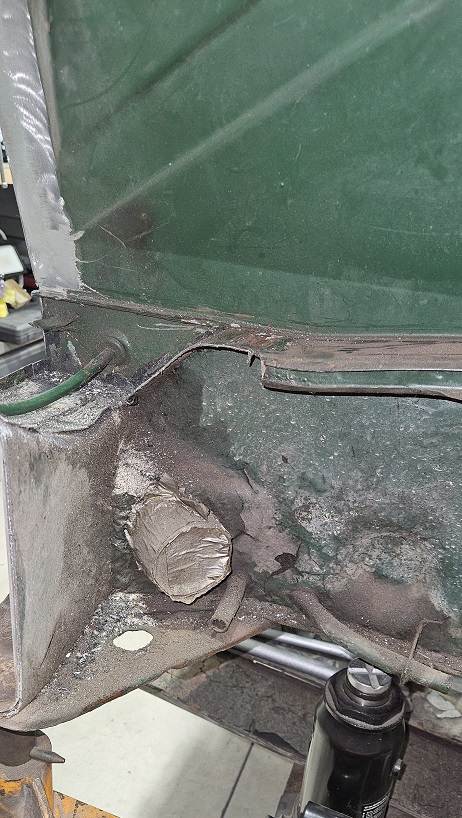 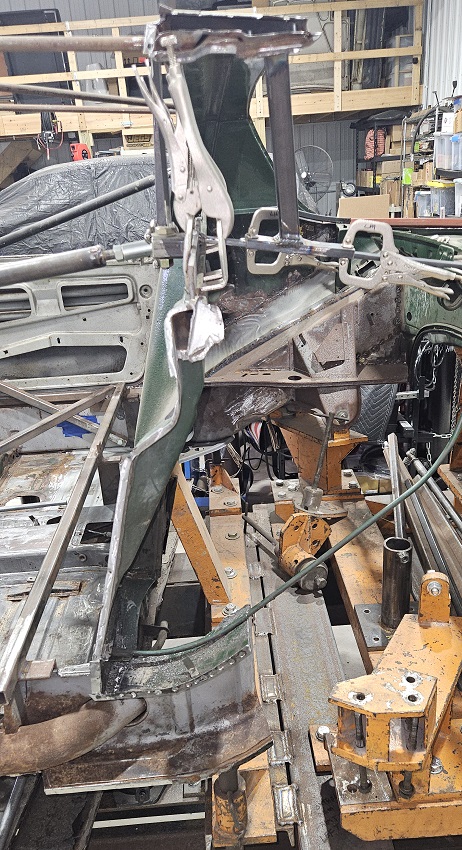 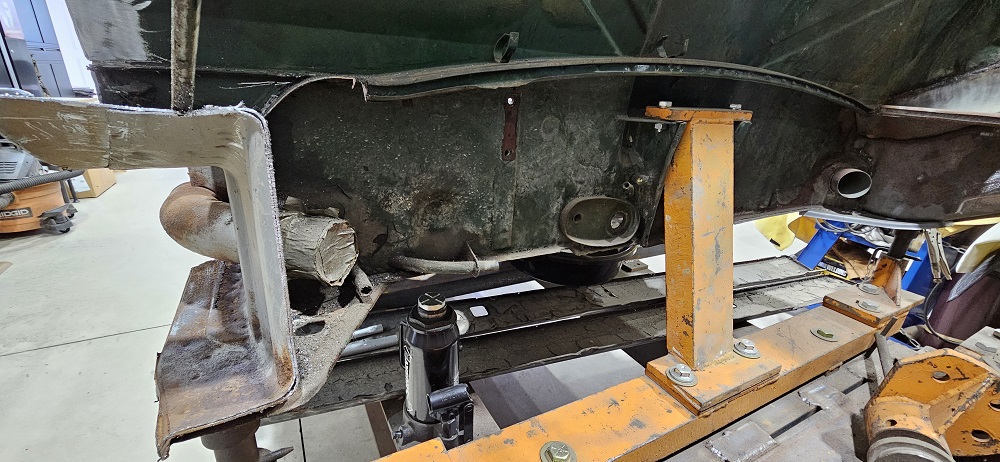 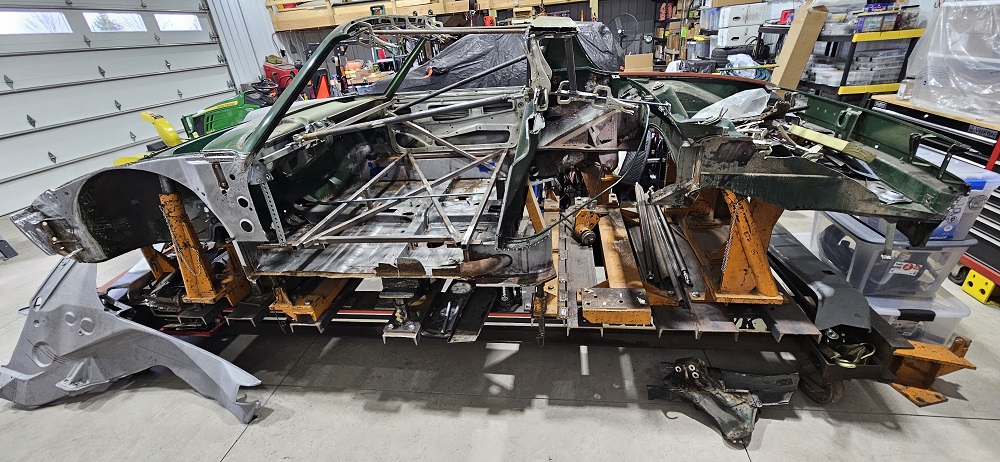
|
|
|
|
| Luke M |
Mar 16 2026, 04:18 PM
Post
#292
|
|
Senior Member Group: Members Posts: 1,564 Joined: 8-February 05 From: WNY Member No.: 3,574 Region Association: North East States |
Quick question for the people out there that have been in the targa area for repairs.
The factory installed what appears to be a foam like material along the seam which I have circled in the pic. That foam seal would keep dirt and whatnot from getting past that lip and farther up into the targa. What have you been using in this area if anything? Attached image(s) 
|
|
|
|
| mepstein |
Mar 16 2026, 05:47 PM
Post
#293
|
|
914-6 GT in waiting Group: Members Posts: 20,842 Joined: 19-September 09 From: Landenberg, PA/Wilmington, DE Member No.: 10,825 Region Association: MidAtlantic Region |
Nothing. It collects water. Same with all the other foam injected parts on the car like the rear of the quarters. In theory, yes, it would keep water from getting in but over time it cracked and let in moisture. I’m betting you aren’t daily driving the car or storing it outside. In my opinion, good prep and paint is all you need.
|
|
|
|
| Montreal914 |
Mar 16 2026, 06:17 PM
Post
#294
|
|
Advanced Member Group: Members Posts: 2,179 Joined: 8-August 10 From: Claremont, CA Member No.: 12,023 Region Association: Southern California |
I too like Mark’s approach. Only way for moisture to dry is to aerate. I plan on leaving this area open.
Another area is the front fender to cowling where that rubber trim fits in. I think this should have some kind of drain instead of being “sealed”. (IMG:style_emoticons/default/confused24.gif) |
|
|
|
| mepstein |
Mar 16 2026, 06:41 PM
Post
#295
|
|
914-6 GT in waiting Group: Members Posts: 20,842 Joined: 19-September 09 From: Landenberg, PA/Wilmington, DE Member No.: 10,825 Region Association: MidAtlantic Region |
QUOTE(Montreal914 @ Mar 16 2026, 08:17 PM) I too like Mark’s approach. Only way for moisture to dry is to aerate. I plan on leaving this area open. Another area is the front fender to cowling where that rubber trim fits in. I think this should have some kind of drain instead of being “sealed”. (IMG:style_emoticons/default/confused24.gif) I’m just leaving mine unglued. The (hopefully) rare times that it gets wet, I’ll just pull out the seal and dry it up. Even if you glue it down, the lack of daily driving and leaving it outside will probably prevent any rust from ever forming. |
|
|
|
| 930cabman |
Mar 17 2026, 05:02 AM
Post
#296
|
|
Advanced Member Group: Members Posts: 4,773 Joined: 12-November 20 From: Buffalo Member No.: 24,877 Region Association: North East States |
I did one of these repairs a couple years ago, looking back I might consider sealing this area with silicone. Leaving it open could cause issues with crap collecting up there from debris thrown up from the rear tires
Approx dimension of this area? 14" x 1 1/2" |
|
|
|
| Luke M |
Mar 17 2026, 06:15 AM
Post
#297
|
|
Senior Member Group: Members Posts: 1,564 Joined: 8-February 05 From: WNY Member No.: 3,574 Region Association: North East States |
QUOTE(930cabman @ Mar 17 2026, 04:02 AM) I did one of these repairs a couple years ago, looking back I might consider sealing this area with silicone. Leaving it open could cause issues with crap collecting up there from debris thrown up from the rear tires Approx dimension of this area? 14" x 1 1/2" Hi John, That's why I'm asking. Even though my factory panel was sealed a bunch of dirt and road grime got all up inside that area. When I removed my Q-panel I found it was loaded with all kinds of crap. I just want to prevent things from getting up between the inner panel and Q-panel. I plan to seam seal that area well but not like the factory did. I want to be able to get a water hose up in there and flush out whatever road grime gets there. There's road grime inside my targa cross panel as well. I'm not even sure how that happened but I know it wasn't from me. There's a few people that I'm going to reach out to see what Kent did on their cars. |
|
|
|
| mepstein |
Mar 17 2026, 06:40 AM
Post
#298
|
|
914-6 GT in waiting Group: Members Posts: 20,842 Joined: 19-September 09 From: Landenberg, PA/Wilmington, DE Member No.: 10,825 Region Association: MidAtlantic Region |
QUOTE(Luke M @ Mar 17 2026, 08:15 AM) QUOTE(930cabman @ Mar 17 2026, 04:02 AM) I did one of these repairs a couple years ago, looking back I might consider sealing this area with silicone. Leaving it open could cause issues with crap collecting up there from debris thrown up from the rear tires Approx dimension of this area? 14" x 1 1/2" Hi John, That's why I'm asking. Even though my factory panel was sealed a bunch of dirt and road grime got all up inside that area. When I removed my Q-panel I found it was loaded with all kinds of crap. I just want to prevent things from getting up between the inner panel and Q-panel. I plan to seam seal that area well but not like the factory did. I want to be able to get a water hose up in there and flush out whatever road grime gets there. There's road grime inside my targa cross panel as well. I'm not even sure how that happened but I know it wasn't from me. There's a few people that I'm going to reach out to see what Kent did on their cars. Would it be reasonable to leave it open and instead of flushing with water, hit it with high pressure air from a compressor every once in a while. It might not get it squeaky clean but get it clean enough. |
|
|
|
| Luke M |
Mar 17 2026, 07:46 AM
Post
#299
|
|
Senior Member Group: Members Posts: 1,564 Joined: 8-February 05 From: WNY Member No.: 3,574 Region Association: North East States |
QUOTE(mepstein @ Mar 17 2026, 05:40 AM) QUOTE(Luke M @ Mar 17 2026, 08:15 AM) QUOTE(930cabman @ Mar 17 2026, 04:02 AM) I did one of these repairs a couple years ago, looking back I might consider sealing this area with silicone. Leaving it open could cause issues with crap collecting up there from debris thrown up from the rear tires Approx dimension of this area? 14" x 1 1/2" Hi John, That's why I'm asking. Even though my factory panel was sealed a bunch of dirt and road grime got all up inside that area. When I removed my Q-panel I found it was loaded with all kinds of crap. I just want to prevent things from getting up between the inner panel and Q-panel. I plan to seam seal that area well but not like the factory did. I want to be able to get a water hose up in there and flush out whatever road grime gets there. There's road grime inside my targa cross panel as well. I'm not even sure how that happened but I know it wasn't from me. There's a few people that I'm going to reach out to see what Kent did on their cars. Would it be reasonable to leave it open and instead of flushing with water, hit it with high pressure air from a compressor every once in a while. It might not get it squeaky clean but get it clean enough. Hi Mark, On my brothers 914 I did not add a seal in this area and still question if I should have. My concern is crap getting up high and into the targa cross brace then down the other side. If one cleans out this area on a regular then it may not be an issue. I would just like to know what others have done. If need be I can add a rubber weather like strip down that section. I'm waiting for some metal to arrive so I can wrap that whole section up. I have sometime to figure it out. Attached image(s) 
|
|
|
|
| 930cabman |
Mar 17 2026, 08:46 AM
Post
#300
|
|
Advanced Member Group: Members Posts: 4,773 Joined: 12-November 20 From: Buffalo Member No.: 24,877 Region Association: North East States |
My gut tells me to seal it off and keep water/debris from getting inside the cavity
(IMG:style_emoticons/default/idea.gif) |
|
|
|
|
2 User(s) are reading this topic (2 Guests and 0 Anonymous Users)
0 Members:

|
Lo-Fi Version | Time is now: 31st July 2026 - 07:51 PM |
Invision Power Board
v9.1.4 © 2026 IPS, Inc.