

 Just another Factory 6 being fixed up Just another Factory 6 being fixed up |
|
|

|
Porsche, and the Porsche crest are registered trademarks of Dr. Ing. h.c. F. Porsche AG.
This site is not affiliated with Porsche in any way. Its only purpose is to provide an online forum for car enthusiasts. All other trademarks are property of their respective owners. |
|
|
  |
| Luke M |
 May 14 2026, 11:46 AM May 14 2026, 11:46 AM
Post
#341
|
|
Senior Member  Group: Members Posts: 1,608 Joined: 8-February 05 From: WNY Member No.: 3,574 Region Association: North East States 
 |
Thank you all that responded on the Wurth product. I'll spray that after it gets the epoxy on the underside. I messed around with the oil system again today. I installed the return oil filter housing then I realized that I may have to lower it a little to clear the engine sheet metal. I'll have to dig the tins out and see where they land. I messed around with the last steel line and man it's a pain. I need it to go up 45 degrees coming out of the t-stat then take a sharp 90 degrees into the oil filter housing. I may fab up a line in copper then have a local hydraulic shop bend me up one from some leftover SS pipe that I have.
Attached image(s) 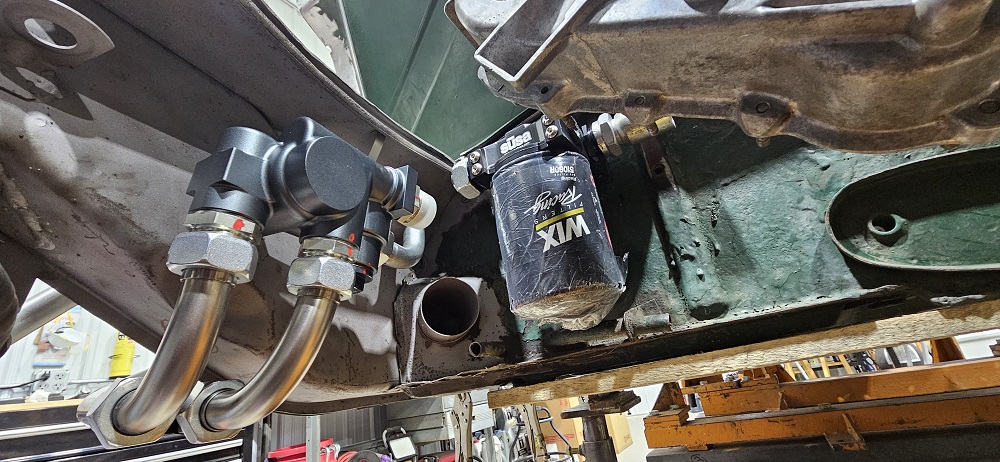 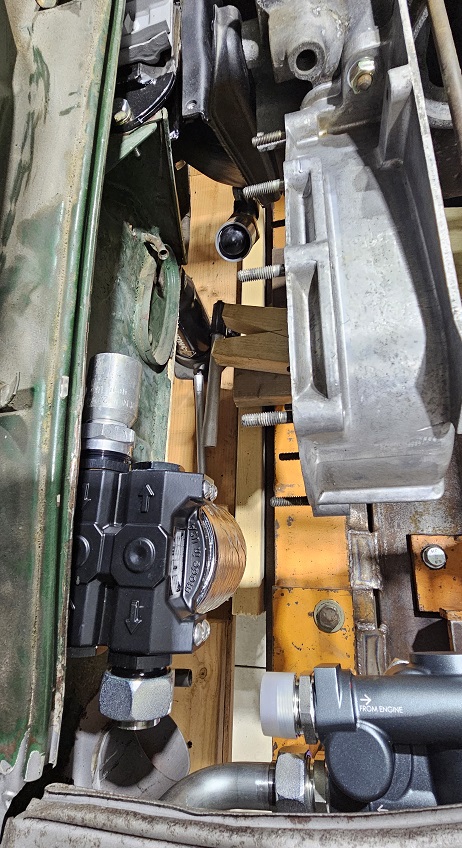 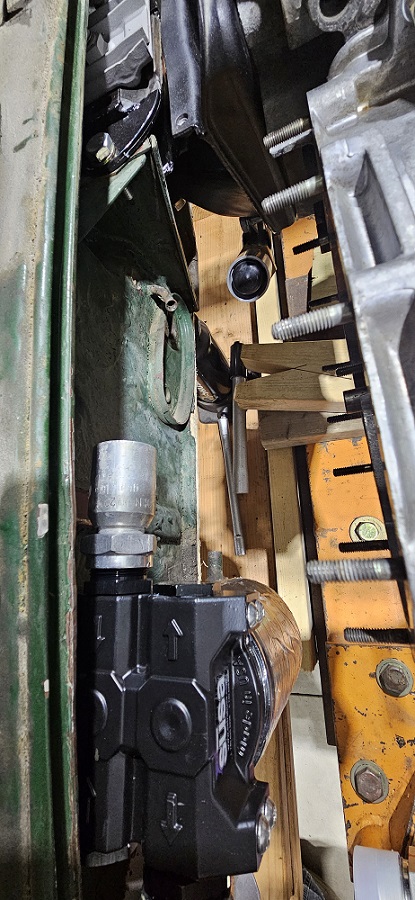 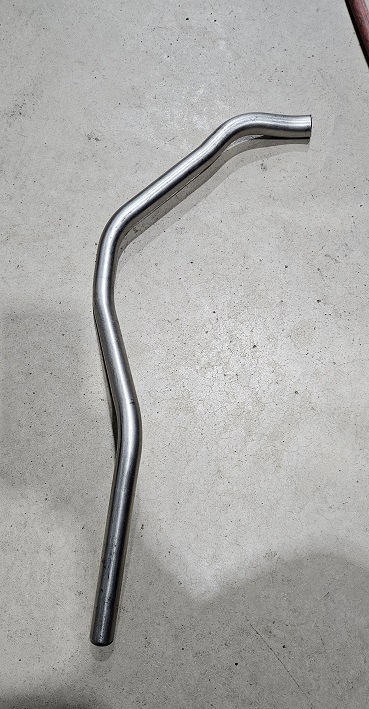
|
   |

 
|
| 914werke |
May 16 2026, 02:46 PM
Post
#342
|
|
"I got blisters on me fingers" Group: Members Posts: 11,762 Joined: 22-March 03 From: USofA Member No.: 453 Region Association: Pacific Northwest
|
New Capet posts
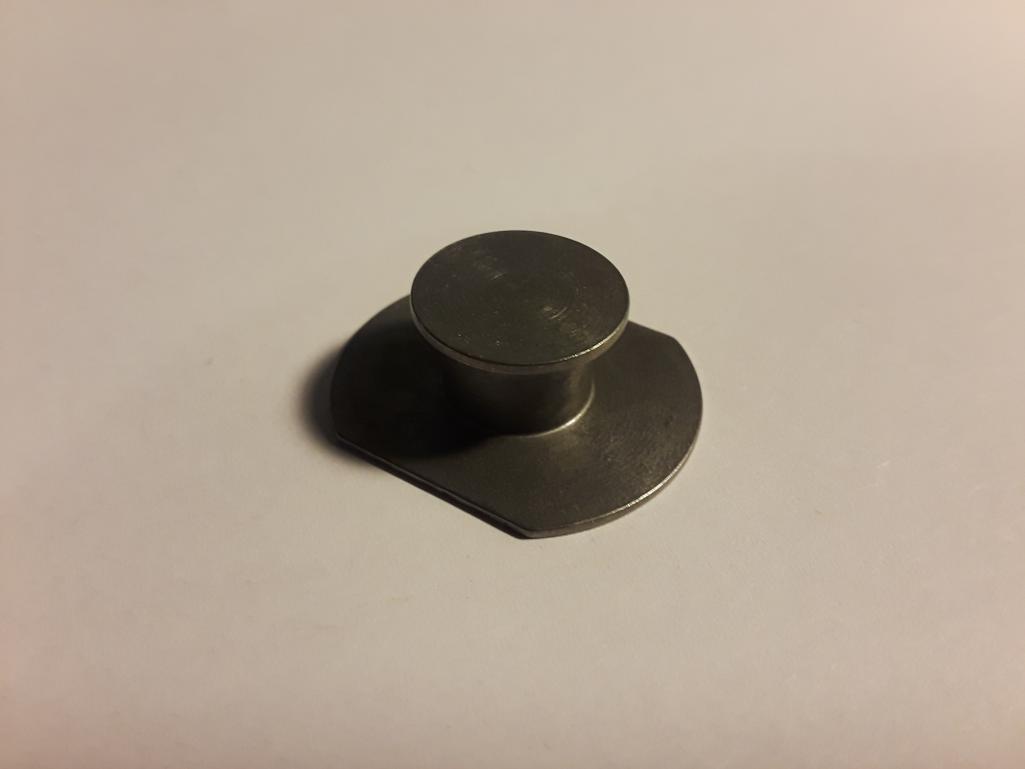 Repop & OG post brackets 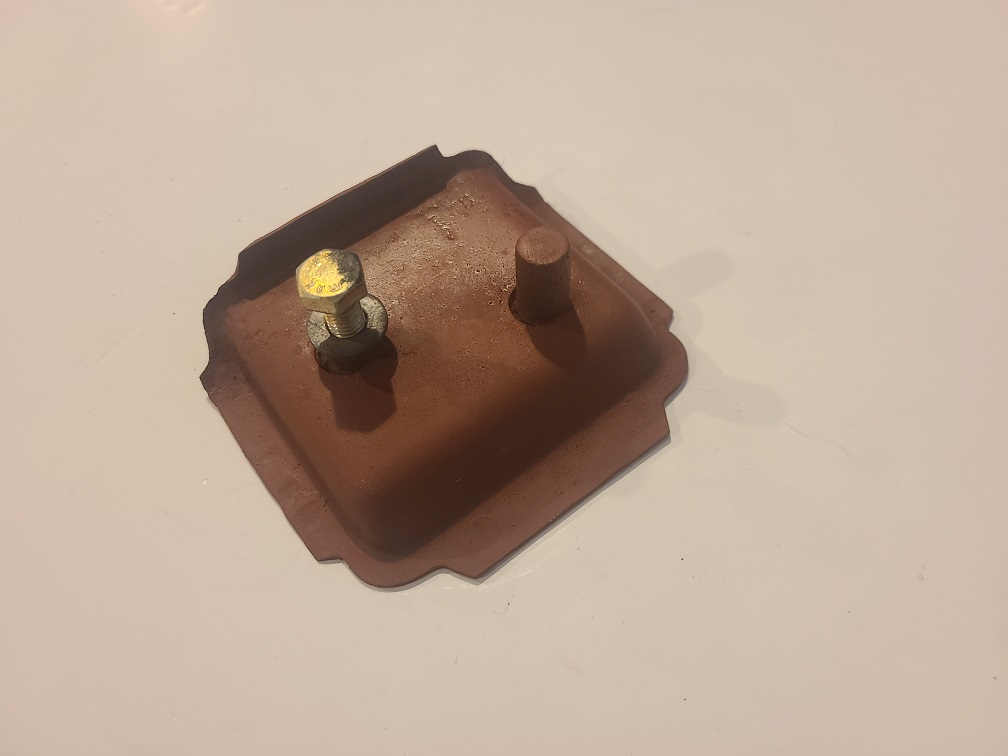 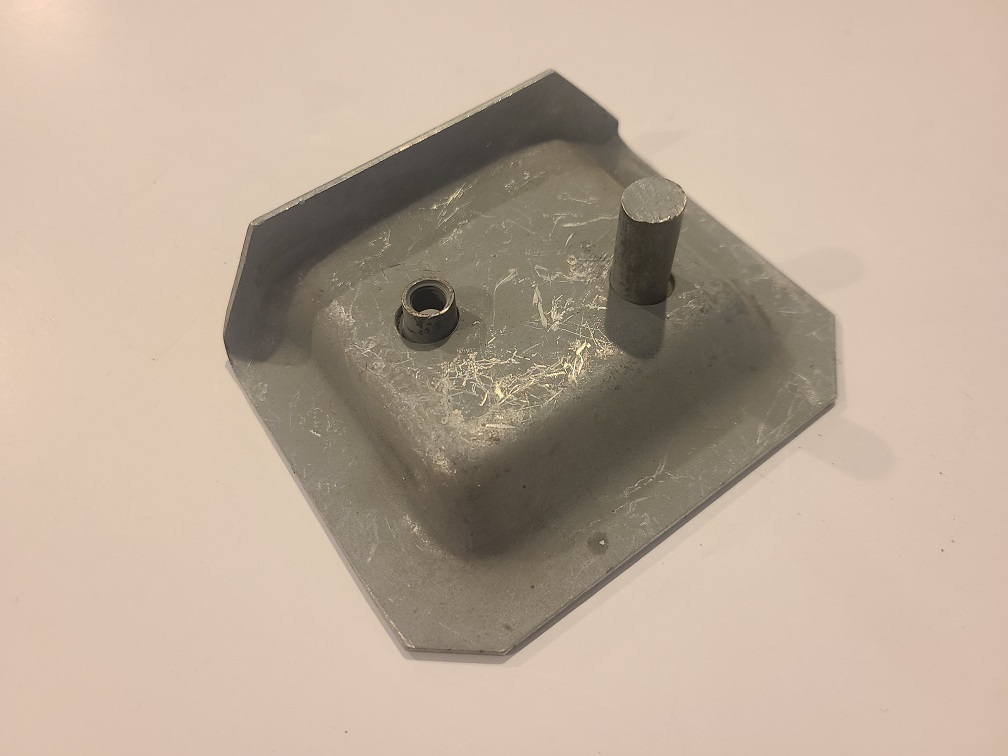 |
|
|
|
| Luke M |
May 18 2026, 01:22 PM
Post
#343
|
|
Senior Member Group: Members Posts: 1,608 Joined: 8-February 05 From: WNY Member No.: 3,574 Region Association: North East States
|
Thanks Rich. I'll keep an eye out for the posts. Rich, I need the part circled in red.
LMK via pm. I made the return hose and test fitted it. The fittings that I used where made by a member over on Pelican and hose from Elephant Racing. I'm still working on the last hard line. Attached image(s) 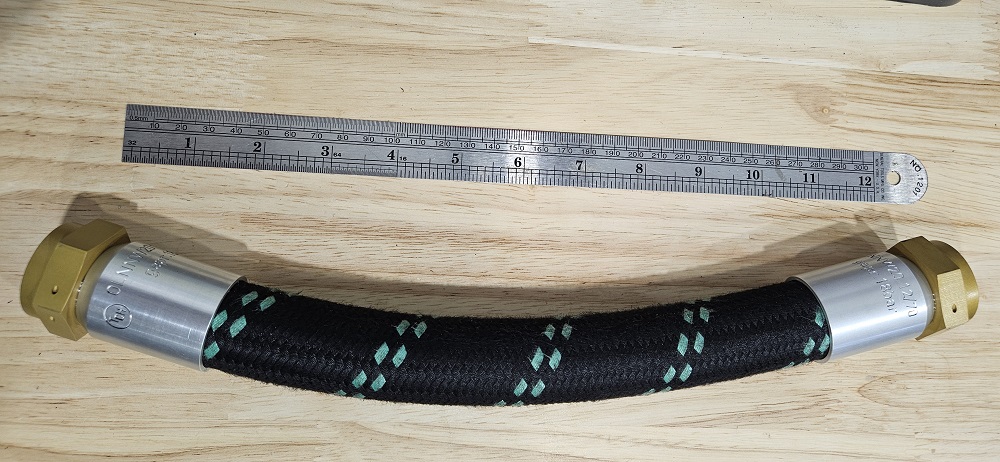 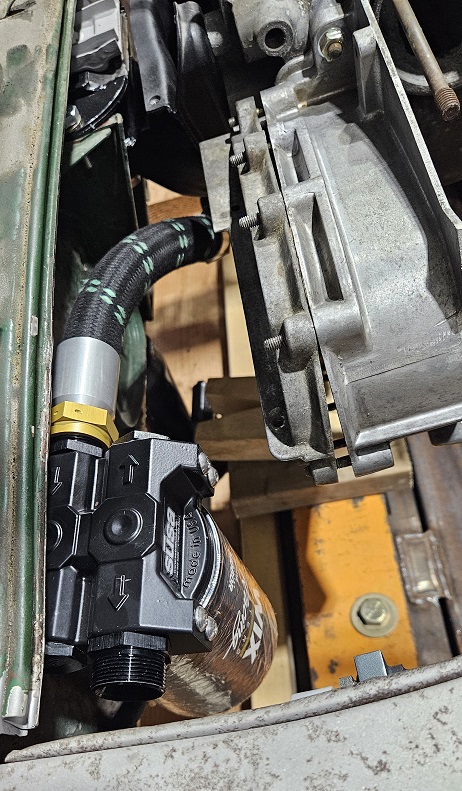 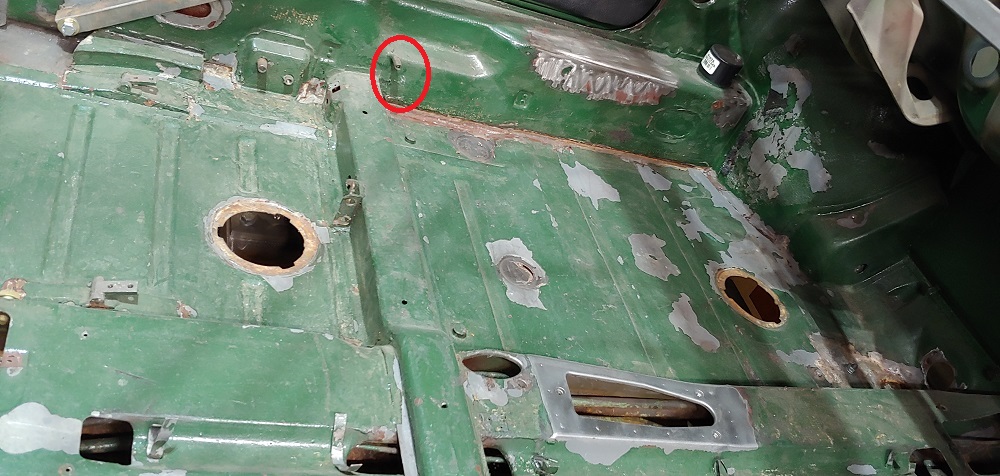
|
|
|
|
| live free & drive |
May 18 2026, 01:36 PM
Post
#344
|
|
Member Group: Members Posts: 216 Joined: 29-June 16 From: New Hampshire Member No.: 20,159 Region Association: None
|
If you are handy with 3d printing or know someone who is you can print your own "header modeling" snap together parts and scale them for oil line such that you can easily fabricate your needed pipe. I would think you may need to fabricate/weld vs bending to get what you need:
https://www.stlfinder.com/3dmodels/header-fabrication |
 |
|
| Luke M |
May 21 2026, 04:52 AM
Post
#345
|
|
Senior Member Group: Members Posts: 1,608 Joined: 8-February 05 From: WNY Member No.: 3,574 Region Association: North East States
|
After a few days of messing around with the last hard line I figured it out. I tried to route a rubber line from the other outgoing port but there's no room for both 30 mm fittings on one side. A an-12 fitting fit ok but I want to keep the fittings in metric. A trip to HD and I have a mocked up line. Now to track down some 22 mm i/d stainless 90 degree fittings.
Attached image(s) 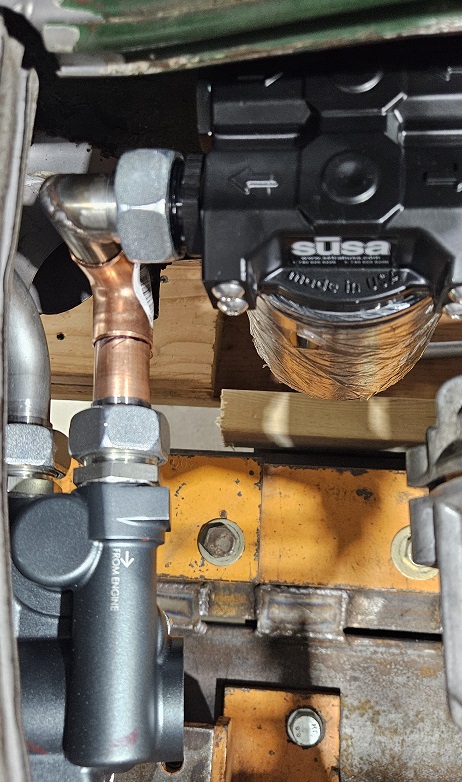 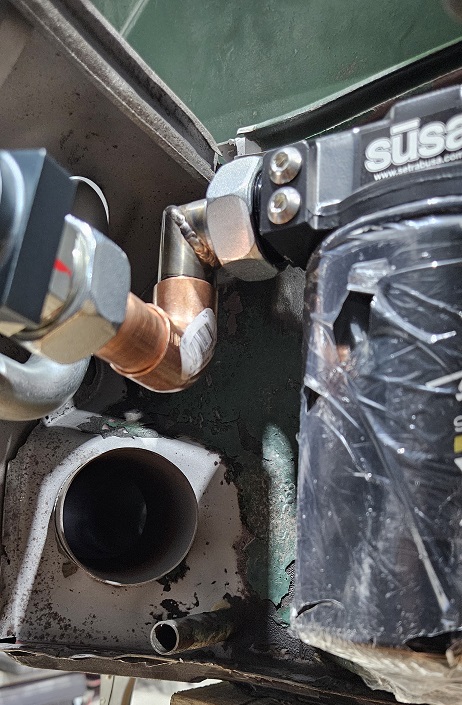 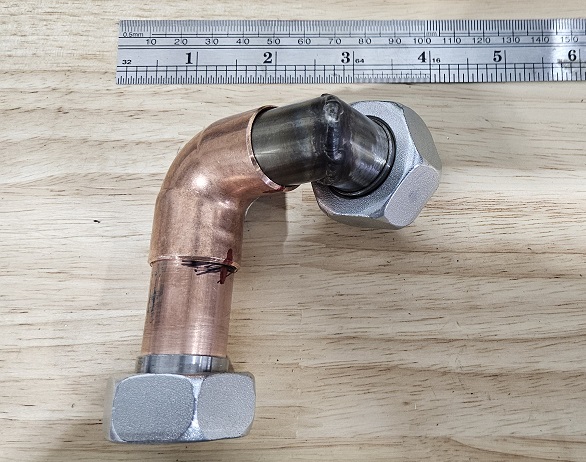
|
|
|
|
| live free & drive |
May 21 2026, 09:08 AM
Post
#346
|
|
Member Group: Members Posts: 216 Joined: 29-June 16 From: New Hampshire Member No.: 20,159 Region Association: None
|
These fittings below might get you somewhere, but you could see if you can find metric versions - these jump from 3/4" - 1", but you really need to know the true ID/OD to see if they will work:
https://www.titanfittings.com/low-pressure-...eld-schedule-10 |
|
|
|
| live free & drive |
May 21 2026, 09:11 AM
Post
#347
|
|
Member Group: Members Posts: 216 Joined: 29-June 16 From: New Hampshire Member No.: 20,159 Region Association: None
|
I should have looked harder at Mcmaster as they have 19mm and 23mm:
https://www.mcmaster.com/products/stainless...urement~metric/ Key words are stainless, tube or tubing, weld, fitting(s) |
|
|
|
| DennisV |
May 21 2026, 11:18 AM
Post
#348
|
|
Senior Member Group: Members Posts: 1,031 Joined: 8-August 20 From: Santa Rosa, CA Member No.: 24,575 Region Association: Northern California
|
QUOTE(Luke M @ May 21 2026, 03:52 AM)  After a few days of messing around with the last hard line I figured it out. I tried to route a rubber line from the other outgoing port but there's no room for both 30 mm fittings on one side. A an-12 fitting fit ok but I want to keep the fittings in metric. A trip to HD and I have a mocked up line. Now to track down some 22 mm i/d stainless fittings. Belmetric and PartsKlassik sell metric conical hose nipples and swivel nuts. |
|
|
|
| Luke M |
May 21 2026, 12:00 PM
Post
#349
|
|
Senior Member Group: Members Posts: 1,608 Joined: 8-February 05 From: WNY Member No.: 3,574 Region Association: North East States
|
QUOTE(live free & drive @ May 21 2026, 08:11 AM) I should have looked harder at Mcmaster as they have 19mm and 23mm: https://www.mcmaster.com/products/stainless...urement~metric/ Key words are stainless, tube or tubing, weld, fitting(s) Thanks for the info. I found some earlier this morning and on order. The ss tubing that I have on hand is 22mm or 7/8" so I need to stay within those sizes. Plus my hose nipples fit the 22 mm tubing. Parts Klassik is where I got all of my metric 30 mm fittings from. |
|
|
|
| Montreal914 |
May 23 2026, 10:47 AM
Post
#350
|
|
Advanced Member Group: Members Posts: 2,205 Joined: 8-August 10 From: Claremont, CA Member No.: 12,023 Region Association: Southern California
|
Beautiful oil network setup! (IMG:style_emoticons/default/drooley.gif)
I like the remote filter for easy mess-free maintenance. How do you plan on dealing with the filter console at the tank? Can you simply install a second filter at the tank and replace it after many years, or is there a spin-on cap that could deal with a filterless tank? (IMG:style_emoticons/default/idea.gif) |
|
|
|
| Luke M |
May 23 2026, 05:57 PM
Post
#351
|
|
Senior Member Group: Members Posts: 1,608 Joined: 8-February 05 From: WNY Member No.: 3,574 Region Association: North East States
|
QUOTE(Montreal914 @ May 23 2026, 09:47 AM) Beautiful oil network setup! (IMG:style_emoticons/default/drooley.gif) I like the remote filter for easy mess-free maintenance. How do you plan on dealing with the filter console at the tank? Can you simply install a second filter at the tank and replace it after many years, or is there a spin-on cap that could deal with a filterless tank? (IMG:style_emoticons/default/idea.gif) I'm going to run both oil filters. The one on the factory 6 tank will get the updated OC54 filter/console and the one on the lower firewall will get the Wix racing 51060R. I wanted a filter on the return line prior to going into the oil t-stat. I figured it wouldn't hurt and keeps junk out of the t-stat and front oil cooler. I found some 90 degree SS fittings and I should see those on Tuesday. I already made the straight section with the 30 mm nut and nipple. |
|
|
|
| Luke M |
May 27 2026, 03:08 PM
Post
#352
|
|
Senior Member Group: Members Posts: 1,608 Joined: 8-February 05 From: WNY Member No.: 3,574 Region Association: North East States
|
Found the correct fitting. The first one I got was the same o/d as my pipe. (IMG:style_emoticons/default/headbang.gif)
So this section is now almost done. Once I have things right where I want them I can tack weld the fitting and a friend of mines kid which is a welder will tig them up. Time to take some measurements and make a few mounting brackets now. Attached image(s) 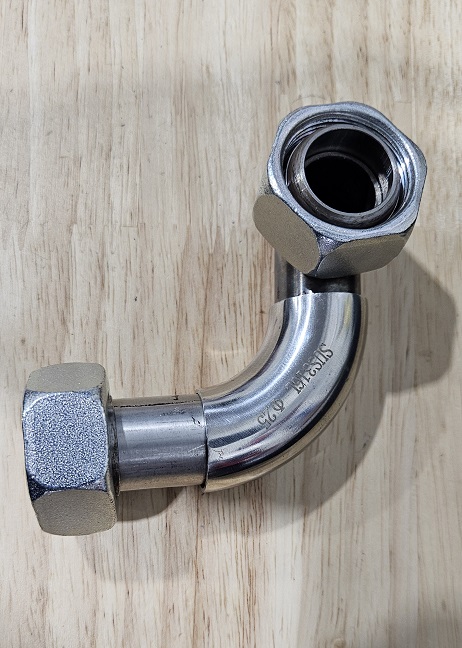 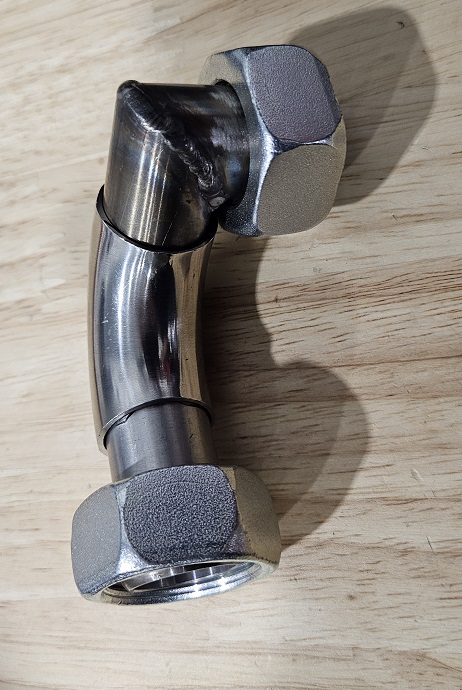 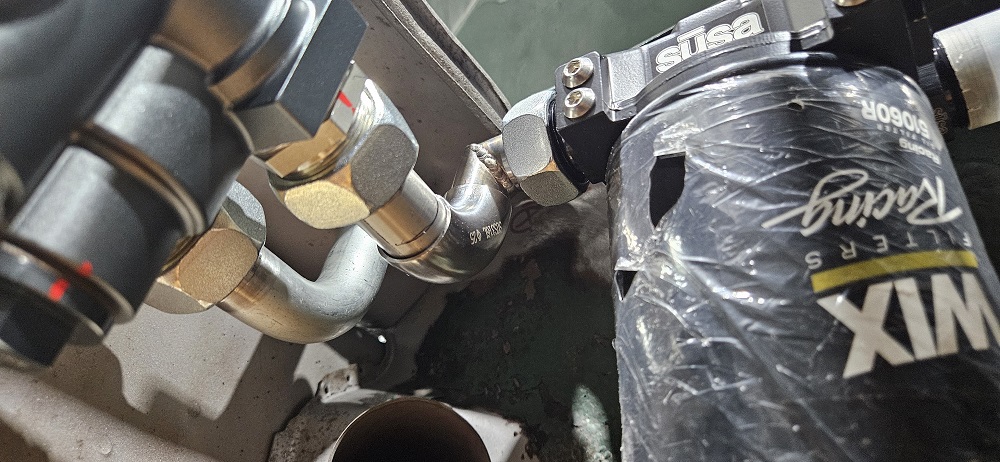 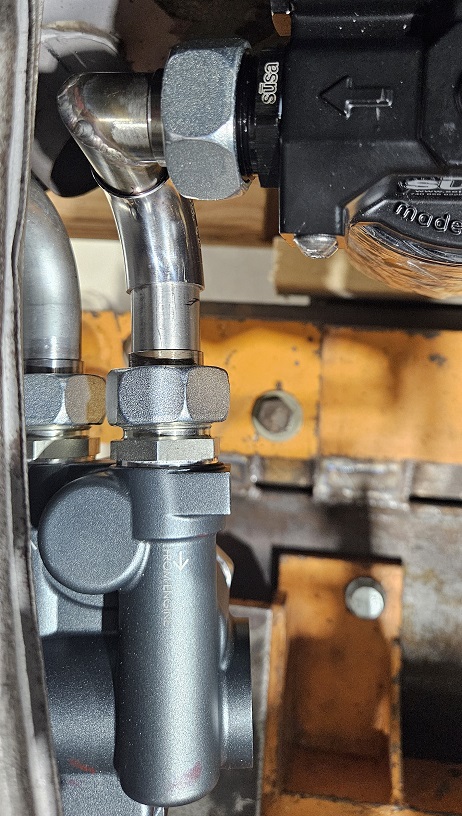
|
|
|
|
| Cairo94507 |
May 28 2026, 07:34 AM
Post
#353
|
|
Michael Group: Members Posts: 10,771 Joined: 1-November 08 From: Auburn, CA Member No.: 9,712 Region Association: Northern California
|
Absolutely beautiful oil line work. (IMG:style_emoticons/default/beerchug.gif)
|
|
|
|
| Luke M |
Jun 11 2026, 06:56 AM
Post
#354
|
|
Senior Member Group: Members Posts: 1,608 Joined: 8-February 05 From: WNY Member No.: 3,574 Region Association: North East States
|
I have the blasting scheduled for the end of the month and hopefully the weather co-operates. Meantime, I have several things to get done. Made the patch for the pass side between the cab and fuel tank area. Looks like I may need to do a little more work in this area before it gets sealed up. I need to grind down all of the high weld spots as well. The one thing I've been putting off is getting the rest of the seam sealer removed. Looks like I have to get to it now. If I have the time I'd like to get the front trunk seal channel replaced as well. After the blasting is done I want to finish up the left long and inner fender installation. Once that's all done and all the welding is complete the chassis will get sprayed in epoxy.
Attached image(s) 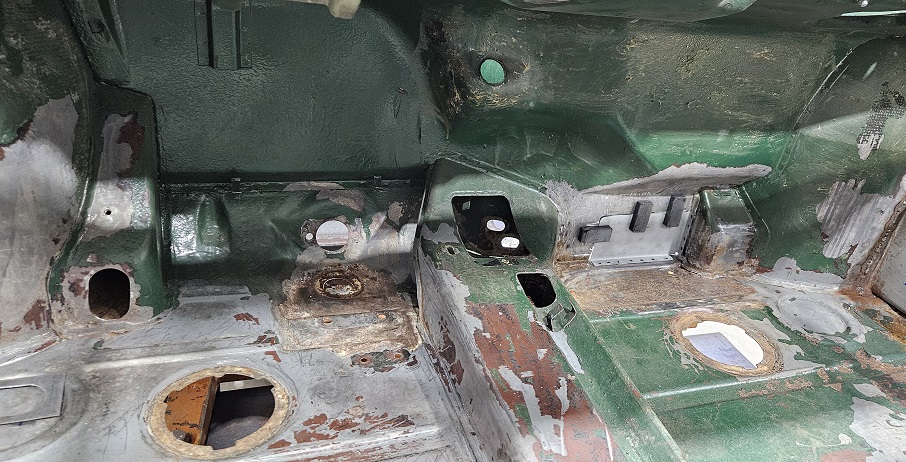
|
|
|
|
| Root_Werks |
Jun 11 2026, 09:27 AM
Post
#355
|
|
Village Idiot Group: Members Posts: 9,068 Joined: 25-May 04 From: About 15NM from Canada Member No.: 2,105 Region Association: Pacific Northwest
|
Can't wait to see the clean epoxied body. Doing the finish body work yourself?
|
|
|
|
| 930cabman |
Jun 11 2026, 01:40 PM
Post
#356
|
|
Advanced Member Group: Members Posts: 4,854 Joined: 12-November 20 From: Buffalo Member No.: 24,877 Region Association: North East States
|
What are you using for a blasting media?
|
|
|
|
| Luke M |
Jun 11 2026, 04:36 PM
Post
#357
|
|
Senior Member Group: Members Posts: 1,608 Joined: 8-February 05 From: WNY Member No.: 3,574 Region Association: North East States
|
QUOTE(Root_Werks @ Jun 11 2026, 08:27 AM) Can't wait to see the clean epoxied body. Doing the finish body work yourself? What are you using for a blasting media? I hired a company to come out and do the onsite blasting. The owner said he may use a few different types of media depending on the area and ease of blasting. He will start with some light media and work his way up if needed. I'll have to ask him what he's using once he's here. I'm not doing the final bodywork. I know a guy that use to own a body shop but is now retired. He now does a few paint jobs a year. I do plan on spraying the epoxy myself. I got the pass foot area pretty much squared away today. I was going to weld things up but then decided not to. The chassis will be blasted here in the next few weeks and figured leaving this area open would ease in getting all the extra media out. I then cut the oil tank holes in the inner fender. Attached image(s) 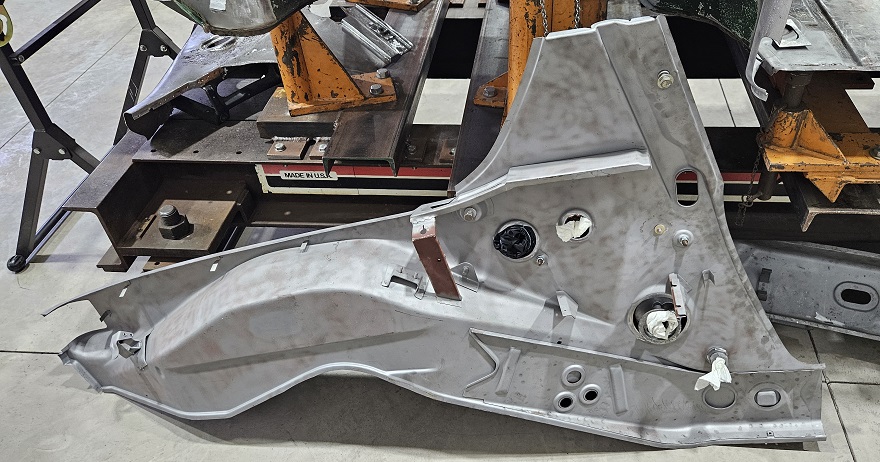 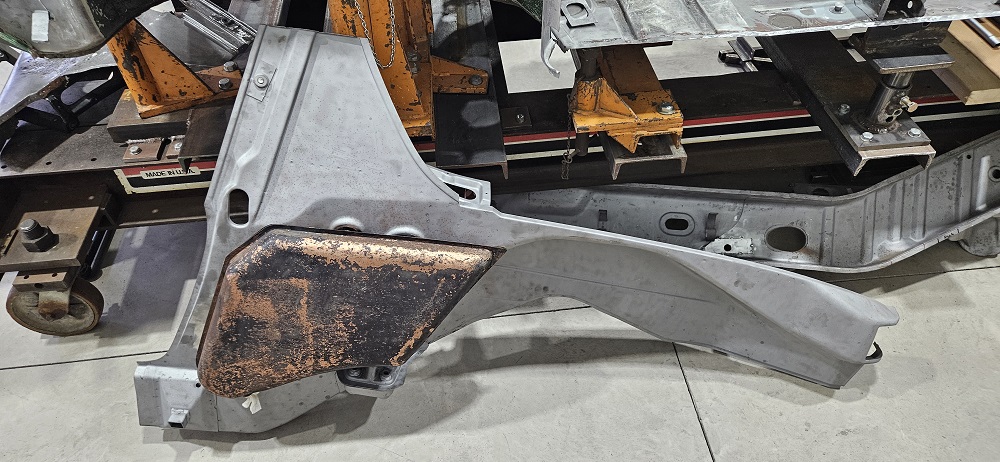 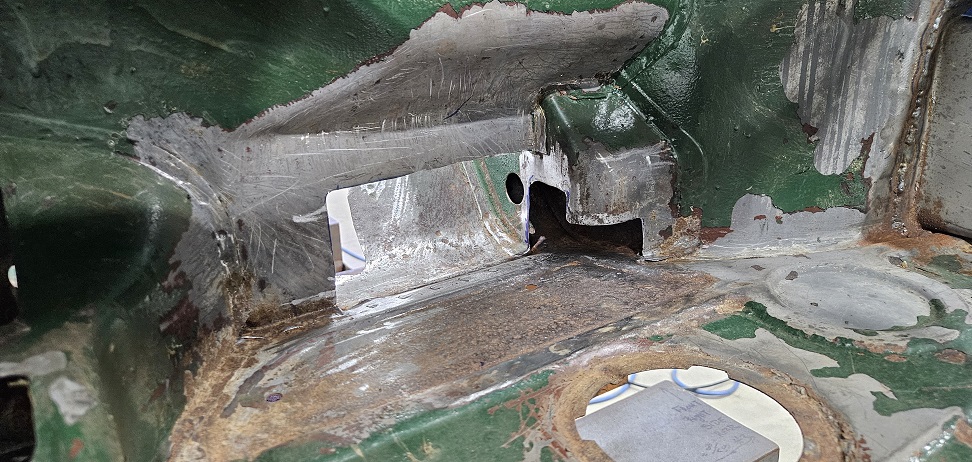 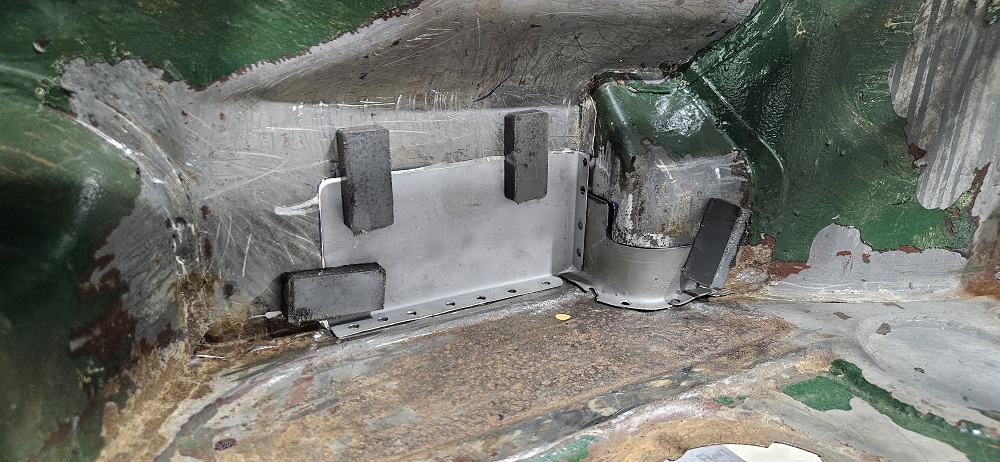
|
|
|
|
| Cairo94507 |
Jun 11 2026, 05:17 PM
Post
#358
|
|
Michael Group: Members Posts: 10,771 Joined: 1-November 08 From: Auburn, CA Member No.: 9,712 Region Association: Northern California
|
That's a cool photo with the oil tank. (IMG:style_emoticons/default/beerchug.gif)
|
|
|
|
| Montreal914 |
Jun 11 2026, 08:56 PM
Post
#359
|
|
Advanced Member Group: Members Posts: 2,205 Joined: 8-August 10 From: Claremont, CA Member No.: 12,023 Region Association: Southern California
|
Nice work! (IMG:style_emoticons/default/smash.gif)
Always enjoying the level of detail of the unibody sheetmetal contruction of the car. Your various pictures really help understanding some of the more intricate areas of the chassis. Thank you for sharing! (IMG:style_emoticons/default/smile.gif) |
|
|
|
| Luke M |
Jun 17 2026, 05:17 AM
Post
#360
|
|
Senior Member Group: Members Posts: 1,608 Joined: 8-February 05 From: WNY Member No.: 3,574 Region Association: North East States
|
Thanks to the rain moving in today through Monday the blasting was re-scheduled for next week. So that will give me a few extra days to wrap up a few small jobs. I want to get the R/R corner attached today. It moves way too much and I feel when the blasting happens that this area may get distorted. I also need to plug up several holes that way the media hopefully doesn't get into certain areas. I'm still debating if I want to have my NOS fenders, Q-panels, and trunk lids blasted. The owner says that they should be fine but I've heard of horror stories from others when they got there's blasted. The last thing I want is several warped panels. I'm thinking some type of paint stripper and manual sanding. Any thoughts from anyone that's done this.
Attached image(s) 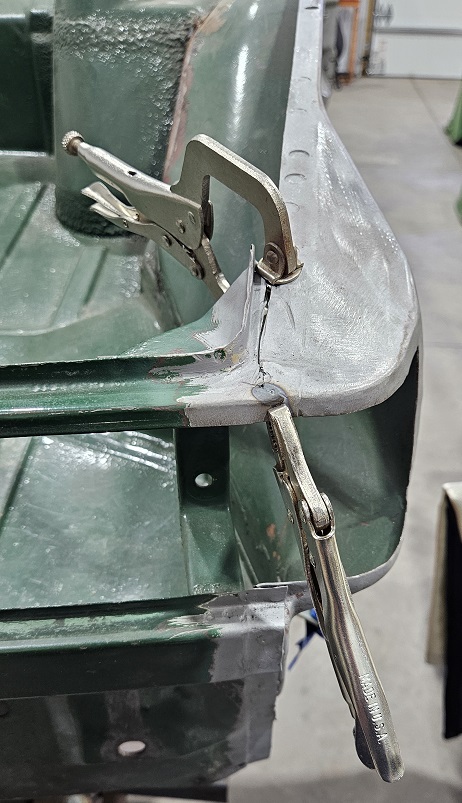 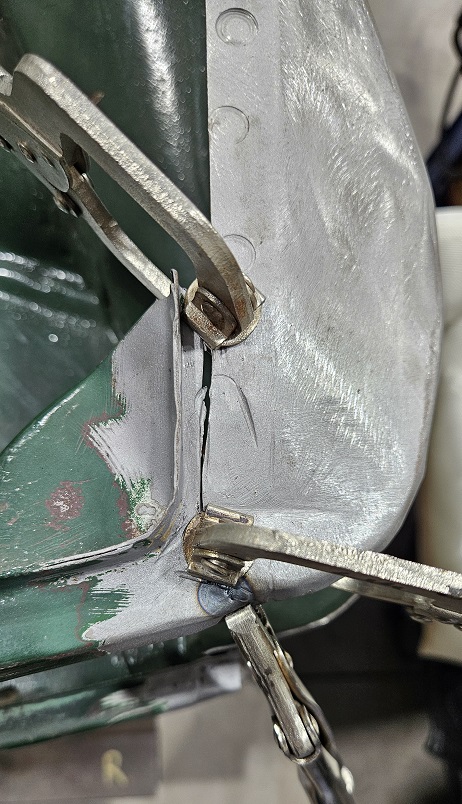 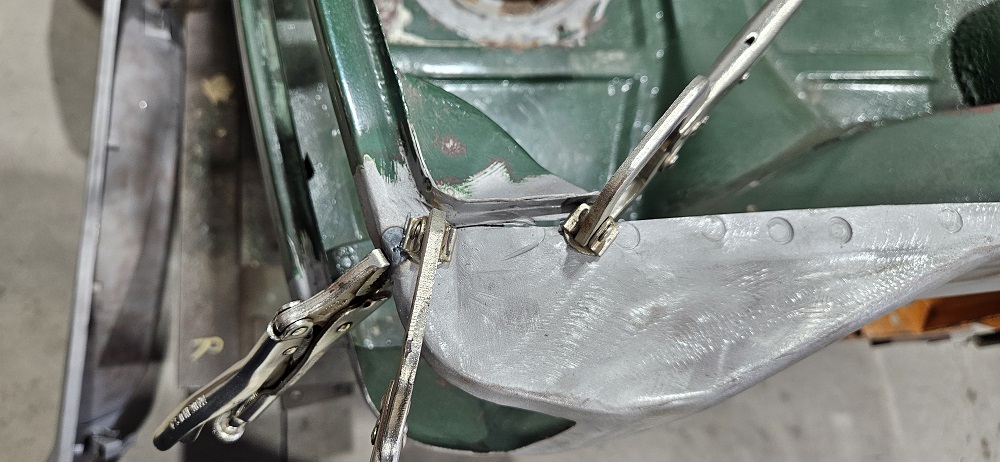
|
|
|
|
|
10 User(s) are reading this topic (10 Guests and 0 Anonymous Users)
0 Members:

|
Lo-Fi Version | Time is now: 5th October 2026 - 04:24 PM |
Invision Power Board
v9.1.4 © 2026 IPS, Inc.