

 Just another Factory 6 being fixed up Just another Factory 6 being fixed up |
|
|

|
Porsche, and the Porsche crest are registered trademarks of Dr. Ing. h.c. F. Porsche AG.
This site is not affiliated with Porsche in any way. Its only purpose is to provide an online forum for car enthusiasts. All other trademarks are property of their respective owners. |
|
|
  |
| IronHillRestorations |
 Jun 17 2026, 05:51 AM Jun 17 2026, 05:51 AM
Post
#361
|
|
I. I. R. C.  Group: Members Posts: 6,956 Joined: 18-March 03 From: West TN Member No.: 439 Region Association: None 
 |
I wouldn’t do anything other than chem strip the NOS parts
|
   |

 
|
| Luke M |
Jun 18 2026, 06:32 AM
Post
#362
|
|
Senior Member Group: Members Posts: 1,608 Joined: 8-February 05 From: WNY Member No.: 3,574 Region Association: North East States
|
QUOTE(IronHillRestorations @ Jun 17 2026, 04:51 AM)  I wouldn’t do anything other than chem strip the NOS parts Hi Perry, Thanks for the info. I figured that chem stripping would be the best approach. I spent a few hours yesterday grinding welds down and prepping for the media blasting. If things go my way with scheduling I'll have the chassis in epoxy after I get the drivers long section installed. I purchased an inflatable paint booth which showed up yesterday. Once I have it setup I'll post a few pics. |
|
|
|
| Luke M |
Jun 18 2026, 03:31 PM
Post
#363
|
|
Senior Member Group: Members Posts: 1,608 Joined: 8-February 05 From: WNY Member No.: 3,574 Region Association: North East States
|
I got the seam sealer all off the chassis today. It's one of those jobs that I really hate doing and the smell... (IMG:style_emoticons/default/icon8.gif)
Next on the list is get into the engine bay and grind down a few spots in the hell hole area. Attached image(s) 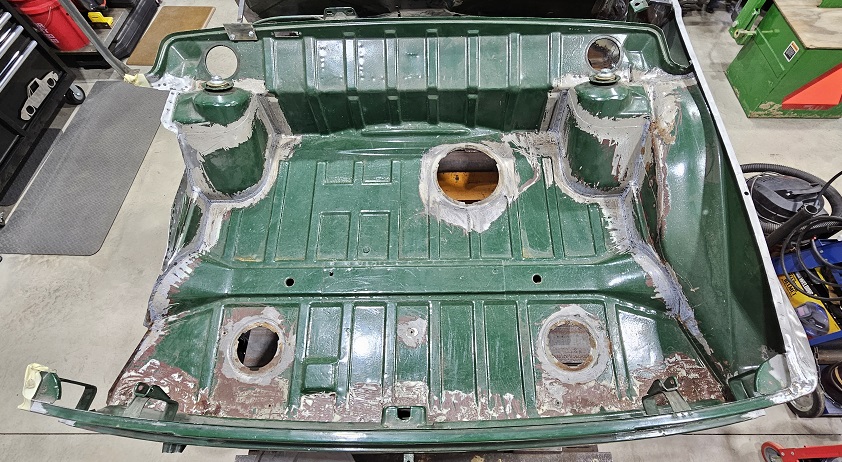 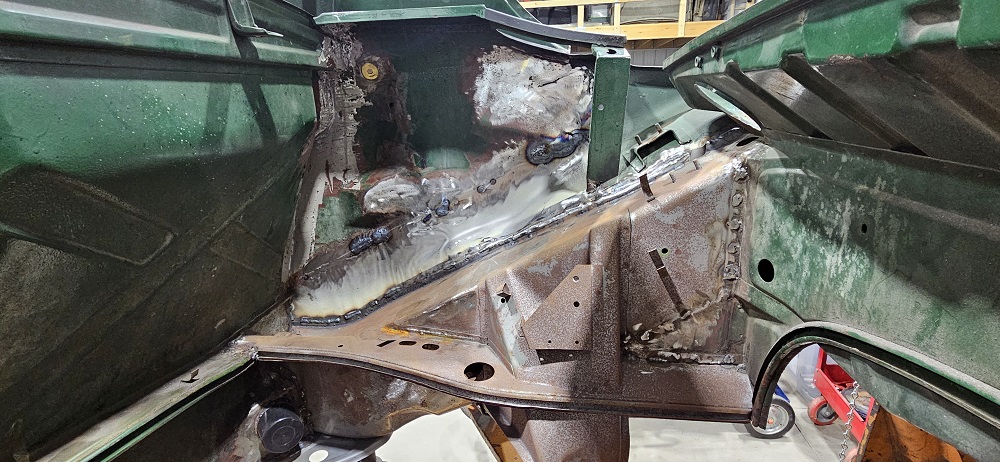
|
|
|
|
| rgalla9146 |
Jun 20 2026, 05:46 AM
Post
#364
|
|
Advanced Member Group: Members Posts: 4,998 Joined: 23-November 05 From: Paramus NJ Member No.: 5,176 Region Association: None
|
QUOTE(Luke M @ Jun 18 2026, 05:31 PM) I got the seam sealer all off the chassis today. It's one of those jobs that I really hate doing and the smell... (IMG:style_emoticons/default/icon8.gif) Next on the list is get into the engine bay and grind down a few spots in the hell hole area. Hey Luke My car (your old GT) was a picnic compared to what you are accomplishing on this project. You are fearless. Both of my cars have original battery trays that appear stock but I modified the attachment so they can be removed. You might want to consider doing the same while you're in there. Easy renoval for clean up / repaint. PS don't forget to remove the MPS bracket in your pic. Attached thumbnail(s) 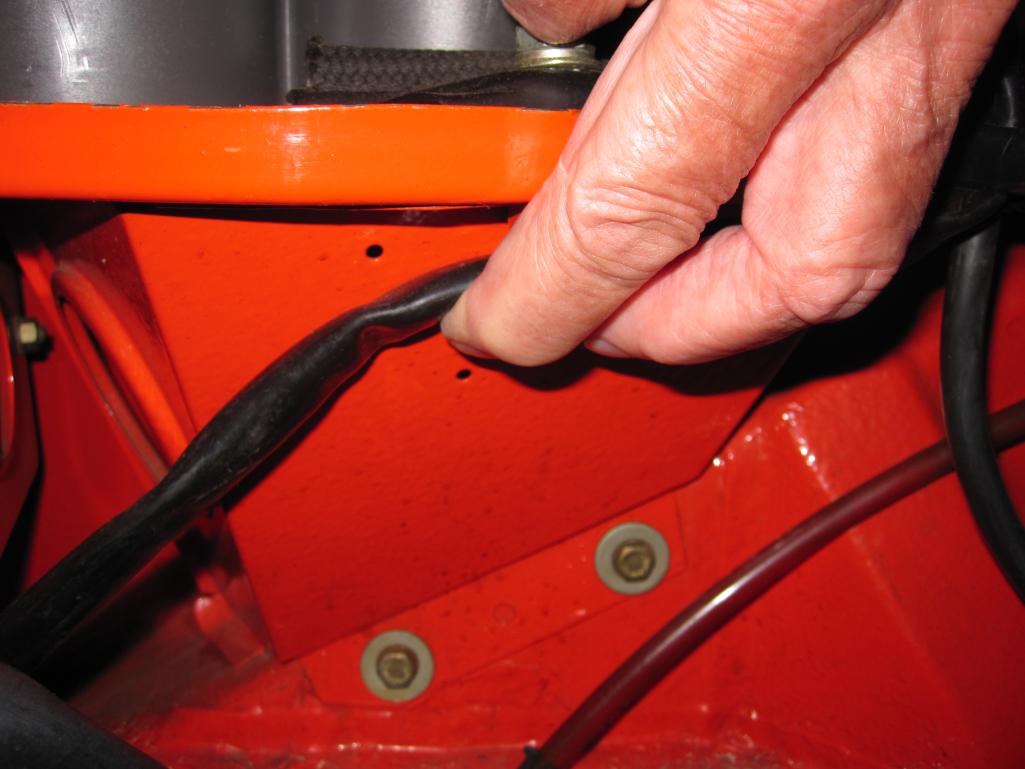 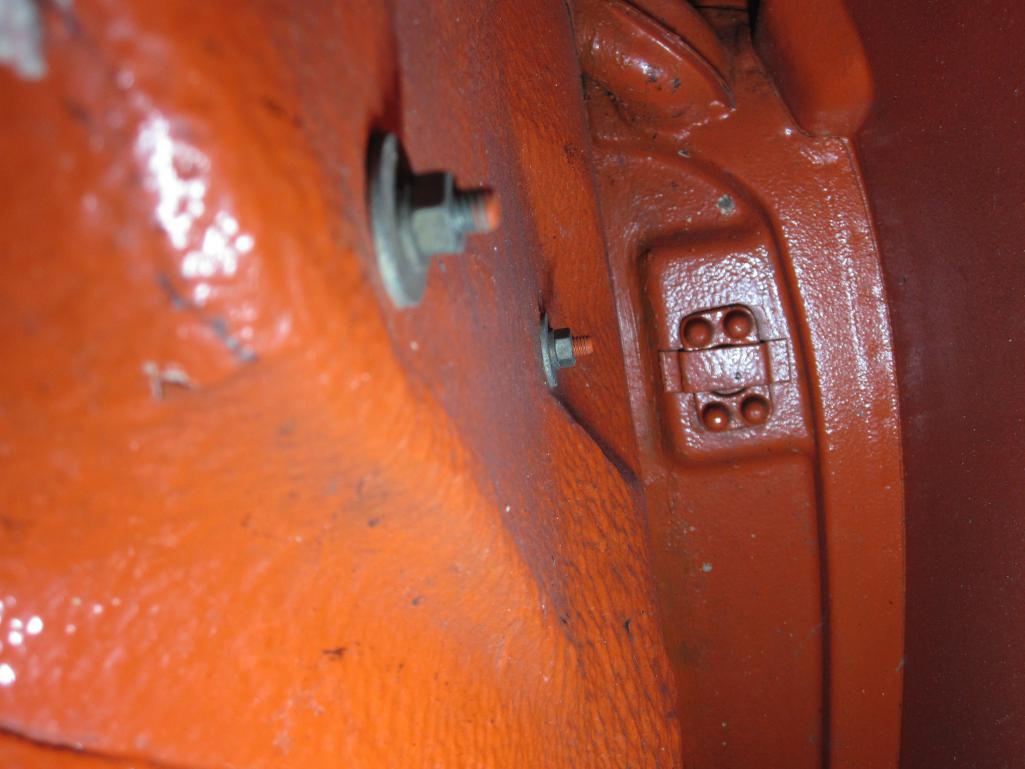
|
|
|
|
| Luke M |
Jun 20 2026, 02:34 PM
Post
#365
|
|
Senior Member Group: Members Posts: 1,608 Joined: 8-February 05 From: WNY Member No.: 3,574 Region Association: North East States
|
Hi Rory,
I have the factory battery tray on hand and yes the plan is to make it so I can bolt it in. The MPS bracket, I was going to leave it in and mount a fuel filter to it. I'm going to remove it just haven't got to it just yet. I have a few other things to get done before the blasting on Tuesday but I'll add that to my to do list. I should've kept that 914. It was one of the best condition 914 chassis that I've owned. Glad it went to a good home and you made it a great 914 GT. (IMG:style_emoticons/default/beerchug.gif) |
|
|
|
| Luke M |
Jun 24 2026, 05:44 AM
Post
#366
|
|
Senior Member Group: Members Posts: 1,608 Joined: 8-February 05 From: WNY Member No.: 3,574 Region Association: North East States
|
Tuesday was a busy day here. The chassis is finally media blasted and for not having it on the rotisserie the guy did a great job. Like I figured, some issues have shown up. The pass floor board/pan needs attention, the left front bumper support area, and the rear trunk pan. There's a few minor spots that have pin holes where I had previously welded but those are an easy fix. First things of order is to get the left long and inner fender installed then address the other issues. I think once the long and associated metal is installed I'll get the chassis into epoxy. Once the epoxy cures I'll start with the other repairs.
Attached image(s) 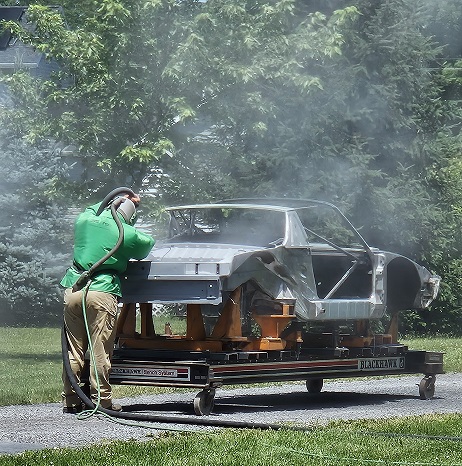 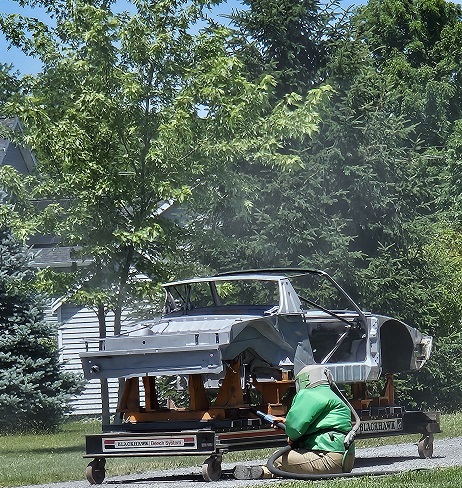 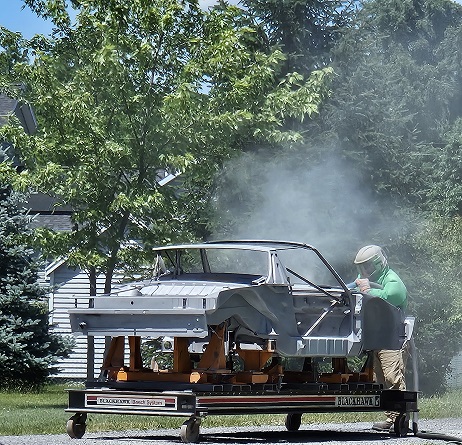 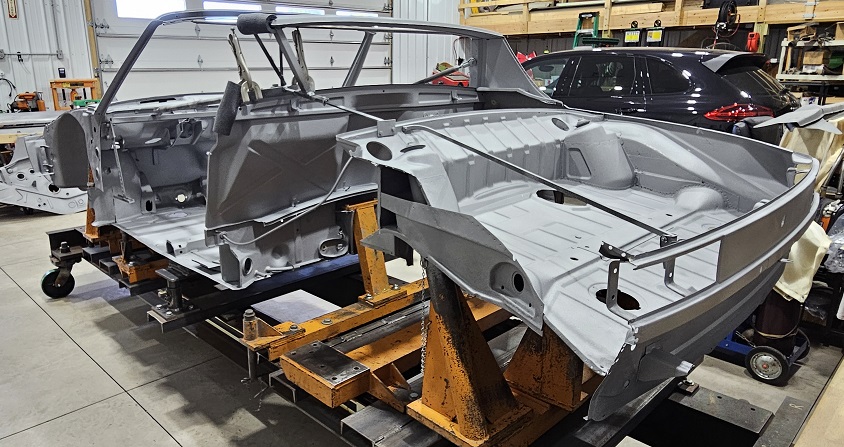 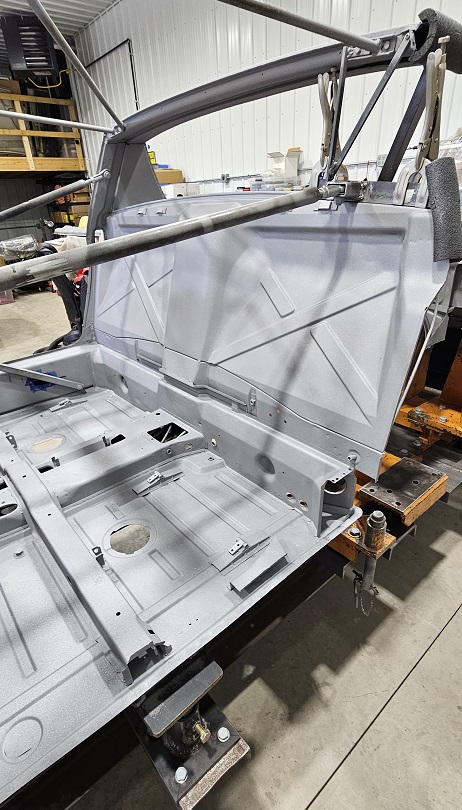 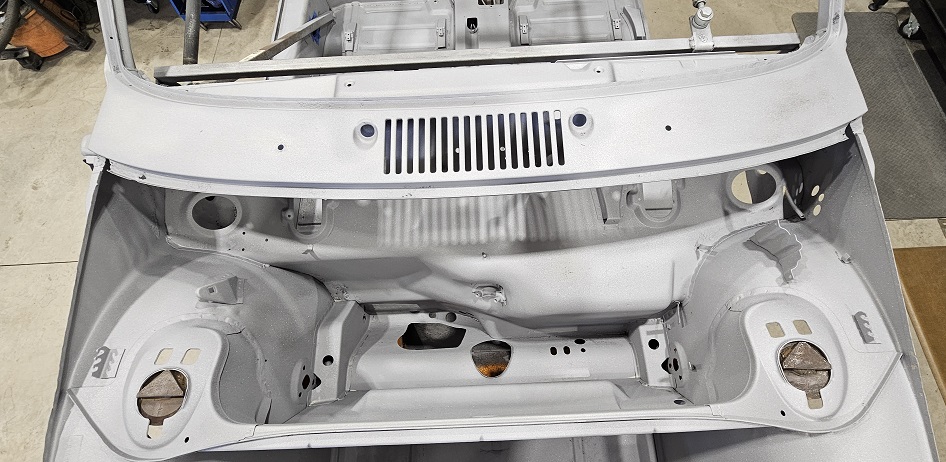 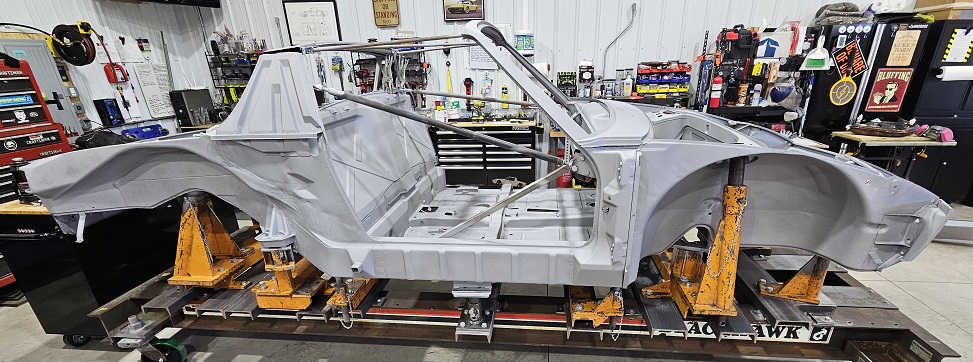 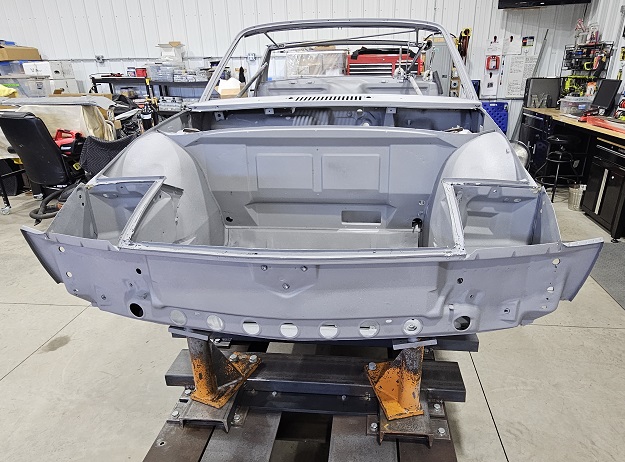 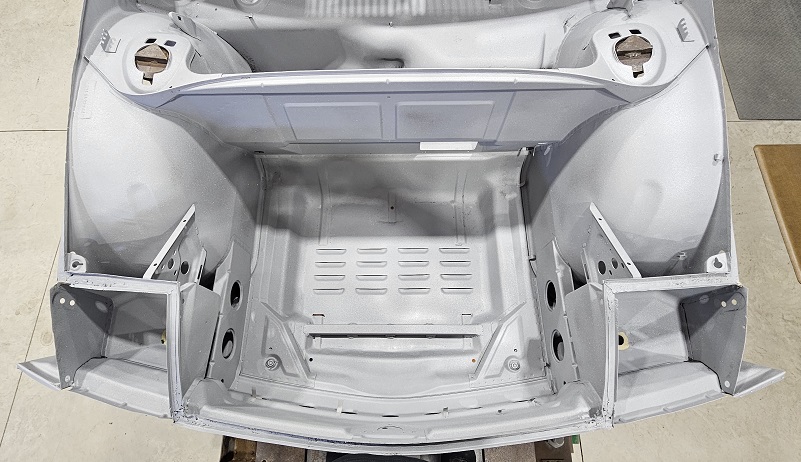 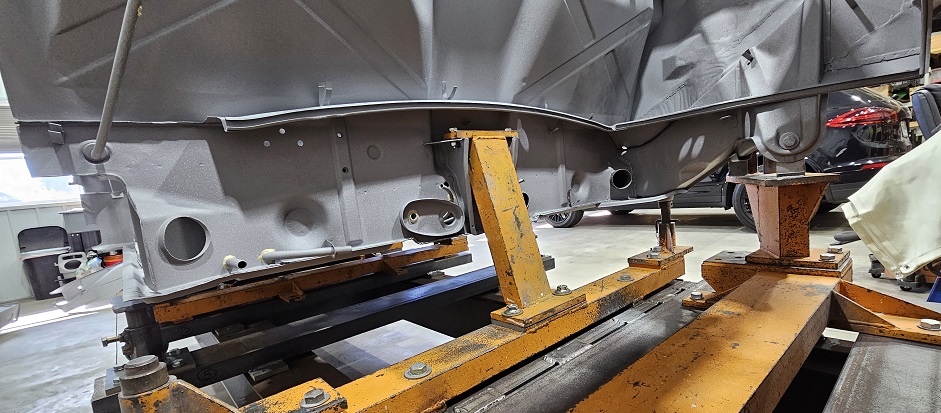 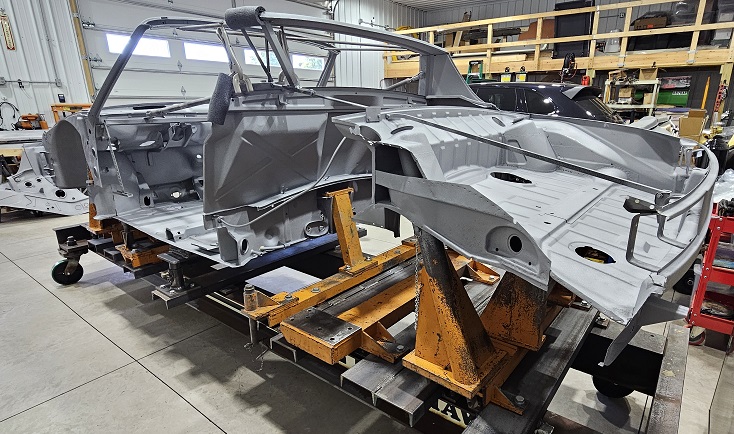 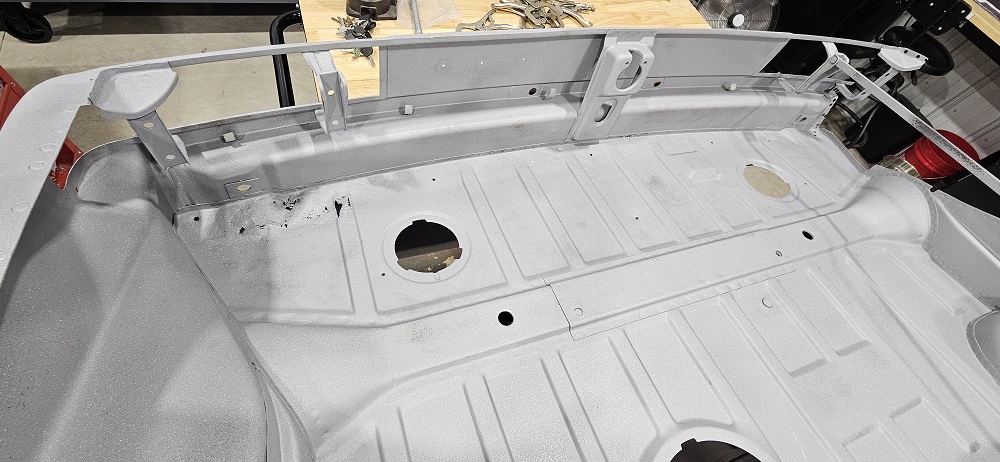 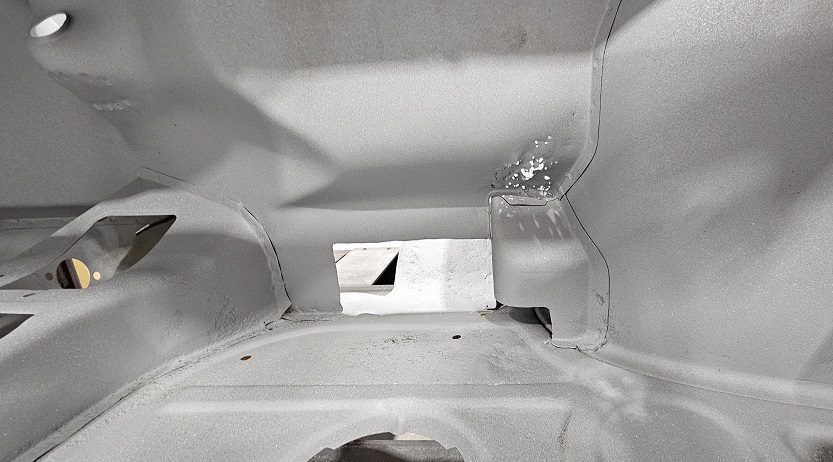 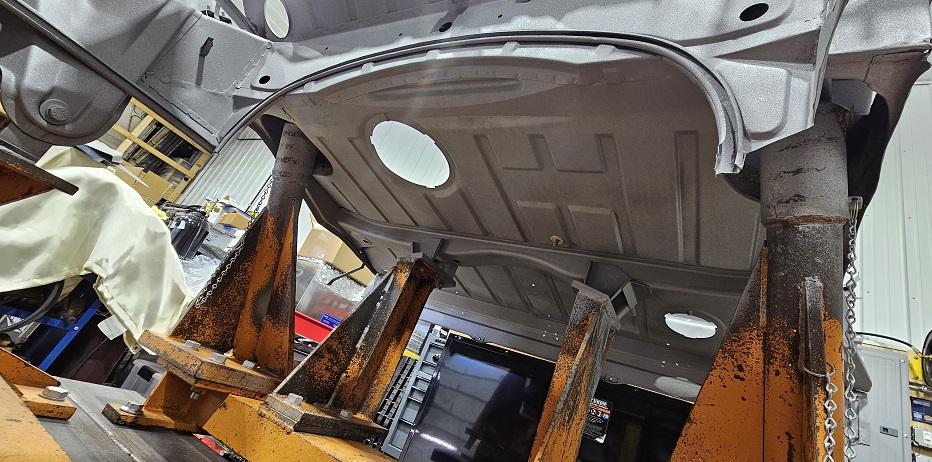 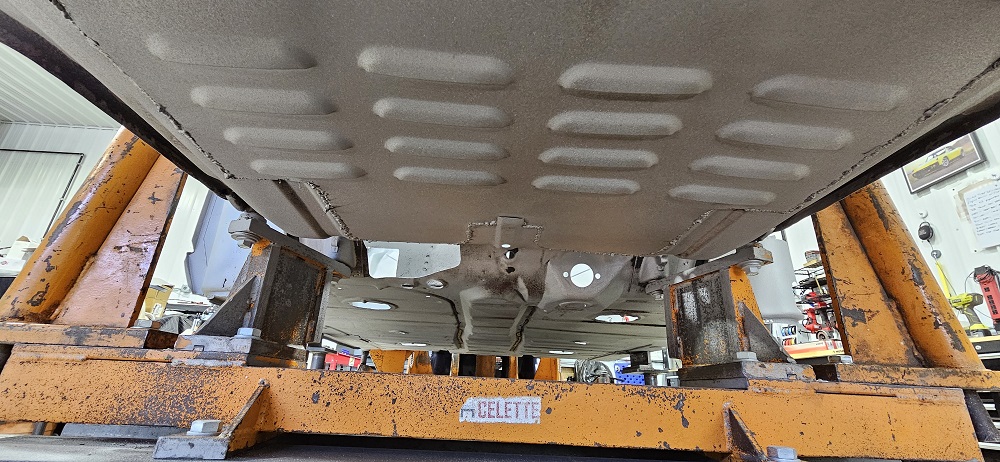 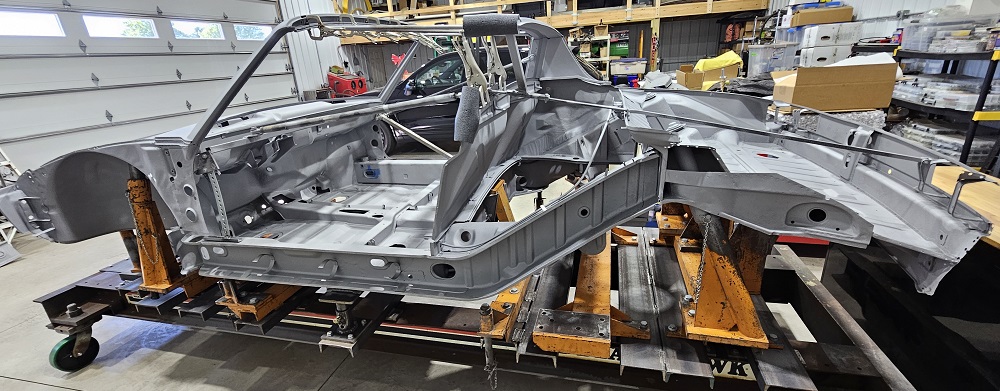
|
|
|
|
| rick 918-S |
Jun 24 2026, 06:30 AM
Post
#367
|
|
Hey nice rack! -Celette Group: Members Posts: 21,352 Joined: 30-December 02 From: Now in Superior WI Member No.: 43 Region Association: Northstar Region 
|
It's hard to see the end when they are that far apart. So nice to see the chassis clean. It renews the interest for sure! (IMG:style_emoticons/default/smilie_pokal.gif) (IMG:style_emoticons/default/welder.gif) (IMG:style_emoticons/default/sawzall-smiley.gif) (IMG:style_emoticons/default/smash.gif)
|
|
|
|
| Cairo94507 |
Jun 24 2026, 07:07 AM
Post
#368
|
|
Michael Group: Members Posts: 10,771 Joined: 1-November 08 From: Auburn, CA Member No.: 9,712 Region Association: Northern California
|
Really nice and a giant step forward. (IMG:style_emoticons/default/beerchug.gif)
|
 |
|
| DennisV |
Jun 24 2026, 07:58 AM
Post
#369
|
|
Senior Member Group: Members Posts: 1,031 Joined: 8-August 20 From: Santa Rosa, CA Member No.: 24,575 Region Association: Northern California
|
QUOTE(Luke M @ Jun 24 2026, 04:44 AM) Tuesday was a busy day here. The chassis is finally media blasted and for not having it on the rotisserie the guy did a great job. Like I figured, some issues have shown up. Another major milestone. Try to enjoy it. I don't think they ever come back from media blast (or acid dip) looking better than expected. Even when you think you've prepared yourself for the worst. It sure is nice to have rust free metal to work from. No more surprises! |
|
|
|
| Luke M |
Jun 25 2026, 07:17 PM
Post
#370
|
|
Senior Member Group: Members Posts: 1,608 Joined: 8-February 05 From: WNY Member No.: 3,574 Region Association: North East States
|
Today started off by more blasting media extraction from the right long and a few other hidden areas. I'm pretty sure I got most of the media out.
I then started the internal coating on the chassis and the new left long. I didn't get enough of the Eastwood rattle cans so now I have to wait until more arrive. I dug out a few of other items that need to find their way onto the chassis. The plan is to have the left long and rear inner fender installed by the end of next week. Attached image(s) 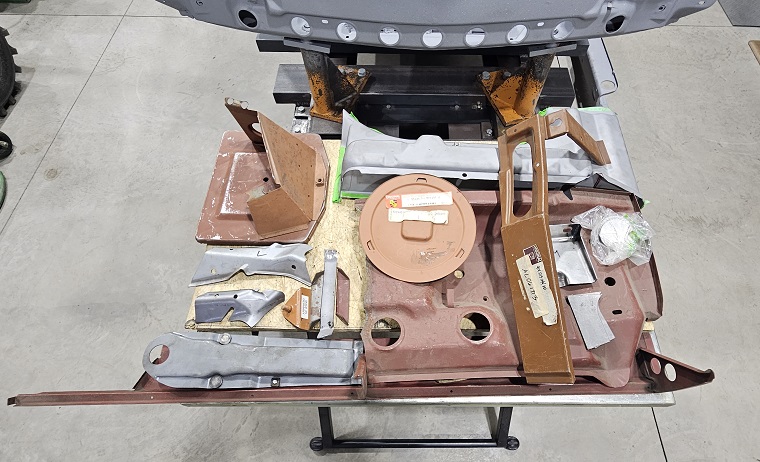 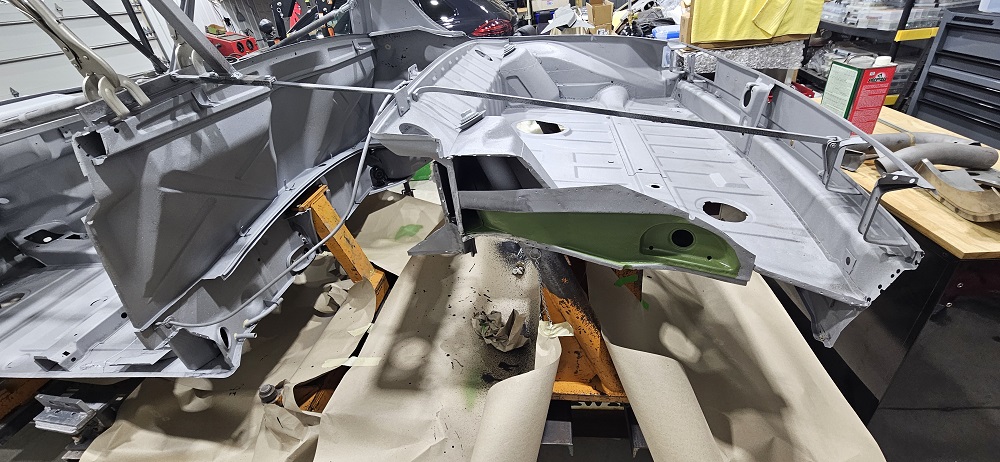 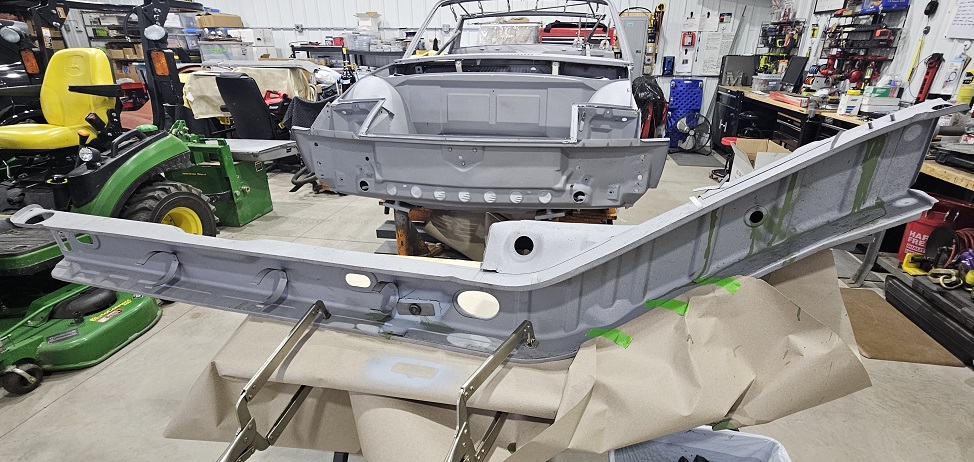
|
|
|
|
| Luke M |
Jun 29 2026, 05:50 PM
Post
#371
|
|
Senior Member Group: Members Posts: 1,608 Joined: 8-February 05 From: WNY Member No.: 3,574 Region Association: North East States
|
Got the internal coating paint in today. Sprayed everyplace that I could before installing the drivers long. I got the drivers long prepped and ready to go in as well. If I have time I'll set it in place on Tuesday then weld it in on Wed. Got the Wurth stoneguard in too. That stuff isn't cheap. Also got an order in at RD for some new metal to fix the rear trunk.
Attached image(s) 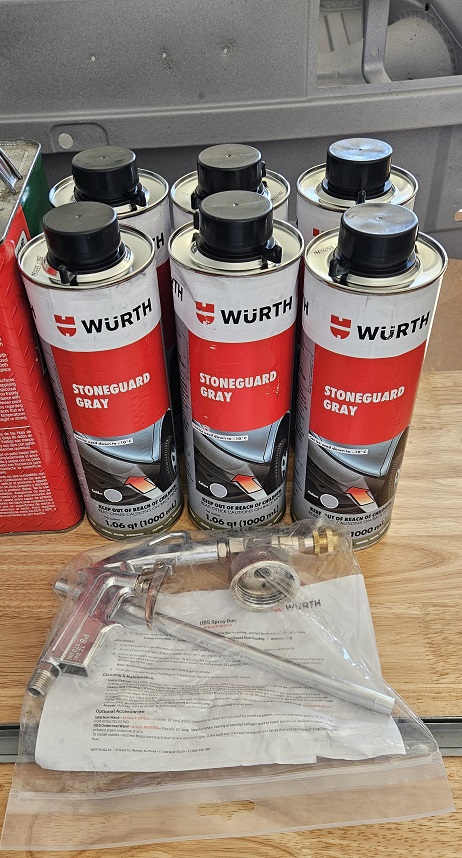
|
|
|
|
| Luke M |
Jul 1 2026, 03:07 PM
Post
#372
|
|
Senior Member Group: Members Posts: 1,608 Joined: 8-February 05 From: WNY Member No.: 3,574 Region Association: North East States
|
Got the left long in and set to where it belongs. I started welding it in and ran out of gas for my mig welder. I didn't have enough time to go get another tank so I worked on spot welding in a few sections.
Attached image(s) 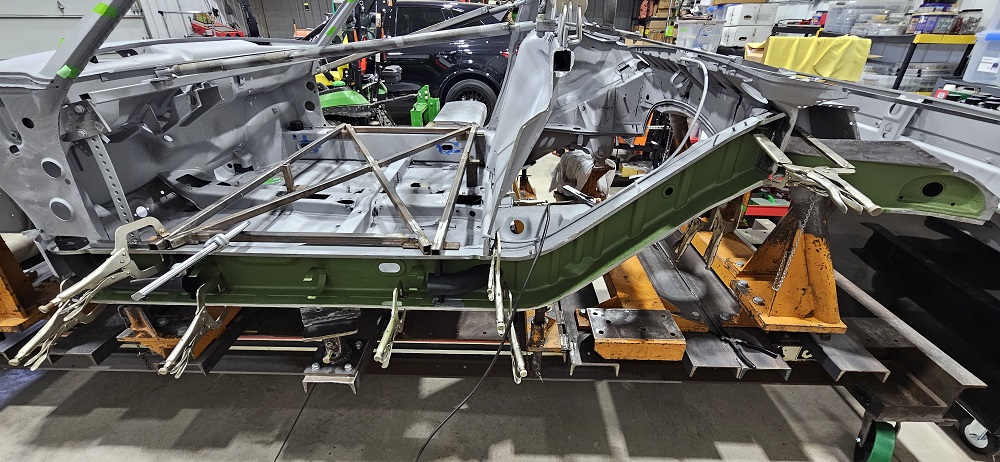 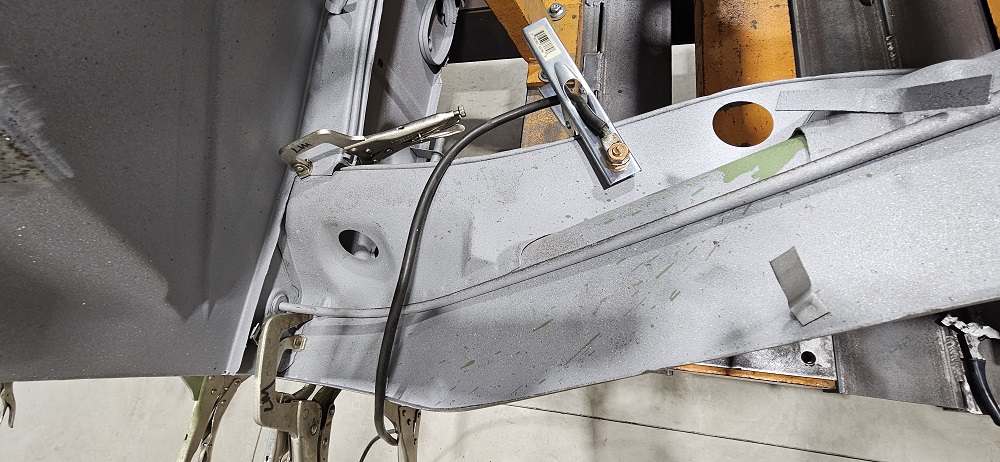 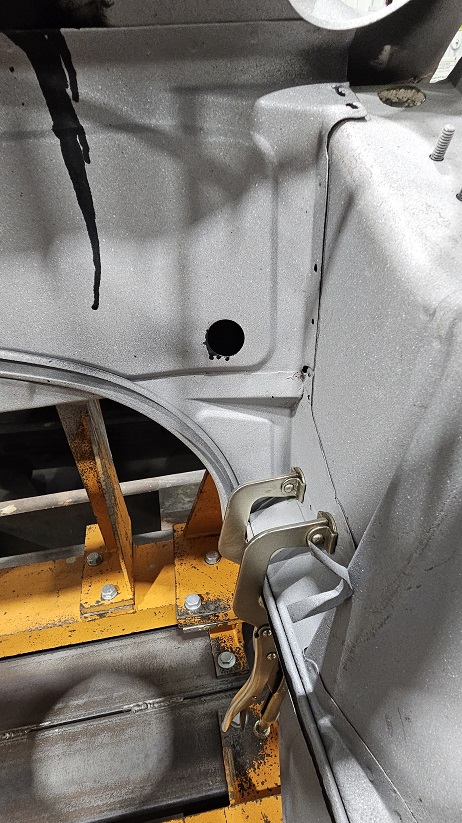 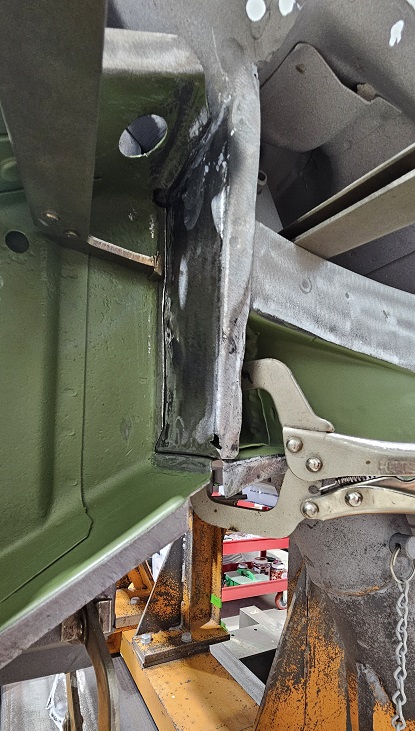 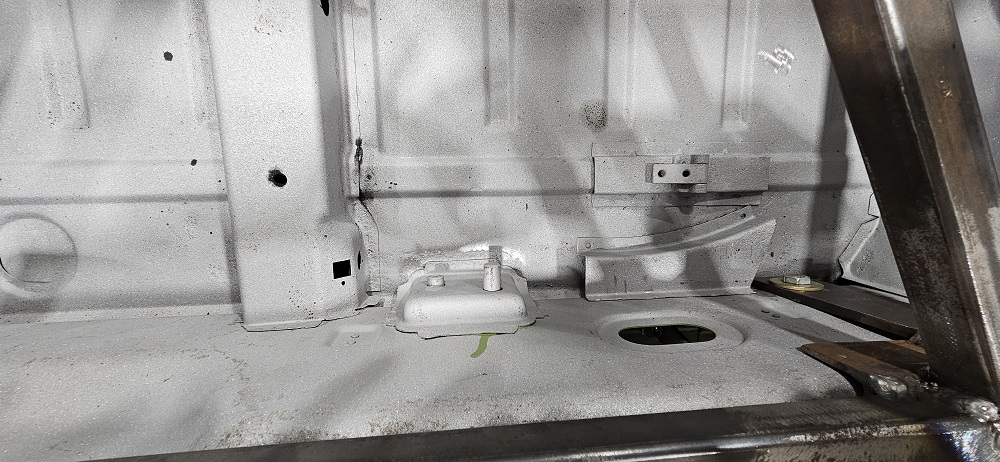 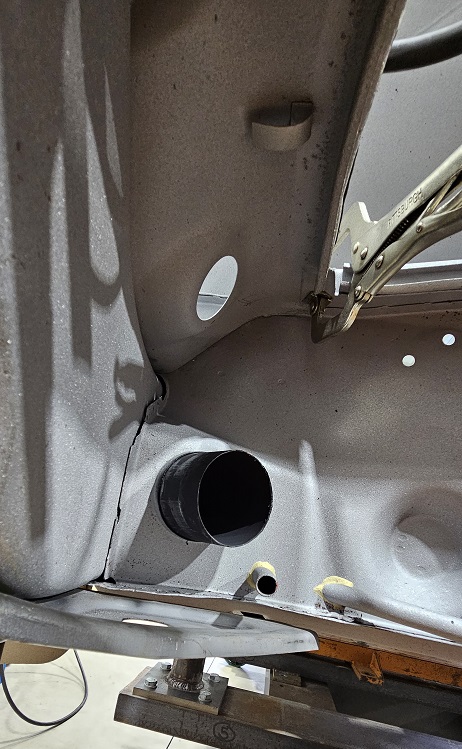 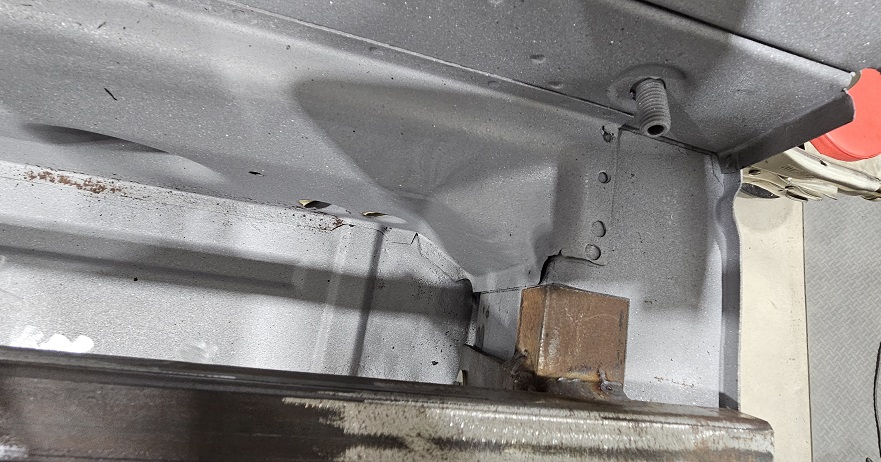
|
|
|
|
| Root_Werks |
Jul 1 2026, 03:10 PM
Post
#373
|
|
Village Idiot Group: Members Posts: 9,068 Joined: 25-May 04 From: About 15NM from Canada Member No.: 2,105 Region Association: Pacific Northwest
|
Wow, that's a huge step forward! So cool to see a 914 taken down that far.
(IMG:style_emoticons/default/welder.gif) (IMG:style_emoticons/default/smash.gif) (IMG:style_emoticons/default/welder.gif) |
|
|
|
| Luke M |
Jul 1 2026, 04:33 PM
Post
#374
|
|
Senior Member Group: Members Posts: 1,608 Joined: 8-February 05 From: WNY Member No.: 3,574 Region Association: North East States
|
QUOTE(sixnotfour @ Mar 25 2026, 07:08 PM) Wow Luke you are committed ... I have my no rust six I wrecked 30 yrs ago on a rack ,,almost straight.. But in trying to keep up.. I found my Troutman thermostat... its the small things sometimes,, Great Effort...and Nice parts.. (IMG:style_emoticons/default/smilie_pokal.gif) (IMG:style_emoticons/default/popcorn[1].gif) (IMG:style_emoticons/default/smash.gif) (IMG:style_emoticons/default/welder.gif) Is that the left rear fender I sold ?? Jimmy over on the bird site got my custom -12 orb to 30 mm fittings done. They fit the Troutman nicely but I went with the new Elephant Racing T-stat. I'll use this setup on my next project. Attached image(s) 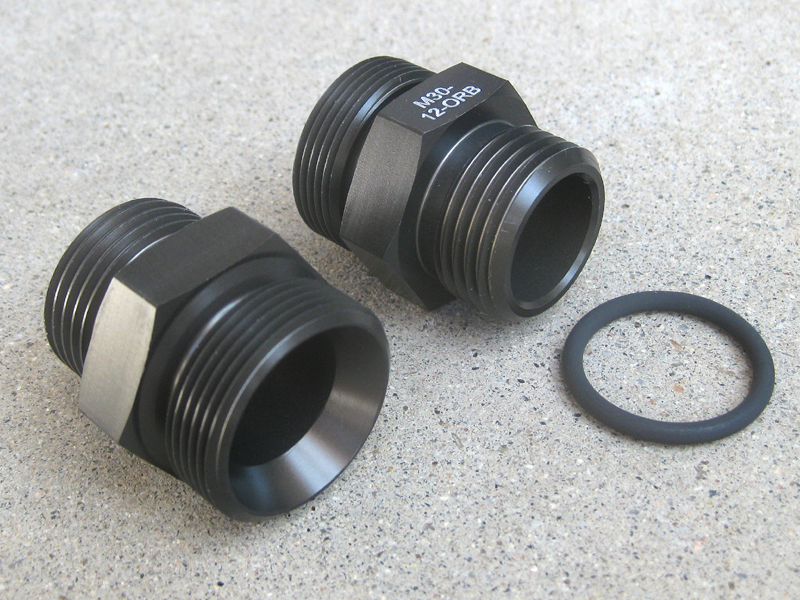 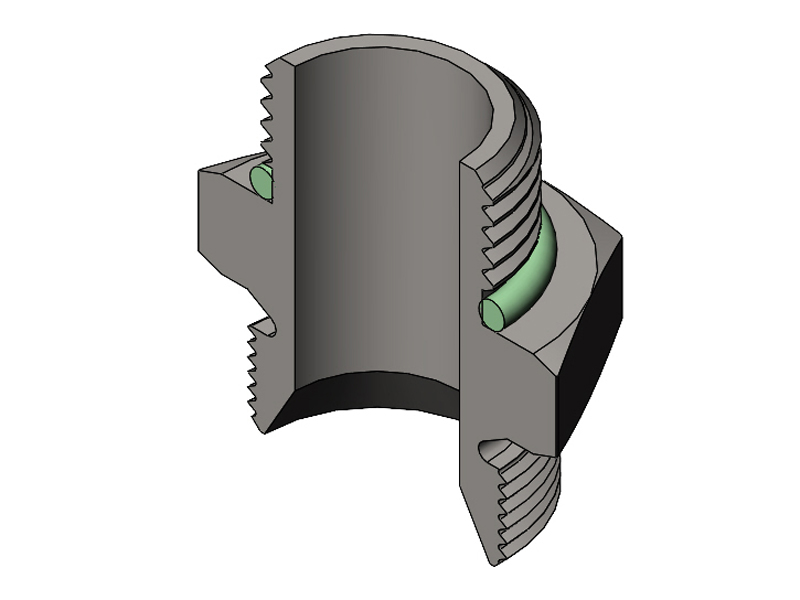
|
|
|
|
| Luke M |
Jul 17 2026, 07:04 AM
Post
#375
|
|
Senior Member Group: Members Posts: 1,608 Joined: 8-February 05 From: WNY Member No.: 3,574 Region Association: North East States
|
Slowly making progress here. I've found some sheet metal to replace the bad sections that showed up after blasting. I should see most if not all of the metal by next Wednesday. Meantime I'm prepping to cutout the rear trunk pan and rear panel. I made up a few braces to keep things inline. I noticed something was off after making the left rear support. Took some measurements and sure enough the l/r corner was 20 mm down. I made up a spacer and that took care of that issue. I want to confirm that everything is lining up just right so I still need to fit the inner fender prior to cutting.
Attached thumbnail(s) 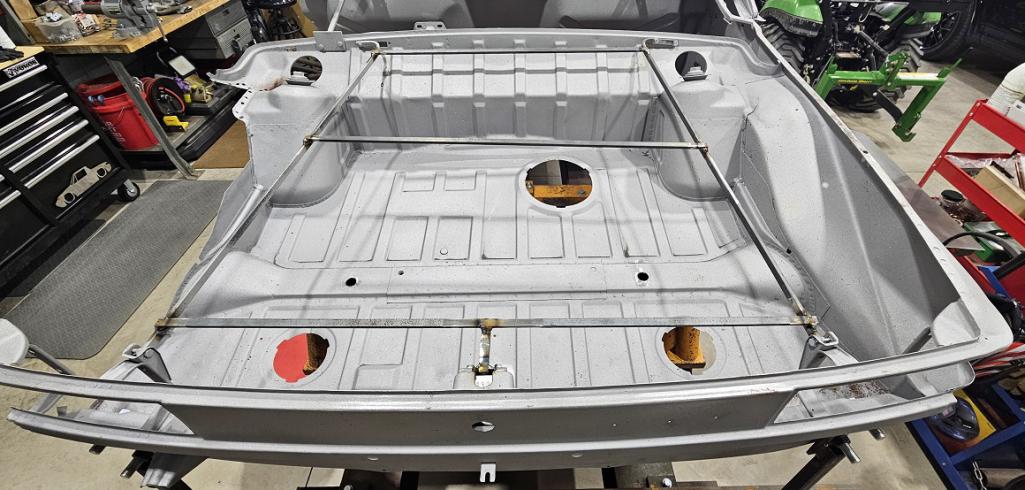 Attached image(s) 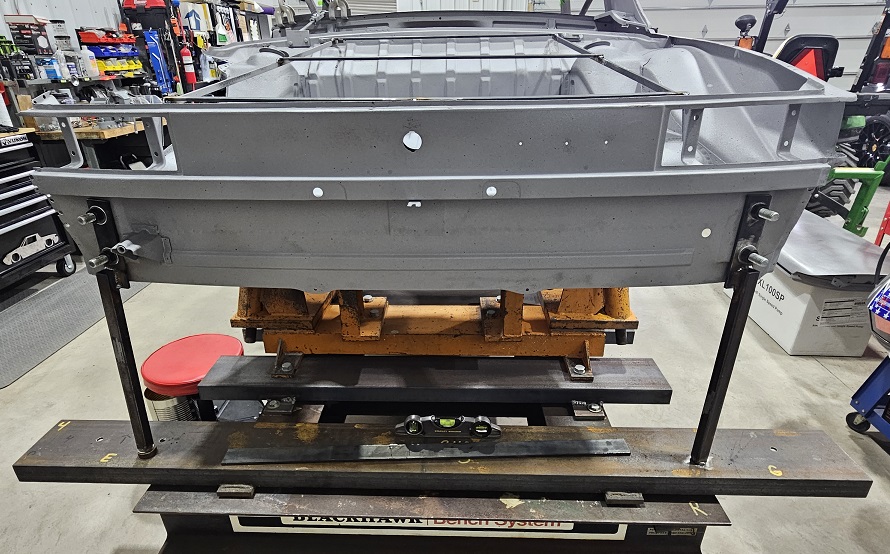
|
|
|
|
| Cairo94507 |
Jul 17 2026, 07:29 AM
Post
#376
|
|
Michael Group: Members Posts: 10,771 Joined: 1-November 08 From: Auburn, CA Member No.: 9,712 Region Association: Northern California
|
Excellent work catching the 20mm problem. When my car was in Virginia (a nightmare ago) the passenger quarter was removed and a very nice panel was welded on. Fast forward and the car ended up at Kent Simmons' shop in Torrance, CA and Kent verified all measurements before beginning metal/body work. The passenger rear quarter was almost 3/4" off. Everything was removed and replaced by Kent. I was so fortunate to meet Kent, Jim, Andy and Bob. (IMG:style_emoticons/default/smilie_pokal.gif)
|
|
|
|
| Luke M |
Jul 18 2026, 07:02 AM
Post
#377
|
|
Senior Member Group: Members Posts: 1,608 Joined: 8-February 05 From: WNY Member No.: 3,574 Region Association: North East States
|
QUOTE(Cairo94507 @ Jul 17 2026, 06:29 AM) Excellent work catching the 20mm problem. When my car was in Virginia (a nightmare ago) the passenger quarter was removed and a very nice panel was welded on. Fast forward and the car ended up at Kent Simmons' shop in Torrance, CA and Kent verified all measurements before beginning metal/body work. The passenger rear quarter was almost 3/4" off. Everything was removed and replaced by Kent. I was so fortunate to meet Kent, Jim, Andy and Bob. (IMG:style_emoticons/default/smilie_pokal.gif) I watched your 6 being worked on by Kent and crew. They all (and you) did an excellent job getting your 6 back on the road. Andy's and your 6 builds was a huge inspiration on why I took my 6 down as much as I did. I figured if I'm going to do this I'm going to do it right the first time. I've spent countless of hours searching for the nos parts and tools to do this work. I have a plan set and I'm trying to meet my own deadlines moving forward with this build. I still find unexpected problems which causes some delays in moving forward. I'm currently waiting for some sheet metal to arrive so I can start on some of these issues. Meantime I'm welding and fitting what I can. I welded up a few pin holes that showed up after blasting and test fitted the left rear inner fender. All measurements look good so I can move forward on the rear trunk pan replacement now. I'll also need to fix the front trunk seal channel as well. Attached thumbnail(s) 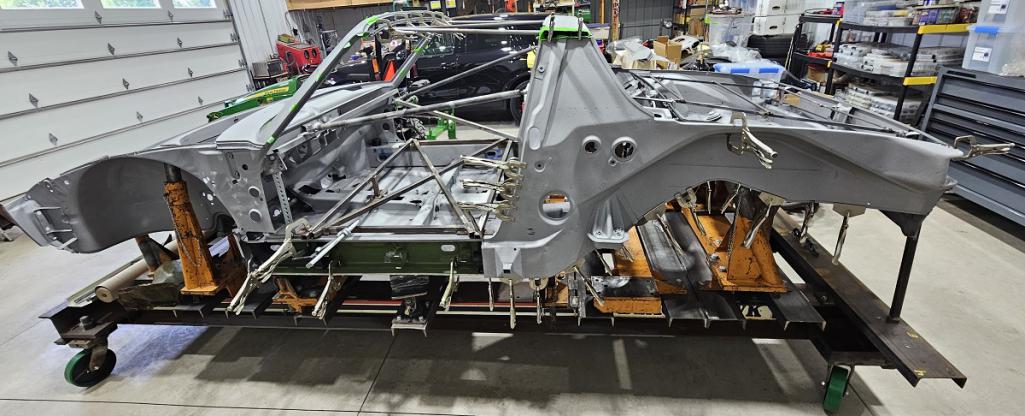 Attached image(s) 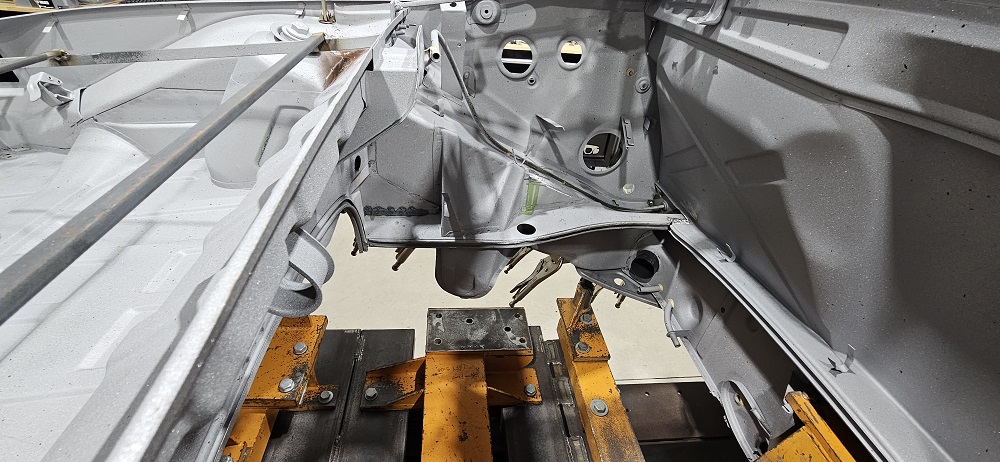 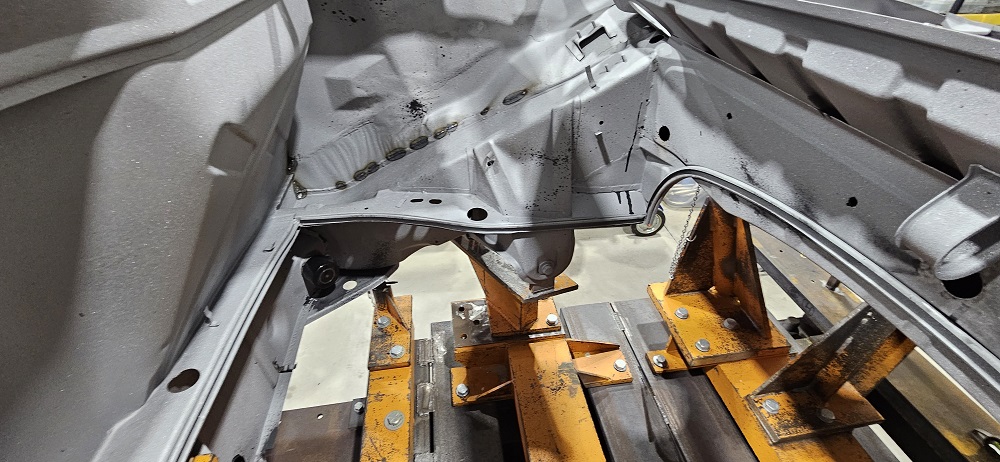 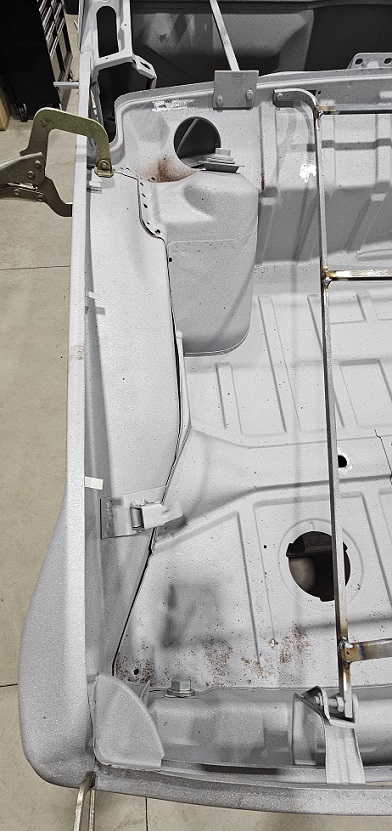 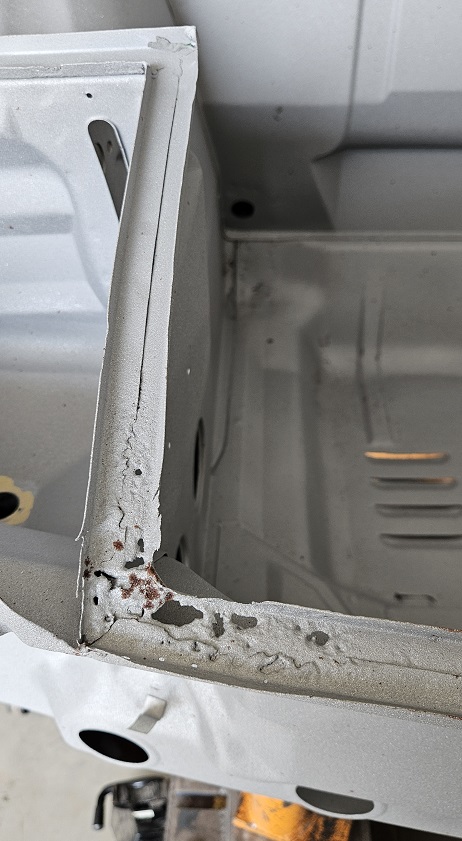 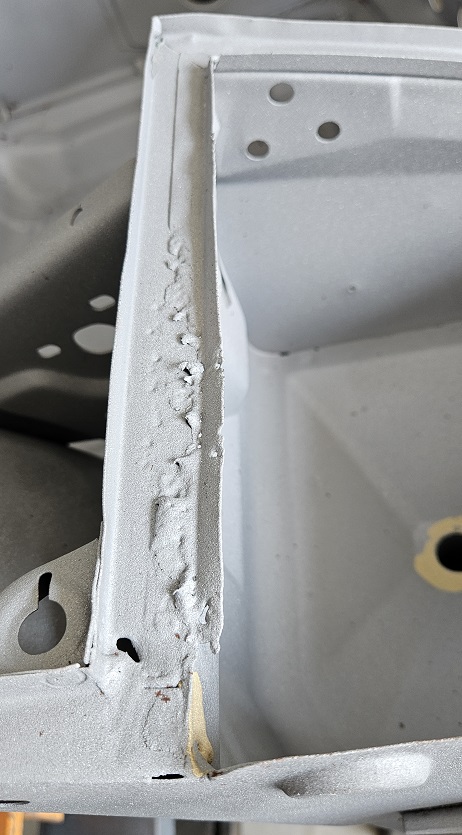 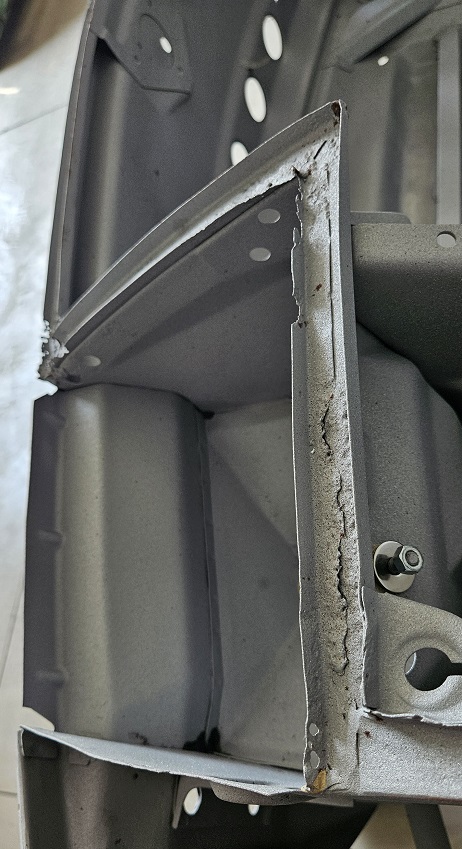
|
|
|
|
| Cairo94507 |
Jul 18 2026, 07:16 AM
Post
#378
|
|
Michael Group: Members Posts: 10,771 Joined: 1-November 08 From: Auburn, CA Member No.: 9,712 Region Association: Northern California
|
It is a journey for sure. I am so glad I met "The Justice League" as I call the crew. I love my car and hope to continue driving it for some time. I know the adriatic blue Six they are assembling now is going to be exceptional.
Thank you for posting all of the progress on your build; it is enjoyable seeing them come together as good as new if not better. (IMG:style_emoticons/default/beerchug.gif) |
|
|
|
| Luke M |
Jul 27 2026, 06:04 PM
Post
#379
|
|
Senior Member Group: Members Posts: 1,608 Joined: 8-February 05 From: WNY Member No.: 3,574 Region Association: North East States
|
Started the front trunk channel repairs. Drivers side is ready to be spot welded in.
Pass side is prepped but I need to make the patches and channels. (IMG:style_emoticons/default/sawzall-smiley.gif) (IMG:style_emoticons/default/smash.gif) (IMG:style_emoticons/default/welder.gif) And done... (IMG:style_emoticons/default/beer3.gif) Attached image(s) 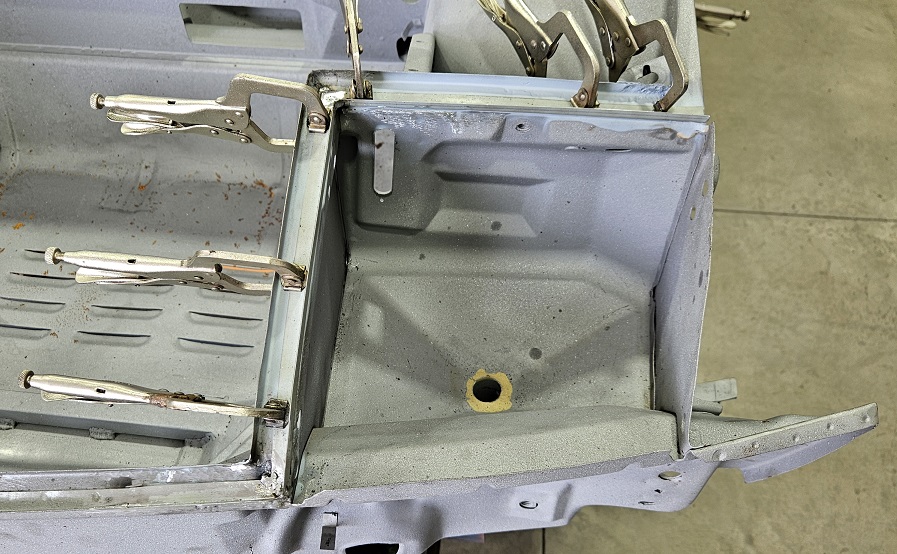 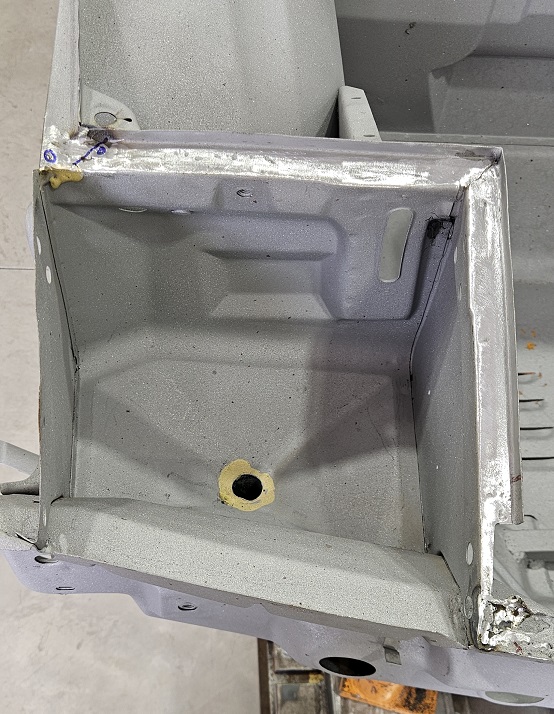 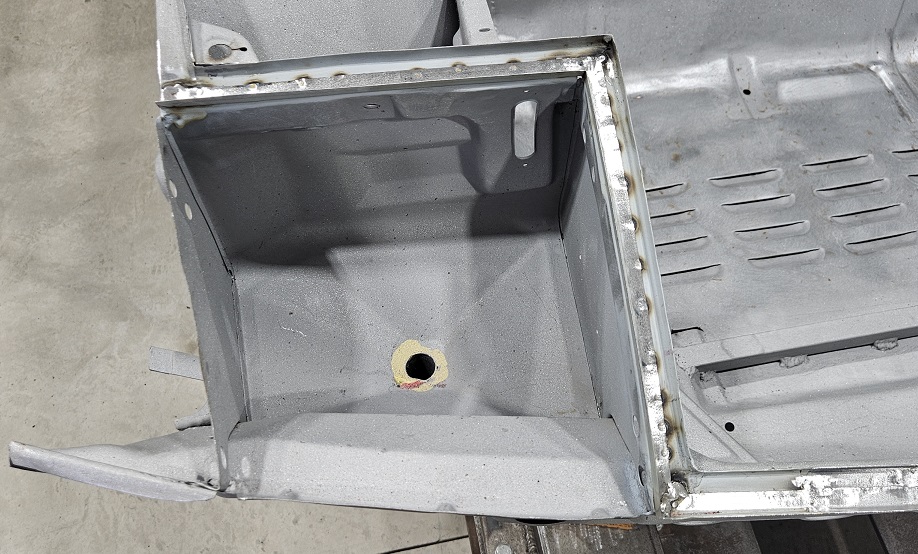 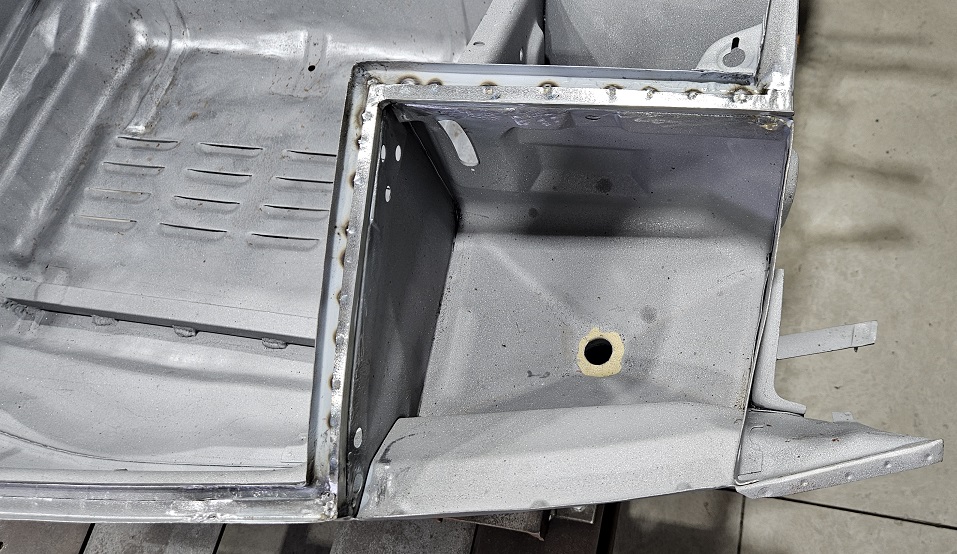
|
|
|
|
| Luke M |
Jul 31 2026, 02:34 PM
Post
#380
|
|
Senior Member Group: Members Posts: 1,608 Joined: 8-February 05 From: WNY Member No.: 3,574 Region Association: North East States
|
A local PCA member had this full pan for sale so I picked it up.
I'm going to use a few sections from it to graft into my 6s floor pan. (IMG:style_emoticons/default/sawzall-smiley.gif) (IMG:style_emoticons/default/smash.gif) (IMG:style_emoticons/default/welder.gif) Attached image(s) 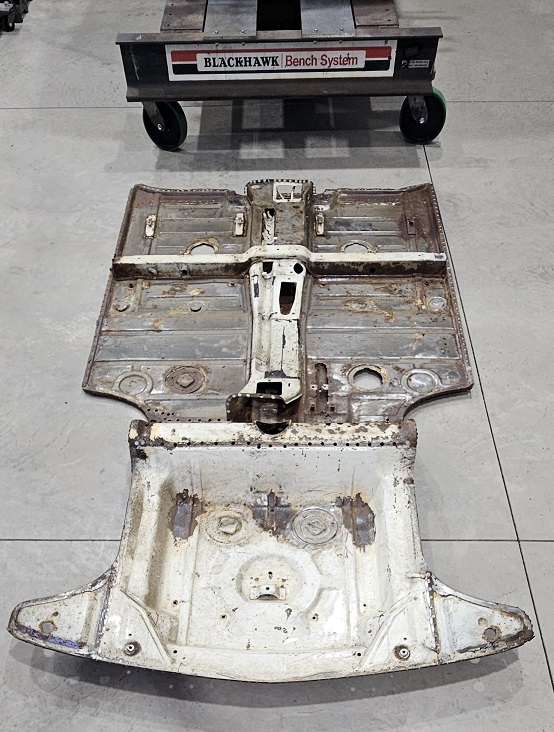
|
|
|
|
|
9 User(s) are reading this topic (9 Guests and 0 Anonymous Users)
0 Members:

|
Lo-Fi Version | Time is now: 5th October 2026 - 04:24 PM |
Invision Power Board
v9.1.4 © 2026 IPS, Inc.