|
|
|
Porsche, and the Porsche crest are registered trademarks of Dr. Ing. h.c. F. Porsche AG.
This site is not affiliated with Porsche in any way. Its only purpose is to provide an online forum for car enthusiasts. All other trademarks are property of their respective owners. |
|
|

  |

| ben1440 |
 Mar 13 2005, 08:52 PM Mar 13 2005, 08:52 PM
Post
#1
|
|
Member  Group: Members Posts: 171 Joined: 1-March 05 From: Santa Rosa Ca Member No.: 3,688 |
Hello everybody, my first post was my hello 914world.com and this one i will use for an ongoing progress thread. Enjoy the pics, please comment and look at my website! For my first progress update i will just steal what i already put in my website: http://www.sonic.net/bkaufman/914
O i finally have got batteries for the only other camera i have to use besides my camera phone. What i have been doing.....I have been trying to strip this thing down as far as possible. i have a lot of the front end broken down, i have the heater left and the brake reservoir. For the inside, its just about completely stripped. All thats left in there is the steering wheel and the wiring. I am leaving the wiring and dont need to take out the steering colum for what i am doing. All the tar is gone and now i am working on containing all the surface rust. Once that is done I will primer it. ohh, and i have the pedal assembly left to take out, but i am not looking foward to that. I also have the engine on a stand now so i am breaking down that too for a complete rebuild but i have 2 screws holding the cover on and they will not come lose at all and now they are totally stripped. Once i find some good vice grips i think i will be able to get them out. Here are some pics i took, a lot are just for my reference but here it goes. Enjoy, well at least if anyone is looking at this. Anyone have any suggestions for the flathead screws holding the enigne cover on? I am having problems with the screw right next to where the intake manifold bolts on. Ohh before i forget, i have some body damange in the back. Could anyone make any recomendations per the pics? Thanks ! Attached image(s) 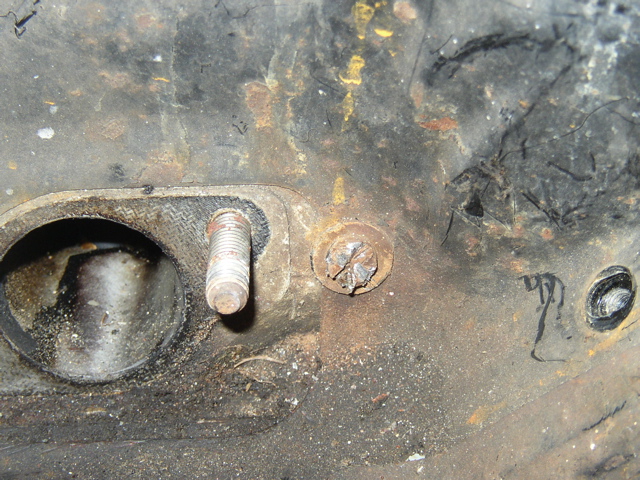
|
   |

 
|
| ben1440 |
Mar 13 2005, 08:53 PM
Post
#2
|
|
Member Group: Members Posts: 171 Joined: 1-March 05 From: Santa Rosa Ca Member No.: 3,688 |
only body damage
Attached image(s) 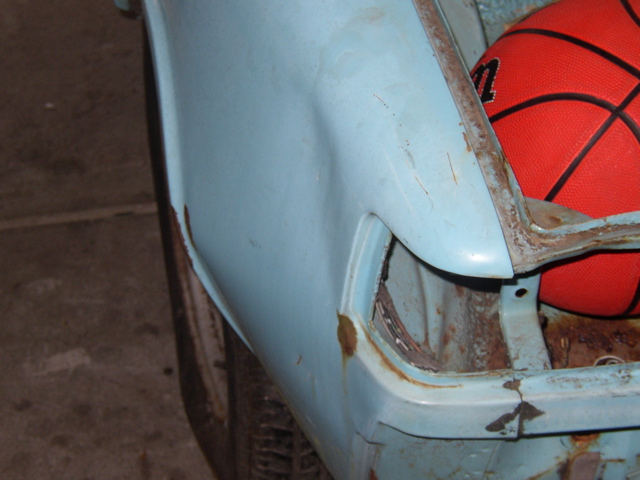
|
|
|
|
| ben1440 |
Mar 13 2005, 08:55 PM
Post
#3
|
|
Member Group: Members Posts: 171 Joined: 1-March 05 From: Santa Rosa Ca Member No.: 3,688 |
and more
Attached image(s) 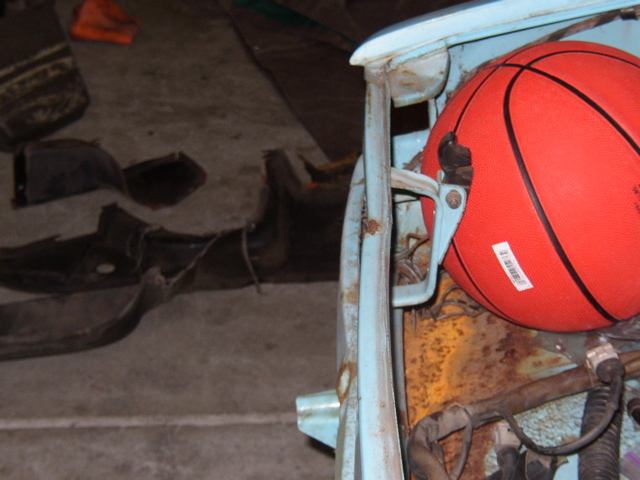
|
|
|
|
| Allan |
Mar 13 2005, 09:26 PM
Post
#4
|
|
Teenerless Weenie Group: Members Posts: 8,373 Joined: 5-July 04 From: Western Mesopotamia Member No.: 2,304 Region Association: Southern California |
Just a little input regarding the dis-assenbly part. I think it would be helpful if you soaked everything you are going to twist, turn or pull with some PB blaster and let it soak. I did it with mine and didn't strip a single fastener.
|
|
|
|
| 914GT |
Mar 13 2005, 09:36 PM
Post
#5
|
|
Senior Member Group: Members Posts: 1,100 Joined: 11-October 04 From: Tucson Member No.: 2,923 Region Association: Southwest Region |
On those screws, get some penetrating oil on them and then take a drive over to Harbor Freight, Sears, etc. and get an impact screwdriver set. There might be enough head on the screw to get a bite on it, if you have enough room to swing a hammer on it. Otherwise, it's vice grips or whatever else works.
On the dents I'm not sure really from the pictures, but I'd try first pulling that bottom of the fender out to where it should be. Then work a flat pry bar or something similar you can reach up inside the fender to work the dent out, as I doubt if you have any body tools for that purpose. If you can get from behind you can push it back out close to original shape then use body filler. If you can't get at it from behind you'll need to use a dent puller or stud gun. The other piece above the taillight should be able to be hammered out using a dolly. At minimum you'll need a basic body hammer and dolly set. HF Tools has a set for less than $20 I think. |
|
|
|
| ben1440 |
Mar 13 2005, 09:45 PM
Post
#6
|
|
Member Group: Members Posts: 171 Joined: 1-March 05 From: Santa Rosa Ca Member No.: 3,688 |
I will take some more pics of it, but your suggestions will most likely be the fix. The only thing i am woried about is that from the accident, the trunk pan is smushed a little bit and there is a good amount of surface rust so i am worried about pounding that area
|
|
|
|
| Qarl |
Mar 13 2005, 10:04 PM
Post
#7
|
|
Shriveled member Group: Benefactors Posts: 5,233 Joined: 8-February 03 From: Florida Member No.: 271 Region Association: None |
So let me guess... you are taking your paychecks and buying....
Basketballs? Weird! (IMG:http://www.914world.com/bbs2/html/emoticons/screwy.gif) |
|
|
|
| ben1440 |
Mar 13 2005, 10:08 PM
Post
#8
|
|
Member Group: Members Posts: 171 Joined: 1-March 05 From: Santa Rosa Ca Member No.: 3,688 |
yes many of them becuase that one got put there after i just got schoold by a 14 year old. hmmm work on the car or practice basketball.....
|
|
|
|
| ben1440 |
Mar 14 2005, 12:22 PM
Post
#9
|
|
Member Group: Members Posts: 171 Joined: 1-March 05 From: Santa Rosa Ca Member No.: 3,688 |
Anyone heard of rustmort? I went to hawleys paint, they didnt have por15 but recomended this. I am giving it a try and it seems to be doing the trick but i have never worked with rust before. Should i ditch it or will it be sufficiant? I will get some before and after pics of what i have already done with it
|
|
|
|
| 914GT |
Mar 14 2005, 05:14 PM
Post
#10
|
||
|
Senior Member Group: Members Posts: 1,100 Joined: 11-October 04 From: Tucson Member No.: 2,923 Region Association: Southwest Region |
Yes, I use Rustmort made by SEM products. They make stuff used by the commercial body shops. Rustmort is a rust converter, probably the same as Ospho. |
||
|
|
|
||
| ben1440 |
Mar 14 2005, 05:35 PM
Post
#11
|
|
Member Group: Members Posts: 171 Joined: 1-March 05 From: Santa Rosa Ca Member No.: 3,688 |
do i sand it out, or primer right over it? I am very new at this (IMG:http://www.914world.com/bbs2/html/emoticons/wink.gif)
|
|
|
|
| 914GT |
Mar 14 2005, 08:27 PM
Post
#12
|
|
Senior Member Group: Members Posts: 1,100 Joined: 11-October 04 From: Tucson Member No.: 2,923 Region Association: Southwest Region |
Make sure there's no loose material - that should have been done before applying the converter. Wire brushing or some 80 grit sandpaper will do. Then convert the rust and let dry overnight. Then use a solvent cleaner/degreaser and prime. Epoxy is best, but if rattle-can is all you have use that. The SEM spray can primers are better than the crap from autozone, etc.
|
|
|
|
| ben1440 |
Mar 18 2005, 11:48 AM
Post
#13
|
|
Member Group: Members Posts: 171 Joined: 1-March 05 From: Santa Rosa Ca Member No.: 3,688 |
so what works good on that goooey crap on the floor? Should i even pursue removing all of it or primer right over it? as always all advice is much appreciated
Attached image(s) 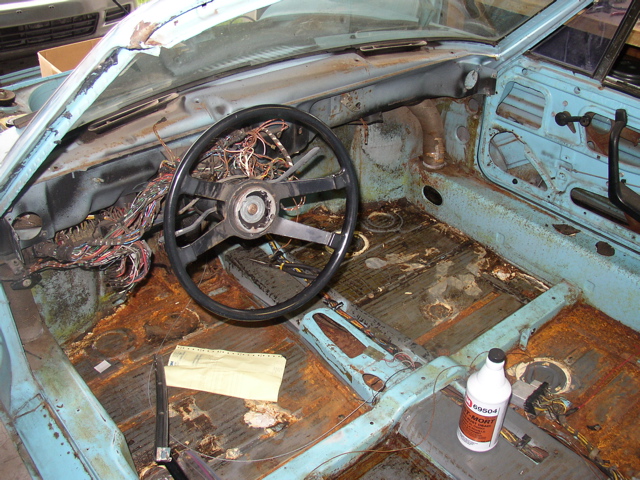
|
|
|
|
| Allan |
Mar 18 2005, 11:51 AM
Post
#14
|
|
Teenerless Weenie Group: Members Posts: 8,373 Joined: 5-July 04 From: Western Mesopotamia Member No.: 2,304 Region Association: Southern California |
I think you should remove it. I believe it's the only way youre going to be able to see what condition the floors are actually in. I think a heat gun and scrapper are about the best way to get it off.
|
|
|
|
| ben1440 |
Mar 22 2005, 01:32 PM
Post
#15
|
|
Member Group: Members Posts: 171 Joined: 1-March 05 From: Santa Rosa Ca Member No.: 3,688 |
Engine stripping has begun. I finally got a hold of some vice grips to get 2 stripped out heat sheild screws out. After the sheild finally came out i started to take out one of the heads but there was heat sheild between the engine and the alternator. I took off the alternator and then got the sheild sheild off. the next hold up was a screw from underneath that was holding in the push rod tube. got that off and the head came right off. hopefully next will other head then i can get the case open i think.
The other day i picked up 2 used seats on good condition, seat belts, a center console, and a speedodemeter. I just bought some por 15 paint and marine cleaner. I am going to get some metal ready too, but now i am going to prep the inside for the por 15 and hope to have that done soon Here is my question. SO i have treated the floors with rustmort, then sanded them. is the the correct order of operations now, clean with the marine cleaner, then use the por15 metal ready product, then use the por15 paint? Does that sound logical. this is what i plan on doing for the trunk and inside Attached image(s) 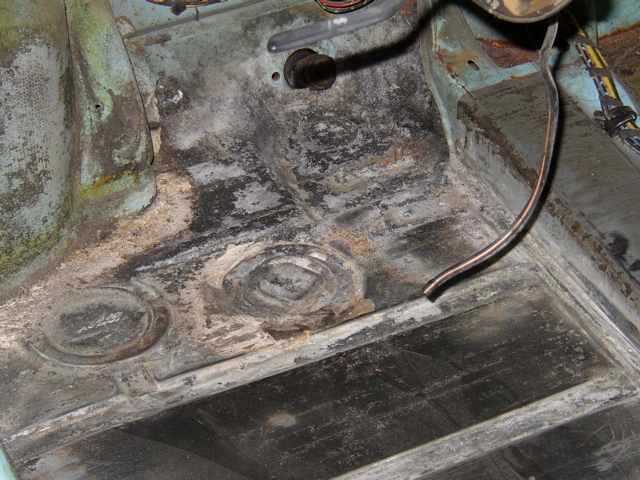
|
|
|
|
| ben1440 |
Mar 22 2005, 01:33 PM
Post
#16
|
|
Member Group: Members Posts: 171 Joined: 1-March 05 From: Santa Rosa Ca Member No.: 3,688 |
my new center console
Attached image(s) 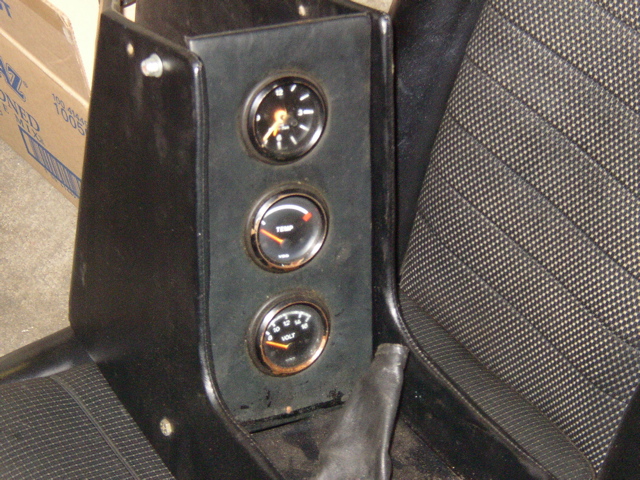
|
|
|
|
| ben1440 |
Mar 22 2005, 01:34 PM
Post
#17
|
|
Member Group: Members Posts: 171 Joined: 1-March 05 From: Santa Rosa Ca Member No.: 3,688 |
mmmmm nice and clean
Attached image(s) 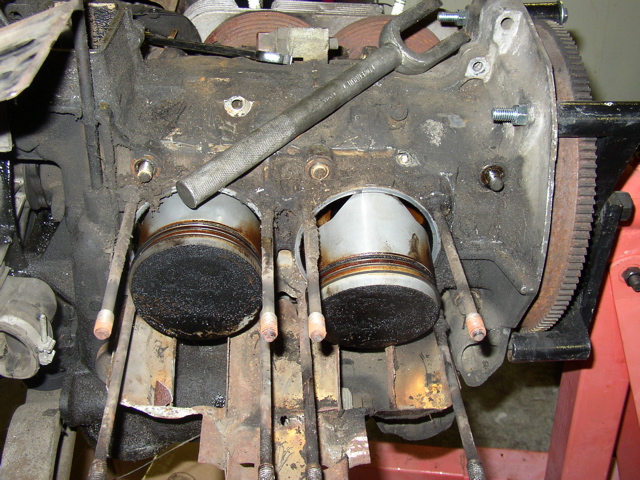
|
|
|
|
| Allan |
Mar 22 2005, 02:09 PM
Post
#18
|
|
Teenerless Weenie Group: Members Posts: 8,373 Joined: 5-July 04 From: Western Mesopotamia Member No.: 2,304 Region Association: Southern California |
I think after you POR-15 everything you can basically use whatever top coat you like.
|
|
|
|
| 914forme |
Mar 22 2005, 07:39 PM
Post
#19
|
|
Times a wastin', get wrenchin'! Group: Members Posts: 3,896 Joined: 24-July 04 From: Dayton, Ohio Member No.: 2,388 Region Association: None |
POR-15 requires a special primer inorder to bond a top coat to it. It is also super casutic stuff, so take the precaustions. I like Eastwoods Rust encapsulator paints, they have a filling capibility and are paintable. I have used both and keep going back to the eastwood stuff. red black silver and now clear, and it works really well if you like one of them colors you don't need to top coat it, it is UV stable. Use it on many things, my trailer has held up for years with the stuff on it.
|
|
|
|
| 914forme |
Mar 22 2005, 07:43 PM
Post
#20
|
|
Times a wastin', get wrenchin'! Group: Members Posts: 3,896 Joined: 24-July 04 From: Dayton, Ohio Member No.: 2,388 Region Association: None |
|
|
|
|
|
1 User(s) are reading this topic (1 Guests and 0 Anonymous Users)
0 Members:

|
Lo-Fi Version | Time is now: 21st May 2024 - 10:36 AM |
Invision Power Board
v9.1.4 © 2024 IPS, Inc.