|
|
|
Porsche, and the Porsche crest are registered trademarks of Dr. Ing. h.c. F. Porsche AG.
This site is not affiliated with Porsche in any way. Its only purpose is to provide an online forum for car enthusiasts. All other trademarks are property of their respective owners. |
|
|

  |

| cary |
 Apr 1 2018, 09:29 AM Apr 1 2018, 09:29 AM
Post
#521
|
|
Advanced Member  Group: Members Posts: 3,900 Joined: 26-January 04 From: Sherwood Oregon Member No.: 1,608 Region Association: Pacific Northwest |
Here's the final layout with the chassis ignition integrated on the right.
Waiting for the relays and new fuse panel to arrive Monday. Then onto 12 volt supply for the injectors and added grounds. Note : Not using OPT 1 & 2, VR1 only for Hall. 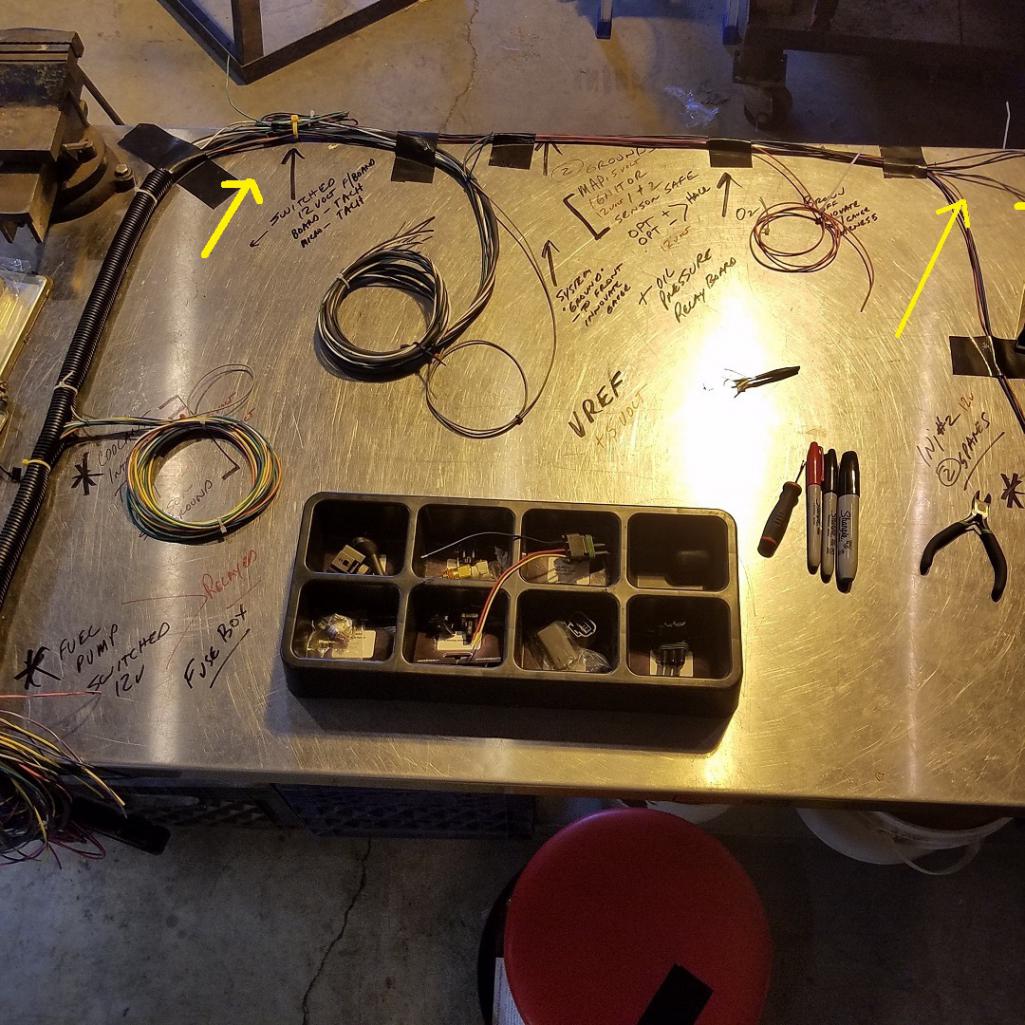 Next onto the crankcase and fuel line venting design. This is a head vented 72 1.7. 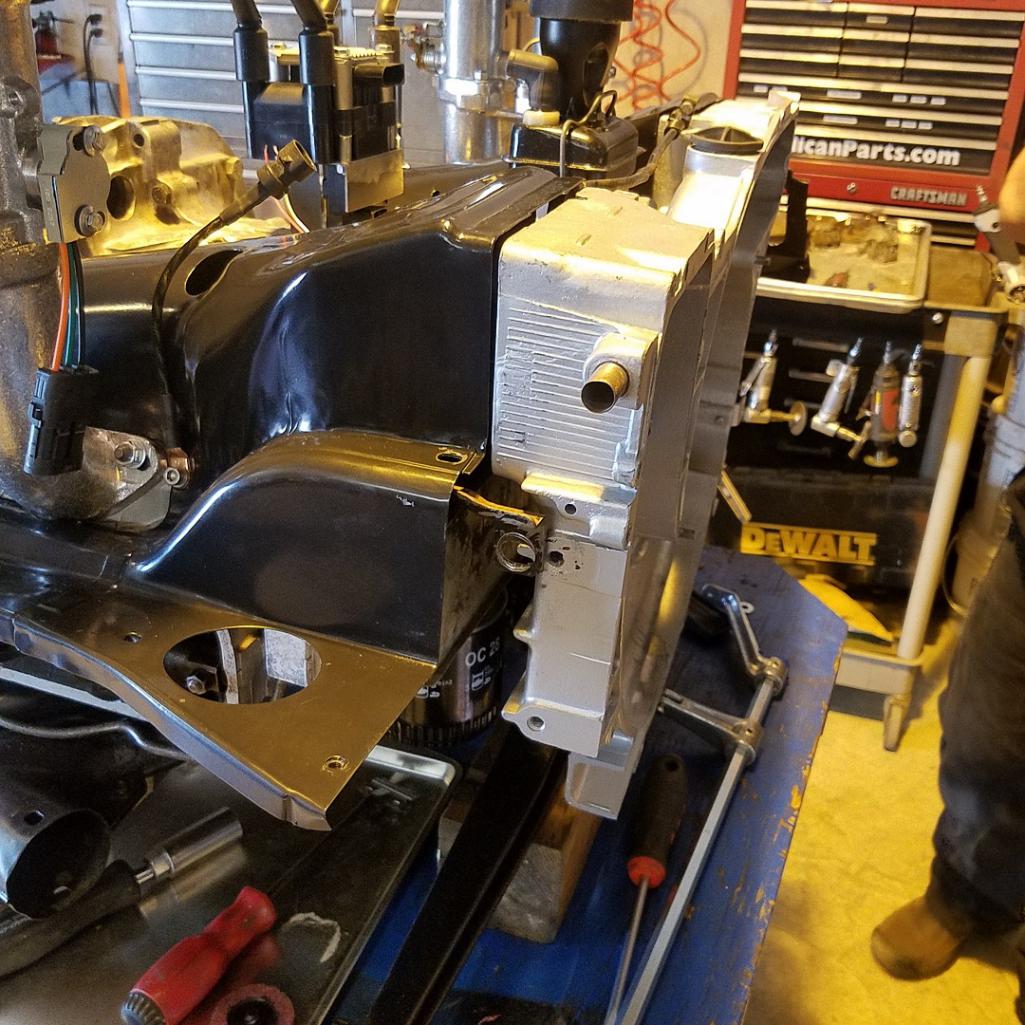 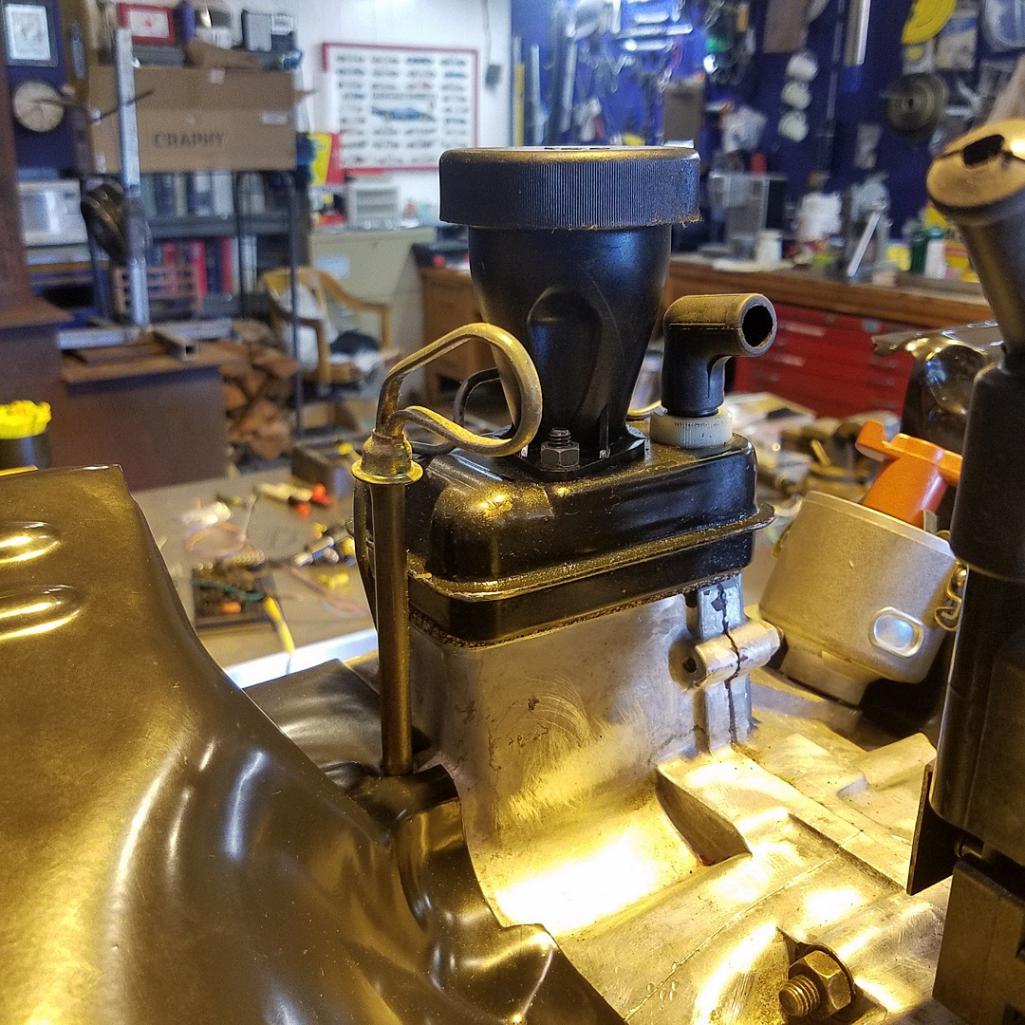 |
   |

 
|
| cary |
Apr 1 2018, 09:50 AM
Post
#522
|
|
Advanced Member Group: Members Posts: 3,900 Joined: 26-January 04 From: Sherwood Oregon Member No.: 1,608 Region Association: Pacific Northwest |
I surely don't want it to look like an Octopus. LOL.
I'm thinking maybe a Tangerine catch can. With only the evap going to one of the air cleaners.  |
|
|
|
| mepstein |
Apr 11 2018, 07:28 AM
Post
#523
|
|
914-6 GT in waiting Group: Members Posts: 20,731 Joined: 19-September 09 From: Landenberg, PA/Wilmington, DE Member No.: 10,825 Region Association: MidAtlantic Region |
|
|
|
|
| cary |
May 3 2018, 07:56 AM
Post
#524
|
|
Advanced Member Group: Members Posts: 3,900 Joined: 26-January 04 From: Sherwood Oregon Member No.: 1,608 Region Association: Pacific Northwest |
Time to get Matt on the road. I'm back from Baja with a 1st Place trophy. Mission accomplished. On leaving yesterday I had Scotty install the new ends on the spark plug wires.
Here he is prepping the connector prior to crimping. 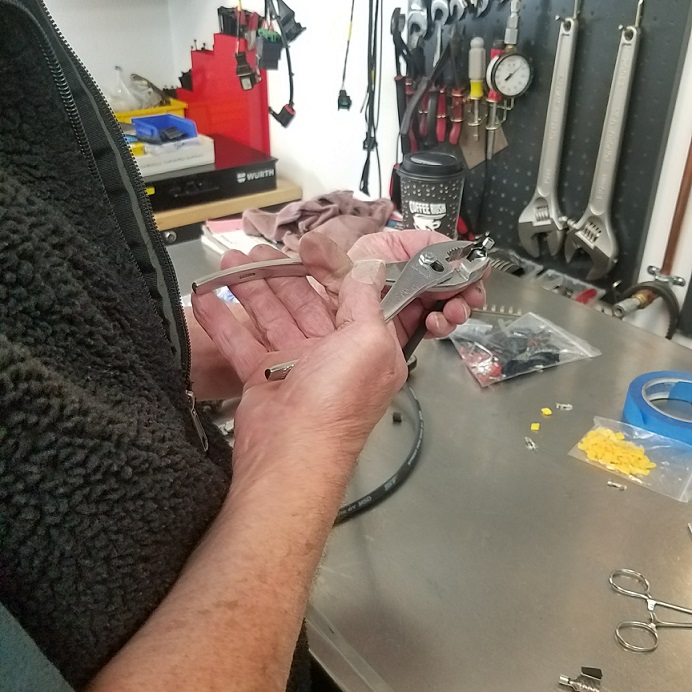 He uses old school MSD crimpers, non ratcheting. https://www.summitracing.com/parts/acc-170037/overview/ |
|
|
|
| cary |
May 3 2018, 08:23 PM
Post
#525
|
|
Advanced Member Group: Members Posts: 3,900 Joined: 26-January 04 From: Sherwood Oregon Member No.: 1,608 Region Association: Pacific Northwest |
For the most part the day was a big turd. NAPA couldn't come up with the right front rotors for my Powerstroke.
But I did get my order of terminal blocks into their storage location. Here is the one we'll use inside the D-Jet ECU box. 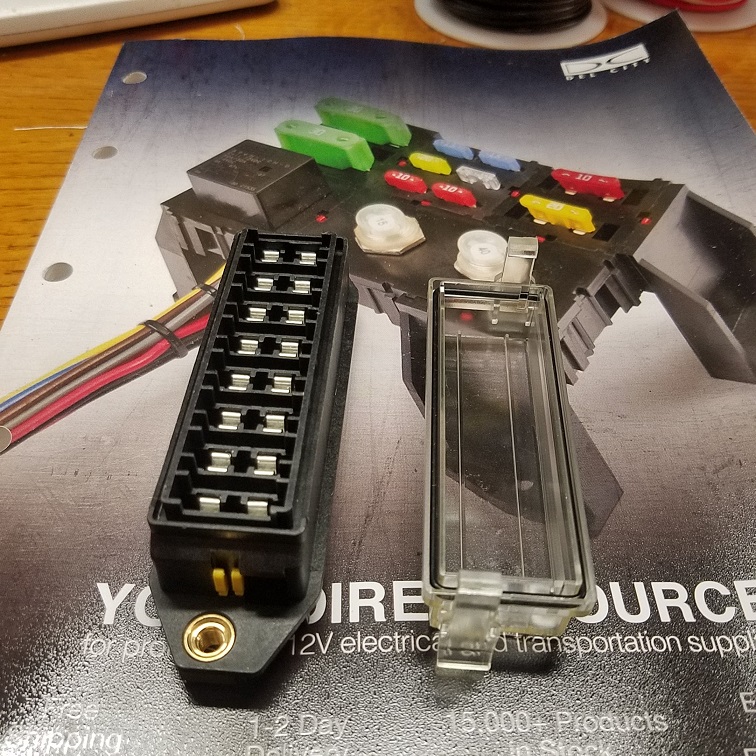 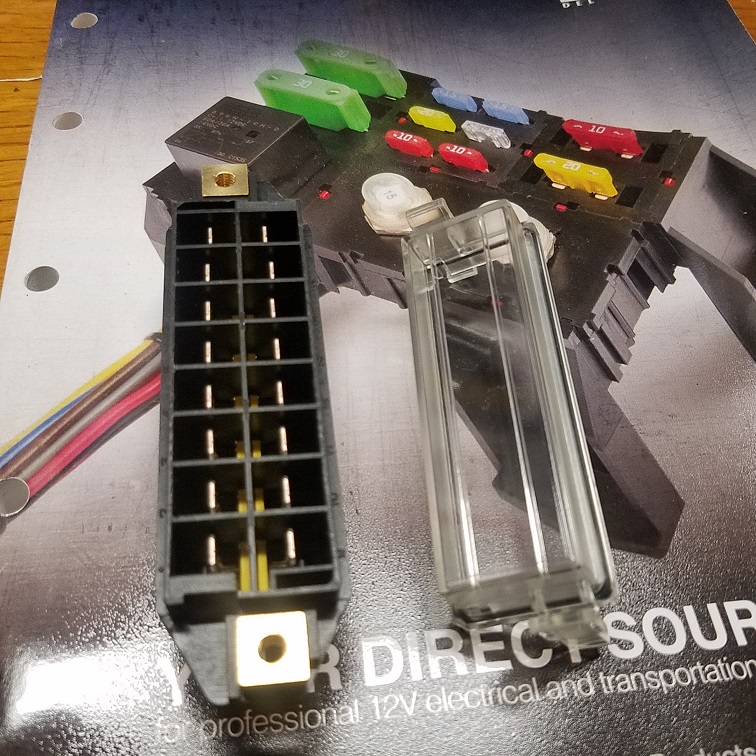 |
|
|
|
| cary |
May 5 2018, 06:48 AM
Post
#526
|
|
Advanced Member Group: Members Posts: 3,900 Joined: 26-January 04 From: Sherwood Oregon Member No.: 1,608 Region Association: Pacific Northwest |
After a 30+ day break I'm back to Matt's MicroSquirt install. We're making an attempt to kind of hide the 21st century components to some degree. At least the mondo wiring harness. So must of the wiring connections will be hidden in the old D-Jet ECU box.
The wiring of the box has begun. All individual components will be fused. 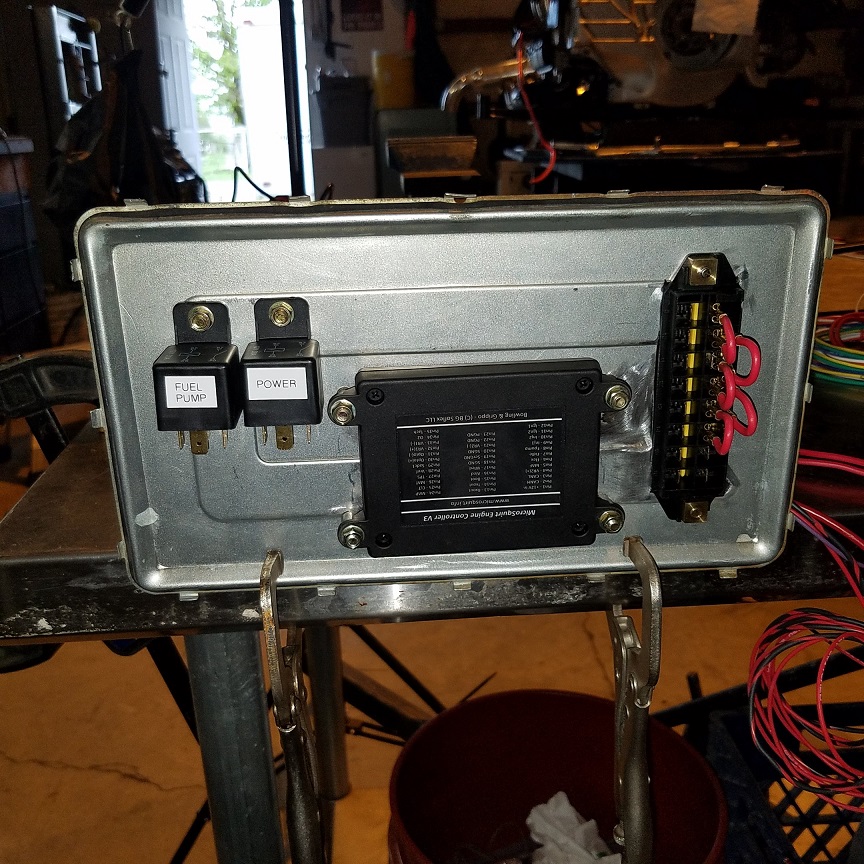 We found one terminal block that would have eliminated the jumpers. But it wasn't robust enough. Still working thru my sleep deprivation from the Mexican 1000 Rally, but it's getting better day by day. Up at 5am and can't wait to get back at it. I think I've been wiring since 3am in my dreams. |
|
|
|
| bbrock |
May 5 2018, 09:29 AM
Post
#527
|
|
914 Guru Group: Members Posts: 5,269 Joined: 17-February 17 From: Montana Member No.: 20,845 Region Association: Rocky Mountains |
QUOTE(cary @ May 5 2018, 06:48 AM)  After a 30+ day break I'm back to Matt's MicroSquirt install. We're making an attempt to kind of hide the 21st century components to some degree. At least the mondo wiring harness. So must of the wiring connections will be hidden in the old D-Jet ECU box. Nice touch (IMG:style_emoticons/default/thumb3d.gif) |
|
|
|
| cary |
May 6 2018, 09:18 AM
Post
#528
|
|
Advanced Member Group: Members Posts: 3,900 Joined: 26-January 04 From: Sherwood Oregon Member No.: 1,608 Region Association: Pacific Northwest |
Here it is wired up ..............
The box is tall enough to allow for the wires to arc and dress out real nice. 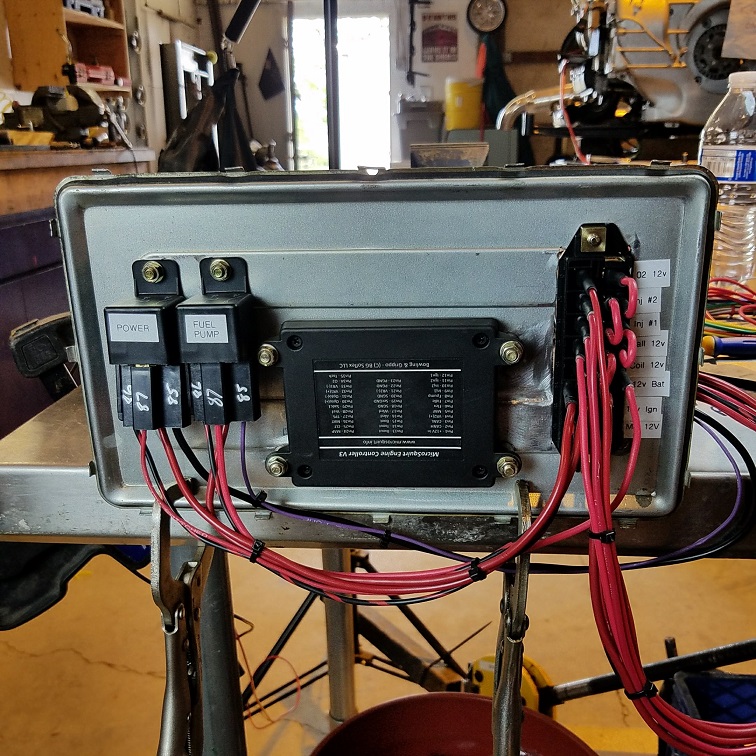 If we do a few more of these we'll have some stickers made to call out the fuses. Both inside and out. |
|
|
|
| cary |
May 6 2018, 09:23 AM
Post
#529
|
|
Advanced Member Group: Members Posts: 3,900 Joined: 26-January 04 From: Sherwood Oregon Member No.: 1,608 Region Association: Pacific Northwest |
After lunch we went after the prepping the engine for re-installation.
  Gave the fan a good cleaning at Rothsport with the soda blaster. Then Matt gave it a couple coats of clear. But don't forget the replace the timing marks. Both factory and the outside rim. 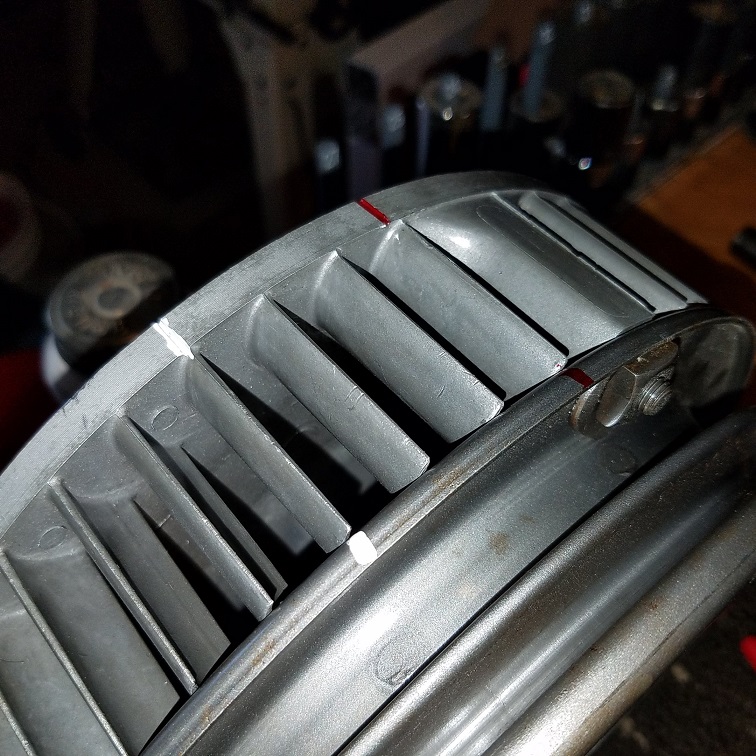 |
|
|
|
| Matty900 |
May 7 2018, 03:00 AM
Post
#530
|
|
Senior Member Group: Members Posts: 1,305 Joined: 21-February 15 From: Oregon Member No.: 18,454 Region Association: Pacific Northwest |
After the mock-up was done I put some work into the ECU boxes. Painted it and then insulated the inside then added a rubber sheathing to help keep any water out of the box.
Starting to look like a V2 rocket (Mark (IMG:style_emoticons/default/poke.gif)) Attached thumbnail(s) 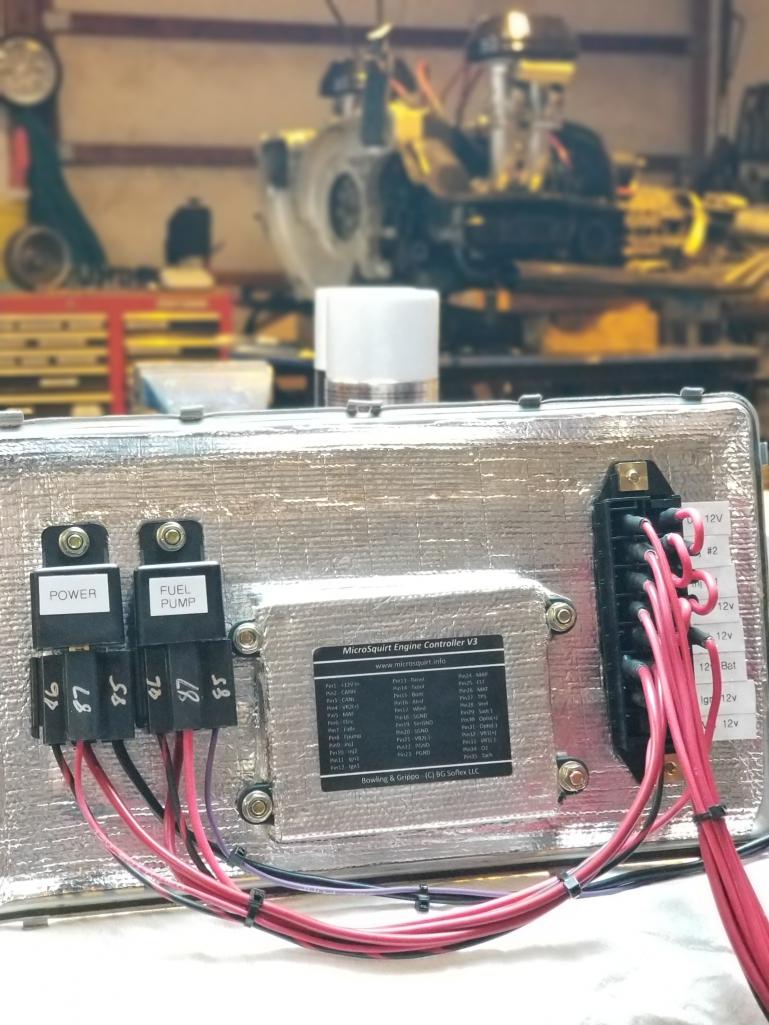 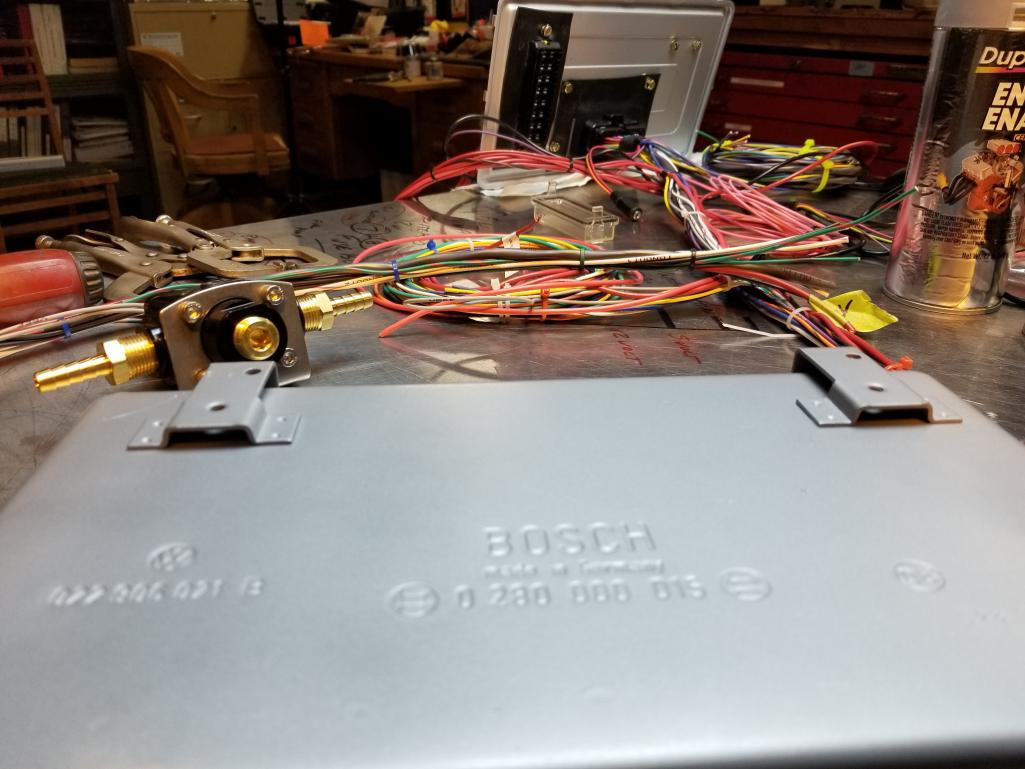
|
|
|
|
| Matty900 |
May 7 2018, 07:43 AM
Post
#531
|
|
Senior Member Group: Members Posts: 1,305 Joined: 21-February 15 From: Oregon Member No.: 18,454 Region Association: Pacific Northwest |
Pulled the tachometer and sent it off to Palo Alto Speedometer (thanks Eric Shae for the advice) to get an upgrade so that it will be able to use the signal from the microsquirt. Now if I could remember what he said about needing a diode somewhere for some resistance (IMG:style_emoticons/default/poke.gif) Eric (IMG:style_emoticons/default/confused24.gif)
Attached thumbnail(s) 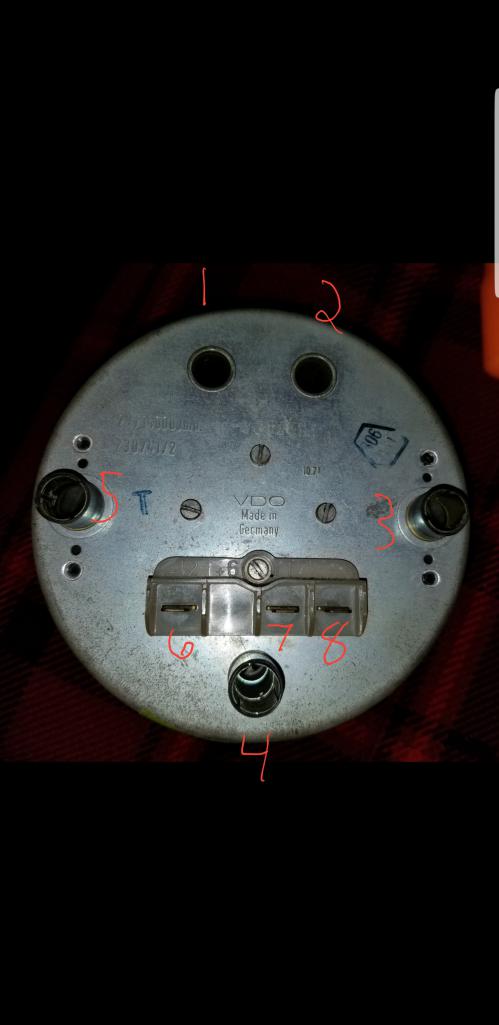
|
|
|
|
| cary |
May 7 2018, 11:11 PM
Post
#532
|
|
Advanced Member Group: Members Posts: 3,900 Joined: 26-January 04 From: Sherwood Oregon Member No.: 1,608 Region Association: Pacific Northwest |
The work continues. Installing fuel lines and fuel pressure regulator.
Lots of engineering along the way. We want to be able to replicate what we've created. 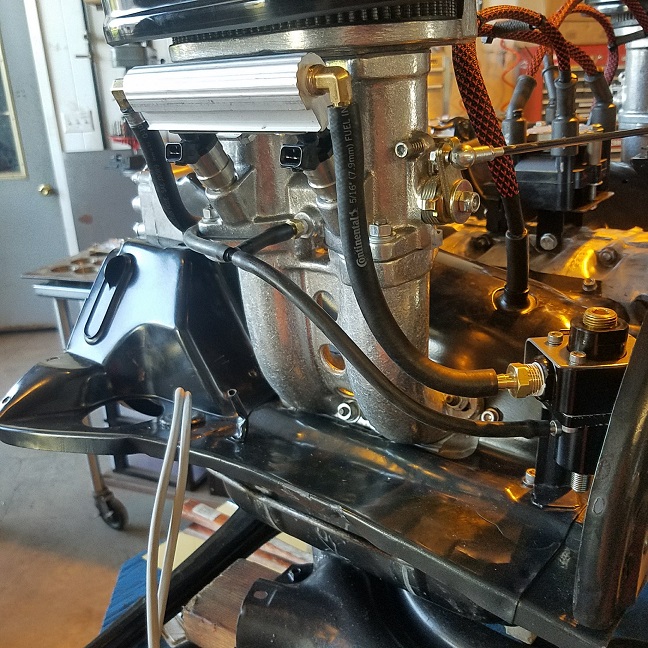 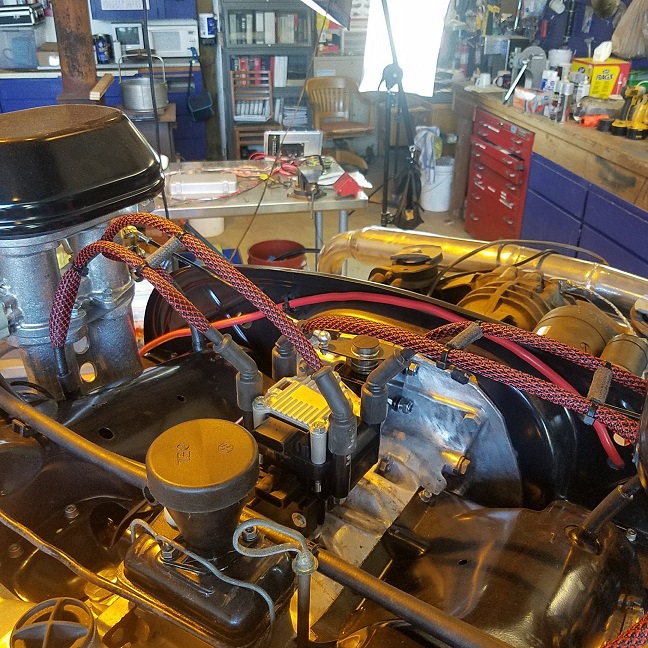 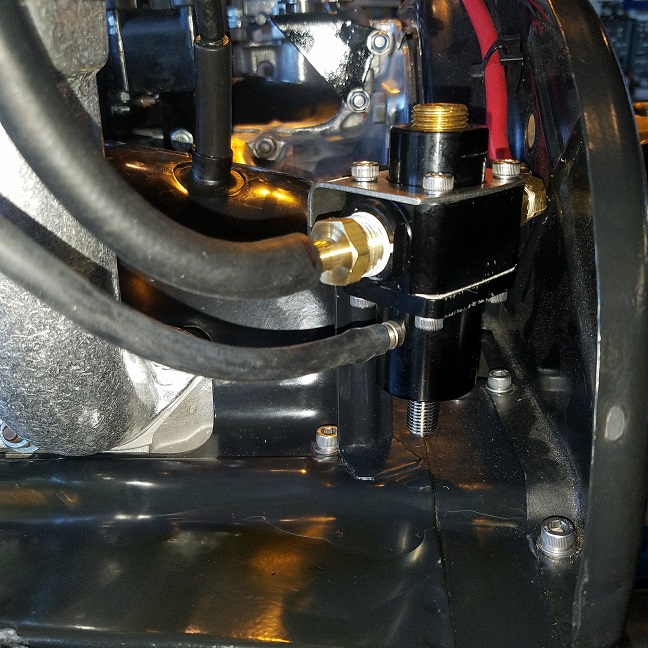 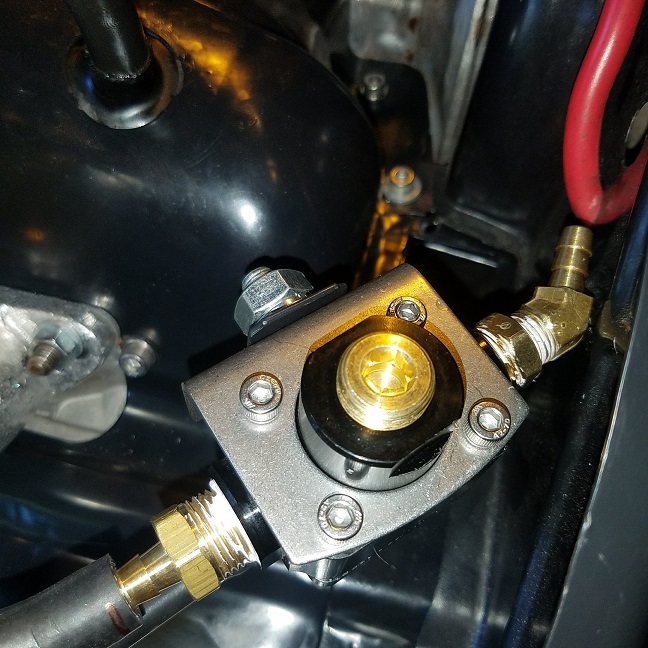 |
|
|
|
| DRPHIL914 |
May 8 2018, 10:23 AM
Post
#533
|
|
Dr. Phil Group: Members Posts: 5,939 Joined: 9-December 09 From: Kennesaw, GA Member No.: 11,106 Region Association: South East States |
nice, very clean and neat! Cary what kind of coating is on the Triad exhaust in the background? I was considering a ceramic coating of some kind to put on mine as well.
Phil. |
|
|
|
| cary |
May 9 2018, 07:39 AM
Post
#534
|
|
Advanced Member Group: Members Posts: 3,900 Joined: 26-January 04 From: Sherwood Oregon Member No.: 1,608 Region Association: Pacific Northwest |
I believe it's ceramic. We'll have to wait for Matt to chime in. Both he and Doug outsourced some items for ceramic coating.
|
|
|
|
| cary |
May 9 2018, 08:09 AM
Post
#535
|
|
Advanced Member Group: Members Posts: 3,900 Joined: 26-January 04 From: Sherwood Oregon Member No.: 1,608 Region Association: Pacific Northwest |
Tuesday was going over the harness one more time before it goes into the engine bay for harness mock up. I'm making sure I have all the wiring I need to integrate the Innovate LC-2 into the harness, it too is going into the ECU box. This is definitely not plug and play. While I was doing that Matt was upgrading the fuel lines to SS and AN fittings.
I climbed up on the engine rack and extracted an engine ground off one of my engines. 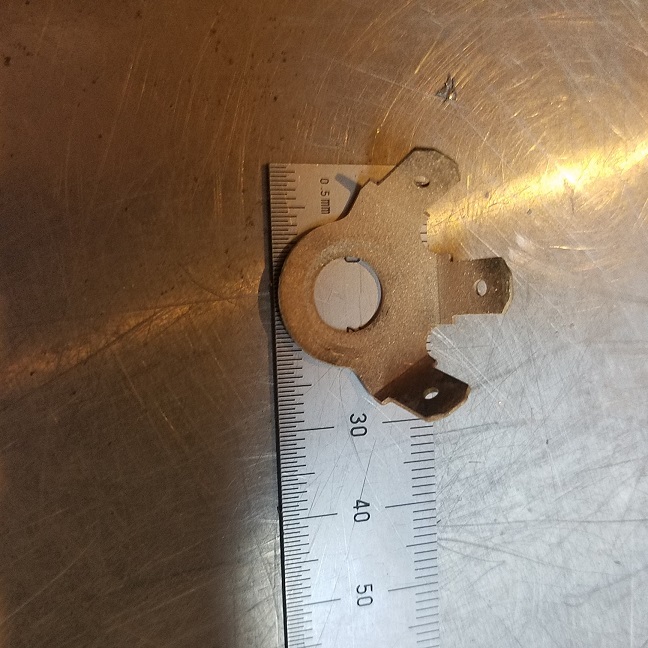 I'd like to find find/purchase 5 more to send out for plating. Then I'm not real crazy about the evap lines going into the throttle body top. So I had Matt pick up some pipe thread taps so I could tap a hole in the stack plate. Should be Tight & Tidy. 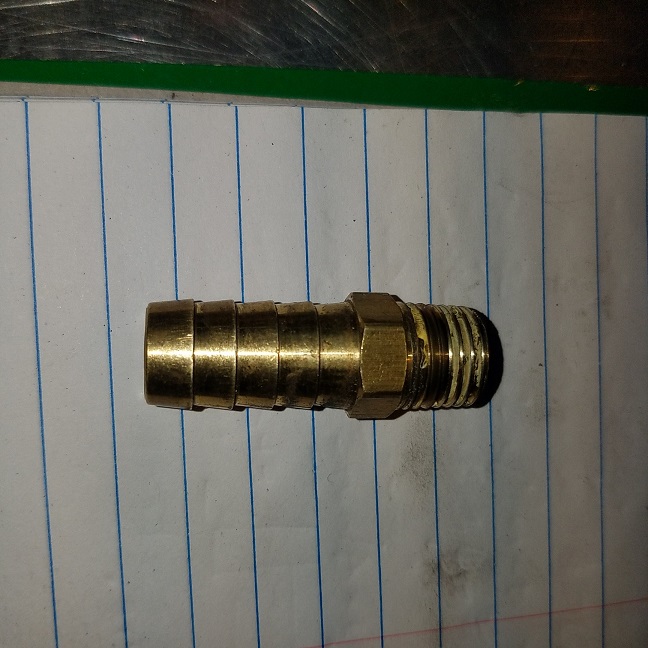 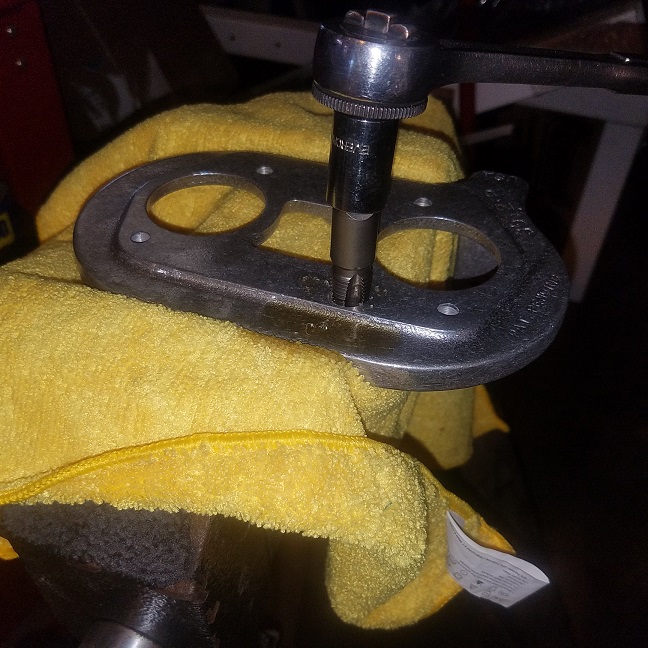 Then onto NEW parts. Matt bought a set of NEW Porsche Classic half shafts. Installed the outer hubs and torqued them down so we can safety wire them today. 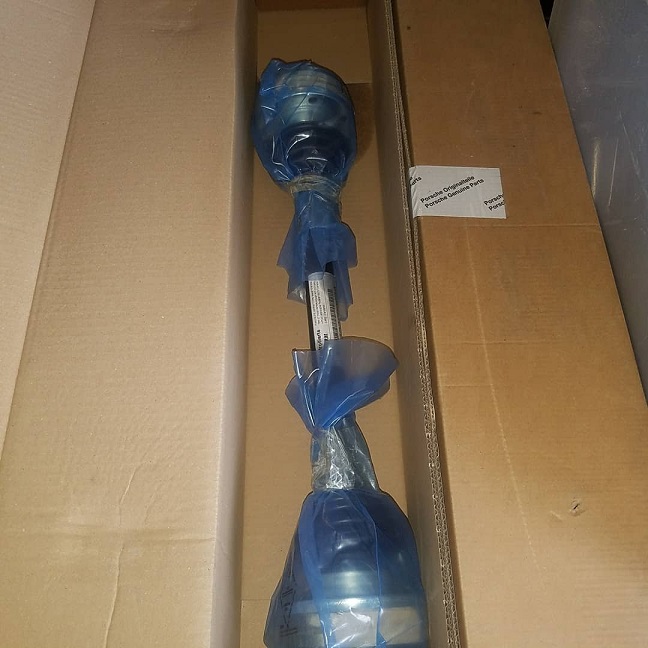 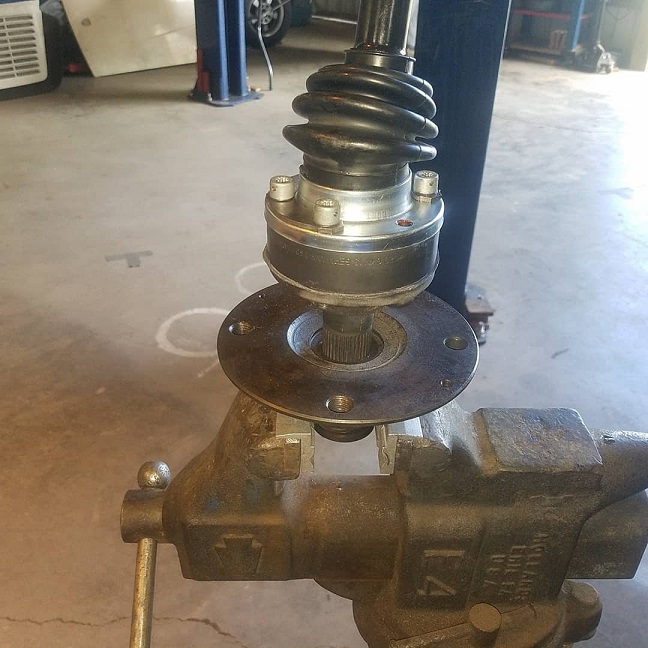 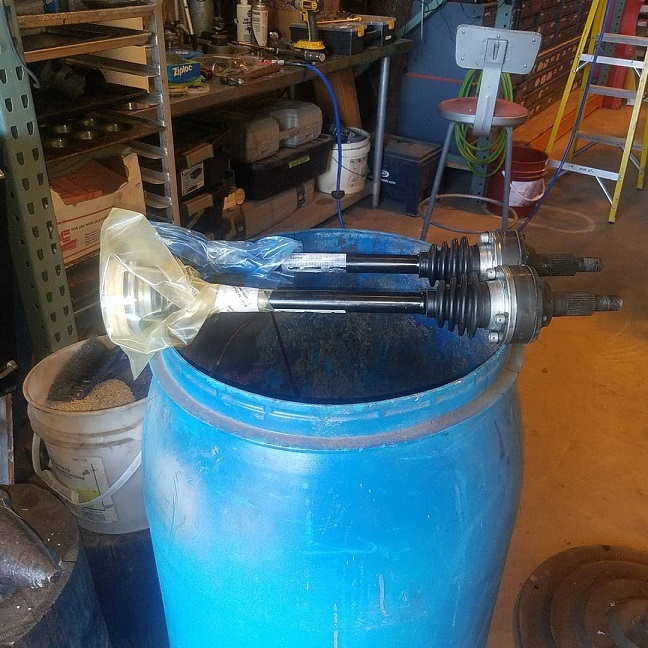 That hub will be painted blue and added to the fixture bin. Got lots ........ Fuel line didn't arrive last night. So theres a change in plans. After a little shop housekeeping the engine is going in without half shaft and fuel lines so I can mock up the harness break outs and shrink tubing. I'm going to time it. LOL. |
|
|
|
| Matty900 |
May 9 2018, 11:53 PM
Post
#536
|
|
Senior Member Group: Members Posts: 1,305 Joined: 21-February 15 From: Oregon Member No.: 18,454 Region Association: Pacific Northwest |
Few more of our new parts going onto the engine
Attached thumbnail(s) 
|
|
|
|
| Matty900 |
May 9 2018, 11:55 PM
Post
#537
|
|
Senior Member Group: Members Posts: 1,305 Joined: 21-February 15 From: Oregon Member No.: 18,454 Region Association: Pacific Northwest |
Alternator and belt installed and adjusted. New alternator inspection covers back on.
Attached thumbnail(s) 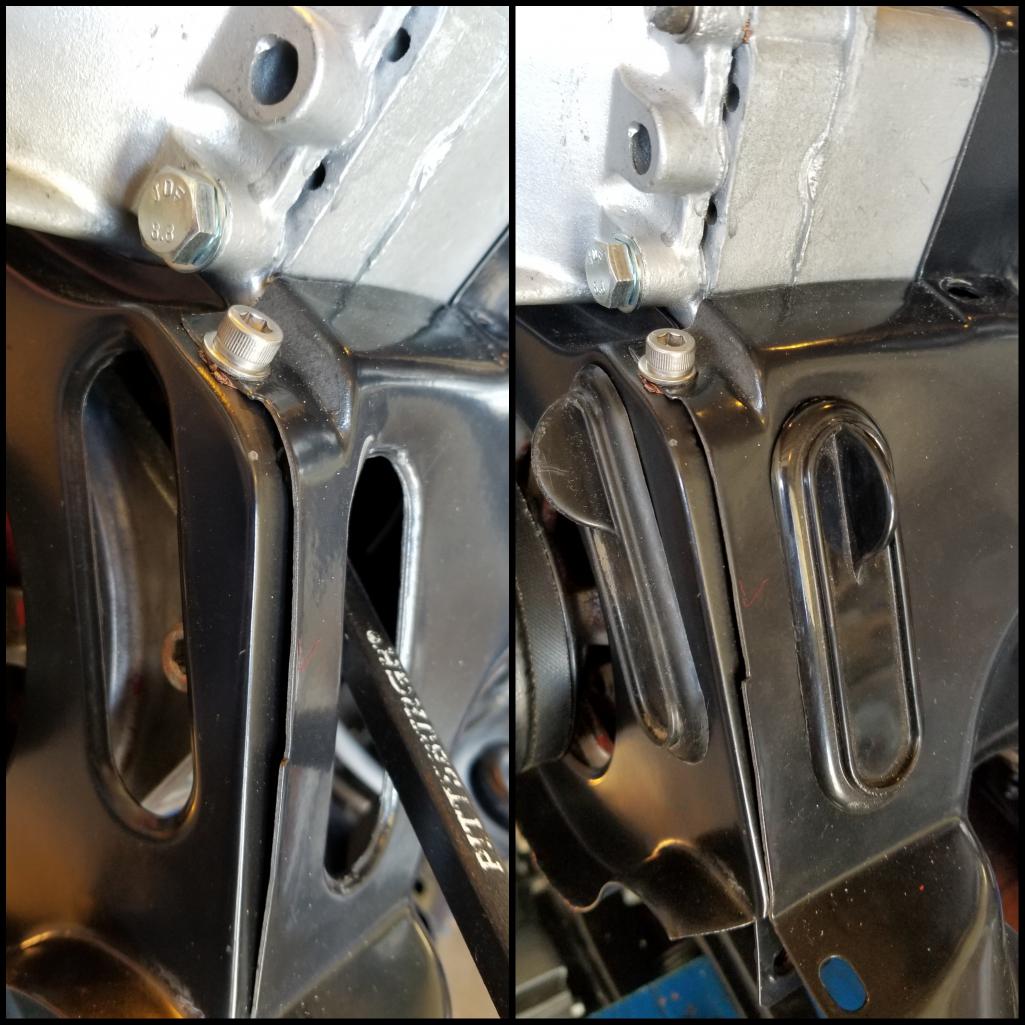
|
|
|
|
| Matty900 |
May 10 2018, 12:04 AM
Post
#538
|
|
Senior Member Group: Members Posts: 1,305 Joined: 21-February 15 From: Oregon Member No.: 18,454 Region Association: Pacific Northwest |
Cary's handiwork on the evaporation line fitting and the dressed vacuum line for the throttle body
Attached thumbnail(s) 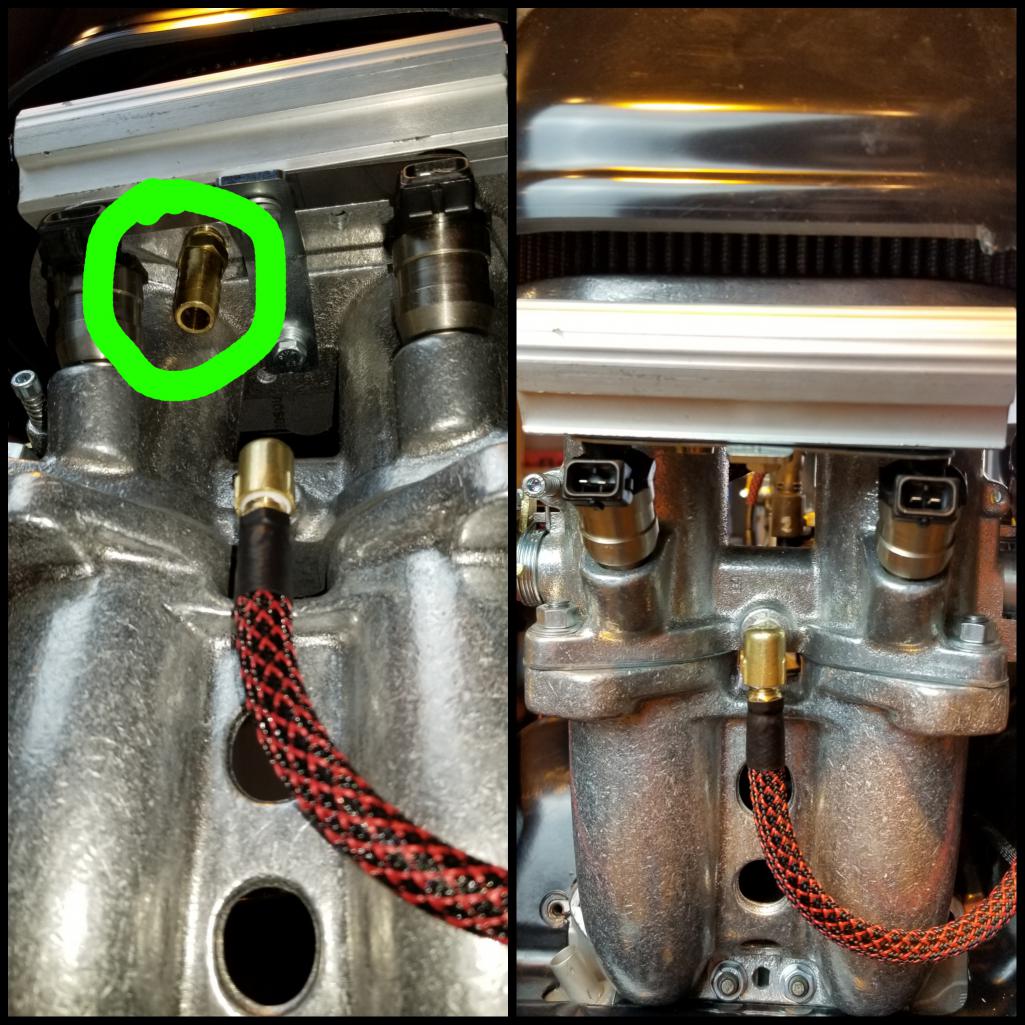
|
|
|
|
| Matty900 |
May 10 2018, 12:06 AM
Post
#539
|
|
Senior Member Group: Members Posts: 1,305 Joined: 21-February 15 From: Oregon Member No.: 18,454 Region Association: Pacific Northwest |
Engine in the car for harness mockup.
Attached thumbnail(s) 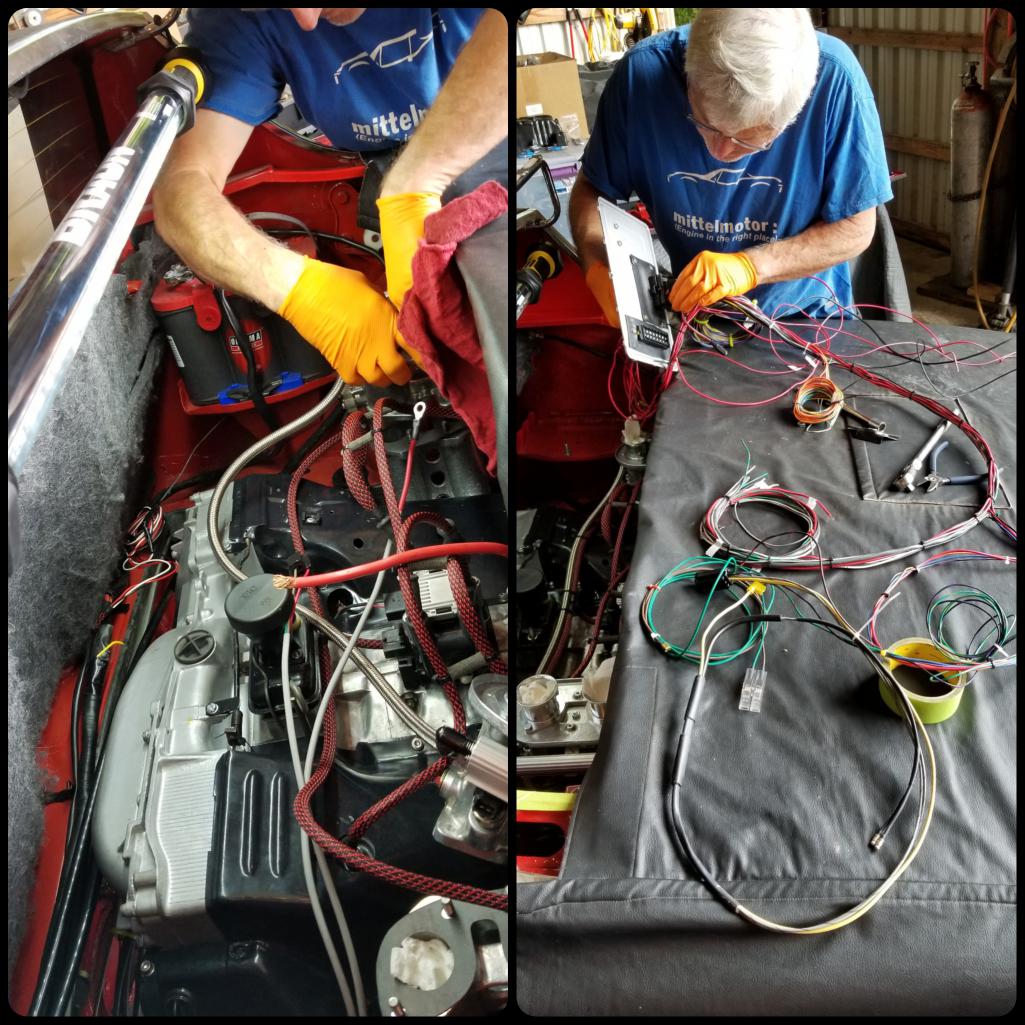
|
|
|
|
| Matty900 |
May 10 2018, 12:13 AM
Post
#540
|
|
Senior Member Group: Members Posts: 1,305 Joined: 21-February 15 From: Oregon Member No.: 18,454 Region Association: Pacific Northwest |
Fitting the air/fuel monitor/controller in to the original ECU box along with everything else. Ready with a plan for tomorrow. Adjust the wiring harness with today's fitment info
Attached thumbnail(s) 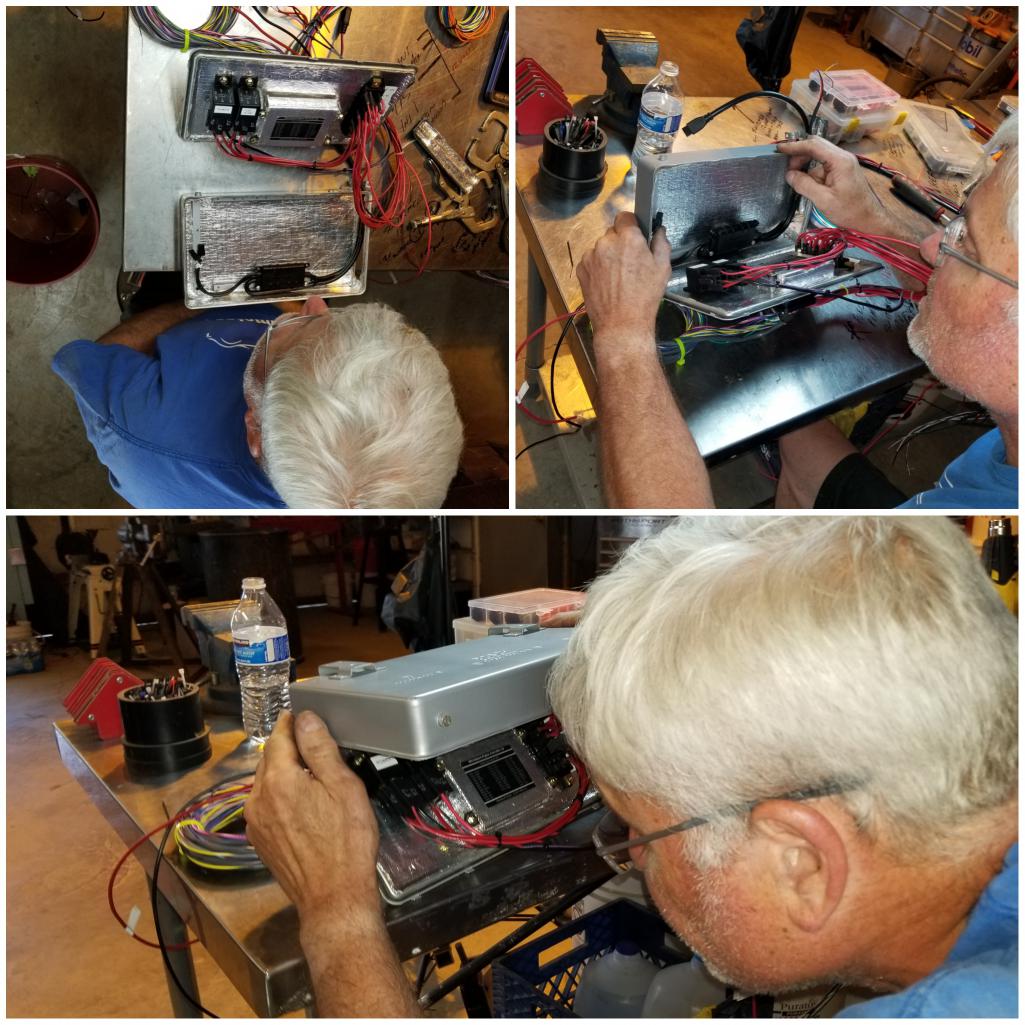
|
|
|
|
|
1 User(s) are reading this topic (1 Guests and 0 Anonymous Users)
0 Members:

|
Lo-Fi Version | Time is now: 3rd June 2026 - 01:55 AM |
Invision Power Board
v9.1.4 © 2026 IPS, Inc.