|
|
|
Porsche, and the Porsche crest are registered trademarks of Dr. Ing. h.c. F. Porsche AG.
This site is not affiliated with Porsche in any way. Its only purpose is to provide an online forum for car enthusiasts. All other trademarks are property of their respective owners. |
|
|

  |

| cary |
 Feb 24 2016, 01:57 AM Feb 24 2016, 01:57 AM
Post
#1
|
|
Advanced Member  Group: Members Posts: 3,900 Joined: 26-January 04 From: Sherwood Oregon Member No.: 1,608 Region Association: Pacific Northwest |
I've been asked by Mark to do some sheet metal/body work on his 75 2.0 Liter project car. The car arrived last Monday. But I needed to finish up a couple things on my project car and in my shop first. But I dove in this afternoon.
First task is to tidy things up after the paint stripping. Which included dropping the engine in order remove any residual media in the nooks and crannies. I was concerned with the rust prevention product that Dustless Blaster mixes with the glass media being left on and in the electrical connections. I'm a firm believer of an ounce of prevention is worth a pound of cure. I dribbled some OSPHO on a couple connectors in my white car. Not good. It ate the crap out the plating. Here's Super In Law working on loosening up the media in order to blow it off. It will need to be steam cleaned. 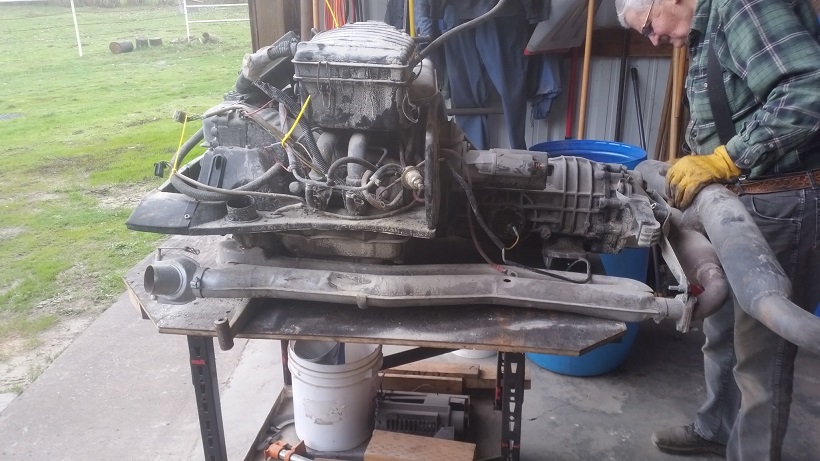 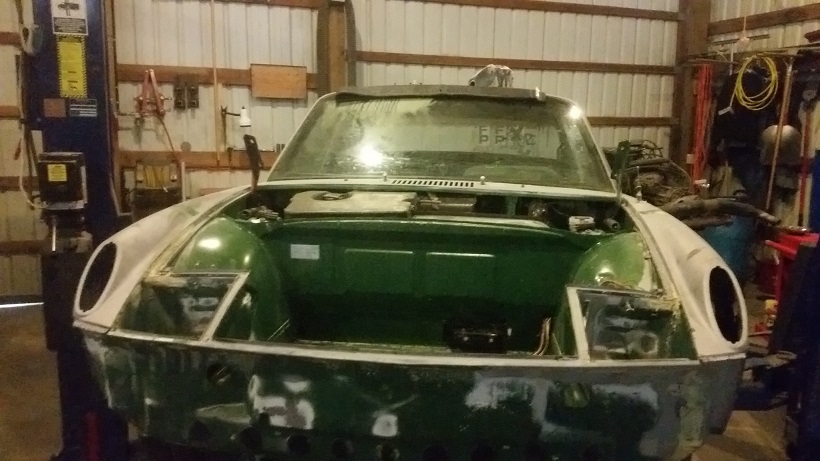 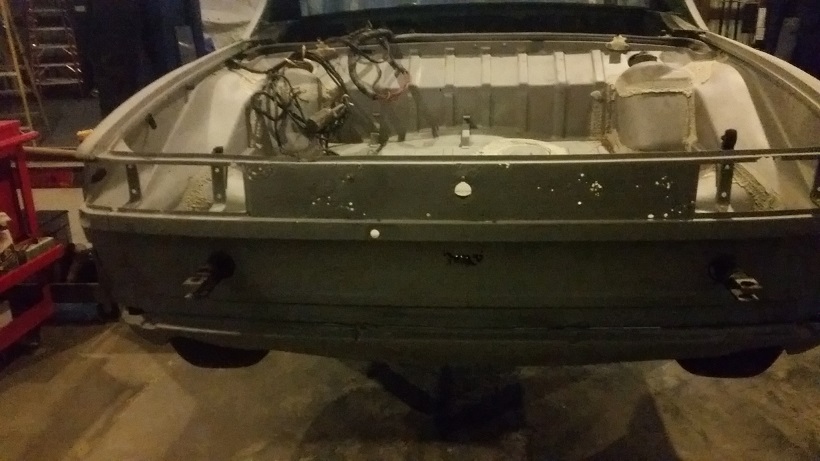 Project List : So Far Replace rear panel Replace rear trunk floor pan Replace back half of floor pan ............... Mark I'll send you pictures Misc. hammer and dolly work A few misc. patch panels R&R both jack points and posts This is like a new car compared to my project ............... Observations : Suspension Consoles look great and seem to be virgin. Same with the motor mounts Battery tray was changed at some time in its life Back engine tray is bent to hell .............pushed up Hell hole is filled with caked in blast media. Stopping at Sears on the way home for a new filter for my vacuum. I'll look closely for prior repairs. Both the lower longs look great at first glance Needing more research : A few rust pits on the upper right outer wheelhouse long 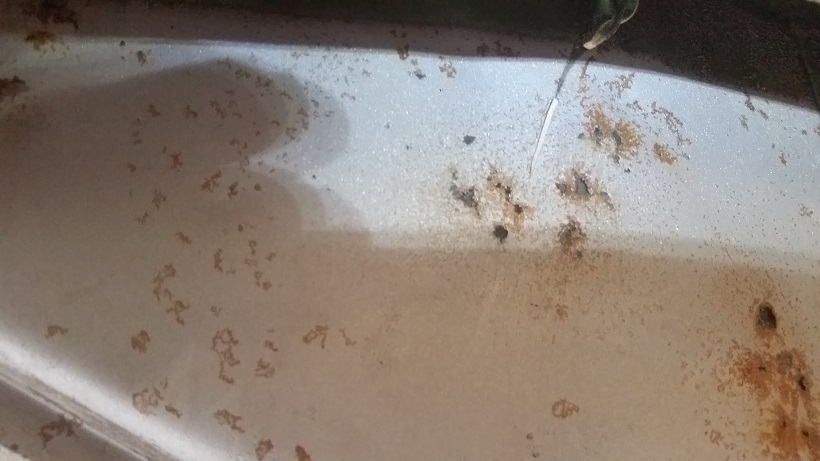 But we also a have fairly good sized rust spot a little further up the upper long. Right next to the suspension console. 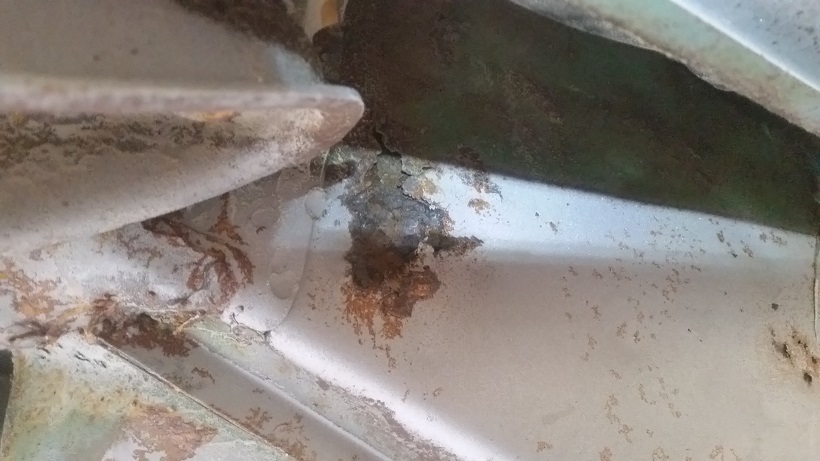 These are both in the double walled section of the upper long. |
   |

 
|
| EdwardBlume |
Feb 24 2016, 07:22 AM
Post
#2
|
|
914 Wizard Group: Members Posts: 12,340 Joined: 2-January 03 From: SLO Member No.: 81 Region Association: Central California |
Good luck with your rust exploration! There always seems to be more.....
|
|
|
|
| EdwardBlume |
Feb 24 2016, 07:22 AM
Post
#3
|
|
914 Wizard Group: Members Posts: 12,340 Joined: 2-January 03 From: SLO Member No.: 81 Region Association: Central California |
Not a bad idea to add CFRs dog ears. I added them to my street car for added security....
|
|
|
|
| sb914 |
Feb 24 2016, 07:52 AM
Post
#4
|
|
Surf Guru Group: Members Posts: 4,643 Joined: 25-November 12 From: Brookings,Oregon Member No.: 15,191 Region Association: Southern California |
I have a good source for the rubber!
|
|
|
|
| cary |
Feb 25 2016, 10:51 AM
Post
#5
|
|
Advanced Member Group: Members Posts: 3,900 Joined: 26-January 04 From: Sherwood Oregon Member No.: 1,608 Region Association: Pacific Northwest |
Got a late start, had to stop and set up an appointment for the kids Audi. The REVO chip needs to be reflashed. Check Sum Error. I love driving that car. It's like driving a monster V8, but no wheel spin.
Super In Law was doing the AARP tax prep thing today. Started with another 3 hours of cleaning out blasting media. By no means am I getting it all. Just enough so that I can examine all the surfaces, seams and welds. I have to keep my eye on the ball, this is a body work and paint job project. Not a restoration. As long as I'm in the engine compartment I decided that I'll start with rear portion of the engine tray. Don't know exactly how it got that way. Someone must have set the car down on the engine somehow. 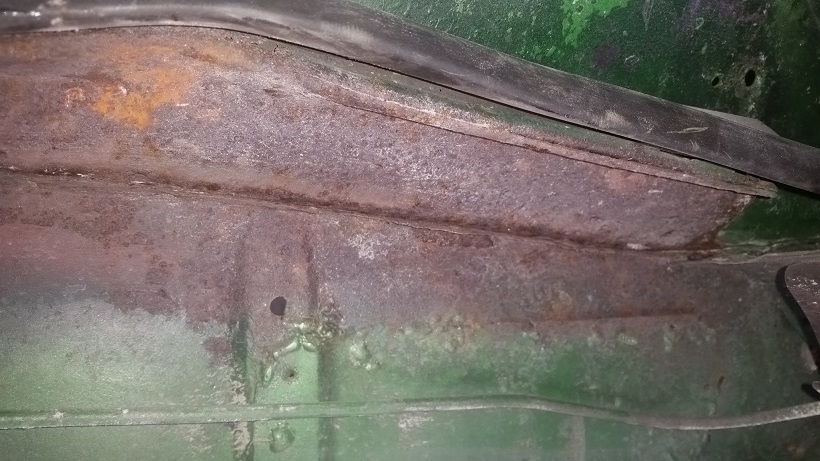 This piece is something that needs to be treated with kids gloves. The three cars I've worked on have a lot of metal degradation on the bottom. I used multiple weapons in order to bend it back into place. But primarily I used a wooden block and a hammer. After bending it back into place I see that combination of the water sitting in the crease and me bending it back into place tore a hall in the fire wall. (IMG:style_emoticons/default/mad.gif) 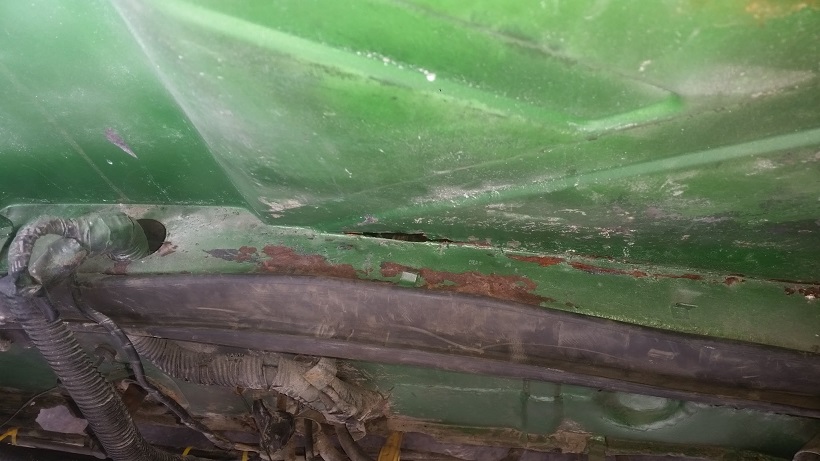 So a patch is in order. Bigger is better. Make it big enough so that your welding on thicker metal. I'd like to say good metal, but thats not always a possibility.  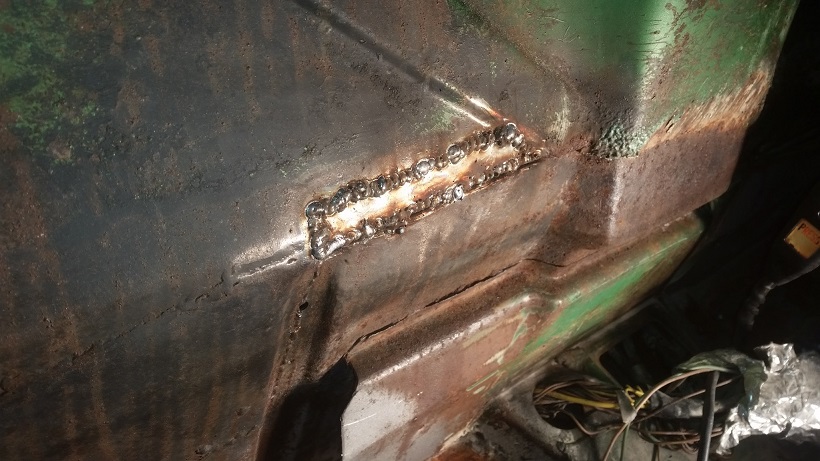 Welds are a little proud (tall) but I'm giving it just enough heat to get a good weld. Anymore and we're looking at the engine compartment. Backside was a little tough to clean up. The shelf is just long enough that you have a tough time getting a grinder in there. Even with my vast assortment 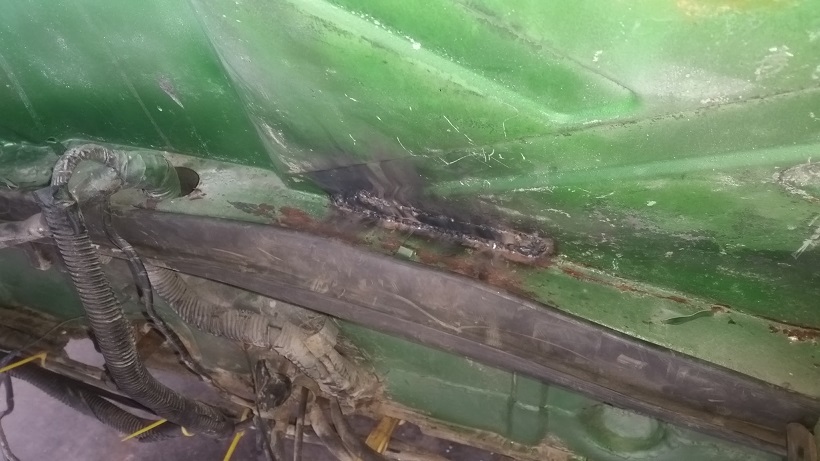 I decide the engine seal needs to come off so I can get to the bottom weld and clean up the tray for a shot of primer. Surprise, surprise I find that the seal channel is bent to hell and all rusted up. 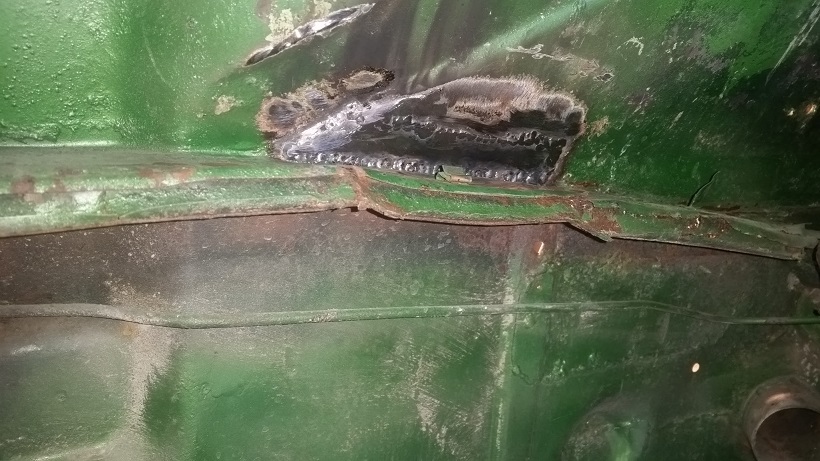 Sorry the shot had poor definition of the channel So thats going to have to be replaced. If I don't have enough left over in the scap pile. I'll cut it off the parts car. Knowing how soft the shelf is I decided to used Rick's screwdriver method on the spot welds. Basically you thin the top surface with the grinder and pop the weld off. 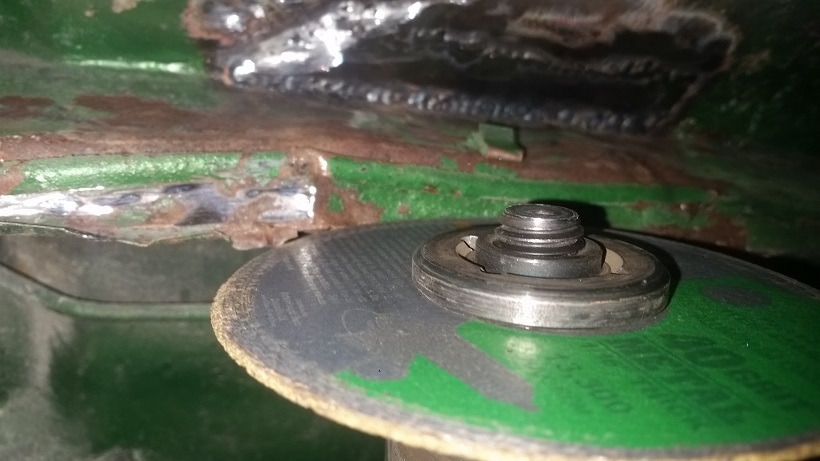 Peeled it off like using a p38 can opener. Used lineman's pliers as the roller. 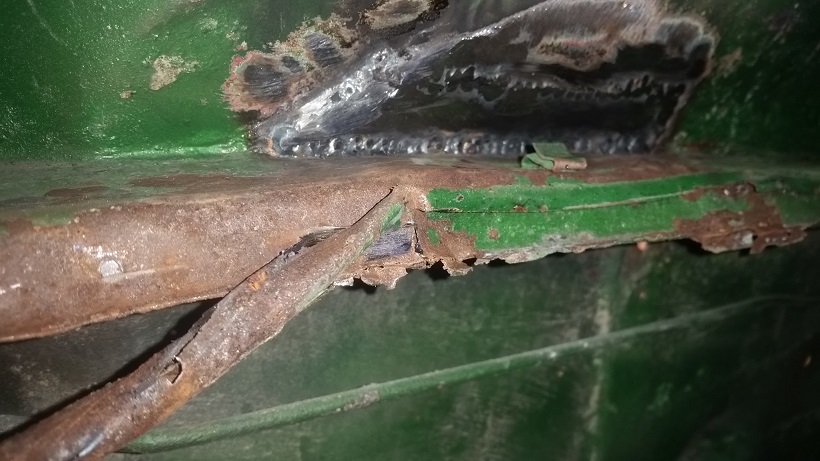 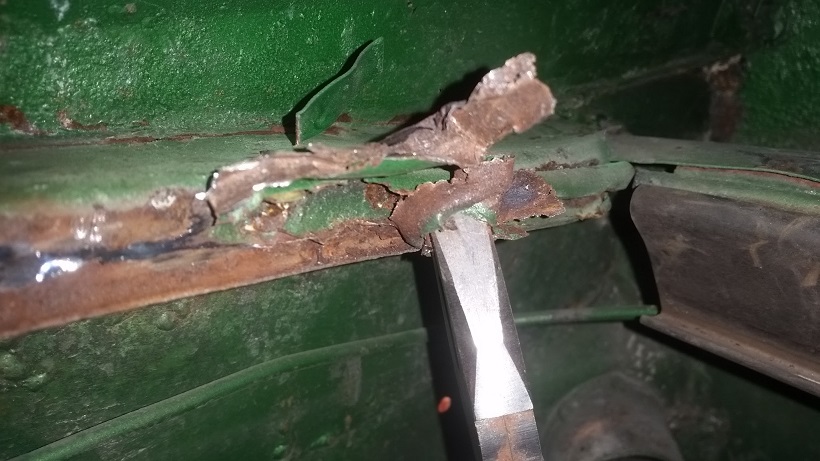 It's 5:10 and I decide to roll the dice and weld the remainder of the seam over to the top of the hell hole. I'm thinking, am I getting to cocky? Its pretty rusty. Took about 20 minutes but I got it with out much fuss. A couple spots kicked up a bit, but all in all went ok.  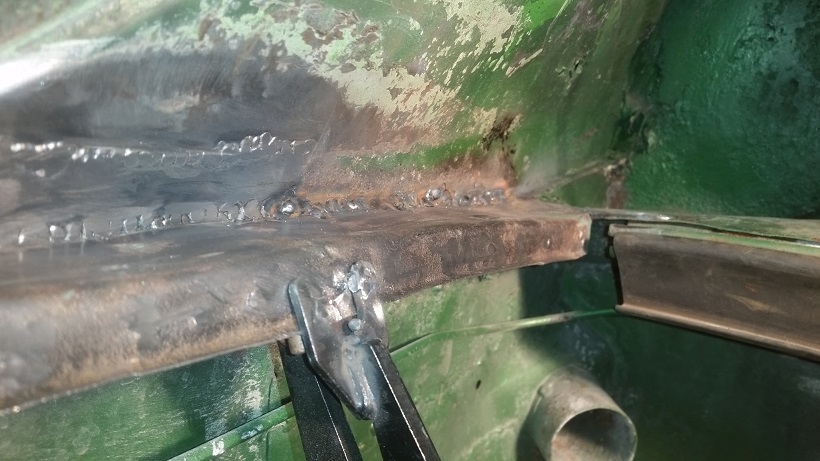 |
|
|
|
| cary |
Feb 25 2016, 10:53 AM
Post
#6
|
|
Advanced Member Group: Members Posts: 3,900 Joined: 26-January 04 From: Sherwood Oregon Member No.: 1,608 Region Association: Pacific Northwest |
I'll add the hell hole, wheelhouse rust research tonight.
I'm burning daylight .............. |
|
|
|
| Mikey914 |
Feb 25 2016, 10:23 PM
Post
#7
|
|
The rubber man Group: Members Posts: 12,782 Joined: 27-December 04 From: Hillsboro, OR Member No.: 3,348 Region Association: None |
Just let me know what you need Cary. I'm back in town Saturday morning. This is why I took this to you. It would still be sitting in my garage. I suspected there may be a few issues to address, and wanted it in capable hands.
|
|
|
|
| cary |
Feb 25 2016, 10:49 PM
Post
#8
|
|
Advanced Member Group: Members Posts: 3,900 Joined: 26-January 04 From: Sherwood Oregon Member No.: 1,608 Region Association: Pacific Northwest |
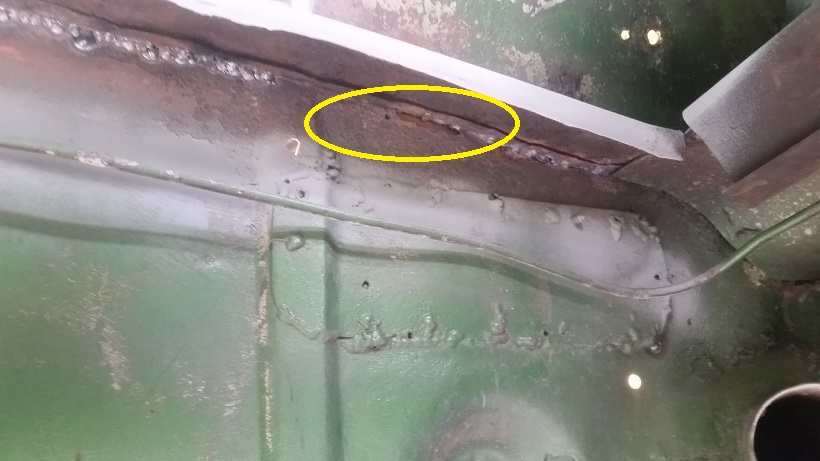
Hell Hole research .............
Ok here's what I see ............ New battery tray and support ... install is over welded (IMG:style_emoticons/default/sad.gif) removing it would be kind of messy. 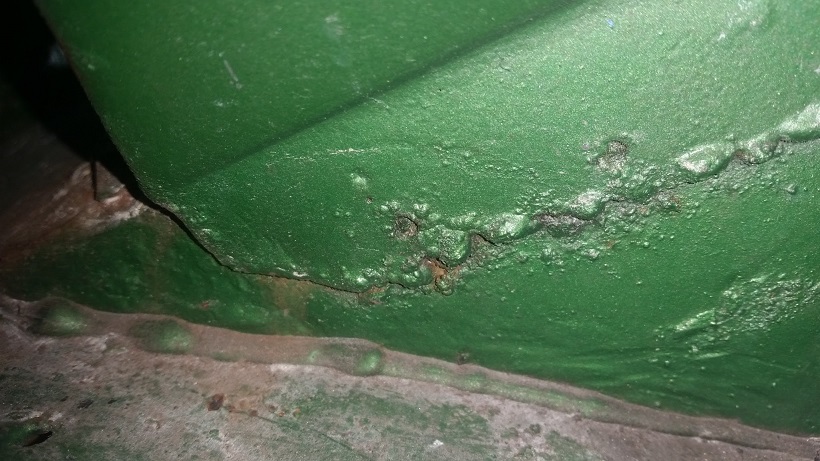 New right engine shelf .......... used silicone as the seam sealer (IMG:style_emoticons/default/idea.gif) 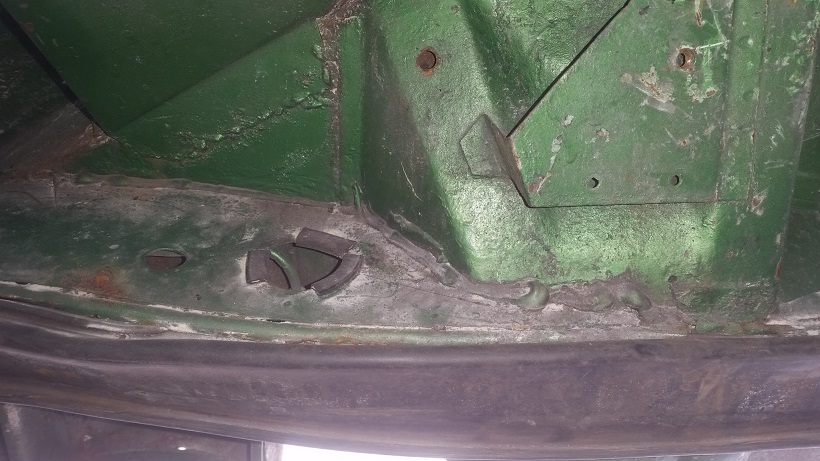 Upper long (hell hole) looks solid. Hell hole end panel (firewall) needs a patch. Engine shelf welds didn't get ground down. (IMG:style_emoticons/default/idea.gif) 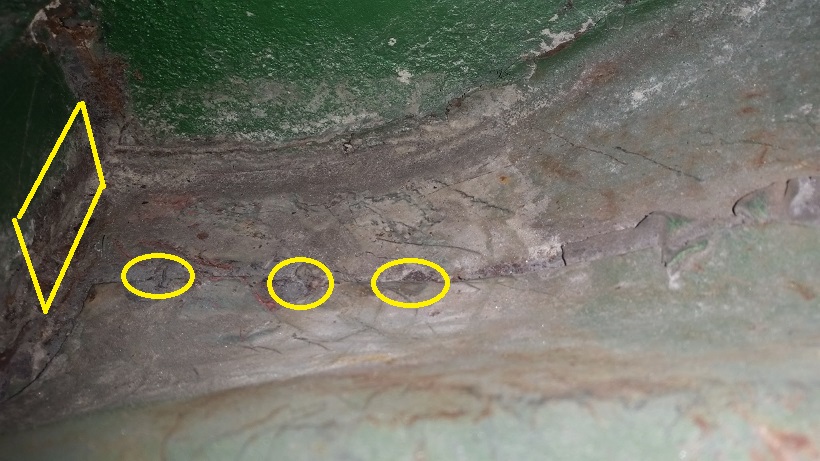 Here's what I see created the outer long rust issue. The flange/seam from the upper long to the wheel house has let go. (IMG:style_emoticons/default/barf.gif) Which allows moisture and or battery acid to slide down between the two layers. 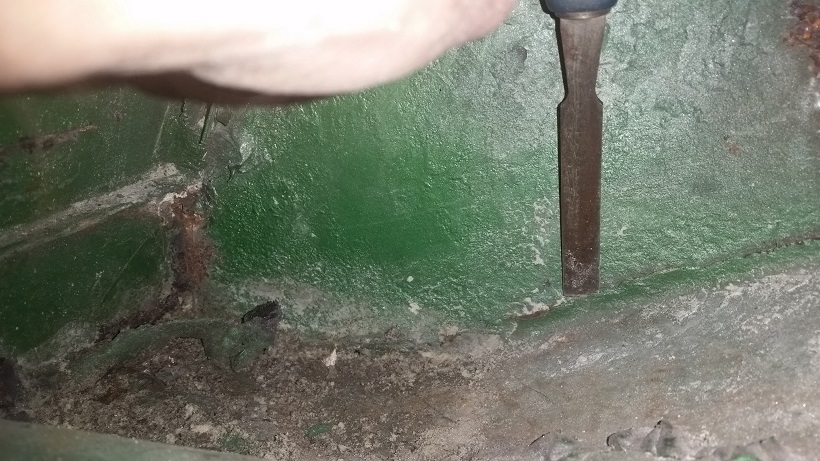 Tomorrow (Friday) I plan to carefully peel off the outer layer of the outside upper long to investigate further. I wish I could figure out a way to get my camera down in there to get a better look. |
|
|
|
| cary |
Feb 25 2016, 11:04 PM
Post
#9
|
|
Advanced Member Group: Members Posts: 3,900 Joined: 26-January 04 From: Sherwood Oregon Member No.: 1,608 Region Association: Pacific Northwest |
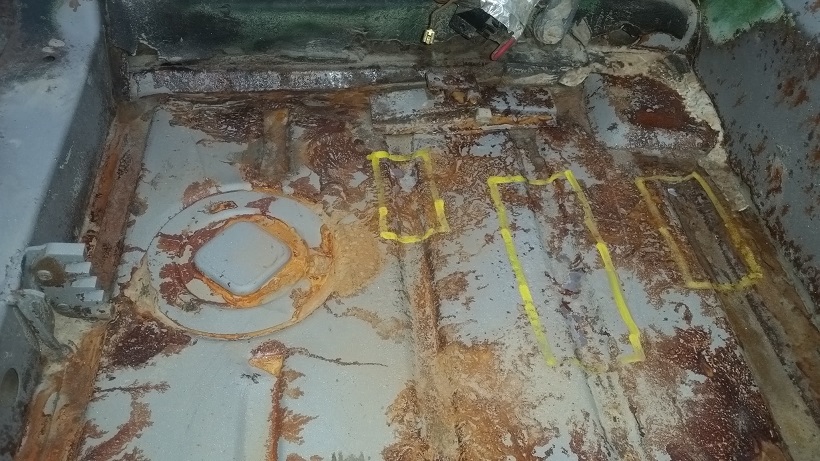
Mark will need to make the call on the floor pan. I think it could be patched. But to make it look sanitary I'd need to buy a seam roller and learn how to use it to create the troughs in the floor pan.
  |
|
|
|
| cary |
Feb 25 2016, 11:08 PM
Post
#10
|
|
Advanced Member Group: Members Posts: 3,900 Joined: 26-January 04 From: Sherwood Oregon Member No.: 1,608 Region Association: Pacific Northwest |
I forgot one thing on the original list.
Right inner lower firewall will need to replaced. It has a big hole in it. 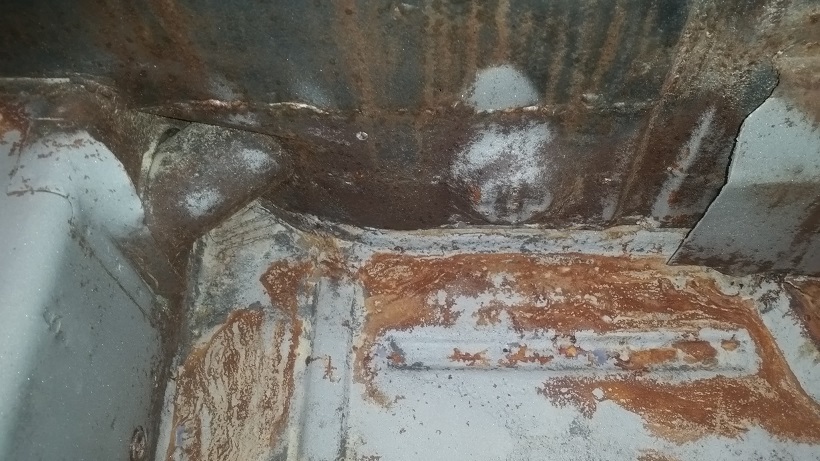 |
|
|
|
| cary |
Feb 25 2016, 11:33 PM
Post
#11
|
|
Advanced Member Group: Members Posts: 3,900 Joined: 26-January 04 From: Sherwood Oregon Member No.: 1,608 Region Association: Pacific Northwest |
Today the team was back together.
Super In Law went after the big dimple in the left rear corner next to the tail light. 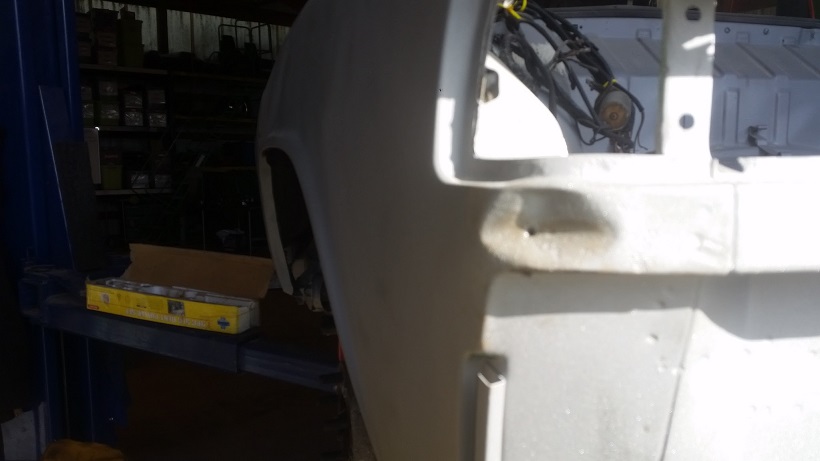 He spent quite a bit of time with the slide hammer to it get it pulled out. 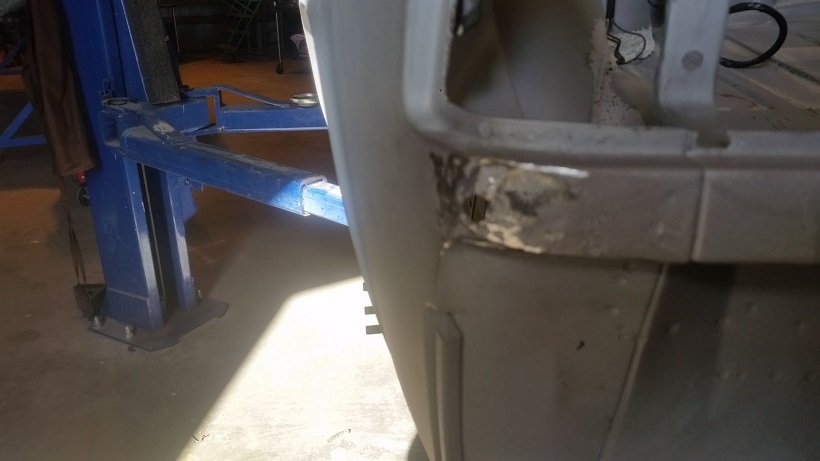 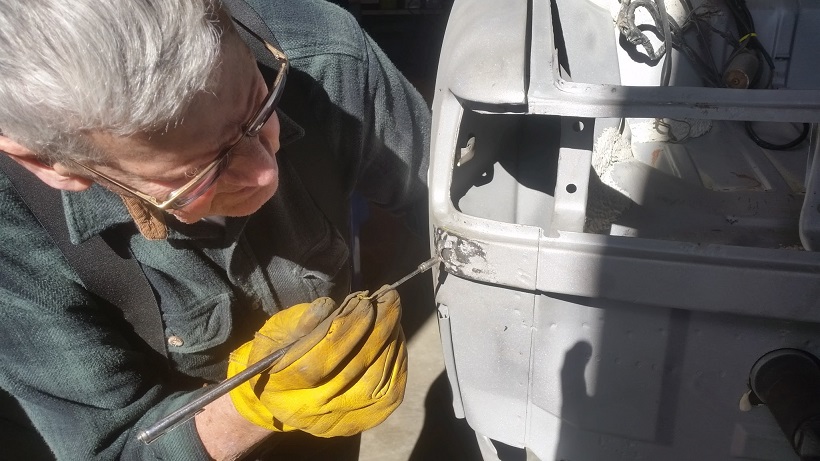 I used a formed plate to plug weld it. 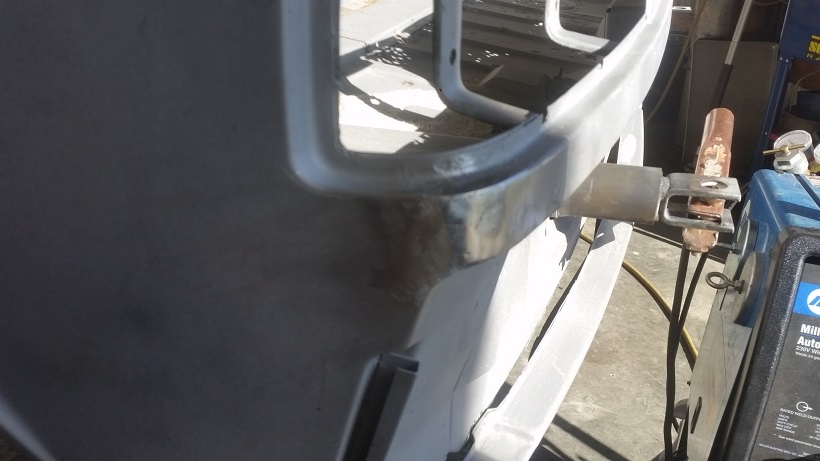 It will take a smidgen of All Metal to make it perfect. But I didn't want to over work it. Filler will be applied after the car gets epoxy primered.  |
|
|
|
| cary |
Feb 26 2016, 12:00 AM
Post
#12
|
|
Advanced Member Group: Members Posts: 3,900 Joined: 26-January 04 From: Sherwood Oregon Member No.: 1,608 Region Association: Pacific Northwest |
I start the day digging thru my stash looking for some engine seal channel. No such luck.
So me move over to the parts car. It's amazing how nice some of the sections are. Then some others ...........not so much. 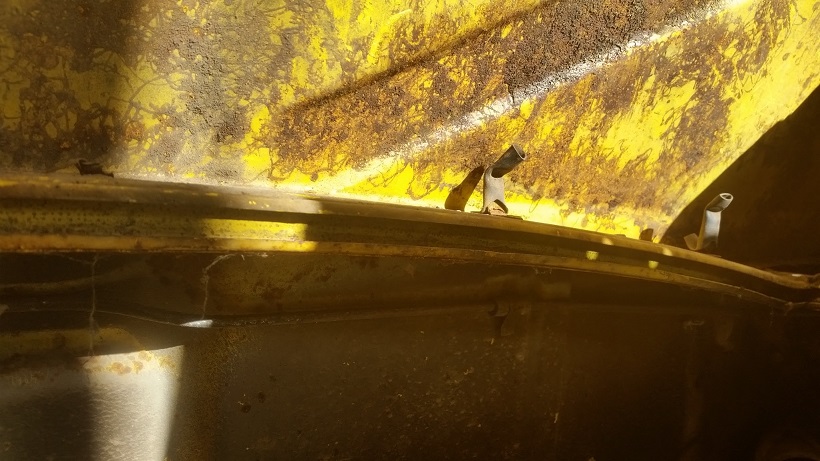 I'm using Rick's spot weld removal technique again. But this time I can drill all the way thru to make it easier. 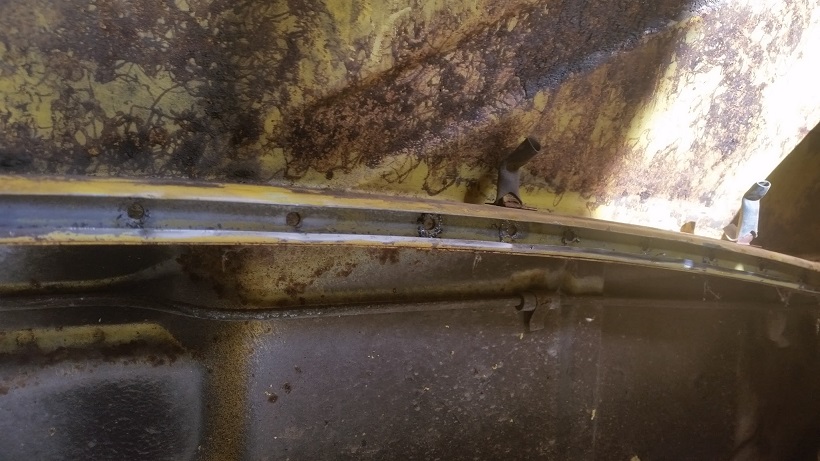 Popped it off with an old chisel. 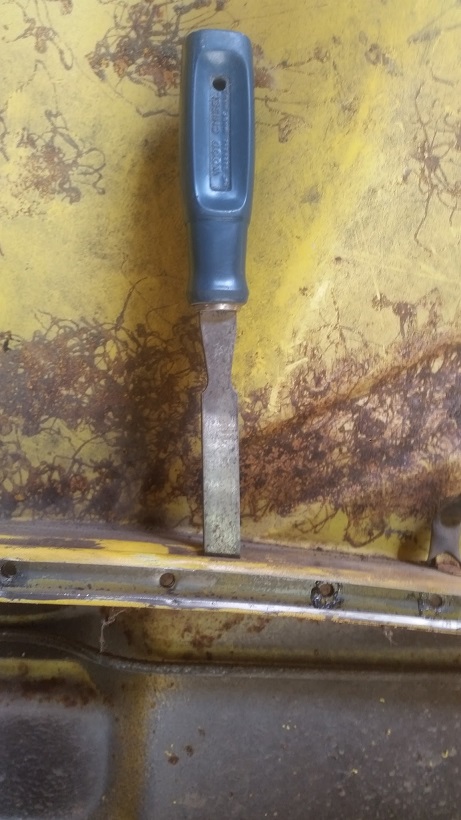 Ran the piece of channel thru the bead blaster. 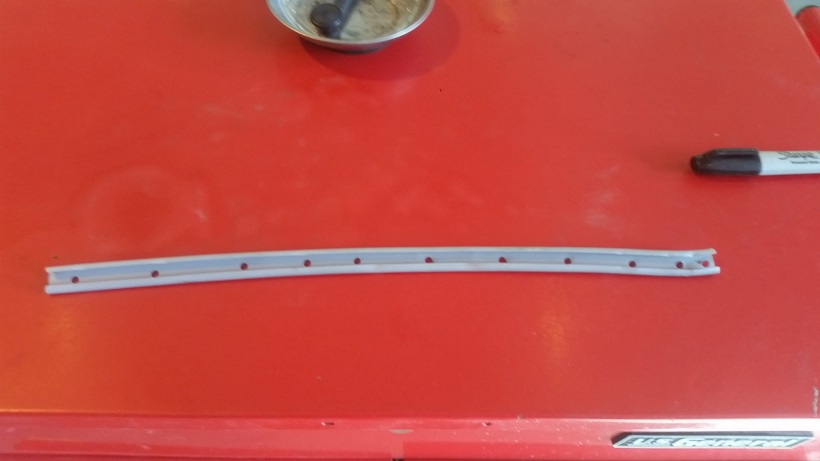 |
|
|
|
| cary |
Feb 26 2016, 12:19 AM
Post
#13
|
|
Advanced Member Group: Members Posts: 3,900 Joined: 26-January 04 From: Sherwood Oregon Member No.: 1,608 Region Association: Pacific Northwest |
Next I need to close up some of these holes on the engine side of the firewall.
 This hole was patched over from the inside. (IMG:style_emoticons/default/sad.gif) Not good. Because it is double walled I cut back all the rotten stuff. 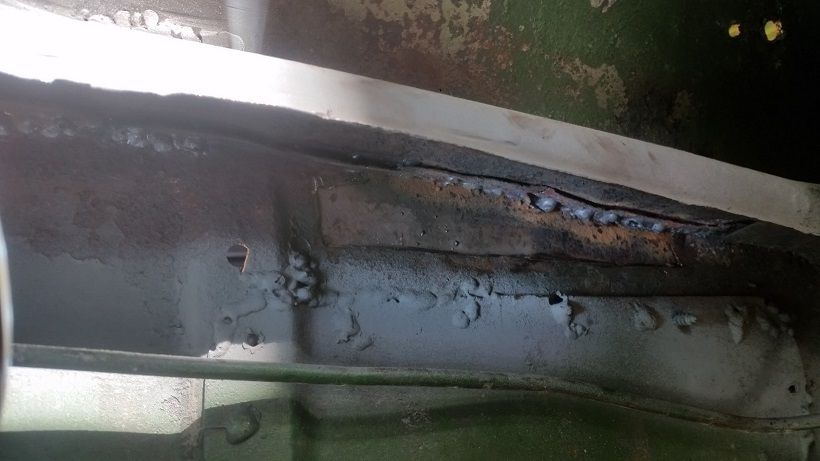 Welded the top seam of the other hillbilly patch also. 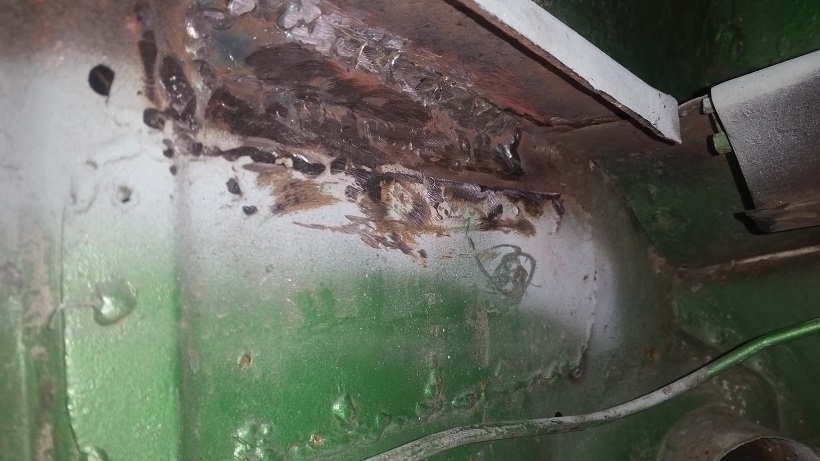 Installed the new piece of engine seal channel and gave her a coat of self etching primer.  Here's a shot of the inside. 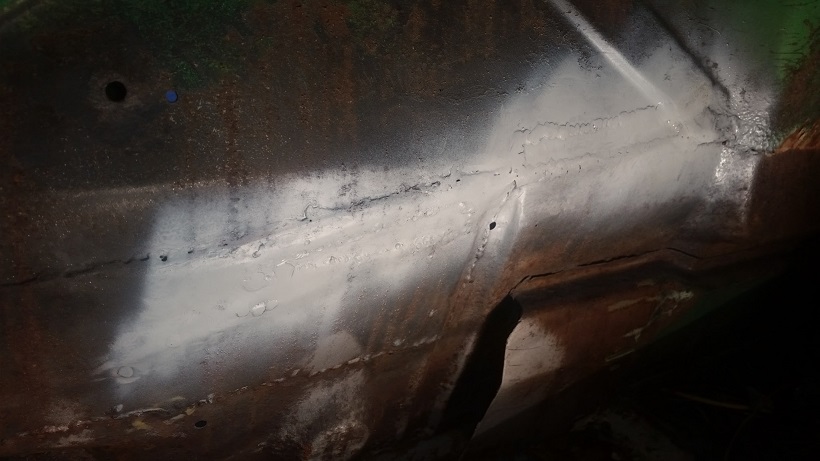 |
|
|
|
| raynekat |
Feb 26 2016, 04:46 AM
Post
#14
|
|
Advanced Member Group: Members Posts: 2,171 Joined: 30-December 14 From: Coeur d'Alene, Idaho Member No.: 18,263 Region Association: Pacific Northwest |
Dang Cary. You might just have to give up that grocery mgr idea, and start doing this for your day job.
I'll just load my 71 up on a trailer when I get back from Thailand and you can start digging into that one as well. (IMG:style_emoticons/default/beerchug.gif) I need your tools and motivation to self tackle my chassis issues. |
|
|
|
| cary |
Feb 26 2016, 11:57 PM
Post
#15
|
|
Advanced Member Group: Members Posts: 3,900 Joined: 26-January 04 From: Sherwood Oregon Member No.: 1,608 Region Association: Pacific Northwest |
We'll talk when you get back. I don't remember any big issues when I saw it.
This car of Mark's is really nice. I kind of wish I'd bought it when I had the chance. |
|
|
|
| raynekat |
Feb 27 2016, 12:26 AM
Post
#16
|
|
Advanced Member Group: Members Posts: 2,171 Joined: 30-December 14 From: Coeur d'Alene, Idaho Member No.: 18,263 Region Association: Pacific Northwest |
QUOTE(cary @ Feb 26 2016, 09:57 PM)  We'll talk when you get back. I don't remember any big issues when I saw it. This car of Mark's is really nice. I kind of wish I'd bought it when I had the chance. Rear panel with the tail light openings needs replacing (have replacment piece in hand), rear 1/3 of trunk floor that butts up to rear panel needs replacing, one of the rear trunk lid hinge supports needs replacing, inside I'll need at least both sides of the rear portion of the floor replaced, hell hole looks funny (prior repair), longs are good I think, lots of holes around the windshield base where water leaked under the windshield trim.... That's just getting started. The car has the usual stuff I'm afraid. Forge ahead my friend. Will catch up with you later this Spring when I'm back in town. |
|
|
|
| cary |
Feb 27 2016, 12:32 AM
Post
#17
|
|
Advanced Member Group: Members Posts: 3,900 Joined: 26-January 04 From: Sherwood Oregon Member No.: 1,608 Region Association: Pacific Northwest |
Short day. Had to drop off and pick up the A6 from Hillside Imports.
Decided to jump into removing the rear panel. This is the first 5 mph bumper that I've worked on. I had no idea that the rear trunk panel was different. The corners are different, they have a hump over the bumper mount. The bumper mount is tied into the transmission mount. But its still spot welded to the trunk floor pan. Here's a shot of the bottom side of my 73. 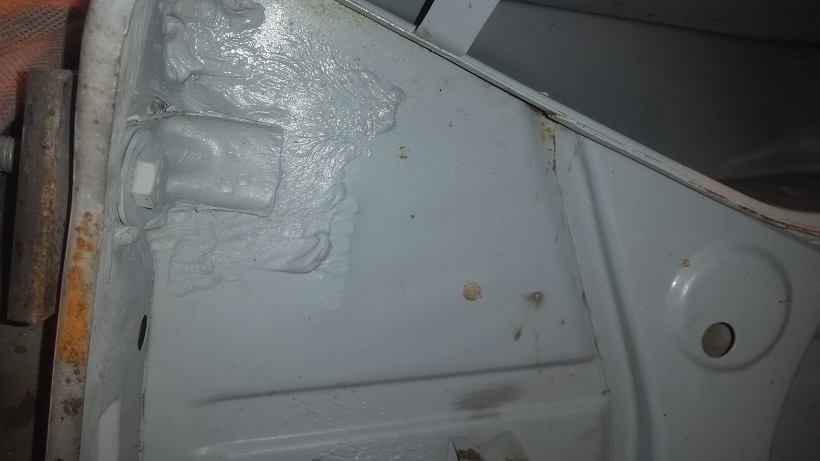 Here's a shot of the 75. 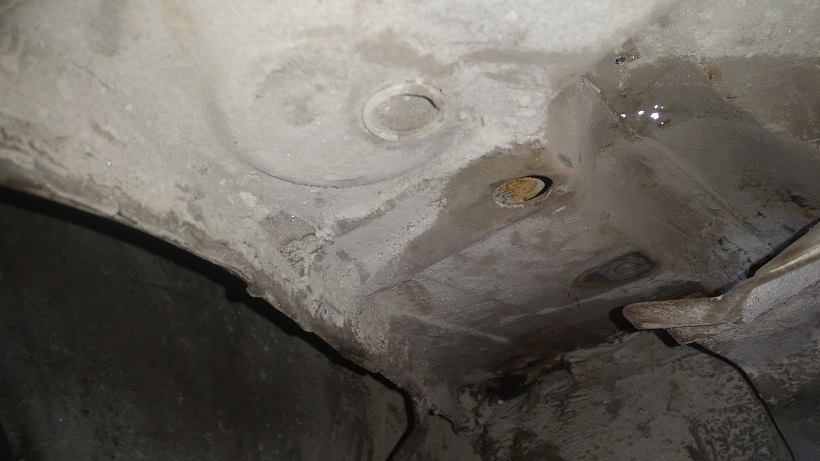 Step one was to figure out what I was going to replace on the trunk pan. Plan A is to remove up the transmission mount hump like must folks are doing. Sketched out the cut lines. Opened up some slots for the sawsall blade and went to work. 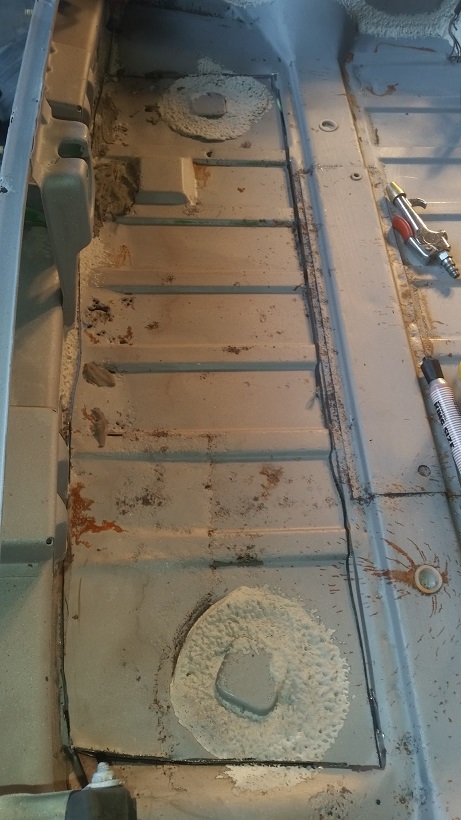 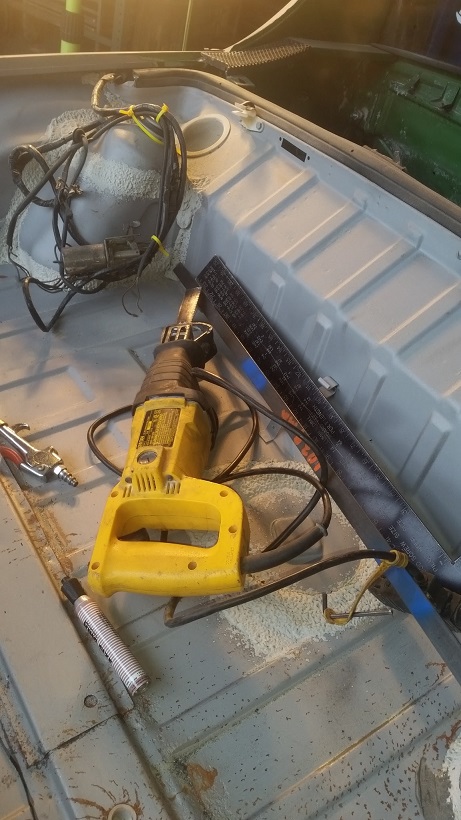 The pan comes out first. That will eliminate drilling out all spot welds across the middle of the rear panel. Both saving time and spot cutter bits. While I started this project, Super In Law set about tearing down one of the 901 tail shifter gear boxes sitting on the shelf. I going to let one of my AX buddies use it, and a starter to bench test a new engine he just finished up. 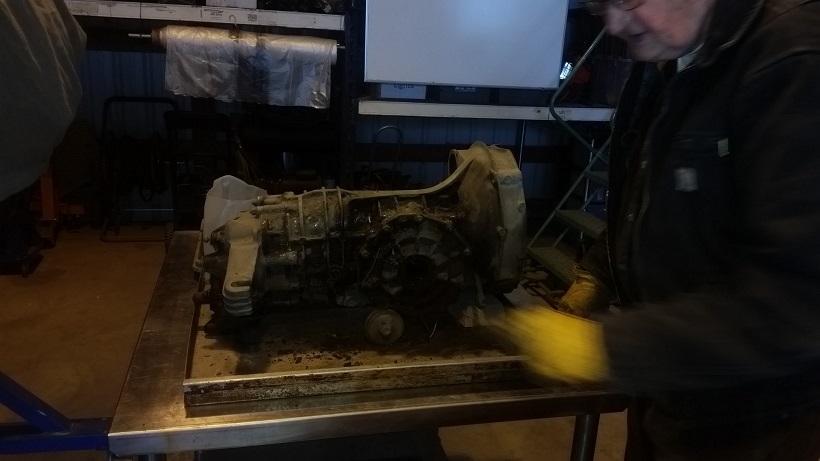 |
|
|
|
| cary |
Feb 27 2016, 12:49 AM
Post
#18
|
|
Advanced Member Group: Members Posts: 3,900 Joined: 26-January 04 From: Sherwood Oregon Member No.: 1,608 Region Association: Pacific Northwest |
BEFORE :
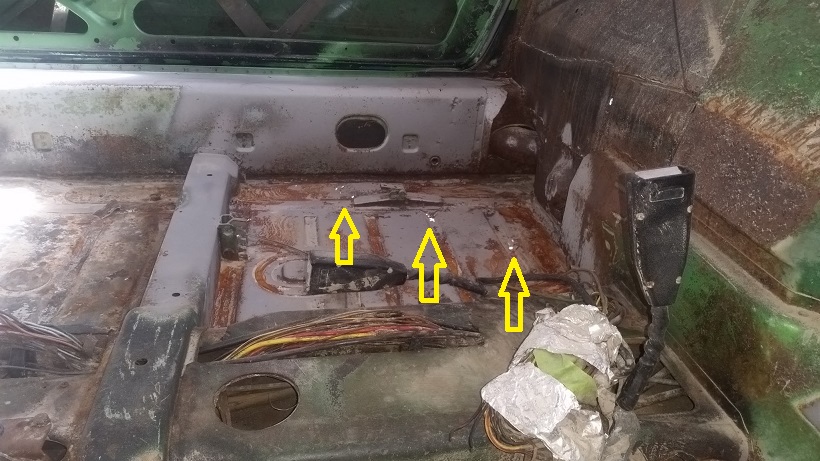
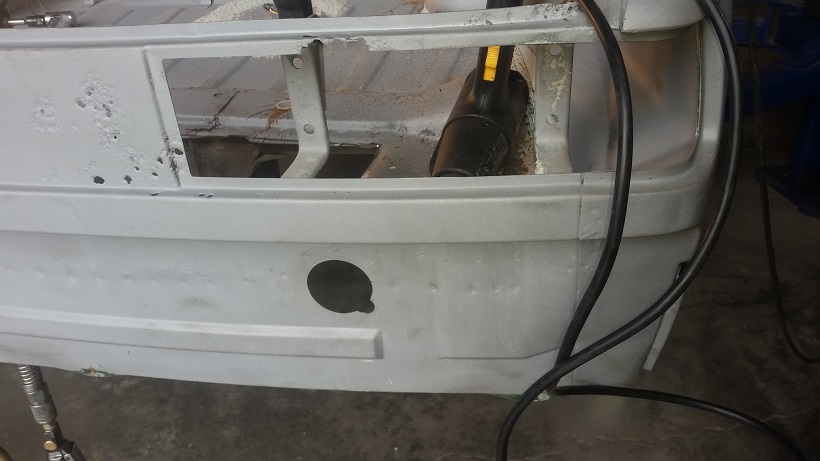 AFTER : 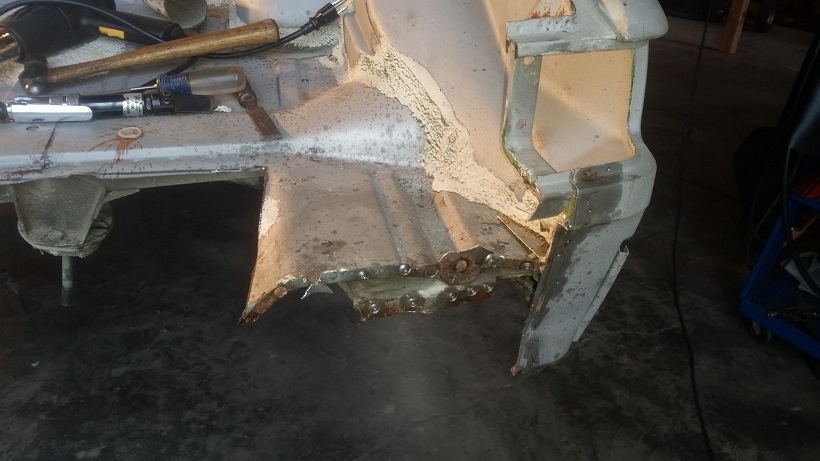 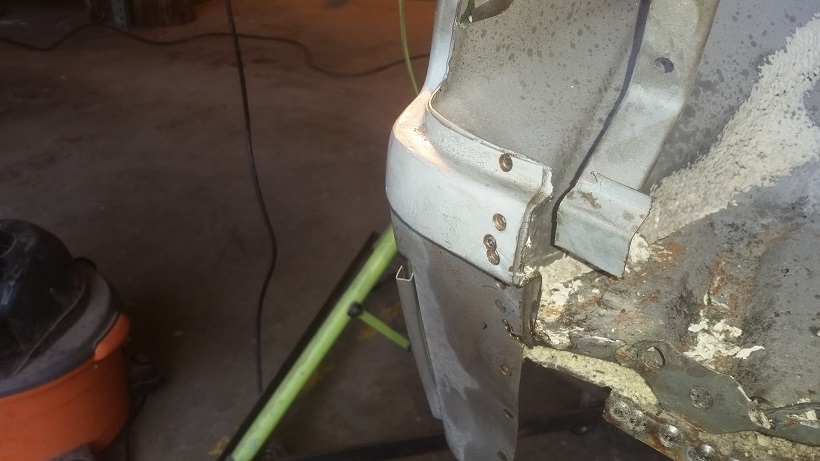 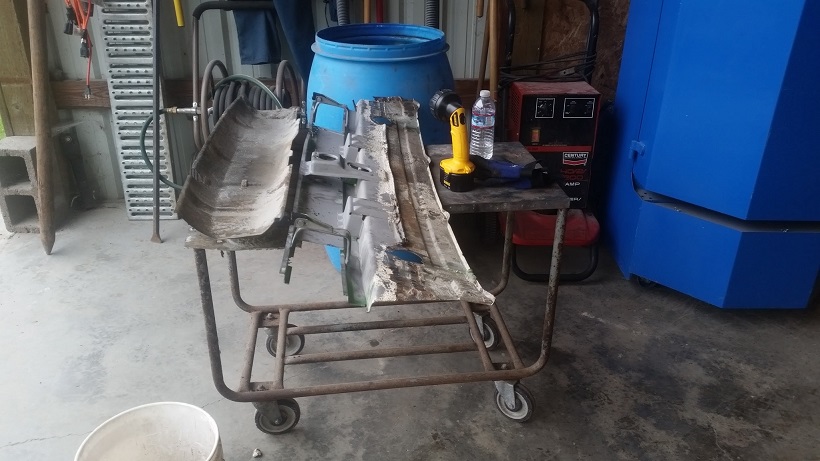 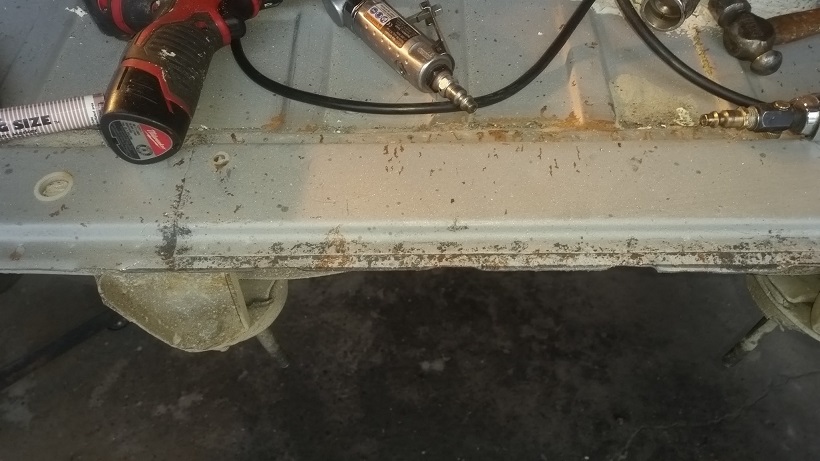 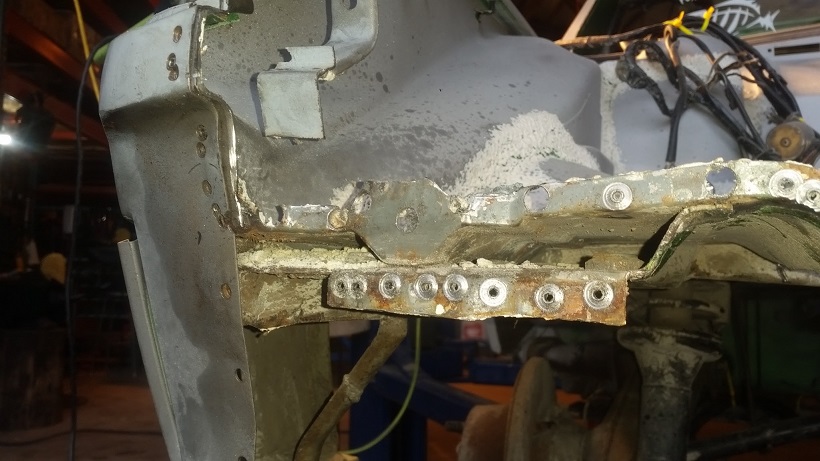 Here's where I ended the day. For one I didn't leave myself much of a tail to pull the remaining rear panel portion out with. (IMG:style_emoticons/default/headbang.gif) Two, something is hanging up where I have the two yellow arrows. It will take some more detailed seam sealer removal on the back side for starters. Then take a closer look for another spot weld. 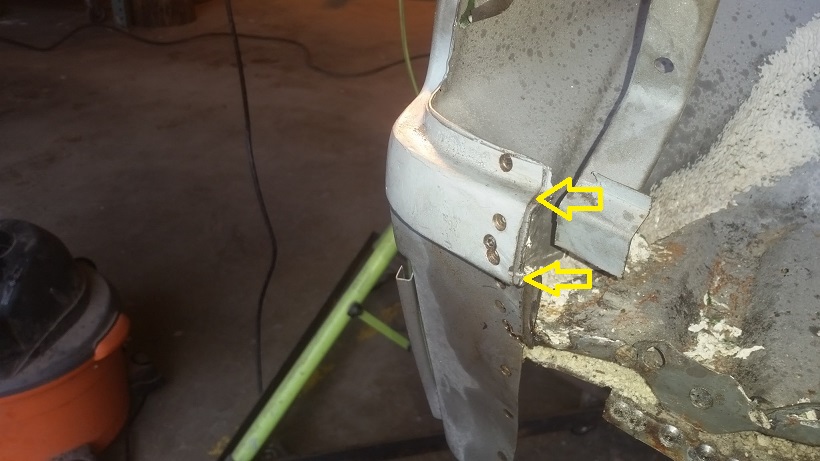 Heading home. Saturday AM is an autocross tech session. Followed by a lunch meeting. Then an afternoon meeting with Mark. 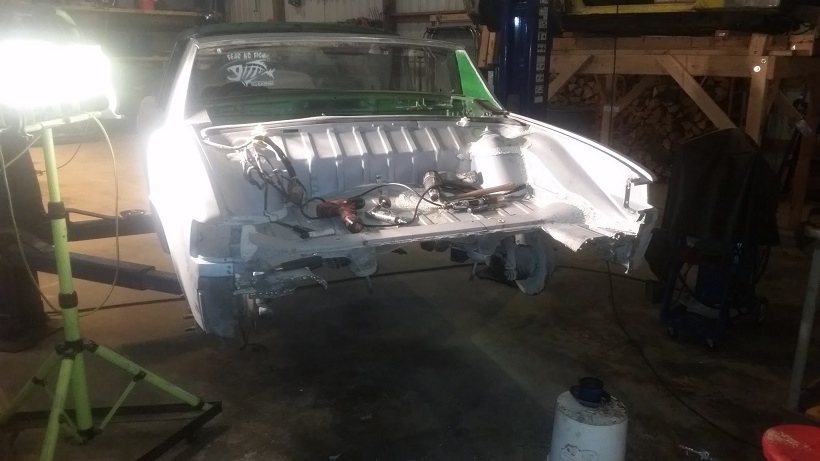 |
|
|
|
| cary |
Feb 28 2016, 10:47 AM
Post
#19
|
|
Advanced Member Group: Members Posts: 3,900 Joined: 26-January 04 From: Sherwood Oregon Member No.: 1,608 Region Association: Pacific Northwest |
Snuck in a hour before Mark showed up on Saturday. I continued with the trunk floor dissection. Went after that piece sandwiched in between the qtr. panel corner. Started on the left side. After carefully prying around with screwdrivers and chisels I found the mystery spot weld. It was actually on the rear panel itself. Which was spot welded to the inner piece. Top yellow arrow calls it out. Sorry for the blurry picture. It couldn't be seen from the outside. The back side is pretty tough duty. It's plastered with spray on seam sealer. I'll do some more cleaning back there to prep for new spray on seam sealer after epoxy is sprayed on. I'll add a shot of the back if I find anything useful.
I drilled thru the outside and the remaining rear panel piece to get it disconnected. The bottom arrow was a smidgen of one of the other spot welds left on the lip. 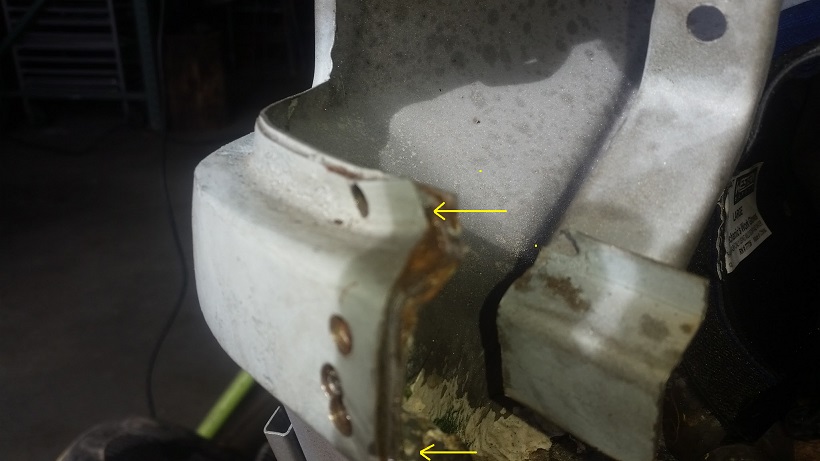 Here's a couple shots of the other spot weld locations that needed to be drilled out. 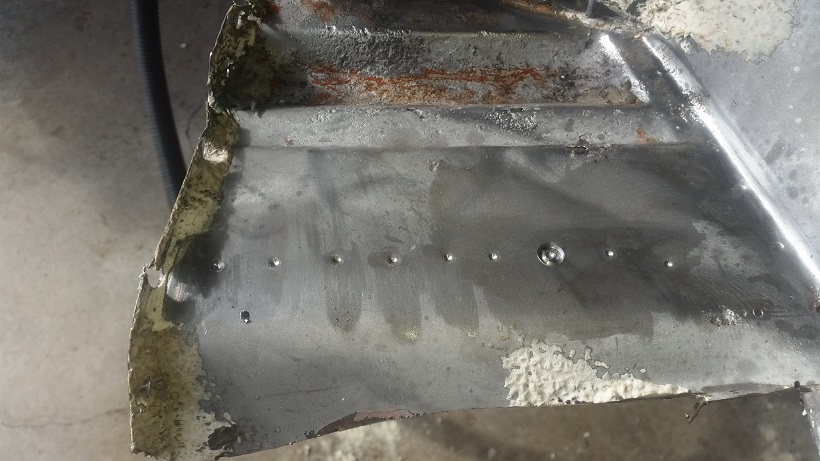 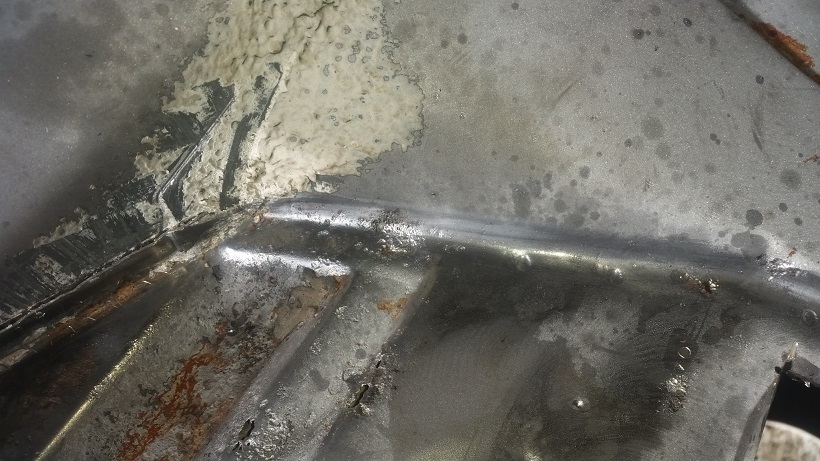 The next trouble area was caused by the rust degradation in the valleys pressed into the floor pan. By drilling out the higher area first, I could lift it up it so it would show me the area that was still attached. Once I got the area thinned down I popped it off with the chisel. 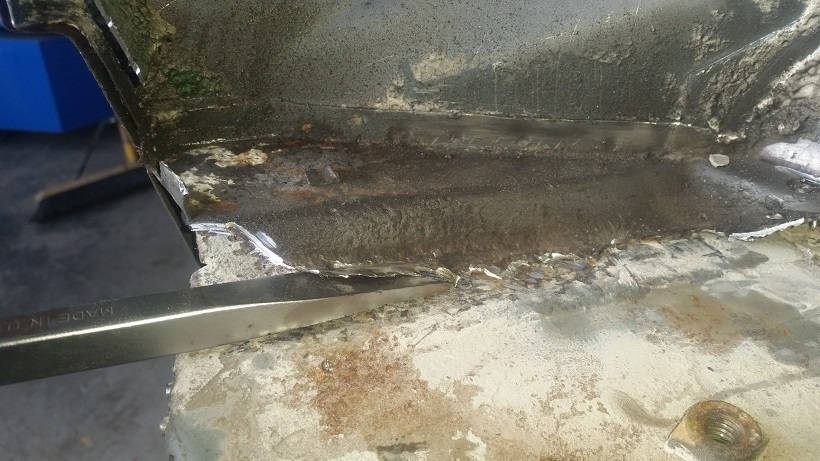 Just got it finished up when Mark and Mike (Warpig) showed up. 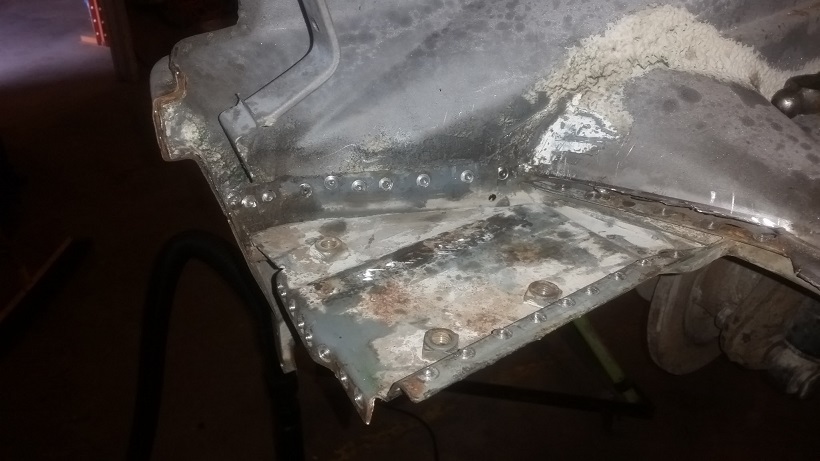 |
|
|
|
| cary |
Feb 28 2016, 11:00 AM
Post
#20
|
|
Advanced Member Group: Members Posts: 3,900 Joined: 26-January 04 From: Sherwood Oregon Member No.: 1,608 Region Association: Pacific Northwest |
QUOTE(raynekat @ Feb 26 2016, 02:46 AM) Dang Cary. You might just have to give up that grocery mgr idea, and start doing this for your day job. I'll just load my 71 up on a trailer when I get back from Thailand and you can start digging into that one as well. (IMG:style_emoticons/default/beerchug.gif) I need your tools and motivation to self tackle my chassis issues. This is the skill level I'd like to attain. Jon has set the bar pretty high. Shot from one of The Metal Surgeons projects 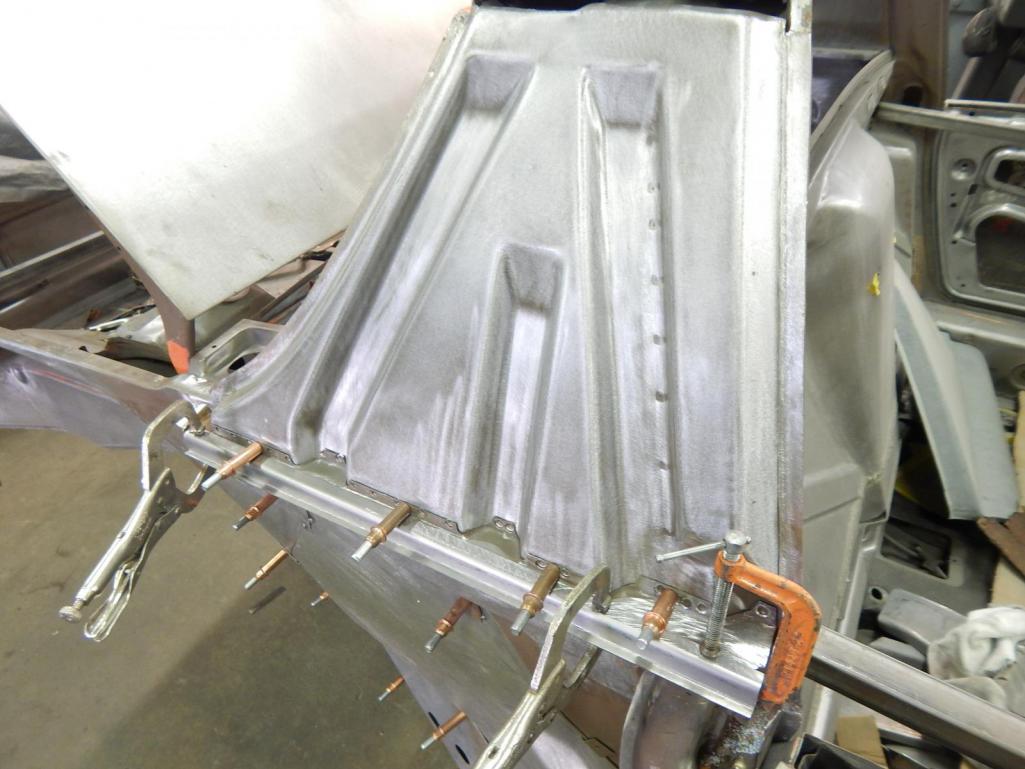 |
|
|
|
|
1 User(s) are reading this topic (1 Guests and 0 Anonymous Users)
0 Members:

|
Lo-Fi Version | Time is now: 24th June 2026 - 01:50 AM |
Invision Power Board
v9.1.4 © 2026 IPS, Inc.