|
|
|
Porsche, and the Porsche crest are registered trademarks of Dr. Ing. h.c. F. Porsche AG.
This site is not affiliated with Porsche in any way. Its only purpose is to provide an online forum for car enthusiasts. All other trademarks are property of their respective owners. |
|
|

  |

| JRust |
 Feb 28 2016, 11:17 AM Feb 28 2016, 11:17 AM
Post
#21
|
|
914 Guru  Group: Members Posts: 6,317 Joined: 10-January 03 From: Albany Oregon Member No.: 129 Region Association: Pacific Northwest |
Your moving right along Cary! You don't waste much time getting that bad metal out. Great to see that car getting fixed right. Watching this one closely (IMG:style_emoticons/default/smile.gif)
|
   |

 
|
| Mikey914 |
Feb 28 2016, 11:19 AM
Post
#22
|
|
The rubber man Group: Members Posts: 12,782 Joined: 27-December 04 From: Hillsboro, OR Member No.: 3,348 Region Association: None |
Yes, He's making great progress. I have to get some sheet metal from design restoration but looks like we are underway.
Mark |
|
|
|
| cary |
Mar 1 2016, 07:35 AM
Post
#23
|
|
Advanced Member Group: Members Posts: 3,900 Joined: 26-January 04 From: Sherwood Oregon Member No.: 1,608 Region Association: Pacific Northwest |
QUOTE(JRust @ Feb 28 2016, 09:17 AM)  Your moving right along Cary! You don't waste much time getting that bad metal out. Great to see that car getting fixed right. Watching this one closely (IMG:style_emoticons/default/smile.gif) Woulda, Coulda, Shoulda .......... Oh well |
|
|
|
| cary |
Mar 1 2016, 07:48 AM
Post
#24
|
|
Advanced Member Group: Members Posts: 3,900 Joined: 26-January 04 From: Sherwood Oregon Member No.: 1,608 Region Association: Pacific Northwest |
Back to work ...............
Super In Law got the extra tail shifter all broke down. Guts are going into a tote. Case will be cut down for an engine test stand at a later date. 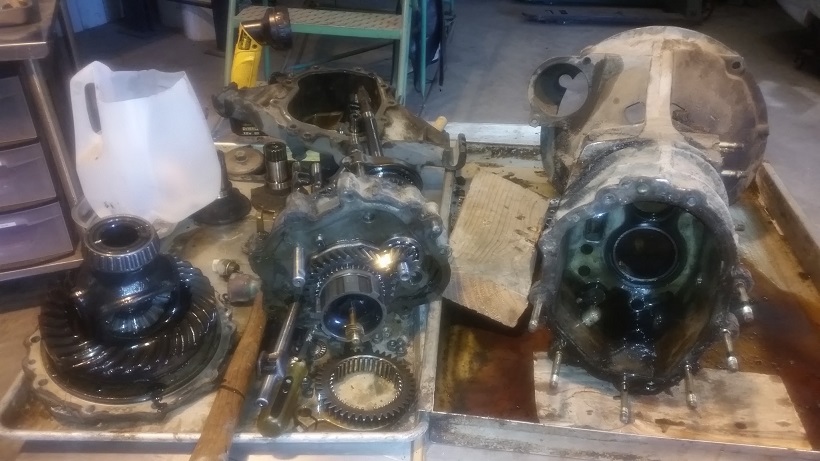 Thems are some shiny parts.............. He'll move on to pulling the heat exchangers off Mark's engine. Mark, it looks like the 75-76 used the same heat exchangers on both 1.8 and the 2.0. Triangle flange and gasket. http://www.pelicanparts.com/cgi-bin/smart/...bypass%2520pipe |
|
|
|
| cary |
Mar 1 2016, 07:58 AM
Post
#25
|
|
Advanced Member Group: Members Posts: 3,900 Joined: 26-January 04 From: Sherwood Oregon Member No.: 1,608 Region Association: Pacific Northwest |
After Mark's and Mike's visit we're going to remove the battery tray so I can repair the wheel house flange. I think the support will get tore up coming out so they'll be replaced. Mark has another tray and support that I'll use.
Mark wants to change out the fuel lines. He'll get those coming There will be a little bit of work on the front trunk rails. I'll run over to Mike's (Warpig) house and cut the rear panel out of his parts car. Probably on Friday, Mike's off. |
|
|
|
| cary |
Mar 1 2016, 08:34 AM
Post
#26
|
|
Advanced Member Group: Members Posts: 3,900 Joined: 26-January 04 From: Sherwood Oregon Member No.: 1,608 Region Association: Pacific Northwest |
Now on to the task at hand ............ continuing with the rear trunk removal.
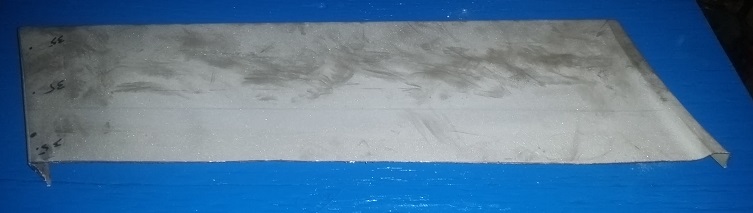
I start the day with removing the rear trunk reinforcement. http://www.restoration-design.com/store/product/PP335A I was thinking we'd be able to reuse that part. Look at how nice and shiny it is on the topside. 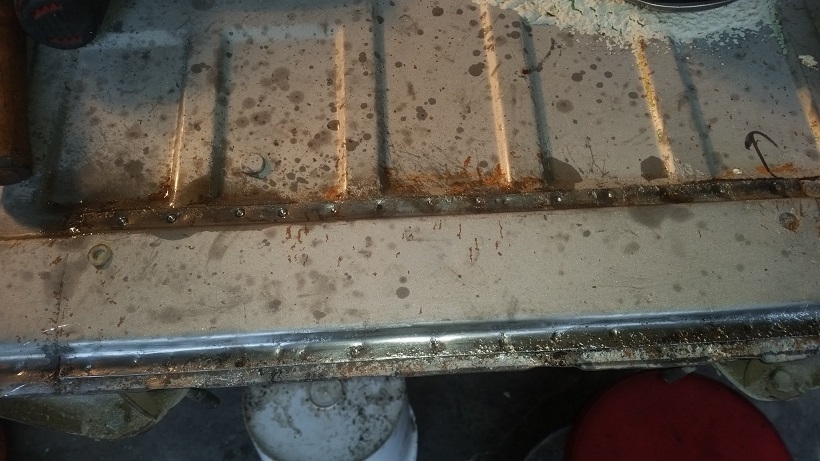  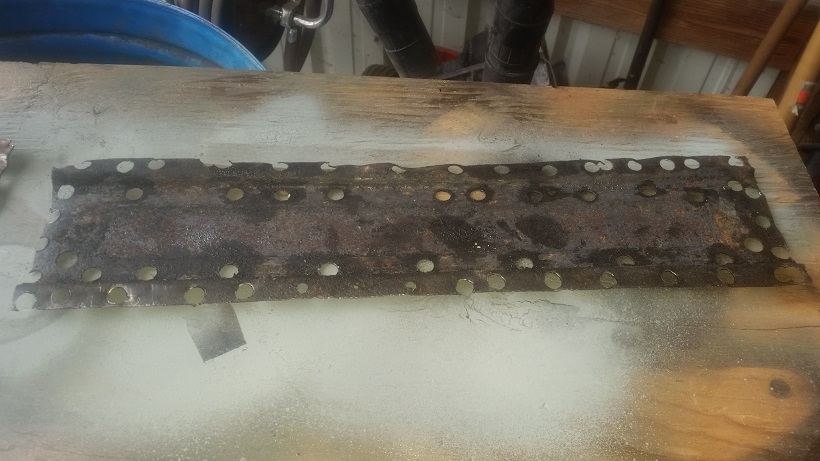 After removal. Not So Much ............... for $25 it's not worth the risk. Even with OSPHO and POR15, not worth the chance. After removing that part I decided that we'll move to plan B and replace the entire trunk piece. Lesson Learned : Remove plate 1st to do your assessment. No time lost, because of the 75-76 bumper support I'd remove it the same way, in pieces. Removing the remaining material off the back of the transmission support was pretty simple. I once again rolled it like a tin can. What I did learn. The floor pan is only spot welded in a couple spots UNDER the reinforcement. Then the top spot welds go thru all three pieces. So you just roll the material until you hit the next spot weld. Then give the already drilled out spot weld a just a little and roll on to the next one. 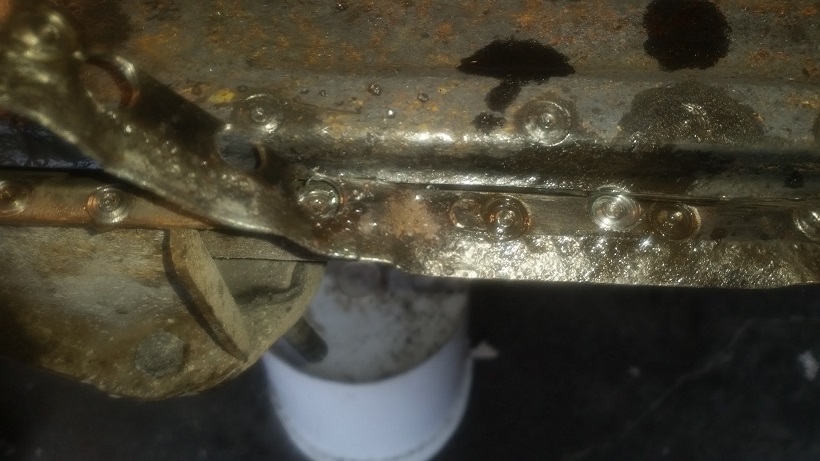 Tomorrow (today) I'll finish the right bumper support area. Probably no new pictures unless something exciting happens. I'll not cut out the remaining portion over the transmission support until I have the new part in my hand. Rob (Beatnavy), I'm still on the same 3/8 Rotacut spot weld cutter head. (IMG:style_emoticons/default/smile.gif) Using a lot of cutting oil. Which is making a mess, but cleans right up with House of Color Wipe Out wax and grease remover. |
|
|
|
| cary |
Mar 1 2016, 08:48 AM
Post
#27
|
|
Advanced Member Group: Members Posts: 3,900 Joined: 26-January 04 From: Sherwood Oregon Member No.: 1,608 Region Association: Pacific Northwest |
Now on to those pesky qtr.panel / rear panel corner pieces. Don't know exactly how I'll install/replace the rear panel to get the best fit & finish so I'll be careful with the corners.
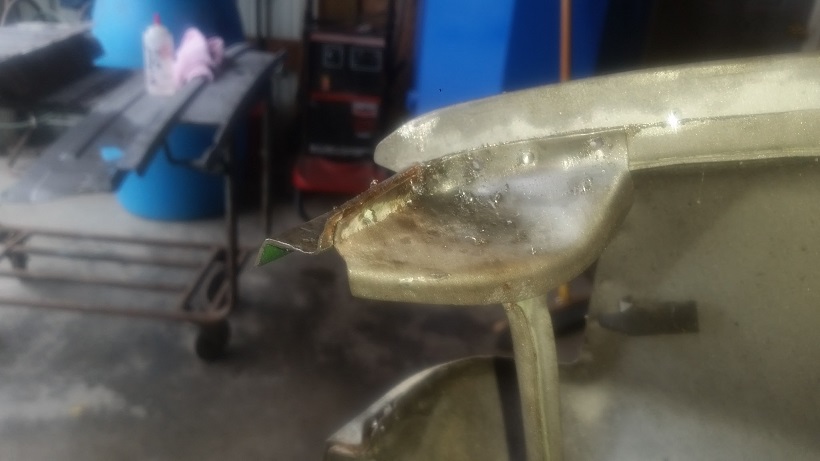 Drilled thru the spot welds with a 5/64 bit. Maybe 3/16 would have been better. Split the seam using the small thin wood chisel. 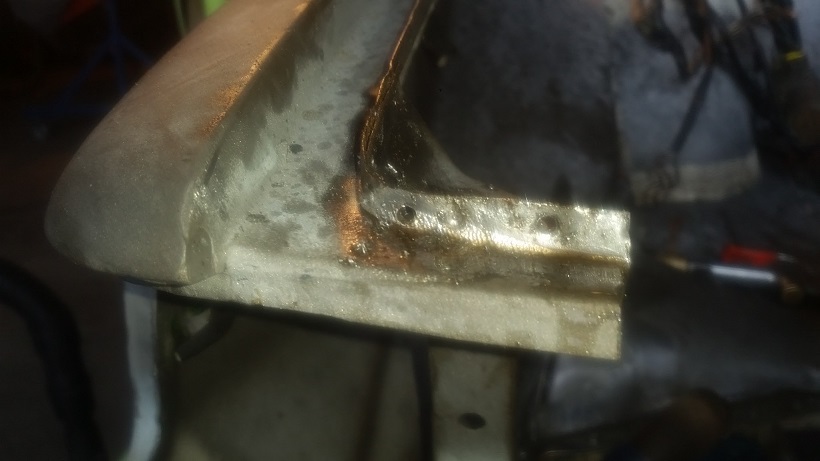 After the spot welds were drilled out I needed to remove the tacks in the corner. Ground off the top one, which you can see. Drilled a hole thru the bottom one, which you'd see looking from the bottom. It attaches the corner to the brace. 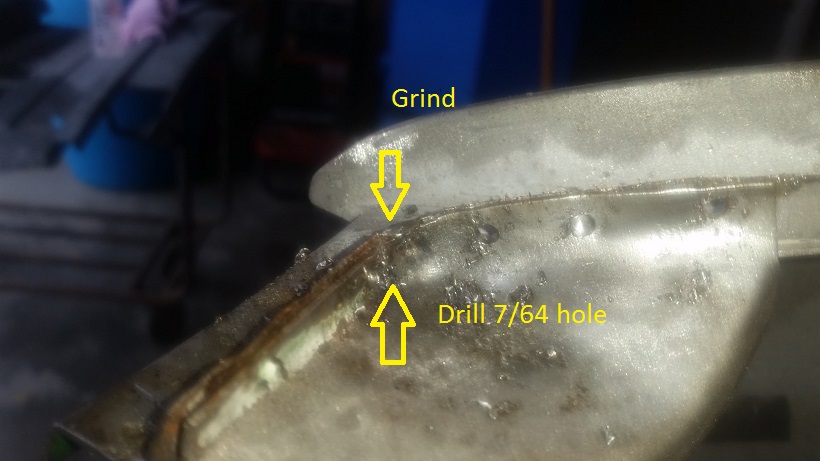 All done ............. 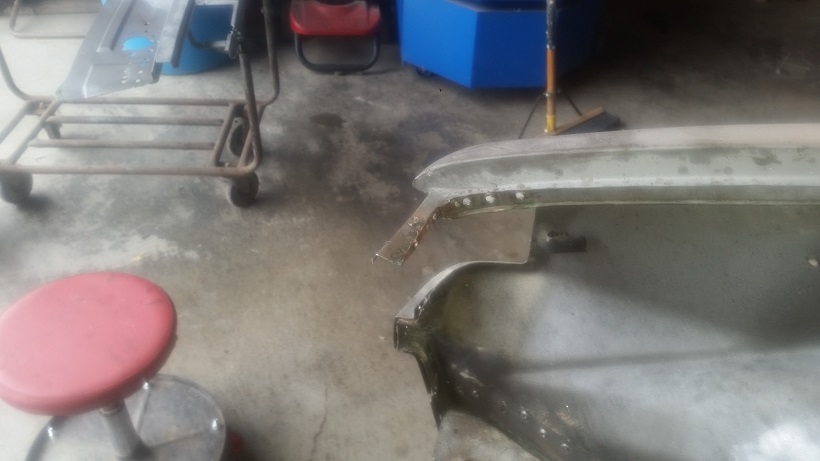 |
|
|
|
| 76-914 |
Mar 1 2016, 09:01 AM
Post
#28
|
|
Repeat Offender & Resident Subaru Antagonist Group: Members Posts: 13,904 Joined: 23-January 09 From: Temecula, CA Member No.: 9,964 Region Association: Southern California |
You are having entirely too much fun. (IMG:style_emoticons/default/beerchug.gif)
|
|
|
|
| cary |
Mar 1 2016, 09:08 AM
Post
#29
|
|
Advanced Member Group: Members Posts: 3,900 Joined: 26-January 04 From: Sherwood Oregon Member No.: 1,608 Region Association: Pacific Northwest |
Next, removing the seat hardware from the floor pan.
I start with the seat reinforcements on the bottom. I'm going to cut out the hinges with the cutting wheel so I can work on them in a vice. 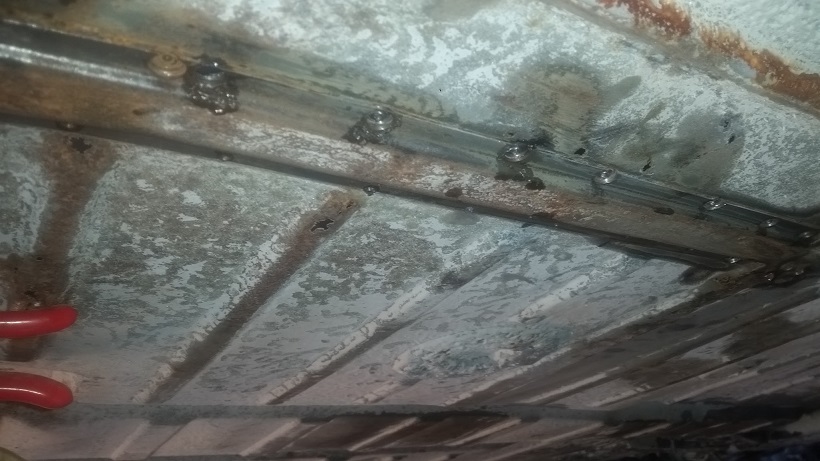 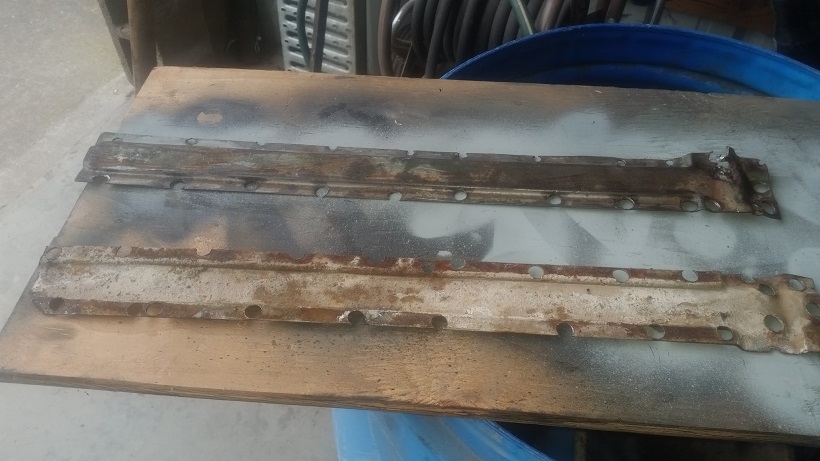 After a run thru the blaster. I'll refill the holes and repunch smaller ones for the reinstall. 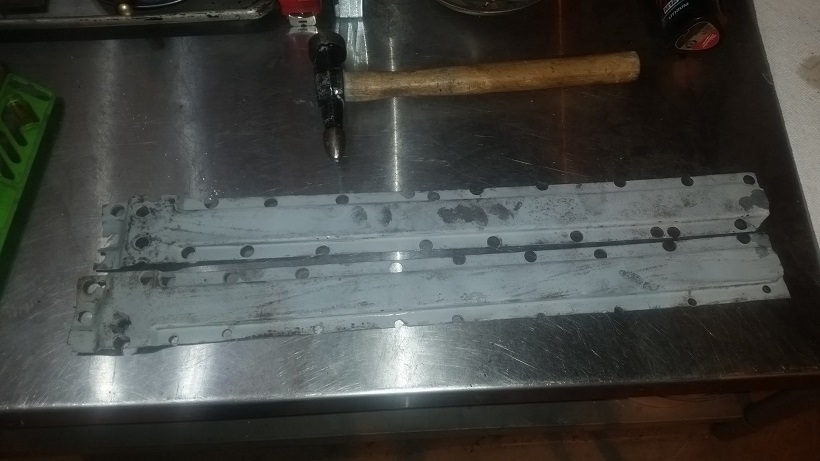 Out came the seat brackets and hinges .............. 4 1/2" cutting wheel from the top. 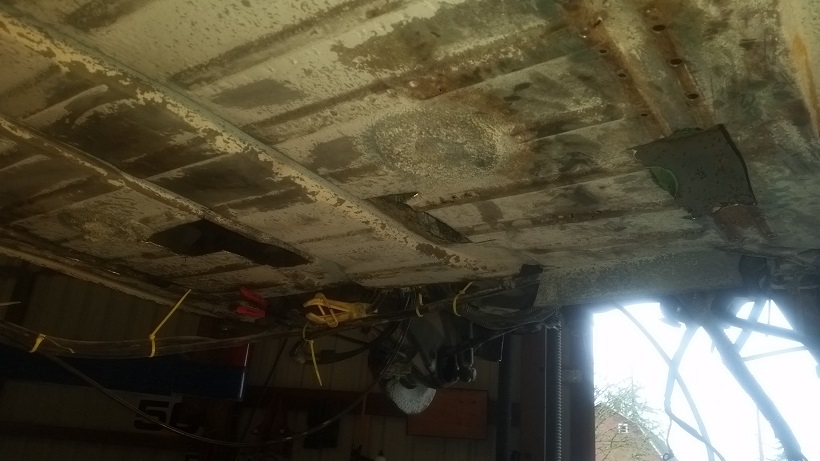 Much easier working on them in the vise. 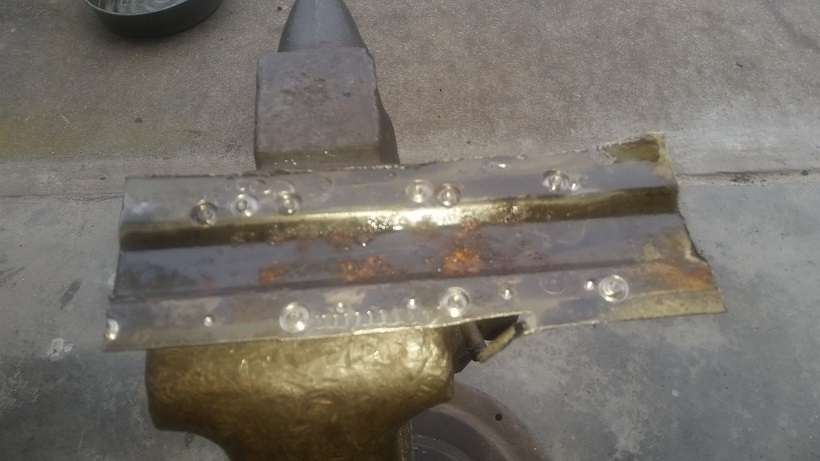 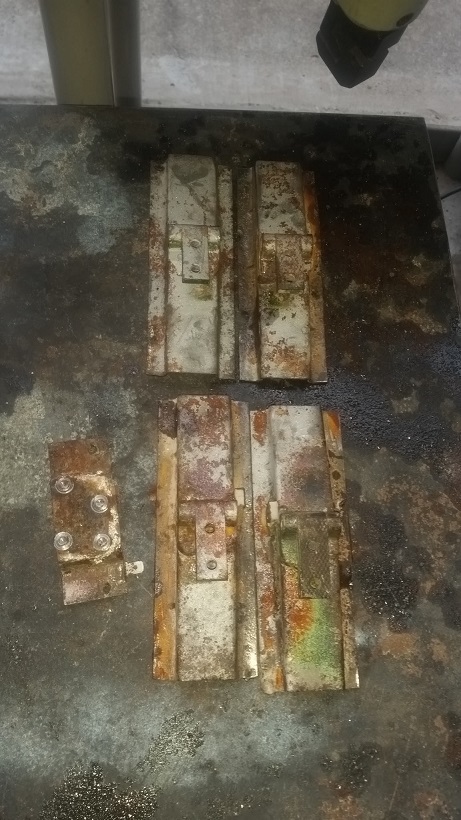 After a trip thru the blaster. Sitting over night with an application of OSPHO. One hinge needs a couple new welds. 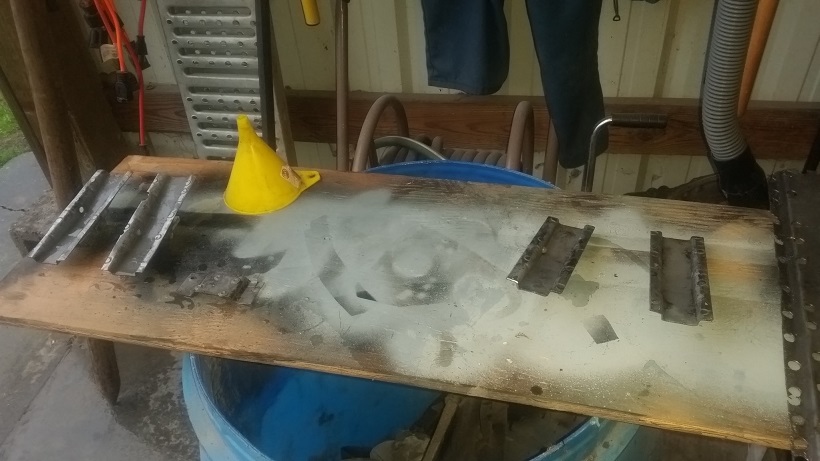 Removed the original trunk cut out from the heat shield. Spot welds were a little tough to find with all the metal degradation. 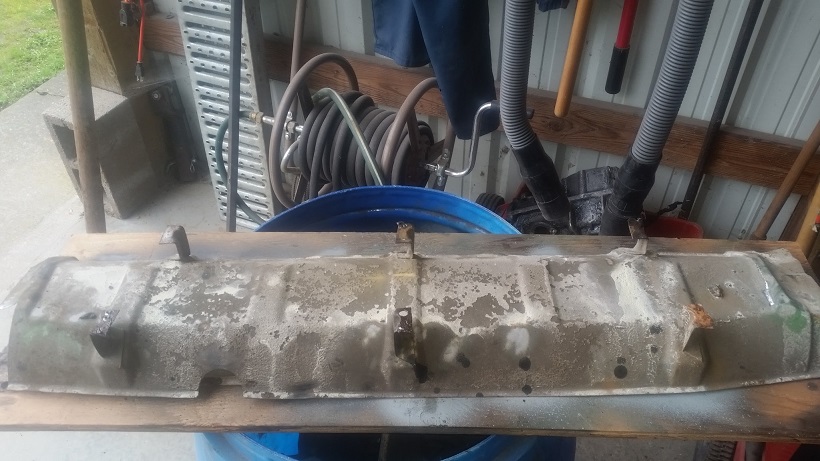 Reference Photo : Location on ground under right seat. 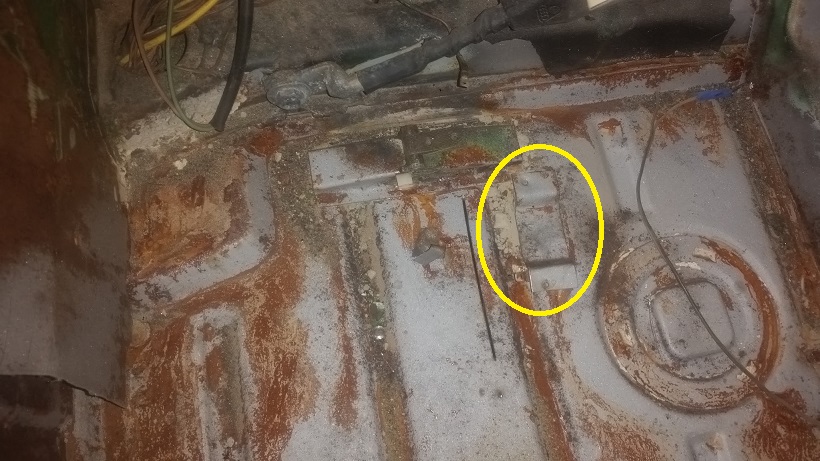 |
|
|
|
| cary |
Mar 1 2016, 09:00 PM
Post
#30
|
|
Advanced Member Group: Members Posts: 3,900 Joined: 26-January 04 From: Sherwood Oregon Member No.: 1,608 Region Association: Pacific Northwest |
Tuesday 3/1/16
Forgot to remove the e-brake cable guide. 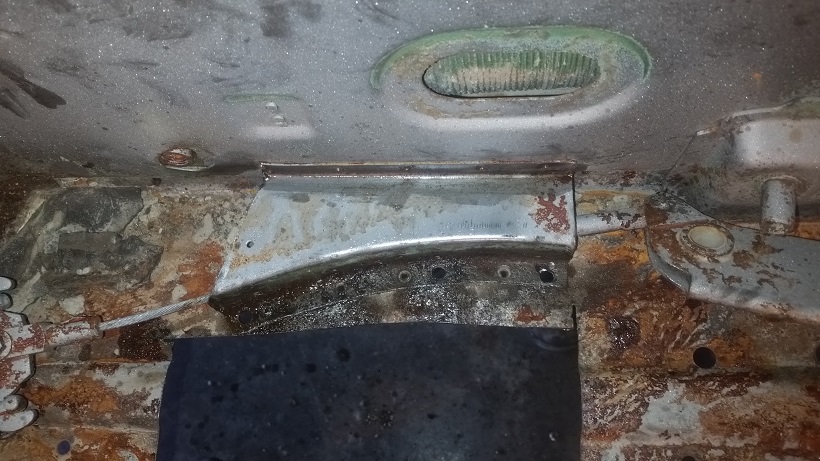 Super In Law (Jack) worked on filling the spot weld cutter holes in the seat reinforcements. 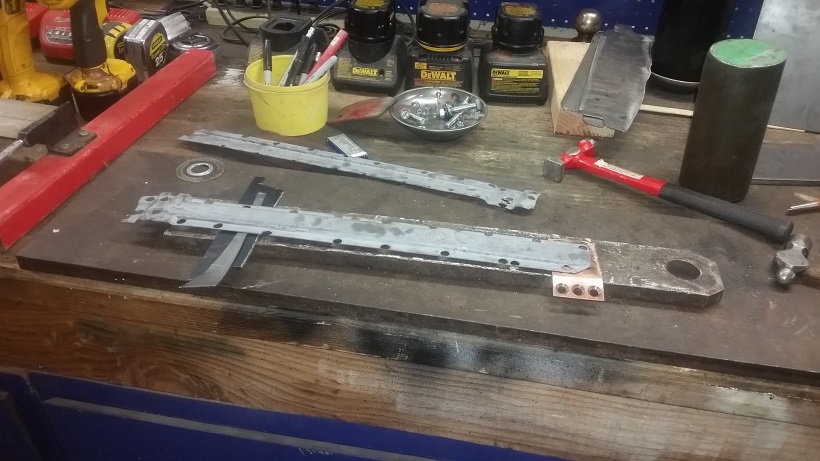 Back end all tidied up and waiting for parts. 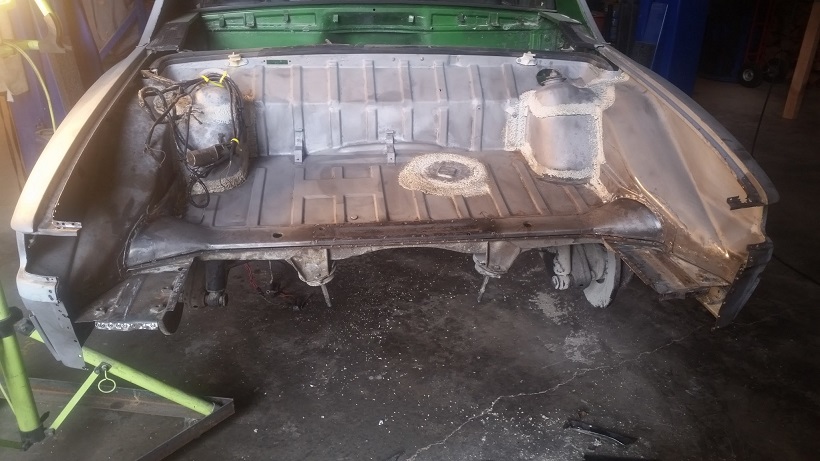 Next on to fixing the right jack post. Looks like it's a virgin too, top is still welded. 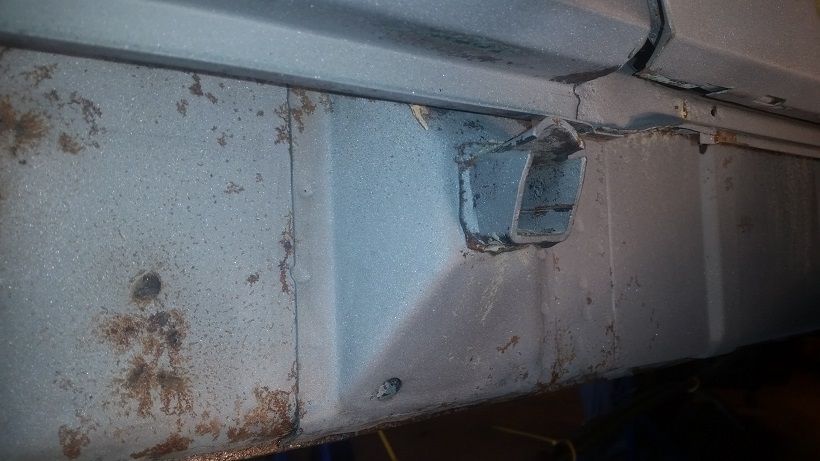 |
|
|
|
| cary |
Mar 1 2016, 09:14 PM
Post
#31
|
|
Advanced Member Group: Members Posts: 3,900 Joined: 26-January 04 From: Sherwood Oregon Member No.: 1,608 Region Association: Pacific Northwest |
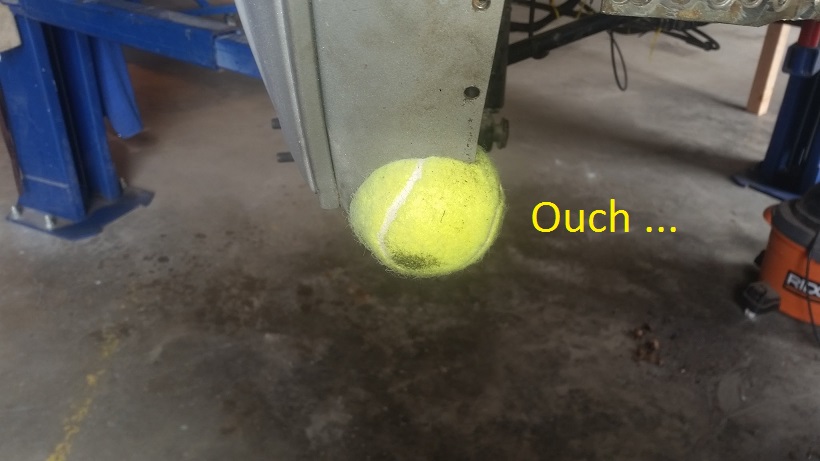
QUOTE(76-914 @ Mar 1 2016, 07:01 AM) Fun just came to a screeching halt ............... (IMG:style_emoticons/default/barf.gif) 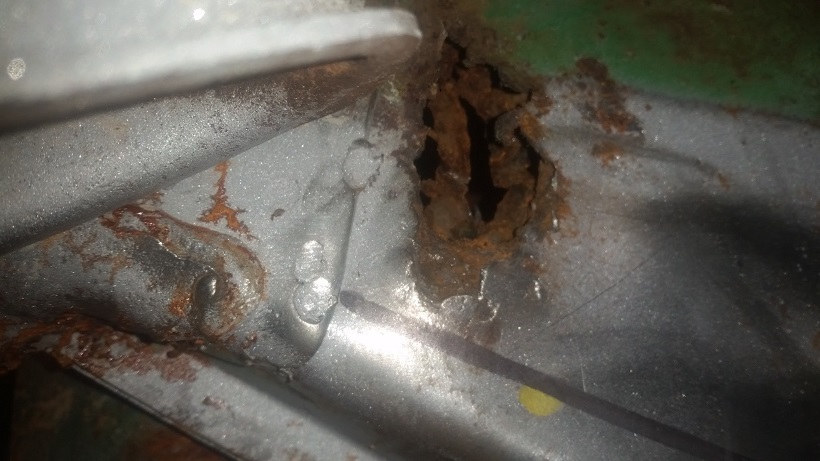 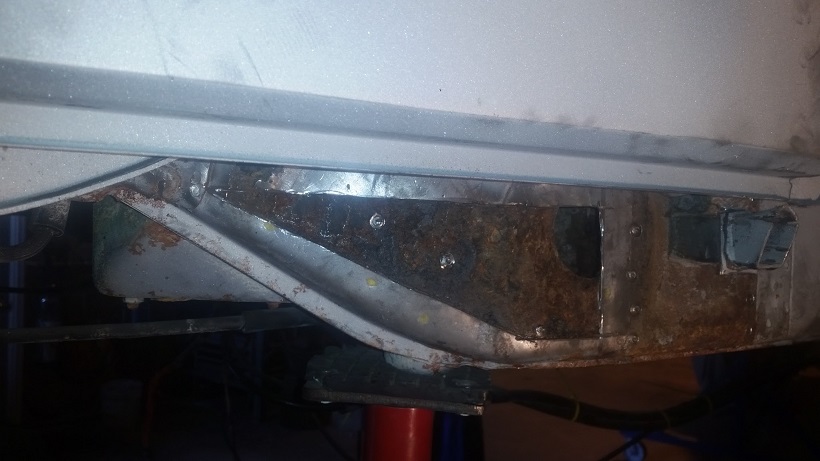 What you can't see is the HUGE mouse nest inside the wheelhouse ............... This probably the best example I've ever seen of these cars rusting from the inside out. These kind of took the wind out of my sails. Time for dinner and a beer. Oh yeah .............. it's a shame someone buggered up the jack post. The metal under the jack post cover is just surface rust. |
|
|
|
| BeatNavy |
Mar 2 2016, 04:41 AM
Post
#32
|
|
Certified Professional Scapegoat Group: Members Posts: 2,965 Joined: 26-February 14 From: Easton, MD Member No.: 17,042 Region Association: MidAtlantic Region |
QUOTE(cary @ Mar 1 2016, 09:34 AM) Rob (Beatnavy), I'm still on the same 3/8 Rotacut spot weld cutter head. (IMG:style_emoticons/default/smile.gif) Using a lot of cutting oil. Which is making a mess, but cleans right up with House of Color Wipe Out wax and grease remover. I'm glad you're having good luck with it too! Getting spot welds out is "fun" enough that you don't need to deal with a lousy cutter that keeps breaking. I'm working a on a driver's side long now... QUOTE(cary @ Mar 1 2016, 10:14 PM) Fun just came to a screeching halt ............... (IMG:style_emoticons/default/barf.gif) What you can't see is the HUGE mouse nest inside the wheelhouse ............... This probably the best example I've ever seen of these cars rusting from the inside out. These kind of took the wind out of my sails. Uh-oh. (IMG:style_emoticons/default/sad.gif) Yes, I know that feeling... |
|
|
|
| cary |
Mar 2 2016, 10:14 AM
Post
#33
|
|
Advanced Member Group: Members Posts: 3,900 Joined: 26-January 04 From: Sherwood Oregon Member No.: 1,608 Region Association: Pacific Northwest |
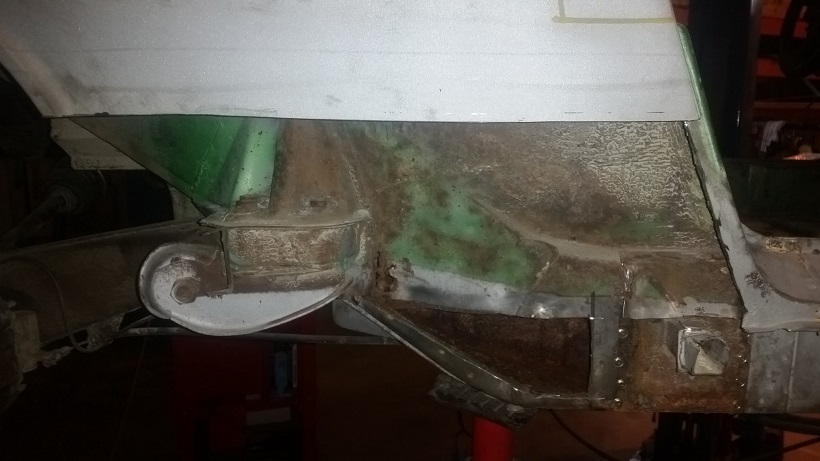
After a good nights sleep its time to go into rust attack mode. (IMG:style_emoticons/default/mad.gif)
I was hoping to only have to cut the door jam to remove and replace the jack point like Rick does. But think I'll need to remove the lower portion of the fender to get up into the wheelhouse. (IMG:style_emoticons/default/sad.gif) 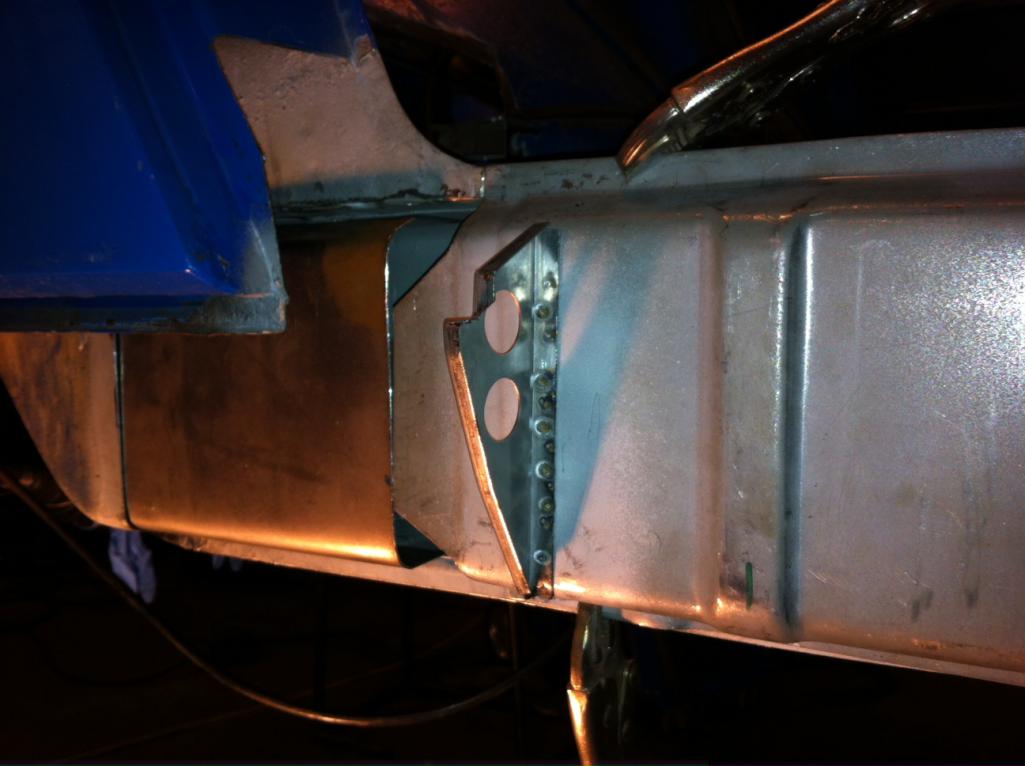 But here's where I'll start this am. Originally I was only going to cut back the top rail about an inch and half and replace the flange. Now we'll open it up to survey the damage. And remove the mouse nest. 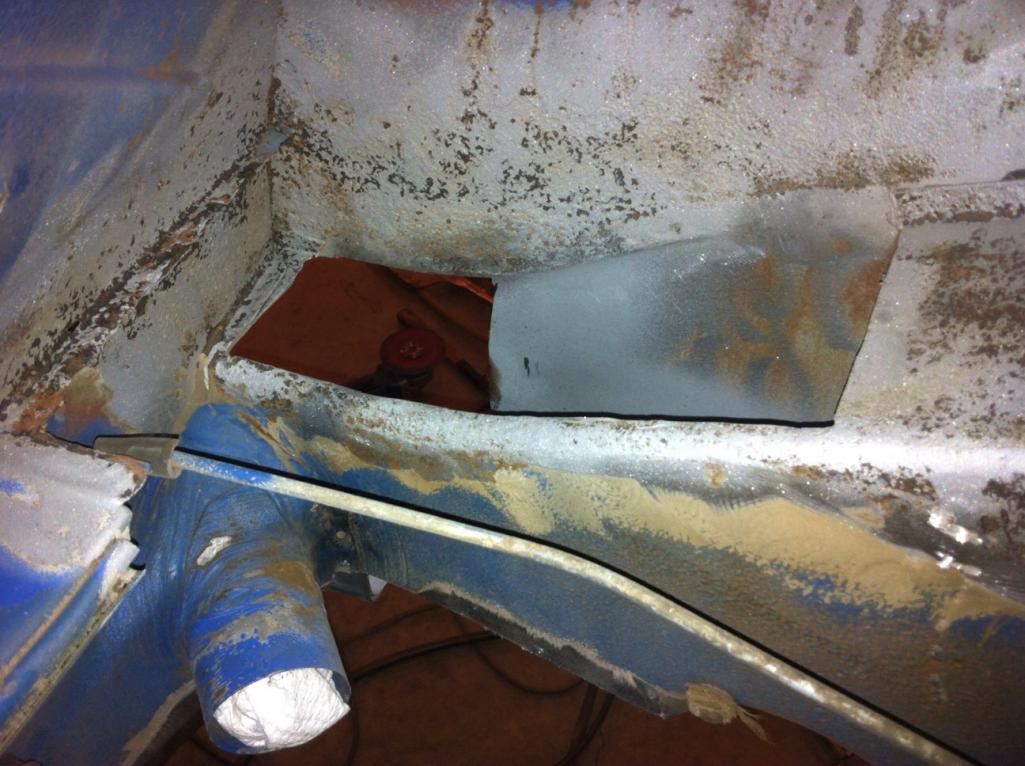 The battery tray will have to be removed first. But that was already planned with the flange/seam repair. It got some 914World inspiration this morning after reading up on Rick's work on Vintage914Racer's car. I was about to say the the rust on Mark's car isn't quite that extensive. It just goes the other direction up into the wheelhouse. But I'll refrain from that proclamation for a couple hours. http://www.914world.com/bbs2/index.php?sho...=226585&hl= |
|
|
|
| Mikey914 |
Mar 2 2016, 10:57 AM
Post
#34
|
|
The rubber man Group: Members Posts: 12,782 Joined: 27-December 04 From: Hillsboro, OR Member No.: 3,348 Region Association: None |
Thanks Cary,
Looks like you are going to town on this one. I never would have had the time. Mark |
|
|
|
| mbseto |
Mar 2 2016, 04:09 PM
Post
#35
|
|
Senior Member Group: Members Posts: 1,257 Joined: 6-August 14 From: Cincy Member No.: 17,743 Region Association: North East States |
QUOTE(cary @ Mar 1 2016, 10:14 PM) What you can't see is the HUGE mouse nest inside the wheelhouse ............... 2nd pic: http://www.914world.com/bbs2/index.php?s=&...t&p=2224731 Haven't gotten back there yet, but still thinking his little skeleton will still be in there... |
|
|
|
| cary |
Mar 2 2016, 08:28 PM
Post
#36
|
|
Advanced Member Group: Members Posts: 3,900 Joined: 26-January 04 From: Sherwood Oregon Member No.: 1,608 Region Association: Pacific Northwest |
Battery tray and its support hit the floor first. Because it was seam welded it came out in pieces. (IMG:style_emoticons/default/sawzall-smiley.gif)
Next came the engine shelf. Needs to come out to open up the top rail. It's reusable. 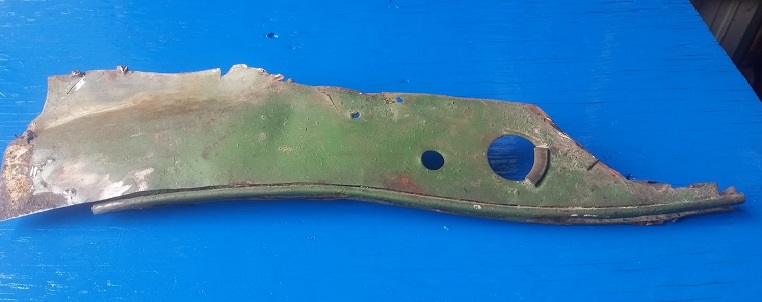 Once again a hillbilly double layered patch comes to light. That's the vertical firewall above the hell hole.  Now I peel off the top layer only on the top rail. Basically delicately cut a slot with the cut off wheel. Then peel it back with screwdriver and or small wood chisel. As I hit spot welds I cut them down from the top side with the mandrel mounted cutting wheel.  Arsenal of cutting wheels ................ 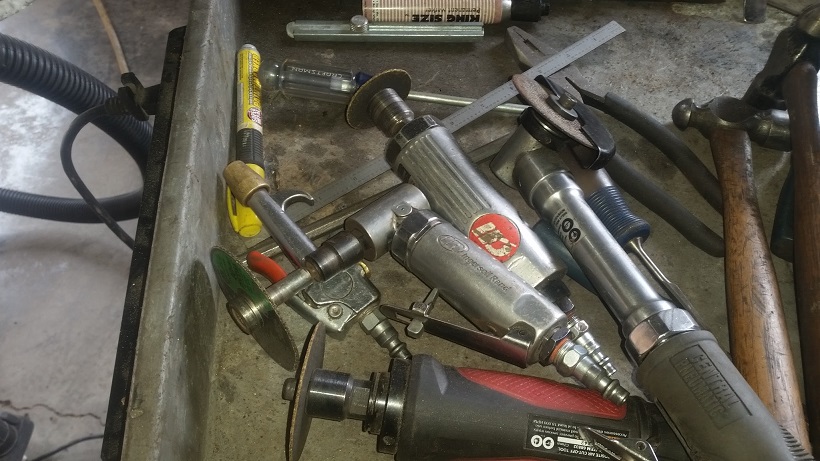 Here's a top side view of what remains of the mouse nest. 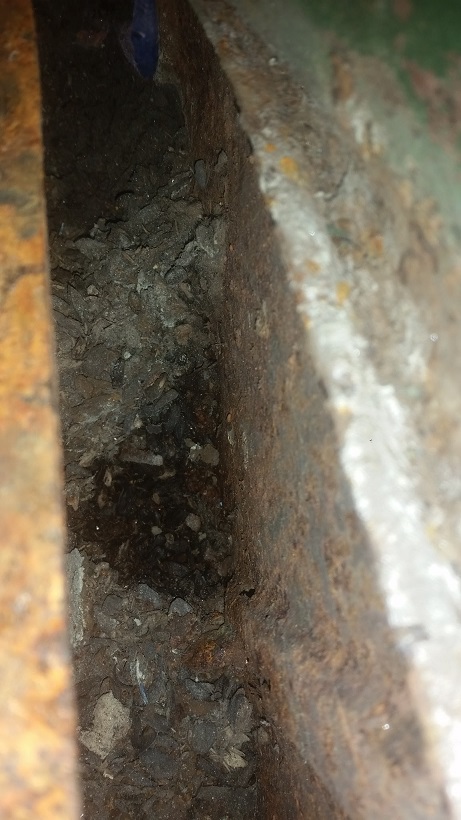 Inside shot of the original large hole I created with the screwdriver. 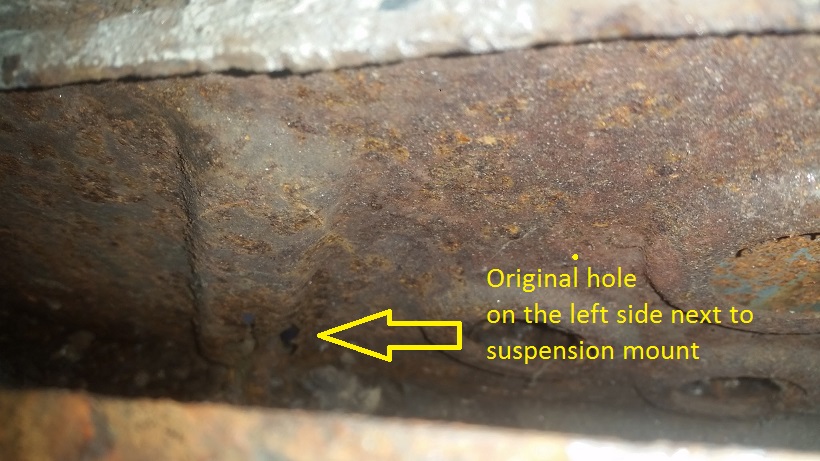 Mission Complete ................ 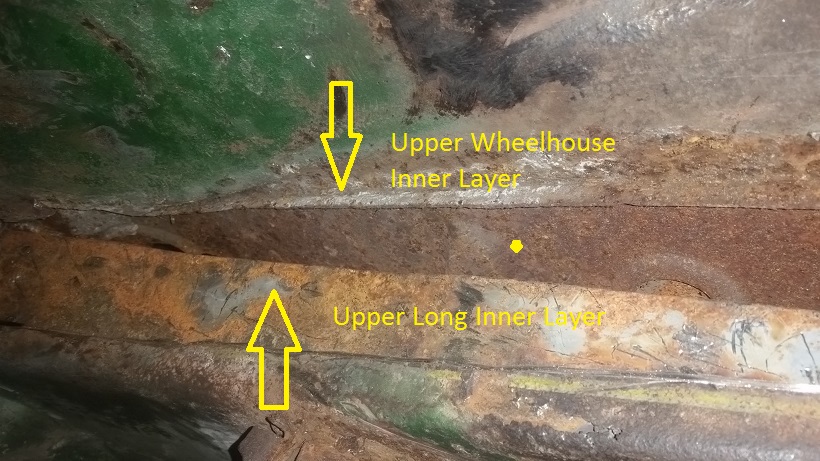 |
|
|
|
| cary |
Mar 2 2016, 09:11 PM
Post
#37
|
|
Advanced Member Group: Members Posts: 3,900 Joined: 26-January 04 From: Sherwood Oregon Member No.: 1,608 Region Association: Pacific Northwest |
 Opened up the wheelhouse so I could continue to vacuum out the mouse nest. Got most of it. But I'll need to dig deeper down the inner long. 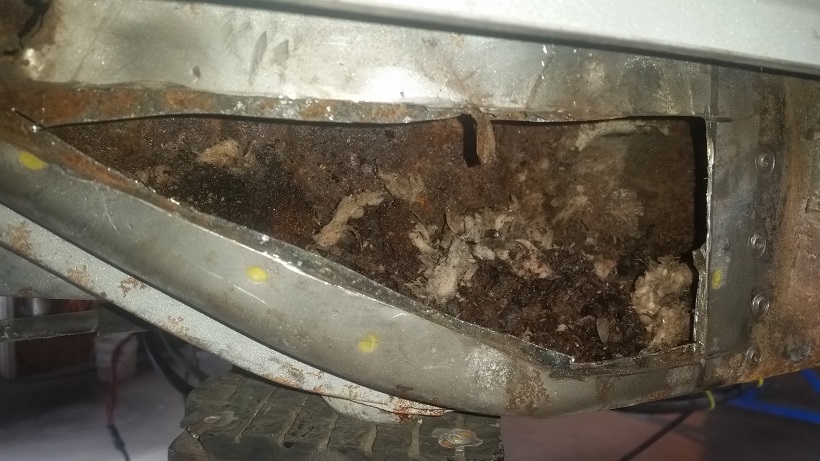 This is a far as I can take it without installing the door braces. Pulled the braces out of my rustoration. Gave them a coat of blue paint and they're drying overnight. I added the wheelhouse to Mark's RD order.The big question will be whether I remove the outer suspension mount or not. (IMG:style_emoticons/default/idea.gif) (IMG:style_emoticons/default/idea.gif) |
|
|
|
| cary |
Mar 2 2016, 09:15 PM
Post
#38
|
|
Advanced Member Group: Members Posts: 3,900 Joined: 26-January 04 From: Sherwood Oregon Member No.: 1,608 Region Association: Pacific Northwest |
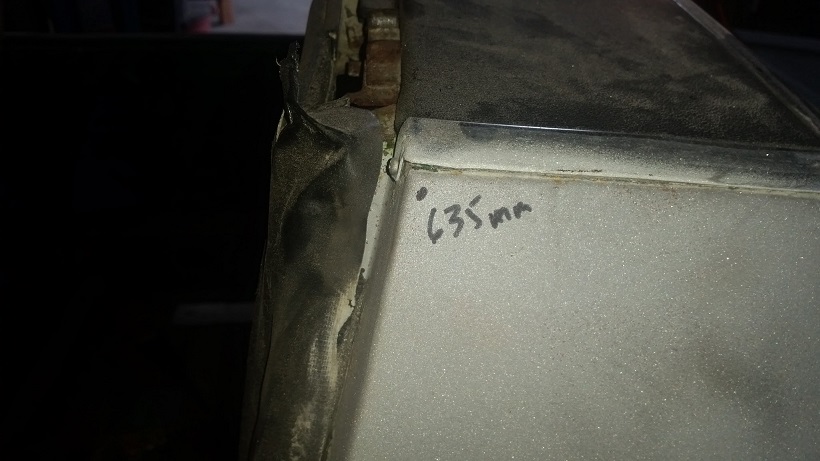
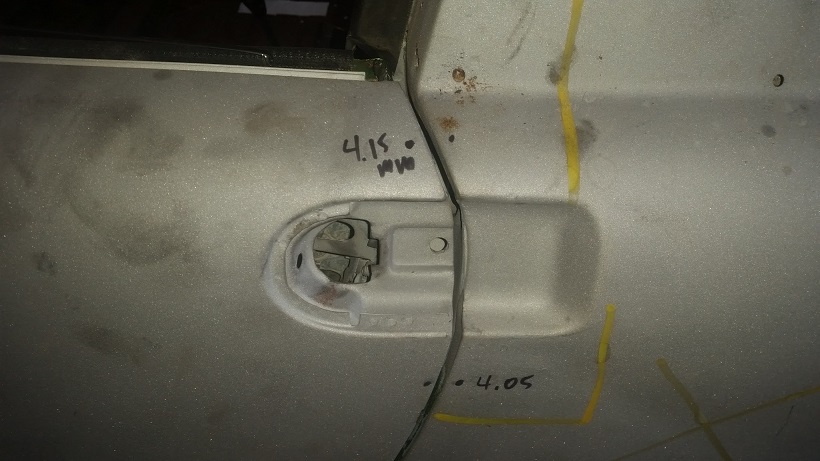
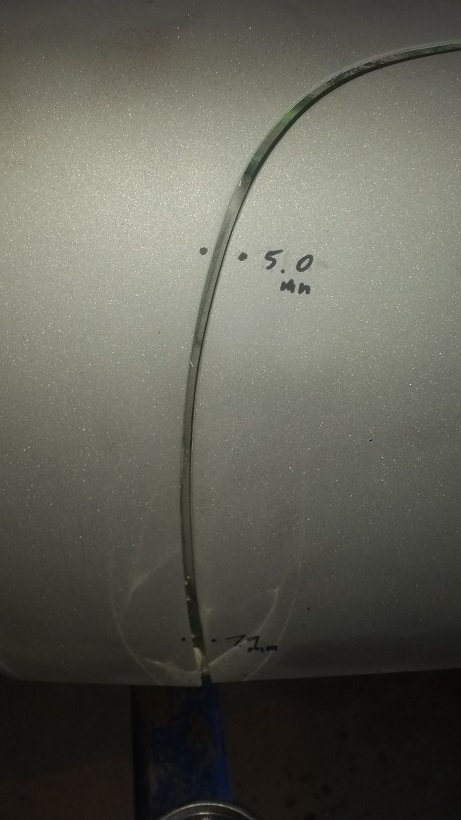
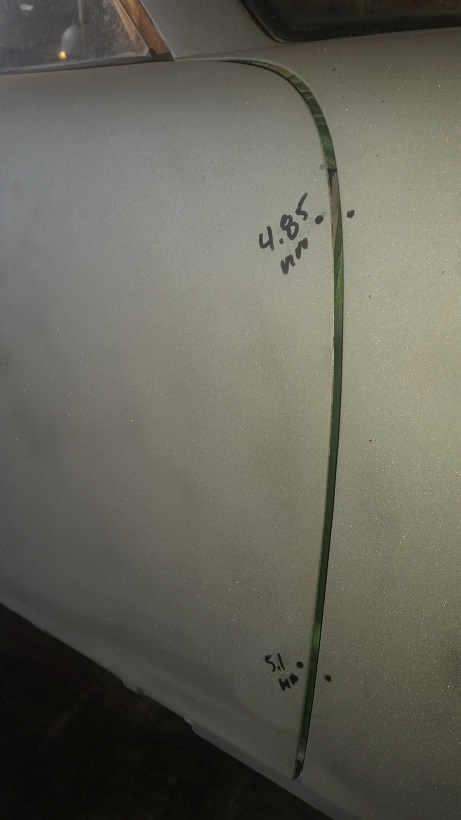
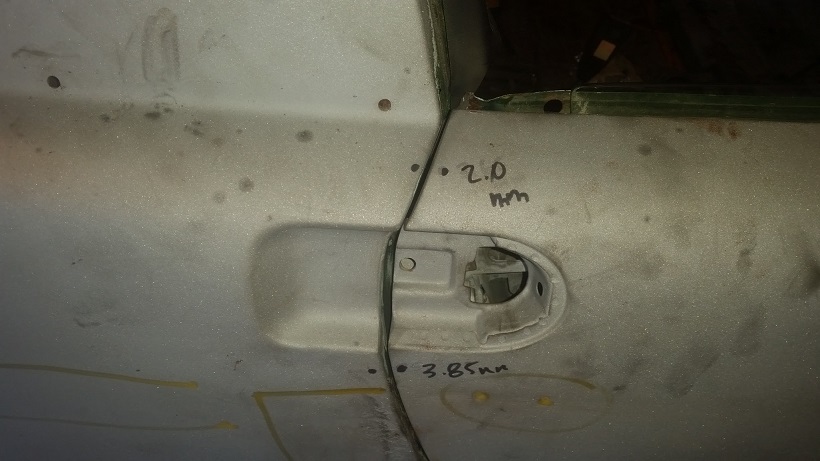
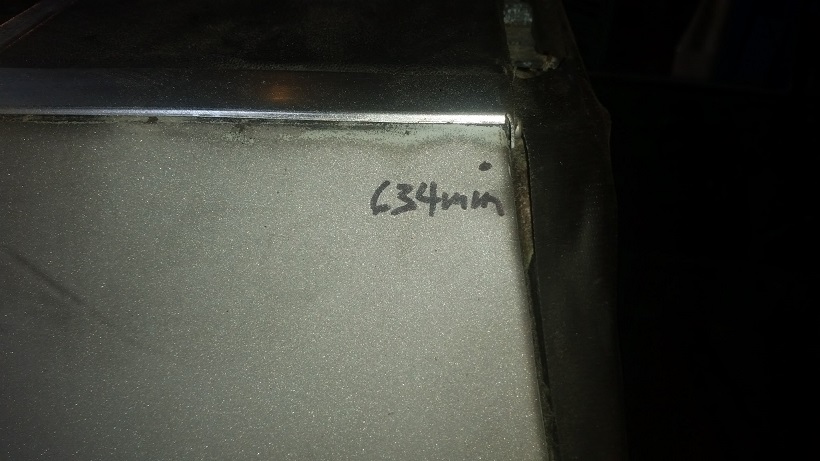
I make multiple measurements before I remove the doors for the door brace install.
      |
|
|
|
| cary |
Mar 2 2016, 09:19 PM
Post
#39
|
|
Advanced Member Group: Members Posts: 3,900 Joined: 26-January 04 From: Sherwood Oregon Member No.: 1,608 Region Association: Pacific Northwest |
Beings that I'll be doing some work to the wheelhouse, off comes the fender. I know Rick is shaking his head. But I need room for my tools and lots of light.
  |
|
|
|
| cary |
Mar 2 2016, 10:18 PM
Post
#40
|
|
Advanced Member Group: Members Posts: 3,900 Joined: 26-January 04 From: Sherwood Oregon Member No.: 1,608 Region Association: Pacific Northwest |
Things that make you go Hmmmmmmmmmmm.
Can I cut off the front and slide the inner layer behind the outer suspension mount ? If could figure it out. How would I clamp/press the new inner layer tight so I could weld it. 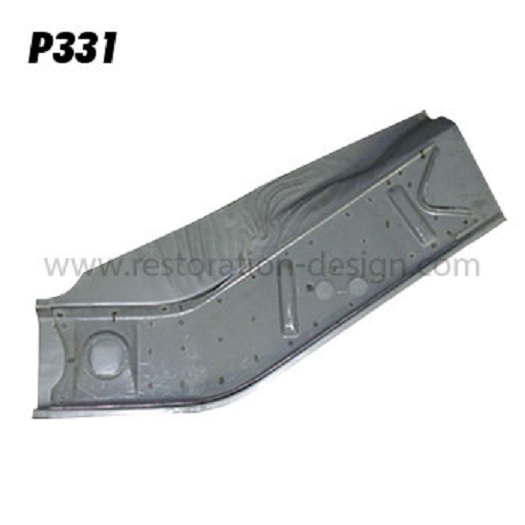 Looks like RD might not be selling the wrinkled AA piece anymore ? Or the RD guys decided to shear off the crappy part. http://www.autoatlanta.com/Porsche-Lower-A...450194420C.html |
|
|
|
|
1 User(s) are reading this topic (1 Guests and 0 Anonymous Users)
0 Members:

|
Lo-Fi Version | Time is now: 24th June 2026 - 12:14 AM |
Invision Power Board
v9.1.4 © 2026 IPS, Inc.