|
|
|
Porsche, and the Porsche crest are registered trademarks of Dr. Ing. h.c. F. Porsche AG.
This site is not affiliated with Porsche in any way. Its only purpose is to provide an online forum for car enthusiasts. All other trademarks are property of their respective owners. |
|
|

  |

| 76-914 |
 May 13 2016, 07:22 AM May 13 2016, 07:22 AM
Post
#261
|
|
Repeat Offender & Resident Subaru Antagonist  Group: Members Posts: 13,830 Joined: 23-January 09 From: Temecula, CA Member No.: 9,964 Region Association: Southern California |
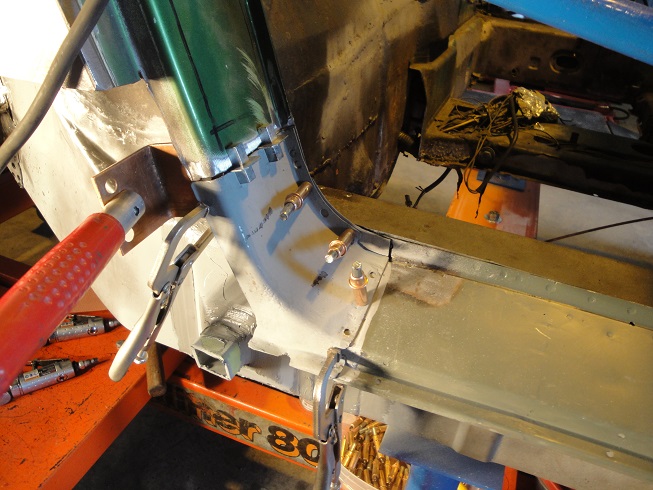
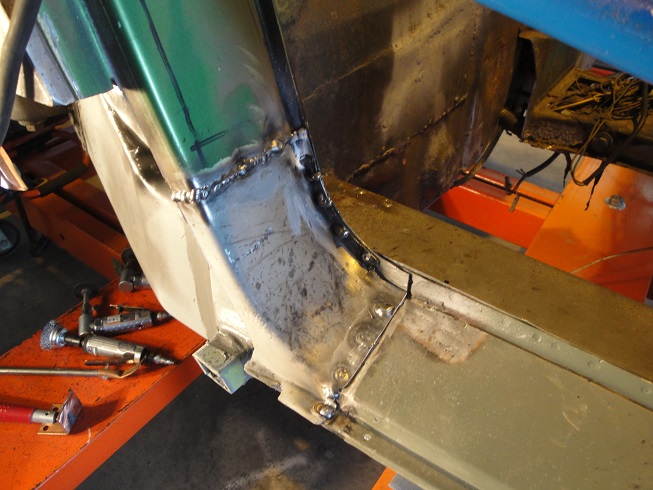
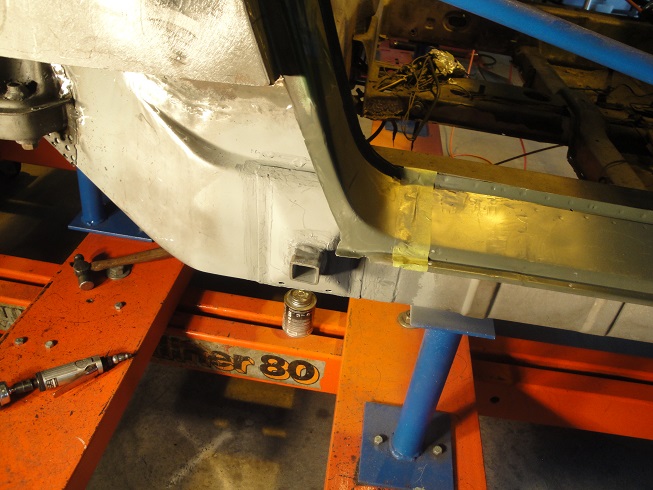
QUOTE(cary @ May 11 2016, 08:13 PM)  Now back where we started ............... After the road test went back to the front trunk seal channel R & R on the green car. Didn't want to loose the little pieces. Reference number: Channel is .78 -82" wide ID. I'm welding on the right. Super In Law is measuring, cutting and fabricating on the left. New lip welded in .......... Up to the front edge. Can't do it CW without removing the front panel. Here's Super In Laws work area ..................... His work is exasperated by the fact that during the last repair the inside flange on the left fender wasn't completely removed. Right front all tidied up .......... Cary, the next to last pic shows 3 layers of metal. What is the center layer? Looks like my left fender was scabbed on as well. |
   |

 
|
| cary |
May 13 2016, 07:37 AM
Post
#262
|
|
Advanced Member Group: Members Posts: 3,900 Joined: 26-January 04 From: Sherwood Oregon Member No.: 1,608 Region Association: Pacific Northwest |
Yep ............... Dandy
|
 |
|
| cary |
May 15 2016, 07:29 PM
Post
#263
|
|
Advanced Member Group: Members Posts: 3,900 Joined: 26-January 04 From: Sherwood Oregon Member No.: 1,608 Region Association: Pacific Northwest |
Mark stopped by yesterday and installed a set of his new, thicker version of the fender liners. I have a set of the original version on my white DD.
   Why everyone doesn't have these are their cars is beyond me. Held in place by the flex of the material and two brackets. The brackets reuse the existing hardware on the rocker and the rear valance. No modifications to the car. What would the 914 World be like if we'd had these in the beginning? Mark will be creating a nice DIY set of instructions. |
|
|
|
| cary |
May 15 2016, 07:41 PM
Post
#264
|
|
Advanced Member Group: Members Posts: 3,900 Joined: 26-January 04 From: Sherwood Oregon Member No.: 1,608 Region Association: Pacific Northwest |
I've been pulling my hair out with a wiring issue.
http://www.914world.com/bbs2/index.php?showtopic=285065 Needed some input so I started another thread. Once again, the car is ready for Mark to pick up and tidy up for the trip to Medford/WCR. Ended the day installing the rear bumper top support. After the fact installation. 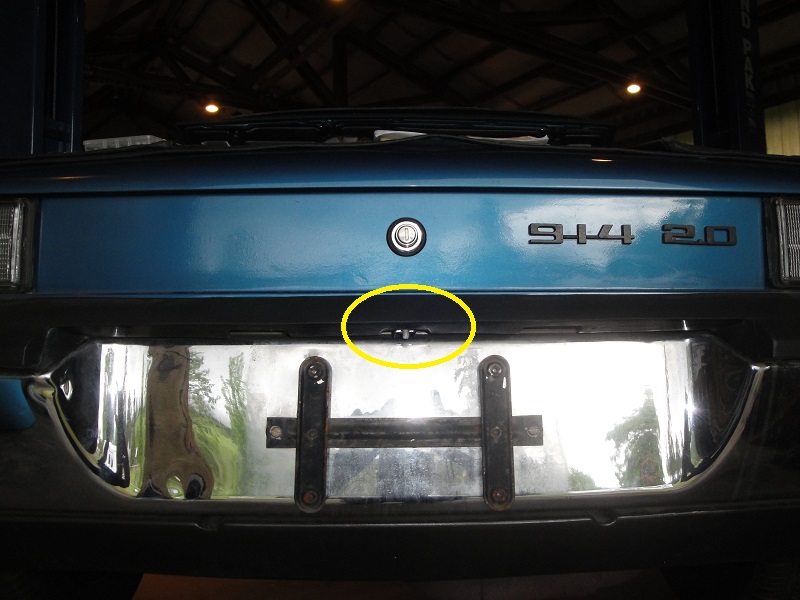 Used a self tapping truss screw after pre-drilling the support with a 3/16" hole. After I unload the stuff off the top of the trunk I'll seam seal the screw from the inside.  |
|
|
|
| AfricanHijinx |
May 15 2016, 08:21 PM
Post
#265
|
|
Member Group: Members Posts: 132 Joined: 12-April 11 From: Snohomish WA Member No.: 12,928 Region Association: Pacific Northwest |
I am sad that I didn't meet up with Cary when I lived in Sherwood not to far from him...I could use some of his knowledge right about now.
|
|
|
|
| cary |
May 15 2016, 10:23 PM
Post
#266
|
|
Advanced Member Group: Members Posts: 3,900 Joined: 26-January 04 From: Sherwood Oregon Member No.: 1,608 Region Association: Pacific Northwest |
Thanks ............
Mark, in case I forget. (Blue Car) 1. Fresh air blower works on the middle setting 2. Selection of fuses in glove box (hopefully they won't be needed) 3. I changed the instrument lamp fuse to 5 amp. (I hate and don't trust them SOBs) |
|
|
|
| cary |
May 17 2016, 11:10 PM
Post
#267
|
|
Advanced Member Group: Members Posts: 3,900 Joined: 26-January 04 From: Sherwood Oregon Member No.: 1,608 Region Association: Pacific Northwest |
While I'm working on the blue car getting it ready for WCR. Super In Law is rebuilding a good portion of the left front headlight bucket.
 While I was digging thru the totes of the parts for my project car I find my black headlight surrounds. Scrubbed one up and slipped it on to Mark's car. 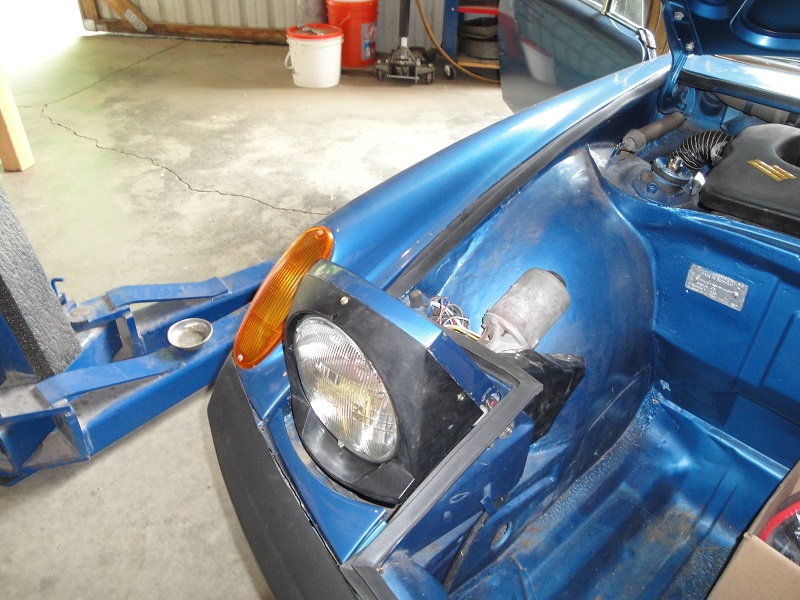 |
|
|
|
| cary |
May 18 2016, 08:59 PM
Post
#268
|
|
Advanced Member Group: Members Posts: 3,900 Joined: 26-January 04 From: Sherwood Oregon Member No.: 1,608 Region Association: Pacific Northwest |
Wiring all wrapped up and reinstalled. Everything checks out. (IMG:style_emoticons/default/driving.gif)
All the twisting and turning needed to reinstall the fuse panel made me little nervous. Knee pad reinstalled. Missing one cage nut, last right bottom, The rest of them worked fine. Tow bar hardware installed. We spent a little more time making the headlight covers look a little better. Car dropped off at Les Schwab at 3:30, its in your name. (phone number). I told them it needed to be done by 10am. 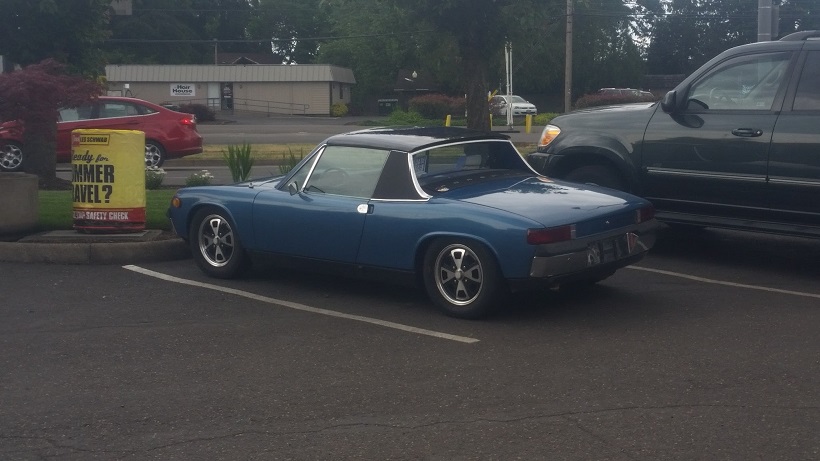 |
|
|
|
| cary |
May 18 2016, 09:06 PM
Post
#269
|
|
Advanced Member Group: Members Posts: 3,900 Joined: 26-January 04 From: Sherwood Oregon Member No.: 1,608 Region Association: Pacific Northwest |
QUOTE(cary @ May 15 2016, 09:23 PM) Thanks ............ Mark, in case I forget. (Blue Car) 1. Fresh air blower works on the middle setting 2. Selection of fuses in glove box (hopefully they won't be needed) 3. I changed the instrument lamp fuse to 5 amp. (I hate and don't trust them SOBs) 4. Didn't check the brake lights. We'll do that tomorrow night. 5. Fuse #11 is touchy. Did a quick bang bang on the driving light flash. Popped the fuse. New turn signal switch should cure it, but keep an eye on it. For whatever reason most the relays run thru that fuse. |
|
|
|
| cary |
May 23 2016, 08:54 PM
Post
#270
|
|
Advanced Member Group: Members Posts: 3,900 Joined: 26-January 04 From: Sherwood Oregon Member No.: 1,608 Region Association: Pacific Northwest |
Back to work. Super In Law has been off 5 days and is hot to trot ...........
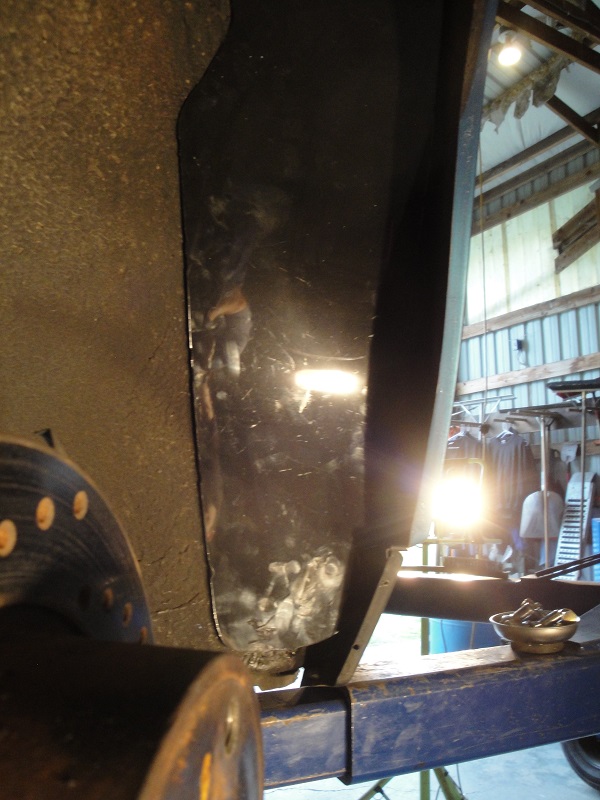
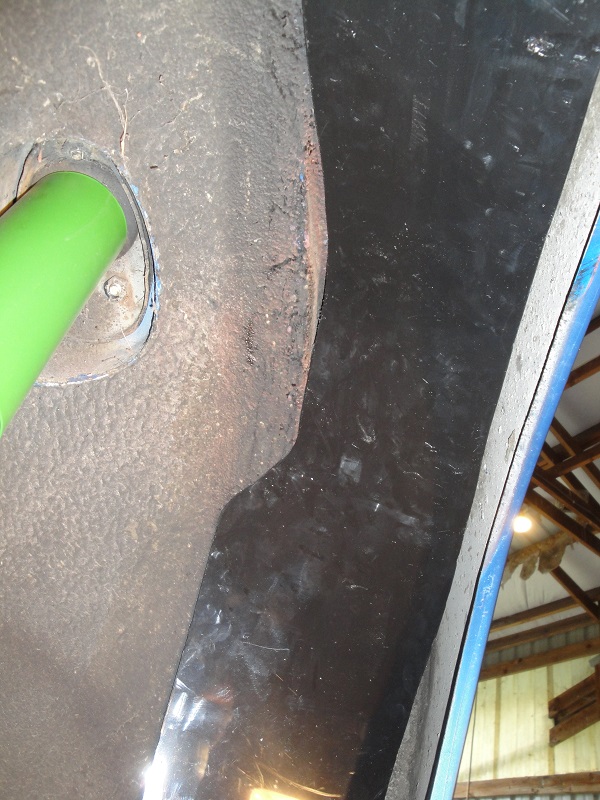
He jumped right back on the left head light bucket and pivot. 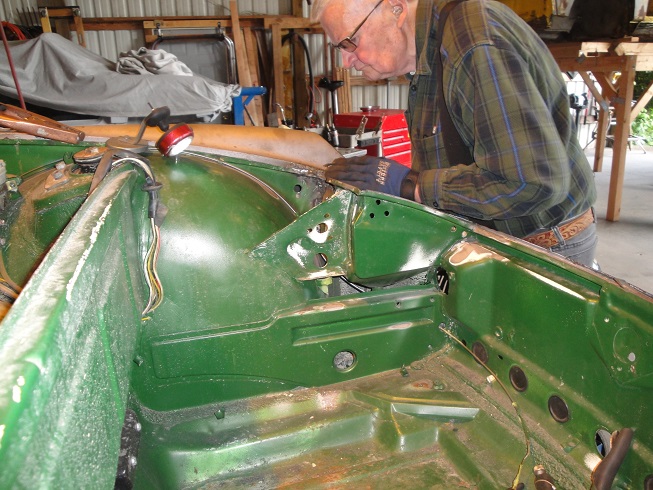 On the way home we discussed building a jig for rebuilding and aligning the fenders,hood and headlight buckets. Something along the lines of the door and windshield frames that Porsche and body shops used to have. Maybe pull the skin off a front hood and use the support bracing for a start .................. I jumped back on the bondo patch in the wheelhouse. The patch welded in fairly easy. The portion right to the front of it. Not so much ............. Got tired of welding and grinding. Cut out the bad spot. 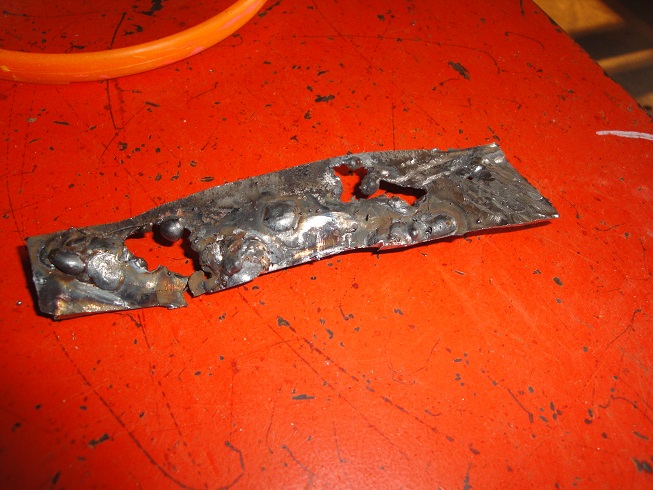 Bondo patch from the outside. 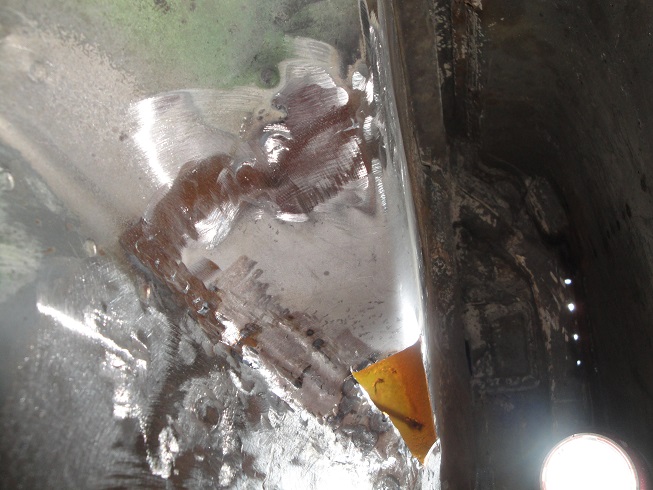 Inside with crappy metal removed. 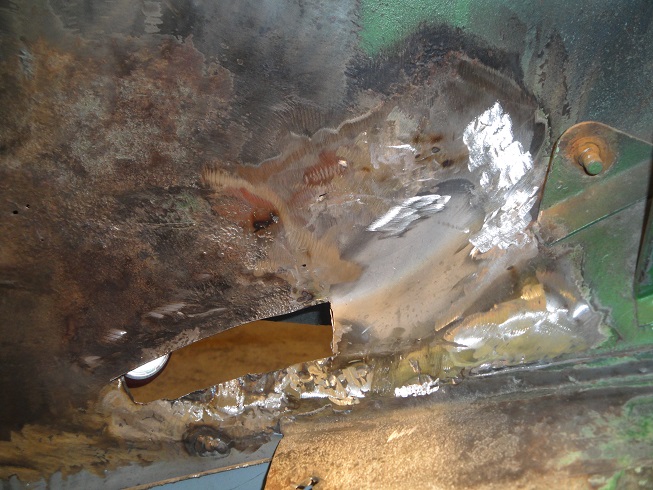 Found some more holes that need patching ................... 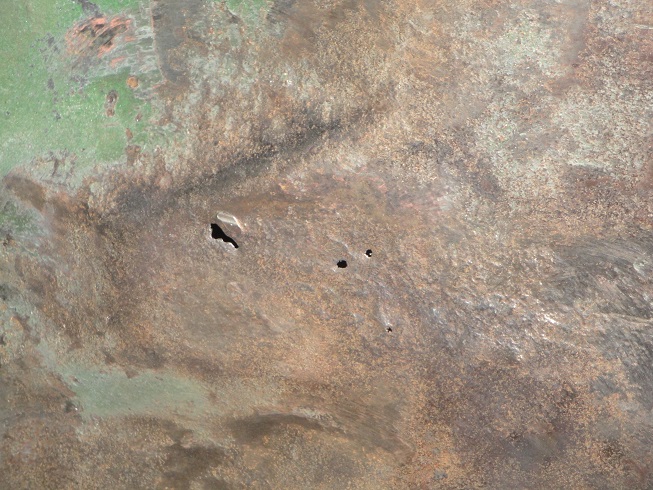 |
|
|
|
| cary |
May 23 2016, 09:09 PM
Post
#271
|
|
Advanced Member Group: Members Posts: 3,900 Joined: 26-January 04 From: Sherwood Oregon Member No.: 1,608 Region Association: Pacific Northwest |
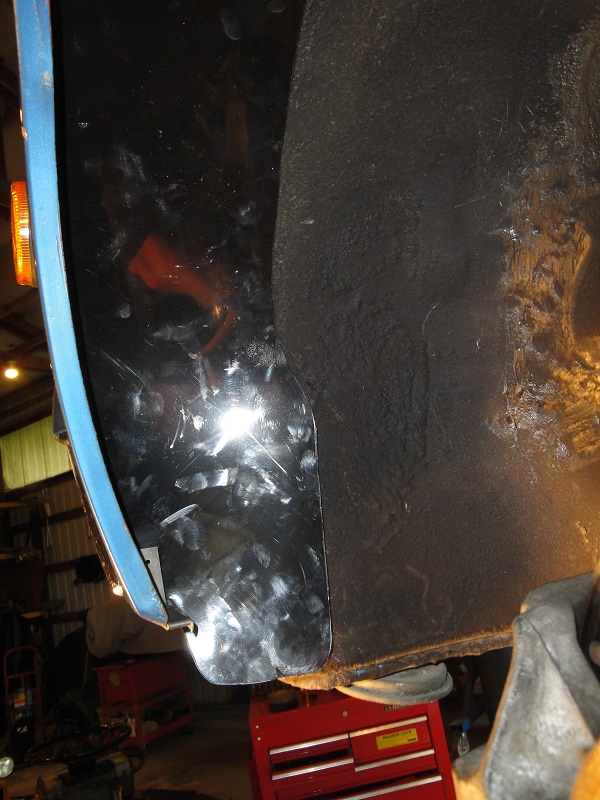
While I was waiting for my turn with the welder. I went to work on the oil can dent on the right quarter panel.
 Went after it with the shrinking disk and soapy water.  Got the oil can dent out. But we have some serious fender contour issues. Pulled the contour off my project car. We'd been discussing changing out the left rear quarter panel because of some really poor patches. But it has a relatively good contour. Here's the left. 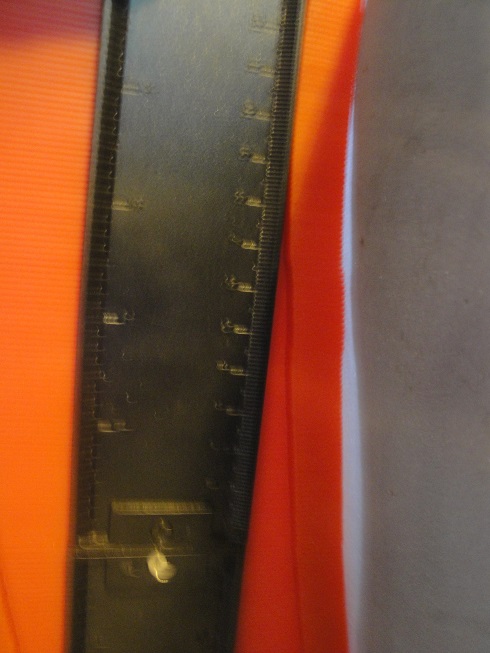 Here's the right. (IMG:style_emoticons/default/sad.gif) 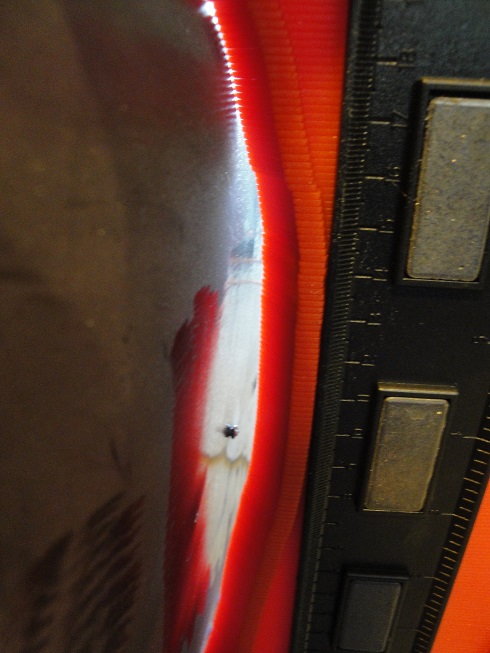 The panel has a long crease from the door handle pocket to the fender arch. It will get pulled out after the fender gets reattached. |
|
|
|
| Mikey914 |
May 24 2016, 01:51 PM
Post
#272
|
|
The rubber man Group: Members Posts: 12,772 Joined: 27-December 04 From: Hillsboro, OR Member No.: 3,348 Region Association: None |
Cary I have a new fender if it's easier than dealing with the mess. As long as everything else is straight is should be easier to weld on a new one. I'm back tomorrow.
|
|
|
|
| cary |
May 24 2016, 10:57 PM
Post
#273
|
|
Advanced Member Group: Members Posts: 3,900 Joined: 26-January 04 From: Sherwood Oregon Member No.: 1,608 Region Association: Pacific Northwest |
Mark, I don't plan on being at the shop tomorrow. I have an appointment to survey Doug's (raynekat) project. We'll be out there on Thursday and Friday.
The new patch went in without much fan fare. 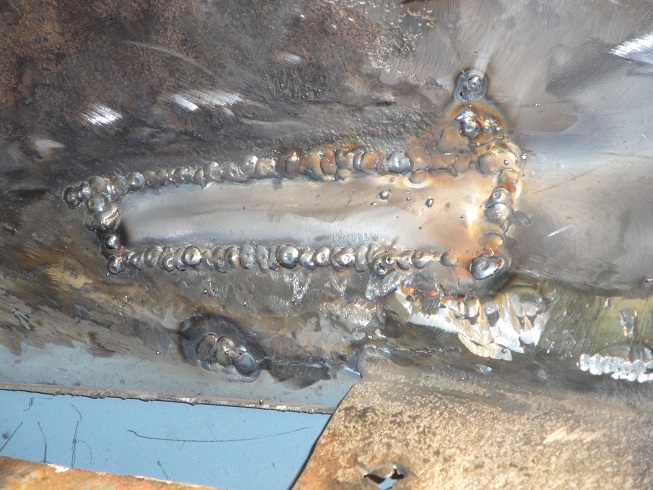 Then I repositioned the bench fixtures to allow me to weld the outer suspension mount to the new wheelhouse. 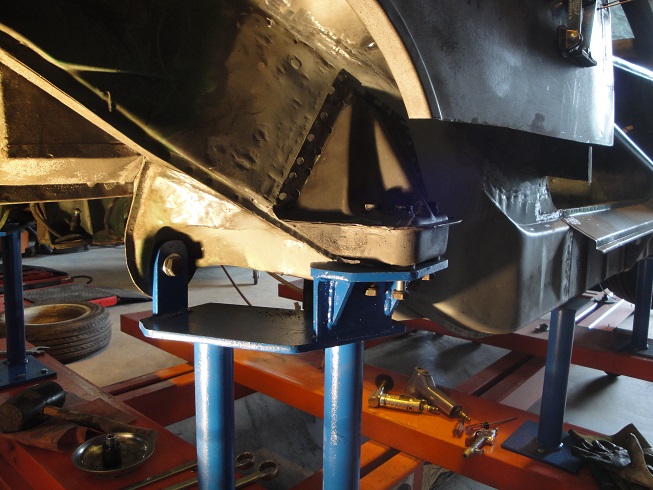 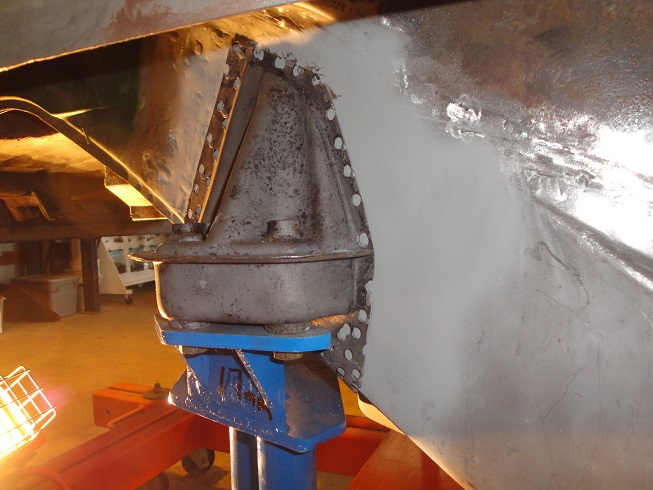 Had to fiddle with the bottom of the mount just a bit to get it to slide into place. 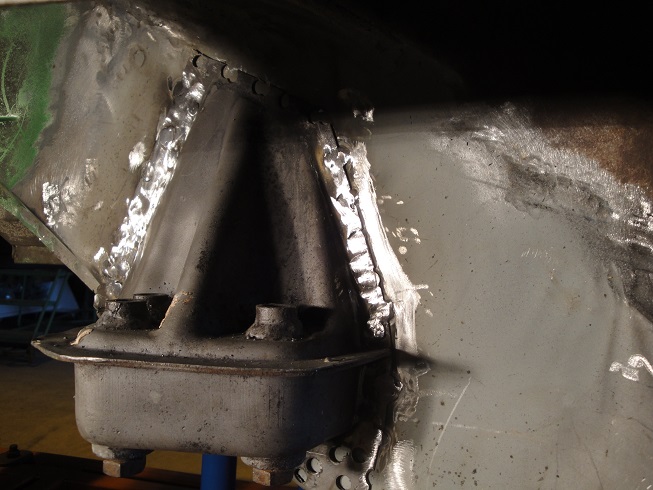 Added 5/26/16 7:30 PST Leaving the top and bottom until I'm working standing up. |
|
|
|
| cary |
May 24 2016, 11:21 PM
Post
#274
|
|
Advanced Member Group: Members Posts: 3,900 Joined: 26-January 04 From: Sherwood Oregon Member No.: 1,608 Region Association: Pacific Northwest |
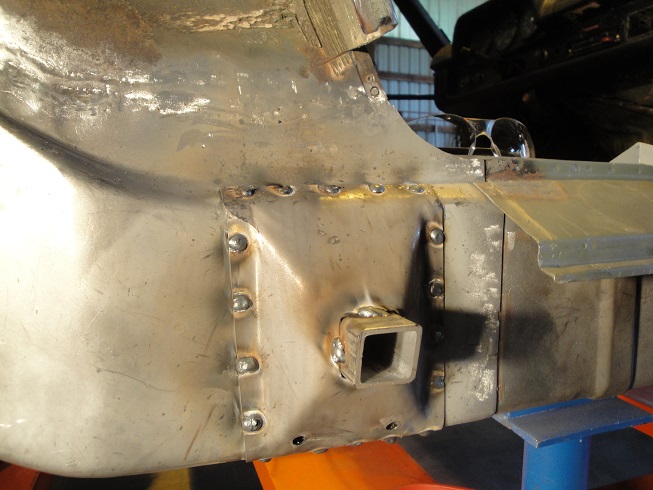
Then I moved on to installing the new jack point.
Put them together and positioned it on the long. 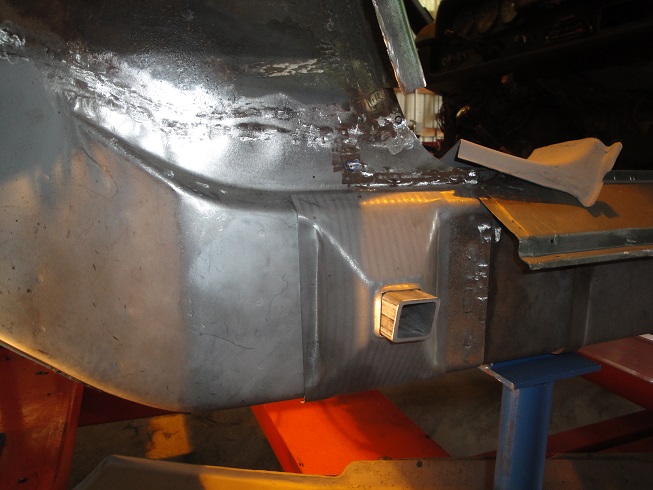 Note : I did need to square up the tube. The cut wasn't quite square. Then I used Mark's old metal and my fiberglass outer rocker to correctly locate it into position. 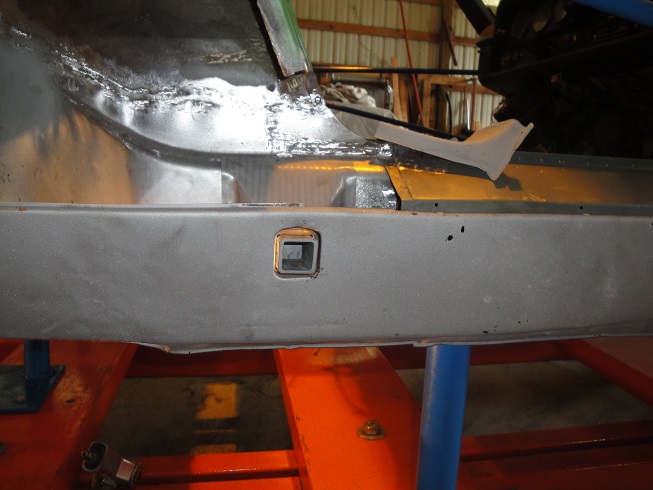 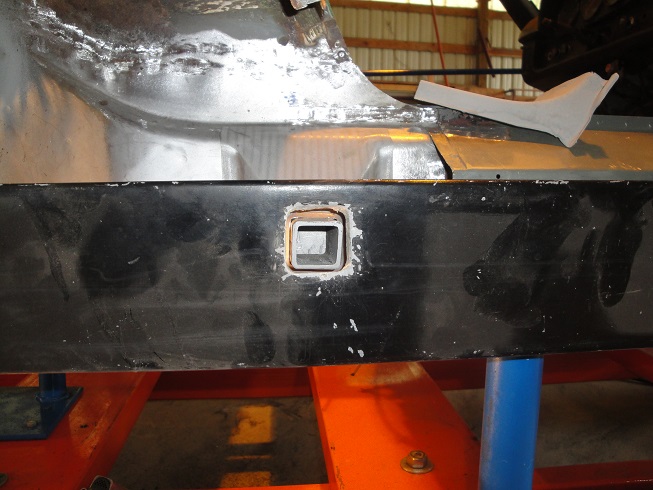 Then I mark the inside of the positioned tube with a pencil. That way I can remove the cover without losing the correct position. Held in place with my monster magnets. 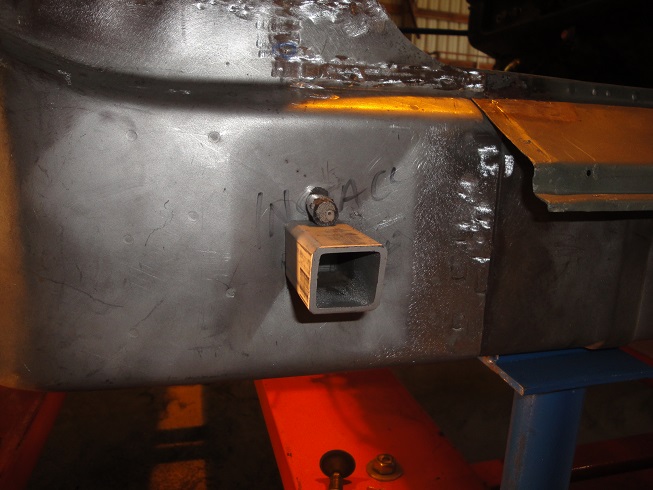 Welded into place. Used between the 1/8 and 3/16 setting on my Millermatic 180. That tube is pretty thick. 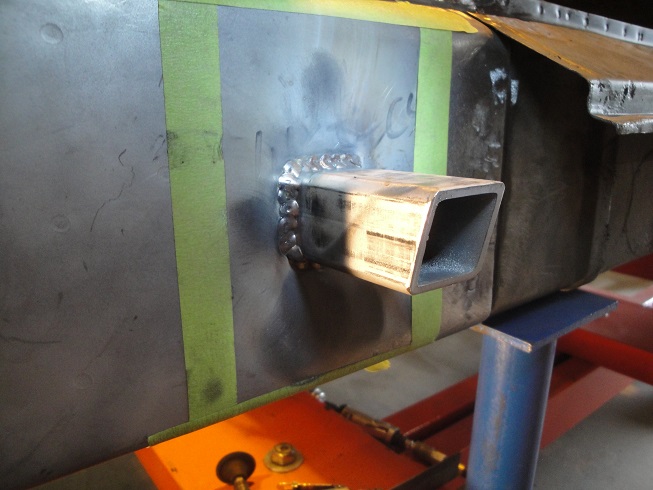 Prepped the inside of the cover with 2 coats of Rustoleum. Prepped the long with Rustoleum Cold Galvanizing. Both had the rosette areas taped off for brush on weld thru primer. 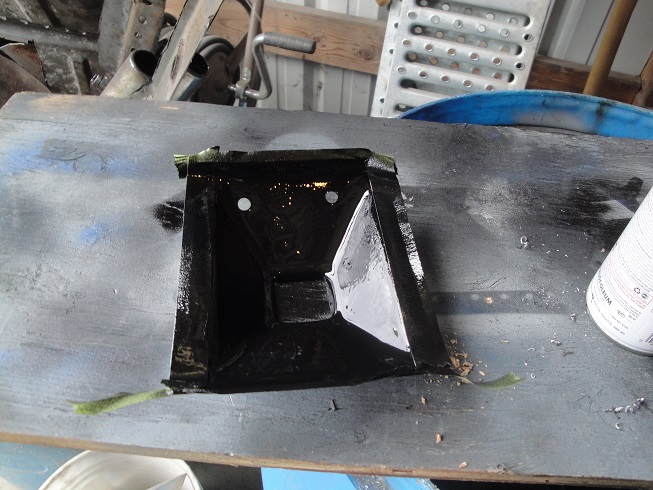 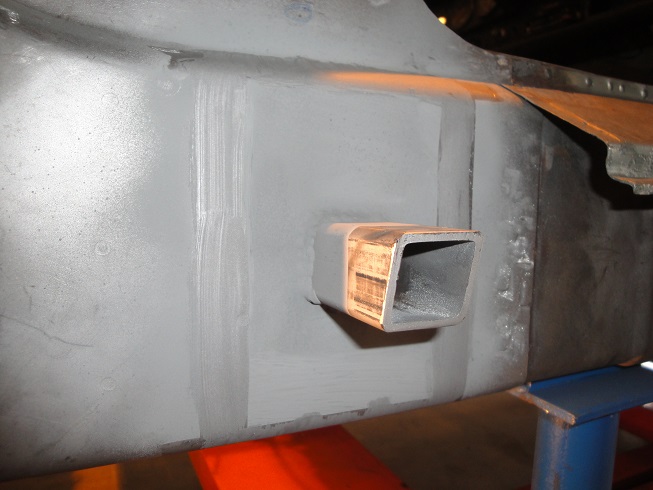 Letting the paint dry. Ready for welding in on Thursday am. 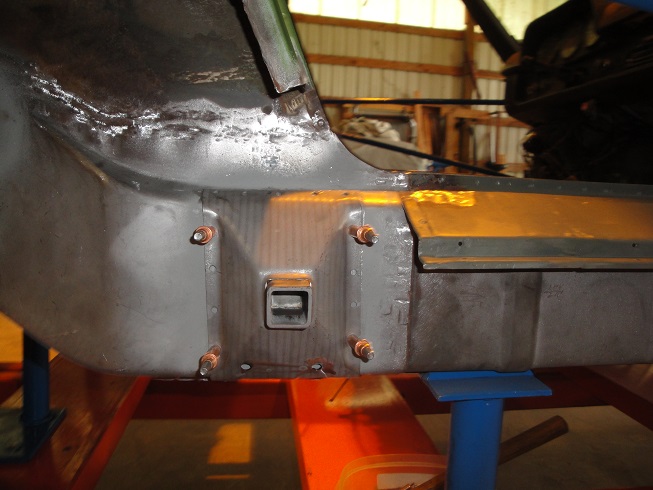 |
|
|
|
| cary |
May 26 2016, 08:41 PM
Post
#275
|
|
Advanced Member Group: Members Posts: 3,900 Joined: 26-January 04 From: Sherwood Oregon Member No.: 1,608 Region Association: Pacific Northwest |
Welds are a little too proud. Too much weld thru primer. (IMG:style_emoticons/default/mad.gif)
 Two coats of cold galvanizing compound. After it dried, two coats of Evercoat brush on seam sealer. Then another coat of cold galvanizing. Tube was taped off again so it can be painted with body color paint. 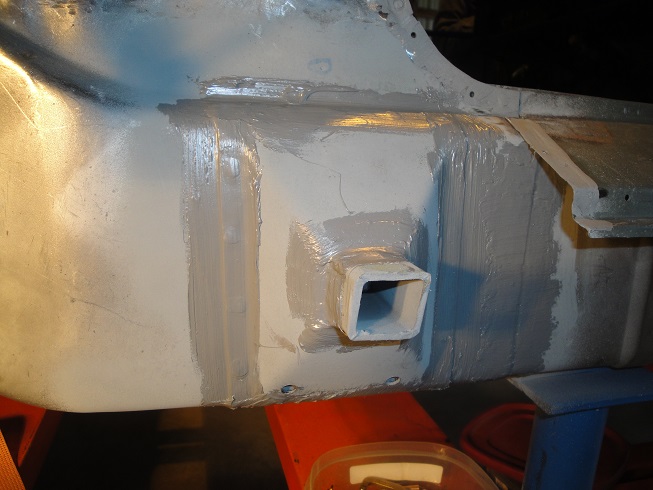 |
|
|
|
| cary |
May 26 2016, 08:45 PM
Post
#276
|
|
Advanced Member Group: Members Posts: 3,900 Joined: 26-January 04 From: Sherwood Oregon Member No.: 1,608 Region Association: Pacific Northwest |
Then I went after reinstalling the door jam that was cut out for removing the jack pint.
   |
|
|
|
| cary |
May 26 2016, 08:54 PM
Post
#277
|
|
Advanced Member Group: Members Posts: 3,900 Joined: 26-January 04 From: Sherwood Oregon Member No.: 1,608 Region Association: Pacific Northwest |
Here's where Super In Law left off yesterday.
 Cut and pasted the upper corners. Not real tough. A little thin in some places on the left. 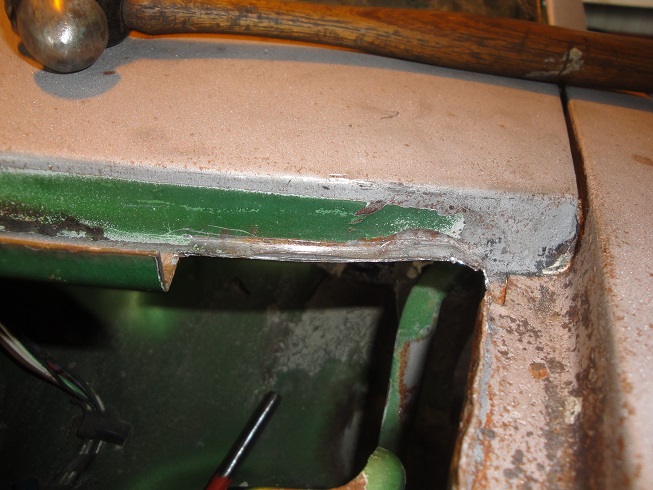 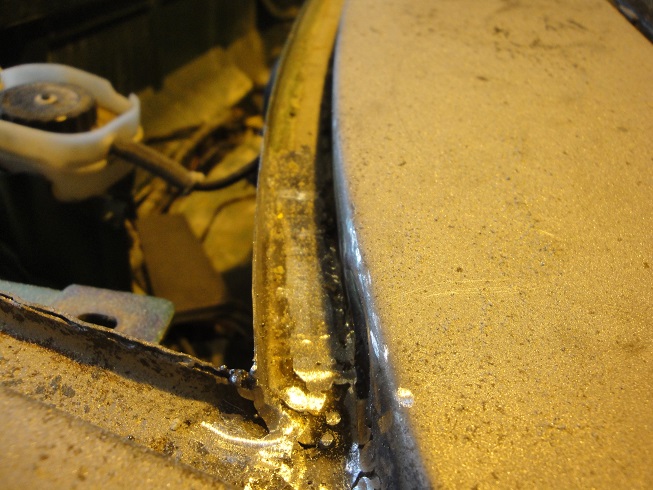 Then I brushed on seam sealer into channels. All sealed except for the left. I gave it a good dose of OSPHO. 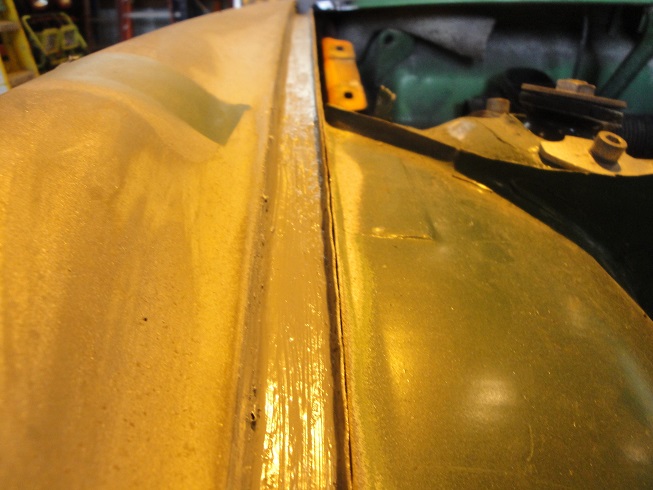  |
|
|
|
| cary |
May 26 2016, 09:14 PM
Post
#278
|
|
Advanced Member Group: Members Posts: 3,900 Joined: 26-January 04 From: Sherwood Oregon Member No.: 1,608 Region Association: Pacific Northwest |
While Super In Law was working on the channels I decided to prep the front hood. I will be using it tomorrow to analyze the hood verses head light bucket alignment. Both left to right and up and down.
Decided to go to NAPA and get studs They will replace the 8mm bolts for ease of installation, alignment and removal. Temporary 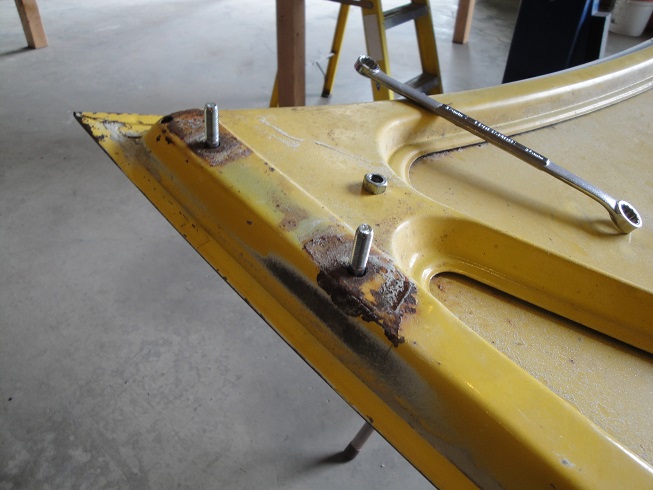 Quite a bit of surface rust in numerous places. But nothing bubbling thru the paint on the top side.   All of these were liberally sprayed down with OSPHO. Did find a pretty big pocket of rust under the front lip.  I filled the front lip with OSPHO and tilted up for an overnight application.  |
|
|
|
| rhodyguy |
May 27 2016, 08:28 AM
Post
#279
|
|
Chimp Sanctuary NW. Check it out. Group: Members Posts: 22,252 Joined: 2-March 03 From: Orion's Bell. The BELL! Member No.: 378 Region Association: Galt's Gulch |
You might want to check the platform leg to the left of the hoist, front end of car, with your level. Might be an optical illusion but it looks way out of plumb.
|
|
|
|
| cary |
May 27 2016, 08:28 AM
Post
#280
|
|
Advanced Member Group: Members Posts: 3,900 Joined: 26-January 04 From: Sherwood Oregon Member No.: 1,608 Region Association: Pacific Northwest |
We measured all 5 cars that are here and everyone of them has a different measurement in the arrowed location. Hmmmm. Hand Built.
So we'll carry on the hand built legacy and adjust the channels until we get the perfect fit.  Waiting for Mark to get home and bring us a new trunk seal. But in the mean time we'll use the old one out of my project car. Waiting on the battery tray attachment area until it's back on the lift and I can work standing up. The more I look, the iffier the metal looks. The last couple weeks I've been thinking of making the battery tray removable. Maybe blind or welded on nuts. But first things first. Lets put in some metal that can be worked with.  |
|
|
|
|
3 User(s) are reading this topic (3 Guests and 0 Anonymous Users)
0 Members:

|
Lo-Fi Version | Time is now: 19th December 2025 - 01:00 PM |
Invision Power Board
v9.1.4 © 2025 IPS, Inc.