|
|
|
Porsche, and the Porsche crest are registered trademarks of Dr. Ing. h.c. F. Porsche AG.
This site is not affiliated with Porsche in any way. Its only purpose is to provide an online forum for car enthusiasts. All other trademarks are property of their respective owners. |
|
|

  |

| cary |
 Oct 9 2016, 06:50 AM Oct 9 2016, 06:50 AM
Post
#361
|
|
Advanced Member  Group: Members Posts: 3,900 Joined: 26-January 04 From: Sherwood Oregon Member No.: 1,608 Region Association: Pacific Northwest |
QUOTE(Mikey914 @ Oct 9 2016, 12:05 AM)  We can easily fabricate these. Just needed to work out the details with Cary . See, what did I tell you. IIRC the patterns work for both sides. You'll just fold it inside out for the left side. |
   |

 
|
| cary |
Oct 9 2016, 07:28 AM
Post
#362
|
|
Advanced Member Group: Members Posts: 3,900 Joined: 26-January 04 From: Sherwood Oregon Member No.: 1,608 Region Association: Pacific Northwest |
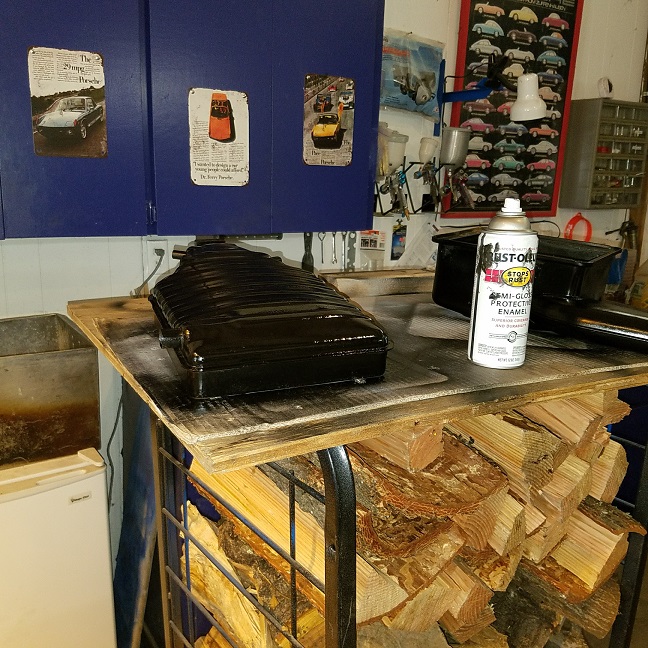
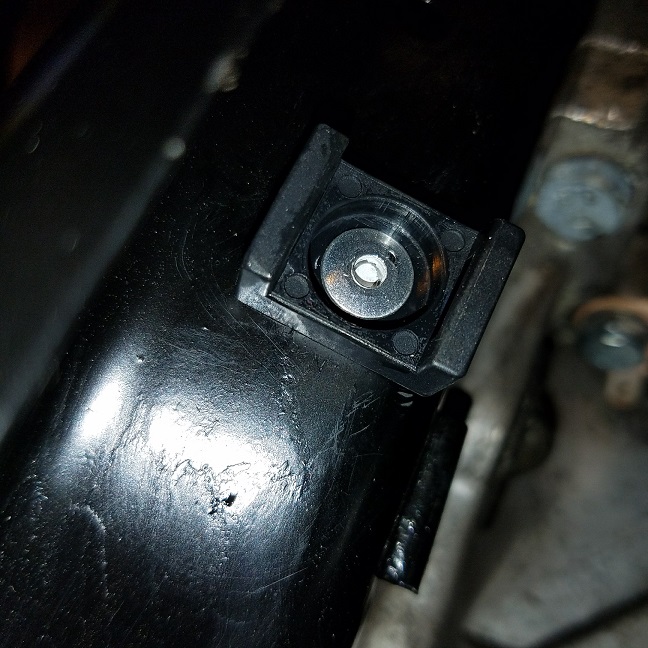
Not much to add for Saturday. Installed the painted brake reservoir strap. Then we proceeded to bleed the brakes. Only to find once we pressurized the system the back calipers freeze up and don't release. (IMG:style_emoticons/default/sad.gif) And it needs new rotors too.
Emailed Mark Installed the valve cover gaskets and covers. Then on to cleaning the bottom of the engine. Used wire brushes, brake cleaner and air. It was primarily left over blasting media stuck to the oil. Then changed the filter and refilled with Brad Penn 15-40. While I was there I removed the thermostat and bagged it up for Mark. Bent up Then back into office/clean room. I was really starting to struggle. The spark plug wires just wouldn't dress out the way I like. Did I have it set up right ? So I turn the engine 45 degrees on the stand and take off the valve cover and watch the #1 combustion cycle again. TDC, exhaust, both tight, intake then TDC again. Everything is dead on. At the end of the day it looks like someone re indexed the distributor, its off 90 degrees. Which is exacerbated by the fact this distributor has the #1 mark cut where we usually have #3. (IMG:style_emoticons/default/sad.gif) 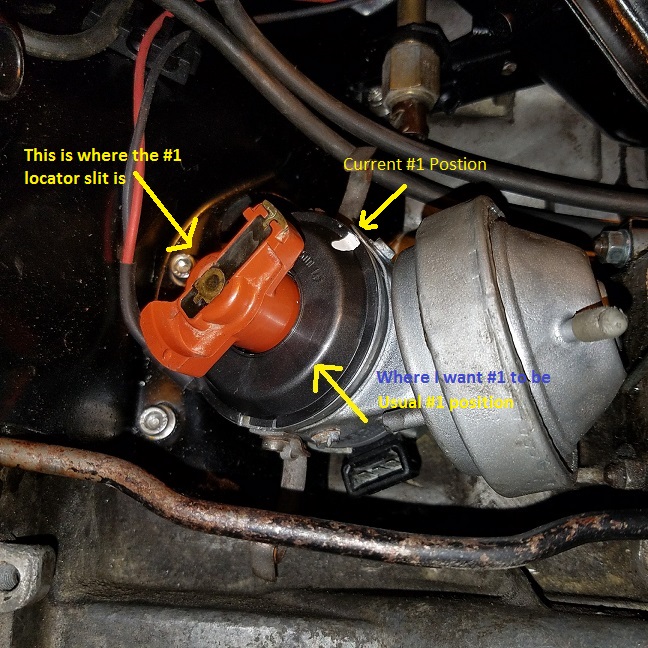 Off to my twice yearly Tire Rack Street Survival instructor duties. 914 World member Gary Chapmen will be there also. He does the inside teaching portion. |
|
|
|
| cary |
Oct 9 2016, 10:14 PM
Post
#363
|
|
Advanced Member Group: Members Posts: 3,900 Joined: 26-January 04 From: Sherwood Oregon Member No.: 1,608 Region Association: Pacific Northwest |
Couldn't let the dizzy issue go ................
Headed back out to Forest Grove after the TRSS. Doubled checked that every thing was at #1 TDC. Then set out to remove the distributor. Then tried pulling out the dizzy gear drive with one of my multiple magnets. No Go. (IMG:style_emoticons/default/sad.gif) Went to the Haynes manual and it suggested snap ring pliers. Grabbed them out of the special tool cabinet and went to work. Easy Deal ............. 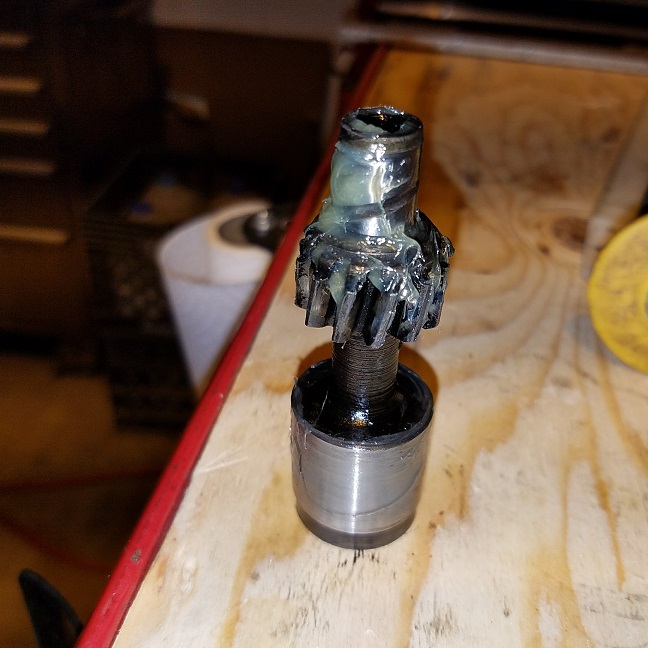 DANGER : After you pull the dizzy. The special oiling washer is just sitting on the dizzy boss. If left alone it could get knocked into the bottom of the engine. Please dont get distracted and retrieve it with a magnet. 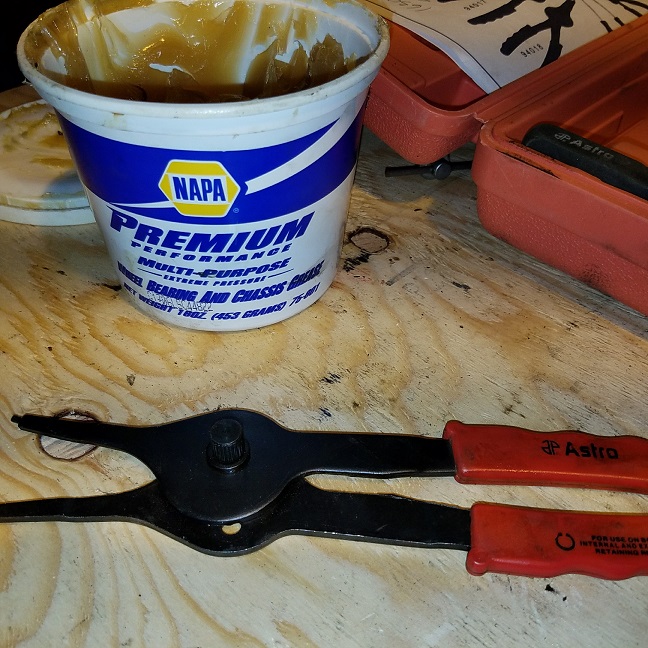 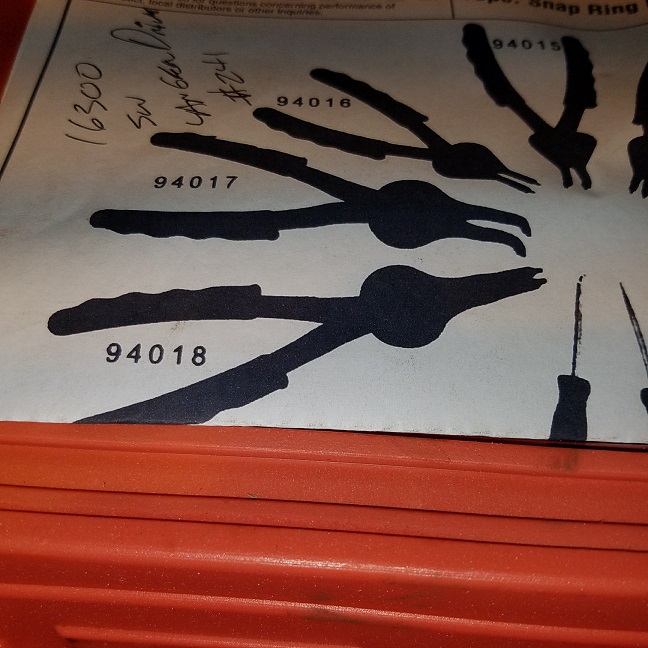 Used the sticky grease to hold the washer in place when I dropped the drive back into the hole. Had to do it twice to get the alignment I wanted. 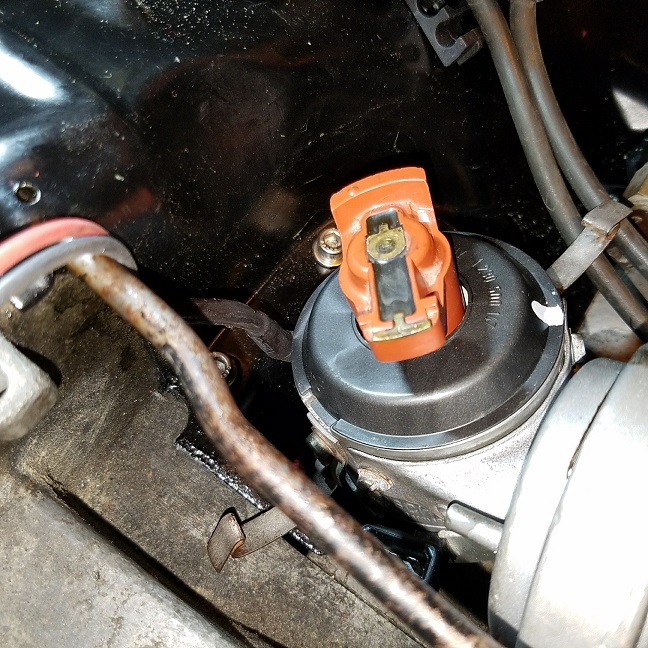 Took two attempts but I have number 1 back where I want it. Now it points right at the vacuum advance hose tube. (IMG:style_emoticons/default/piratenanner.gif) (IMG:style_emoticons/default/piratenanner.gif) Now I can dress the spark plug wires to my liking ............... 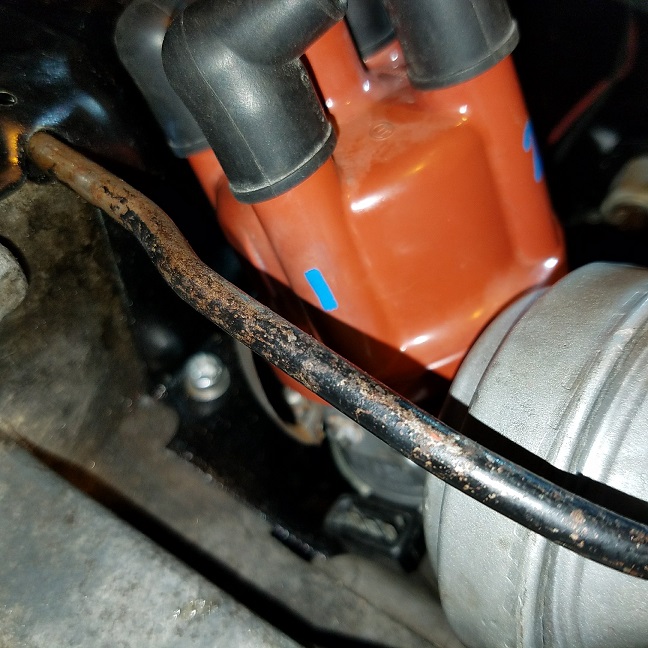 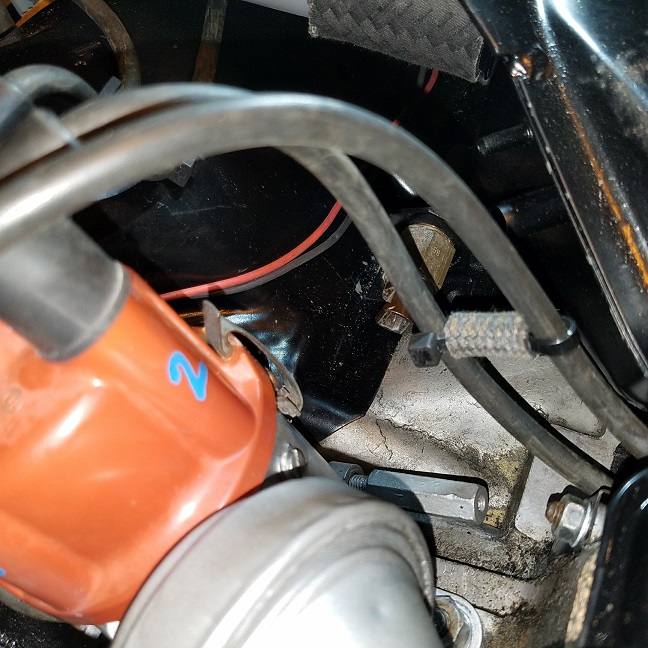 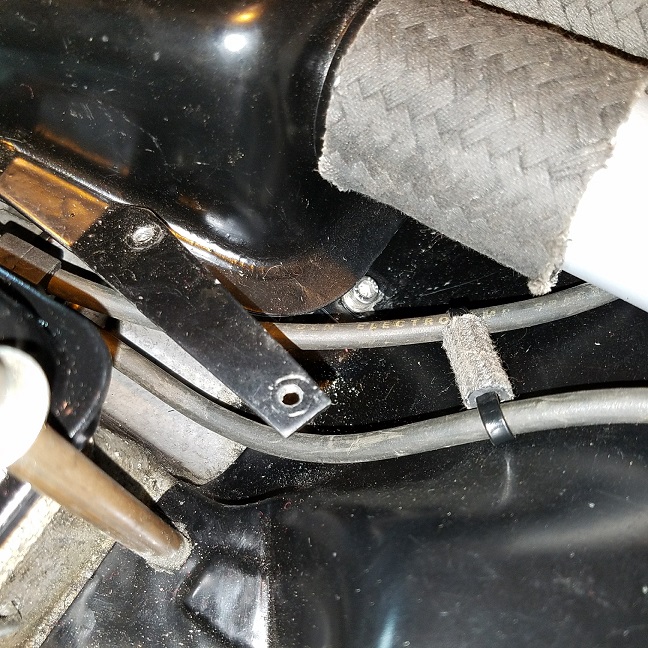 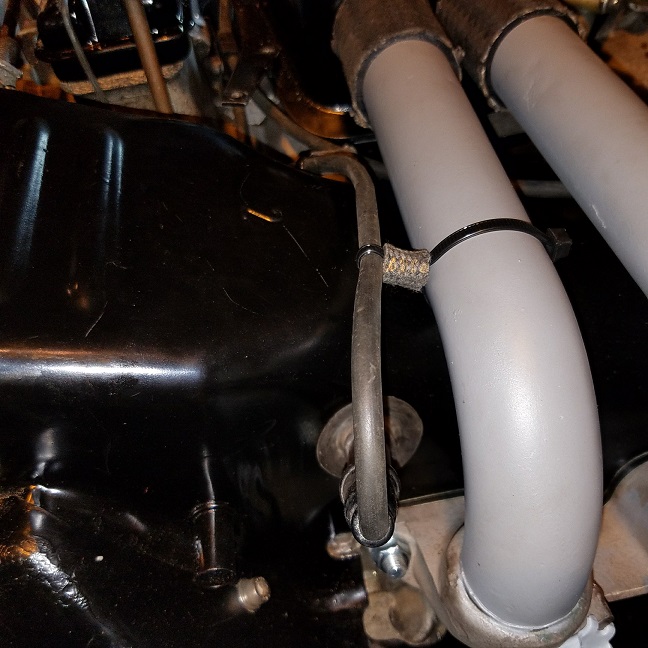 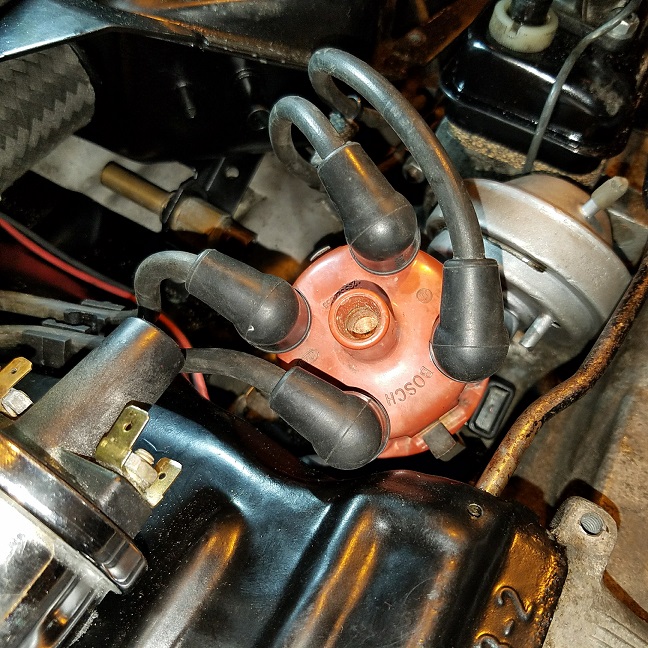 |
|
|
|
| Cairo94507 |
Oct 10 2016, 07:40 AM
Post
#364
|
|
Michael Group: Members Posts: 10,677 Joined: 1-November 08 From: Auburn, CA Member No.: 9,712 Region Association: Northern California |
Very nice way to tidy up the spark plug wires.
|
|
|
|
| cary |
Oct 15 2016, 08:54 AM
Post
#365
|
|
Advanced Member Group: Members Posts: 3,900 Joined: 26-January 04 From: Sherwood Oregon Member No.: 1,608 Region Association: Pacific Northwest |
  Found my used pins from the rewiring of the 3.2 conversion on my 911. 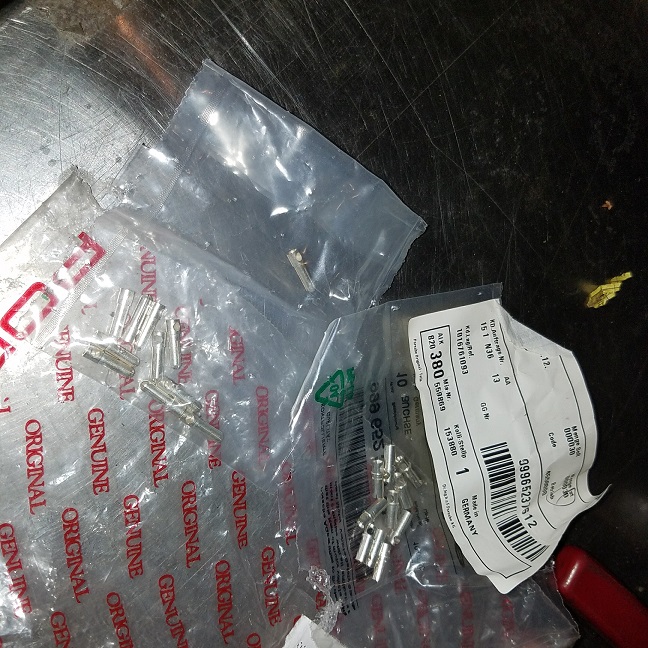 |
|
|
|
| cary |
Oct 15 2016, 09:37 PM
Post
#366
|
|
Advanced Member Group: Members Posts: 3,900 Joined: 26-January 04 From: Sherwood Oregon Member No.: 1,608 Region Association: Pacific Northwest |
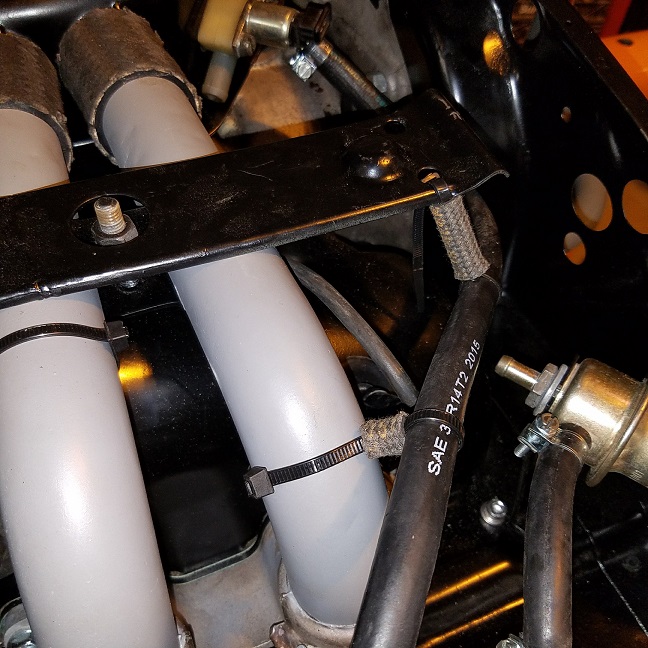
Finished up the return line with a new twist (non CW). Added a couple zip tie holders to the rear engine tin. Keeps it all tidy. I'm also going to have Super In Law fabricate a brace to hold the rear engine tin place. I get tired of it laying over.
 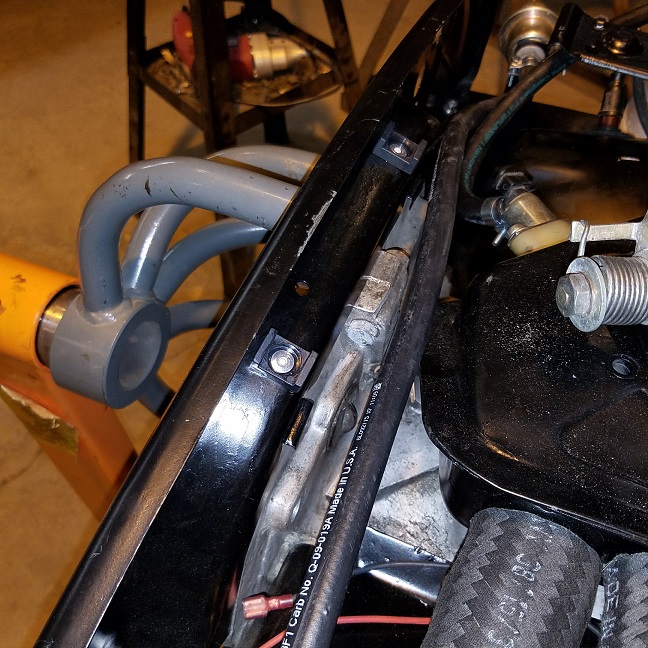 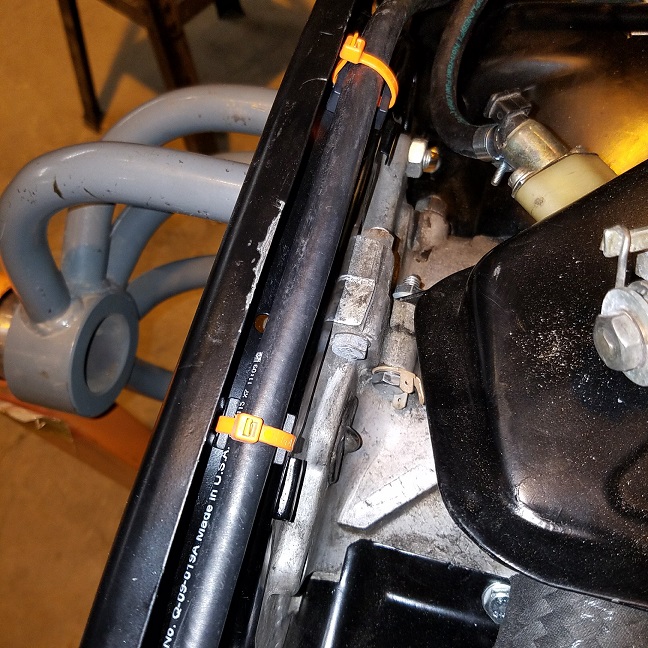 We'll see if I like the location after its back in the car. If not I'll hang it from the outer slot. |
|
|
|
| cary |
Oct 16 2016, 06:20 AM
Post
#367
|
|
Advanced Member Group: Members Posts: 3,900 Joined: 26-January 04 From: Sherwood Oregon Member No.: 1,608 Region Association: Pacific Northwest |
One little rust repair behind the drivers seat. Usual spot ..................
Cancer cut out. And entire area sprayed with cold galvanizing. 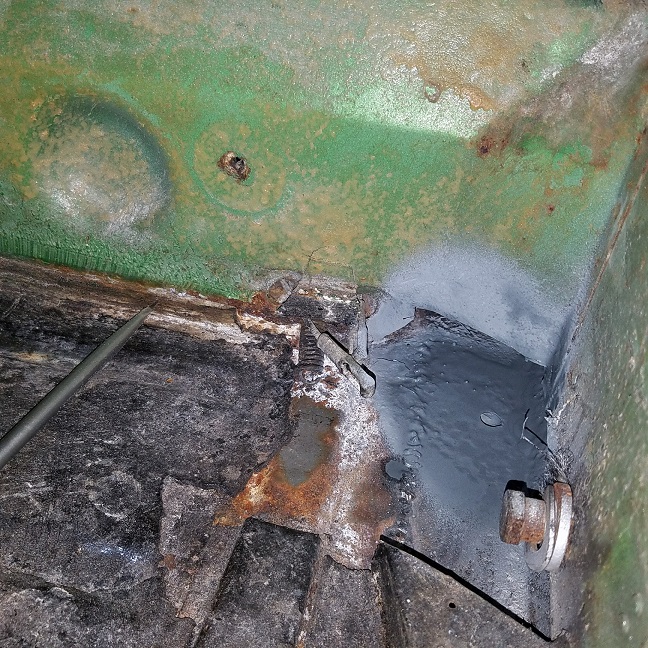 Patch welded in. Tough duty for a right hander. Upside down and backwards. Super In Law made the patch piece. But after closer inspection I'll need a little extension right under the e brake tubes. 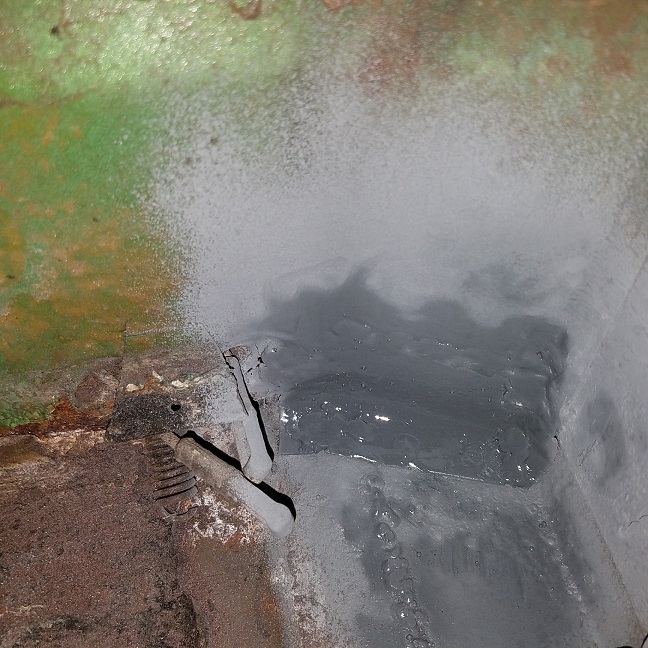 Went thru a few sanding belts to smooth down the weld. Not exactly my prettiest work. A little metal degradation on the upper portion and brazing on the left. 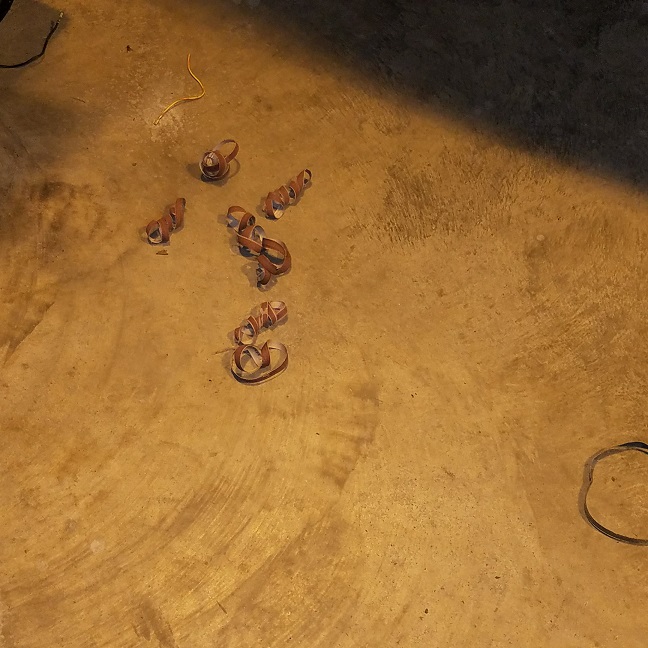 |
|
|
|
| cary |
Oct 16 2016, 08:49 AM
Post
#368
|
|
Advanced Member Group: Members Posts: 3,900 Joined: 26-January 04 From: Sherwood Oregon Member No.: 1,608 Region Association: Pacific Northwest |
QUOTE(BeatNavy @ Jun 1 2016, 06:38 PM) QUOTE(DirtyCossack @ Jun 1 2016, 09:21 PM) I'd love a pattern!!! (IMG:style_emoticons/default/agree.gif) I could definitely use that as well, Cary. Thanks for any and all help! For those that would like a copy of the suspension tie patterns PM me with your mailing address. I have Rich and Rob's already. But I need to go to Staples and get some thicker paper first. |
|
|
|
| cary |
Oct 18 2016, 08:02 AM
Post
#369
|
|
Advanced Member Group: Members Posts: 3,900 Joined: 26-January 04 From: Sherwood Oregon Member No.: 1,608 Region Association: Pacific Northwest |
Rich and Rob patterns going out in the mail today.
|
|
|
|
| BeatNavy |
Oct 18 2016, 02:23 PM
Post
#370
|
|
Certified Professional Scapegoat Group: Members Posts: 2,965 Joined: 26-February 14 From: Easton, MD Member No.: 17,042 Region Association: MidAtlantic Region |
Thanks, Cary. You are the man (and so is Super-In-Law) (IMG:style_emoticons/default/beer.gif)
|
|
|
|
| mbseto |
Oct 19 2016, 12:15 PM
Post
#371
|
|
Senior Member Group: Members Posts: 1,257 Joined: 6-August 14 From: Cincy Member No.: 17,743 Region Association: North East States |
QUOTE(cary @ Oct 16 2016, 10:49 AM) For those that would like a copy of the suspension tie patterns PM me with your mailing address. I have Rich and Rob's already. But I need to go to Staples and get some thicker paper first. I could use a pattern, but wouldn't it be easier for you to scan them and just email a scan? |
|
|
|
| cary |
Oct 20 2016, 08:44 AM
Post
#372
|
|
Advanced Member Group: Members Posts: 3,900 Joined: 26-January 04 From: Sherwood Oregon Member No.: 1,608 Region Association: Pacific Northwest |
Send me your email and I'll try it tonight ..........
|
|
|
|
| cary |
Oct 23 2016, 02:08 PM
Post
#373
|
|
Advanced Member Group: Members Posts: 3,900 Joined: 26-January 04 From: Sherwood Oregon Member No.: 1,608 Region Association: Pacific Northwest |
QUOTE(mbseto @ Oct 19 2016, 11:15 AM) QUOTE(cary @ Oct 16 2016, 10:49 AM) For those that would like a copy of the suspension tie patterns PM me with your mailing address. I have Rich and Rob's already. But I need to go to Staples and get some thicker paper first. I could use a pattern, but wouldn't it be easier for you to scan them and just email a scan? For those that want a PDF. I have the PDF scaled 100% dead on. Send me your email. |
|
|
|
| JoeDees |
Oct 24 2016, 08:41 AM
Post
#374
|
|
Senior Member Group: Members Posts: 515 Joined: 10-November 14 From: Northern Kentucky Member No.: 18,106 Region Association: None |
QUOTE(mbseto @ Oct 19 2016, 01:15 PM) QUOTE(cary @ Oct 16 2016, 10:49 AM) For those that would like a copy of the suspension tie patterns PM me with your mailing address. I have Rich and Rob's already. But I need to go to Staples and get some thicker paper first. I could use a pattern, but wouldn't it be easier for you to scan them and just email a scan? Reading this, I remembered that I was supposed to scan in and send you my template...sorry. But on the bright side, I'm 100% sure Cary's will be better than mine. |
|
|
|
| cary |
Oct 28 2016, 09:26 AM
Post
#375
|
|
Advanced Member Group: Members Posts: 3,900 Joined: 26-January 04 From: Sherwood Oregon Member No.: 1,608 Region Association: Pacific Northwest |
Mark stopped by yesterday to drop off the first batch of steering rack cases (?) to be washed in the jet washer.
He also picked up the templates for the suspension ties to see about having them cut out with a CNC or plasma table. 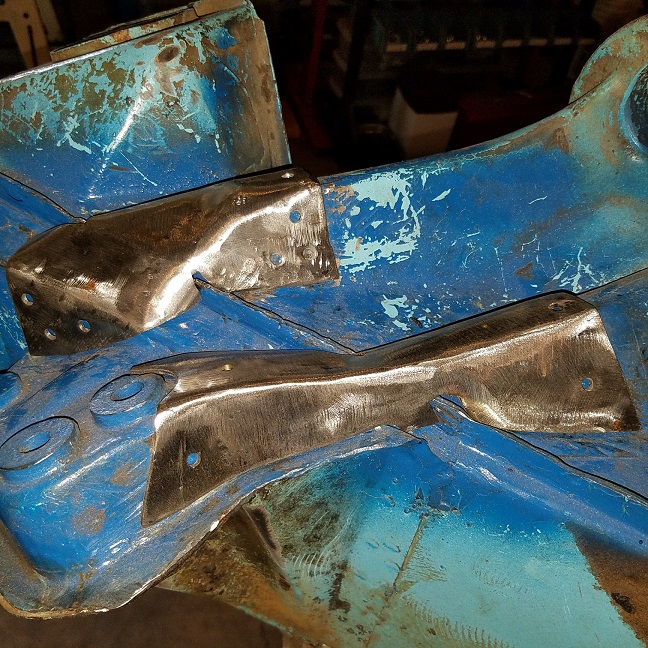 |
|
|
|
| BeatNavy |
Oct 28 2016, 09:58 AM
Post
#376
|
|
Certified Professional Scapegoat Group: Members Posts: 2,965 Joined: 26-February 14 From: Easton, MD Member No.: 17,042 Region Association: MidAtlantic Region |
Cary - thanks again for sending these out. You, sir, are an upstanding 914World citizen. Having said that, if Mark does make these and sell them reasonably priced, I will gladly go that route rather than attempt to make myself.
|
|
|
|
| cary |
May 4 2017, 08:02 AM
Post
#377
|
|
Advanced Member Group: Members Posts: 3,900 Joined: 26-January 04 From: Sherwood Oregon Member No.: 1,608 Region Association: Pacific Northwest |
Mark stopped by yesterday and did a project review on the For Sale Car. It's been a while.
Work List .................. * Inspect the fuel tank and lines * Finish the rebuilding of the brake system (rears & bleeding) * Finish engine/FI refreshment and install Then it will return to 914 Rubber for the interior and trunk painting. |
|
|
|
| cary |
May 13 2017, 07:57 PM
Post
#378
|
|
Advanced Member Group: Members Posts: 3,900 Joined: 26-January 04 From: Sherwood Oregon Member No.: 1,608 Region Association: Pacific Northwest |
QUOTE(BeatNavy @ Oct 8 2016, 05:25 AM) As always, it's great to read your progress, Cary. I enjoy seeing the detail you put into this. Did you ever get around to making a template for the suspension tie pieces? I know you have other fish to fry, but I'm going to have to deal with this sooner or later. No worries/no pressure, just curious. Look what Matt dropped off this afternoon. Don't know the pricing ................. 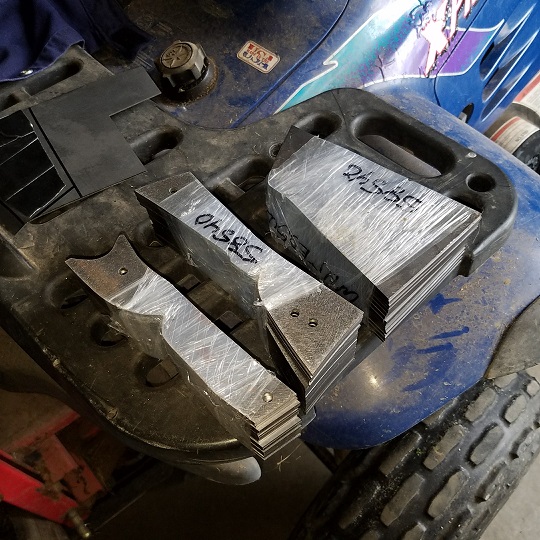 |
|
|
|
| rhodyguy |
May 13 2017, 09:06 PM
Post
#379
|
|
Chimp Sanctuary NW. Check it out. Group: Members Posts: 22,252 Joined: 2-March 03 From: Orion's Bell. The BELL! Member No.: 378 Region Association: Galt's Gulch |
Nice trick with the zip ties and piece of hose on the wires.
|
|
|
|
| cary |
May 29 2017, 09:05 PM
Post
#380
|
|
Advanced Member Group: Members Posts: 3,900 Joined: 26-January 04 From: Sherwood Oregon Member No.: 1,608 Region Association: Pacific Northwest |
As Super In Law is finishing up the engine tray patch on Doug's car. I jumped over and installed the new rotors and calipers on Mark's for sale car.
I did also crack the hose connections right below the engine tray on both sides. (IMG:style_emoticons/default/biggrin.gif) No issues. I removed the hard and soft lines on Saturday after pulling the calipers and rotors. 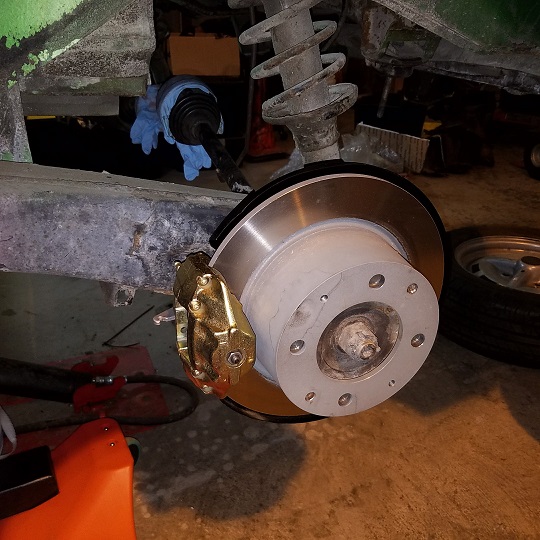 |
|
|
|
|
1 User(s) are reading this topic (1 Guests and 0 Anonymous Users)
0 Members:

|
Lo-Fi Version | Time is now: 23rd June 2026 - 10:38 PM |
Invision Power Board
v9.1.4 © 2026 IPS, Inc.