|
|
|
Porsche, and the Porsche crest are registered trademarks of Dr. Ing. h.c. F. Porsche AG.
This site is not affiliated with Porsche in any way. Its only purpose is to provide an online forum for car enthusiasts. All other trademarks are property of their respective owners. |
|
|

  |

| Jameel |
 Mar 12 2016, 08:25 AM Mar 12 2016, 08:25 AM
Post
#1
|
|
Member  Group: Members Posts: 98 Joined: 6-October 15 From: Iowa Member No.: 19,239 Region Association: None |
A few days ago I decided to take a closer look at my shift linkage, since my car has some serious issues. Took that rear cover off and found this: https://youtu.be/gtFysPUBIO0
I'm no engineer, but that looks nasty to me. I decided to fix it right. So yesterday I made a trip to 914 Limited and was treated quite well by Brad and Mike. Brad and I had exchanged a couple emails and calls and since I'm less than 3 hours from Peoria, I decided to kill two birds and simply drive in. Brad was kind enough to let me drive his daily 914 to see what a side shifter felt like. Took me about 1/3 mile to decide I would do the conversion. Brad and Mike walked me through a few of the finer points of the process, but this being my first time opening up a transaxle, I figured I'd try and document as much as possible. I've done a bunch of searches here (and at Pelican) but have not found much in terms of step-by-step. Brad's instructions were provided, and he invited me to call anytime for support, but I'll be taking pics anyway, so figured I'd start a thread. Can anyone point me to a thread where someone has documented the process? The best I've found so far is mikedsilva's, here. I could not find others. Sort of off topic too, but is there any way to get rid of the huge smileys window when composing a post? My composition pane is just tiny, like 1/4 the size of the smileys pane. |
   |

 
|
| Spoke |
Mar 12 2016, 09:12 AM
Post
#2
|
|
Jerry Group: Members Posts: 6,973 Joined: 29-October 04 From: Allentown, PA Member No.: 3,031 Region Association: None |
Dr Evil here has a DVD on how to rebuild the 901 transmission. Send him a PM here or on Facebook.
Evilwerks |
|
|
|
| TheCabinetmaker |
Mar 12 2016, 12:42 PM
Post
#3
|
|
I drive my car everyday Group: Members Posts: 8,300 Joined: 8-May 03 From: Tulsa, Ok. Member No.: 666 |
As for the smilie thing, just use the fast reply button at the bottom.
|
|
|
|
| 0396 |
Mar 12 2016, 12:44 PM
Post
#4
|
|
Advanced Member Group: Members Posts: 2,046 Joined: 13-October 03 From: L.A. Calif Member No.: 1,245 Region Association: Southern California |
QUOTE(Jameel @ Mar 12 2016, 06:25 AM)  A few days ago I decided to take a closer look at my shift linkage, since my car has some serious issues. Took that rear cover off and found this: https://youtu.be/gtFysPUBIO0 I'm no engineer, but that looks nasty to me. I decided to fix it right. So yesterday I made a trip to 914 Limited and was treated quite well by Brad and Mike. Brad and I had exchanged a couple emails and calls and since I'm less than 3 hours from Peoria, I decided to kill two birds and simply drive in. Brad was kind enough to let me drive his daily 914 to see what a side shifter felt like. Took me about 1/3 mile to decide I would do the conversion. Brad and Mike walked me through a few of the finer points of the process, but this being my first time opening up a transaxle, I figured I'd try and document as much as possible. I've done a bunch of searches here (and at Pelican) but have not found much in terms of step-by-step. Brad's instructions were provided, and he invited me to call anytime for support, but I'll be taking pics anyway, so figured I'd start a thread. Can anyone point me to a thread where someone has documented the process? The best I've found so far is mikedsilva's, here. I could not find others. Sort of off topic too, but is there any way to get rid of the huge smileys window when composing a post? My composition pane is just tiny, like 1/4 the size of the smileys pane. You have all the information on mikedsilva"s tread. It's not rocket science.....you can do it. |
|
|
|
| jcd914 |
Mar 12 2016, 06:10 PM
Post
#5
|
|
Advanced Member Group: Members Posts: 2,081 Joined: 7-February 08 From: Sacramento, CA Member No.: 8,684 Region Association: Northern California |
QUOTE(Jameel @ Mar 12 2016, 06:25 AM) Sort of off topic too, but is there any way to get rid of the huge smileys window when composing a post? My composition pane is just tiny, like 1/4 the size of the smileys pane. Use you mouse to grab the bottom right corner of the of the composition pane and drag down and out to make the pane larger. The is also a "+" and a "-" button at the bottom left corner of the composition pane that will lengthen or shorten the pane. Jim |
 |
|
| stugray |
Mar 12 2016, 07:06 PM
Post
#6
|
|
Advanced Member Group: Members Posts: 3,824 Joined: 17-September 09 From: Longmont, CO Member No.: 10,819 Region Association: None |
One trick:
You have to remove the engine bar to put the SS rod in the center tunnel. So if the engine is out, put that rod in before you put the engine back in. If the engine is in, you have to jack up the engine and remove the bar. And if the car was originally a TS and you are converting to a SS you either need to buy the special bushing from PP, or tangerine racing has a firewall bushing that will work instead (and is better). |
|
|
|
| Jameel |
Mar 12 2016, 08:16 PM
Post
#7
|
|
Member Group: Members Posts: 98 Joined: 6-October 15 From: Iowa Member No.: 19,239 Region Association: None |
Thanks everybody. I don't have any doubts that I'll be able to figure it out. Just hoping to flatten the learning curve a little. Stu, I'm fairly certain Brad included everything I need to do the conversion. I'll keep your sequence in mind. I'm not planning on dropping the engine to do the conversion. I'll eventually drop the engine I suppose, but for now I just want to get the car shifting sweeter so I can drive around this summer and enjoy it while I learn the ropes.
|
|
|
|
| Jameel |
Mar 17 2016, 07:56 PM
Post
#8
|
|
Member Group: Members Posts: 98 Joined: 6-October 15 From: Iowa Member No.: 19,239 Region Association: None |
Took the day off to work on this. I spent the last couple days looking for step photos of this process, but came up empty, so I've decided to make my own step photos with explanations for complete neophytes (me of course) Keep in mind this is my first time doing this, or working on a 914 at all for that matter. Feel free to laugh, ridicule, whatever. I'm ready.
First task, remove the muffler. I need a new bracket, obviously... 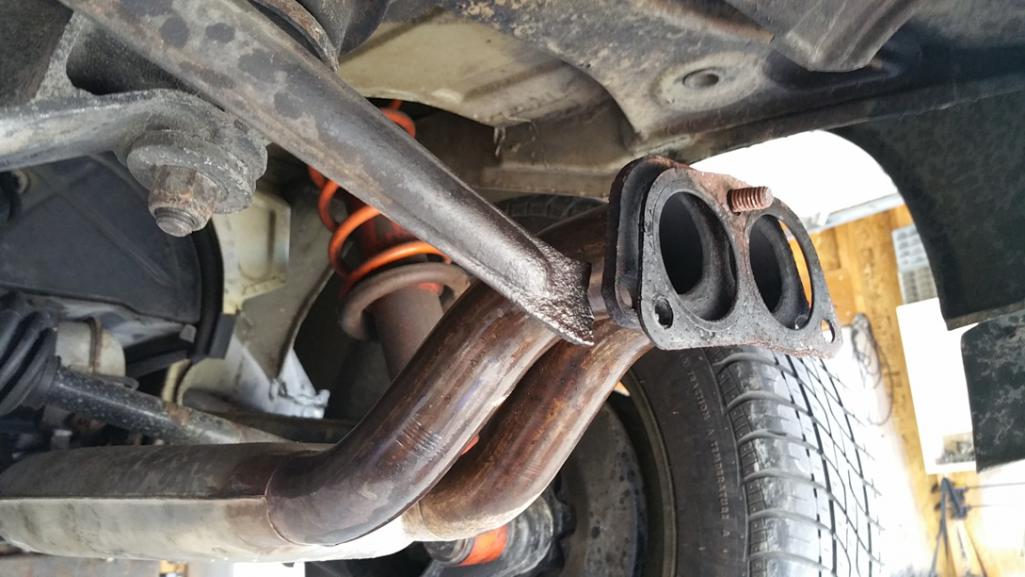 Next up, remove the tail shifter components from the back of the tranny all the way up to the shifter. Removing these two bolts is about all that can be done before venturing into the tunnel up front. 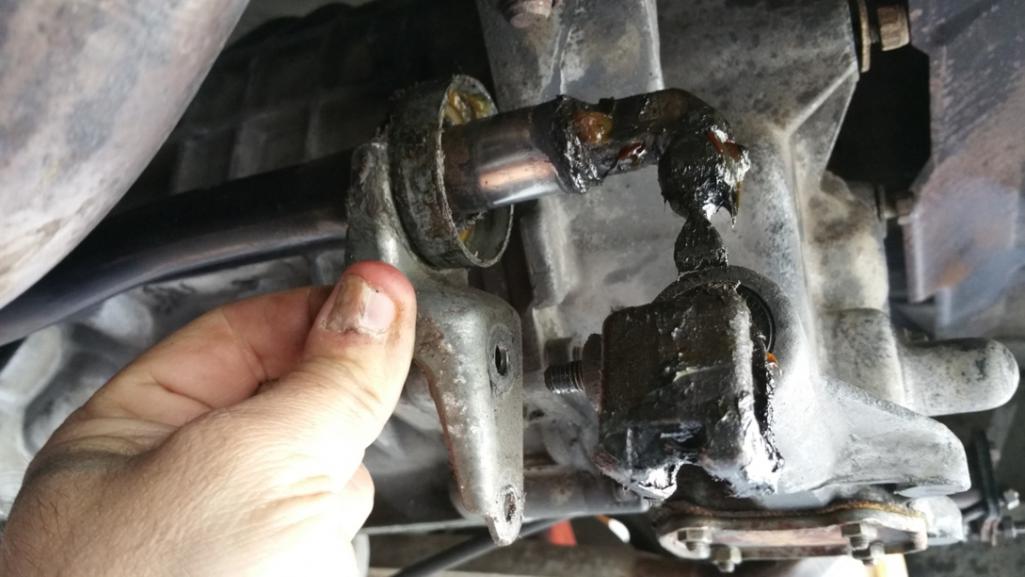 After pulling the center seat out (it just lifts up) I unscrewed the plastic tray underneath to reveal tunnel. I peeled back the vinyl to get at the little access door by the firewall. 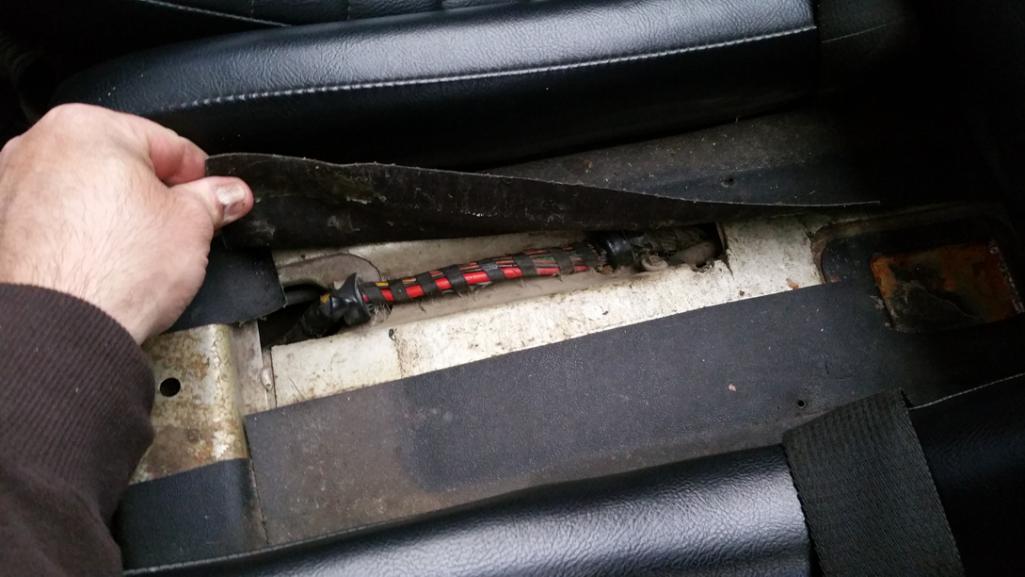 I quickly realized I would need tor remove all the seats to access the tunnel properly. Driver's seat comes out easy enough (it has that little tab to press down on the driver's side--like my 69 bug, only on the proper side!) Passenger fixed seat came out with a few nuts and screws under the bottom seat cushion and at the bottom of the back, then I slide it down and forward to remove. I unscrewed the engine lid release knob too before pulling the seat out. 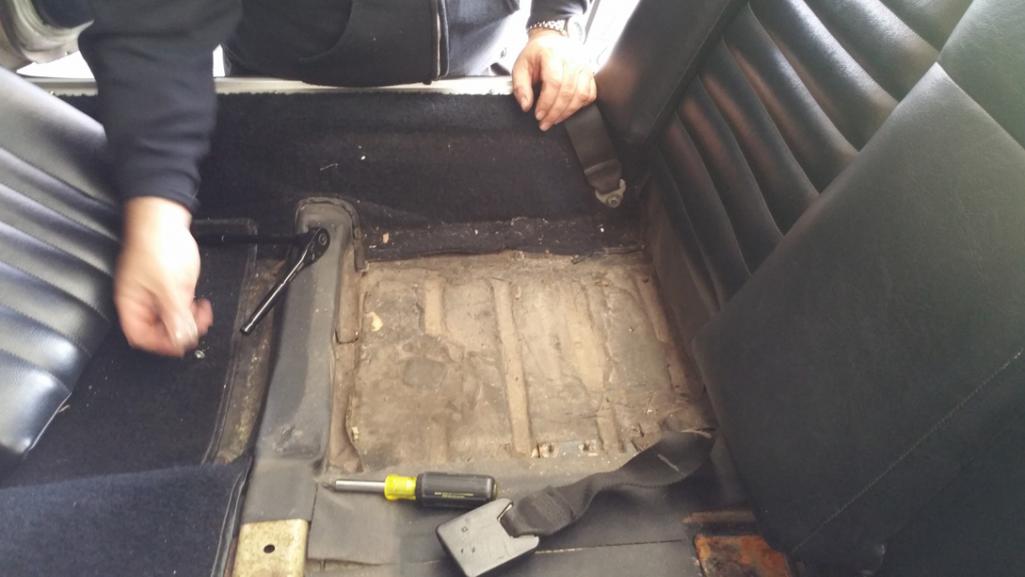 I also removed the light, and disconnected the wires before pulling the seat.  With the seat out I realized I'll need to redo the rear window rubber before I put it back. 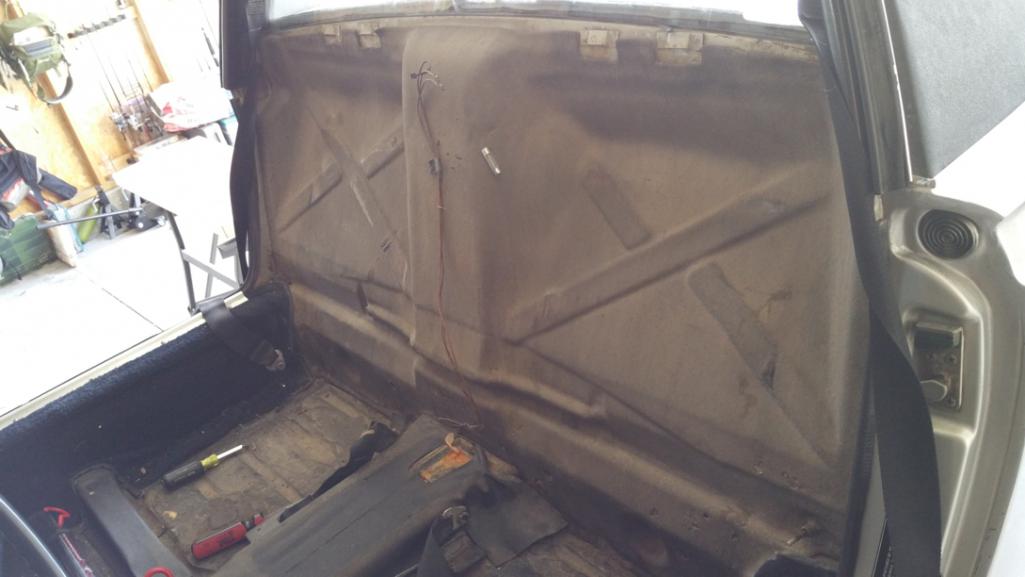 I peeled back the vinyl to expose the tunnel access panel. 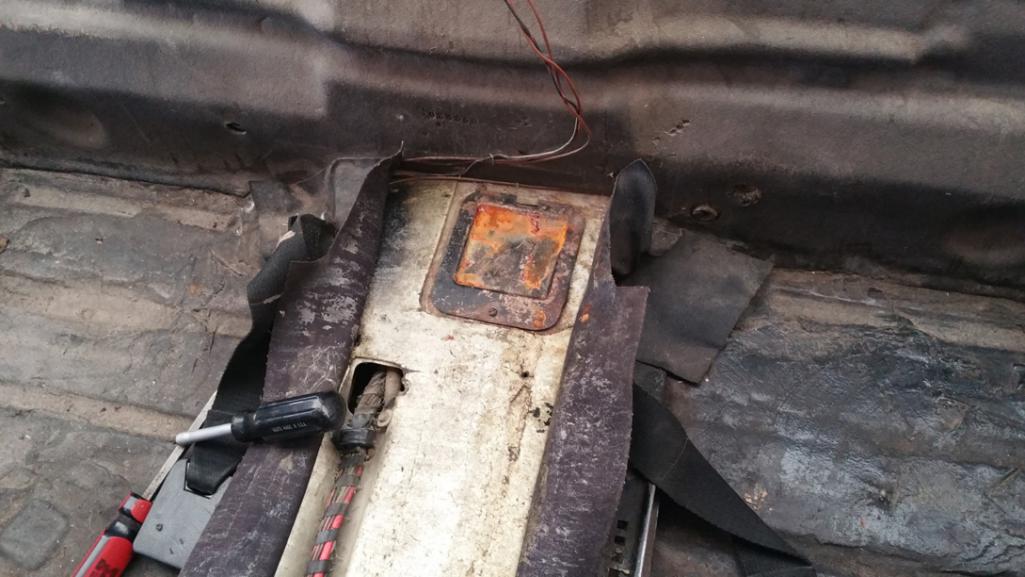 Removed the little screw to remove the panel. 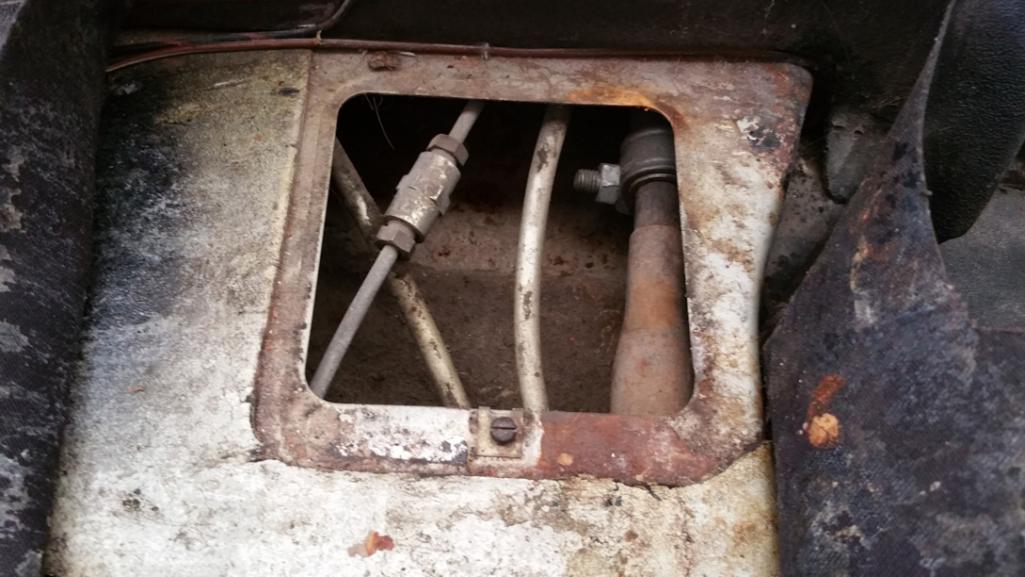 Pulled the shift knob off (it had a tiny set screw holding it on) removed the carpet, then unbolted the shifter from the tunnel. 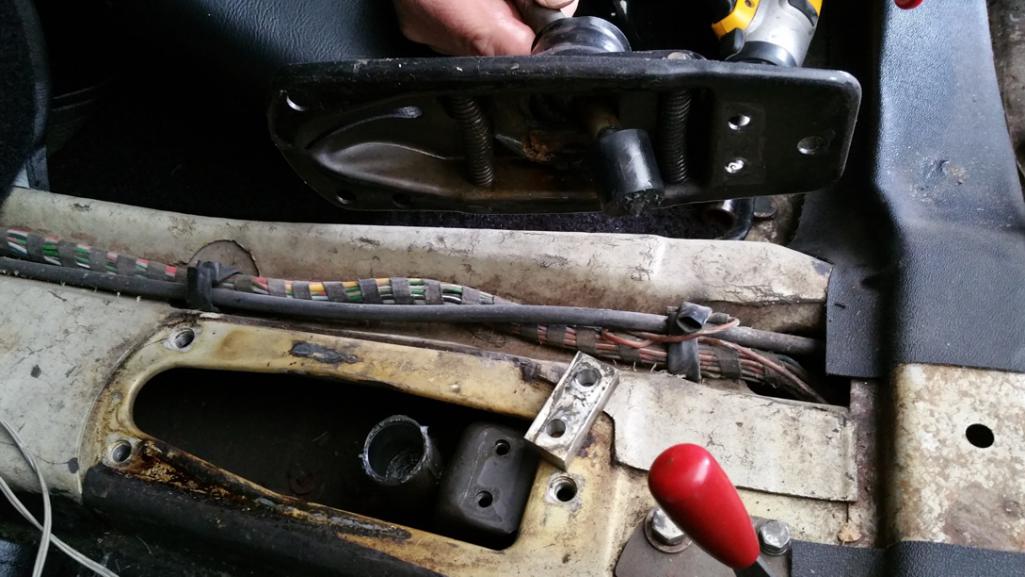 |
|
|
|
| Jameel |
Mar 17 2016, 08:08 PM
Post
#9
|
|
Member Group: Members Posts: 98 Joined: 6-October 15 From: Iowa Member No.: 19,239 Region Association: None |
Next I loosened the connection between the two shift rods in the access panel.
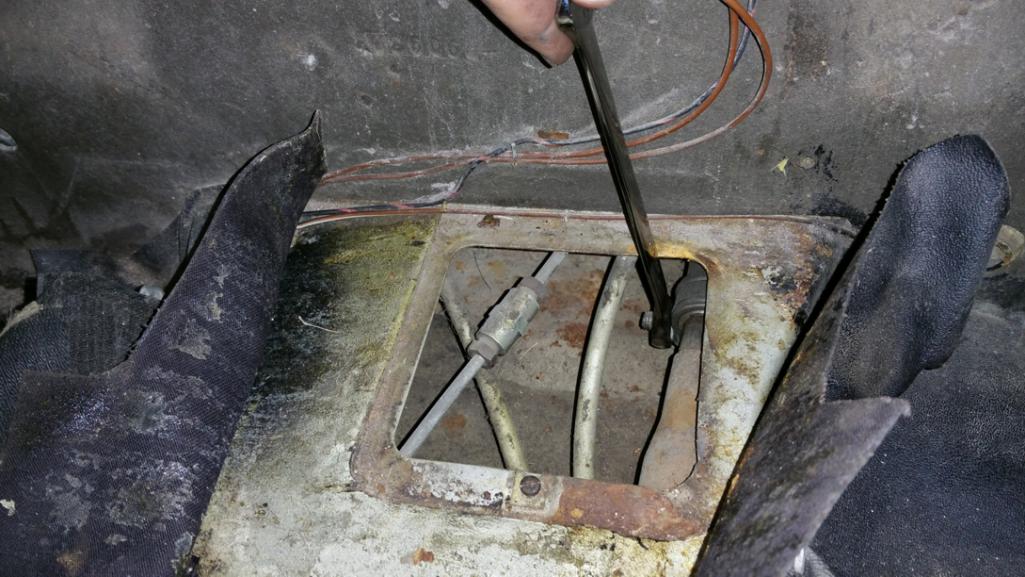 Then the shift connector rod pulled out pretty easily from behind the firewall, along with the rear shift rod.  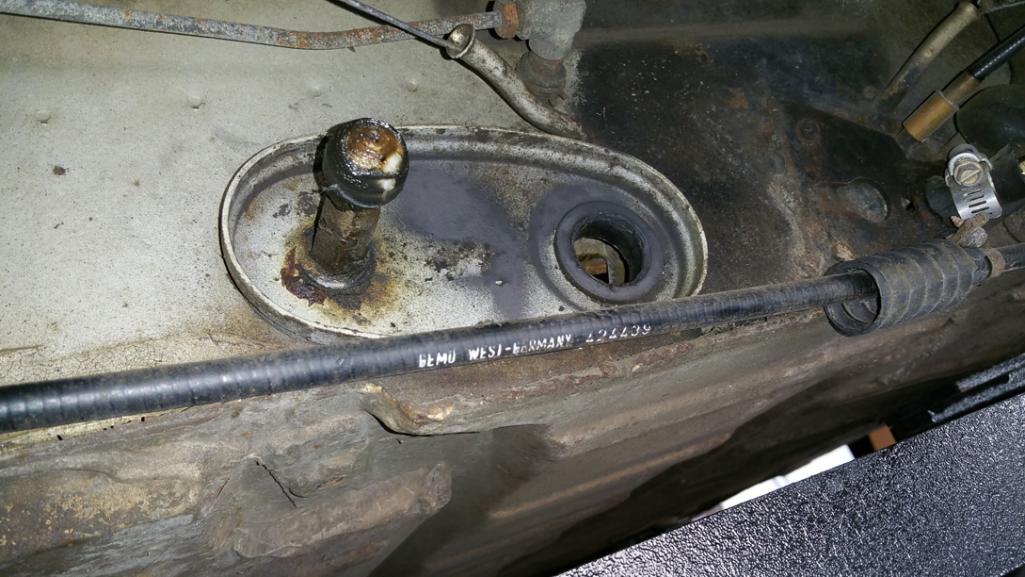 Next I dismantled the front shift rod from the shift rod head. It's a single allen head set screw with a cone shaped shaft. 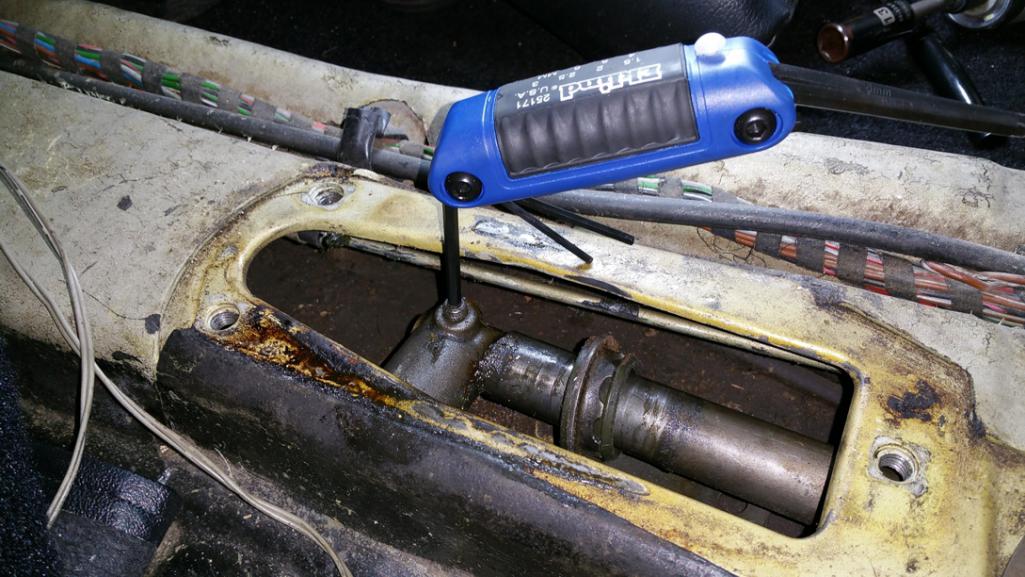 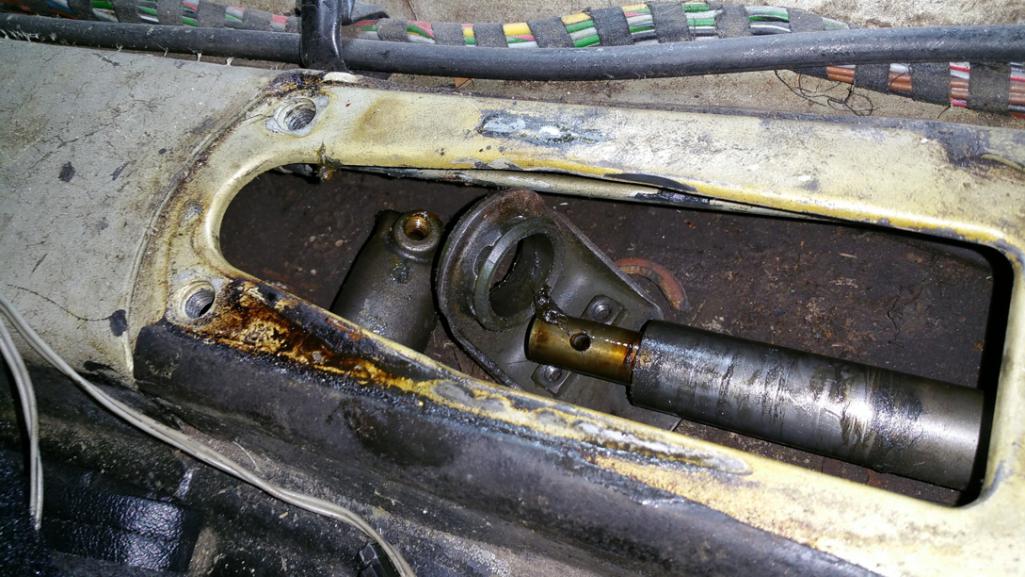 Next I removed the old bushing from the firewall by prying it out with a screwdriver. It came out fairly easily. 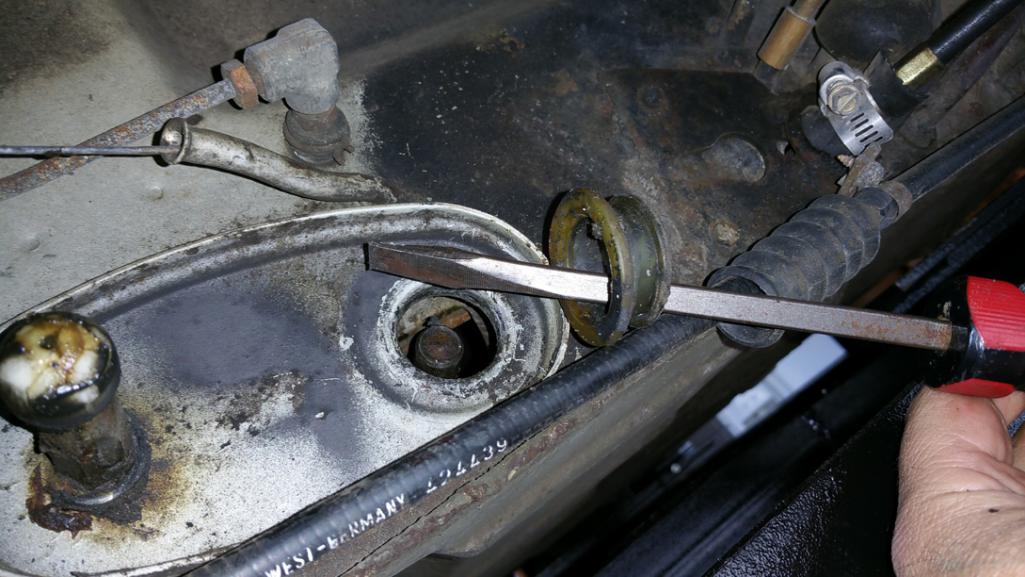 With the bushing out I could feed the front shift rod out the firewall. 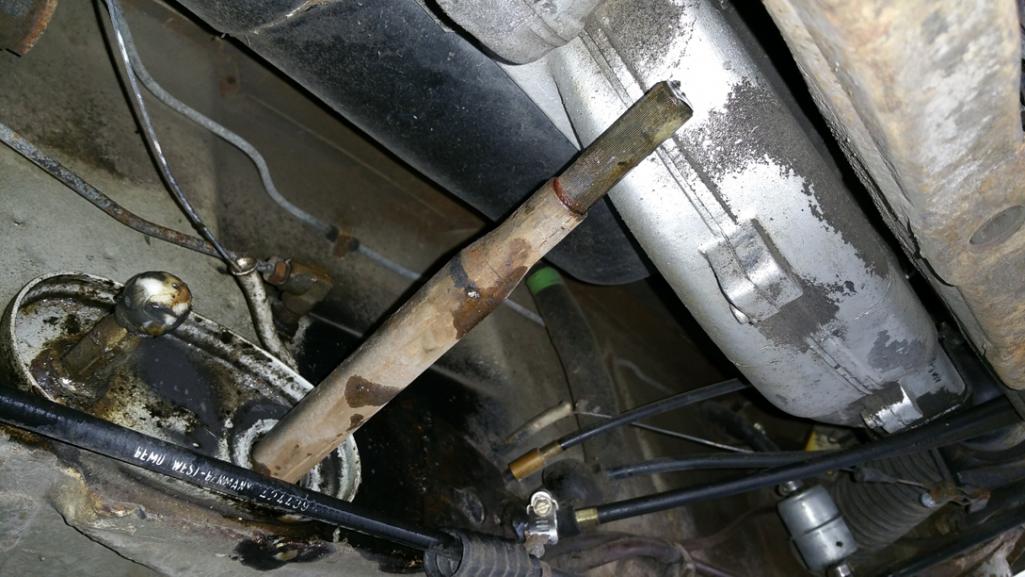 |
|
|
|
| Jameel |
Mar 17 2016, 08:26 PM
Post
#10
|
|
Member Group: Members Posts: 98 Joined: 6-October 15 From: Iowa Member No.: 19,239 Region Association: None |
Next I began removing the engine support bar to replace it with the one that came with my side shift conversion kit.
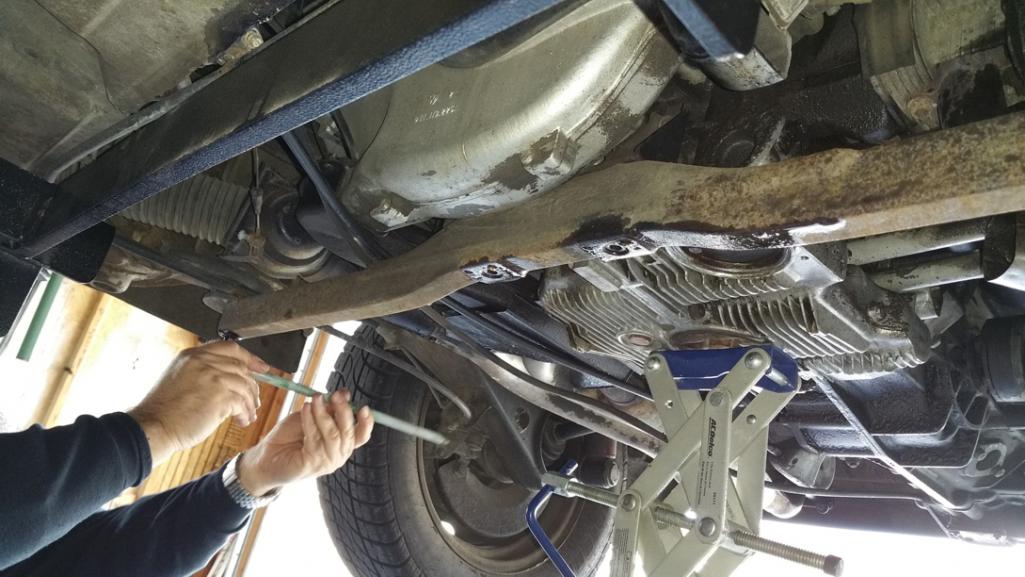 I was told to support the engine while swapping this out, so I slid my workmate underneath and used some blocking and a scissor jack to support the engine. |
|
|
|
| SKL1 |
Mar 17 2016, 09:46 PM
Post
#11
|
|
Senior Member Group: Members Posts: 1,597 Joined: 19-February 11 From: north Scottsdale Member No.: 12,732 Region Association: Upper MidWest |
May I recommend while you're going to that trouble, put in a Rennshift at the same time!
|
|
|
|
| Jameel |
Mar 17 2016, 10:01 PM
Post
#12
|
|
Member Group: Members Posts: 98 Joined: 6-October 15 From: Iowa Member No.: 19,239 Region Association: None |
QUOTE(SKL1 @ Mar 17 2016, 07:46 PM) May I recommend while you're going to that trouble, put in a Rennshift at the same time! I thought Brad's side shift felt pretty great compared to my nearly unshiftable tail shift. What does the Rennshift provide above a nice side shift? |
|
|
|
| ndfrigi |
Mar 17 2016, 10:05 PM
Post
#13
|
|
Advanced Member Group: Members Posts: 2,928 Joined: 21-August 11 From: Orange County Member No.: 13,474 Region Association: Southern California |
You might want to just get a set of side shift parts and transmission and i think you should fix the clutch tube since it has that clamp already for temporary holding the clutch tube.
ooops sorry your title already said you are converting it to side shift. |
|
|
|
| rhodyguy |
Mar 18 2016, 08:38 AM
Post
#14
|
|
Chimp Sanctuary NW. Check it out. Group: Members Posts: 22,060 Joined: 2-March 03 From: Orion's Bell. The BELL! Member No.: 378 Region Association: Galt's Gulch |
The fact that most if not all of the bushings are spent lead to your shifting issues. Note the pivot ball on the post on the firewall.
|
|
|
|
| Jameel |
Mar 18 2016, 07:53 PM
Post
#15
|
|
Member Group: Members Posts: 98 Joined: 6-October 15 From: Iowa Member No.: 19,239 Region Association: None |
QUOTE(ndfrigi @ Mar 17 2016, 08:05 PM) You might want to just get a set of side shift parts and transmission and i think you should fix the clutch tube since it has that clamp already for temporary holding the clutch tube. ooops sorry your title already said you are converting it to side shift. I will eventually deal with the clutch cable (among other things). One step at a time... |
|
|
|
| Jameel |
Mar 18 2016, 08:19 PM
Post
#16
|
|
Member Group: Members Posts: 98 Joined: 6-October 15 From: Iowa Member No.: 19,239 Region Association: None |
Managed to sneak in a couple hours on the 914 after work today. I took off the old engine support mounts from the chassis. I thought I'd have to replace these since the rubber was cracked, but it turns out the new bar just bolts right to the chassis, no rubber involved.
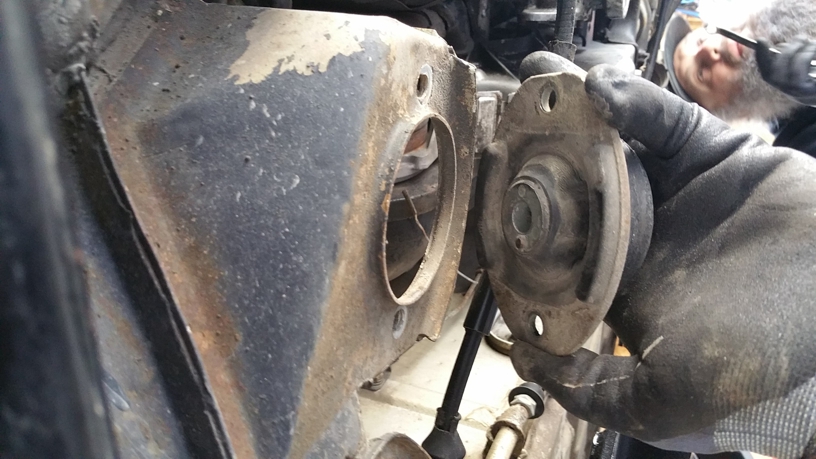 After removing the bracket that holds the engine support to the engine I bolted up the new bracket. It's a little tight access to the upper bolts, but its doable. Can't figure out why these pics are posting rotated... Next up the U brackets into the chassis points. These replace the rubber mounts. 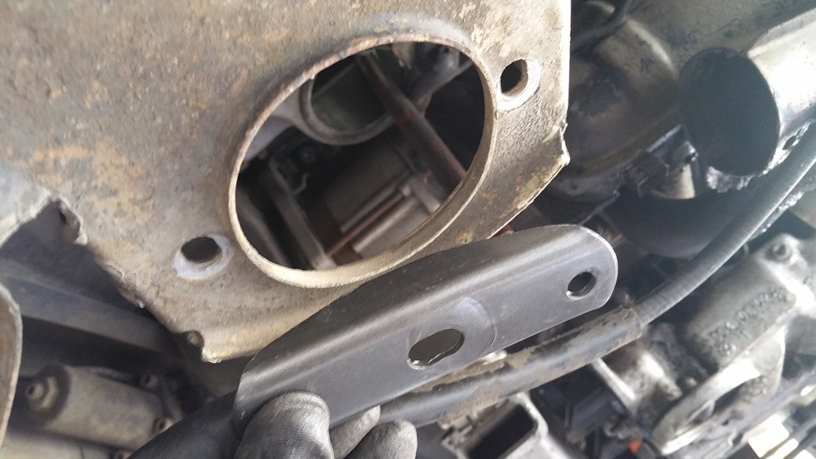 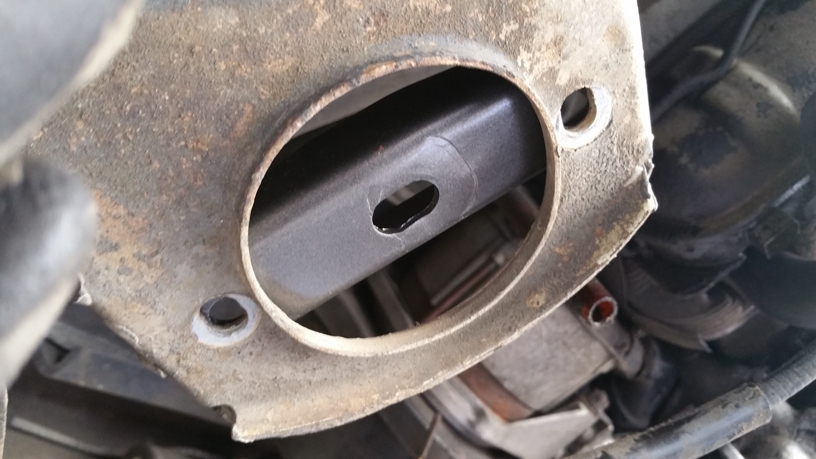 The engine bar bolts right to these U brackets. At least that what I was told, and what the parts explosion shows. 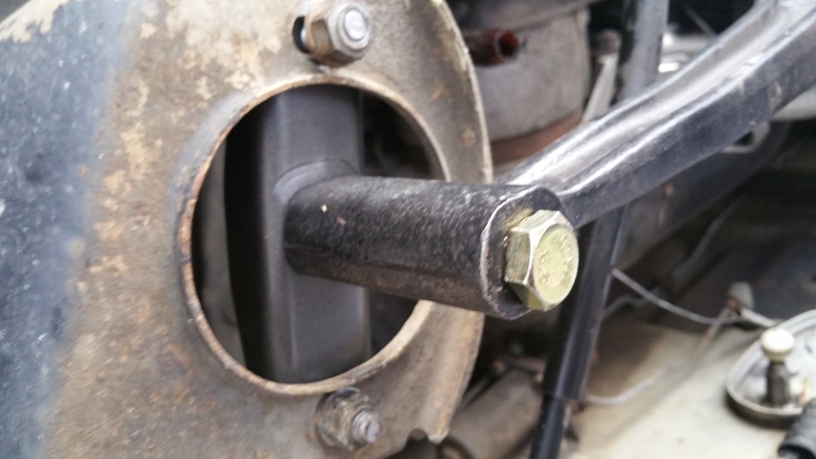 I'm doing things sort of out of order. I can't fully bolt up the engine support yet, because I don't have the firewall bushing in, which means I can't also insert the front shift rod. Which means (still with me?) I need to venture inside and start cutting holes. Here's the template for the access hole for cutting away part of the hole in the bulkhead--clearance for the new shift rod. I punched the corners using Brad's template, then taped off the outline with the ubiquitous blue masking tape. 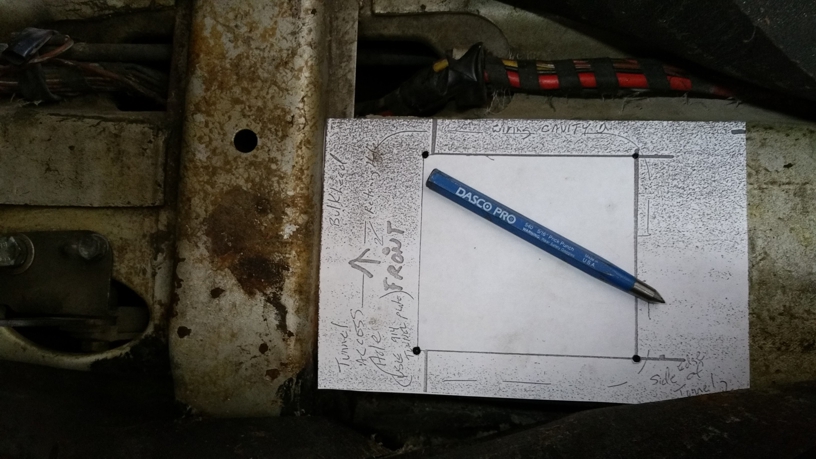 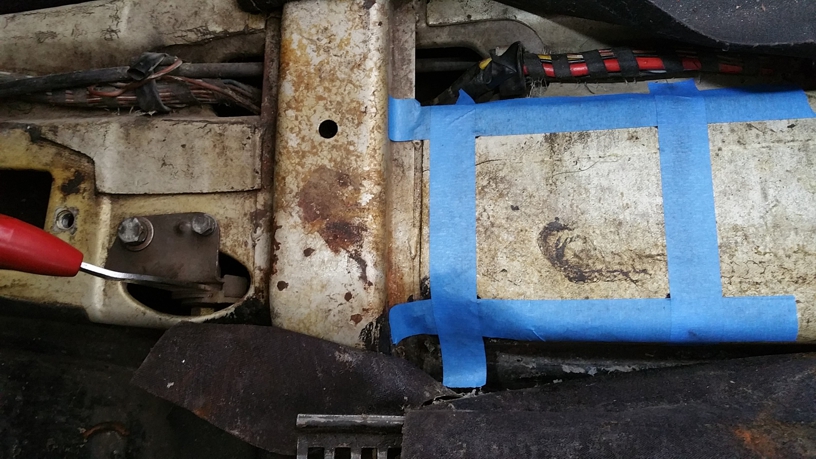 I'm making sparks inside my car. There are tools everywhere. I feel like a total hack, yet I'm loving every minute of it. This car will shift like a champ, I can feel it. 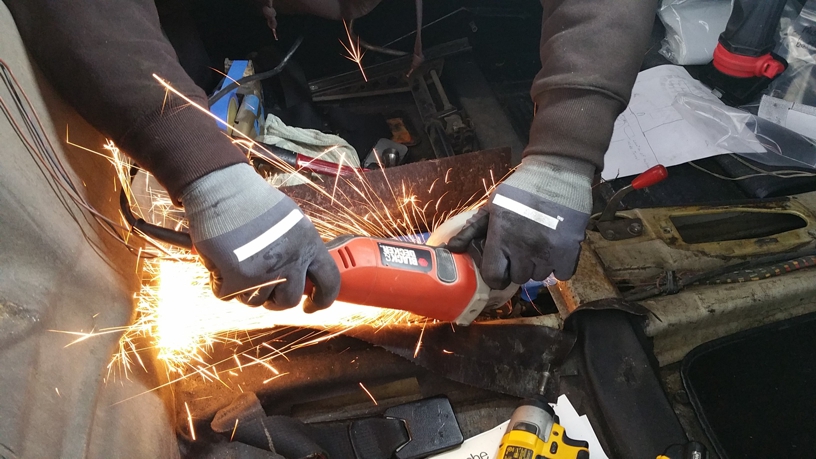 I get the hole cut without ruining anything inside. Yes! This is ripping good fun. 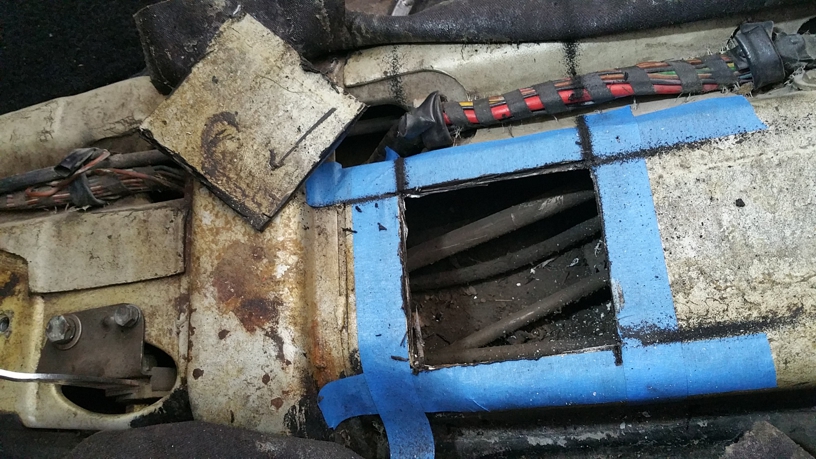 Look at that bulkhead, will you? This tail shift rod has been trying to escape for years I tell you! I guess I don't need to file any clearance for the new rod. I bet the right side of that puppy comes out with a couple twists. Clutch cable is unscathed, as far as I can tell. Tomorrow I get to boil my bushing. Always wanted to say that. 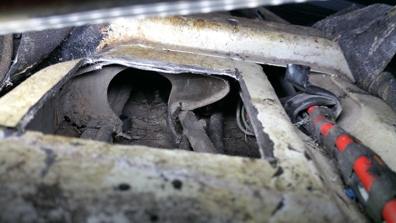 Attached image(s) 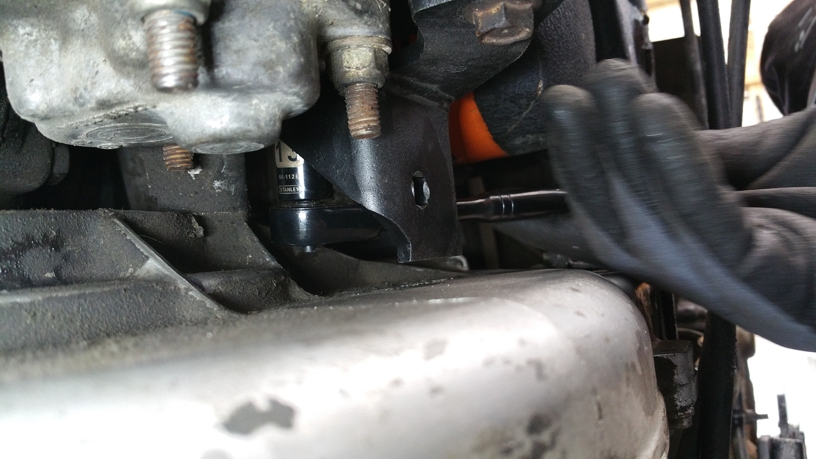
|
|
|
|
| eyesright |
Mar 19 2016, 04:41 AM
Post
#17
|
|
Member Group: Members Posts: 430 Joined: 8-January 12 From: OK Member No.: 13,979 Region Association: Southwest Region |
Good work and nice write up. We are waiting with...er...bait breath... for the next step...at least in part because you may be starting with a well worn shifter but very nice everything else. This will shift like a dream.
|
|
|
|
| Jameel |
Mar 19 2016, 07:06 PM
Post
#18
|
|
Member Group: Members Posts: 98 Joined: 6-October 15 From: Iowa Member No.: 19,239 Region Association: None |
QUOTE(eyesright @ Mar 19 2016, 02:41 AM) Good work and nice write up. We are waiting with...er...bait breath... for the next step...at least in part because you may be starting with a well worn shifter but very nice everything else. This will shift like a dream. Thanks! I certainly hope it shifts like a dream. |
|
|
|
| Jameel |
Mar 19 2016, 08:58 PM
Post
#19
|
|
Member Group: Members Posts: 98 Joined: 6-October 15 From: Iowa Member No.: 19,239 Region Association: None |
So this is the first entire day I've been able to work on the 914. Got a bunch done. First up, getting rid of the gnarly part of that bulkhead with a die grinder. I didn't manage to hit any fuel lines. Bonus!
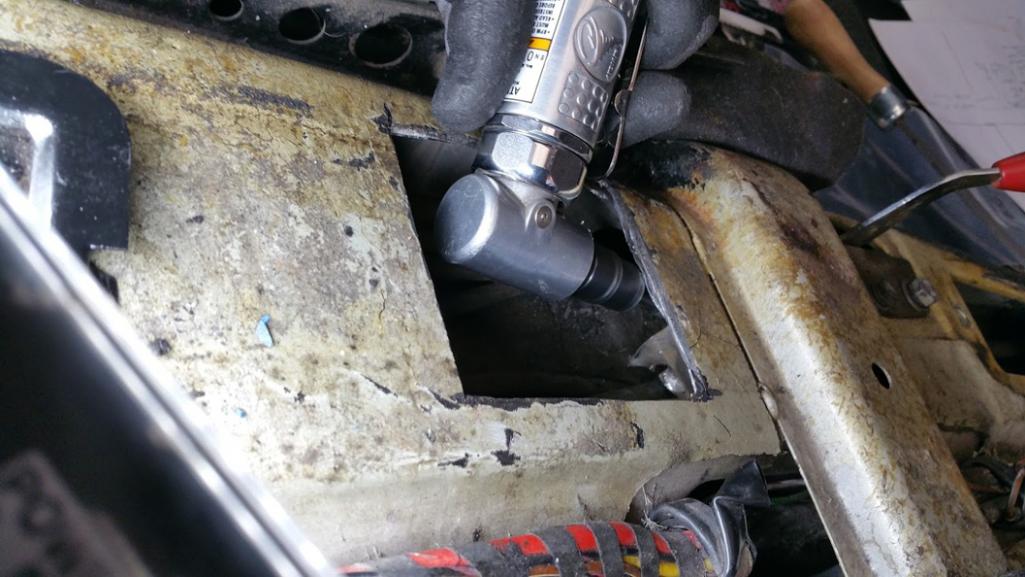 With the tunnel ready to accept the front shift rod, I boiled me some bushing and popped it in. Easy. What is everyone doing for a boot here? The raised metal flange is for tail shift setup, so I can't use a side shift boot here. 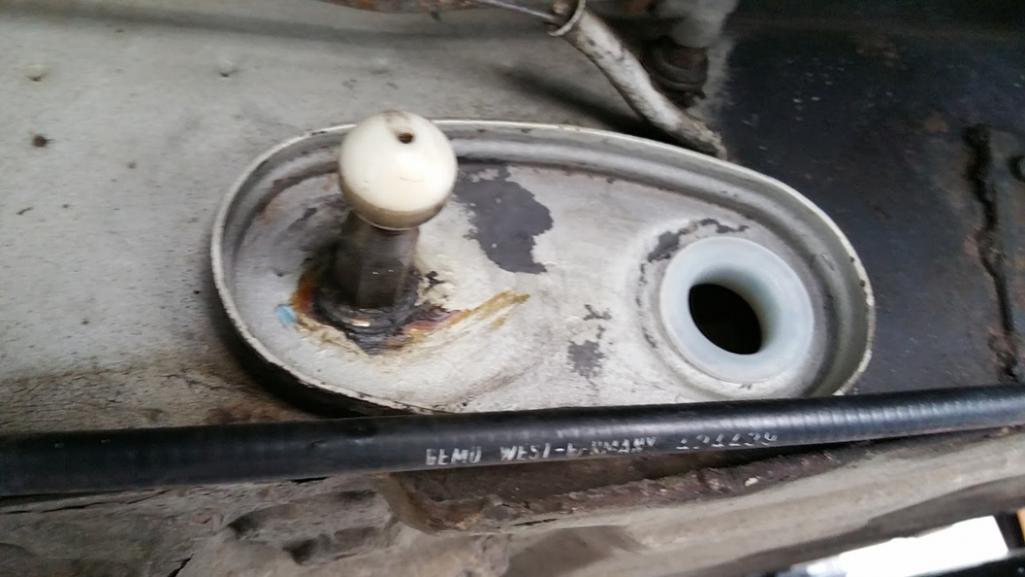 When I went to finally mount the engine support bar on I realized it was pretty much impossible to bolt the rubber dampers to the engine case (the brackets were already on the case) with the bar in place. So I ended up taking the dampers off the bar and bolting them to the brackets individually. It was still a pain to do this since access to the front of the case is so restricted. The left one went on pretty easy, but the right one was a pain. I had to loosen the upper bolt from the bracket and pivot it to get the damper mounted. Then I pivoted the bracket/damper back up and was just barely able to fit a small socket in there. The oil filter is in the way. Taking it out would make this a much easier task. But I don't have a tool for taking the filter off yet. I finally got them and the bar mounted after an hour of damned tedious work. Glad I'm done with that. 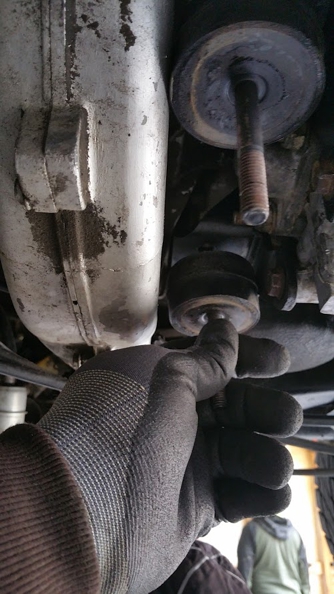 With the bar mounted I went ahead and fed the front shift rod into the tunnel through the new bushing. No pic of this. I'll take one next time. Next step is to remove the transaxle. Before I got too deep into that I decided to drain the gear oil. The first minute was dark brown and opaque. Looked pretty nasty to me, but I really have no idea what I'm talking about, so it could be okay...who knows? 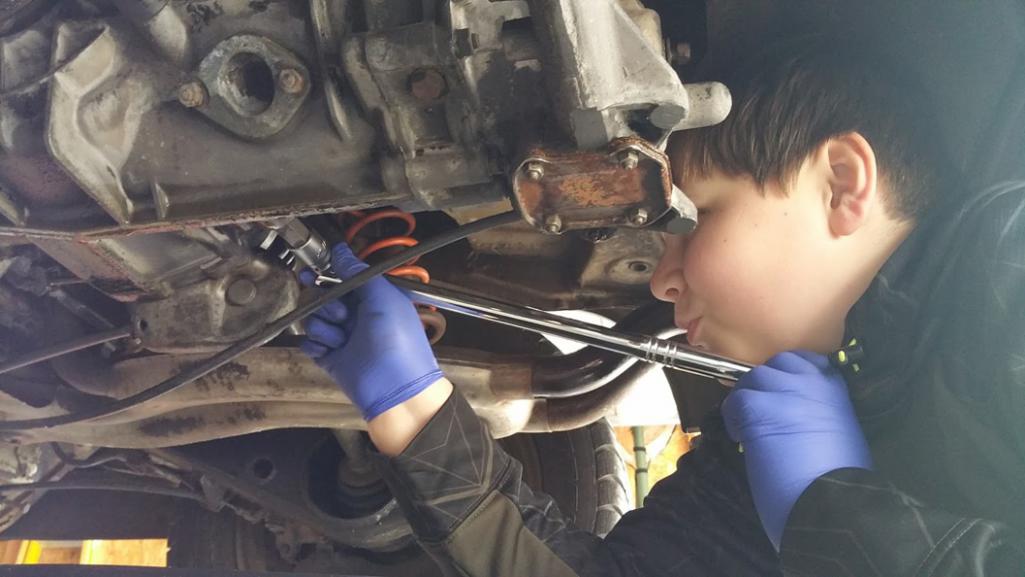 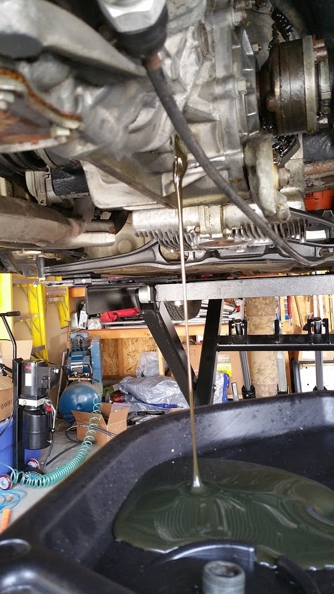 The magnet had some filings on it. But nothing big (what's big anyway?) 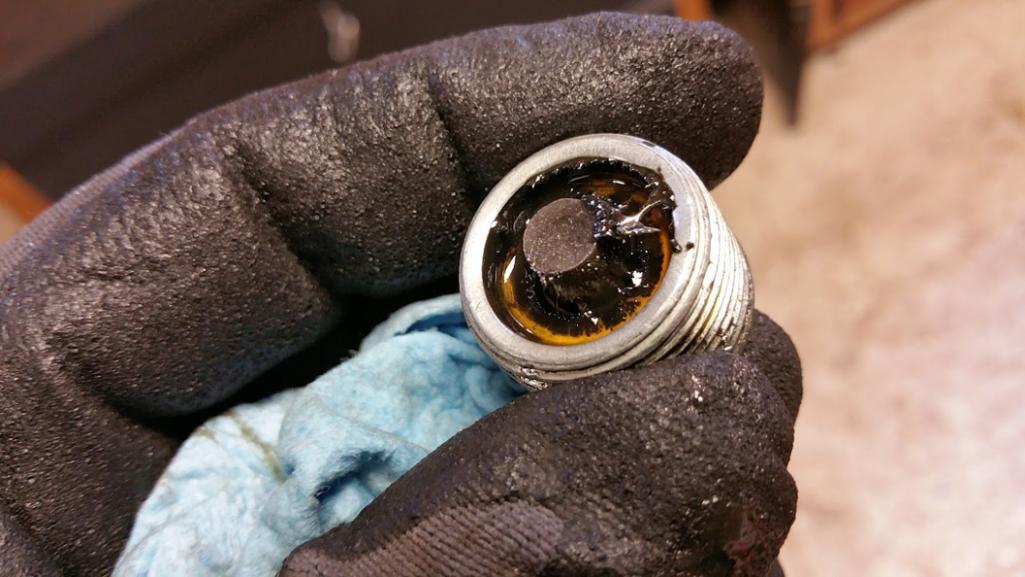 While the tranny drained I started disconnecting stuff. First the speedometer cable. I loosened the light colored nut here. Discovered it was a left hand thread before I destroyed it thankfully. 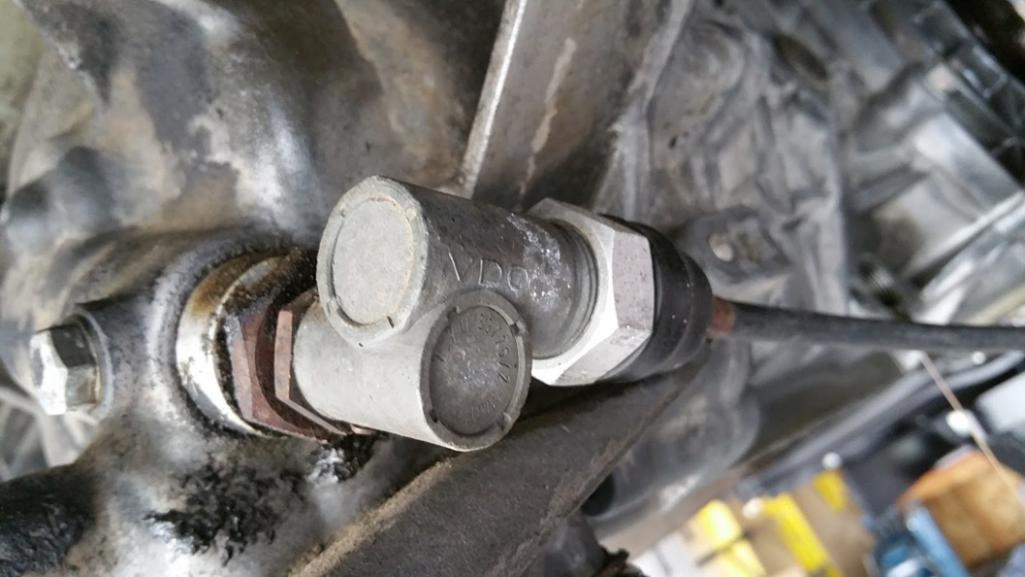 Then I unbolted the CV joints. 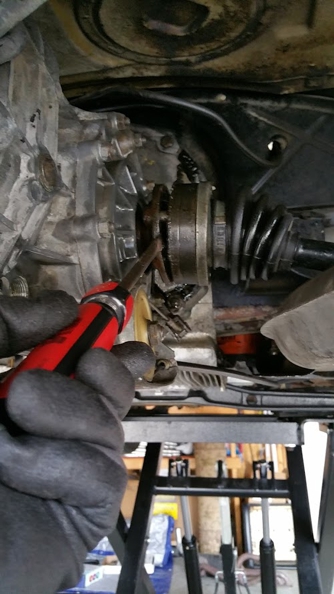 Removing the reverse light switch. Add this to the shopping list. This looks like its been at the bottom of the ocean for a century. Weird, since the boot is in great shape. 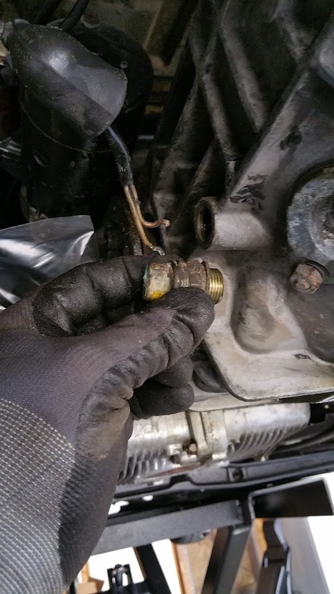 Then I disconnected the three wires going into the starter motor solenoid (I think that's right, right?) 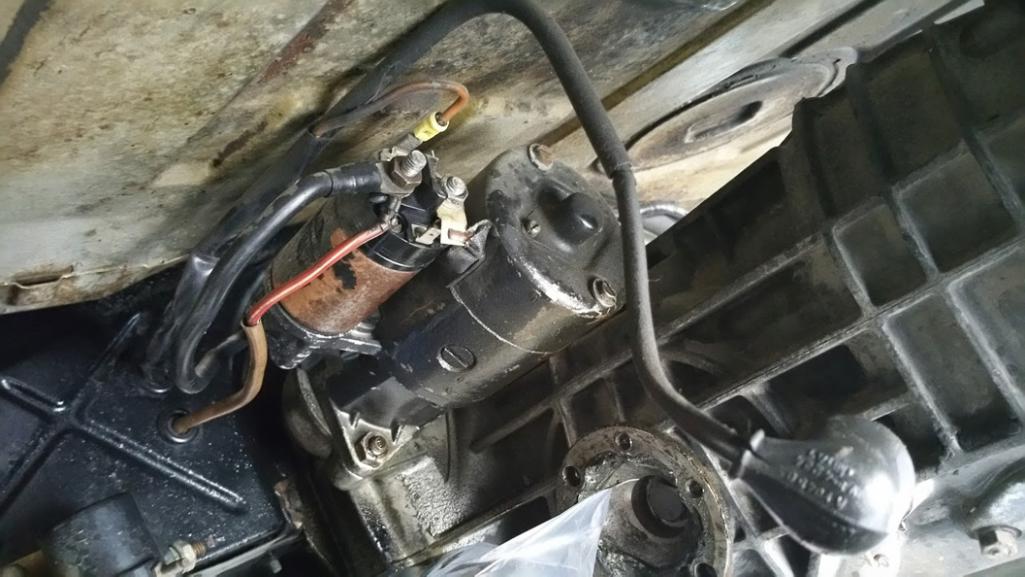 Two nuts and a washer came off the end of the clutch cable, which allowed me to pull the cable from the lever. 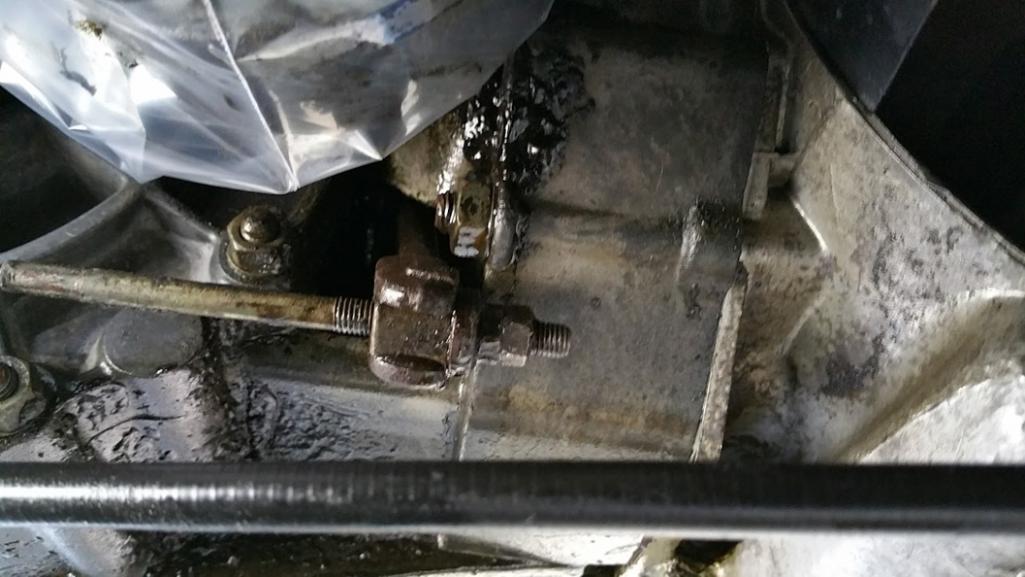 The center nut in the middle of the clutch pulley allows the pulley to come off and the cable to detach from the transaxle. Tomorrow I hope to get the tranny removed completely. Then the real fun begins. Get the popcorn, because this greenhorn is about to crack open his first transmission. 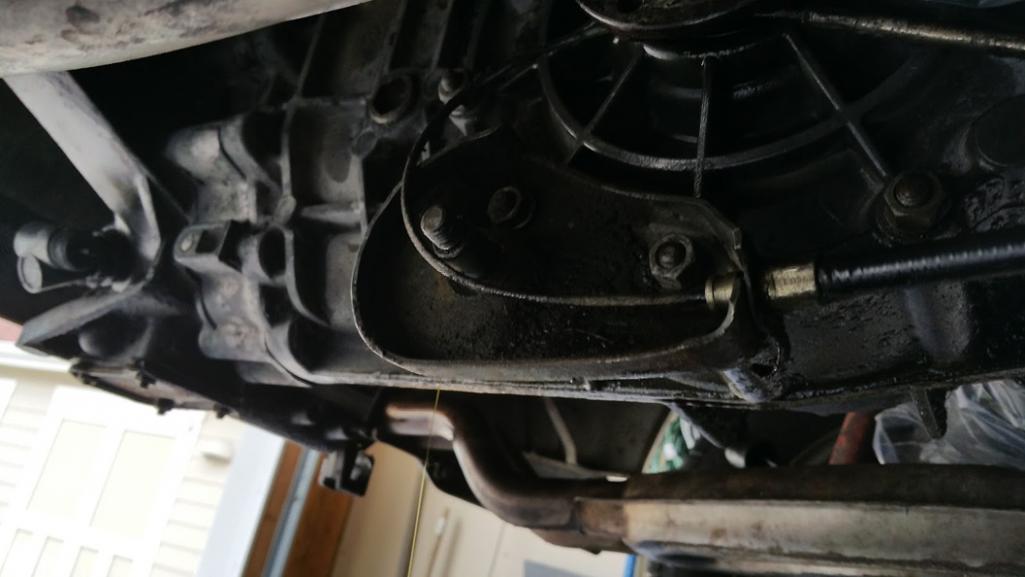 |
|
|
|
| SKL1 |
Mar 19 2016, 10:16 PM
Post
#20
|
|
Senior Member Group: Members Posts: 1,597 Joined: 19-February 11 From: north Scottsdale Member No.: 12,732 Region Association: Upper MidWest |
Wonder why you had to cut out that access hole in the tunnel? When I converted my '71 to a side shifter MANY years ago I didn't have to do that.
When adjusting the shift rod, if you experience difficulties, Tangerine makes a slick part that allows easier adjustment- check Tangerine Racing website... |
|
|
|
|
1 User(s) are reading this topic (1 Guests and 0 Anonymous Users)
0 Members:

|
Lo-Fi Version | Time is now: 25th April 2024 - 01:27 AM |
Invision Power Board
v9.1.4 © 2024 IPS, Inc.