|
|
|
Porsche, and the Porsche crest are registered trademarks of Dr. Ing. h.c. F. Porsche AG.
This site is not affiliated with Porsche in any way. Its only purpose is to provide an online forum for car enthusiasts. All other trademarks are property of their respective owners. |
|
|

  |

| db9146 |
 Apr 6 2016, 09:04 PM Apr 6 2016, 09:04 PM
Post
#41
|
|
Senior Member  Group: Members Posts: 953 Joined: 21-December 04 From: Atlanta, GA Member No.: 3,315 Region Association: None |
QUOTE(Jameel @ Apr 6 2016, 03:31 PM)  My Panoramas only go back to '92. Any chance you've got a scan? See my post below for the much higher resolution scan of the August 1990 Pano article that includes an adapter diagram that enables the use of the sideshifter boot at the firewall. |
   |

 
|
| Dr Evil |
Apr 6 2016, 09:29 PM
Post
#42
|
|
Send me your transmission! Group: Members Posts: 22,993 Joined: 21-November 03 From: Loveland, OH 45140 Member No.: 1,372 Region Association: MidAtlantic Region |
Yer teeth are worn. Like saggy roofs. Look to the inner aspect, not the profile.
|
|
|
|
| oldie914 |
Apr 7 2016, 01:52 AM
Post
#43
|
|
Member Group: Members Posts: 102 Joined: 2-May 10 From: Germany Member No.: 11,680 Region Association: None |
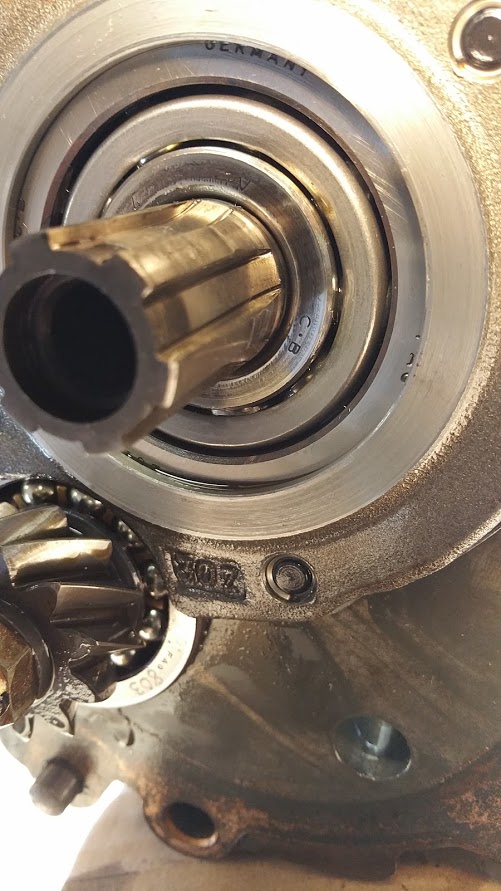
Your March 31st video shows visible end play on your pinion shaft. If you can feel end play, it is too much; if you can see the play, it is way too much.
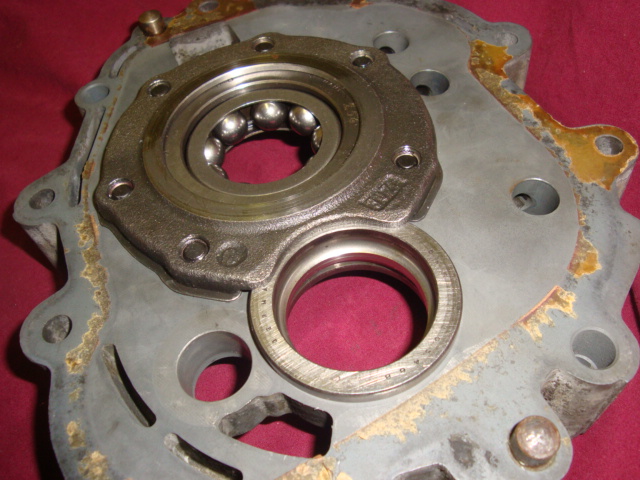
The pinion bearing is probably turning in the intermediate plate and has worn into the retaining plate. The plate should clamp the bearing with about 0.08mm preload. The attached picture shows a clamping plate with wear on the mainshaft bearing retaining area. The mainshaft bearing turns first because it is not clamped well; the pinion shaft bearing follows. You need to replace the retaining plate and will probably the intermediate plate as well. 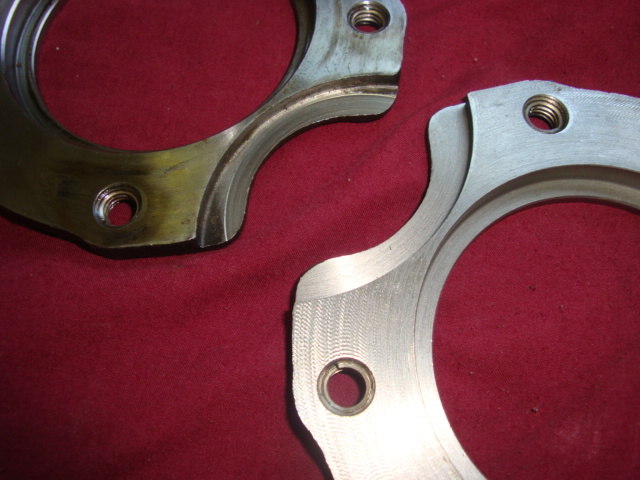 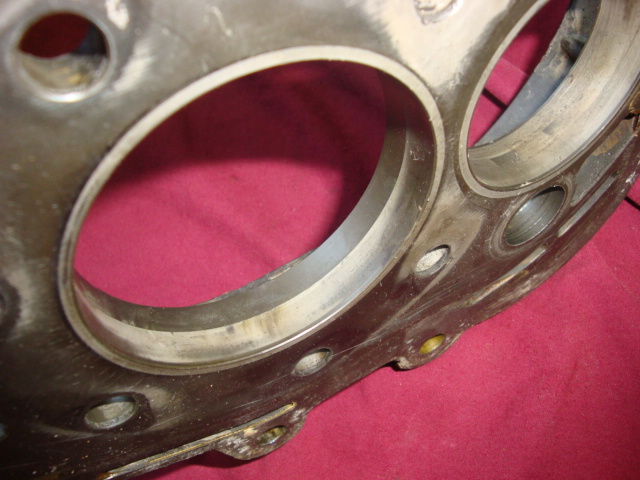 |
|
|
|
| oldie914 |
Apr 7 2016, 03:27 AM
Post
#44
|
|
Member Group: Members Posts: 102 Joined: 2-May 10 From: Germany Member No.: 11,680 Region Association: None |
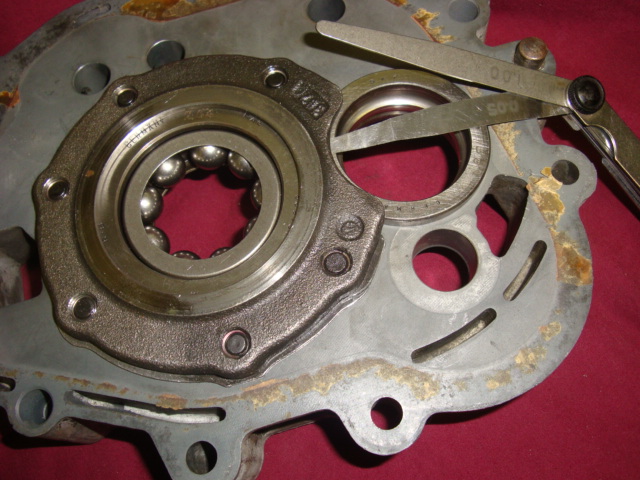
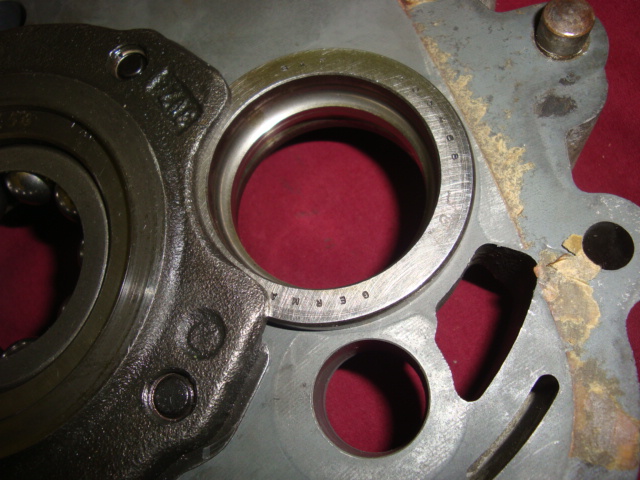
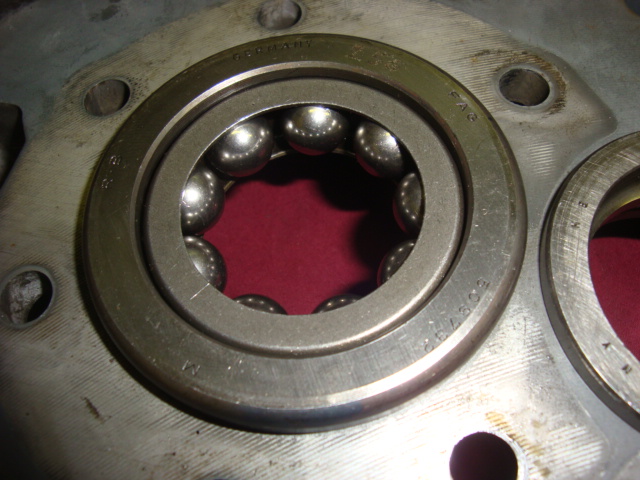
Here are some more pictures showing indicators of loose intermediate plate bearings. You can see the wear signs on the bearing even though it is hardened steel. When the bearings start to turn, they only get worse.
    |
|
|
|
| Jameel |
Apr 7 2016, 06:19 AM
Post
#45
|
|
Member Group: Members Posts: 98 Joined: 6-October 15 From: Iowa Member No.: 19,239 Region Association: None |
QUOTE(Dr Evil @ Apr 6 2016, 07:29 PM) Yer teeth are worn. Like saggy roofs. Look to the inner aspect, not the profile. Aha, I get it. So not the shape of the gable end of the roof, but the condition of the ridge and the "roof surface". I just got a new 1st gear syncro and slider set from Brad, so I'll be swapping them out. |
|
|
|
| Jameel |
Apr 7 2016, 06:42 AM
Post
#46
|
|
Member Group: Members Posts: 98 Joined: 6-October 15 From: Iowa Member No.: 19,239 Region Association: None |
Thanks for the tips oldie914. I'll look closer when I have everything apart.
|
|
|
|
| Jameel |
Apr 8 2016, 02:02 PM
Post
#47
|
|
Member Group: Members Posts: 98 Joined: 6-October 15 From: Iowa Member No.: 19,239 Region Association: None |
QUOTE(db9146 @ Apr 6 2016, 07:04 PM) QUOTE(Jameel @ Apr 6 2016, 03:31 PM) My Panoramas only go back to '92. Any chance you've got a scan? I've got Panos way back but the scan tonight is lacking.  Aug._1990_Panorama_914_TS_to_SS_Conversion_Article.pdf ( 363.34k )
Number of downloads: 133
Aug._1990_Panorama_914_TS_to_SS_Conversion_Article.pdf ( 363.34k )
Number of downloads: 133Its not as clear as I'd like for it to be but you can get an idea of the oval plate and washers for the adapter for the SS cover. I'll try again with the better scanner at the office, including a close up of the adapter plate and washer dimensions. Thanks for posting that. I'll have to hunt around for a boot now. |
|
|
|
| Jameel |
Apr 8 2016, 08:28 PM
Post
#48
|
|
Member Group: Members Posts: 98 Joined: 6-October 15 From: Iowa Member No.: 19,239 Region Association: None |
Got some deliveries past couple days. I have everything I need, except for the boot/cover at the firewall. If you've got an extra of either style, I'd be interested.
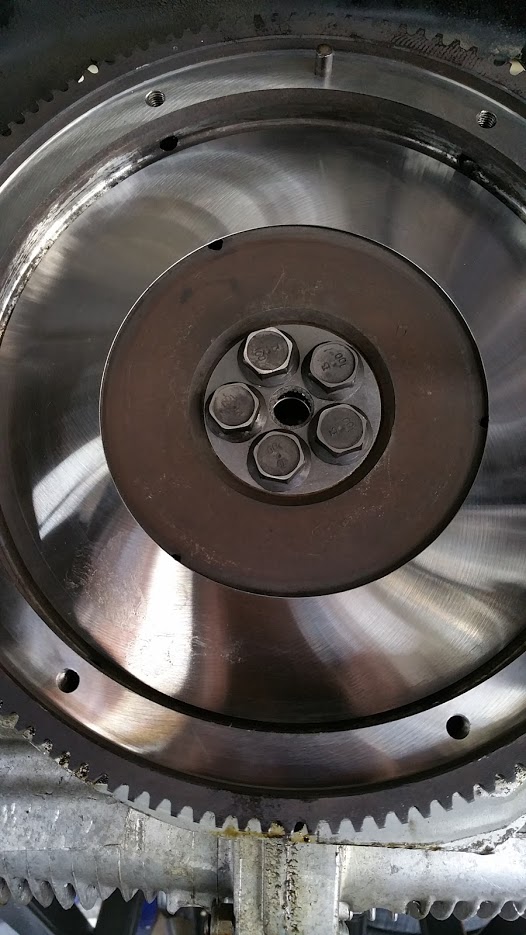
I grabbed my old clutch and hacksawed the rivets out, then had a friend weld up a drive shaft tool ala Dr. Evil. I see a welder in my future... 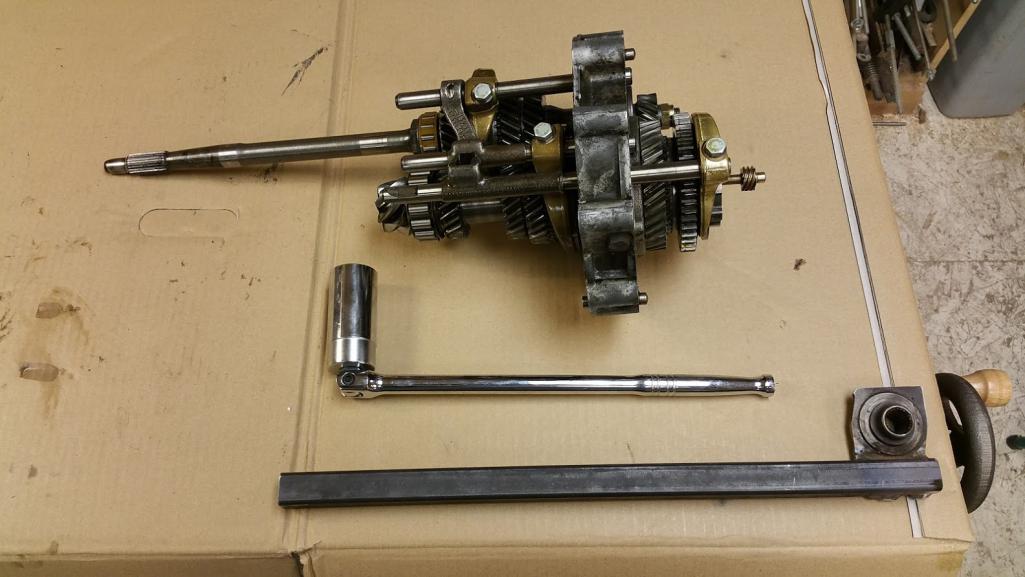 I've decided to replace 1st gear, 1st /rev slider and syncro band with a good used one from Brad Mayeur. So first step is to get the shift forks and rods off, along with the detent assembly. If you're a rank beginner like me, and you're reading this sometime in the future, just do yourself a favor and buy Dr. Evil's DVD. I won't be covering the assembly of the side shift rods and forks here because he obviously covers it better than I ever could. Plus, it's already a pain to try and shoot cell phone pics with gear oil all over my hands. 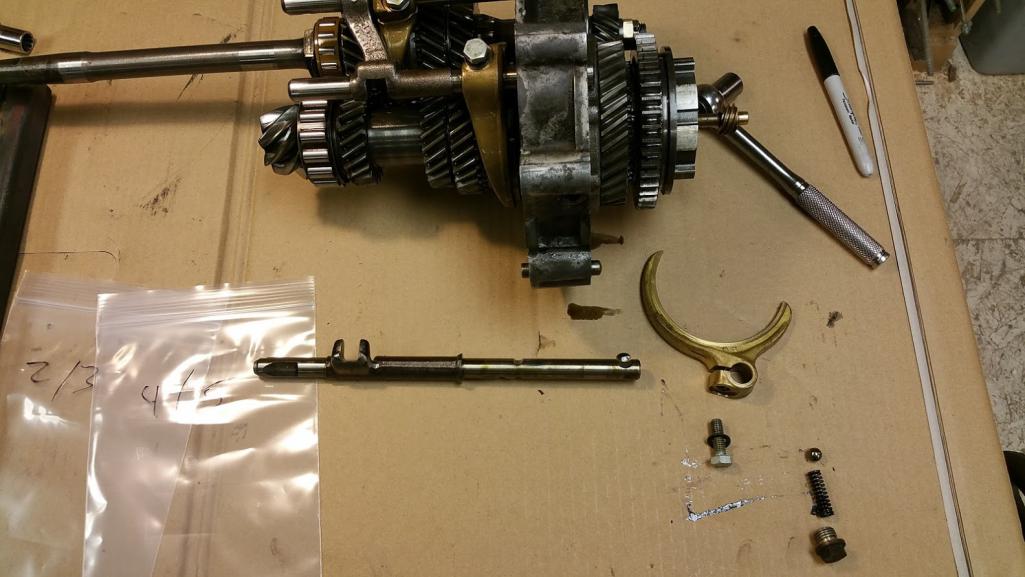 Someone has cracked this tranny open before I think. They scratched the numbers of the gears into the bronze shift forks. Thanks for that, whoever you are! 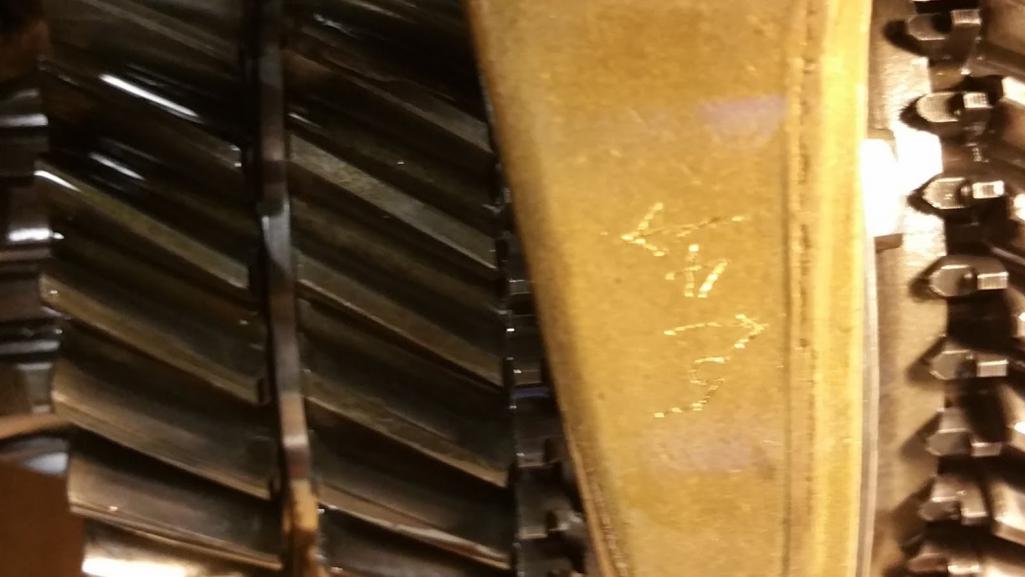 I was also surprised to see a Volkswagen symbol cast into the shift forks. Is this normal? I thought the 901 transmission was a Porsche product, same as the early 911's. 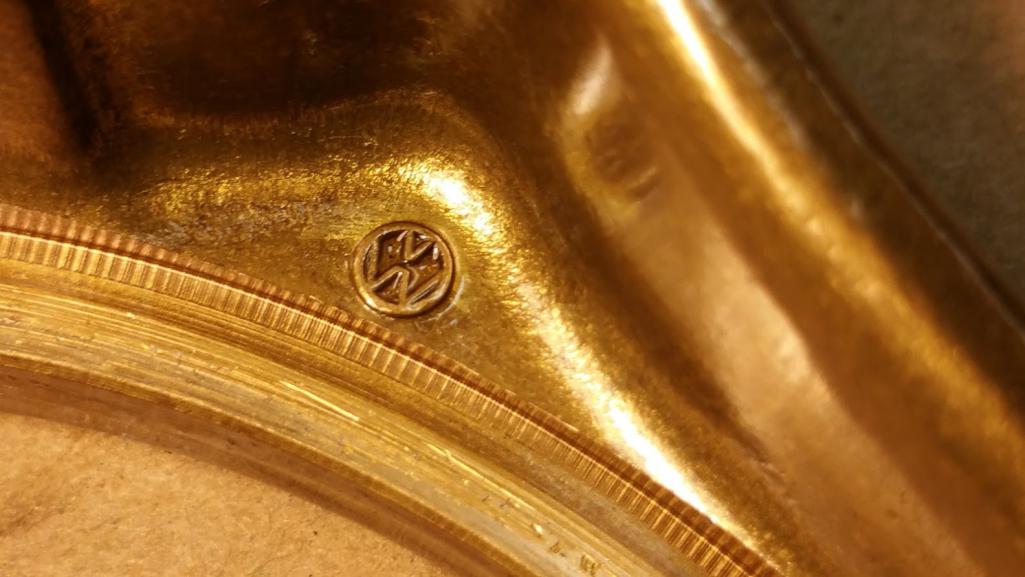 Started getting tired, so I pulled off the tranny and did a little grunt work. Since my flywheel got .023" removed to resurface, I ground at least .023" off the raised rim of the flywheel bolt heads so they don't interfere with the clutch. Tomorrow, if I everything goes well, I may get this thing put back together!  |
|
|
|
| Jameel |
Apr 9 2016, 05:58 PM
Post
#49
|
|
Member Group: Members Posts: 98 Joined: 6-October 15 From: Iowa Member No.: 19,239 Region Association: None |
Lots to report today. Here's my setup for taking off the pinion shaft nut. I found that it was better to turn so the pinion shaft was turning "into" the drive shaft. This helped prevent the two shafts from spreading. Of course the jig (Brad Mayeur kindly lent me one of his) helps this too.
  Here's my first gear. The dog teeth definitely look worse with the gear out of the stack. 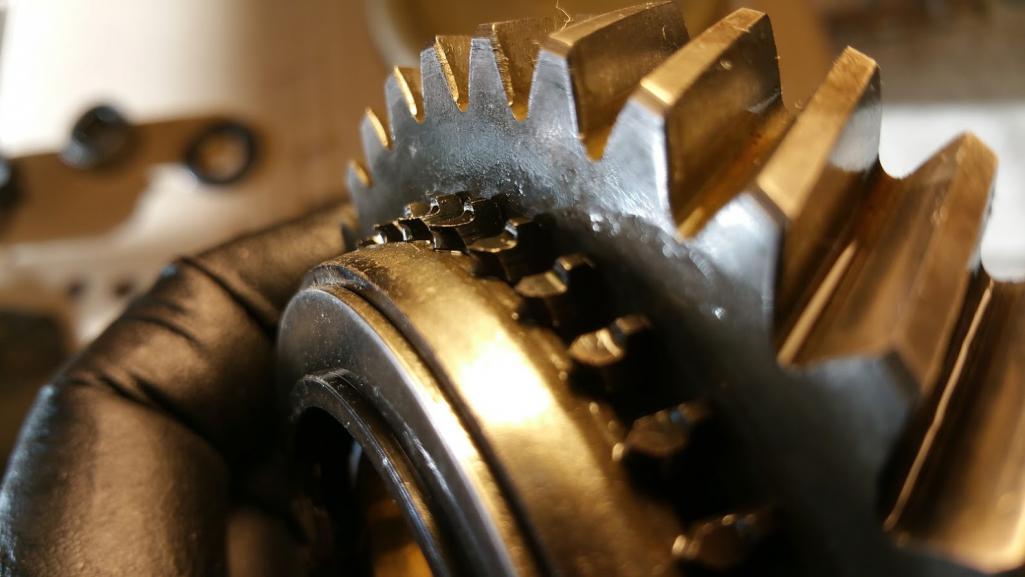 The new used gear and syncro from Brad. 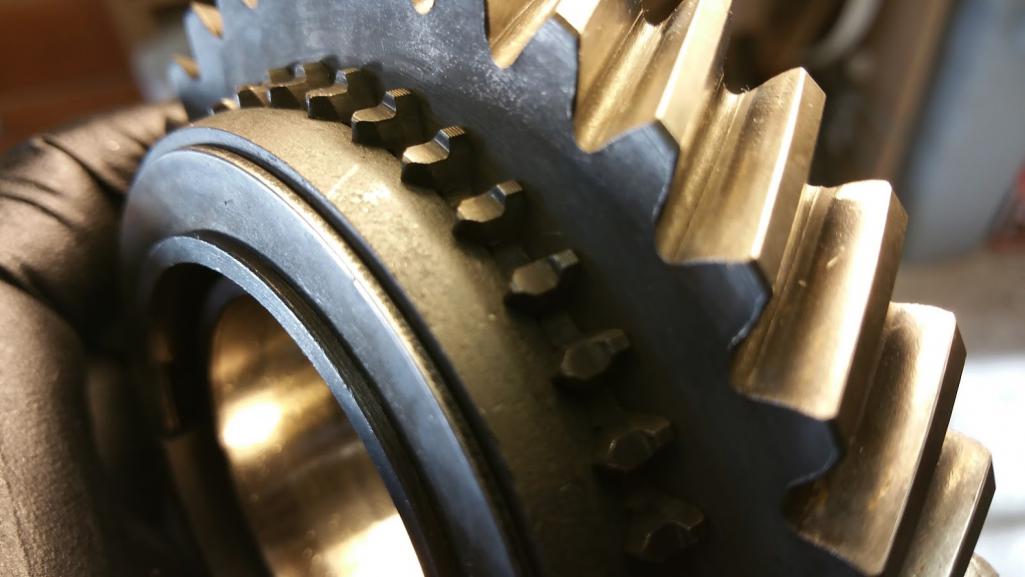 After replacing the gears I replaced the tail shift rods with the side shift rods. This was a tad finicky, but I actually enjoyed it. I spent a good 45 minutes getting everything lined up as perfectly as I could. I want this to shift sweetly. I followed Dr. Evil's steps from the DVD. https://www.youtube.com/watch?v=Dj35Zq-tt98 The inner surface of the intermediate plate was kind of messy. Looks like someone had put some RTV in there at some point. It was really on the surface or the gaskets, just thin remnants mostly in the voids of the casting. I picked it all out with tweezers 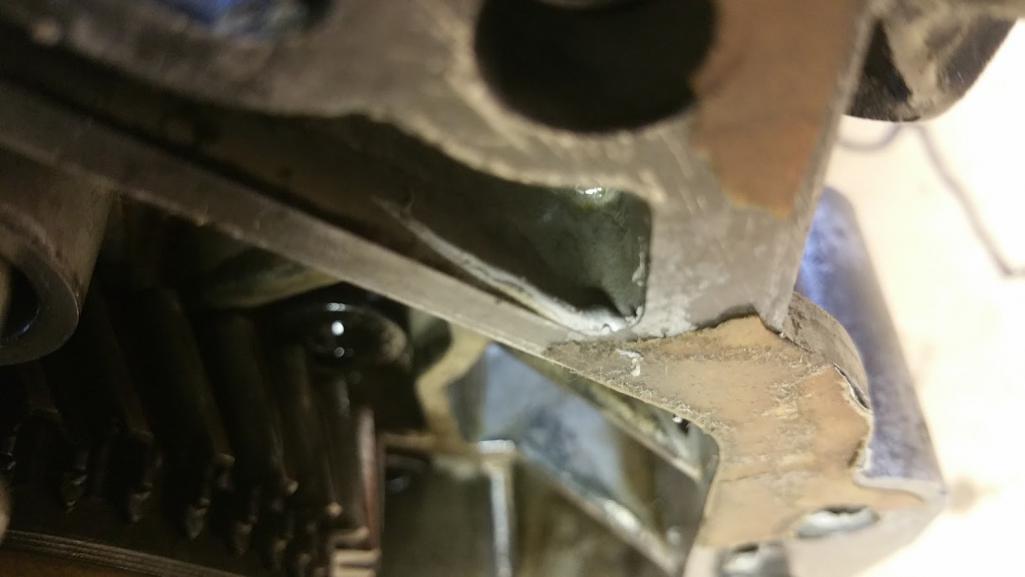  To prep the case for cleaning I removed the starter motor. The side with the long through bolt had a thin washer under it, but no washer on the stud side. I couldn't find this washer in my Hayne's manual. Any clues here? 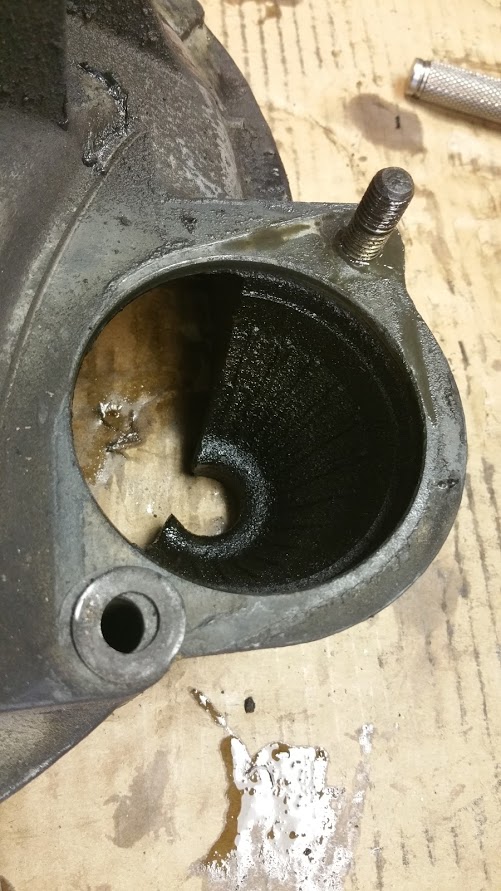 It felt good to do something brainless for a change. Tomorrow I may have this back together. 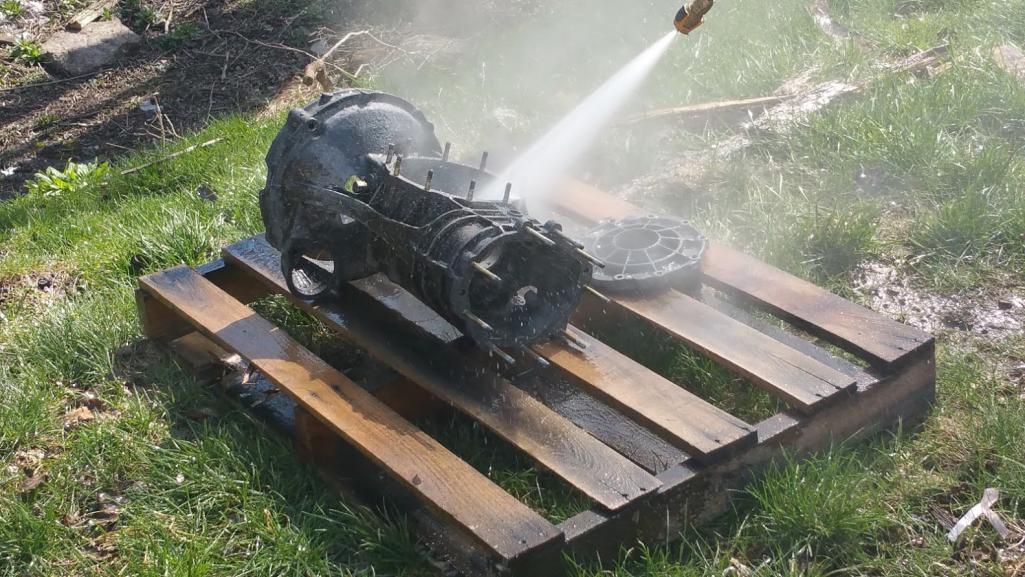 |
|
|
|
| Jameel |
Apr 9 2016, 09:01 PM
Post
#50
|
|
Member Group: Members Posts: 98 Joined: 6-October 15 From: Iowa Member No.: 19,239 Region Association: None |
Well, I guess I screwed up. Sort of half assed cleaned my case today by scrubbing off the thick sludge with mineral spirits and a brush, then sprayed that off with just water. I guess I missed that from Dr. Evils notes when I read them earlier this week. So now I guess I need to clean it all the way so the paint will stick. Cripes. What an idiotic mistake.
|
|
|
|
| Jameel |
Apr 12 2016, 08:07 PM
Post
#51
|
|
Member Group: Members Posts: 98 Joined: 6-October 15 From: Iowa Member No.: 19,239 Region Association: None |
Putting my case back together I had to reuse the bottom rectangular plate from the tail cone of my tail shifter. The thing was a little beat up. Like someone had backed into a curb or something. The back edge was folder over a little, and the plate was far from flat on the gasket side. There were raised areas around each hole, like the plate got pulled away from the case.
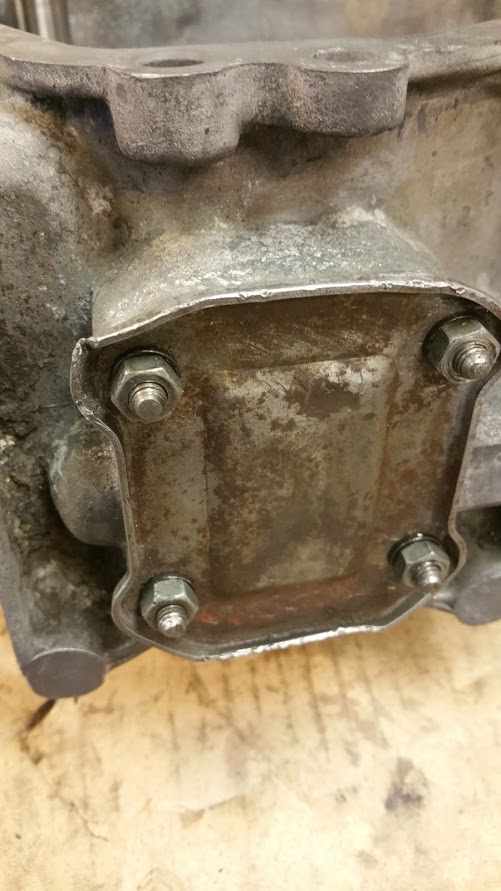 Looks like someone tried to fix this with a cork gasket and a paper one together. My gasket set only came with one gasket, and it wasn't nearly thick enough to span the 1/16" gaps between studs on this plate. 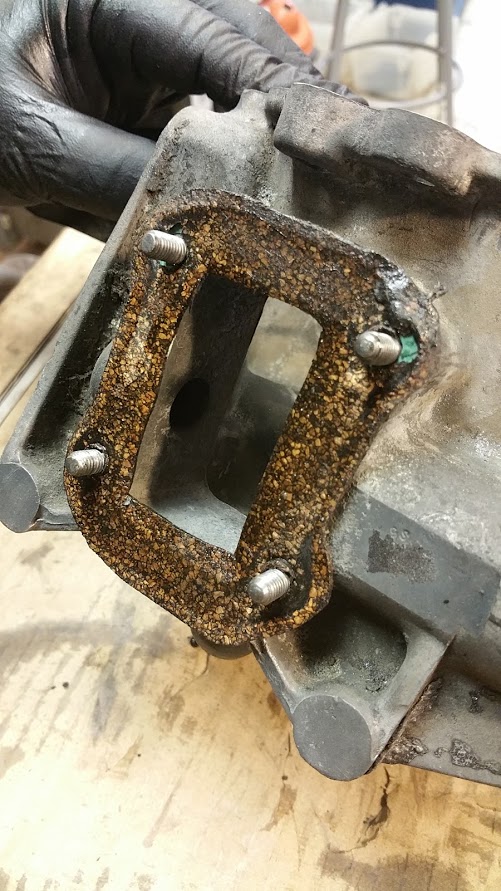 So I went to the anvil and carefully peened around each hole from the outside of the plate with a 1/4 punch to flatten it. It worked really well. It still wasn't perfectly flat though. So I hit the inside face on my belt sander and then it flattened up real quick. Hopefully this will be leak proof. 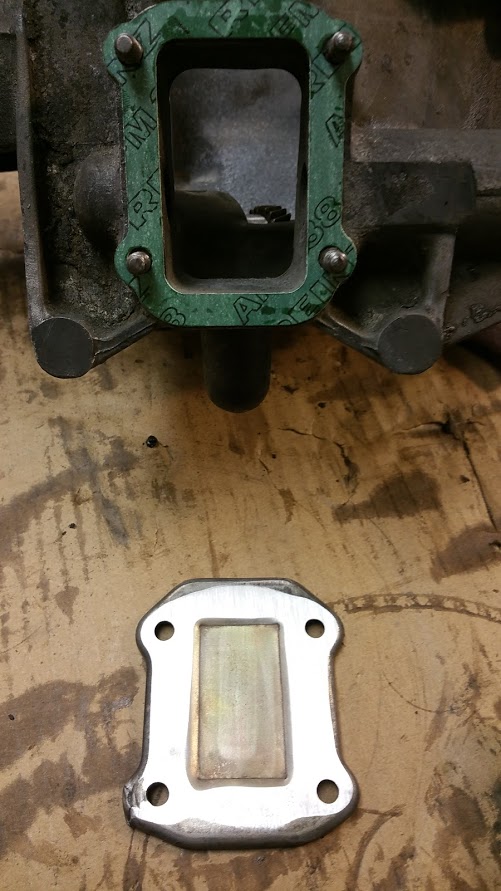 Also used Dr. Evil's method to get the cup out of the clutch throwout arm. PTFE S'mores anyone? 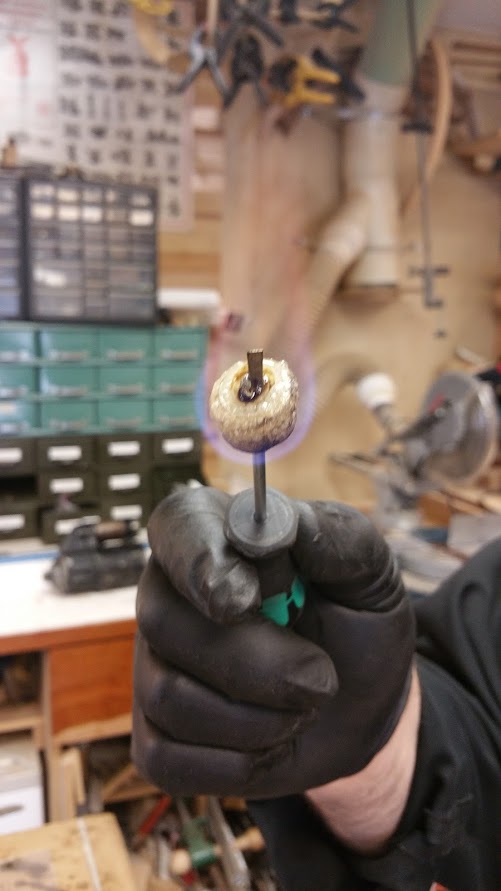 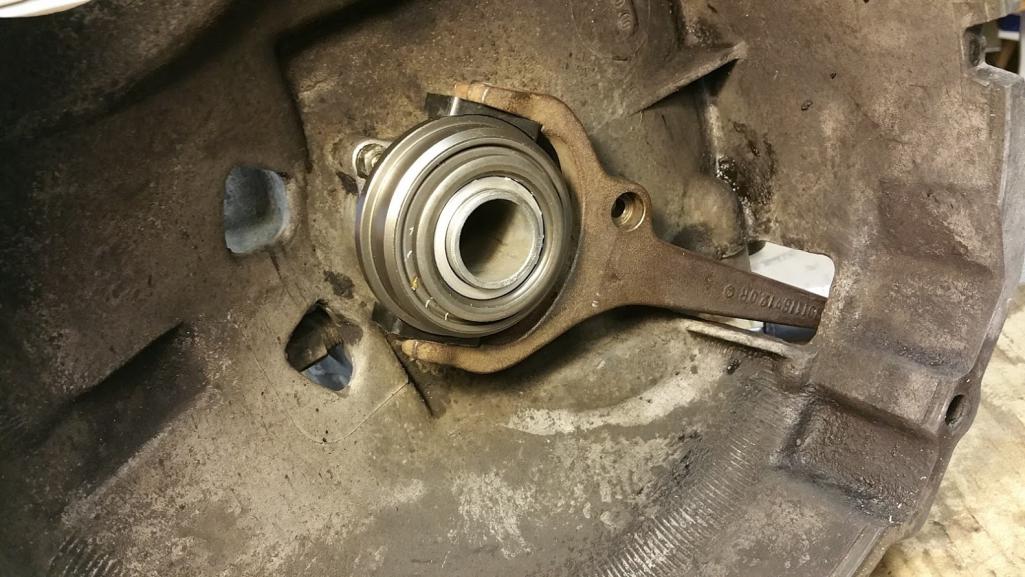 The last step was to install the new side shift console (I polished up the ball arm) and try and select the gears. I was able to select all gears pretty easily. They all clicked in real positively. I didn't feel any interference between the comb and the selector arms, so I must have got my spacing correct. This was so satisfying. I can't wait to shift this in the car!! 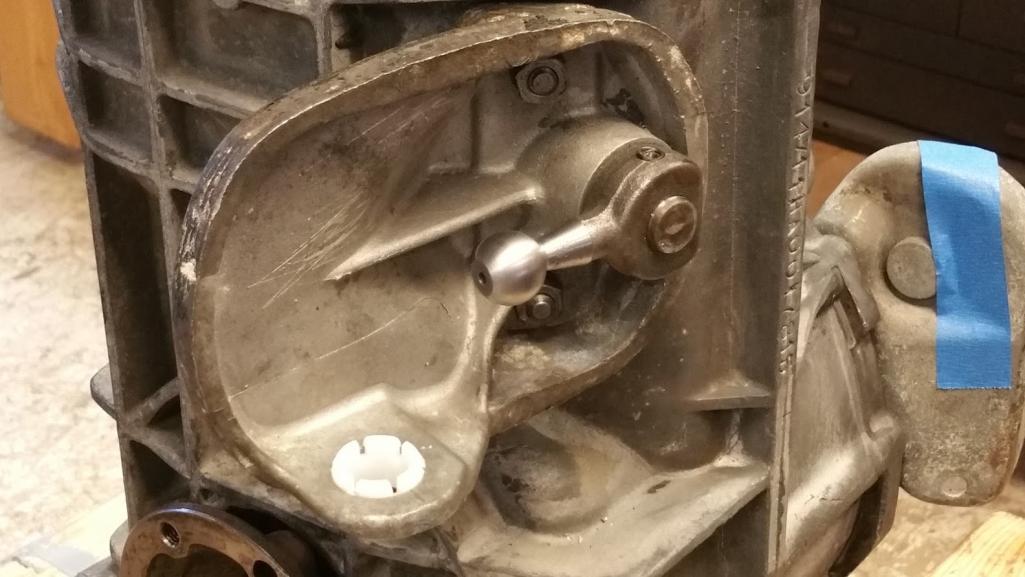 |
|
|
|
| db9146 |
Apr 15 2016, 11:33 AM
Post
#52
|
|
Senior Member Group: Members Posts: 953 Joined: 21-December 04 From: Atlanta, GA Member No.: 3,315 Region Association: None |
Here is the much better scan of the Pano article from my collection - 26 years old! Good grief I've got a lot of stuff in the basement.
This includes an idea on how to make an adapter so that the sideshifter boot at the back of the firewall can be incorporated. Hope this helps. I'm going to be doing this conversion myself.
914_Tail_Shift_to_Side_Shift_Conversion___Pano_Aug._1990.pdf ( 1.57mb )
Number of downloads: 245 |
|
|
|
| Dr Evil |
Apr 18 2016, 08:22 PM
Post
#53
|
|
Send me your transmission! Group: Members Posts: 22,993 Joined: 21-November 03 From: Loveland, OH 45140 Member No.: 1,372 Region Association: MidAtlantic Region |
Great job on this! Looking like you got it all good. Its going to shift well and you will be happy for many miles (IMG:style_emoticons/default/smile.gif)
|
|
|
|
| Jameel |
Apr 19 2016, 07:45 AM
Post
#54
|
|
Member Group: Members Posts: 98 Joined: 6-October 15 From: Iowa Member No.: 19,239 Region Association: None |
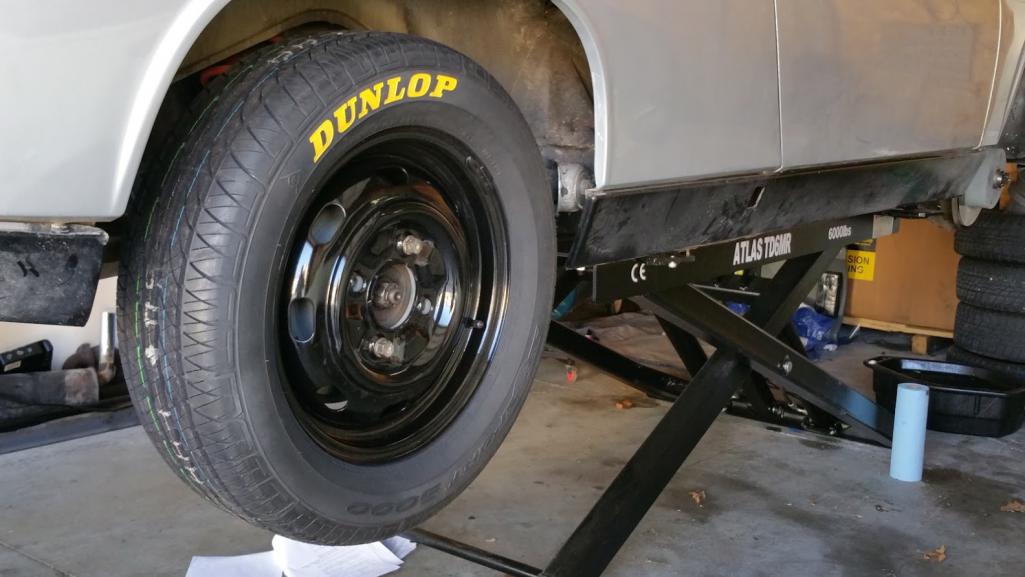
Thank you Sir! I'm just waiting on some new trans mounts to arrive before I can plug it back in. Getting new tires today too. Dunlop SP Sport 5000. Mine dated out (14 years.)
|
|
|
|
| Jameel |
May 8 2016, 07:36 AM
Post
#55
|
|
Member Group: Members Posts: 98 Joined: 6-October 15 From: Iowa Member No.: 19,239 Region Association: None |
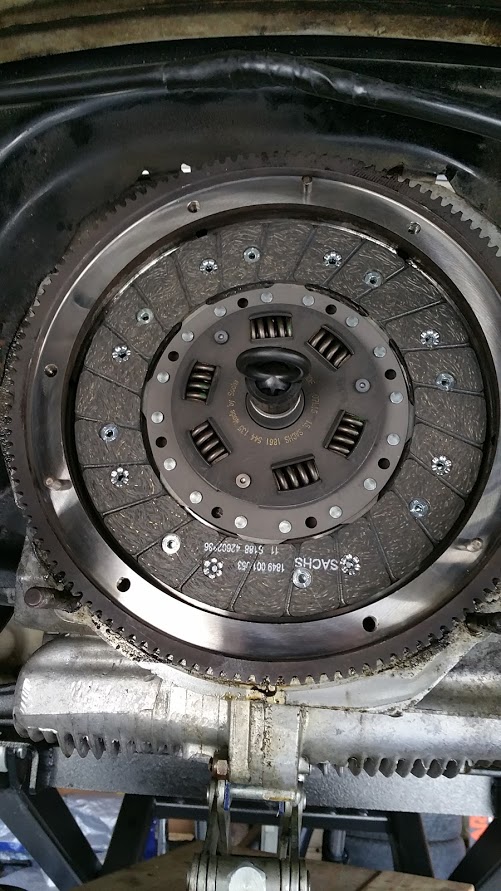
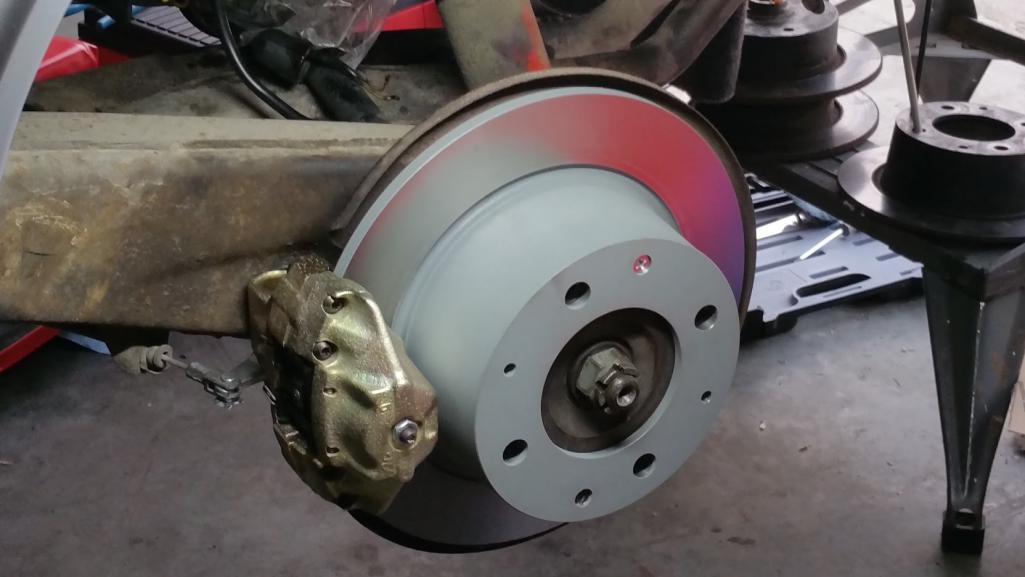
So I'm still waiting on a couple rubber boots to arrive to get this put back together. I did get the transmission reinstalled, and along with it a new clutch and pressure plate. The flywheel had enough meat left to do a resurface. I took 0.023" off, which I also ground from crown of the flywheel bolt heads. I also added a 0.023" washer under the pivot ball. So it should all work sweetly (crossing fingers.) I resealed the trans with all new seals. So while fiddling around with my brakes, I thought I'd mic my discs. Way past the wear limit. So not much choice, I ordered a set of discs and rebuild calipers from PMB. Didn't expect this bill, but all new brakes (and lines) will be really nice for staying alive. I also got my wheels painted up in the meantime and new tires mounted. These are Dunlop SP Sport 5000 195/65s. I'm having a little fun with this one, so I took an oil paint marker to paint the raised letters. If all goes well in the next week, I'll have this car back on the road lickety split.
      |
|
|
|
| Jameel |
May 14 2016, 08:07 AM
Post
#56
|
|
Member Group: Members Posts: 98 Joined: 6-October 15 From: Iowa Member No.: 19,239 Region Association: None |
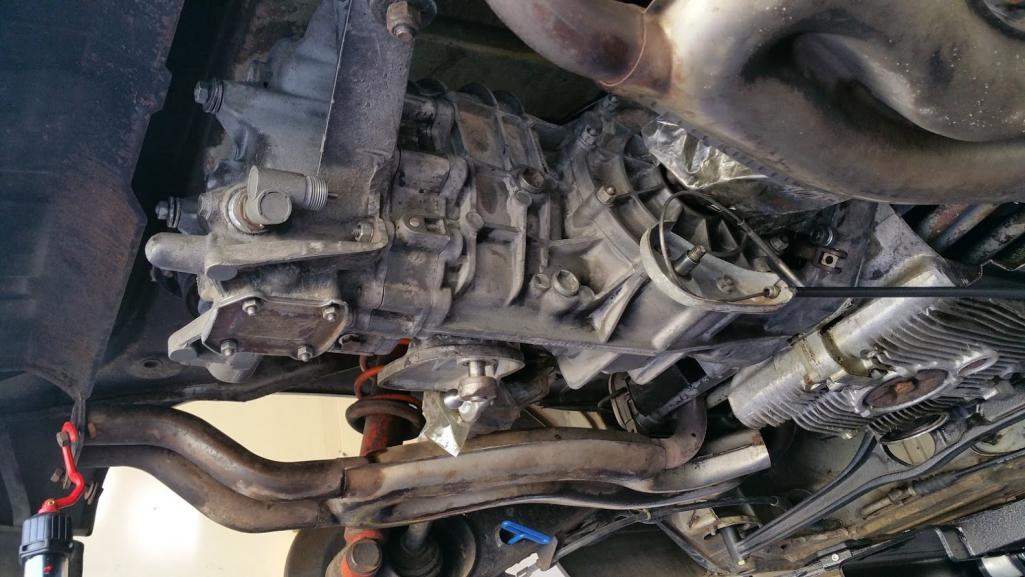
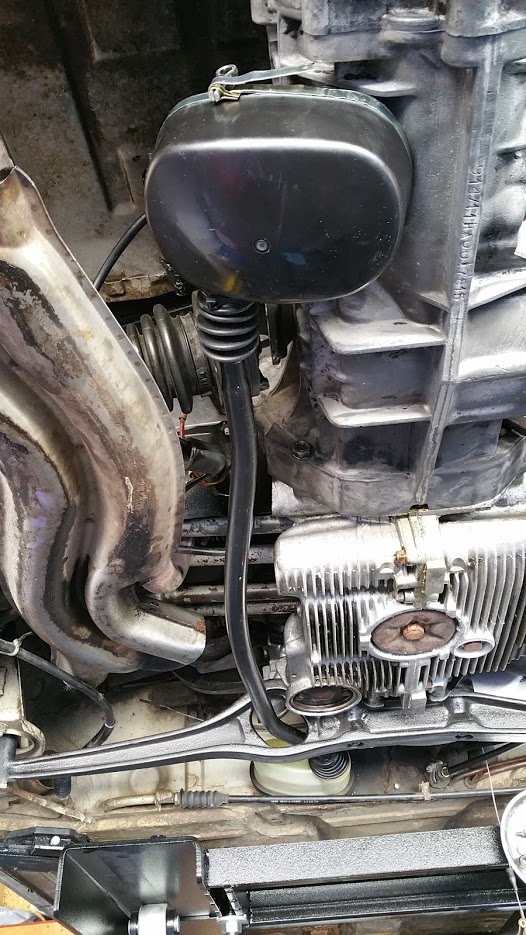
Made some good progress this week. Got the shifter rods installed.
Greased the front shift rod where it passes through the firewall. I ended up pulling the shift rod into the tunnel to get a little grease in the bushing itself. 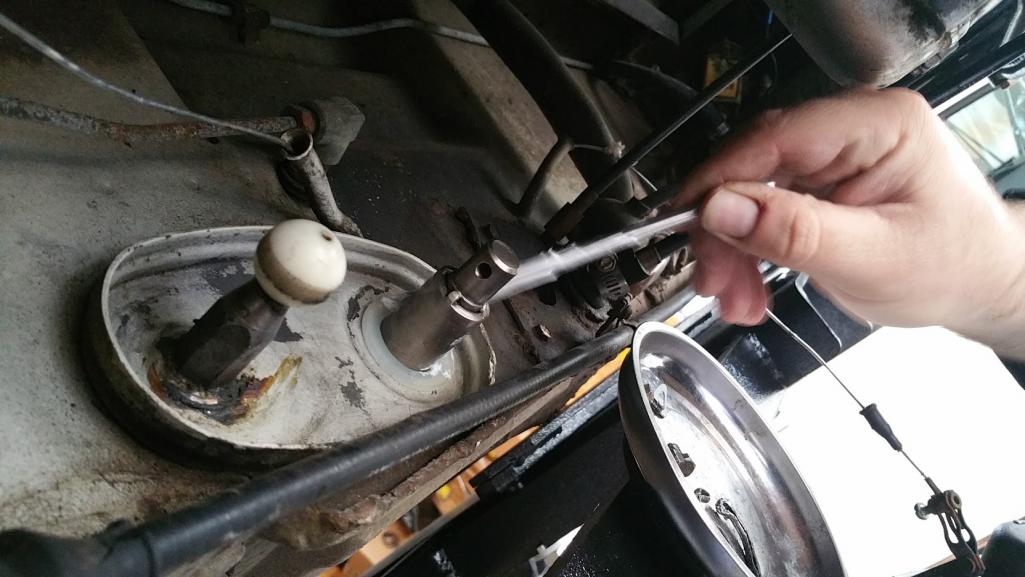 The rear side shift rod has a football-shaped flange on the front end (right behind joint) I learned that this was to clip the side shift boot onto. But since I'm doing the conversion I needed to cut off the flange (sorry, no pics) so the front end of the shift rod would fit into the tail shift plastic firewall housing. Once the flange gets cut off, the rubber bellows (http://shop.914rubber.com/Early-tail-shift-bellows-91442429700-70-72-91442429700.htm?categoryId=-1) got installed from the back end of the rod. 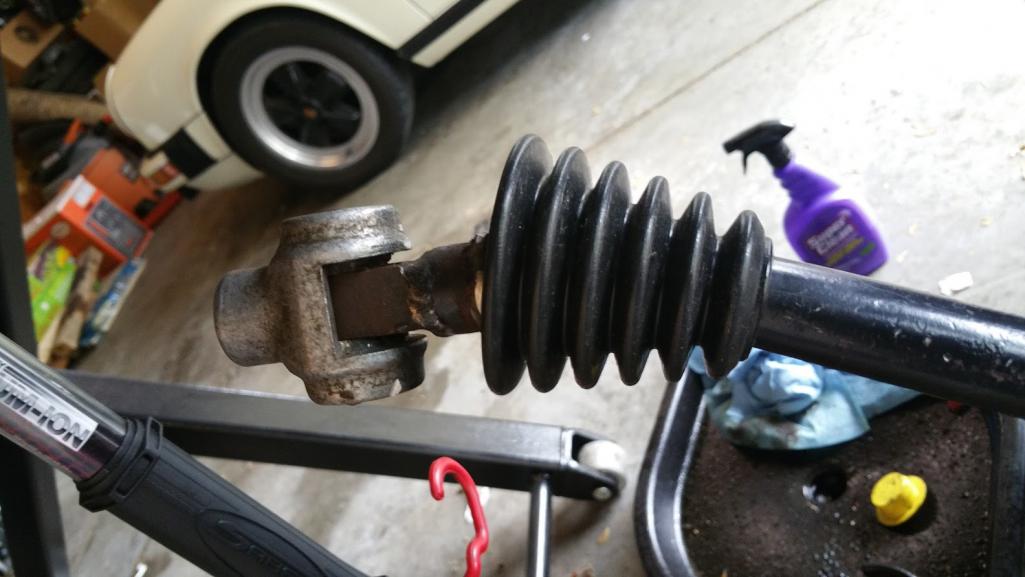 And then I put the boot on that clips to the side shift module cover. 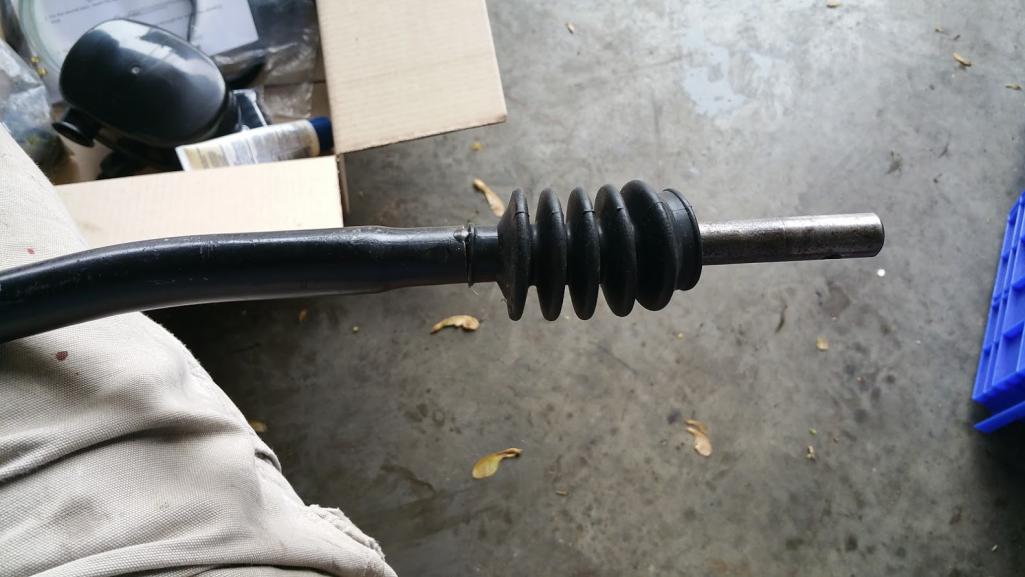 I installed the tail shift firewall housing by pulling the rubber band toward the back of the car (while on the housing), working the housing over the steel lip on the firewall, then working the rubber band over the lip. This was a little tedious. It helped to put a small screwdriver under the band to stretch it and get it started over the lip. Then I pushed it on by working my way around the lip. 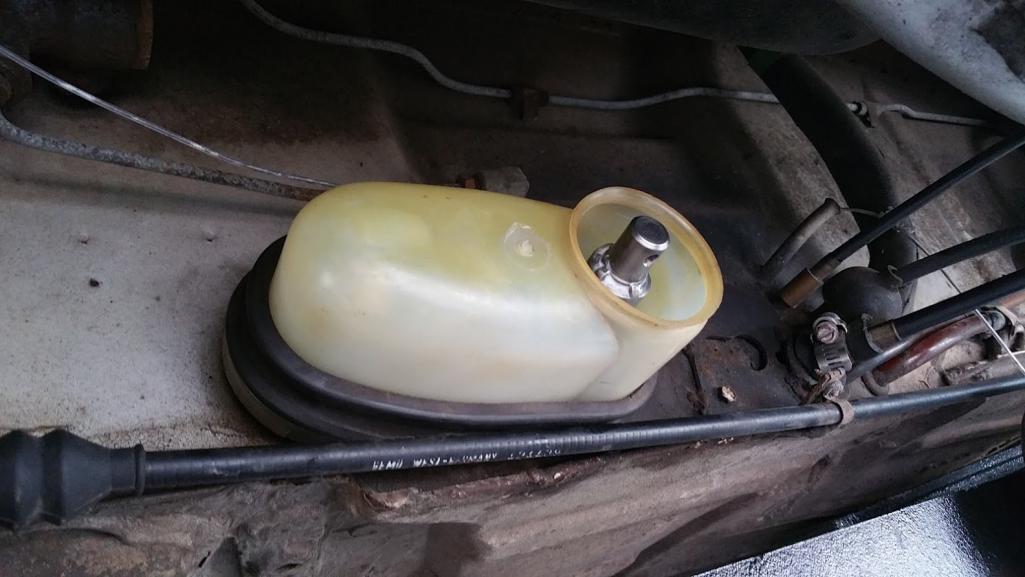 Then I greased the shifter ball at the back. 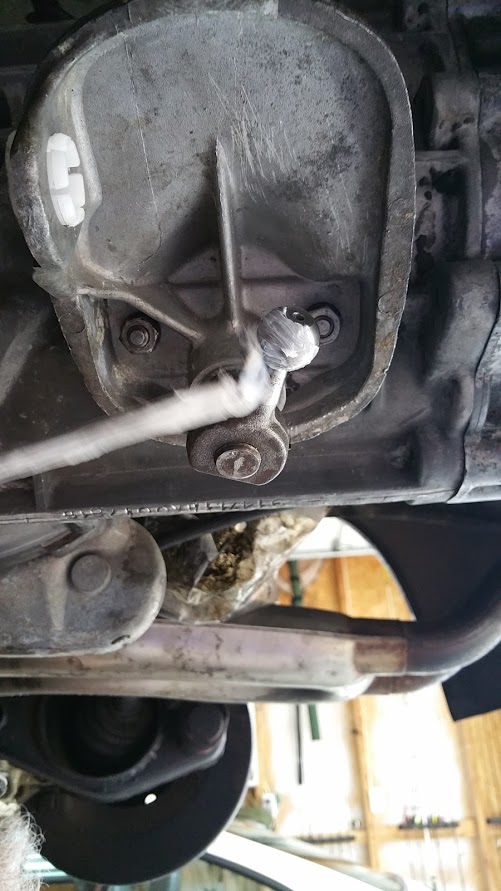 And tapped on the bushing (which I also put a little grease into) 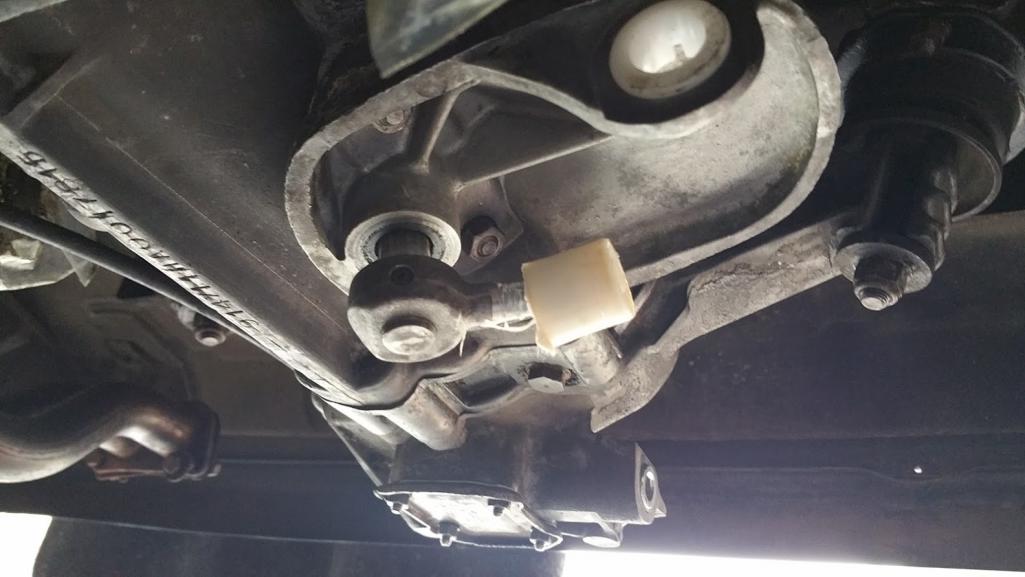 And then pressed on the coupler until it clicked over the bushing. 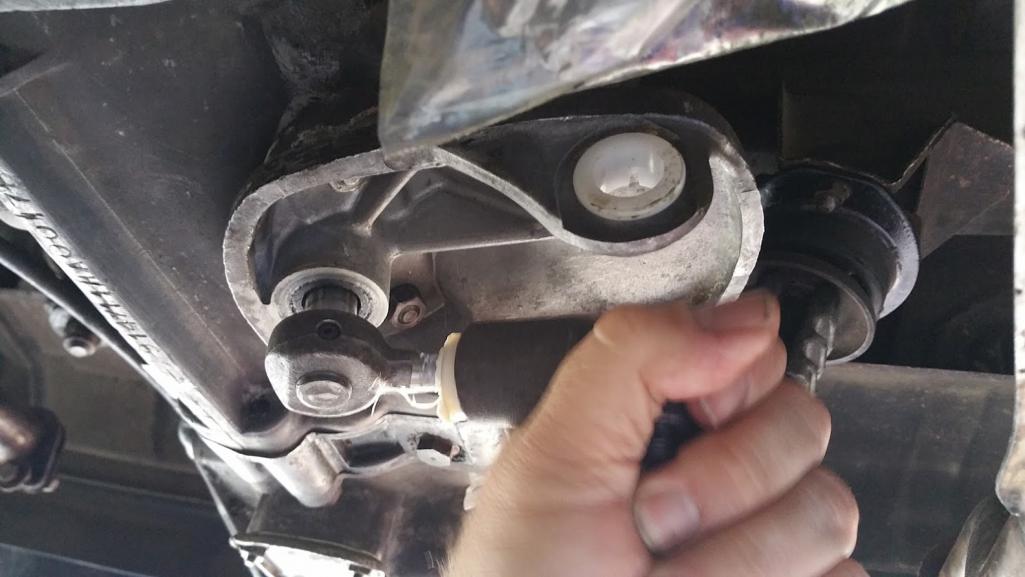 I fed the shift rod through the engine bar from the back and let it ride under the chassis a little until the rear end cleared the side shift module. 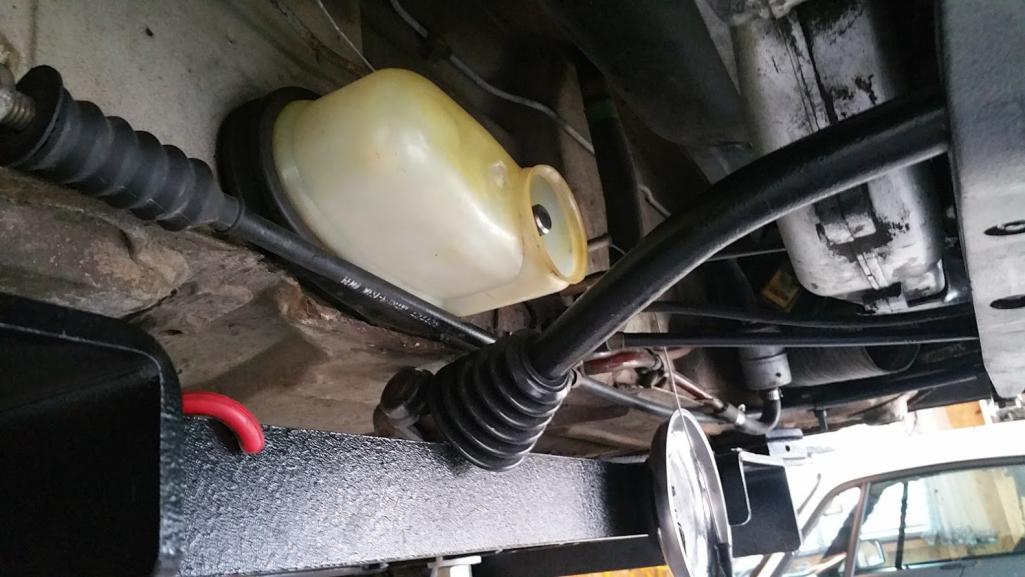 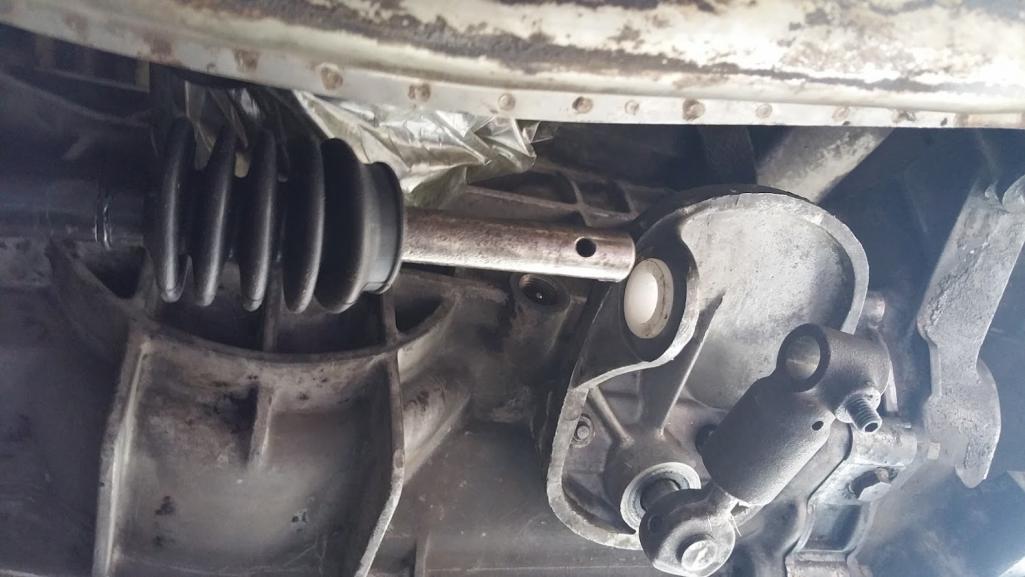 Then I installed the plastic cover  Then I fed the shift rod through the cover and bushing into the module 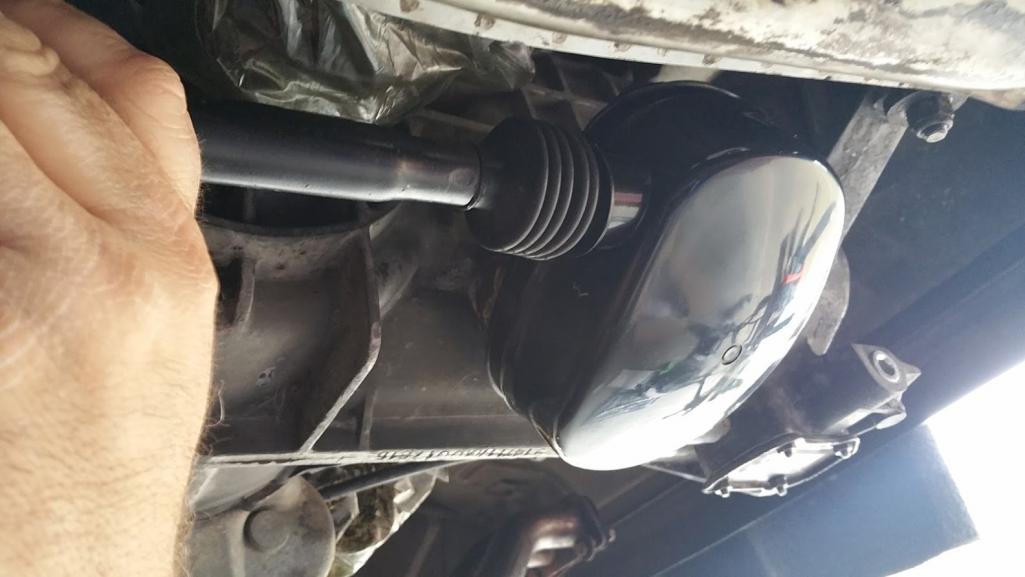 I found it needs to go past the coupler to clear things up front 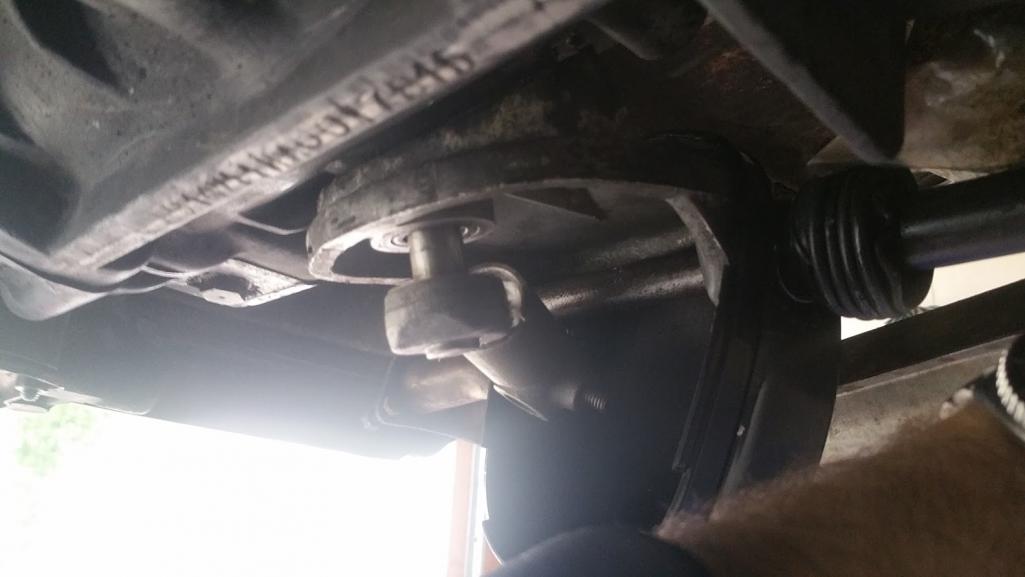 With a good amount of fiddling, I eventually got the shift rods lined up. I did need to remove the cone screws so I could get the holes lined up just right. This wasn't difficult, just tedious. 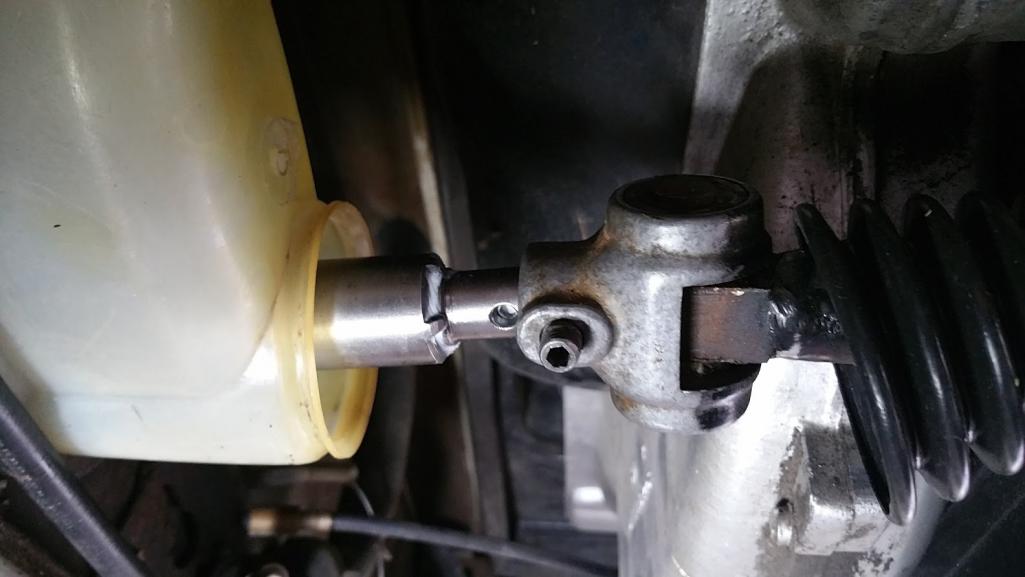 With the holes lined up at the front coupler I installed the cone screw, then did the same thing at the back end and installed the second cone screw. I had to shift the trans into a different gear to get the coupler to line up with the shift rod. 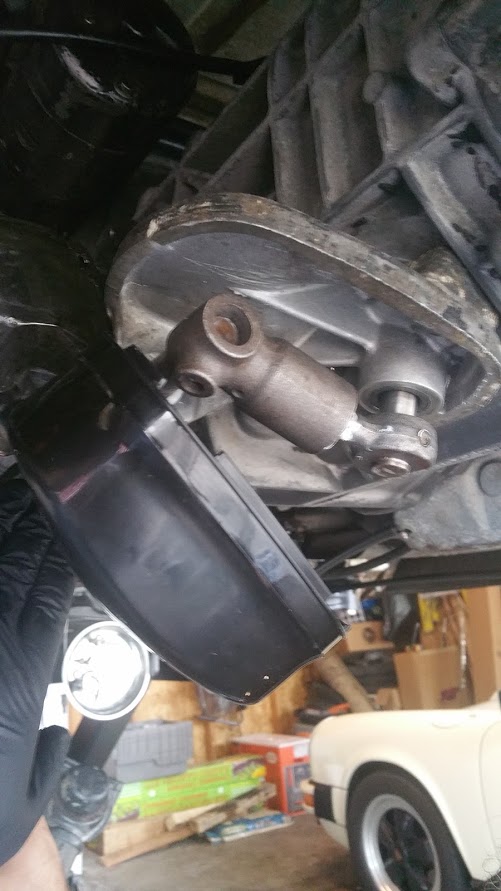 With the rods all attached, I stretched the bellows over the covers. I still need to attach the strap to the rear cover to hold it in place. I think I'm going to use some wire to hold the bellows on, unless someone here has a better idea. My car didn't come with anything here, so suggestions welcome.  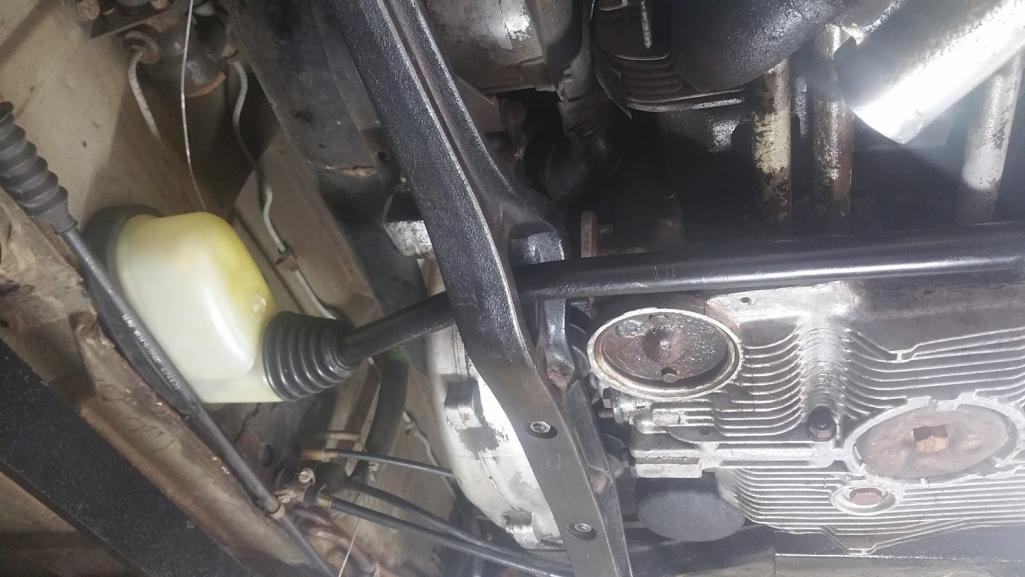 |
|
|
|
| Jameel |
May 15 2016, 08:40 PM
Post
#57
|
|
Member Group: Members Posts: 98 Joined: 6-October 15 From: Iowa Member No.: 19,239 Region Association: None |
Today I finished up the side shift conversion!! I got all the covers completely attached as follows:
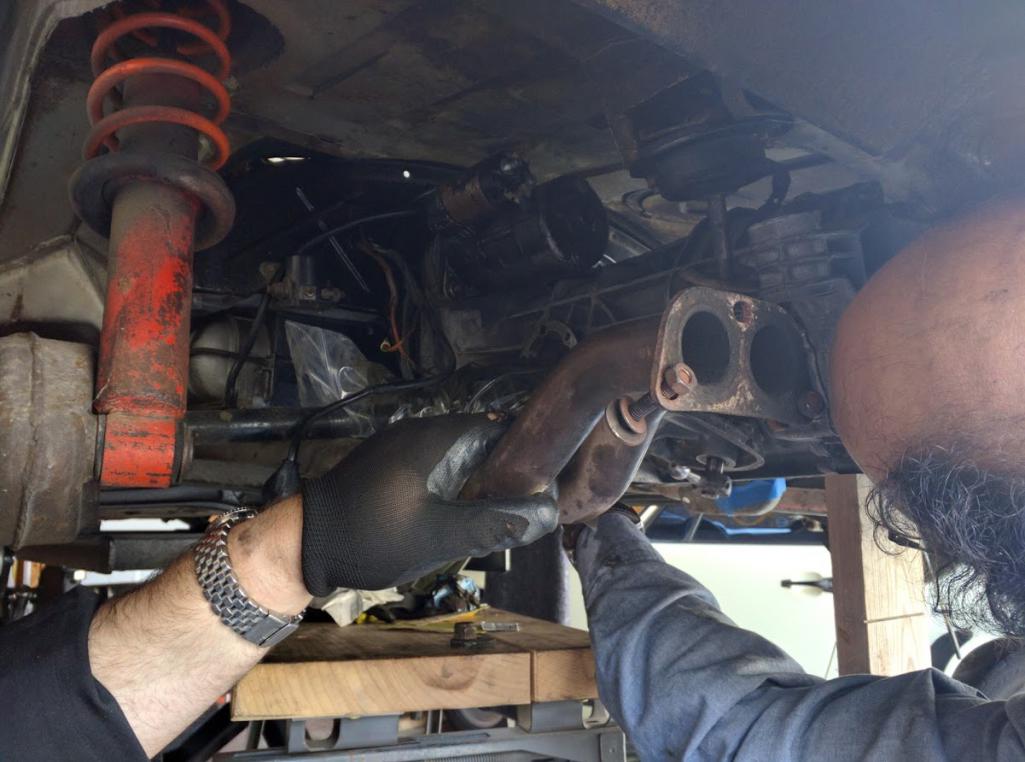
 The bellows at the side shifter module cover got secured with a zip tie. I figured it'd hold up as long as the bellows, so I wasn't too concerned about not using a metal strap. 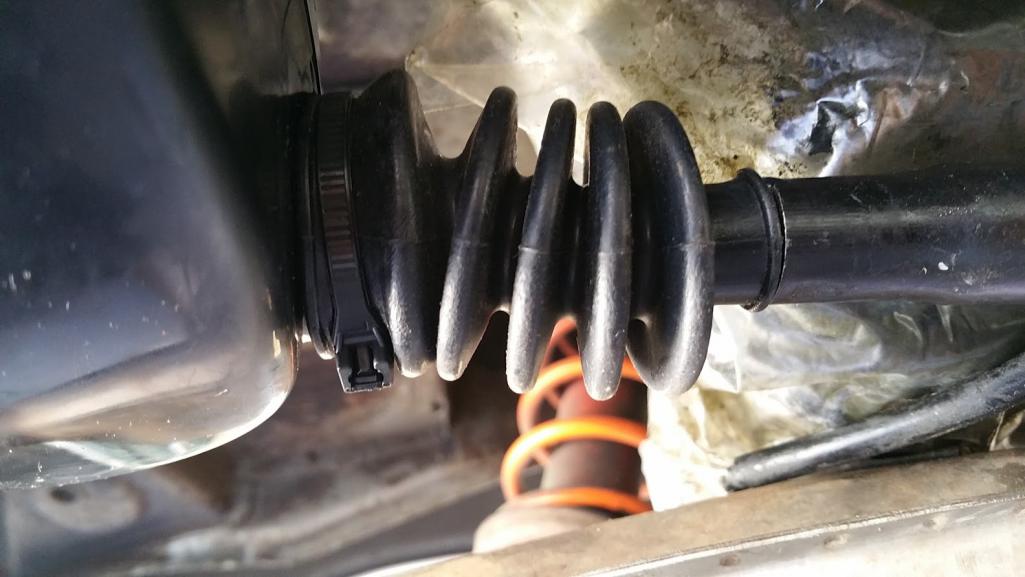 The bellows at the firewall cover posed some problems. There really isn't much of a lip on either the bellows, or the cover. I tried to wrap a wire around the groove in the cover, but I didn't have much luck. It turns out that the first pleat in the bellows fit rather nicely just inside the hole in the cover. It felt quite secure. So I simply tucked one pleat inside and called it good. We'll see how this holds up I guess. 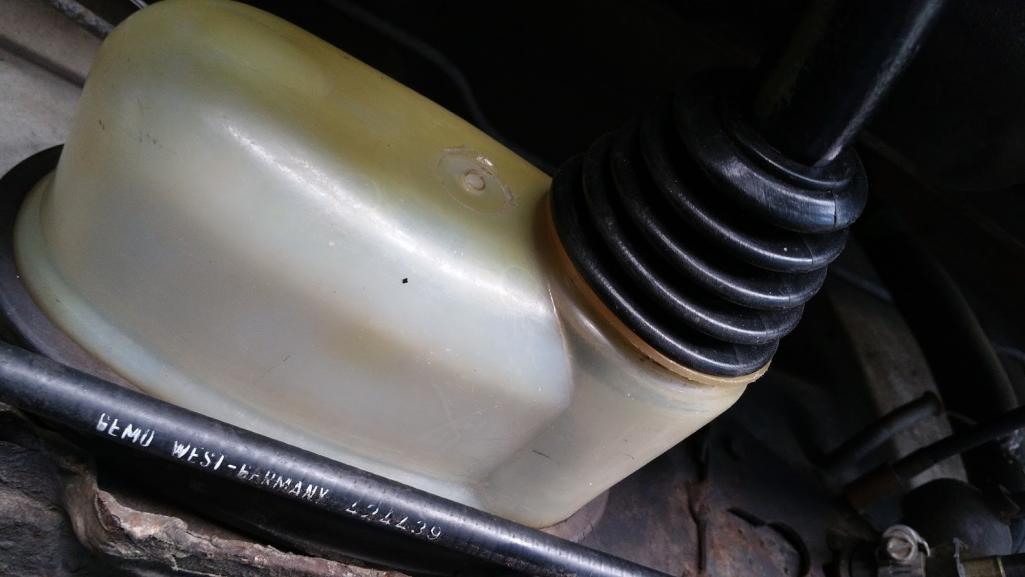 The metal strap that came with the side shift cover from 914 rubber was a little tricky to install. The instructions were a little vague for this first timer. I had to do it twice to get it right, but once I figured it out I was able to cinch it down tight and it stayed put. 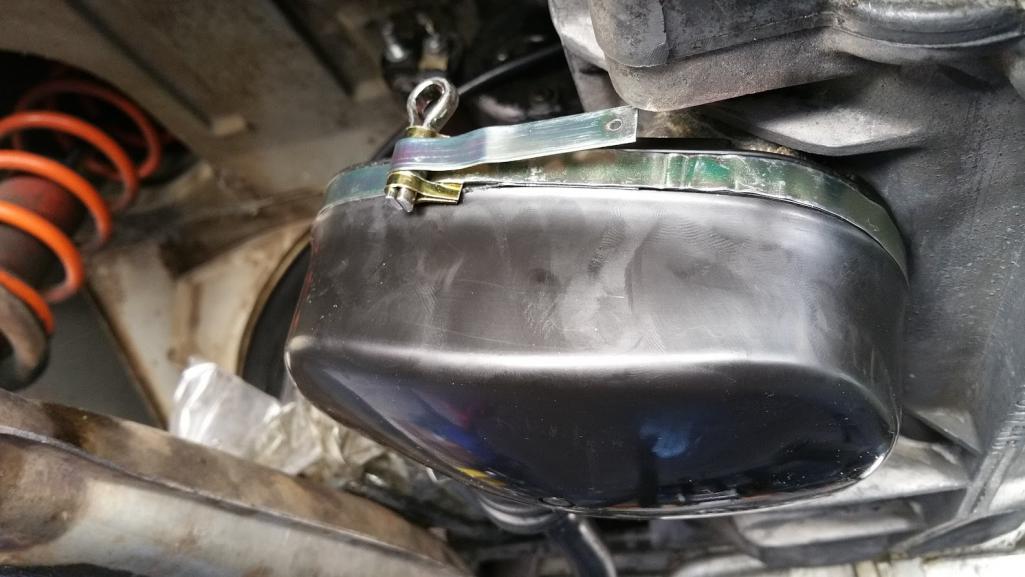 The terminals that connect with the back up switch were totally corroded in my old switch, so I had to wire some new ones on. I had a hard time finding any that would fit the round holes. And at this point I've gotten a little impatient, so I dug around in my electrical supplies and found these. They were too small, but I found they had a split in the side. So I took a little pick and a thin blade and worked the metal apart to make it a little large. They fit in the switch nicely with a good amount of bite. Seems like they will hold just fine. 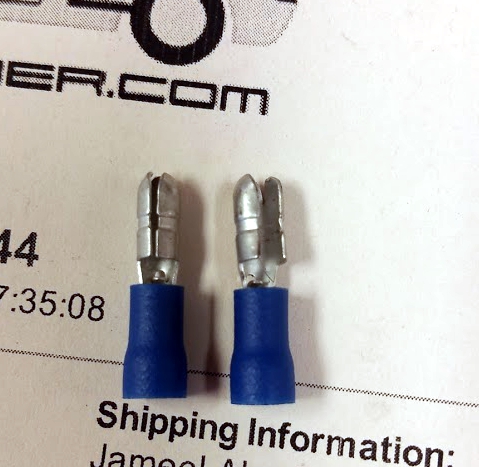 I also reattached my wiring to the started motor and installed a new reverse light switch into the tranny. I followed Dr. Evils dirt simple method of shifting the transmission into 2nd, then pushing the shift lever forward into second as I slipped the coupler over the front end of the front shift rod, while holding the lever tight to the spring plate (left) and cinching down the pinch bolt. It feels good as is, but I'll need to drive the car to make the final determination. All I'm waiting on now is a rear brake caliper to show up, then reinstall the muffler and I can fire her up! |
|
|
|
| gereed75 |
May 16 2016, 04:30 AM
Post
#58
|
|
Senior Member Group: Members Posts: 1,239 Joined: 19-March 13 From: Pittsburgh PA Member No.: 15,674 Region Association: North East States |
Really nice write up. Thanks
|
|
|
|
| Jameel |
May 17 2016, 07:49 AM
Post
#59
|
|
Member Group: Members Posts: 98 Joined: 6-October 15 From: Iowa Member No.: 19,239 Region Association: None |
Hopefully someone in my shoes someday will find it useful. I'm hoping to bleed my brakes after work today, fire her up and take her out for a test drive!
|
|
|
|
| Porsche930dude |
May 20 2016, 09:39 PM
Post
#60
|
|
Member Group: Members Posts: 399 Joined: 25-November 11 From: Vestal NY Member No.: 13,819 Region Association: None |
I just picked up a junk yard side shift trans today and am looking forward to the conversion. I did not get the new style rubber mounts with the cross bar. do you think it would be possible to retain the old rubber outer mounts and solid mount the center like the old bar?
|
|
|
|
|
1 User(s) are reading this topic (1 Guests and 0 Anonymous Users)
0 Members:

|
Lo-Fi Version | Time is now: 20th April 2024 - 03:22 AM |
Invision Power Board
v9.1.4 © 2024 IPS, Inc.