|
|
|
Porsche, and the Porsche crest are registered trademarks of Dr. Ing. h.c. F. Porsche AG.
This site is not affiliated with Porsche in any way. Its only purpose is to provide an online forum for car enthusiasts. All other trademarks are property of their respective owners. |
|
|

  |

| ThinAir |
 Mar 30 2005, 10:22 PM Mar 30 2005, 10:22 PM
Post
#1
|
|
Best friends  Group: Members Posts: 2,575 Joined: 4-February 03 From: Flagstaff, AZ Member No.: 231 Region Association: Southwest Region |
This is the center tunnel from the donor car, turned upside down.
Attached thumbnail(s) 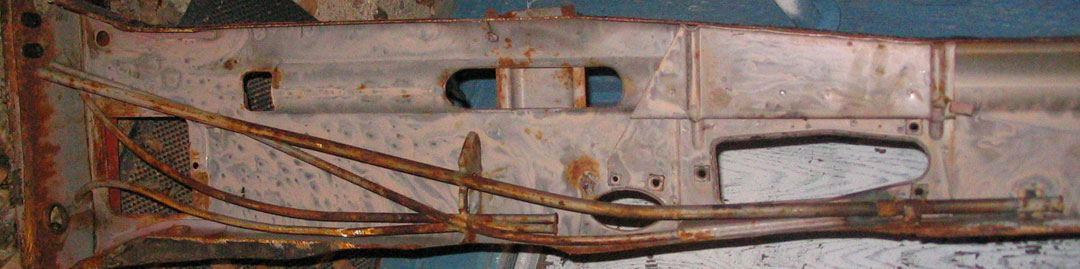
|
   |

 
|
| ThinAir |
Mar 30 2005, 10:24 PM
Post
#2
|
|
Best friends Group: Members Posts: 2,575 Joined: 4-February 03 From: Flagstaff, AZ Member No.: 231 Region Association: Southwest Region |
This is what the center weld point looks like. The bracket shown is from the early tunnel. The later tunnels have a more oval hole in the bracket. Our bracket had the whole right side gone.
Attached image(s) 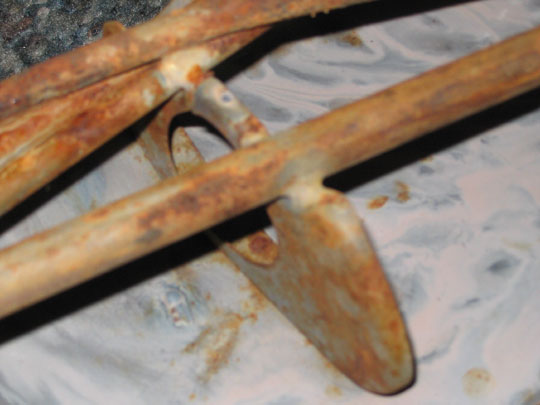
|
|
|
|
| ThinAir |
Mar 30 2005, 10:25 PM
Post
#3
|
|
Best friends Group: Members Posts: 2,575 Joined: 4-February 03 From: Flagstaff, AZ Member No.: 231 Region Association: Southwest Region |
This is the firewall from the donor to show what it's supposed to look like.
Attached image(s) 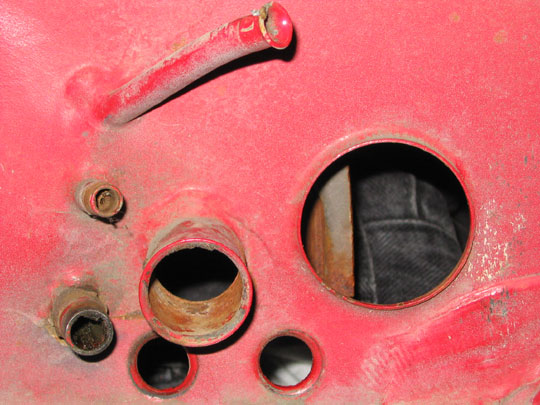
|
|
|
|
| ThinAir |
Mar 30 2005, 10:28 PM
Post
#4
|
|
Best friends Group: Members Posts: 2,575 Joined: 4-February 03 From: Flagstaff, AZ Member No.: 231 Region Association: Southwest Region |
This is what our firewall looked like. We were surprised to find out that all the metal was still there. We just had to bend it back into shape from the inside of the tunnel. Our original plan was to replace a piece of the firewall from the donor along with using the the tube from the donor as well. It turned out to be easier to put the original tube back into the tunnel and fix the firewall.
Attached image(s) 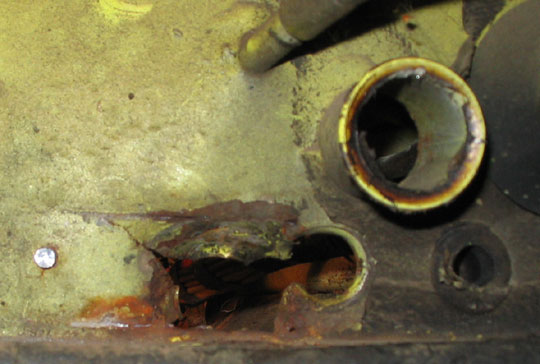
|
|
|
|
| ThinAir |
Mar 30 2005, 10:30 PM
Post
#5
|
|
Best friends Group: Members Posts: 2,575 Joined: 4-February 03 From: Flagstaff, AZ Member No.: 231 Region Association: Southwest Region |
The front end of our clutch tube.
Attached image(s) 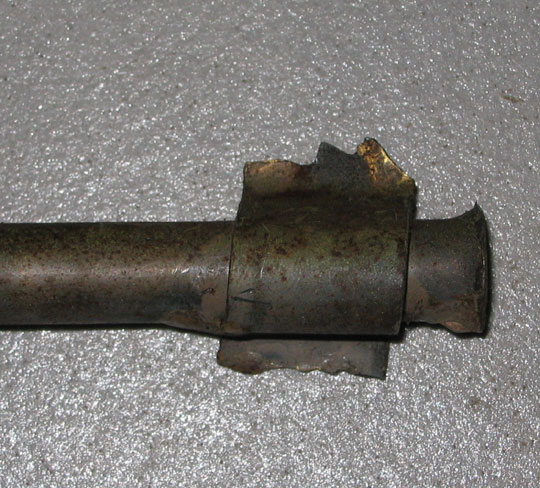
|
|
|
|
| ThinAir |
Mar 30 2005, 10:30 PM
Post
#6
|
|
Best friends Group: Members Posts: 2,575 Joined: 4-February 03 From: Flagstaff, AZ Member No.: 231 Region Association: Southwest Region |
The front tube bracket reinforced.
Attached image(s) 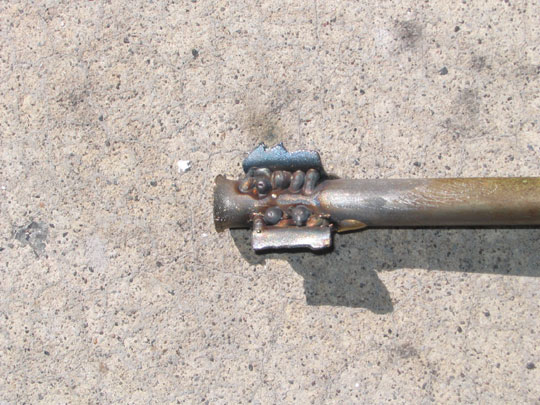
|
|
|
|
| ThinAir |
Mar 30 2005, 10:31 PM
Post
#7
|
|
Best friends Group: Members Posts: 2,575 Joined: 4-February 03 From: Flagstaff, AZ Member No.: 231 Region Association: Southwest Region |
Front tube bracket #2. The brazing that you see came back to haunt us later.
Attached image(s) 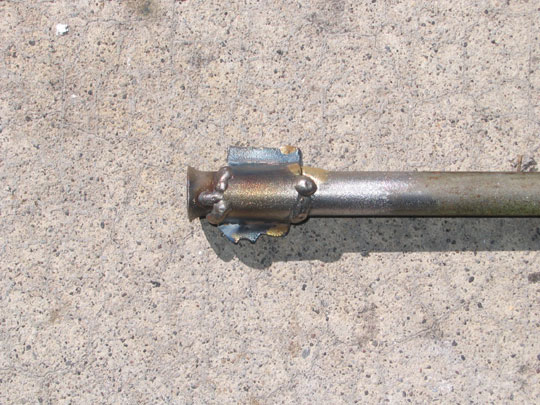
|
|
|
|
| ThinAir |
Mar 30 2005, 10:32 PM
Post
#8
|
|
Best friends Group: Members Posts: 2,575 Joined: 4-February 03 From: Flagstaff, AZ Member No.: 231 Region Association: Southwest Region |
This is the flap we cut in the front of the tunnel. Tape shows the measurement from the shifter hole
Attached image(s) 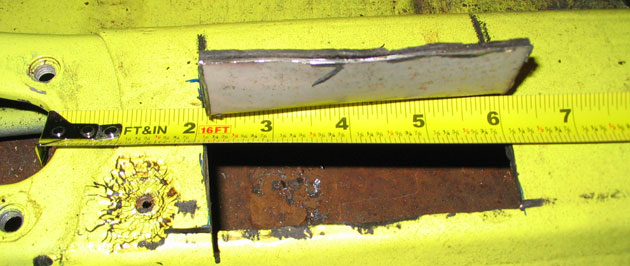
|
|
|
|
| ThinAir |
Mar 30 2005, 10:33 PM
Post
#9
|
|
Best friends Group: Members Posts: 2,575 Joined: 4-February 03 From: Flagstaff, AZ Member No.: 231 Region Association: Southwest Region |
This is the rear flap, measured from the cross brace.
Attached image(s) 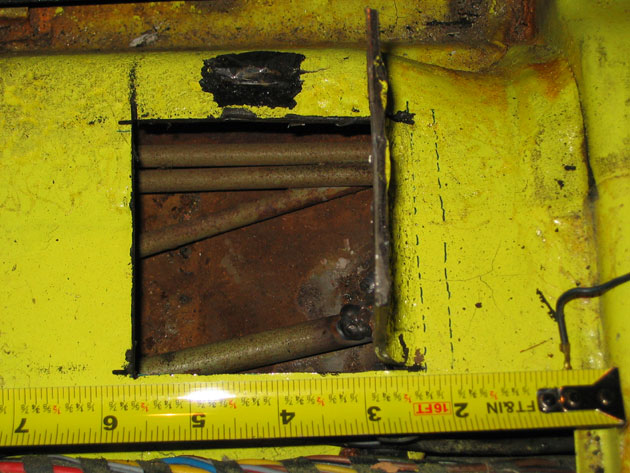
|
|
|
|
| ThinAir |
Mar 30 2005, 10:35 PM
Post
#10
|
|
Best friends Group: Members Posts: 2,575 Joined: 4-February 03 From: Flagstaff, AZ Member No.: 231 Region Association: Southwest Region |
The front bracket as originally repaired. We just welded the bracket where it had originally broken.
Attached image(s) 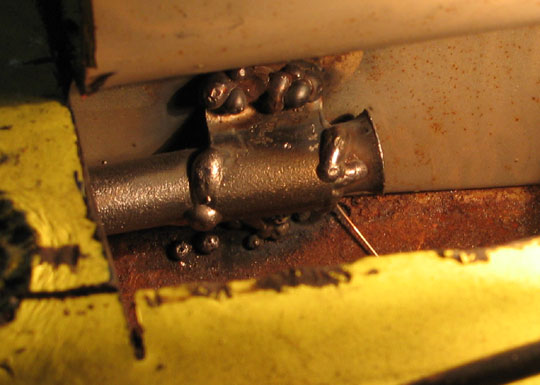
|
|
|
|
| ThinAir |
Mar 30 2005, 10:36 PM
Post
#11
|
|
Best friends Group: Members Posts: 2,575 Joined: 4-February 03 From: Flagstaff, AZ Member No.: 231 Region Association: Southwest Region |
We cut a piece from the donor's old tunnel to make a "bracket" for the center weld point. It was easier to weld it to the floor of the tunnel than to try to rebuild the factory bracket.
Attached image(s) 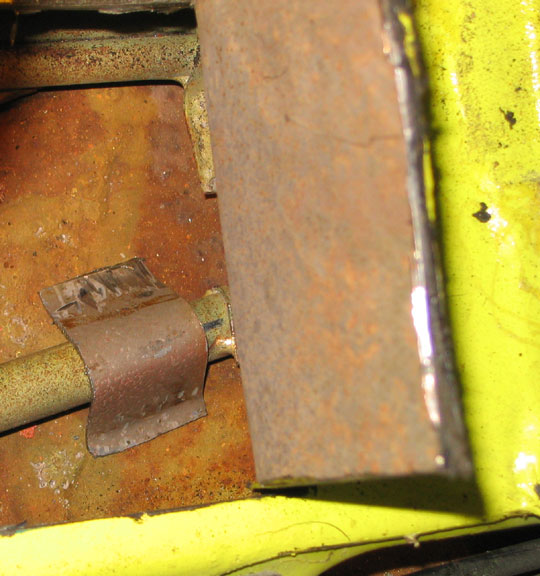
|
|
|
|
| ThinAir |
Mar 30 2005, 10:37 PM
Post
#12
|
|
Best friends Group: Members Posts: 2,575 Joined: 4-February 03 From: Flagstaff, AZ Member No.: 231 Region Association: Southwest Region |
The center weld after it was finished. You can see how little of the original bracket was left.
Attached image(s) 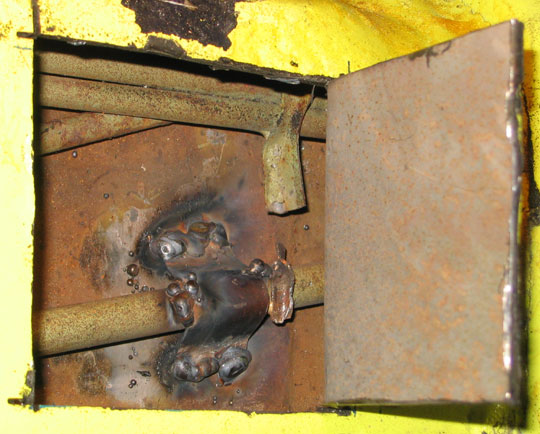
|
|
|
|
| ThinAir |
Mar 30 2005, 10:39 PM
Post
#13
|
|
Best friends Group: Members Posts: 2,575 Joined: 4-February 03 From: Flagstaff, AZ Member No.: 231 Region Association: Southwest Region |
The firewall was repaired by bending the metal back into as flat a shape as we could get, then using an appropriate washer that was cut into a "D" to fit and welding it in place.
Attached image(s) 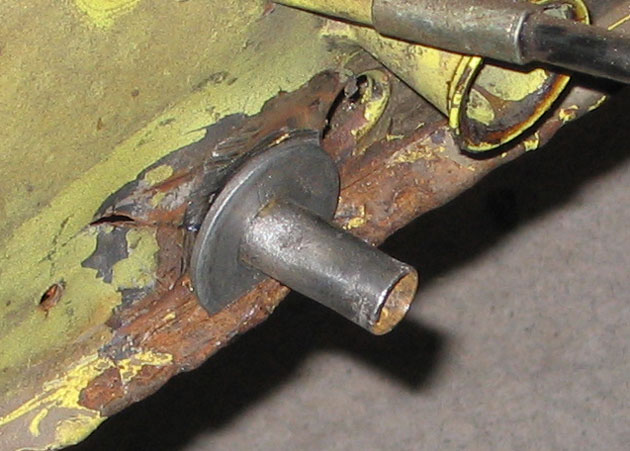
|
|
|
|
| ThinAir |
Mar 30 2005, 10:40 PM
Post
#14
|
|
Best friends Group: Members Posts: 2,575 Joined: 4-February 03 From: Flagstaff, AZ Member No.: 231 Region Association: Southwest Region |
The finished firewall welding.
Attached image(s) 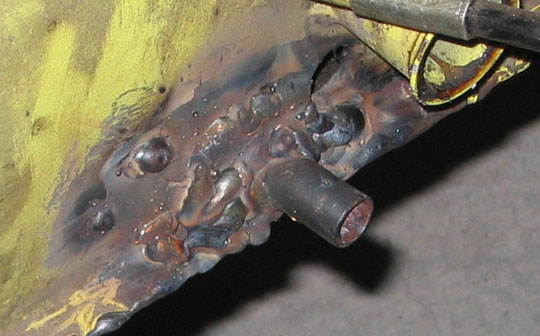
|
|
|
|
| ThinAir |
Mar 30 2005, 10:41 PM
Post
#15
|
|
Best friends Group: Members Posts: 2,575 Joined: 4-February 03 From: Flagstaff, AZ Member No.: 231 Region Association: Southwest Region |
Mike was not happy with the way the welding came out. I'm sure it will hold just fine. It looks better after I worked on it with the grinder. It's hard to reach a lot of places in that space. Once it is painted it will look just fine by me.
Attached image(s) 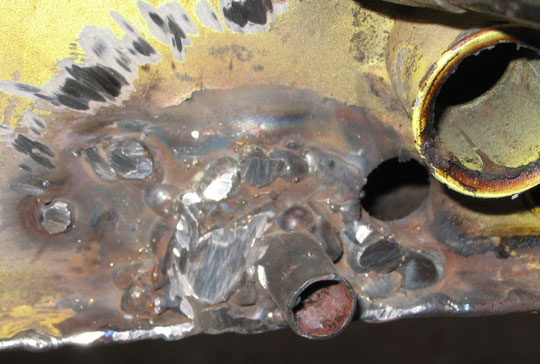
|
|
|
|
| ThinAir |
Mar 30 2005, 10:45 PM
Post
#16
|
|
Best friends Group: Members Posts: 2,575 Joined: 4-February 03 From: Flagstaff, AZ Member No.: 231 Region Association: Southwest Region |
The engine end of our tube was bent and out of round. Mike pounded a spike into it to fix these problems, but the force ended up breaking the middle weld where the bracket attached to the tube and the front weld where the bracket attached to the wall. The pre-existing brazing on the front seemed to be the problem.
The middle was just rewelded. The front was fixed using a trick that Brad Roberts posted. Mike drilled holes through the wall and the bracket, then welded through the holes. This worked quite well. For those who only have a broken front bracket, this might be the only thing you need to do instead of cutting the flaps for access to the inside of the tunnel. Here's Brad's Repair Thread This post has been edited by ThinAir914: Aug 18 2005, 06:15 PM Attached image(s) 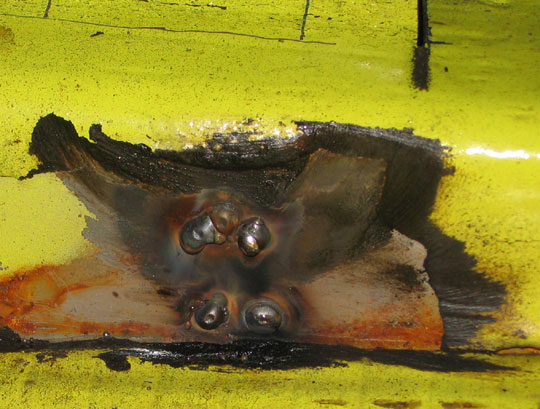
|
|
|
|
| ThinAir |
Mar 30 2005, 10:46 PM
Post
#17
|
|
Best friends Group: Members Posts: 2,575 Joined: 4-February 03 From: Flagstaff, AZ Member No.: 231 Region Association: Southwest Region |
My welder at work. I can't say thanks enough for Mike taking a weekend to come up from Phoenix with his welder to do this job. Thanks Mike! (IMG:http://www.914world.com/bbs2/html/emoticons/pray.gif)
Attached image(s) 
|
|
|
|
| ThinAir |
Mar 30 2005, 10:48 PM
Post
#18
|
|
Best friends Group: Members Posts: 2,575 Joined: 4-February 03 From: Flagstaff, AZ Member No.: 231 Region Association: Southwest Region |
It was only 44F and the wind was blowing when we did this job. Fortunately I had the pieces of a recently removed fiberglass tub/shower to use as wind breaks.
Attached image(s) 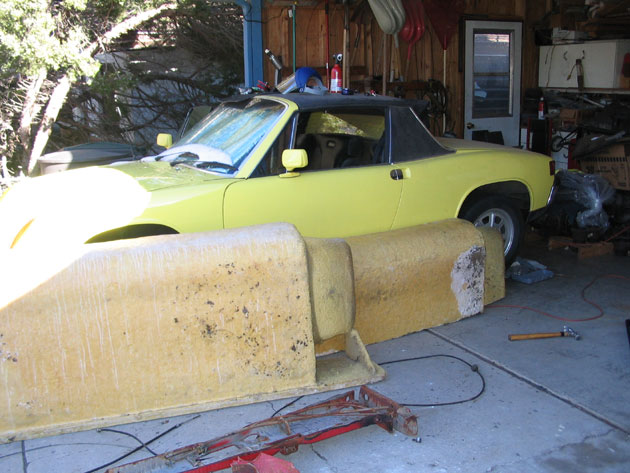
|
|
|
|
| ThinAir |
Mar 30 2005, 10:50 PM
Post
#19
|
|
Best friends Group: Members Posts: 2,575 Joined: 4-February 03 From: Flagstaff, AZ Member No.: 231 Region Association: Southwest Region |
As clutch cable tube repair jobs go, I would guess that this is about as involved as they can be since the tube had broken free in all three places. The hole in the fire wall was large enough that I was actually able to pull the tube out through the firewall.
Hopefully this will help others who face this common repair job. |
|
|
|
| mattillac |
Mar 31 2005, 12:34 AM
Post
#20
|
|
robots! Group: Members Posts: 536 Joined: 27-October 04 From: vallejo,ca Member No.: 3,020 |
nice work!
|
|
|
|
|
1 User(s) are reading this topic (1 Guests and 0 Anonymous Users)
0 Members:

|
Lo-Fi Version | Time is now: 2nd July 2026 - 11:50 PM |
Invision Power Board
v9.1.4 © 2026 IPS, Inc.