|
|
|
Porsche, and the Porsche crest are registered trademarks of Dr. Ing. h.c. F. Porsche AG.
This site is not affiliated with Porsche in any way. Its only purpose is to provide an online forum for car enthusiasts. All other trademarks are property of their respective owners. |
|
|

  |

| JoeDees |
 Jun 11 2016, 06:18 PM Jun 11 2016, 06:18 PM
Post
#1
|
|
Senior Member  Group: Members Posts: 515 Joined: 10-November 14 From: Northern Kentucky Member No.: 18,106 Region Association: None |
There's been a lot of talk about these lately. They're 12 gauge steel making them difficult to fabricate, unfortunately they're no longer available from Porsche, and tragically, nobody makes a replacement for them. So let's figure out what can be done.
|
   |

 
|
| JoeDees |
Jun 11 2016, 06:27 PM
Post
#2
|
|
Senior Member Group: Members Posts: 515 Joined: 10-November 14 From: Northern Kentucky Member No.: 18,106 Region Association: None |
The outer/longer one's fabrication seems well covered here: http://www.performanceforum.com/wesvann/91.../rd-9-1-08.html
But the inner/shorter one is another matter. Cary and his father-in-law created one out of a single piece, which seems to be the best method in order to maintain structural integrity since you're tying the two sides together. I'm currently working a scheme for a 2 piecer, but am thinking the 12 gauge will be super difficult to work with the weird curves. I really don't know how Cary's Superman did it! So here's an interesting question: I have me some 12 gauge sheet, but couldn't find any 14 (to cheat), do you think it has to be 12? Or do you think I could get away with 16? I'm confident I can get the bigger tie done in 12, so would the little one need to equal it, or could we get away with a little less? Also, do you think a 2 piecer for the little will work? (I'll post cardboard pics of my idea when I get them done) Don't hold back on your opinion. Thanks. |
|
|
|
| 914_teener |
Jun 11 2016, 10:24 PM
Post
#3
|
|
914 Guru Group: Members Posts: 5,193 Joined: 31-August 08 From: So. Cal Member No.: 9,489 Region Association: Southern California |
QUOTE(DirtyCossack @ Jun 11 2016, 05:27 PM)  The outer/longer one's fabrication seems well covered here: http://www.performanceforum.com/wesvann/91.../rd-9-1-08.html But the inner/shorter one is another matter. Cary and his father-in-law created one out of a single piece, which seems to be the best method in order to maintain structural integrity since you're tying the two sides together. I'm currently working a scheme for a 2 piecer, but am thinking the 12 gauge will be super difficult to work with the weird curves. I really don't know how Cary's Superman did it! So here's an interesting question: I have me some 12 gauge sheet, but couldn't find any 14 (to cheat), do you think it has to be 12? Or do you think I could get away with 16? I'm confident I can get the bigger tie done in 12, so would the little one need to equal it, or could we get away with a little less? Also, do you think a 2 piecer for the little will work? (I'll post cardboard pics of my idea when I get them done) Don't hold back on your opinion. Thanks. I think Superinlaw is skilled in sheet metal and I think you should stick with the 12 ga. If you know how to triangulate the curves then you can do what he does. Half skill and art. My 02. |
|
|
|
| cary |
Jun 12 2016, 06:13 AM
Post
#4
|
|
Advanced Member Group: Members Posts: 3,900 Joined: 26-January 04 From: Sherwood Oregon Member No.: 1,608 Region Association: Pacific Northwest |
Here's where we're at while I'm getting ready for my career change. Super In Law is still working on repairing the rust on the cut out long first (pattern base) . Sorry to say the four that I've cut open have had rust damage. After he finishes that he'll start the hammer work on the ties. When we're happy with what we've created we'll hand it off to an ME at church and he'll do the 3D thing. They'll see if they can manufacture them and at what cost. They manufacture crop picking machines, primarily tomatoes. All I hope to get of that is the drawings. Then we'll hand them to Mark and see what his metal folks can do.
If that hits a dead end. I'll see if my new boss, Mr. Gamroth can get us into contact with one of his manufacturing folks. At the end of the day I hope Pete and his family at RD can do them. But it sounds like the entire next year is all scheduled out. My plan is to have Super In Law prepare both the left and right suspension pieces. Build two or three of each. Then maybe ship the long pieces to RD with one of each that we've created. We'll get this done ............ Off to a PCA autocross ................. |
|
|
|
| JoeDees |
Jun 12 2016, 07:57 AM
Post
#5
|
|
Senior Member Group: Members Posts: 515 Joined: 10-November 14 From: Northern Kentucky Member No.: 18,106 Region Association: None |
After multiple cardboard experiments and a test with 20 gauge, I actually think the single piece is the way to go...
|
|
|
|
| saigon71 |
Jun 12 2016, 04:45 PM
Post
#6
|
|
Senior Member Group: Members Posts: 1,994 Joined: 1-June 09 From: Dillsburg, PA Member No.: 10,428 Region Association: MidAtlantic Region |
I went with thicker steel, made individual pieces and welded them together. I may still have the poster board templates. Let me know if they would be any help in development of these parts.
Process starts on post 130: http://www.914world.com/bbs2/index.php?sho...3957&st=120 |
|
|
|
| JoeDees |
Jun 12 2016, 05:38 PM
Post
#7
|
|
Senior Member Group: Members Posts: 515 Joined: 10-November 14 From: Northern Kentucky Member No.: 18,106 Region Association: None |
Those are very nice and pretty!
|
|
|
|
| JoeDees |
Jun 12 2016, 09:06 PM
Post
#8
|
|
Senior Member Group: Members Posts: 515 Joined: 10-November 14 From: Northern Kentucky Member No.: 18,106 Region Association: None |
I went with the 12 gauge and found that it really wasn't too bad. Formed in one piece with a vice, torch, and BFH. The first picture shows my multiple cardboard forms and the 20 gauge sample/practice pieces.
Attached thumbnail(s) 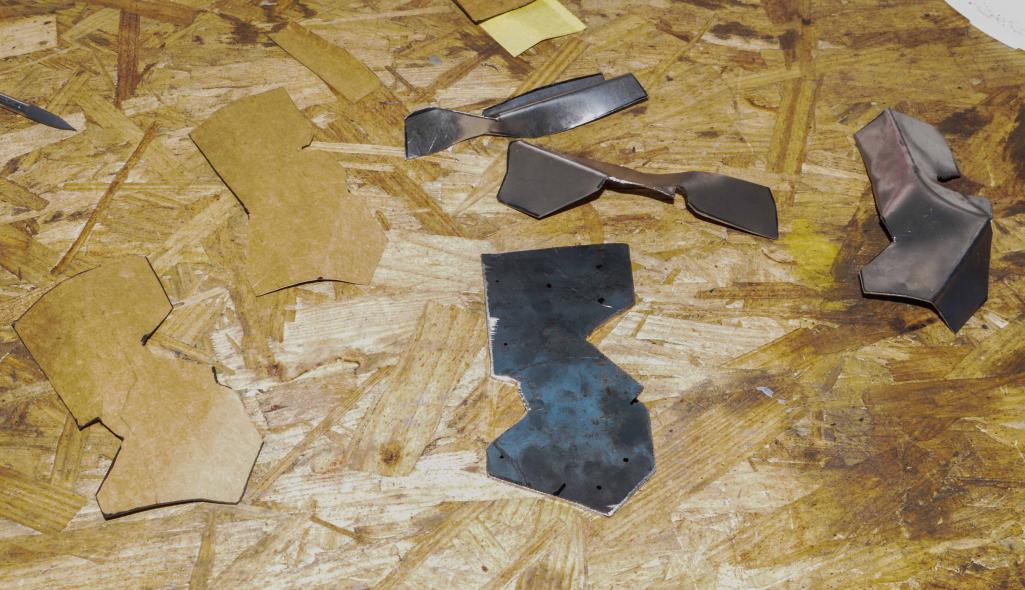 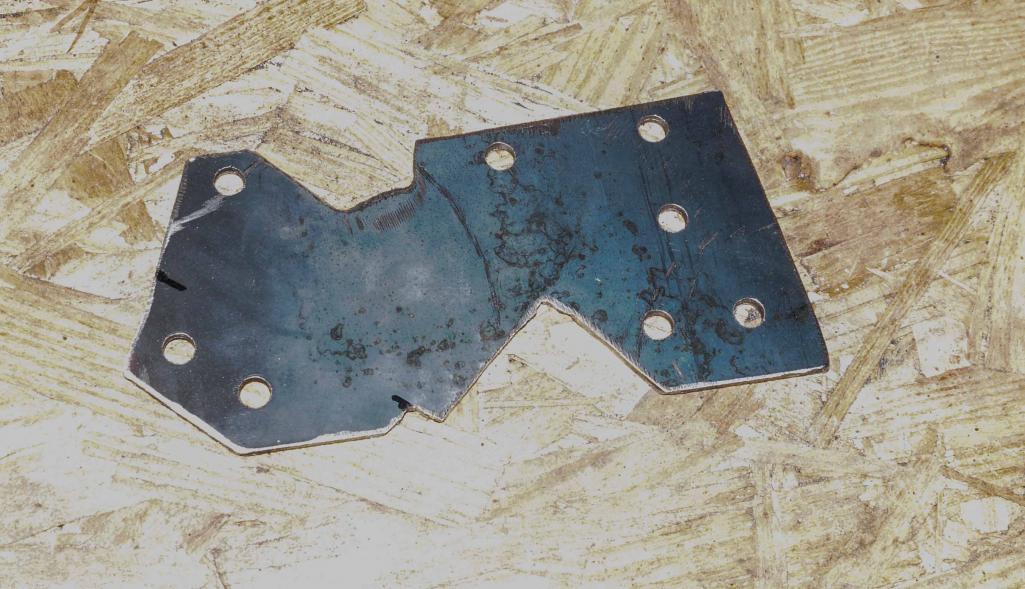 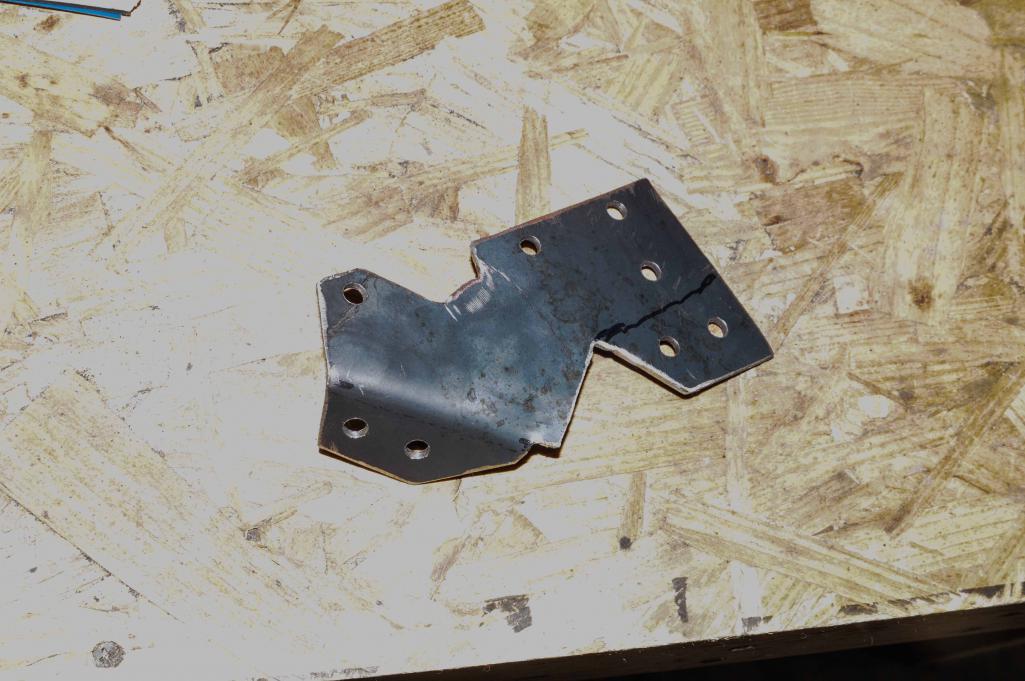 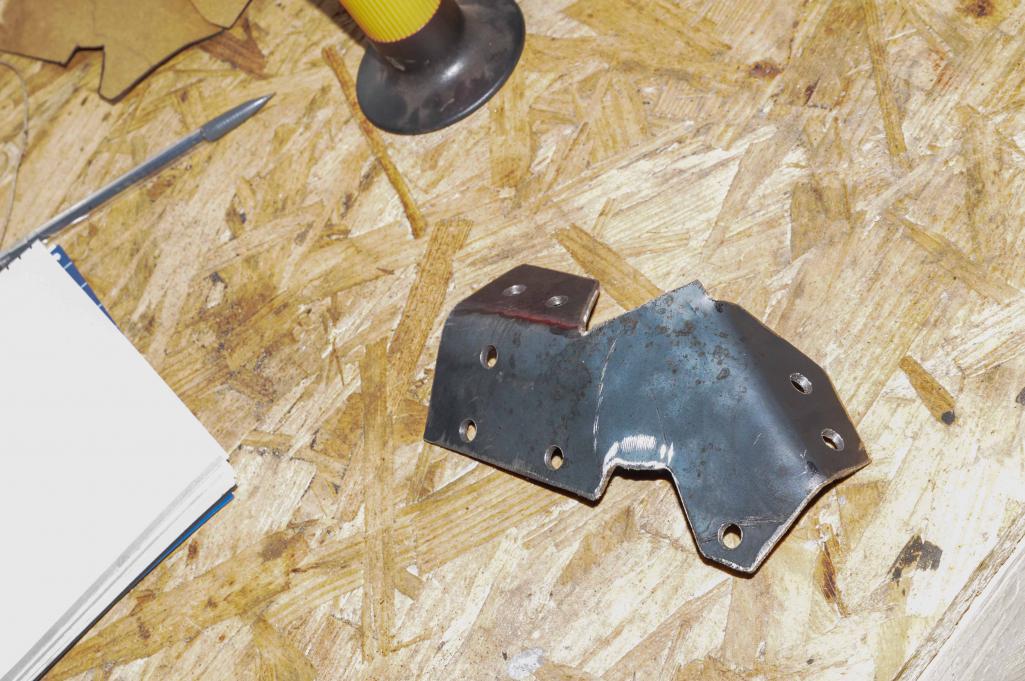 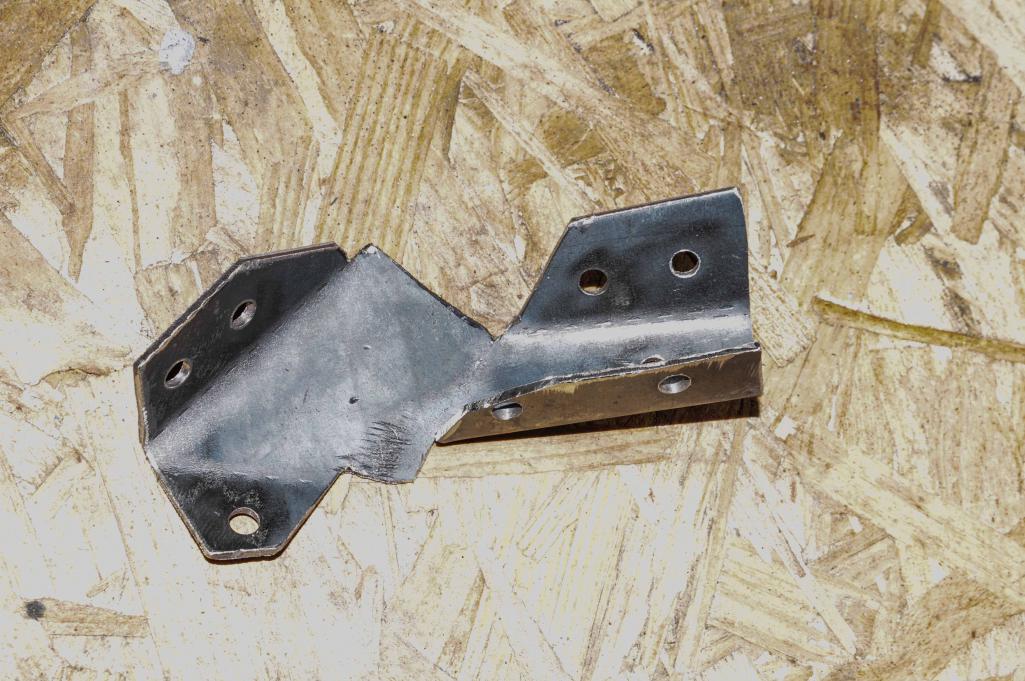 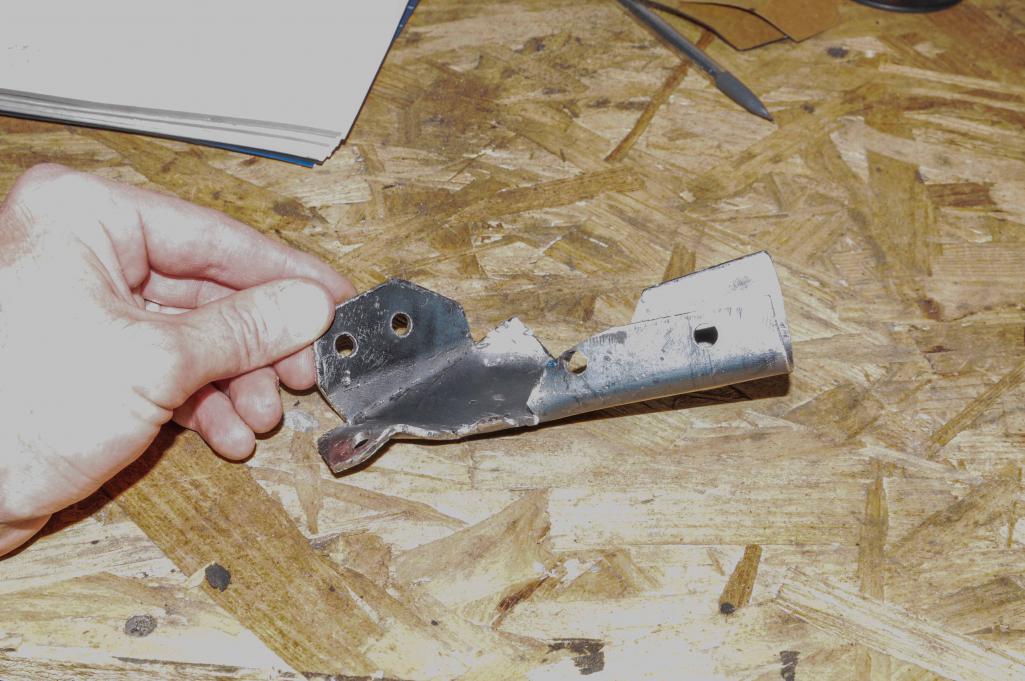
|
|
|
|
| JoeDees |
Jun 12 2016, 09:08 PM
Post
#9
|
|
Senior Member Group: Members Posts: 515 Joined: 10-November 14 From: Northern Kentucky Member No.: 18,106 Region Association: None |
Some more pics. For the bigger tie I used the method as seen in the link.
Attached thumbnail(s) 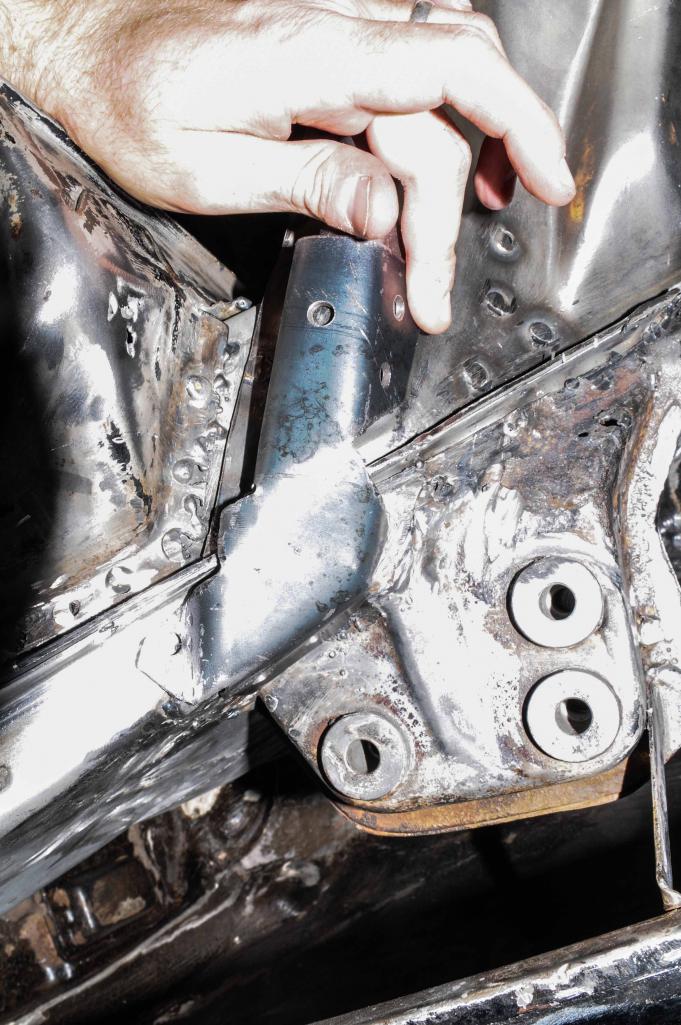 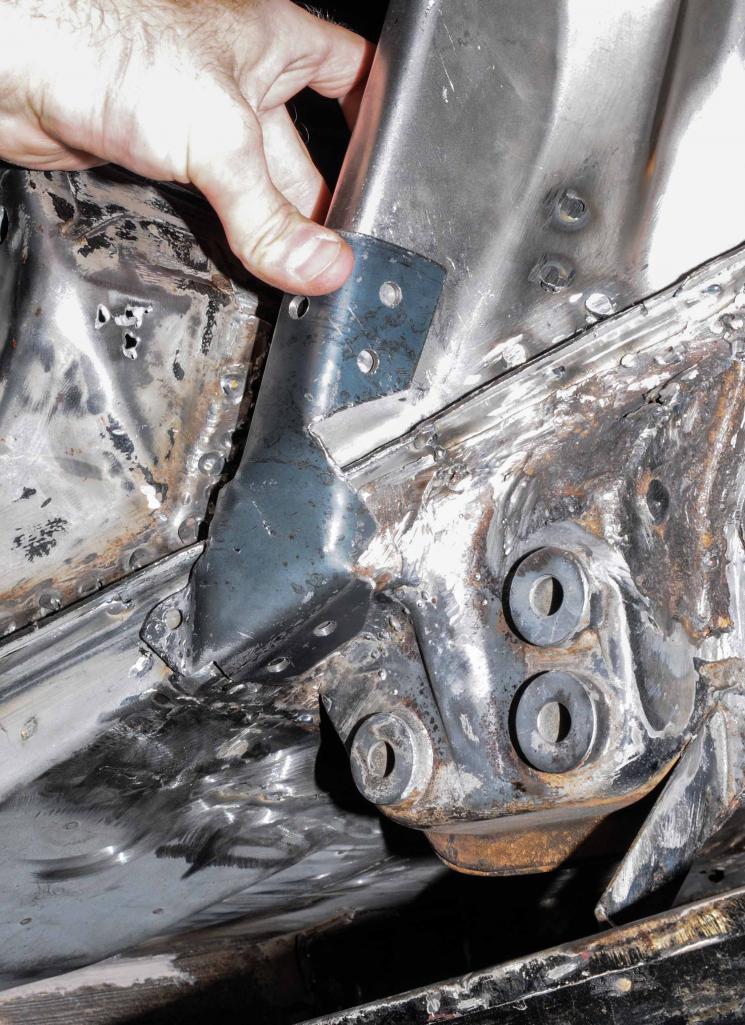 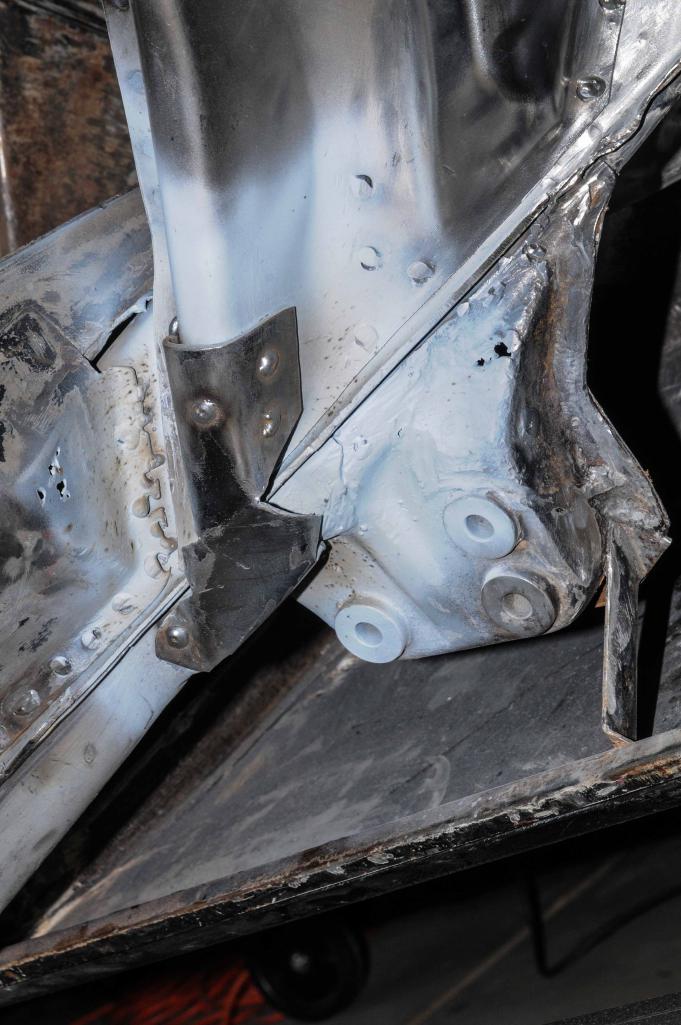 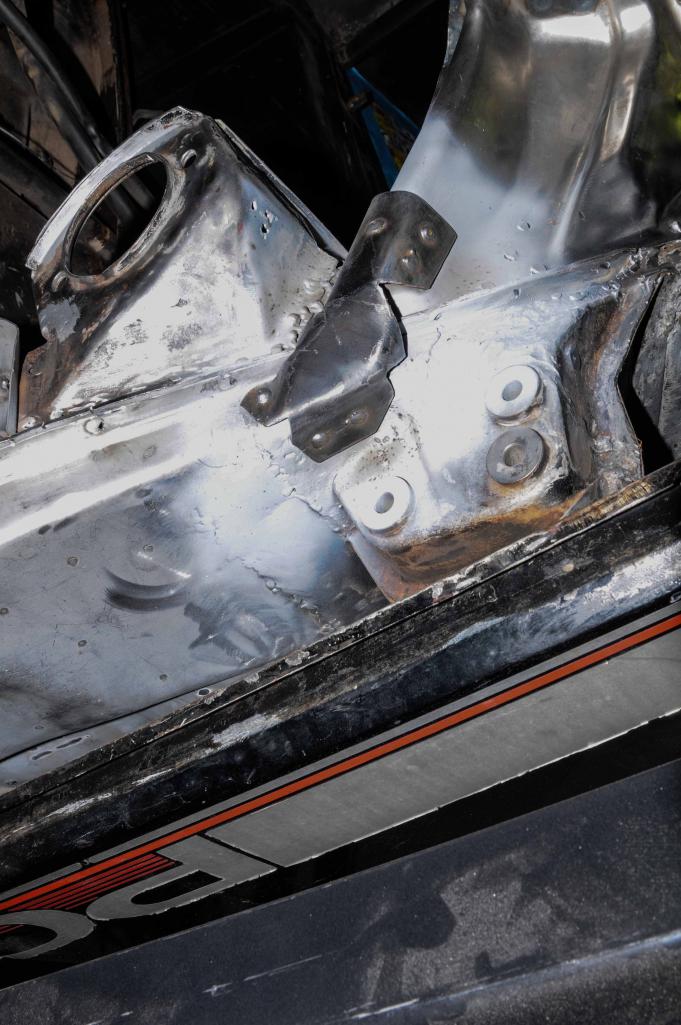 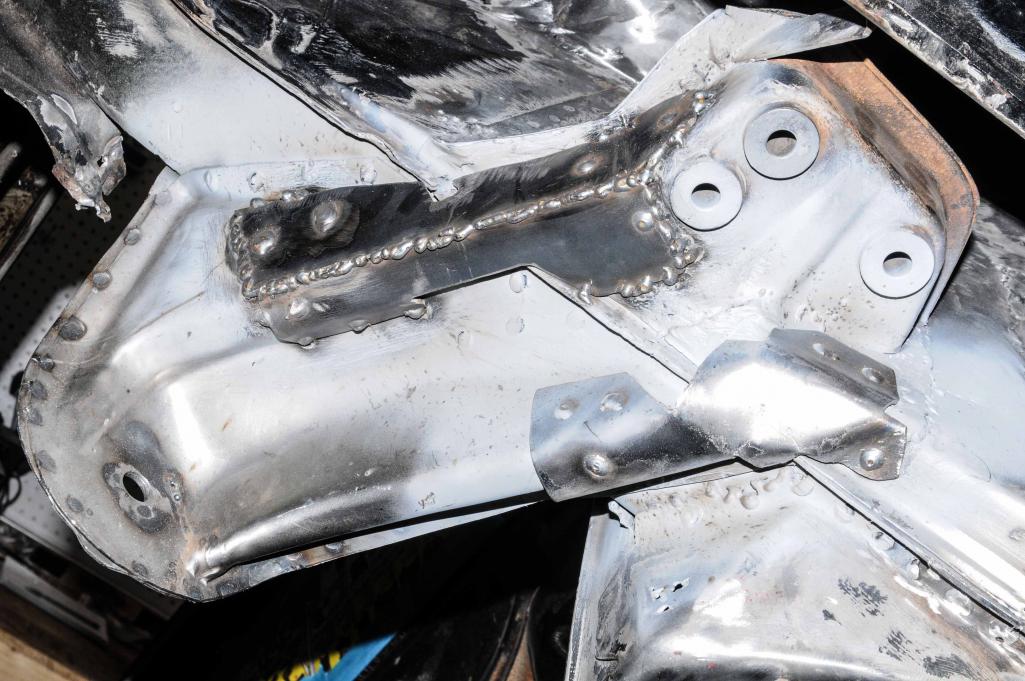
|
|
|
|
| r_towle |
Jun 12 2016, 09:27 PM
Post
#10
|
|
Custom Member Group: Members Posts: 24,560 Joined: 9-January 03 From: Taxachusetts Member No.: 124 Region Association: North East States |
Is this the right thread to lodge a complaint regarding the rear suspension design?
Nice job so far, keep it up! |
|
|
|
| JoeDees |
Jun 12 2016, 09:30 PM
Post
#11
|
|
Senior Member Group: Members Posts: 515 Joined: 10-November 14 From: Northern Kentucky Member No.: 18,106 Region Association: None |
QUOTE(r_towle @ Jun 12 2016, 10:27 PM) Is this the right thread to lodge a complaint regarding the rear suspension design? I'd say it is. I had my share of choice words for it this weekend. |
|
|
|
| BeatNavy |
Jun 13 2016, 03:42 AM
Post
#12
|
|
Certified Professional Scapegoat Group: Members Posts: 2,924 Joined: 26-February 14 From: Easton, MD Member No.: 17,042 Region Association: MidAtlantic Region |
Yup, this is very helpful for me. I've been avoiding this task and focusing on other things.
Nice work, and thanks for sharing. |
|
|
|
| mgp4591 |
Jun 13 2016, 04:39 AM
Post
#13
|
|
914 Guru Group: Members Posts: 5,363 Joined: 1-August 12 From: Salt Lake City Ut Member No.: 14,748 Region Association: Intermountain Region |
Is it my imagination or does it look like seam welding could help the overall strength of this assembly?
|
|
|
|
| 914dave |
Jun 13 2016, 07:04 AM
Post
#14
|
|
914 Addict Group: Members Posts: 700 Joined: 19-October 03 From: Willow Grove Pa. Member No.: 1,262 Region Association: North East States |
Nicely done!!!!
|
|
|
|
| 914werke |
Jun 13 2016, 07:33 AM
Post
#15
|
|
"I got blisters on me fingers" Group: Members Posts: 9,995 Joined: 22-March 03 From: USofA Member No.: 453 Region Association: Pacific Northwest |
(IMG:style_emoticons/default/agree.gif) This has been on my "to do" list for some time.
Nice work. |
|
|
|
| mbseto |
Jun 13 2016, 08:10 AM
Post
#16
|
|
Senior Member Group: Members Posts: 1,253 Joined: 6-August 14 From: Cincy Member No.: 17,743 Region Association: North East States |
Any interest in creating a PDF file of the templates?
|
|
|
|
| JoeDees |
Jun 13 2016, 09:02 AM
Post
#17
|
|
Senior Member Group: Members Posts: 515 Joined: 10-November 14 From: Northern Kentucky Member No.: 18,106 Region Association: None |
I can see what I can do. I still have them, but it's going to be a long and busy week at work.
|
|
|
|
| mbseto |
Jun 14 2016, 07:38 AM
Post
#18
|
|
Senior Member Group: Members Posts: 1,253 Joined: 6-August 14 From: Cincy Member No.: 17,743 Region Association: North East States |
No rush, I still have a lot of work to do before I get back to the rear suspension.
If you're done with them and don't have a scanner handy, mail them to me and I'll scan them and post the scan. |
|
|
|
| JoeDees |
Jun 14 2016, 08:23 AM
Post
#19
|
|
Senior Member Group: Members Posts: 515 Joined: 10-November 14 From: Northern Kentucky Member No.: 18,106 Region Association: None |
QUOTE(mgp4591 @ Jun 13 2016, 05:39 AM) Is it my imagination or does it look like seam welding could help the overall strength of this assembly? I think you're absolutely right, I'm going to see what's up this weekend. I'm also thinking about adding a little triangular piece in this area:  And an apology to mbseto, I should have known that as the early phone watcher I'd have nothing better to do at work this morning and should have brought the templates in to scan (I'll have to do them here at work anyways...). I'll try and see if I can trade an opening duty with somebody for later this week. |
|
|
|
| draganc |
Jun 16 2016, 08:08 PM
Post
#20
|
|
Senior Member Group: Members Posts: 725 Joined: 2-November 09 From: central new jersey Member No.: 11,000 Region Association: North East States |
Not trying to be a dick, but your seam welds look like they didn't penetrate the metal.
The spot welds looks right on! PS: great design/work! |
|
|
|
|
1 User(s) are reading this topic (1 Guests and 0 Anonymous Users)
0 Members:

|
Lo-Fi Version | Time is now: 18th April 2024 - 02:03 PM |
Invision Power Board
v9.1.4 © 2024 IPS, Inc.