|
|
|
Porsche, and the Porsche crest are registered trademarks of Dr. Ing. h.c. F. Porsche AG.
This site is not affiliated with Porsche in any way. Its only purpose is to provide an online forum for car enthusiasts. All other trademarks are property of their respective owners. |
|
|

  |

| Dion |
 Sep 9 2016, 10:27 AM Sep 9 2016, 10:27 AM
Post
#1
|
|
RN  Group: Members Posts: 2,931 Joined: 16-September 04 From: Shepherdstown, WV Member No.: 2,766 Region Association: MidAtlantic Region |
Well I've started the process of preparing for
my 2056 GT to 2.4L six "rallye tribute" auto. Tearing into the interior I discovered some rust mites have been eating for a while. Doesn't look too extensive but will be probing some more. The exterior left long was patched a long time ago, albeit incorrectly. This was done by shop that wasn't fully up to speed on these cars and I was still a novice, well still am. I'll be doing some exploratory surgery on this left side inside and out. So I'll get this addressed before any engine install takes place. Would like to have it buttoned up for Hershey 2017. Wish me luck. " Attached thumbnail(s) 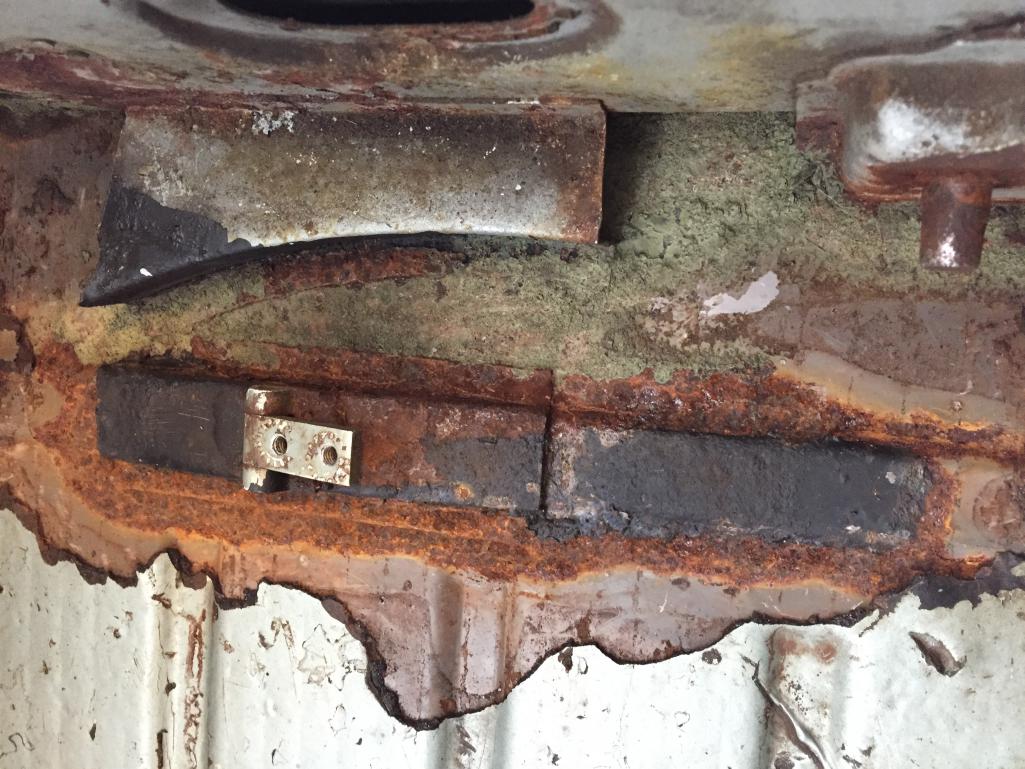 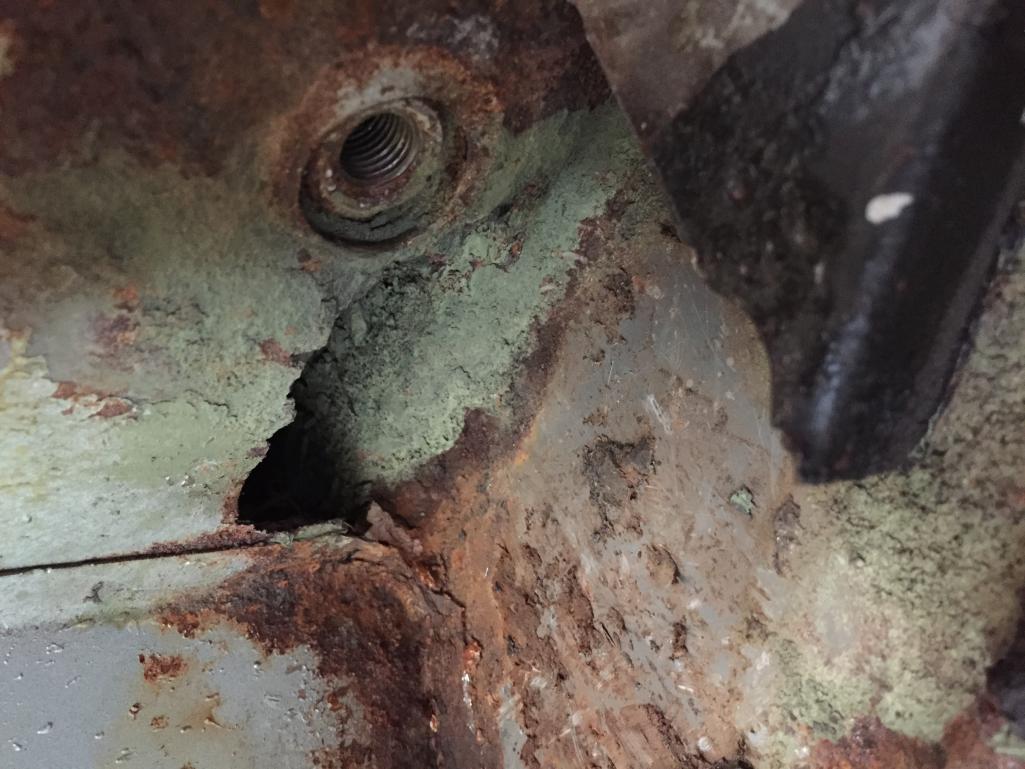
|
   |

 
|
| Dion |
Sep 9 2016, 10:28 AM
Post
#2
|
|
RN Group: Members Posts: 2,931 Joined: 16-September 04 From: Shepherdstown, WV Member No.: 2,766 Region Association: MidAtlantic Region |
E brake area top:
Exterior long near door sill bottom pic Attached thumbnail(s) 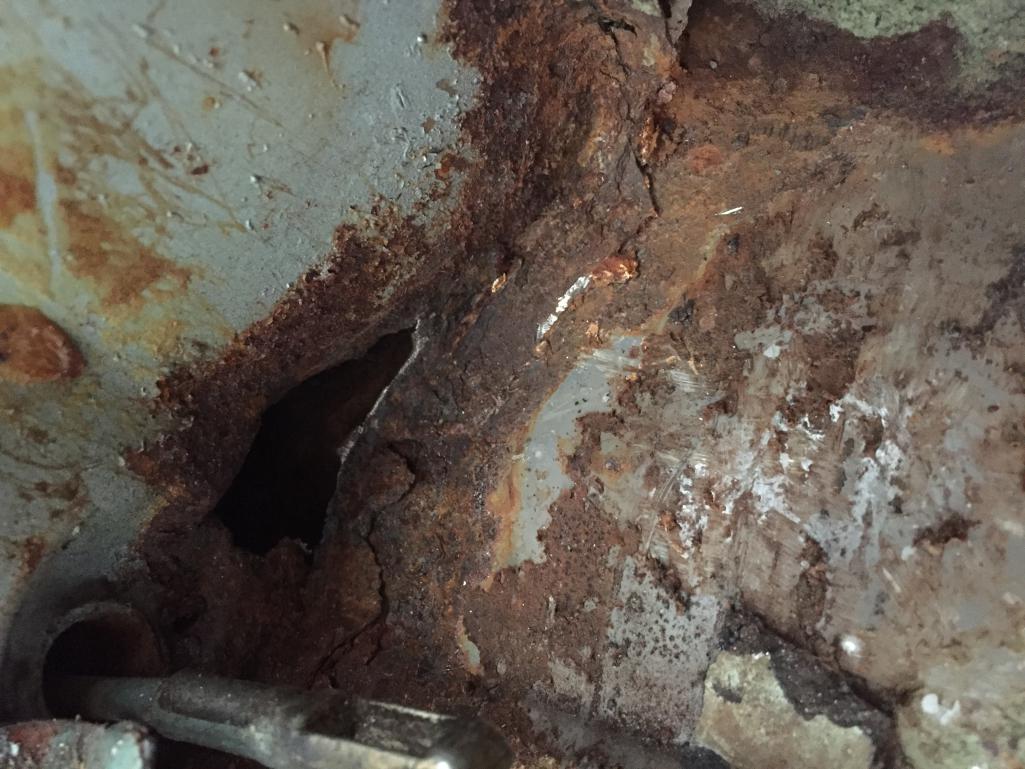 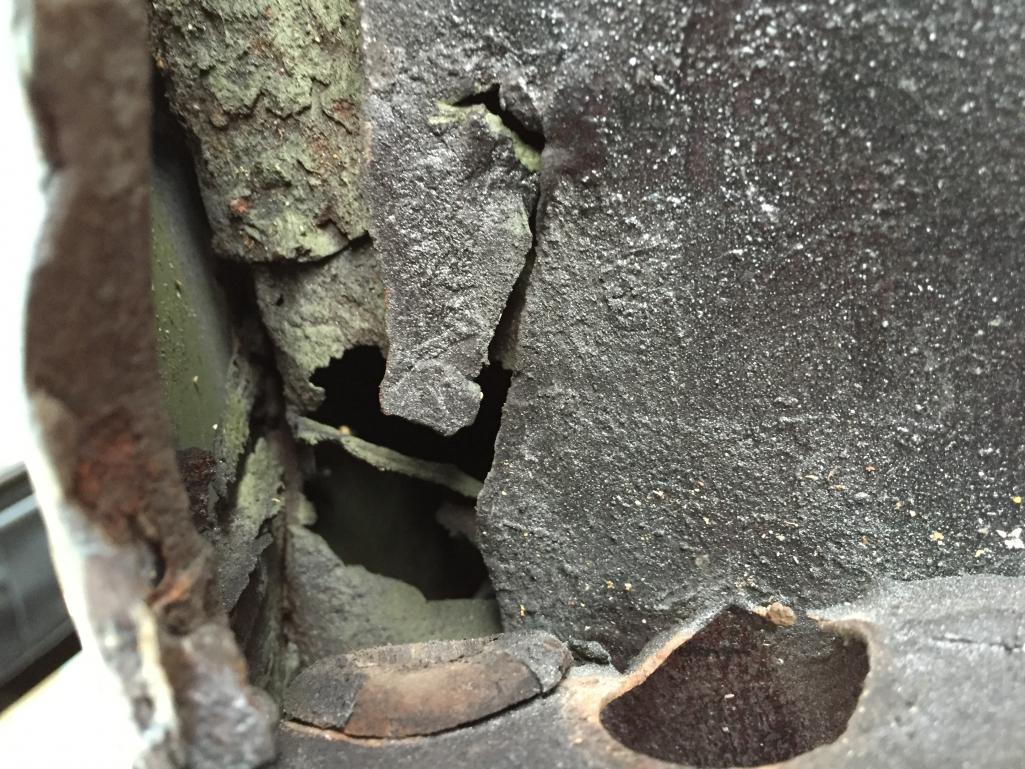
|
|
|
|
| mepstein |
Sep 9 2016, 11:16 AM
Post
#3
|
|
914-6 GT in waiting Group: Members Posts: 20,778 Joined: 19-September 09 From: Landenberg, PA/Wilmington, DE Member No.: 10,825 Region Association: MidAtlantic Region |
Doesn't look bad. Grab a multi tool and get rid of the floor tar once and for all.
|
|
|
|
| 914dave |
Sep 9 2016, 11:47 AM
Post
#4
|
|
914 Addict Group: Members Posts: 743 Joined: 19-October 03 From: Willow Grove Pa. Member No.: 1,262 Region Association: North East States |
QUOTE(mepstein @ Sep 9 2016, 01:16 PM)  Doesn't look bad. Grab a multi tool and get rid of the floor tar once and for all. I was going to suggest , contact cement heavy duty aluminum foil in place and new carpets. Good as new. Wasn't sure how that would be received. (IMG:style_emoticons/default/shades.gif) |
|
|
|
| Dion |
Sep 9 2016, 12:16 PM
Post
#5
|
|
RN Group: Members Posts: 2,931 Joined: 16-September 04 From: Shepherdstown, WV Member No.: 2,766 Region Association: MidAtlantic Region |
I intend to Mark.
As always Dave has my back! I rely on his Jedi knowledge. |
|
|
|
| rgalla9146 |
Sep 9 2016, 12:25 PM
Post
#6
|
|
Advanced Member Group: Members Posts: 4,976 Joined: 23-November 05 From: Paramus NJ Member No.: 5,176 Region Association: None |
QUOTE(914dave @ Sep 9 2016, 01:47 PM) QUOTE(mepstein @ Sep 9 2016, 01:16 PM) Doesn't look bad. Grab a multi tool and get rid of the floor tar once and for all. I was going to suggest , contact cement heavy duty aluminum foil in place and new carpets. Good as new. Wasn't sure how that would be received. (IMG:style_emoticons/default/shades.gif) License plate ( aluminum kind , easy to bend, more 'professional') and bondo. 1/2 hour max. Finish with duct tape to prevent further rust. |
|
|
|
| mepstein |
Sep 9 2016, 12:32 PM
Post
#7
|
|
914-6 GT in waiting Group: Members Posts: 20,778 Joined: 19-September 09 From: Landenberg, PA/Wilmington, DE Member No.: 10,825 Region Association: MidAtlantic Region |
QUOTE(rgalla9146 @ Sep 9 2016, 02:25 PM) QUOTE(914dave @ Sep 9 2016, 01:47 PM) QUOTE(mepstein @ Sep 9 2016, 01:16 PM) Doesn't look bad. Grab a multi tool and get rid of the floor tar once and for all. I was going to suggest , contact cement heavy duty aluminum foil in place and new carpets. Good as new. Wasn't sure how that would be received. (IMG:style_emoticons/default/shades.gif) License plate ( aluminum kind , easy to bend, more 'professional') and bondo. 1/2 hour max. Finish with duct tape to prevent further rust. It's a VW. The proper method is to steal some street signs and fiberglass them in. Construction adhesive would also work. |
|
|
|
| Dion |
Sep 9 2016, 12:49 PM
Post
#8
|
|
RN Group: Members Posts: 2,931 Joined: 16-September 04 From: Shepherdstown, WV Member No.: 2,766 Region Association: MidAtlantic Region |
At what point do I go to Earl Schreib & Zeibart?
After the foil is in? |
|
|
|
| 914dave |
Sep 9 2016, 01:10 PM
Post
#9
|
|
914 Addict Group: Members Posts: 743 Joined: 19-October 03 From: Willow Grove Pa. Member No.: 1,262 Region Association: North East States |
Right after the foil. If you want it proper.
|
|
|
|
| mepstein |
Sep 9 2016, 01:43 PM
Post
#10
|
|
914-6 GT in waiting Group: Members Posts: 20,778 Joined: 19-September 09 From: Landenberg, PA/Wilmington, DE Member No.: 10,825 Region Association: MidAtlantic Region |
All you need to do a pro repair- no metal work!
Attached image(s) 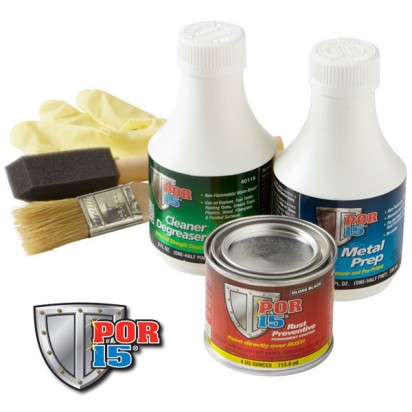
|
|
|
|
| Dion |
Sep 9 2016, 02:54 PM
Post
#11
|
|
RN Group: Members Posts: 2,931 Joined: 16-September 04 From: Shepherdstown, WV Member No.: 2,766 Region Association: MidAtlantic Region |
I knew this club would payoff in its wealth of knowledge. (IMG:style_emoticons/default/dry.gif)
Thanks boys! Stay tuned.... (IMG:style_emoticons/default/welder.gif) |
|
|
|
| flippa |
Sep 9 2016, 04:22 PM
Post
#12
|
|
Advanced Member Group: Members Posts: 3,184 Joined: 7-May 07 From: Boston, MA Member No.: 7,720 Region Association: North East States |
QUOTE(mepstein @ Sep 9 2016, 11:32 AM) It's a VW. The proper method is to steal some street signs and fiberglass them in. Construction adhesive would also work. What, no pop rivets? (IMG:style_emoticons/default/huh.gif) |
|
|
|
| bretth |
Sep 9 2016, 05:14 PM
Post
#13
|
|
Senior Member Group: Members Posts: 899 Joined: 23-June 15 From: Central TX Member No.: 18,882 Region Association: Southwest Region |
QUOTE(flippa @ Sep 9 2016, 06:22 PM) Yeah one pop rivet over a 4 inch hole in the frame is all it took to hold my car together. Brett |
|
|
|
| wndsnd |
Sep 9 2016, 05:23 PM
Post
#14
|
|
You wanted a horse, but got a goat. Nobody wants a goat.... Group: Members Posts: 2,861 Joined: 12-February 12 From: North Shore, MA Member No.: 14,124 Region Association: North East States |
QUOTE(flippa @ Sep 9 2016, 06:22 PM) QUOTE(mepstein @ Sep 9 2016, 11:32 AM) It's a VW. The proper method is to steal some street signs and fiberglass them in. Construction adhesive would also work. What, no pop rivets? (IMG:style_emoticons/default/huh.gif) Leave it to an engineer to overcomplicate this repair! |
|
|
|
| Dion |
Sep 9 2016, 05:30 PM
Post
#15
|
|
RN Group: Members Posts: 2,931 Joined: 16-September 04 From: Shepherdstown, WV Member No.: 2,766 Region Association: MidAtlantic Region |
You guys are great. This is gonna be fun. (IMG:style_emoticons/default/beer3.gif)
|
|
|
|
| jmitro |
Sep 9 2016, 07:56 PM
Post
#16
|
|
Senior Member Group: Members Posts: 713 Joined: 23-July 15 From: Oklahoma Member No.: 18,986 Region Association: None |
looks like you got a little work to do. Good luck with it!
|
|
|
|
| rgalla9146 |
Sep 10 2016, 03:25 AM
Post
#17
|
|
Advanced Member Group: Members Posts: 4,976 Joined: 23-November 05 From: Paramus NJ Member No.: 5,176 Region Association: None |
Paint it Red. Very important. |
|
|
|
| cary |
Sep 10 2016, 08:10 AM
Post
#18
|
|
Advanced Member Group: Members Posts: 3,900 Joined: 26-January 04 From: Sherwood Oregon Member No.: 1,608 Region Association: Pacific Northwest |
The problem your going to run into is the degradation of the inner stiffening layer too. Which is the layer where the seat belt anchor starts it spot welds. (IMG:style_emoticons/default/sad.gif)
Jeff did an extensive rebuild/patch in that area in his thread. http://www.914world.com/bbs2/index.php?sho...791&hl=dead Hopefully yours won't be that extensive. Was the jack point replaced on the prior repair ? |
|
|
|
| Dion |
Sep 10 2016, 10:25 AM
Post
#19
|
|
RN Group: Members Posts: 2,931 Joined: 16-September 04 From: Shepherdstown, WV Member No.: 2,766 Region Association: MidAtlantic Region |
Hey Cary,
The jack point was completely cut out. They just welded up "patch". However unbeknownst to me they never joined the top of the patch to where it meets the door sill area. I will cutting out that whole area to see what's what. Yeah it will be a nice challenge with that seat belt anchor area. We'll get it done. Also need to address front of long next to front left wheel well/fender. Purchasing cut off wheels and a new grinder/ die grinder. I'll add to this thread as I make progress Thanks guys. Attached thumbnail(s) 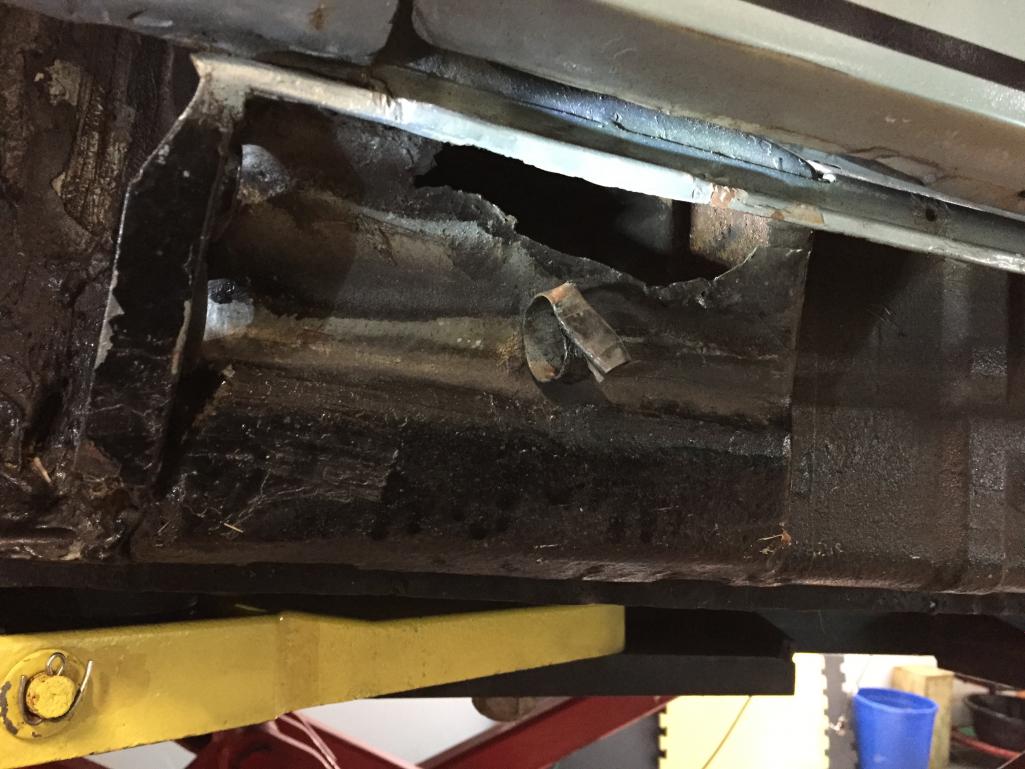 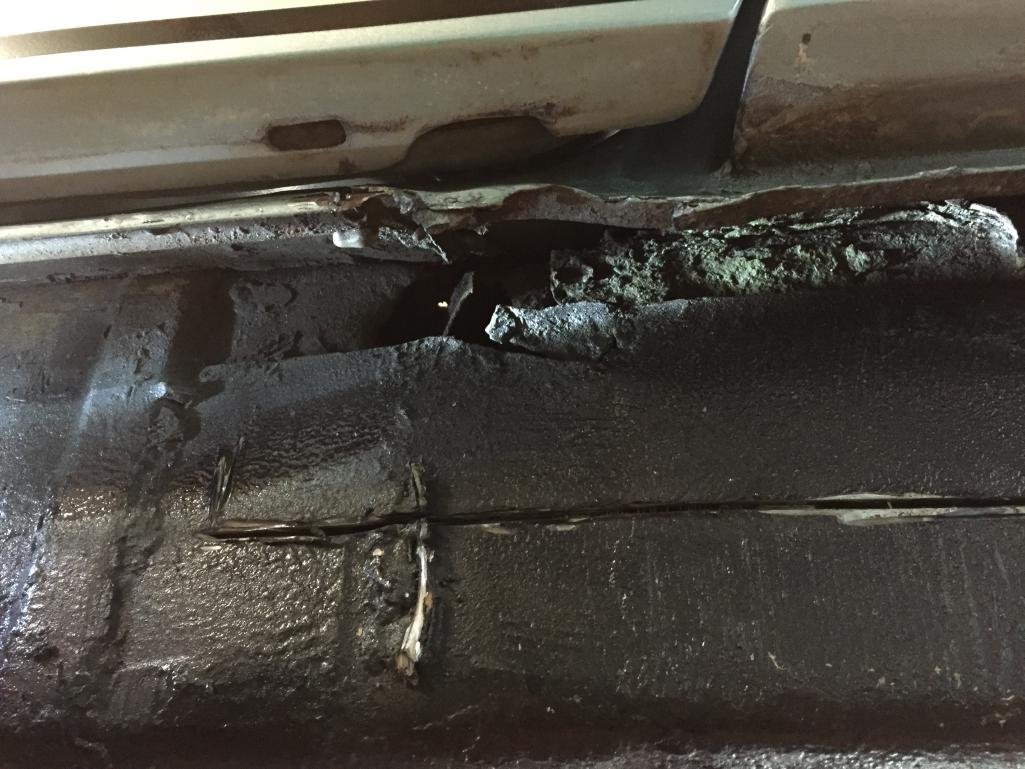
|
|
|
|
| Dion |
Oct 2 2016, 05:27 PM
Post
#20
|
|
RN Group: Members Posts: 2,931 Joined: 16-September 04 From: Shepherdstown, WV Member No.: 2,766 Region Association: MidAtlantic Region |
Ok, tar all scraped out. Door braces in place.
Time this week to start cutting and removing the offending rust areas on the longs. Attached thumbnail(s) 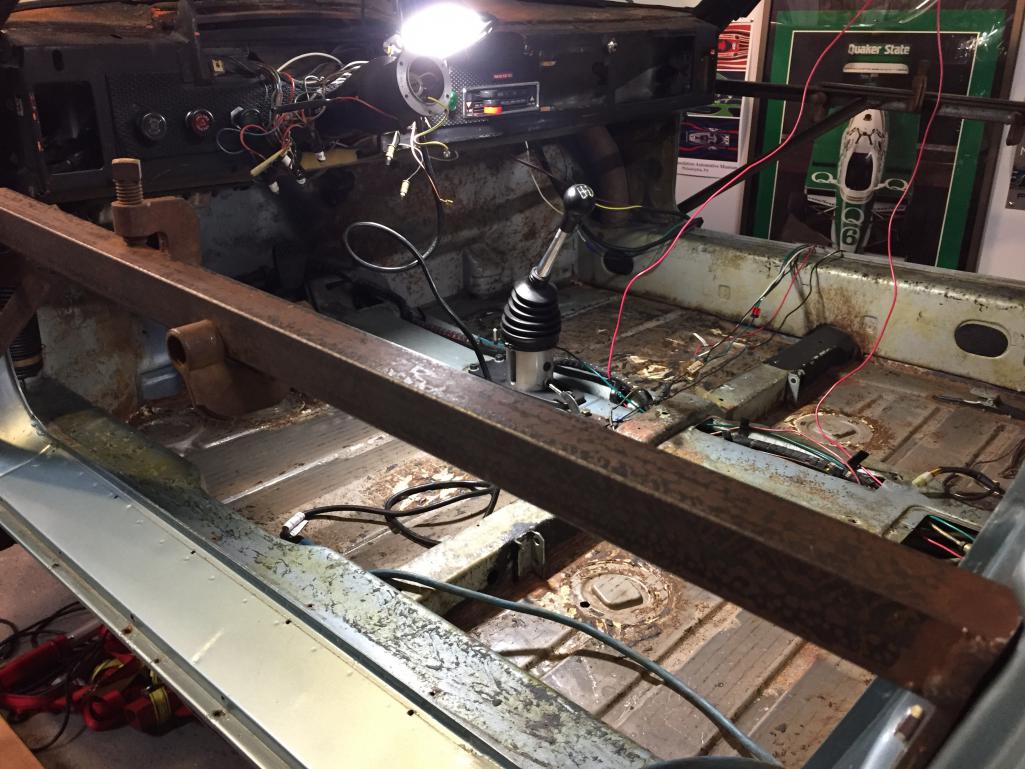 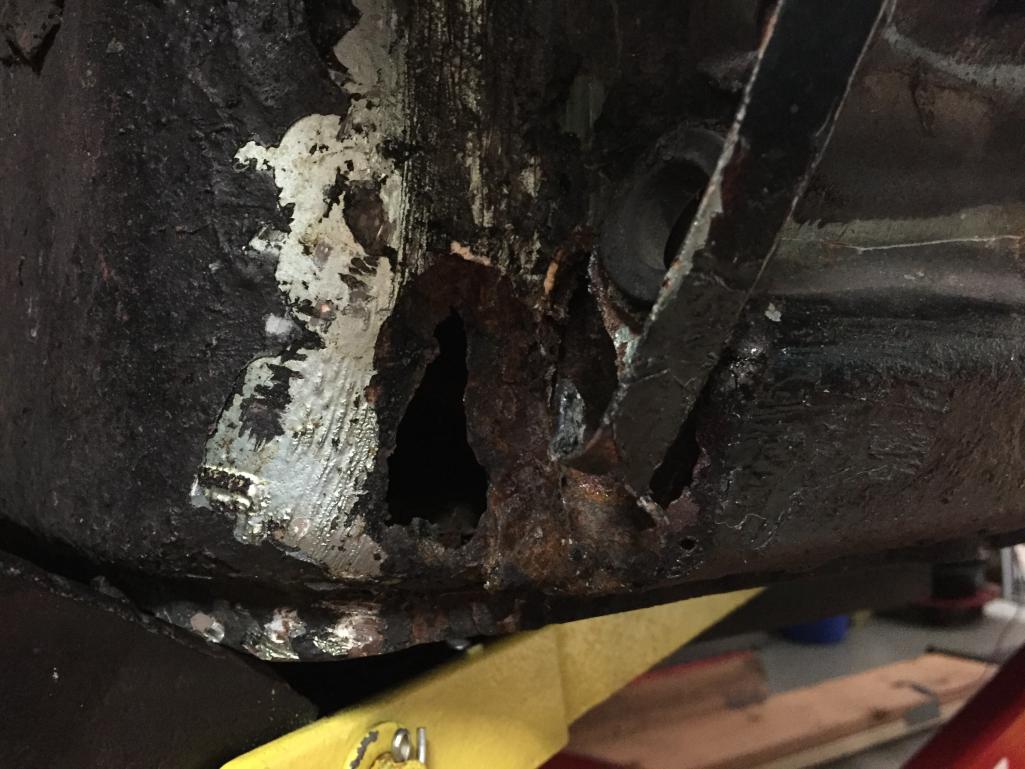
|
|
|
|
|
2 User(s) are reading this topic (2 Guests and 0 Anonymous Users)
0 Members:

|
Lo-Fi Version | Time is now: 25th June 2026 - 03:09 AM |
Invision Power Board
v9.1.4 © 2026 IPS, Inc.