|
|
|
Porsche, and the Porsche crest are registered trademarks of Dr. Ing. h.c. F. Porsche AG.
This site is not affiliated with Porsche in any way. Its only purpose is to provide an online forum for car enthusiasts. All other trademarks are property of their respective owners. |
|
|

  |

| Dion |
 May 28 2020, 10:09 AM May 28 2020, 10:09 AM
Post
#681
|
|
RN  Group: Members Posts: 2,931 Joined: 16-September 04 From: Shepherdstown, WV Member No.: 2,766 Region Association: MidAtlantic Region |
Some primer. Now ready to weld in the pieces Chris sent me. Thanks @tygaboy !
Really appreciate the parts. Attached thumbnail(s) 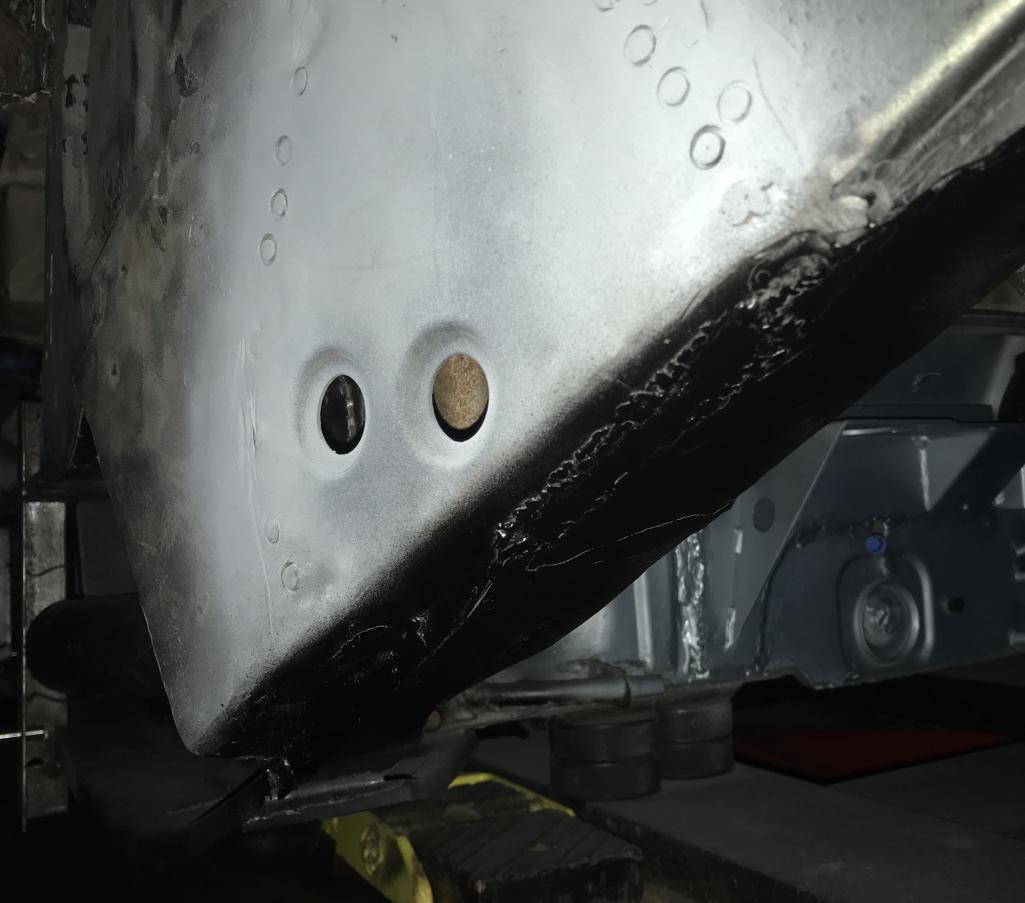 
|
   |

 
|
| tygaboy |
May 28 2020, 10:11 AM
Post
#682
|
|
914 Guru Group: Members Posts: 5,840 Joined: 6-October 15 From: Petaluma, CA Member No.: 19,241 Region Association: Northern California |
Yeah, baby! Great to see you're at the point of installing the console! (IMG:style_emoticons/default/aktion035.gif)
And welcome to the club of folks who've removed those mofo consoles. Not fun, as you well know... Great job on that locator jig, too! |
 |
|
| TonyA |
May 28 2020, 10:18 AM
Post
#683
|
|
Nachmal Group: Members Posts: 711 Joined: 17-November 16 From: Hilltown PA Member No.: 20,596 Region Association: North East States |
Looking good Dion! I did a LOL when you said Dave made some dowel pins at Work. It reminded me of my dad making stuff at work at the Budd company as a tool as die guy. He would bring stuff home to incorporate into my go cart we were building.
|
|
|
|
| Dion |
Jun 29 2020, 11:53 AM
Post
#684
|
|
RN Group: Members Posts: 2,931 Joined: 16-September 04 From: Shepherdstown, WV Member No.: 2,766 Region Association: MidAtlantic Region |
It’s been a little while. Time to update the diary.
With the console jig in place and outer trailing arm console firmly attached I began the task of welding it in place. It was pretty straightforward. The spot weld areas had already been drilled out. Tacked it in. Rechecked the measurements. All was good. Gave it some primer and seam sealer. Next up, the engine (Inner console). Attached thumbnail(s) 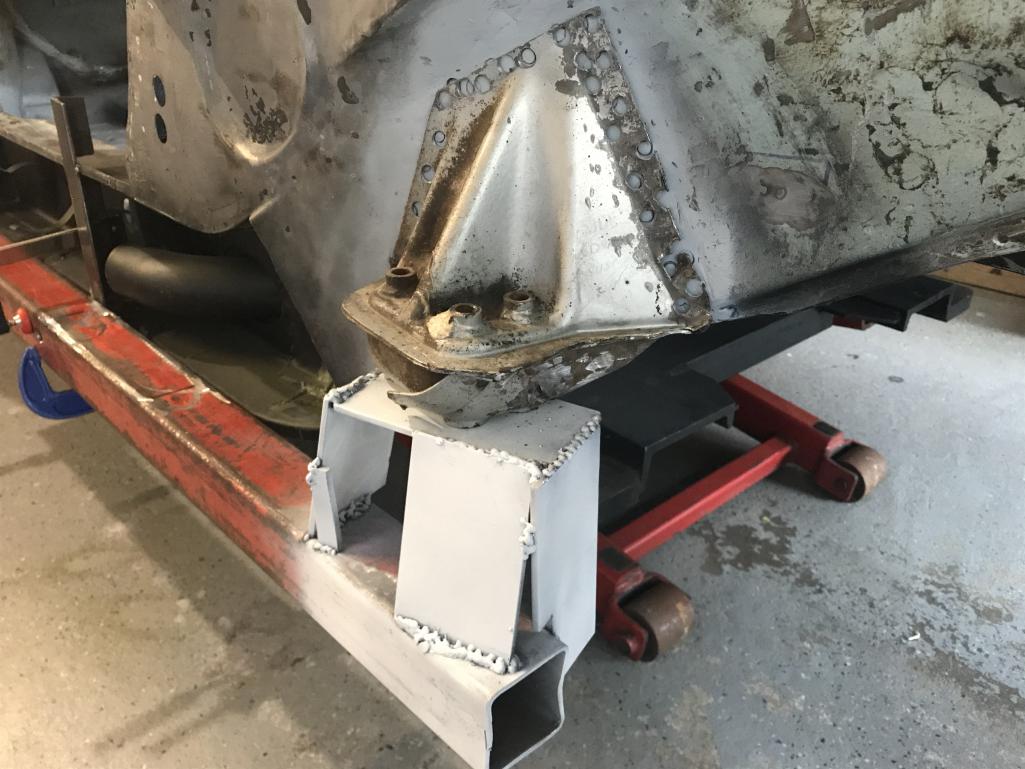
|
|
|
|
| Dion |
Jun 29 2020, 11:54 AM
Post
#685
|
|
RN Group: Members Posts: 2,931 Joined: 16-September 04 From: Shepherdstown, WV Member No.: 2,766 Region Association: MidAtlantic Region |
Welded & primered
Attached thumbnail(s) 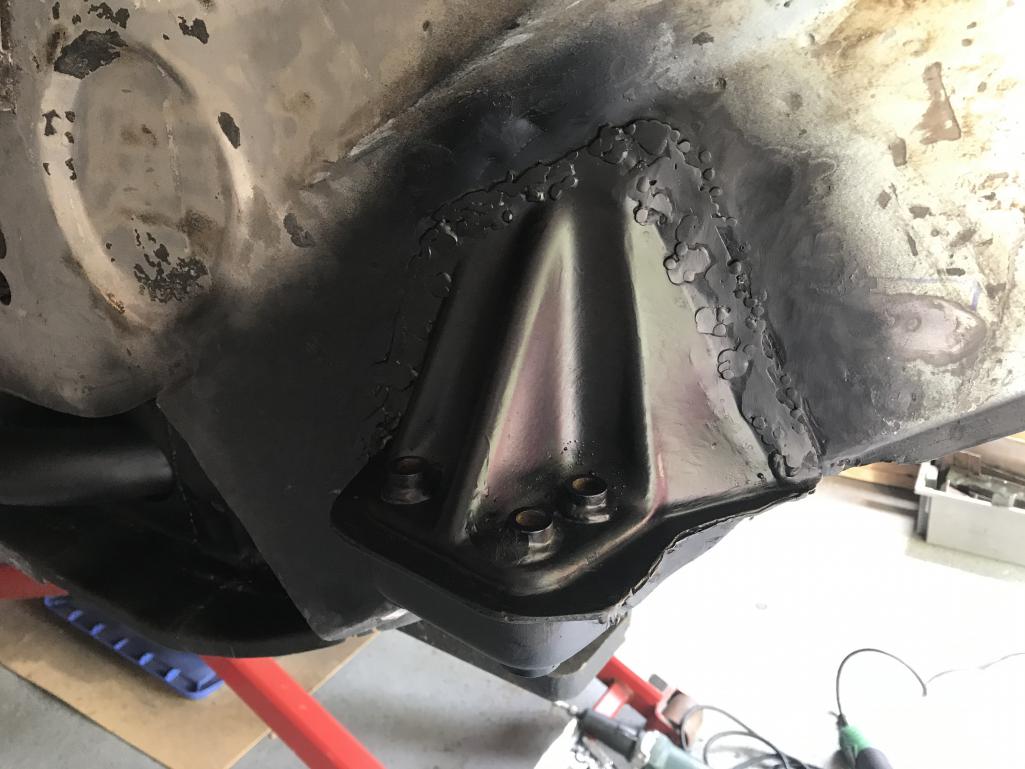
|
|
|
|
| Dion |
Jun 29 2020, 11:58 AM
Post
#686
|
|
RN Group: Members Posts: 2,931 Joined: 16-September 04 From: Shepherdstown, WV Member No.: 2,766 Region Association: MidAtlantic Region |
Inner console piece was prepped and positioned.
I also cut some steel rods to use as measurement guides to keep me on track. Attached thumbnail(s) 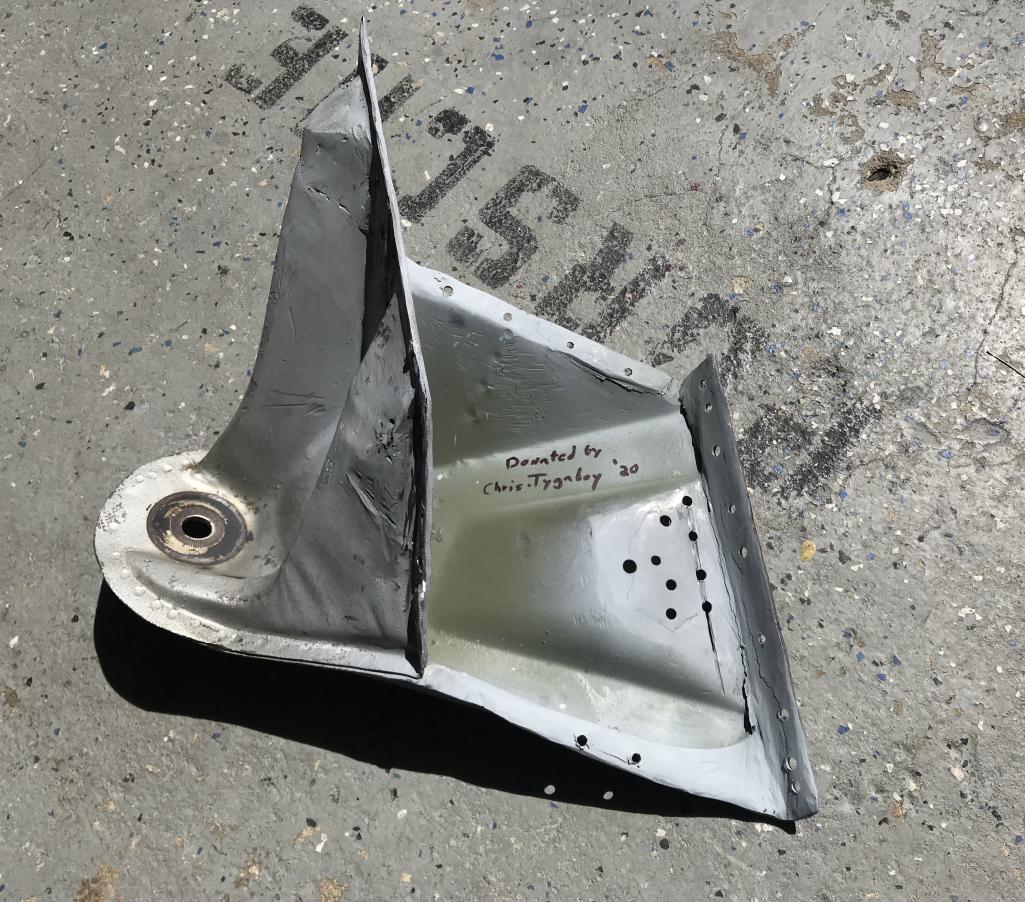
|
|
|
|
| Dion |
Jun 29 2020, 11:59 AM
Post
#687
|
|
RN Group: Members Posts: 2,931 Joined: 16-September 04 From: Shepherdstown, WV Member No.: 2,766 Region Association: MidAtlantic Region |
Measurement rods
Attached thumbnail(s) 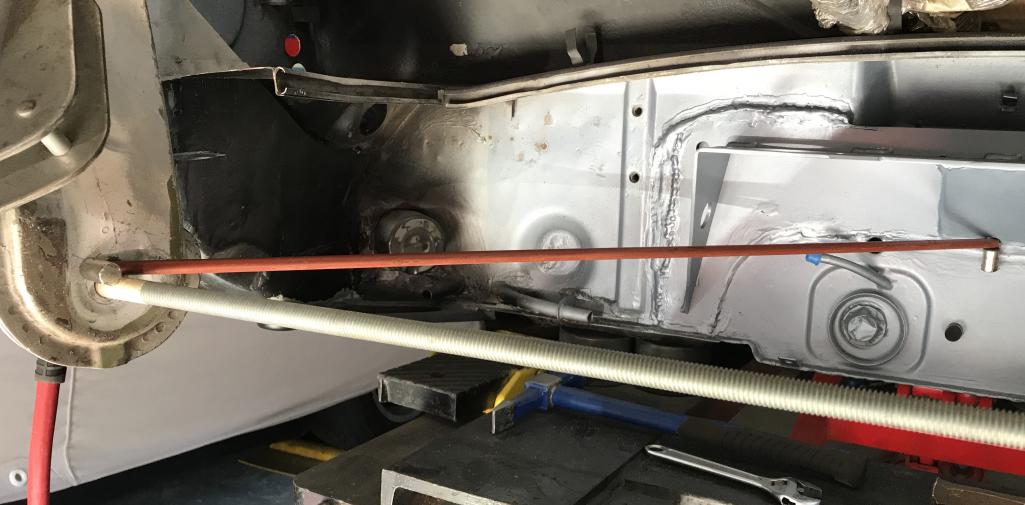 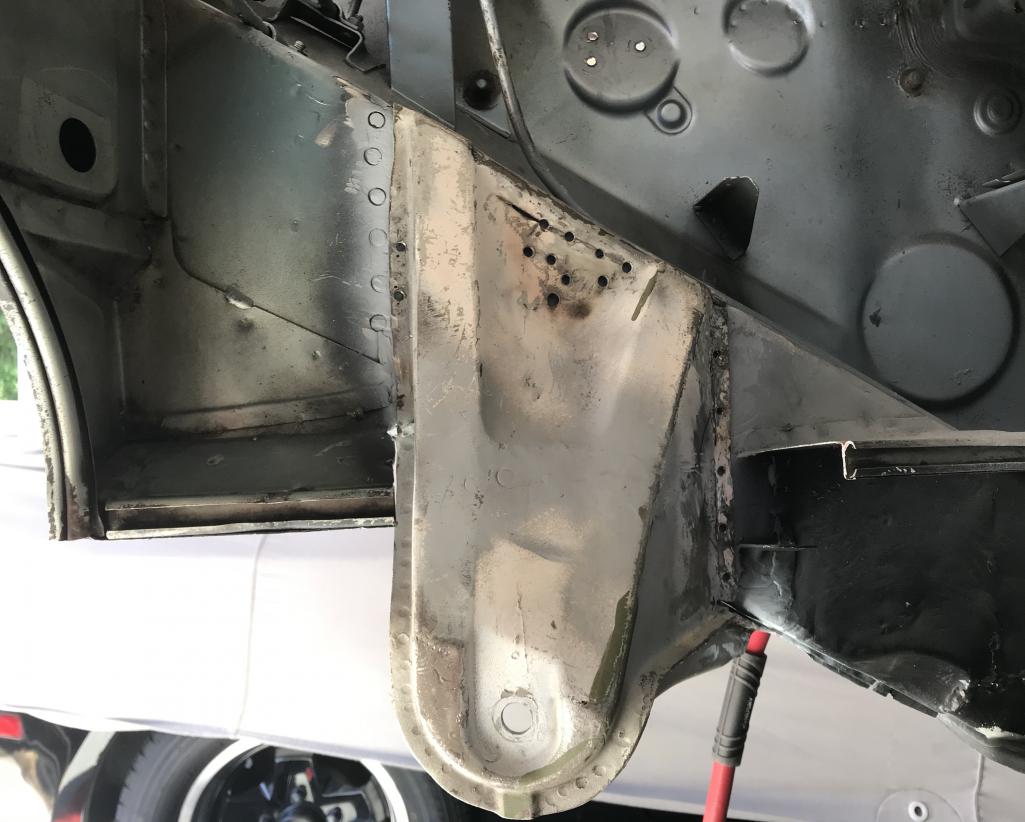
|
|
|
|
| Dion |
Jun 29 2020, 12:03 PM
Post
#688
|
|
RN Group: Members Posts: 2,931 Joined: 16-September 04 From: Shepherdstown, WV Member No.: 2,766 Region Association: MidAtlantic Region |
Welded in and then set to add the extra strengthening pieces that wrap around the console arm.
Attached thumbnail(s) 
|
|
|
|
| Dion |
Jun 29 2020, 12:04 PM
Post
#689
|
|
RN Group: Members Posts: 2,931 Joined: 16-September 04 From: Shepherdstown, WV Member No.: 2,766 Region Association: MidAtlantic Region |
Extra metal gussets
Attached thumbnail(s) 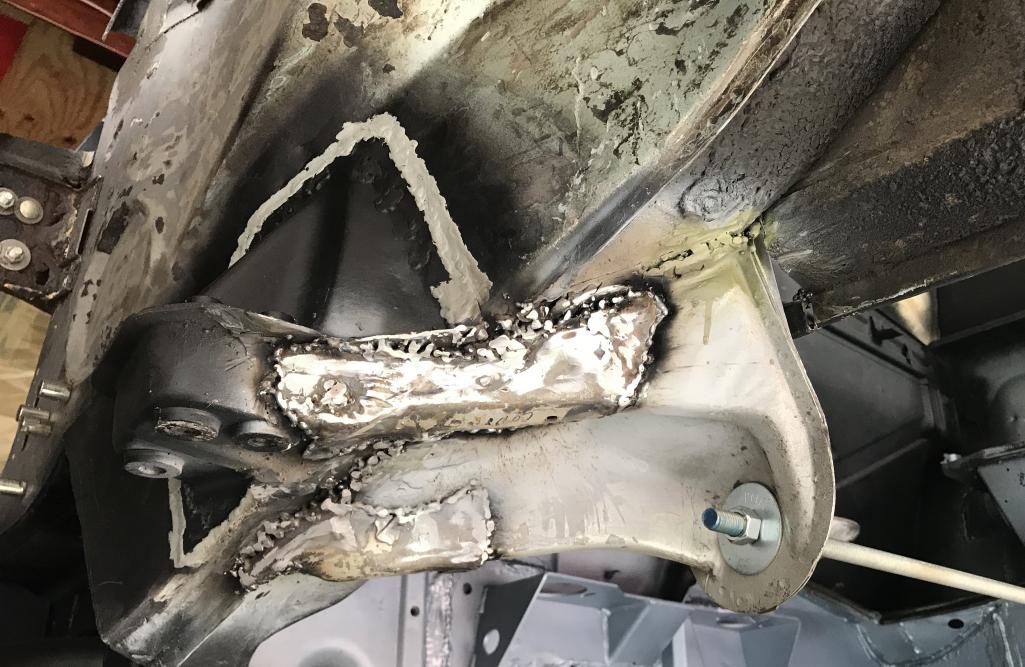
|
|
|
|
| Dion |
Jun 29 2020, 12:06 PM
Post
#690
|
|
RN Group: Members Posts: 2,931 Joined: 16-September 04 From: Shepherdstown, WV Member No.: 2,766 Region Association: MidAtlantic Region |
Some seam seal and primer
Attached thumbnail(s) 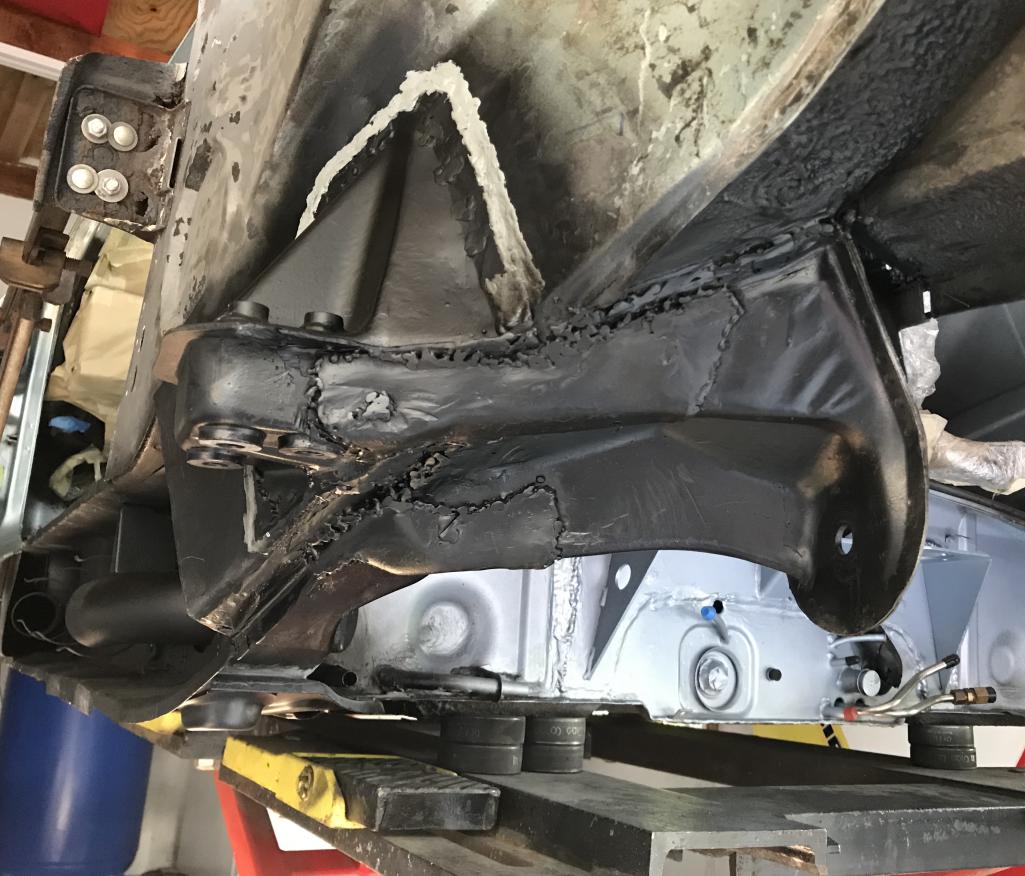 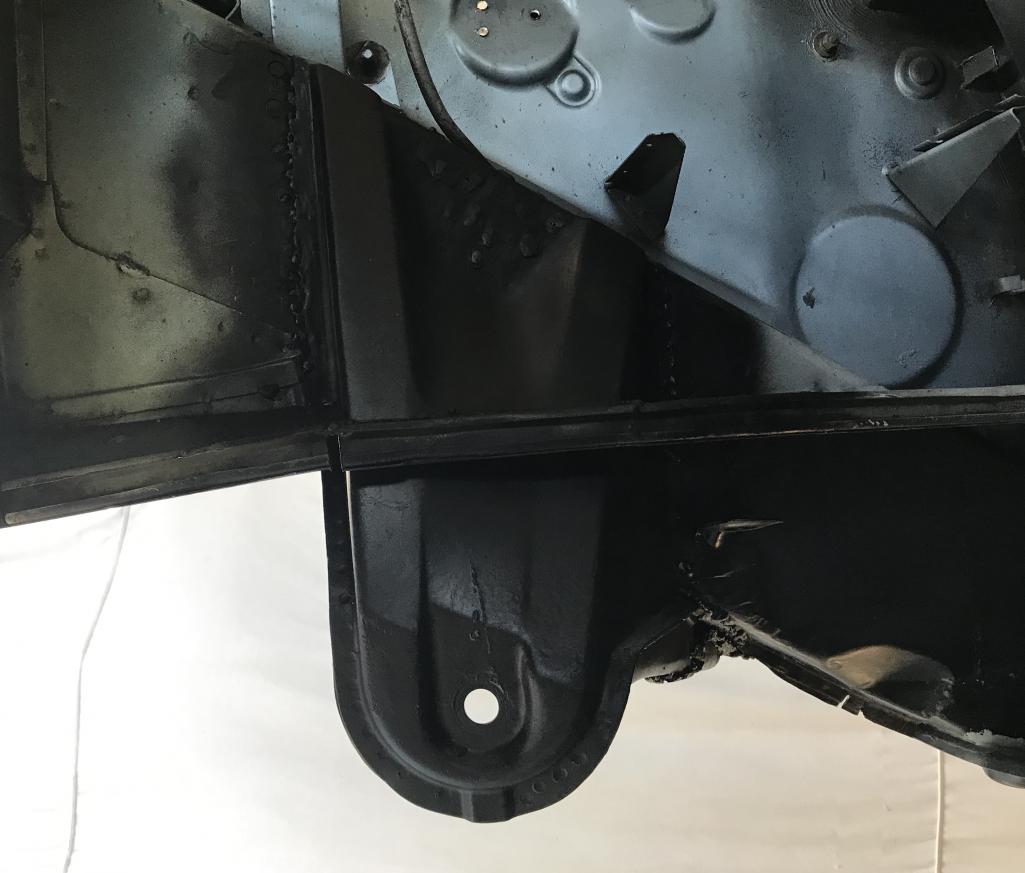
|
|
|
|
| tygaboy |
Jun 29 2020, 12:07 PM
Post
#691
|
|
914 Guru Group: Members Posts: 5,840 Joined: 6-October 15 From: Petaluma, CA Member No.: 19,241 Region Association: Northern California |
Dion - That is one BIG job you just did there, my friend! BIG Congrats on the major item checked off your to-do list. Way to go. (IMG:style_emoticons/default/aktion035.gif)
|
|
|
|
| Dion |
Jun 29 2020, 12:09 PM
Post
#692
|
|
RN Group: Members Posts: 2,931 Joined: 16-September 04 From: Shepherdstown, WV Member No.: 2,766 Region Association: MidAtlantic Region |
Now onto buttoning up the long.
Some mods needed to resto design piece. Attached thumbnail(s) 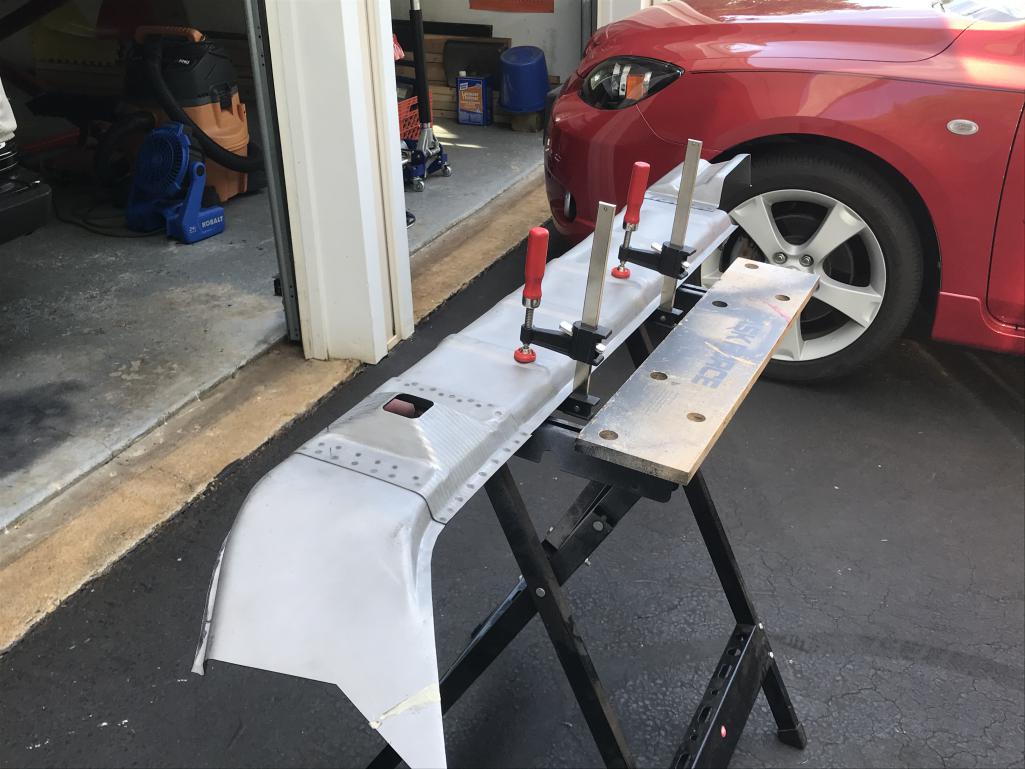 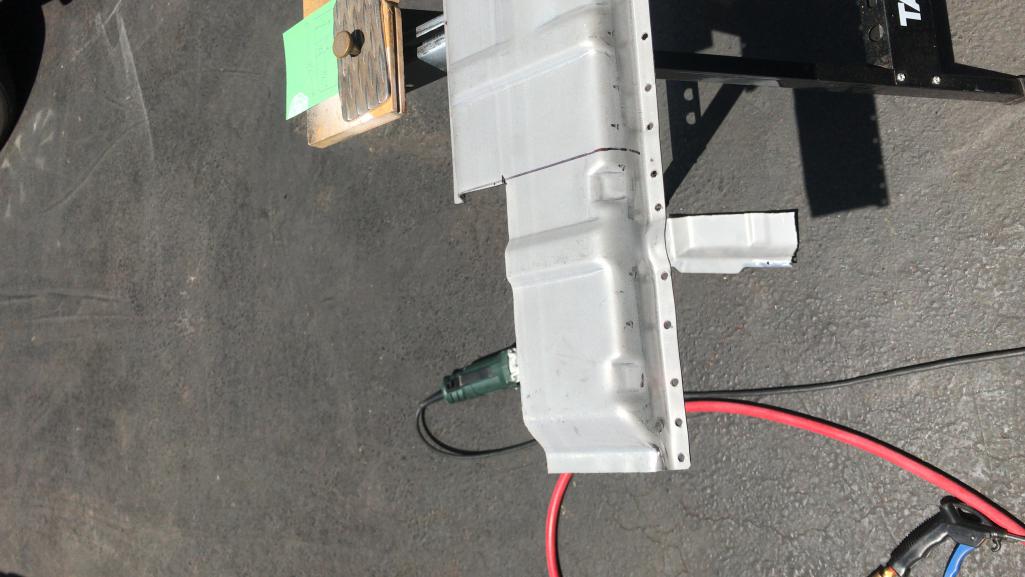
|
|
|
|
| Dion |
Jun 29 2020, 12:11 PM
Post
#693
|
|
RN Group: Members Posts: 2,931 Joined: 16-September 04 From: Shepherdstown, WV Member No.: 2,766 Region Association: MidAtlantic Region |
Spiffy “new to me” heater tube put in place.
Attached thumbnail(s) 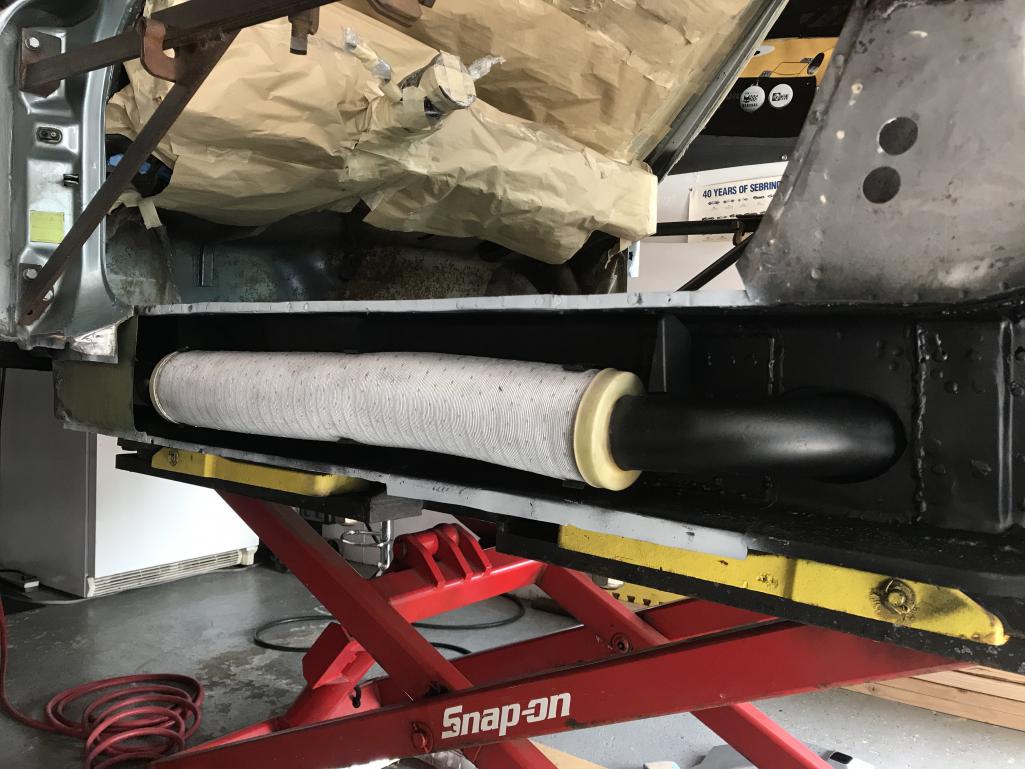
|
|
|
|
| Dion |
Jun 29 2020, 12:53 PM
Post
#694
|
|
RN Group: Members Posts: 2,931 Joined: 16-September 04 From: Shepherdstown, WV Member No.: 2,766 Region Association: MidAtlantic Region |
Double checked alignments and clamped the outer clamshell on. I want to add: prior to welding the outer clamshell on and the rear kickup piece, (forgot to take pics, too excited about getting them on) I sprayed the perimeter where I would be welding with weld through primer. The rest of the panels interior i treated with Eastwood internal chassis coating. Even though the RD panels are galvaneal i figure the extra coating won’t hurt.
Attached thumbnail(s) 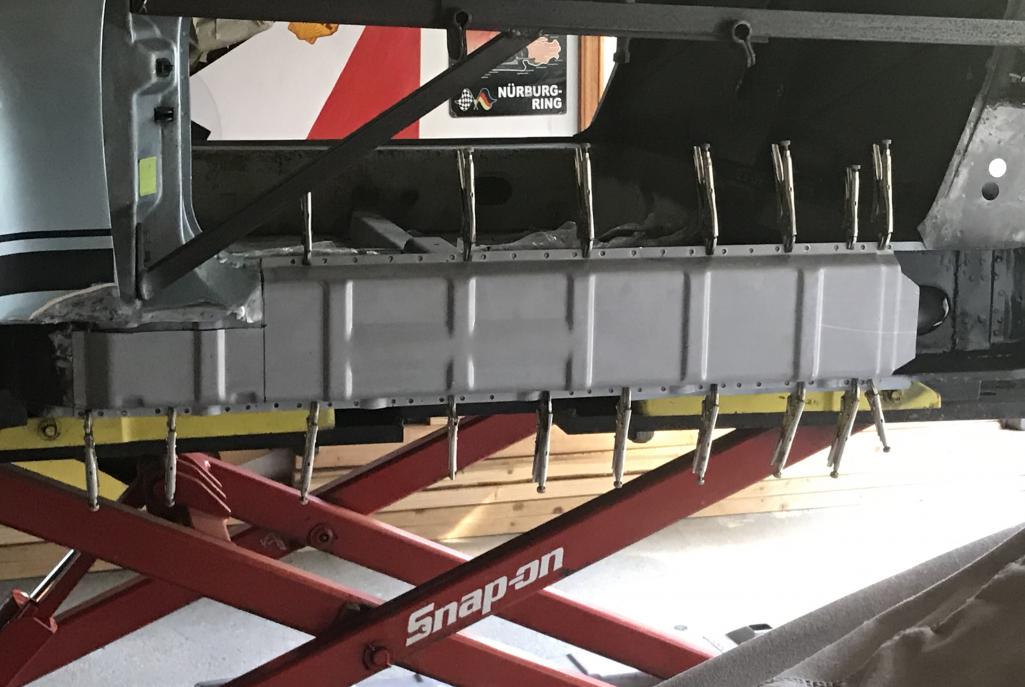 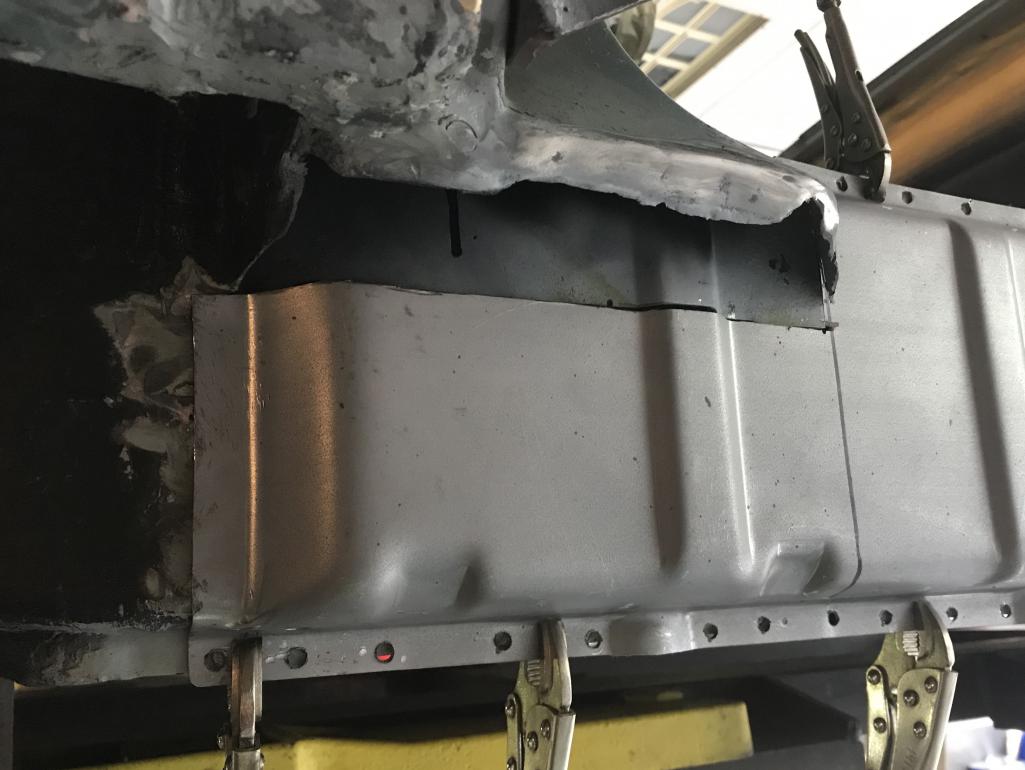
|
|
|
|
| Dion |
Jun 29 2020, 01:29 PM
Post
#695
|
|
RN Group: Members Posts: 2,931 Joined: 16-September 04 From: Shepherdstown, WV Member No.: 2,766 Region Association: MidAtlantic Region |
Thanks for the kudos Chris! @tygaboy . It was a bit nerve wracking for the novice here.
Welded clamshell Attached thumbnail(s) 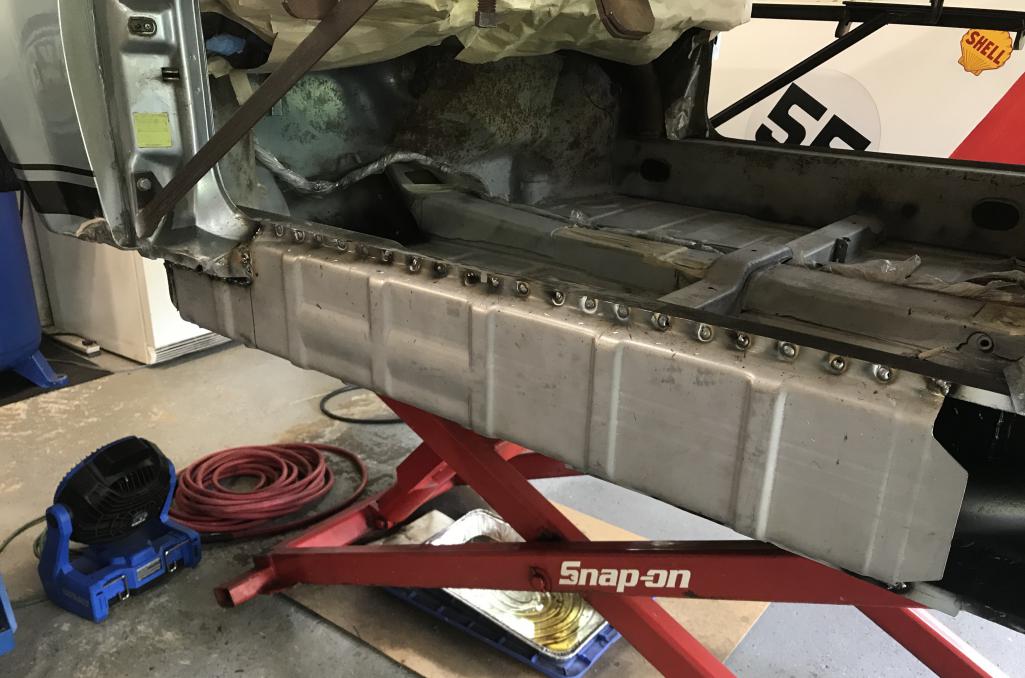 
|
|
|
|
| Dion |
Jun 29 2020, 01:34 PM
Post
#696
|
|
RN Group: Members Posts: 2,931 Joined: 16-September 04 From: Shepherdstown, WV Member No.: 2,766 Region Association: MidAtlantic Region |
Then finally finished up the kickup area. As you can see I’m not doing the factory jack post. It is never going to be concours. I will always be using my lift to service it.
If it needs lifting on the road well there’s AAA flatbed or use the “donut” areas. Attached thumbnail(s) 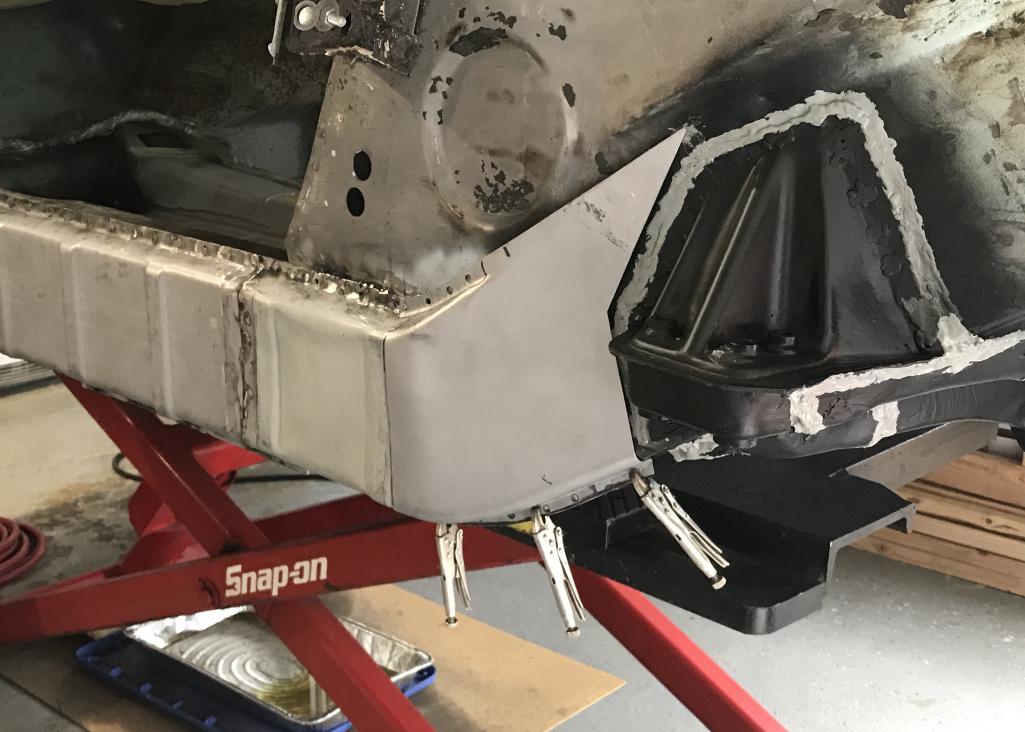 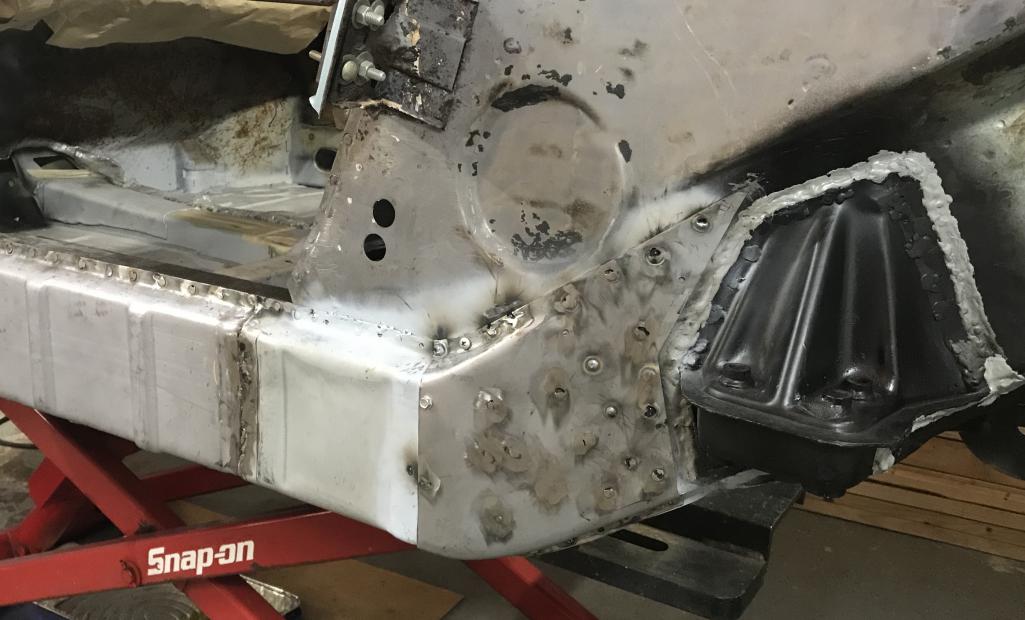
|
|
|
|
| Dion |
Jun 29 2020, 01:40 PM
Post
#697
|
|
RN Group: Members Posts: 2,931 Joined: 16-September 04 From: Shepherdstown, WV Member No.: 2,766 Region Association: MidAtlantic Region |
After the kick up i returned to the front of long and worked the a-pillar base
Attached thumbnail(s) 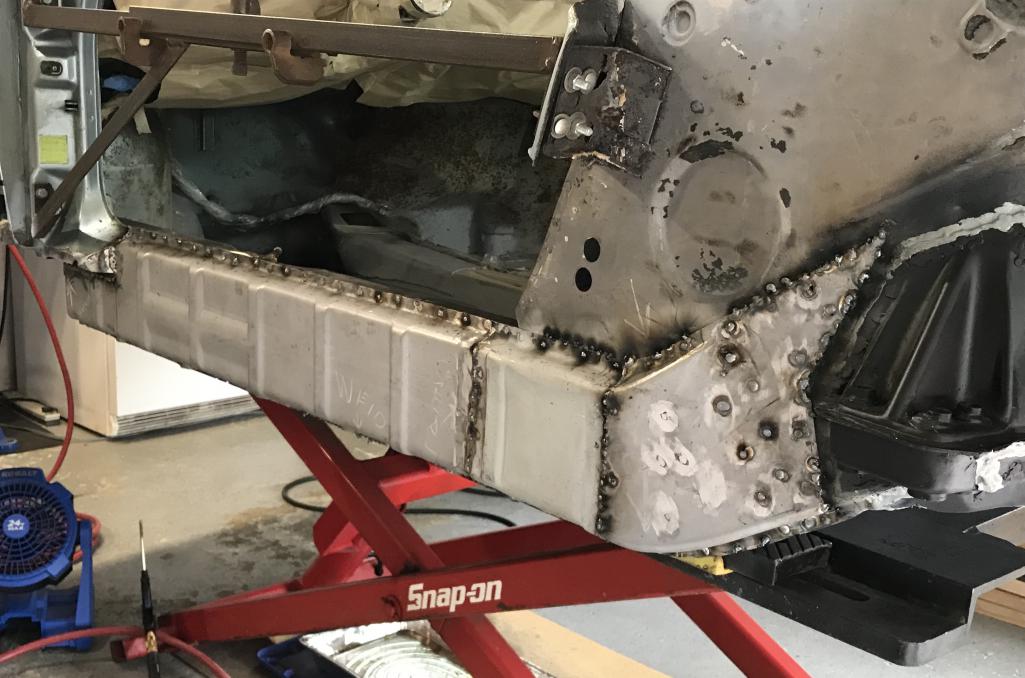 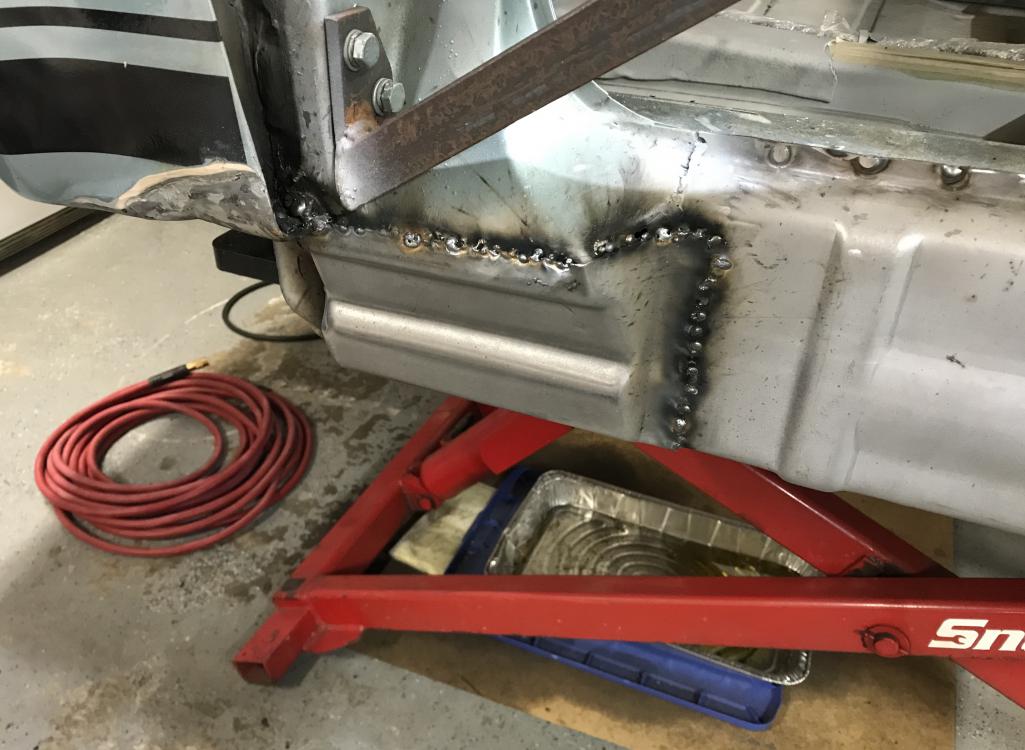
|
|
|
|
| Dion |
Jun 29 2020, 01:43 PM
Post
#698
|
|
RN Group: Members Posts: 2,931 Joined: 16-September 04 From: Shepherdstown, WV Member No.: 2,766 Region Association: MidAtlantic Region |
Took the door brace out and thankfully all the measurements stayed in spec!!
Attached thumbnail(s) 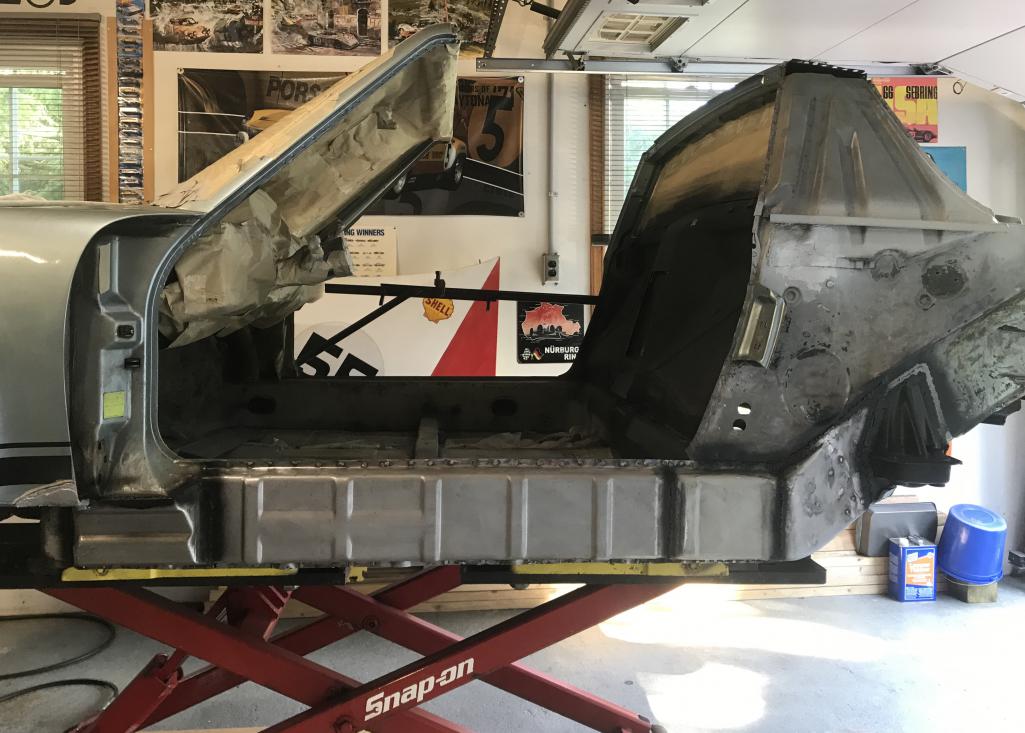 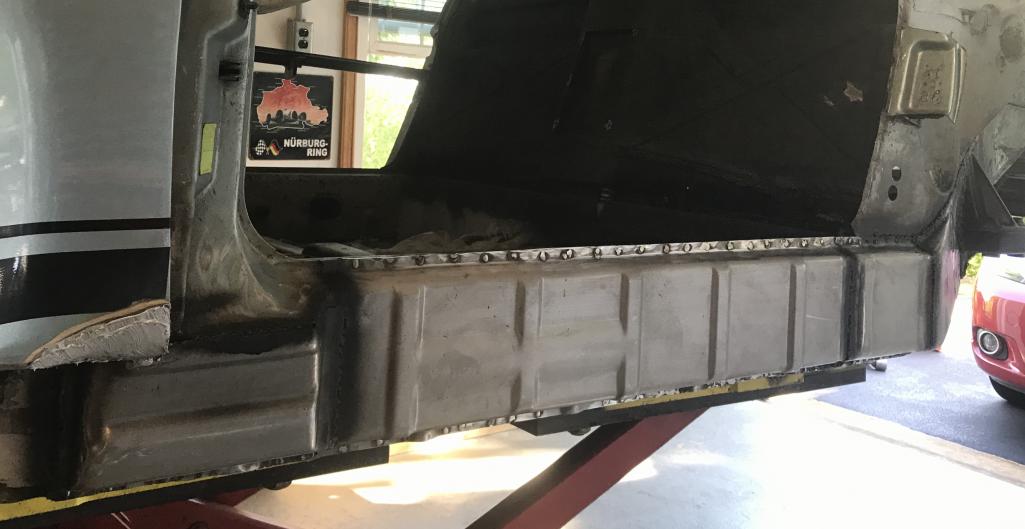
|
|
|
|
| Dion |
Jun 29 2020, 01:46 PM
Post
#699
|
|
RN Group: Members Posts: 2,931 Joined: 16-September 04 From: Shepherdstown, WV Member No.: 2,766 Region Association: MidAtlantic Region |
Removed the door catch piece. It was a rusty hunk. Surprised it was strong enough to handle the braces. Had to cut out bad metal lurking behind it.
Attached thumbnail(s) 
|
|
|
|
| Dion |
Jun 29 2020, 01:48 PM
Post
#700
|
|
RN Group: Members Posts: 2,931 Joined: 16-September 04 From: Shepherdstown, WV Member No.: 2,766 Region Association: MidAtlantic Region |
Making way for a clean piece of metal
Attached thumbnail(s) 
|
|
|
|
|
1 User(s) are reading this topic (1 Guests and 0 Anonymous Users)
0 Members:

|
Lo-Fi Version | Time is now: 11th July 2026 - 11:35 PM |
Invision Power Board
v9.1.4 © 2026 IPS, Inc.