|
|
|
Porsche, and the Porsche crest are registered trademarks of Dr. Ing. h.c. F. Porsche AG.
This site is not affiliated with Porsche in any way. Its only purpose is to provide an online forum for car enthusiasts. All other trademarks are property of their respective owners. |
|
|

  |

| Cracker |
 May 12 2018, 06:27 PM May 12 2018, 06:27 PM
Post
#1041
|
|
Advanced Member  Group: Members Posts: 2,148 Joined: 2-February 10 From: Atlanta (area) Member No.: 11,316 Region Association: South East States |
Do not do anything with those nylon fittings...replace with aluminum. I believe I have mentioned this to you before - they will leak, eventually.
T |
   |

 
|
| tygaboy |
May 12 2018, 07:41 PM
Post
#1042
|
|
914 Guru Group: Members Posts: 5,818 Joined: 6-October 15 From: Petaluma, CA Member No.: 19,241 Region Association: Northern California |
QUOTE(Cracker @ May 12 2018, 05:27 PM)  Do not do anything with those nylon fittings...replace with aluminum. I believe I have mentioned this to you before - they will leak, eventually. T Hey Tony - Yep, the plastic is on the way out. It'll all be an fittings, I'll weld bungs to the radiator, too. Then hard lines where it makes sense, flex line everywhere else. |
|
|
|
| tygaboy |
May 12 2018, 07:49 PM
Post
#1043
|
|
914 Guru Group: Members Posts: 5,818 Joined: 6-October 15 From: Petaluma, CA Member No.: 19,241 Region Association: Northern California |
QUOTE(mgp4591 @ May 12 2018, 05:08 PM) Chris, just wondering what the advantage is in having the bottom open in the center tunnel in your new/old design - is the purpose to make access to the coolant lines easier? I'm also running mine down a redesigned center tunnel because my floor and console were eaten and it will add to the stiffening structure. I know you don't need additional support because the design you've got going on... pretty impressive stuff! Thanks! I want the bottom open to help reduce heat build up. As Rand pointed out, that's a concern. Having the bottom open will provide access to everything I run in the tunnel. I plan on ceramic heat coating and sound undercoat on the firewall and underside of the tunnel. Assuming I actually go with this design, I'll also fab a removable brace structure that bolts to bosses in the underside of each side of the tunnel and runs the length of the floor. With what I have planned for the upper tunnel/console, it should be way stronger than the stock tunnel. |
|
|
|
| tygaboy |
May 12 2018, 07:51 PM
Post
#1044
|
|
914 Guru Group: Members Posts: 5,818 Joined: 6-October 15 From: Petaluma, CA Member No.: 19,241 Region Association: Northern California |
QUOTE(Rand @ May 12 2018, 05:13 PM) It will bring heat into the cabin. Not that it's a problem depending on where you live, but just a thought. I've heard of oil cooler lines in the longs making a noticeable difference. Andy and Amoy can comment about that. Keep up the great work! Stellar project. Hi Rand! Glad to hear from you - it's been a while... I think I can manage the heat with what I have planned. There will certainly be development once it's running but that'll just be the next phase of the project. Always more to do, eh? |
|
|
|
| bbrock |
May 13 2018, 06:56 AM
Post
#1045
|
|
914 Guru Group: Members Posts: 5,269 Joined: 17-February 17 From: Montana Member No.: 20,845 Region Association: Rocky Mountains |
QUOTE(tygaboy @ May 12 2018, 04:35 PM) And not to be outdone by Brett and his critter pics, here's mine for today: Even the local reptiles are "hanging on every step" of my build. Sweet! You are the Lizard King. You can do anything. (IMG:style_emoticons/default/aktion035.gif) |
|
|
|
| 914forme |
May 13 2018, 02:51 PM
Post
#1046
|
|
Times a wastin', get wrenchin'! Group: Members Posts: 3,899 Joined: 24-July 04 From: Dayton, Ohio Member No.: 2,388 Region Association: None |
I have thought about the same tunnel design but also thought about adding a butterfly brace like the Miata boys and girls run. With your car you could just do it down the tunnel.
On the Miata it does make a huge difference. You would think that building a box section about 2" deep would not make one bit of difference, but it does. 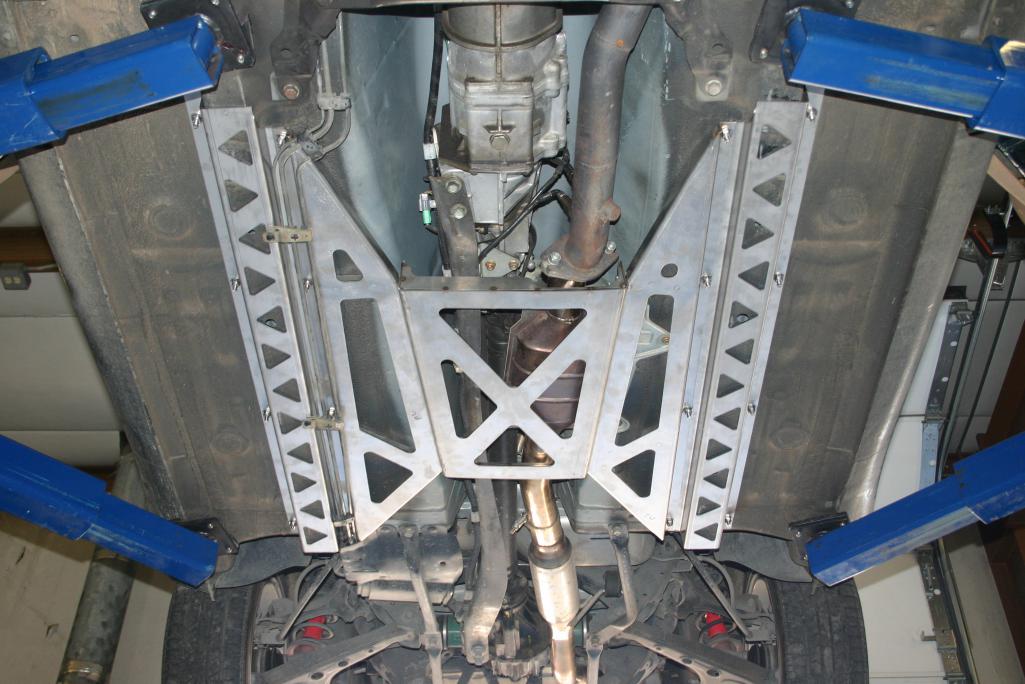 Look forward to seeing what you do with it. |
|
|
|
| tygaboy |
May 13 2018, 05:27 PM
Post
#1047
|
|
914 Guru Group: Members Posts: 5,818 Joined: 6-October 15 From: Petaluma, CA Member No.: 19,241 Region Association: Northern California |
QUOTE(914forme @ May 13 2018, 01:51 PM) I have thought about the same tunnel design but also thought about adding a butterfly brace like the Miata boys and girls run. With your car you could just do it down the tunnel. On the Miata it does make a huge difference. You would think that building a box section about 2" deep would not make one bit of difference, but it does. Look forward to seeing what you do with it. Stephen - That's the same sorta design I have in mind. I really appreciate the pic as it give some ideas that will improve what I was thinking I'd do! Keep the cards and letters coming... |
|
|
|
| tygaboy |
May 13 2018, 05:31 PM
Post
#1048
|
|
914 Guru Group: Members Posts: 5,818 Joined: 6-October 15 From: Petaluma, CA Member No.: 19,241 Region Association: Northern California |
I spent (wasted?) more time screwing around with the air box idea. It really doesn't advance the build but it is fun doing the fab work.
I got the other side's base done and evened up both ends in prep for building the middle, ends and sides. My buddy Martin has a vacu-former and we were talking about using this sheet metal version as a mold and making a clear air box! I think at the very least, I'll do a clear top so the stacks are always visible. That'd be pretty neat, too. Attached thumbnail(s) 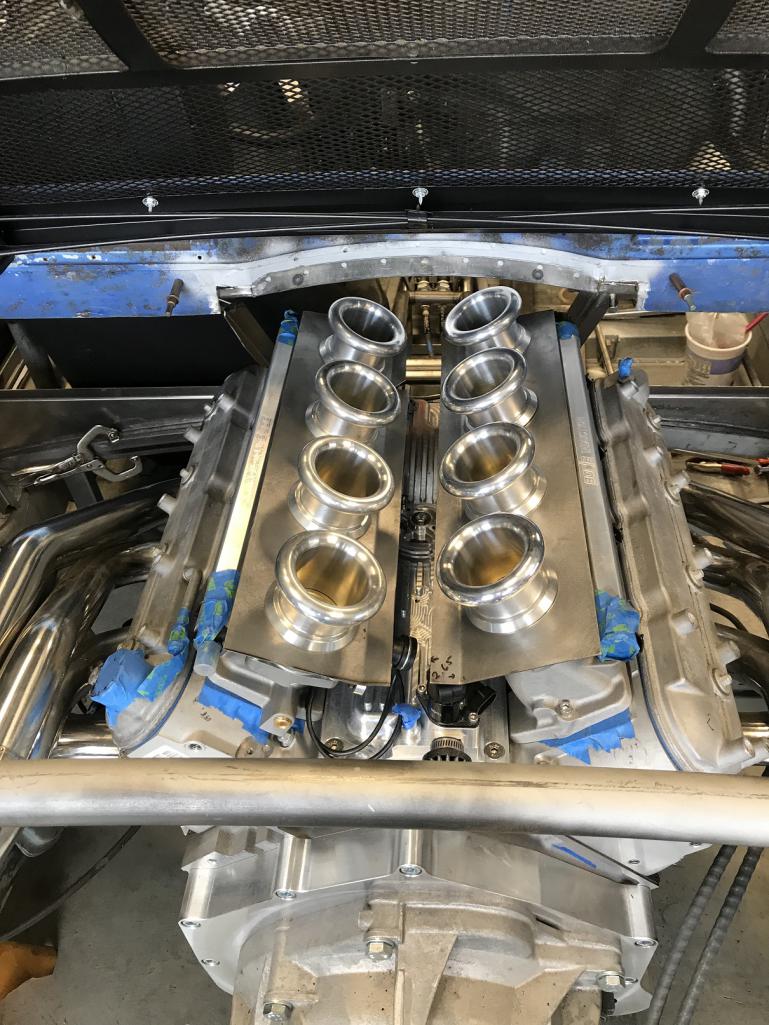 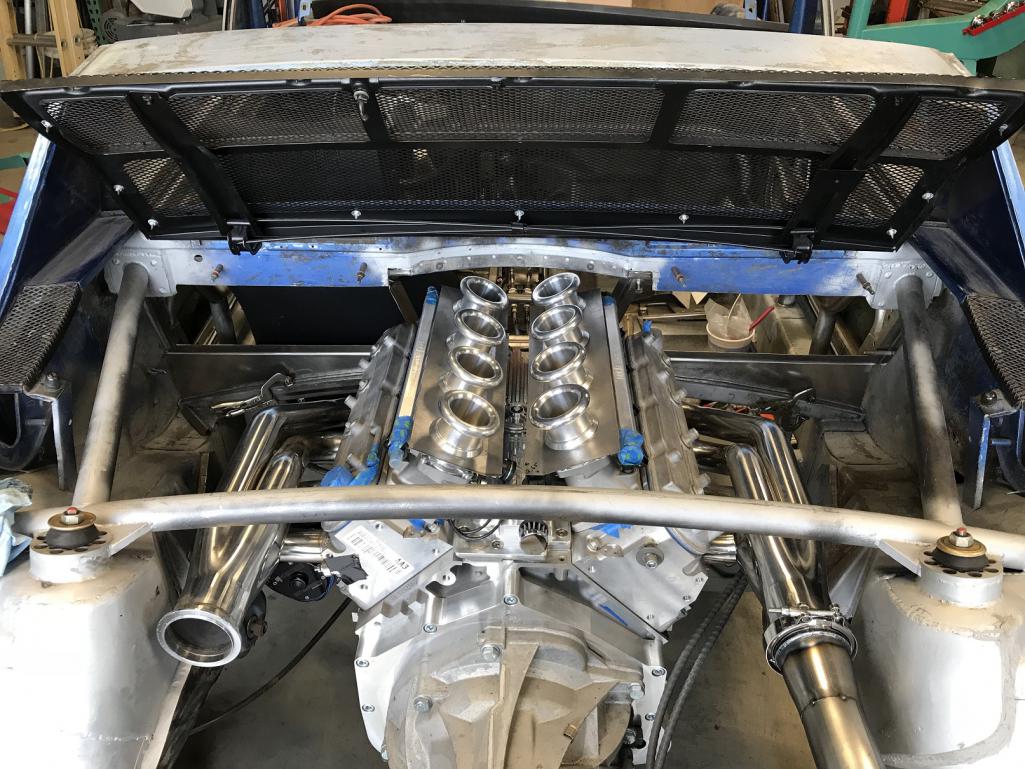
|
|
|
|
| bbrock |
May 13 2018, 09:19 PM
Post
#1049
|
|
914 Guru Group: Members Posts: 5,269 Joined: 17-February 17 From: Montana Member No.: 20,845 Region Association: Rocky Mountains |
(IMG:style_emoticons/default/popcorn[1].gif) This is going to be interesting!
|
|
|
|
| Dion |
May 14 2018, 10:20 AM
Post
#1050
|
|
RN Group: Members Posts: 2,926 Joined: 16-September 04 From: Audubon,PA Member No.: 2,766 Region Association: MidAtlantic Region |
Fuel for your fire: something Lambo styled...
I know You could do a variation of... Attached thumbnail(s) 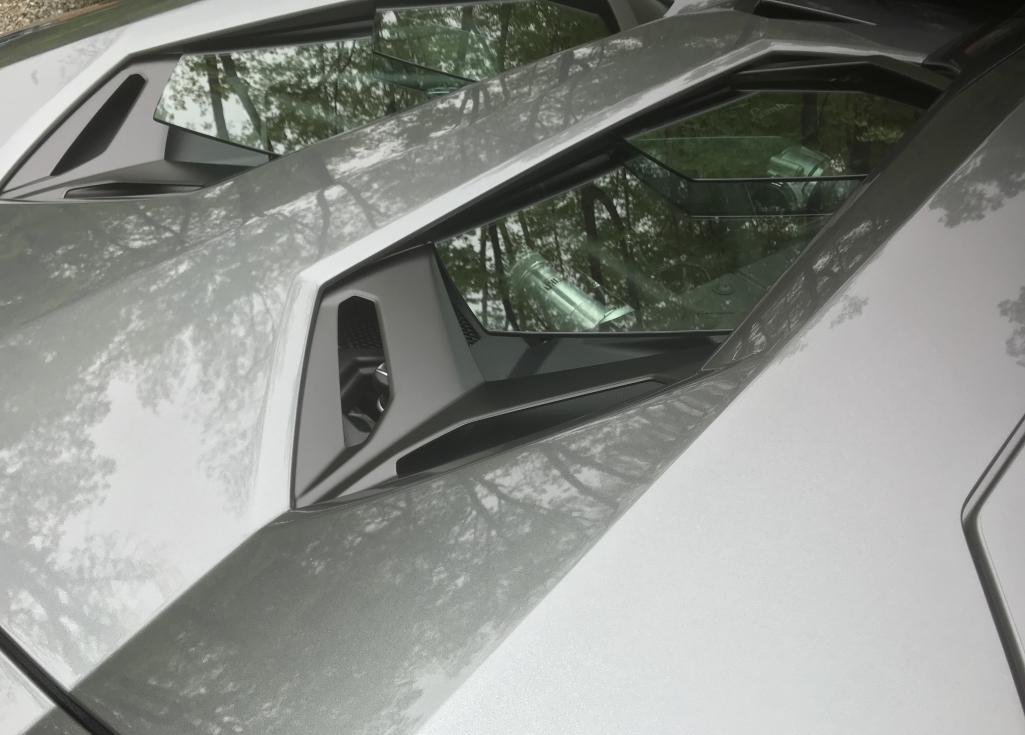
|
|
|
|
| Dion |
May 14 2018, 10:23 AM
Post
#1051
|
|
RN Group: Members Posts: 2,926 Joined: 16-September 04 From: Audubon,PA Member No.: 2,766 Region Association: MidAtlantic Region |
Obviously stacks & trumpets are sexier than this, the bracing is cool though and of course a needed function.
Attached thumbnail(s) 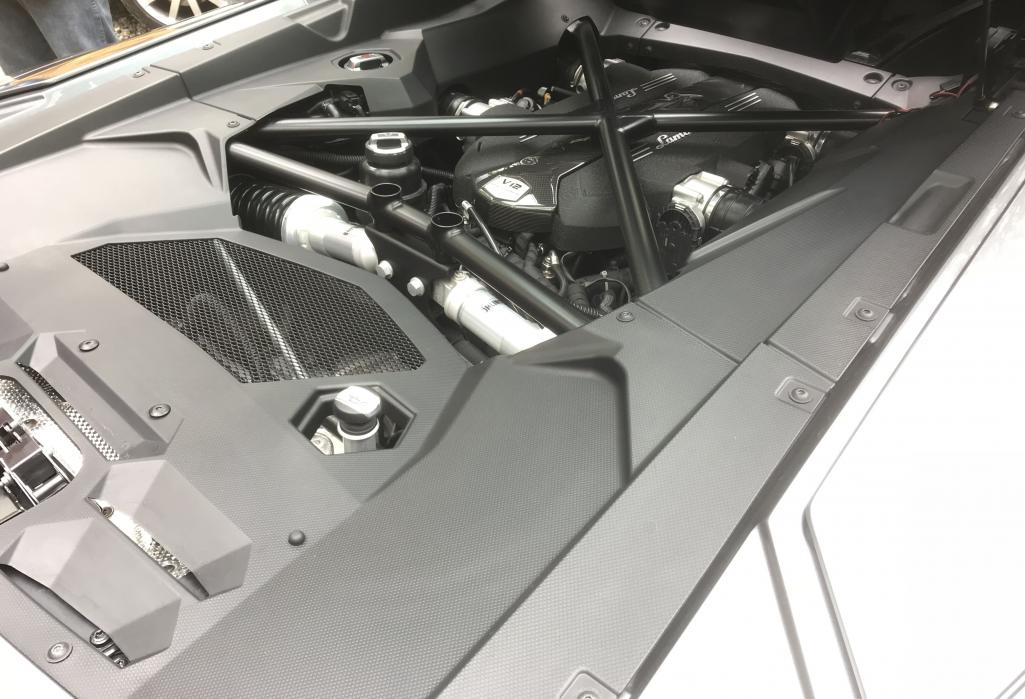
|
|
|
|
| bbrock |
May 14 2018, 10:42 AM
Post
#1052
|
|
914 Guru Group: Members Posts: 5,269 Joined: 17-February 17 From: Montana Member No.: 20,845 Region Association: Rocky Mountains |
To expand on my quick comment, I have a weird affinity for air boxes. Their ability to make a boring engine look sexy and a sexy engine look boring fascinates me. For some reason, I find the 914/6 air box downright sensuous. I can't wait to see what you do to make this dead sexy engine look (IMG:style_emoticons/default/shocked[1].gif) (IMG:style_emoticons/default/smiley_notworthy.gif)
|
|
|
|
| motoTrooper |
May 14 2018, 02:49 PM
Post
#1053
|
|
Newbie Group: Members Posts: 39 Joined: 18-March 16 From: Palo Alto Member No.: 19,774 Region Association: None |
Hey Chris, I just bombed through this whole thread in the last 24 hours. Brilliant, creative work full stop. We seem to be a lot alike with respect to the bike and car building stuff. I only wandered over here from Chris H's EG33 build with welcoming comments by Mueller.
I am doing an EG33 into a Lancia Scorpion and am staring at the rusted out floor and the firewall I had to cut to get the engine/transaxle into position. Your solutions have given me some great insight and ideas. Many thanks and looking forward to what you share next! -Christopher |
|
|
|
| tygaboy |
May 14 2018, 03:22 PM
Post
#1054
|
|
914 Guru Group: Members Posts: 5,818 Joined: 6-October 15 From: Petaluma, CA Member No.: 19,241 Region Association: Northern California |
QUOTE(motoTrooper @ May 14 2018, 01:49 PM) Hey Chris, I just bombed through this whole thread in the last 24 hours. Brilliant, creative work full stop. We seem to be a lot alike with respect to the bike and car building stuff. I only wandered over here from Chris H's EG33 build with welcoming comments by Mueller. I am doing an EG33 into a Lancia Scorpion and am staring at the rusted out floor and the firewall I had to cut to get the engine/transaxle into position. Your solutions have given me some great insight and ideas. Many thanks and looking forward to what you share next! -Christopher Hi Christopher - Thanks for the kind words. Maybe you've connected the dots but you'll see the car and meet me if you come to the June 2 fabrication day at my place! My English wheel is reserved for you to take a swing at fabbing your roof panel. Hope you can still make it... Chris |
|
|
|
| motoTrooper |
May 14 2018, 05:59 PM
Post
#1055
|
|
Newbie Group: Members Posts: 39 Joined: 18-March 16 From: Palo Alto Member No.: 19,774 Region Association: None |
I am shoving some stars into alignment so I can be present for introductions, pinching my fingertips in your English wheel would be gravy on the cake! (IMG:style_emoticons/default/beerchug.gif)
|
|
|
|
| johnod |
May 14 2018, 09:33 PM
Post
#1056
|
|
Newbie Group: Members Posts: 6 Joined: 26-February 11 From: Canada Member No.: 12,760 Region Association: Canada |
Just found this thread, it's great, lovely work , thanks.
|
|
|
|
| Matty900 |
May 15 2018, 01:14 PM
Post
#1057
|
|
Senior Member Group: Members Posts: 1,304 Joined: 21-February 15 From: Oregon Member No.: 18,454 Region Association: Pacific Northwest |
QUOTE(tygaboy @ May 13 2018, 04:31 PM) I spent (wasted?) more time screwing around with the air box idea. It really doesn't advance the build but it is fun doing the fab work. I got the other side's base done and evened up both ends in prep for building the middle, ends and sides. My buddy Martin has a vacu-former and we were talking about using this sheet metal version as a mold and making a clear air box! I think at the very least, I'll do a clear top so the stacks are always visible. That'd be pretty neat, too. Joey in Florida makes some cool carbon fiber rain hats, one with a clear insert that looks cool too. I like the Idea of being able to see inside, but a completely clear box may not turn out looking as "finished", if that makes sense Attached image(s) 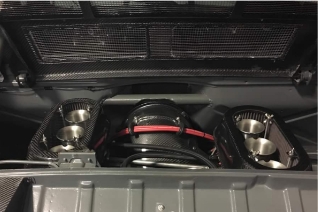 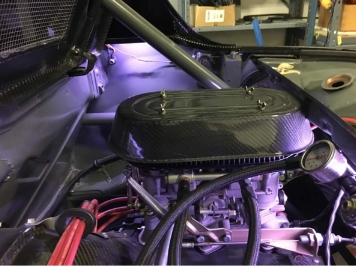
|
|
|
|
| tygaboy |
May 18 2018, 02:11 PM
Post
#1058
|
|
914 Guru Group: Members Posts: 5,818 Joined: 6-October 15 From: Petaluma, CA Member No.: 19,241 Region Association: Northern California |
Took today off and got the passenger side firewall components welded up.
Tacked them while they were clamped and clecoed in the car, then removed to final weld on the bench. (IMG:style_emoticons/default/welder.gif) Attached thumbnail(s) 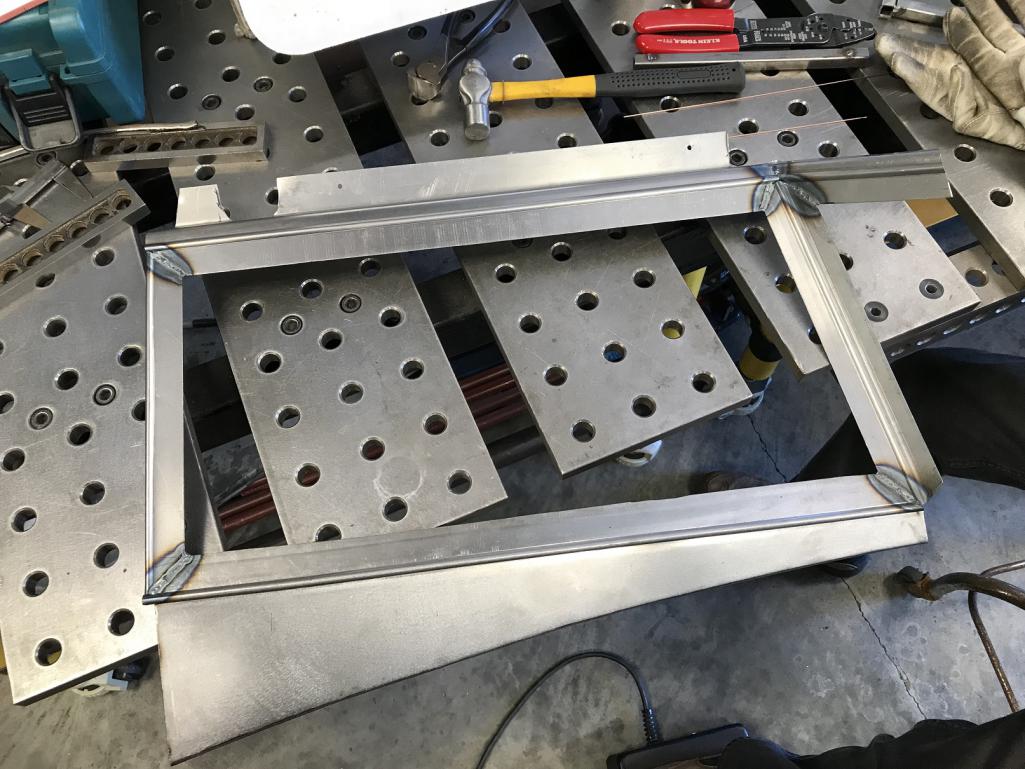
|
|
|
|
| tygaboy |
May 18 2018, 02:12 PM
Post
#1059
|
|
914 Guru Group: Members Posts: 5,818 Joined: 6-October 15 From: Petaluma, CA Member No.: 19,241 Region Association: Northern California |
And what was "they" are now an "it"... And it still fits! (IMG:style_emoticons/default/cheer.gif)
Attached thumbnail(s) 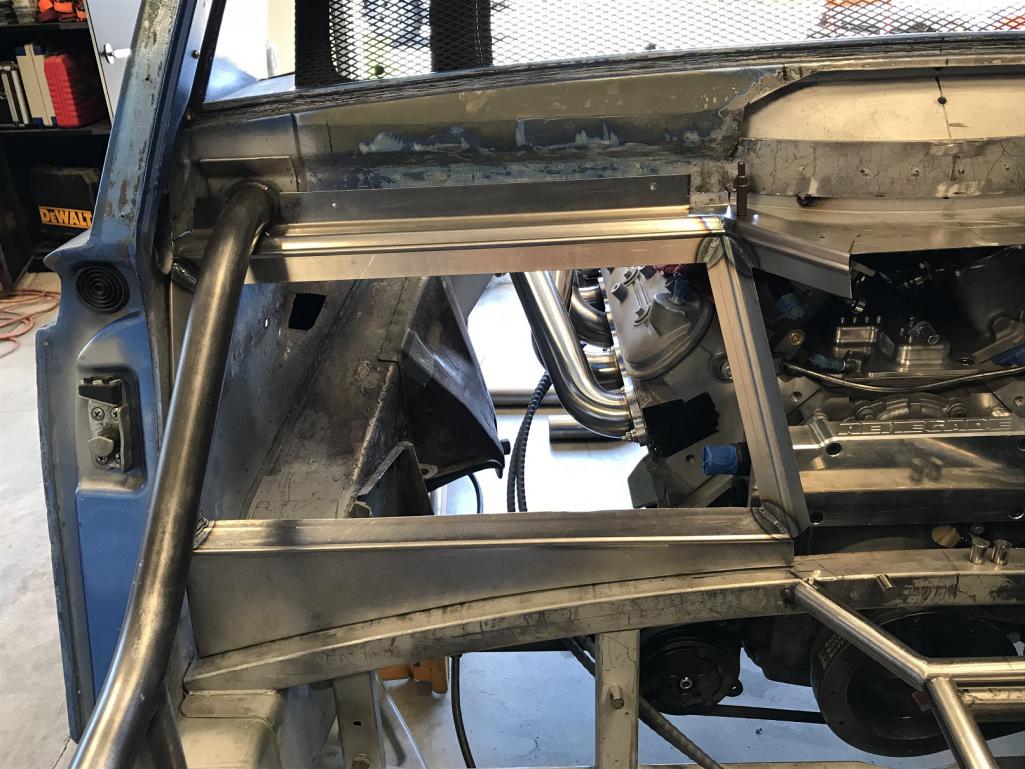
|
|
|
|
| tygaboy |
May 19 2018, 12:47 PM
Post
#1060
|
|
914 Guru Group: Members Posts: 5,818 Joined: 6-October 15 From: Petaluma, CA Member No.: 19,241 Region Association: Northern California |
Yesterday, the driver side fire wall pieces were also welded together. With that done, I turned to working on the tunnel and coolant line routing.
The Slippery Slope of Custom Stuff: Given I've moved the drive train forward 1.5" and built the custom lower fire wall, if I want to run the coolant lines up in the tunnel, I don't have room/the same option of just dumping them right out the back of the stock tunnel location, like others who have gone this route. So... Here's a pic of what seems about my only option. Some 1.5" PVC I had laying around. For you wise guys: Yes, it's for mock up, and yes, it'll be replaced with suitable material. (IMG:style_emoticons/default/shades.gif) Still lots to work out and it may turn out to be more work than it's worth. We shall see... (IMG:style_emoticons/default/idea.gif) Attached thumbnail(s) 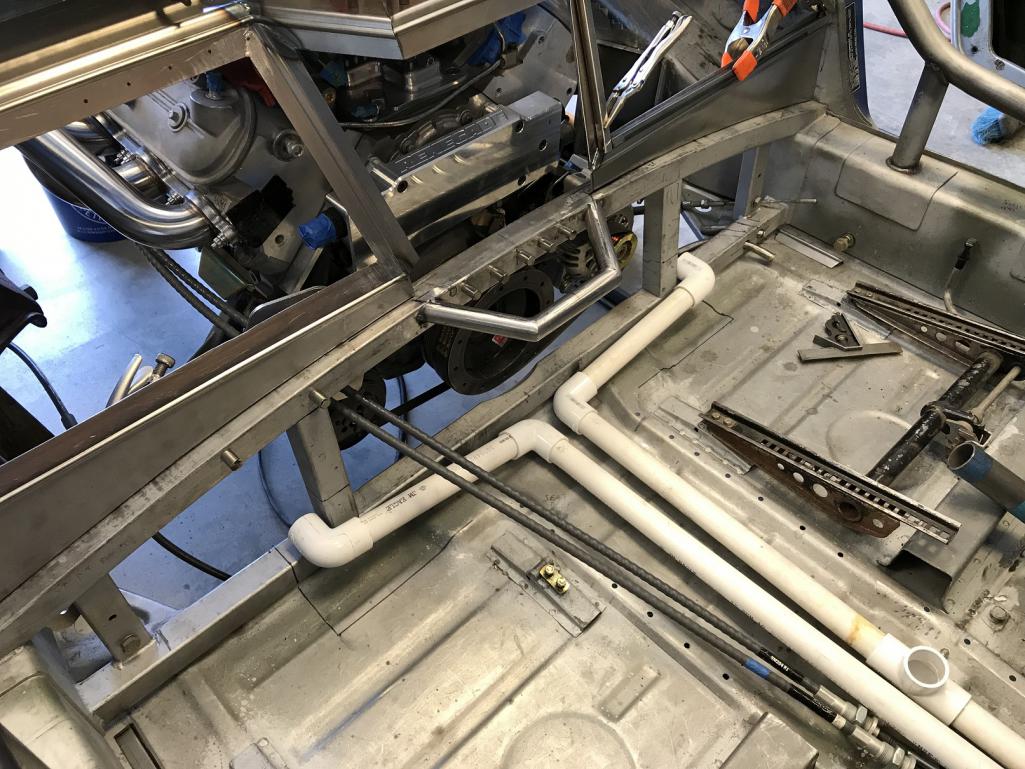
|
|
|
|
|
3 User(s) are reading this topic (3 Guests and 0 Anonymous Users)
0 Members:

|
Lo-Fi Version | Time is now: 29th April 2026 - 06:58 AM |
Invision Power Board
v9.1.4 © 2026 IPS, Inc.