|
|
|
Porsche, and the Porsche crest are registered trademarks of Dr. Ing. h.c. F. Porsche AG.
This site is not affiliated with Porsche in any way. Its only purpose is to provide an online forum for car enthusiasts. All other trademarks are property of their respective owners. |
|
|

  |

| tygaboy |
 May 27 2018, 06:08 PM May 27 2018, 06:08 PM
Post
#1081
|
|
914 Guru  Group: Members Posts: 5,819 Joined: 6-October 15 From: Petaluma, CA Member No.: 19,241 Region Association: Northern California |
QUOTE(Andyrew @ May 27 2018, 02:01 PM)  Do you have space to move that muffler up? Doesn't look that concealed unless it's just mock position. Love the firewall and the welds (IMG:style_emoticons/default/smile.gif) That's its final position. I suppose it could have move up a bit but it's not the lowest part of the car. You can do a full review when you see it on Sat. I'm interested to hear what folks think once they see it in person. |
   |

 
|
| tygaboy |
May 27 2018, 06:09 PM
Post
#1082
|
|
914 Guru Group: Members Posts: 5,819 Joined: 6-October 15 From: Petaluma, CA Member No.: 19,241 Region Association: Northern California |
Playing with tighter rivet spacing and adding more of the planned layout, just to get a better feel for how it'll look. Still working on how the two rivet lines will come together on the inside of that lowest piece...
Attached thumbnail(s) 
|
|
|
|
| tygaboy |
May 27 2018, 06:15 PM
Post
#1083
|
|
914 Guru Group: Members Posts: 5,819 Joined: 6-October 15 From: Petaluma, CA Member No.: 19,241 Region Association: Northern California |
And then it was back to the fiddly stuff. I think I've landed on how I want to finish off the upper section of the fire wall. Here's my current thinking for how to address the door bar.
I'll add a piece to the top of the main fire wall that has the same sort of bead detail that this upper section will rivet to. Pics as I get that fabbed. Attached thumbnail(s) 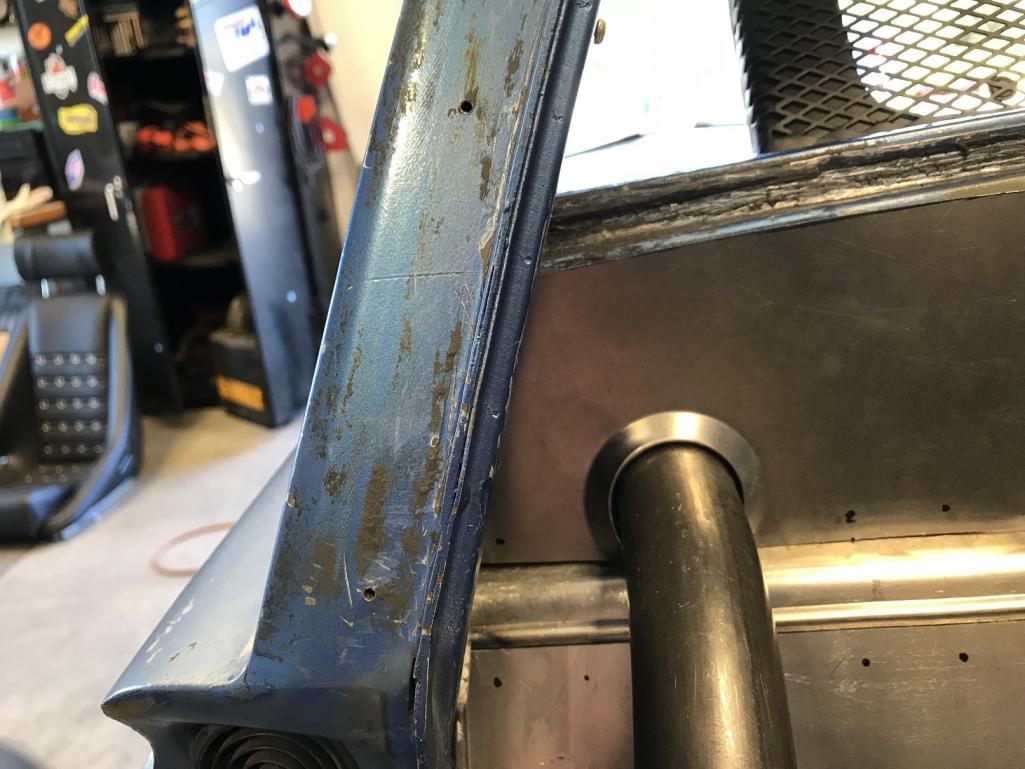
|
|
|
|
| tygaboy |
Jun 1 2018, 07:16 PM
Post
#1084
|
|
914 Guru Group: Members Posts: 5,819 Joined: 6-October 15 From: Petaluma, CA Member No.: 19,241 Region Association: Northern California |
Brent (bbrock) was in town from Montana and was able to swing by for a visit!
Proving yet again what great people we have participating on this board! Brent, it was great to meet you! (but in typical "we were all focused on car stuff", I didn't remember to get a pic... (IMG:style_emoticons/default/headbang.gif) As far as progress on the car, the driver side firewall frame got final welded. Time to make that side's panel and order up the rivets...! Attached thumbnail(s) 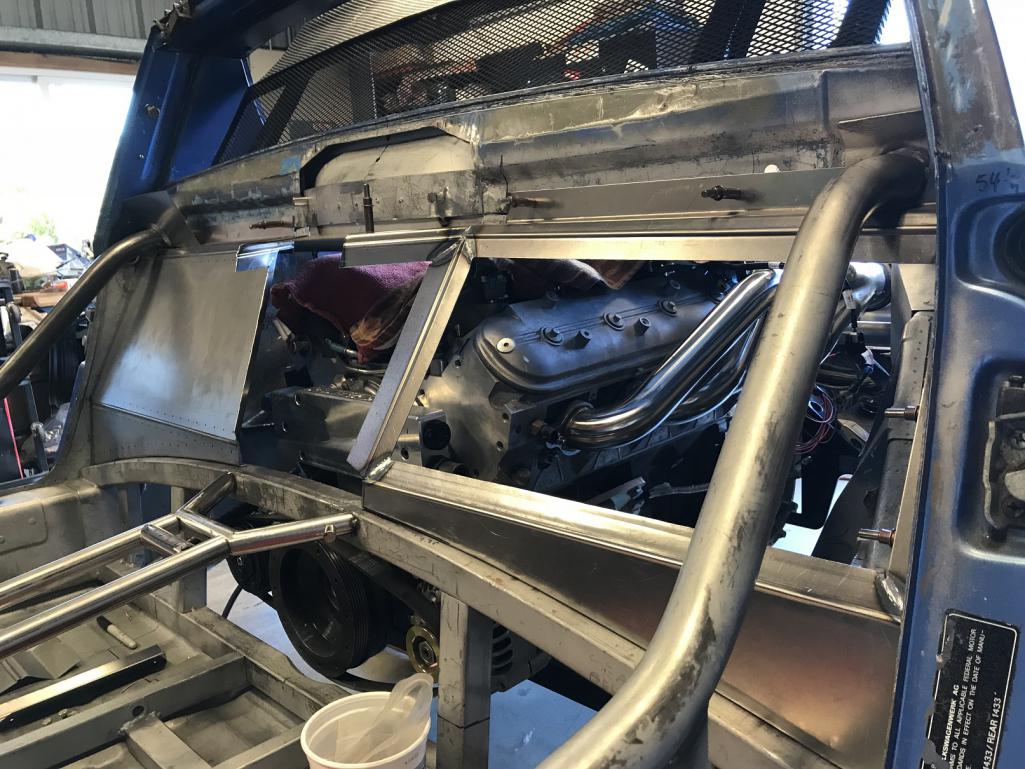
|
|
|
|
| db9146 |
Jun 1 2018, 07:46 PM
Post
#1085
|
|
Senior Member Group: Members Posts: 953 Joined: 21-December 04 From: Atlanta, GA Member No.: 3,315 Region Association: None |
Wow, this is looking great. Fantastic attention to detail !!!!!
|
 |
|
| tygaboy |
Jun 3 2018, 04:18 PM
Post
#1086
|
|
914 Guru Group: Members Posts: 5,819 Joined: 6-October 15 From: Petaluma, CA Member No.: 19,241 Region Association: Northern California |
Well, it seems a good time was had by all at yesterday's Fabrication day event. While I was hoping to get some time on my build today, it turned into a long tandem ride with my wife, a visit to see my buddy's plane that just got wrapped and some honey do items.
I did, however, accomplish this: my first rivet! I'll use these for the fire wall and tunnel panels. CherryMax structural rivets, not regular ol' pop rivets. Different animal altogether. Yes, it was just a test but also yes, this was all I did on the car today. And people wonder why this is taking so long... (IMG:style_emoticons/default/shades.gif) Attached thumbnail(s) 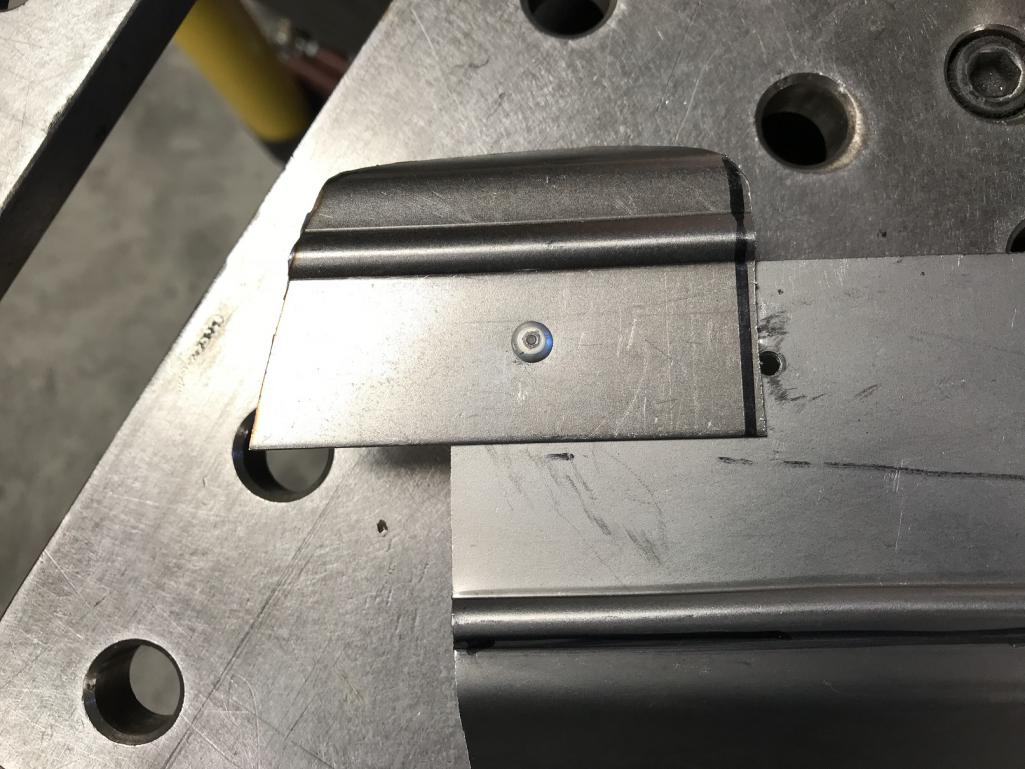
|
|
|
|
| ConeDodger |
Jun 3 2018, 04:22 PM
Post
#1087
|
|
Apex killer! Group: Members Posts: 24,423 Joined: 31-December 04 From: Tahoe Area Member No.: 3,380 Region Association: Northern California |
Chris,
Weren't you thinking along these lines? (IMG:style_emoticons/default/smile.gif) Attached image(s) 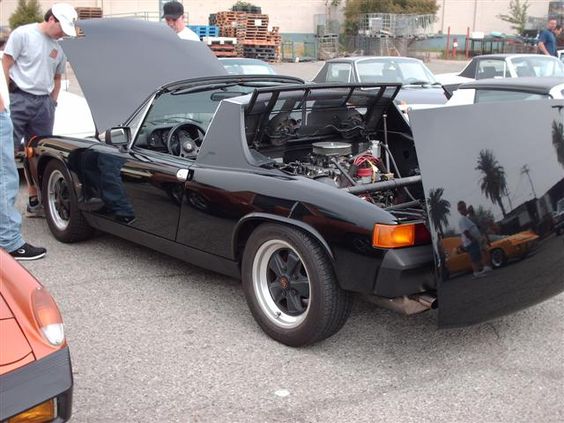
|
|
|
|
| tygaboy |
Jun 4 2018, 10:19 AM
Post
#1088
|
|
914 Guru Group: Members Posts: 5,819 Joined: 6-October 15 From: Petaluma, CA Member No.: 19,241 Region Association: Northern California |
QUOTE(ConeDodger @ Jun 3 2018, 03:22 PM) Oh Rob... (IMG:style_emoticons/default/sad.gif) I'm hurt that you haven't prioritized my build above all else in your life... (IMG:style_emoticons/default/poke.gif) (IMG:style_emoticons/default/happy11.gif) I all but finished that up back in Nov. of last year. Attached thumbnail(s) 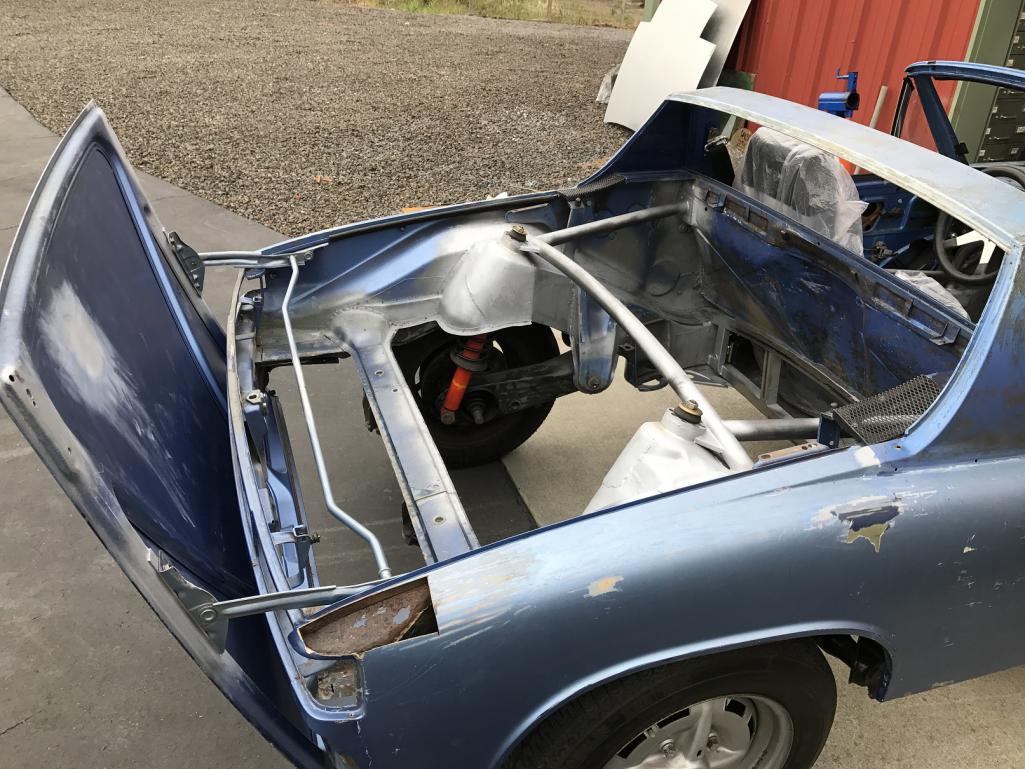
|
|
|
|
| bbrock |
Jun 4 2018, 09:32 PM
Post
#1089
|
|
914 Guru Group: Members Posts: 5,269 Joined: 17-February 17 From: Montana Member No.: 20,845 Region Association: Rocky Mountains |
On my way home to Bozeman now. It was great meeting you last Friday Chris!!! Amazing work you are doing on that rocket ship. Sorry I missed meeting others at the fab party on Saturday. Looks like I missed a great time. (IMG:style_emoticons/default/aktion035.gif)
|
|
|
|
| ConeDodger |
Jun 4 2018, 09:58 PM
Post
#1090
|
|
Apex killer! Group: Members Posts: 24,423 Joined: 31-December 04 From: Tahoe Area Member No.: 3,380 Region Association: Northern California |
QUOTE(tygaboy @ Jun 4 2018, 01:19 PM) QUOTE(ConeDodger @ Jun 3 2018, 03:22 PM) Oh Rob... (IMG:style_emoticons/default/sad.gif) I'm hurt that you haven't prioritized my build above all else in your life... (IMG:style_emoticons/default/poke.gif) (IMG:style_emoticons/default/happy11.gif) I all but finished that up back in Nov. of last year. Ha! (IMG:style_emoticons/default/av-943.gif) Missed that! (IMG:style_emoticons/default/blink.gif) |
|
|
|
| amfab |
Jun 5 2018, 07:10 PM
Post
#1091
|
|
Member Group: Members Posts: 401 Joined: 17-May 16 From: Los Angeles Member No.: 20,004 Region Association: None |
Im curious about the cherry max rivets, what makes them so different?
|
|
|
|
| tygaboy |
Jun 7 2018, 08:02 AM
Post
#1092
|
|
914 Guru Group: Members Posts: 5,819 Joined: 6-October 15 From: Petaluma, CA Member No.: 19,241 Region Association: Northern California |
QUOTE(amfab @ Jun 5 2018, 06:10 PM) Im curious about the cherry max rivets, what makes them so different? Hope this isn't too much detail, and note that we're sorta moving into aircraft construction when talking about "strength" of rivets. For my purposes, I'm leveraging the aircraft guidelines, not following them to the letter. That said: When you install a pop rivet, the steel core breaks off, leaving a hollow rivet. They aren't considered structural because small-ish forces can destroy the joint. They can fail due to forces in shear, tension and torsional directions. They generally get used to install a surface panel or decorative element and can easily be drilled out, replaced, etc. A structural rivet retains the core when it's installed, making them far stronger. Also, a lot more fun to drill out. Attached thumbnail(s) 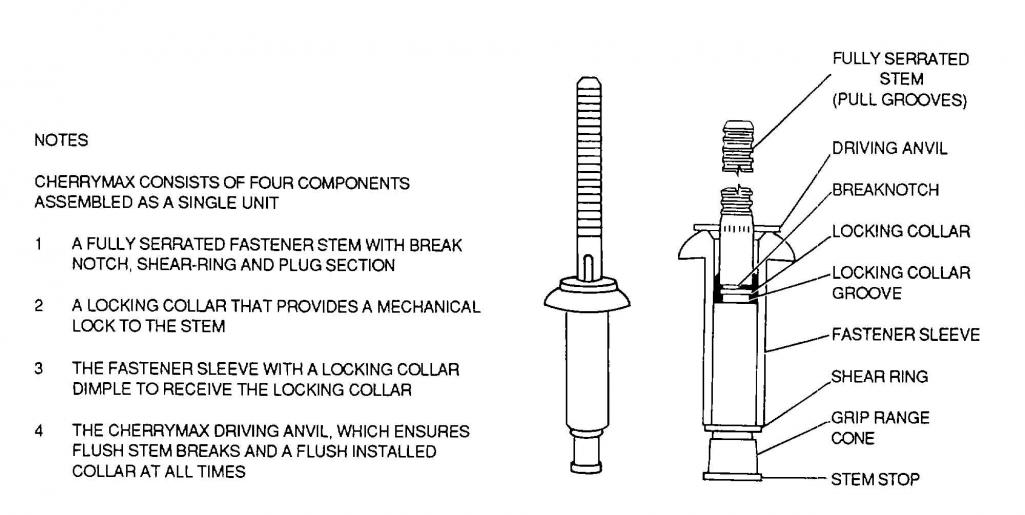
|
|
|
|
| motoTrooper |
Jun 8 2018, 09:54 AM
Post
#1093
|
|
Newbie Group: Members Posts: 39 Joined: 18-March 16 From: Palo Alto Member No.: 19,774 Region Association: None |
Thanks for the additional information, I was wondering about your choice of using rivets for the firewall panels. Should be pretty structurally strong. Are you going to make the center panel bolt-on/off for service access?
|
|
|
|
| tygaboy |
Jun 8 2018, 05:48 PM
Post
#1094
|
|
914 Guru Group: Members Posts: 5,819 Joined: 6-October 15 From: Petaluma, CA Member No.: 19,241 Region Association: Northern California |
QUOTE(motoTrooper @ Jun 8 2018, 08:54 AM) Thanks for the additional information, I was wondering about your choice of using rivets for the firewall panels. Should be pretty structurally strong. Are you going to make the center panel bolt-on/off for service access? Yes, that center section will be removable. I just need to finalize framing the entire opening, then I'll get going on the removable part. |
|
|
|
| amfab |
Jun 8 2018, 11:50 PM
Post
#1095
|
|
Member Group: Members Posts: 401 Joined: 17-May 16 From: Los Angeles Member No.: 20,004 Region Association: None |
very cool, thanks
|
|
|
|
| tygaboy |
Jun 9 2018, 10:19 PM
Post
#1096
|
|
914 Guru Group: Members Posts: 5,819 Joined: 6-October 15 From: Petaluma, CA Member No.: 19,241 Region Association: Northern California |
I worked a bit more on the uppermost section of the firewall. After making some practice pieces to be sure I understood the necessary dimensions, I fabbed up what I hope is a final piece.
Attached thumbnail(s) 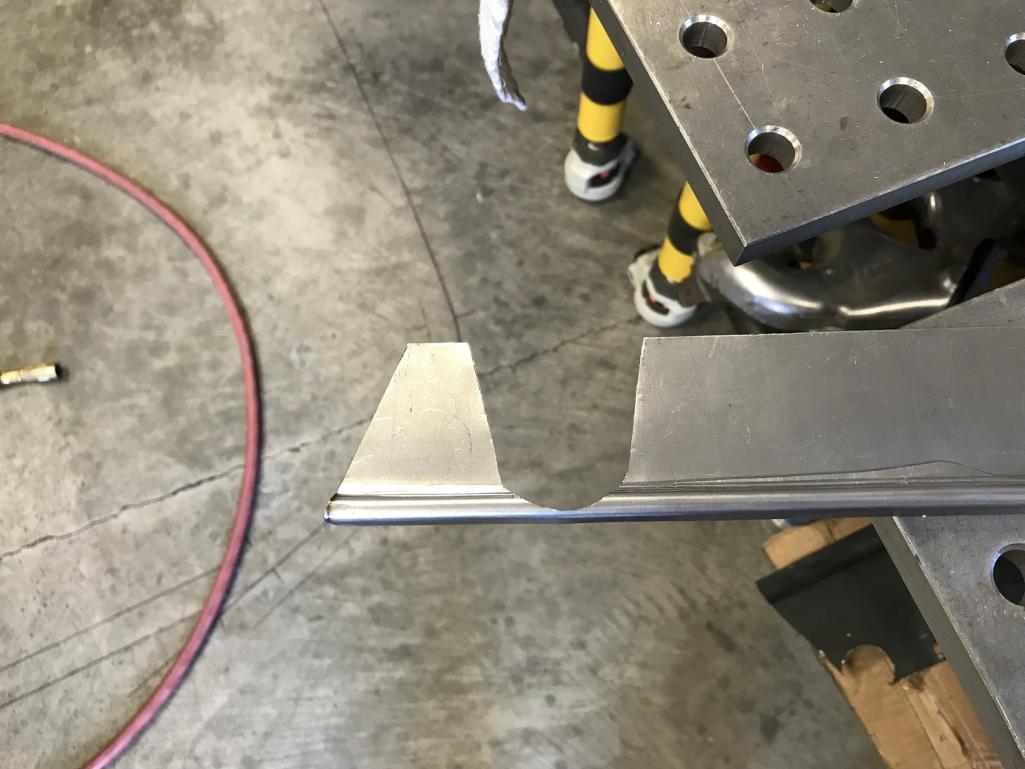
|
|
|
|
| tygaboy |
Jun 9 2018, 10:20 PM
Post
#1097
|
|
914 Guru Group: Members Posts: 5,819 Joined: 6-October 15 From: Petaluma, CA Member No.: 19,241 Region Association: Northern California |
Mocked into position
Attached thumbnail(s) 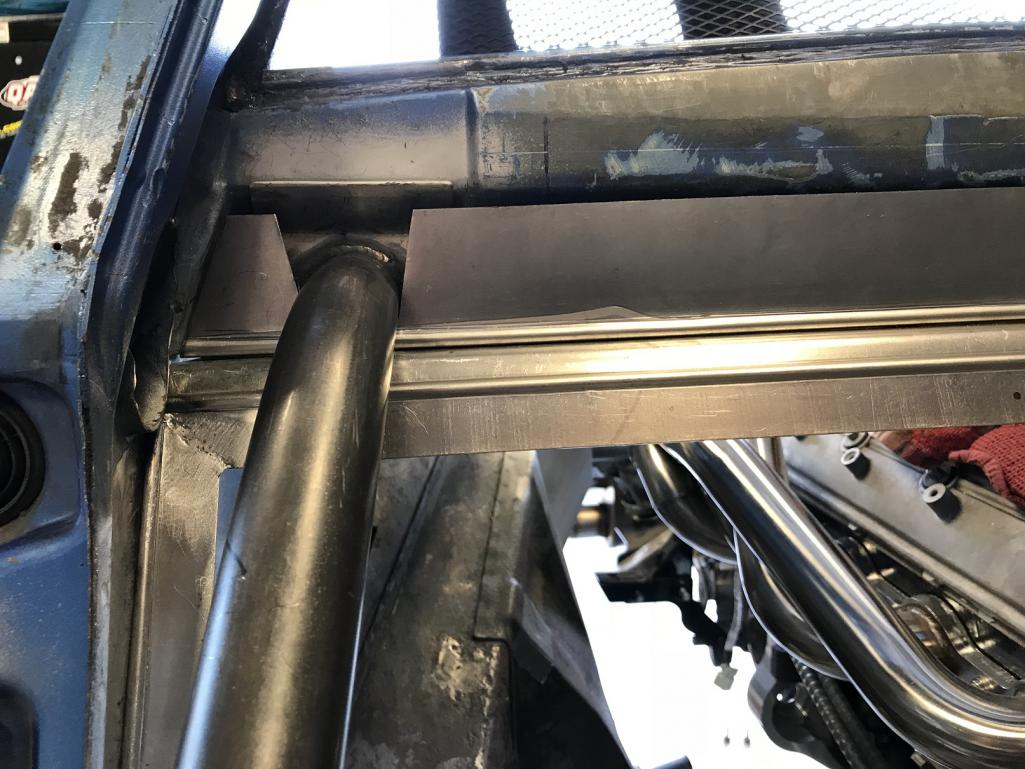
|
|
|
|
| tygaboy |
Jun 9 2018, 10:20 PM
Post
#1098
|
|
914 Guru Group: Members Posts: 5,819 Joined: 6-October 15 From: Petaluma, CA Member No.: 19,241 Region Association: Northern California |
Practice piece to work out where the edges and hole need to be...
Attached thumbnail(s) 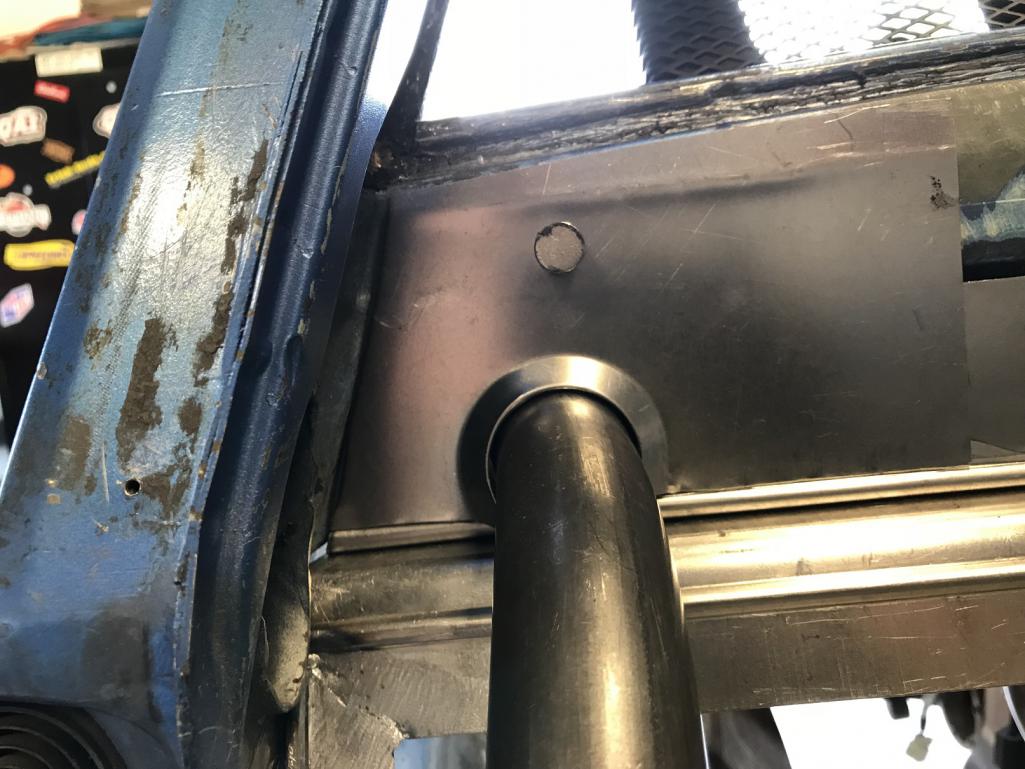
|
|
|
|
| tygaboy |
Jun 9 2018, 10:23 PM
Post
#1099
|
|
914 Guru Group: Members Posts: 5,819 Joined: 6-October 15 From: Petaluma, CA Member No.: 19,241 Region Association: Northern California |
Once I had the dimensions, I took a swing at the final part. Turned out pretty well. I still need to do final trimming and add a bend so the top portion tips back and can be riveted to the stock portion of the fire wall.
I'm thinking I'll add a bead or some sort of detail. That's still TBD. Attached thumbnail(s) 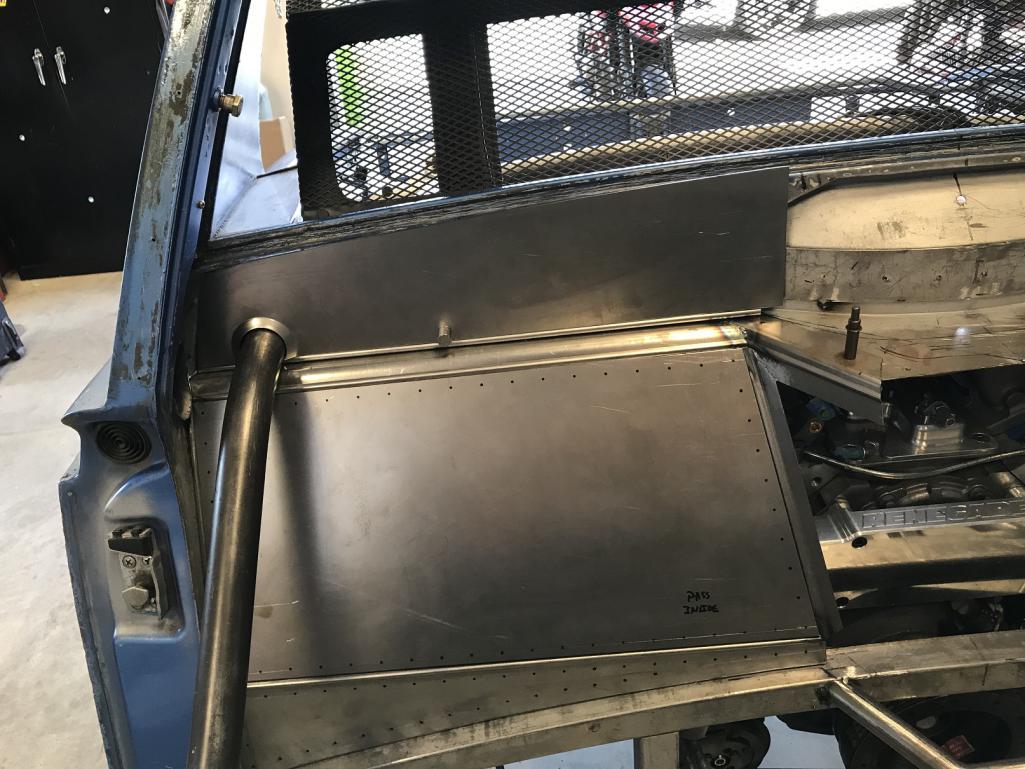 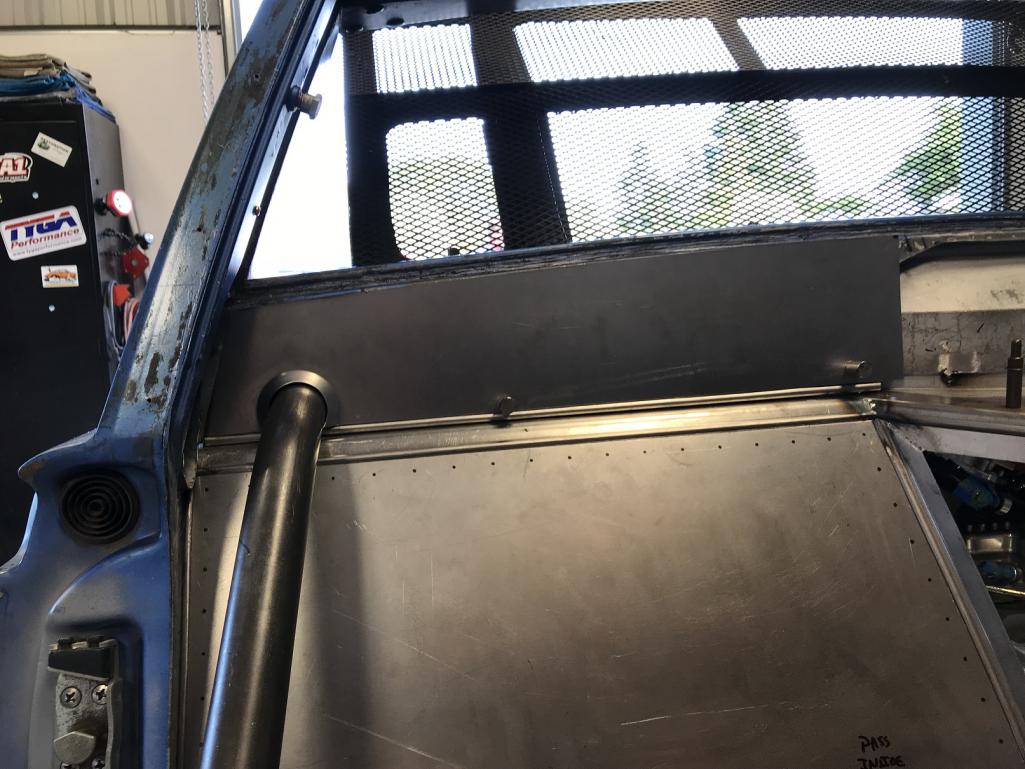 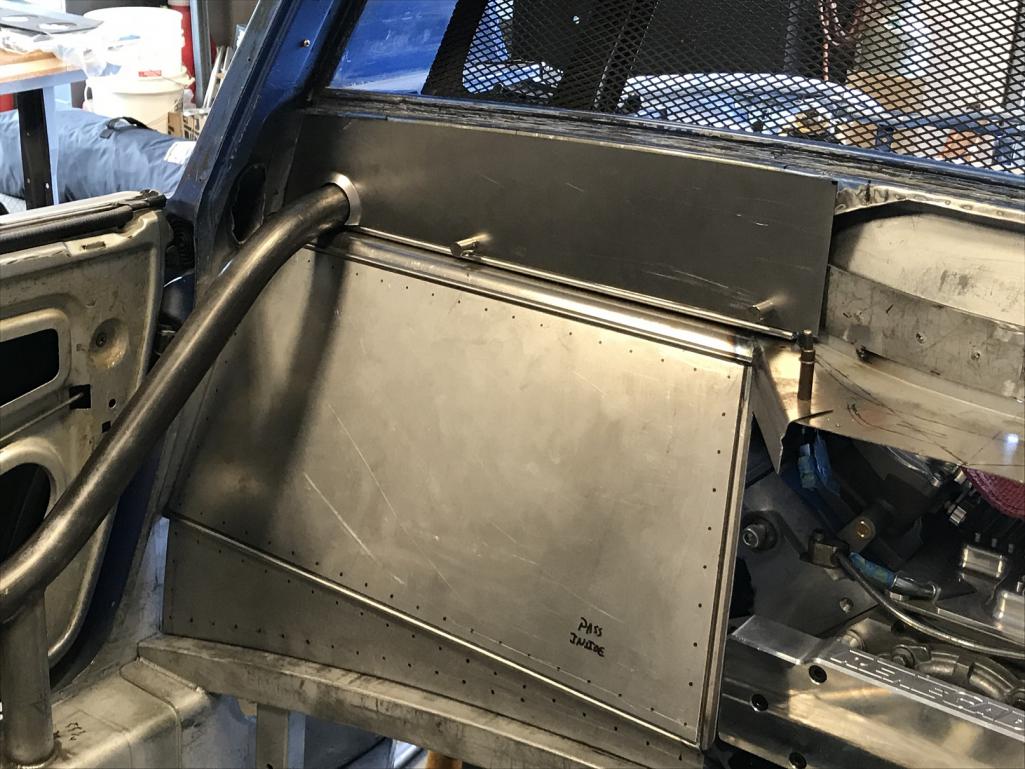
|
|
|
|
| tygaboy |
Jun 16 2018, 12:44 PM
Post
#1100
|
|
914 Guru Group: Members Posts: 5,819 Joined: 6-October 15 From: Petaluma, CA Member No.: 19,241 Region Association: Northern California |
Closing in on closing it in! A few more pieces to fab then it's time for riveting and welding.
Attached thumbnail(s) 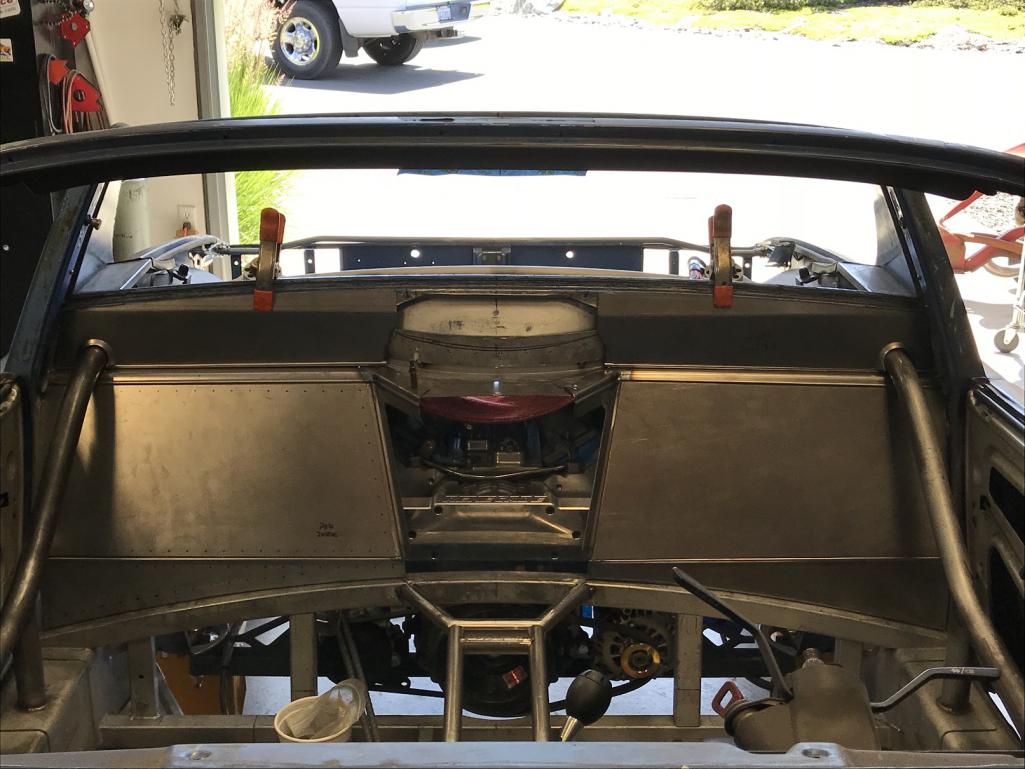
|
|
|
|
|
2 User(s) are reading this topic (2 Guests and 0 Anonymous Users)
0 Members:

|
Lo-Fi Version | Time is now: 29th April 2026 - 08:00 AM |
Invision Power Board
v9.1.4 © 2026 IPS, Inc.