|
|
|
Porsche, and the Porsche crest are registered trademarks of Dr. Ing. h.c. F. Porsche AG.
This site is not affiliated with Porsche in any way. Its only purpose is to provide an online forum for car enthusiasts. All other trademarks are property of their respective owners. |
|
|

  |

| mb911 |
 Jun 16 2018, 07:33 PM Jun 16 2018, 07:33 PM
Post
#1101
|
|
914 Guru  Group: Members Posts: 7,756 Joined: 2-January 09 From: Burlington wi Member No.: 9,892 Region Association: Upper MidWest |
Looks great.. Keep the updates coming.
|
   |

 
|
| 914forme |
Jun 17 2018, 08:08 AM
Post
#1102
|
|
Times a wastin', get wrenchin'! Group: Members Posts: 3,899 Joined: 24-July 04 From: Dayton, Ohio Member No.: 2,388 Region Association: None |
QUOTE(tygaboy @ Jun 16 2018, 02:44 PM)  Closing in on closing it in! A few more pieces to fab then it's time for riveting and welding. That is looking great. For detail you need to bead in something. (IMG:style_emoticons/default/confused24.gif) what I do not know. If you are wishing to run down a deep habit hole, there is so much you can do with a bead roller. From the simple, to the extreme. 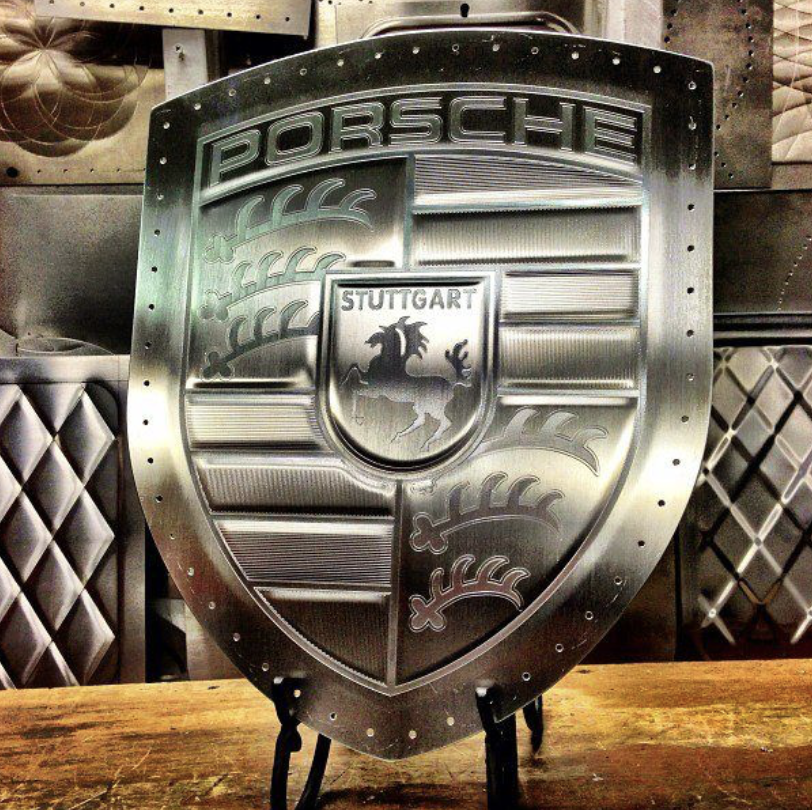 Not sure I would waste the days doing something that intricate, but I would add a few just to get rid of any possible tin can effects. I want to see the car on the road, and the huge smile on your face when it is done. |
 |
|
| tygaboy |
Jun 17 2018, 01:08 PM
Post
#1103
|
|
914 Guru Group: Members Posts: 5,819 Joined: 6-October 15 From: Petaluma, CA Member No.: 19,241 Region Association: Northern California |
Stephen - I was thinking of a crest on the front section of the removable fire wall panel. Probably not bead rolled...! (IMG:style_emoticons/default/wacko.gif) I'm no where near skilled enough for that.
However, since I'm clearly in no hurry to get it running ( (IMG:style_emoticons/default/av-943.gif) ), I stayed with my "hmmm, I don't like that/think I'll do it over" approach. As I'm working on the fire wall, I'm not liking the corners - too sharp an angle. To my eye, it conflicted with the nice, soft 1" round tube edges of the rest of the console... So... I wasn't sure I could pull it off (and I've only done one corner so the final outcome remains to be seen) but I went "full fiddly" and worked out the necessary angles, cut the appropriate shape and did my first "around a corner" bead. Then I had to (IMG:style_emoticons/default/sawzall-smiley.gif) and bend and trim and (IMG:style_emoticons/default/smash.gif) tweak, but I think it looks LOADS better and keeps a consistent theme with the rest of the corners. Here's the before and after. I still need to weld and finish that clipped area but: What say you? Attached thumbnail(s) 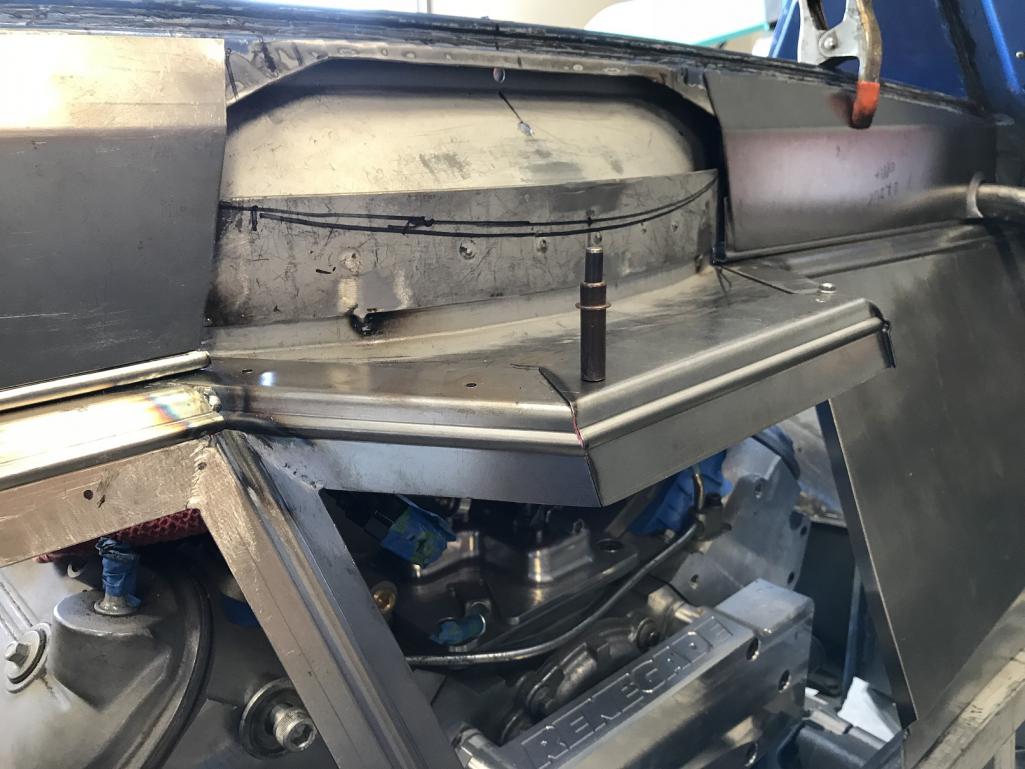 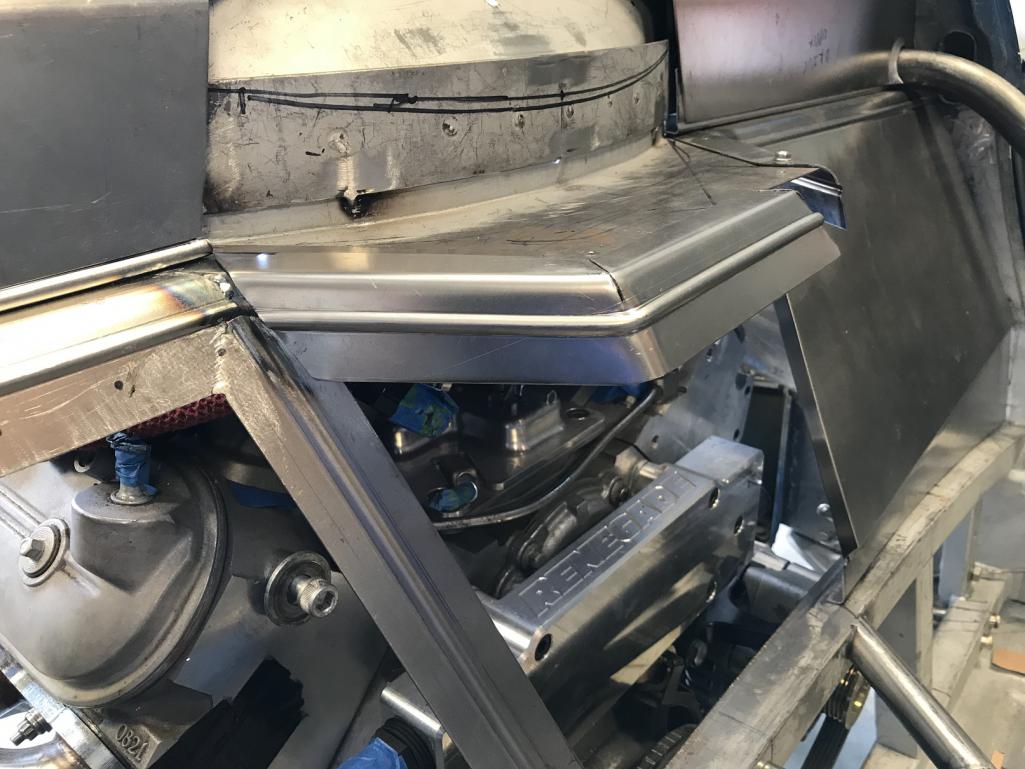
|
|
|
|
| bbrock |
Jun 17 2018, 01:33 PM
Post
#1104
|
|
914 Guru Group: Members Posts: 5,269 Joined: 17-February 17 From: Montana Member No.: 20,845 Region Association: Rocky Mountains |
Oooh. I like that! Nice touch. (IMG:style_emoticons/default/aktion035.gif)
|
|
|
|
| 914forme |
Jun 17 2018, 03:55 PM
Post
#1105
|
|
Times a wastin', get wrenchin'! Group: Members Posts: 3,899 Joined: 24-July 04 From: Dayton, Ohio Member No.: 2,388 Region Association: None |
(IMG:style_emoticons/default/agree.gif)
If you look closely the basics of the crest are bead rolled the rest was etched / scribed. So lay out the shield and a couple of the center dividers and then "cheat" a little and laser etch, acid etch, or CNC the other sections for the look you want. Or cheat the entire thing take it to the beach find an air brush artist and have them brush the crest in. Since you have a CNC plasma cutter it would be a lot faster the plasma the details out, TIG them on in the best dime stack you can muster and just clear coat it out for the world to see. (IMG:style_emoticons/default/aktion035.gif) |
|
|
|
| tygaboy |
Jun 17 2018, 08:00 PM
Post
#1106
|
|
914 Guru Group: Members Posts: 5,819 Joined: 6-October 15 From: Petaluma, CA Member No.: 19,241 Region Association: Northern California |
I keep being distracted by the fire wall work. I want to get the engine to the dyno guys and all that it needs is to finalize the muffler mount. So...
If this isn't "getting jiggy wi't it", I don't know what is! (IMG:style_emoticons/default/lol-2.gif) Yes, seriously. This really is the fixturing craziness that I came up with. Attached thumbnail(s) 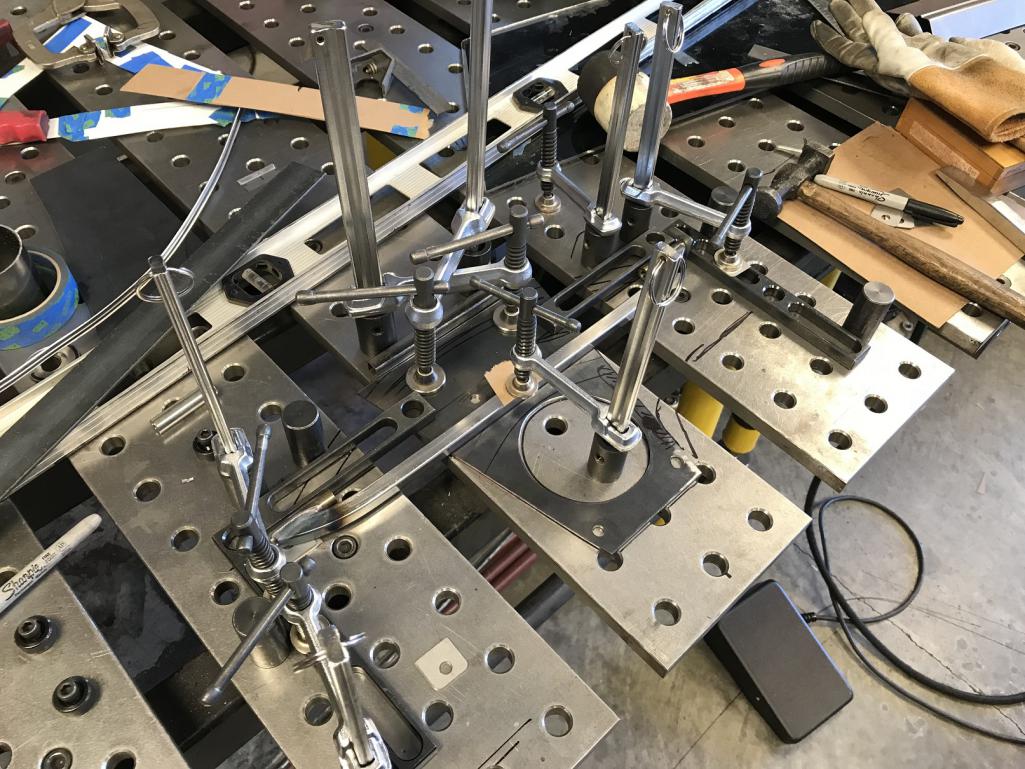
|
|
|
|
| tygaboy |
Jun 17 2018, 08:01 PM
Post
#1107
|
|
914 Guru Group: Members Posts: 5,819 Joined: 6-October 15 From: Petaluma, CA Member No.: 19,241 Region Association: Northern California |
Almost there...
Attached thumbnail(s) 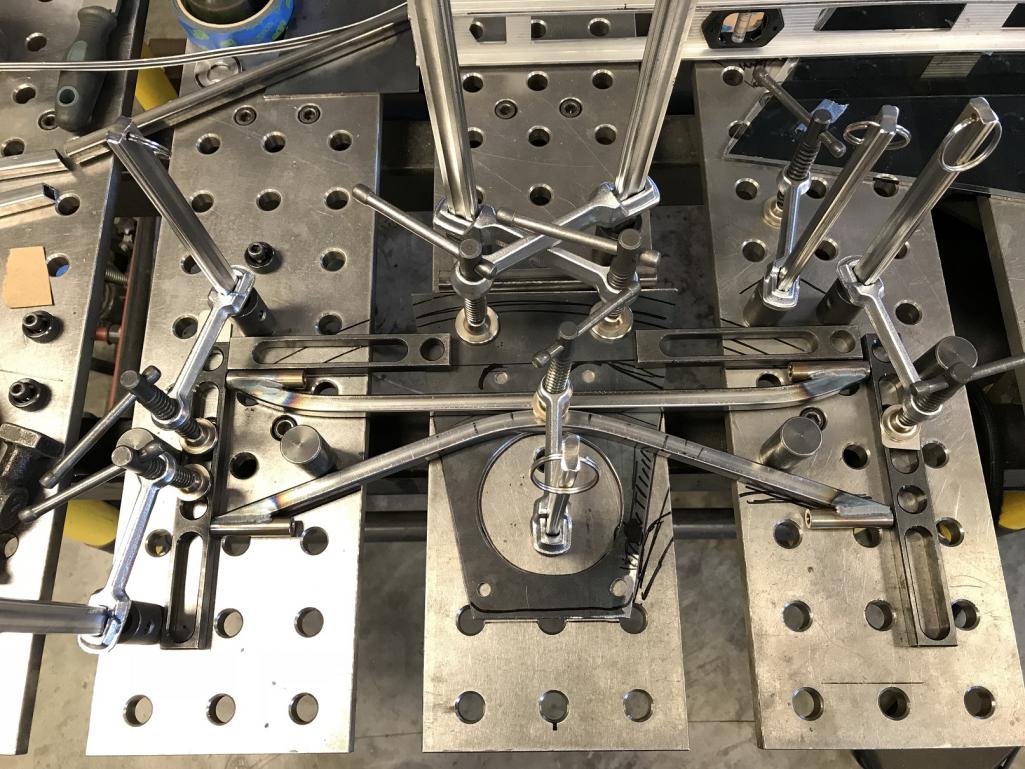
|
|
|
|
| tygaboy |
Jun 17 2018, 08:02 PM
Post
#1108
|
|
914 Guru Group: Members Posts: 5,819 Joined: 6-October 15 From: Petaluma, CA Member No.: 19,241 Region Association: Northern California |
Sorta like this. I still have to add a flange all around the plate to stiffen it up but you get the idea.
Attached thumbnail(s) 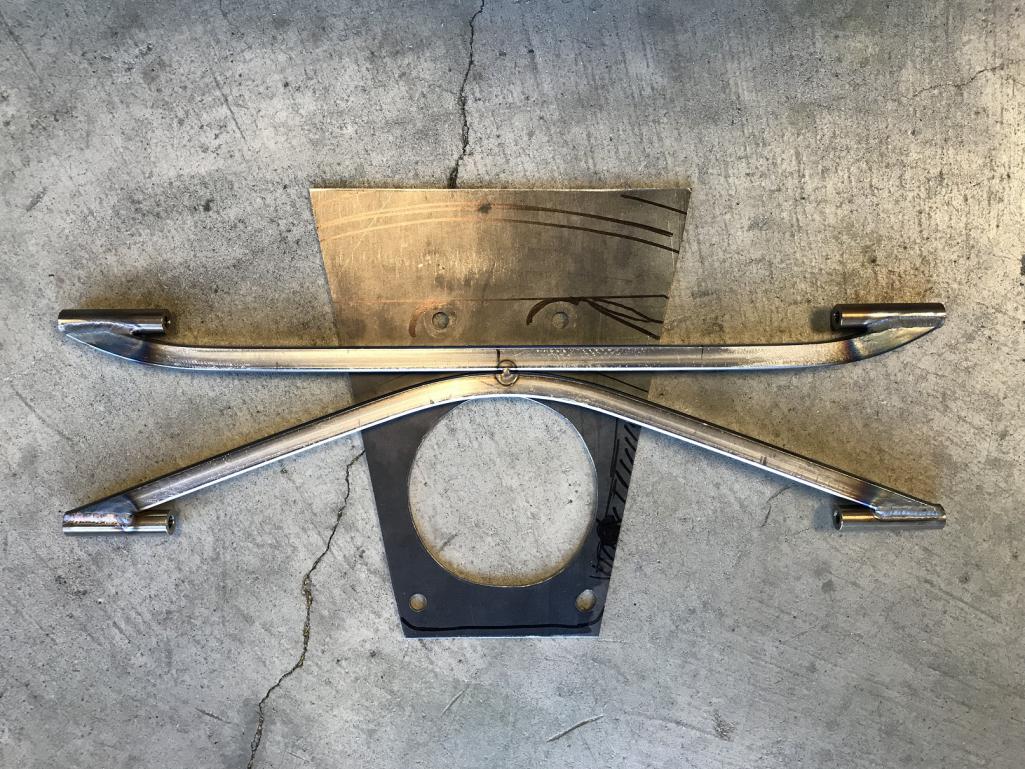
|
|
|
|
| tygaboy |
Jun 17 2018, 08:04 PM
Post
#1109
|
|
914 Guru Group: Members Posts: 5,819 Joined: 6-October 15 From: Petaluma, CA Member No.: 19,241 Region Association: Northern California |
Once the mount is complete, tabs get added to the muffler.
A couple small items after that then the motor comes out and I can get back to work on the chassis and all the remaining sheet metal, Tangerine Racing rear pick up points and the last parts of the rust repair. Still a ways to go... Attached thumbnail(s) 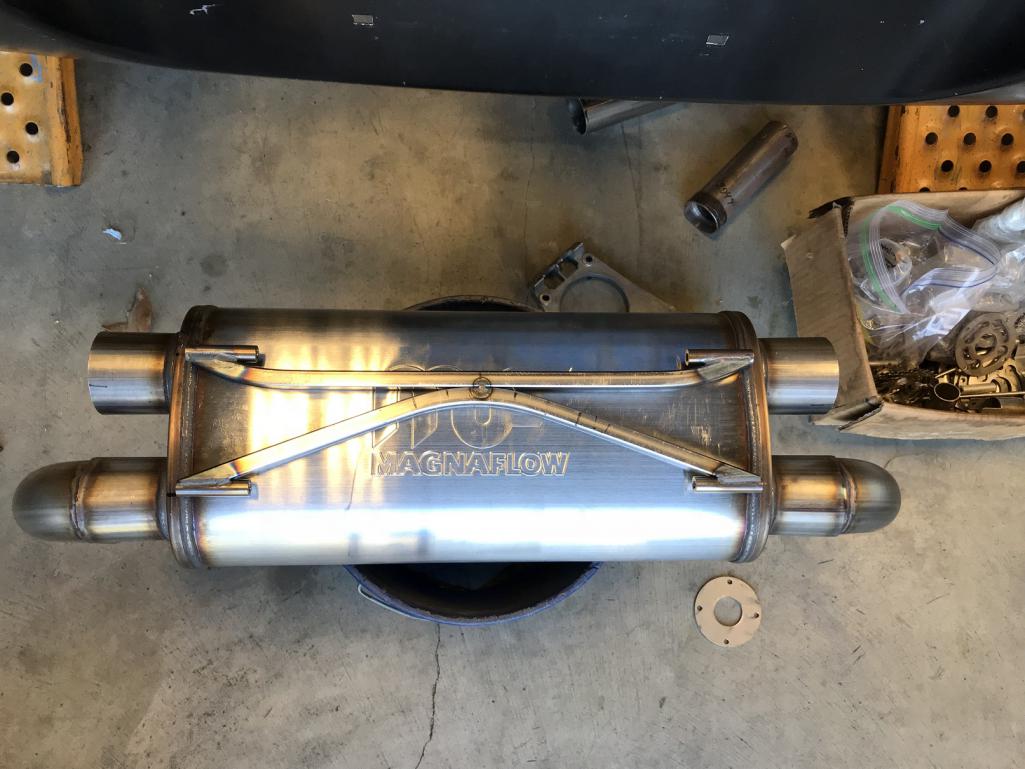
|
|
|
|
| motoTrooper |
Jun 19 2018, 10:22 AM
Post
#1110
|
|
Newbie Group: Members Posts: 39 Joined: 18-March 16 From: Palo Alto Member No.: 19,774 Region Association: None |
Nice progress there, I'd have been happy with the beaded corners but the radius is nicer to inadvertently bump against. That muffler bracket is lovely.
I've been finally able to spend some time looking at those roof panel pieces and figuring out how to mount one... |
|
|
|
| tygaboy |
Jun 23 2018, 06:33 PM
Post
#1111
|
|
914 Guru Group: Members Posts: 5,819 Joined: 6-October 15 From: Petaluma, CA Member No.: 19,241 Region Association: Northern California |
That earlier version of the muffler bracket plate simply wouldn't do. A little plasma table and some added style points.
Still need to finish welding but you get the idea. It's not real light, but it likely won't ever fail! (IMG:style_emoticons/default/laugh.gif) Attached thumbnail(s) 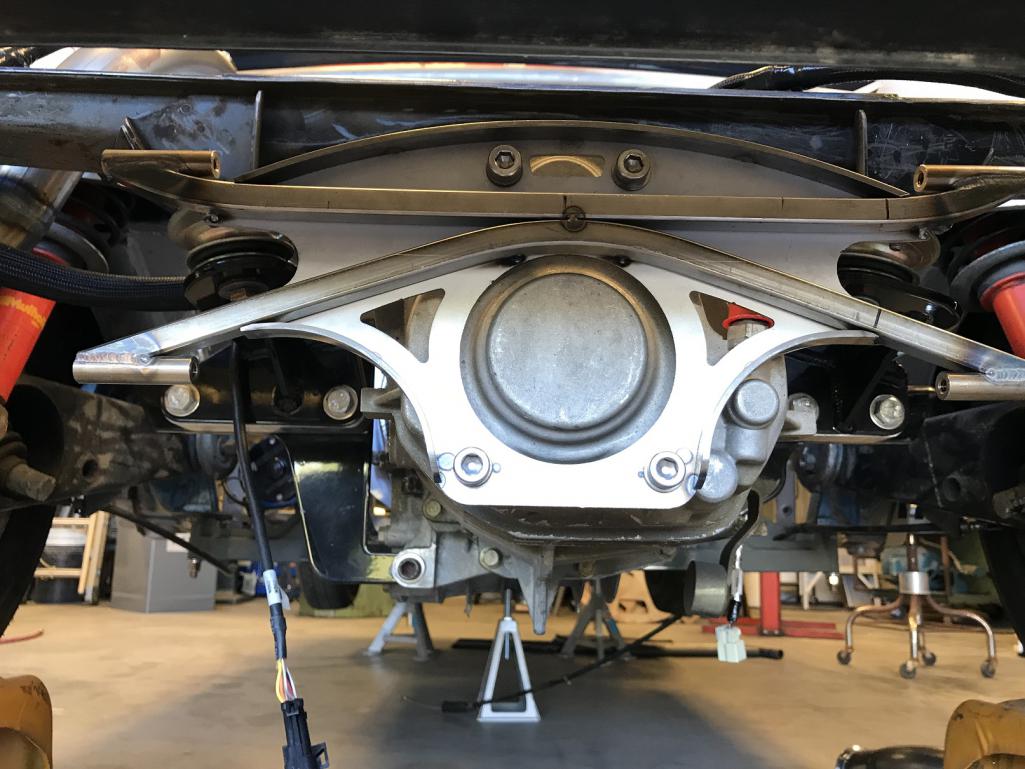
|
|
|
|
| 914forme |
Jun 23 2018, 07:06 PM
Post
#1112
|
|
Times a wastin', get wrenchin'! Group: Members Posts: 3,899 Joined: 24-July 04 From: Dayton, Ohio Member No.: 2,388 Region Association: None |
Chris that looks great, nice design and artwork all in one.
|
|
|
|
| Dion |
Jun 23 2018, 08:04 PM
Post
#1113
|
|
RN Group: Members Posts: 2,926 Joined: 16-September 04 From: Audubon,PA Member No.: 2,766 Region Association: MidAtlantic Region |
QUOTE(914forme @ Jun 23 2018, 05:06 PM) Chris that looks great, nice design and artwork all in one. (IMG:style_emoticons/default/agree.gif) In with Stephen on this. Couldn’t say it better. |
|
|
|
| Mueller |
Jun 23 2018, 10:10 PM
Post
#1114
|
|
914 Freak! Group: Members Posts: 17,155 Joined: 4-January 03 From: Antioch, CA Member No.: 87 Region Association: None |
Dang Chris, you need to be a designer at Bugatti or Pagani....nice
|
|
|
|
| ConeDodger |
Jun 24 2018, 07:37 PM
Post
#1115
|
|
Apex killer! Group: Members Posts: 24,423 Joined: 31-December 04 From: Tahoe Area Member No.: 3,380 Region Association: Northern California |
QUOTE(Mueller @ Jun 24 2018, 01:10 AM) Dang Chris, you need to be a designer at Bugatti or Pagani....nice If you’re interested in doing the design thing at Bugatti, the head of designs daughter goes to school with my youngest. He is a Porsche fan too. Achim Ansheit? https://m.youtube.com/watch?v=eAY5fRglsb4 |
|
|
|
| Andyrew |
Jun 24 2018, 09:29 PM
Post
#1116
|
|
Spooling.... Please wait Group: Members Posts: 13,380 Joined: 20-January 03 From: Riverbank, Ca Member No.: 172 Region Association: Northern California |
QUOTE(tygaboy @ Jun 23 2018, 05:33 PM) That earlier version of the muffler bracket plate simply wouldn't do. You and I simply do things so much differently (IMG:style_emoticons/default/smile.gif) Good enough just isn't in your vocabulary (IMG:style_emoticons/default/wink.gif) |
|
|
|
| tygaboy |
Jun 30 2018, 11:48 AM
Post
#1117
|
|
914 Guru Group: Members Posts: 5,819 Joined: 6-October 15 From: Petaluma, CA Member No.: 19,241 Region Association: Northern California |
Thanks for the kind words, gents. It does help with the motivation.
Back to the fire wall. I wasn't happy with any of my ideas for closing in the upper portion because they all seemed to conflict with the 1" round edges of the console. So I took a step back and tried to get a clean slate in my head about what this should look like. Here's the latest: Continue the console all the way up to the top! Still a few things to work out and, as always, it's not over til it's over but I think I like this better. The front of it will still be removable for access. Attached thumbnail(s) 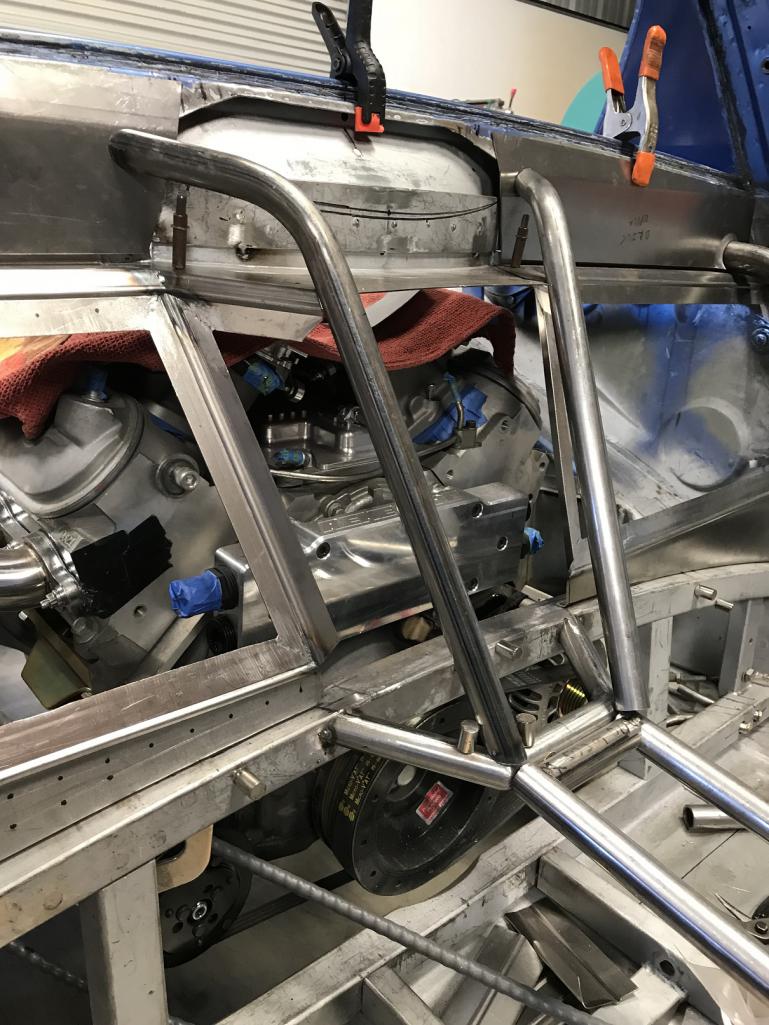 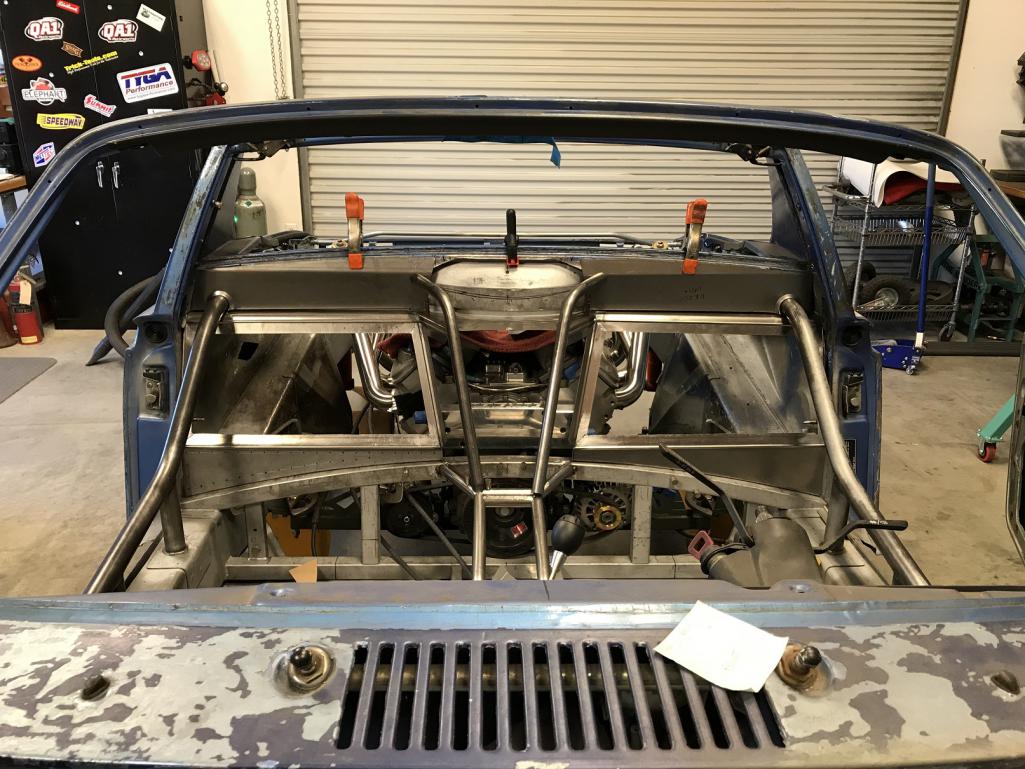
|
|
|
|
| tygaboy |
Jul 4 2018, 02:39 PM
Post
#1118
|
|
914 Guru Group: Members Posts: 5,819 Joined: 6-October 15 From: Petaluma, CA Member No.: 19,241 Region Association: Northern California |
I needed a break from the fire wall. The chassis has a few more spots that need rust repair so I figured I'd get after the frunk seal channels.
Time for my best effort at an impersonation of Brent, Cary and Kent... Attached thumbnail(s) 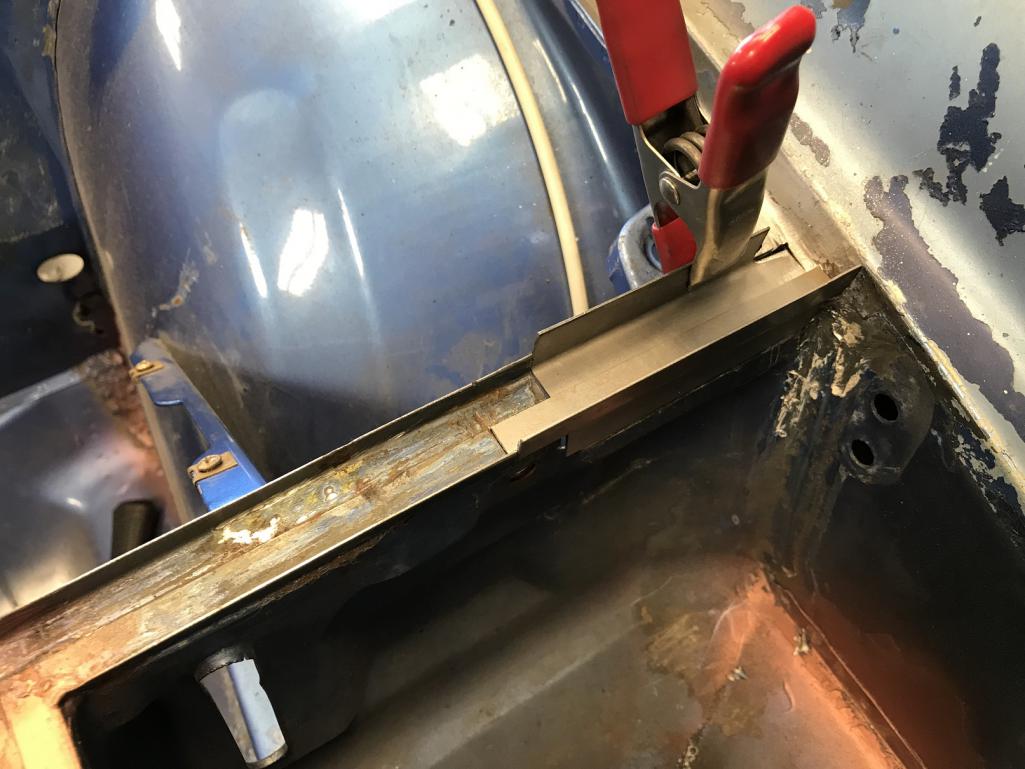
|
|
|
|
| dan10101 |
Jul 4 2018, 03:42 PM
Post
#1119
|
|
TORQUE-o-holic Group: Members Posts: 1,140 Joined: 29-April 03 From: Eagle Point, Or Member No.: 626 Region Association: Pacific Northwest |
I think I missed it. What's a frunk?
I'm trying to pay more attention, now. |
|
|
|
| Rand |
Jul 4 2018, 03:59 PM
Post
#1120
|
|
Cross Member Group: Members Posts: 7,415 Joined: 8-February 05 From: OR Member No.: 3,573 Region Association: None |
front trunk
|
|
|
|
|
1 User(s) are reading this topic (1 Guests and 0 Anonymous Users)
0 Members:

|
Lo-Fi Version | Time is now: 29th April 2026 - 08:00 AM |
Invision Power Board
v9.1.4 © 2026 IPS, Inc.