|
|
|
Porsche, and the Porsche crest are registered trademarks of Dr. Ing. h.c. F. Porsche AG.
This site is not affiliated with Porsche in any way. Its only purpose is to provide an online forum for car enthusiasts. All other trademarks are property of their respective owners. |
|
|

  |

| tygaboy |
 Aug 26 2018, 06:15 PM Aug 26 2018, 06:15 PM
Post
#1181
|
|
914 Guru  Group: Members Posts: 5,819 Joined: 6-October 15 From: Petaluma, CA Member No.: 19,241 Region Association: Northern California |
QUOTE(914forme @ Aug 26 2018, 07:39 AM)  QUOTE(tygaboy @ Aug 25 2018, 08:01 PM) Reservoir in place. I like the way it turned out. See you been spying on my thread again (IMG:style_emoticons/default/shades.gif) I like the mount why did you choose that location? I am just wondering, as I put mine closer to the stock area, so the over filled fluid can run done the fresh paint and start the 914 conversion to rust process all over again. (IMG:style_emoticons/default/huh.gif) (IMG:style_emoticons/default/poke.gif) Start working on the solid roof section (IMG:style_emoticons/default/poke.gif) I have my ideas in my head as to how to do it, just would prefer you to burn the stack of metal that comes from doing the work 3-6 times to get it just right. (IMG:style_emoticons/default/aktion035.gif) Stephen - I located it there because the chassis stiffening bars I ran to the front shock towers sort of prevent me using the space where the stock reservoir lived. The roof will likely not start to happen until after I have it on the road. I want to focus on getting it running. |
   |

 
|
| tygaboy |
Aug 26 2018, 06:17 PM
Post
#1182
|
|
914 Guru Group: Members Posts: 5,819 Joined: 6-October 15 From: Petaluma, CA Member No.: 19,241 Region Association: Northern California |
Next, it was time to make a panel to close off where the late model cars mount the fuel pump. I'll use this as the passage for the reservoir hoses to the pedal assembly.
I started off by cutting a simple panel with the appropriate holes for the hoses. A few grommets and I'm done... Attached thumbnail(s) 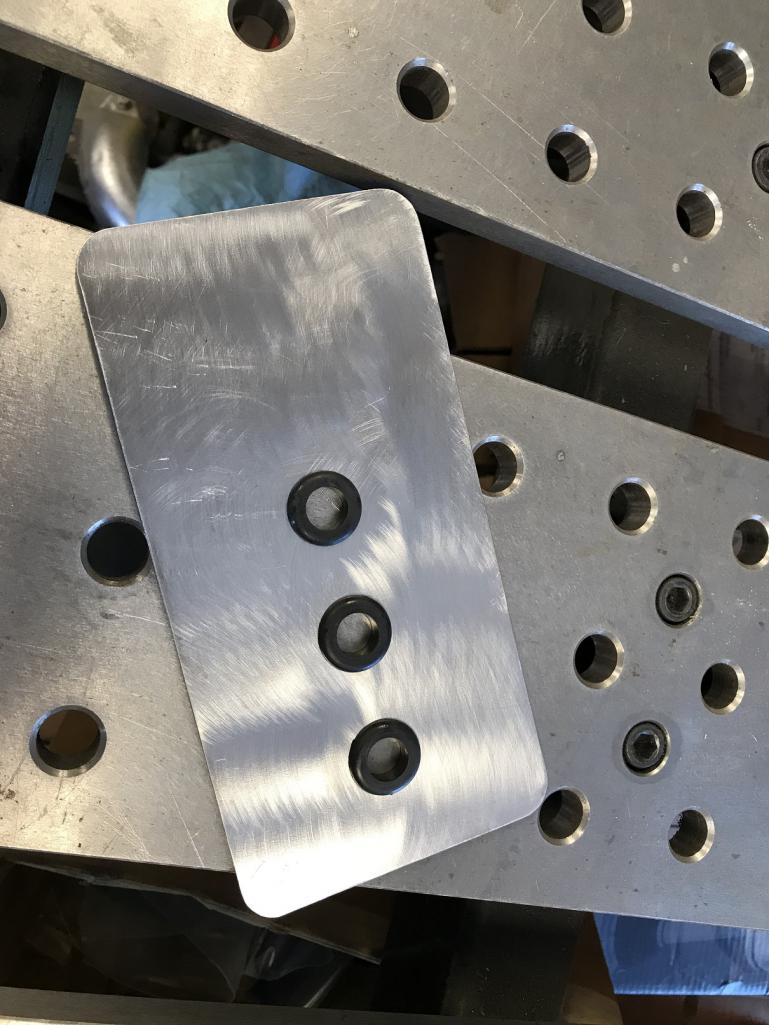 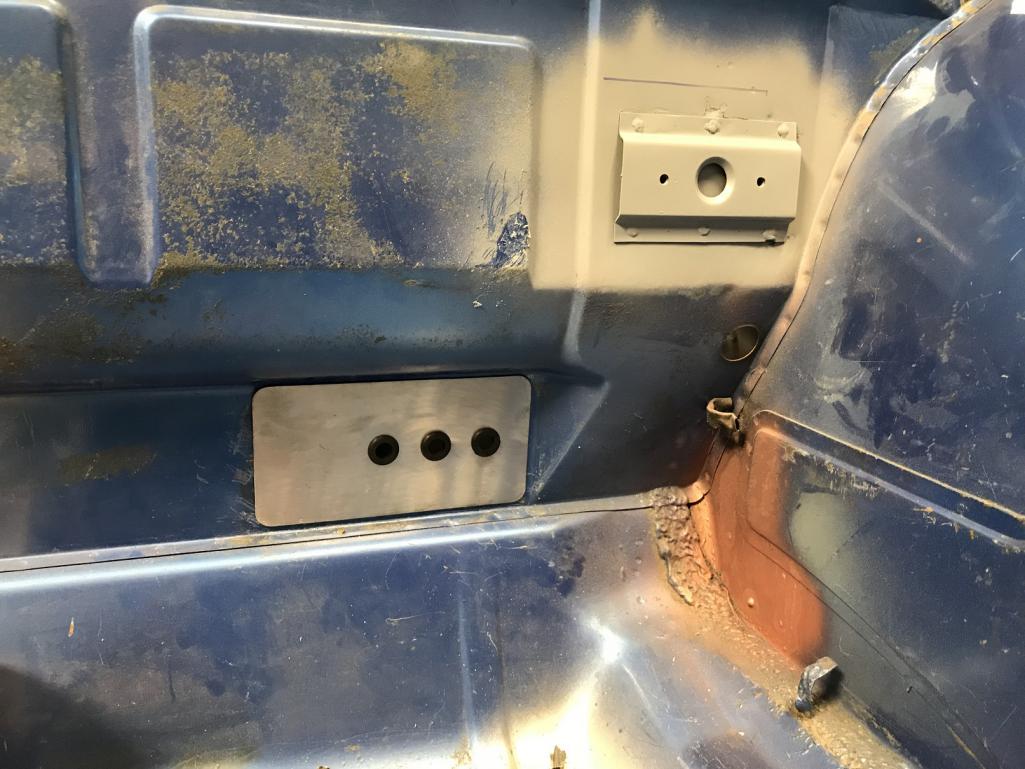
|
|
|
|
| tygaboy |
Aug 26 2018, 06:20 PM
Post
#1183
|
|
914 Guru Group: Members Posts: 5,819 Joined: 6-October 15 From: Petaluma, CA Member No.: 19,241 Region Association: Northern California |
That looked OK but I figured I could do better so decided to make a die for the press that would allow me to raise the section around the hose holes.
I plasma cut a couple pieces of 10 ga and marked them so I could align everything once it was all in the press. Attached thumbnail(s) 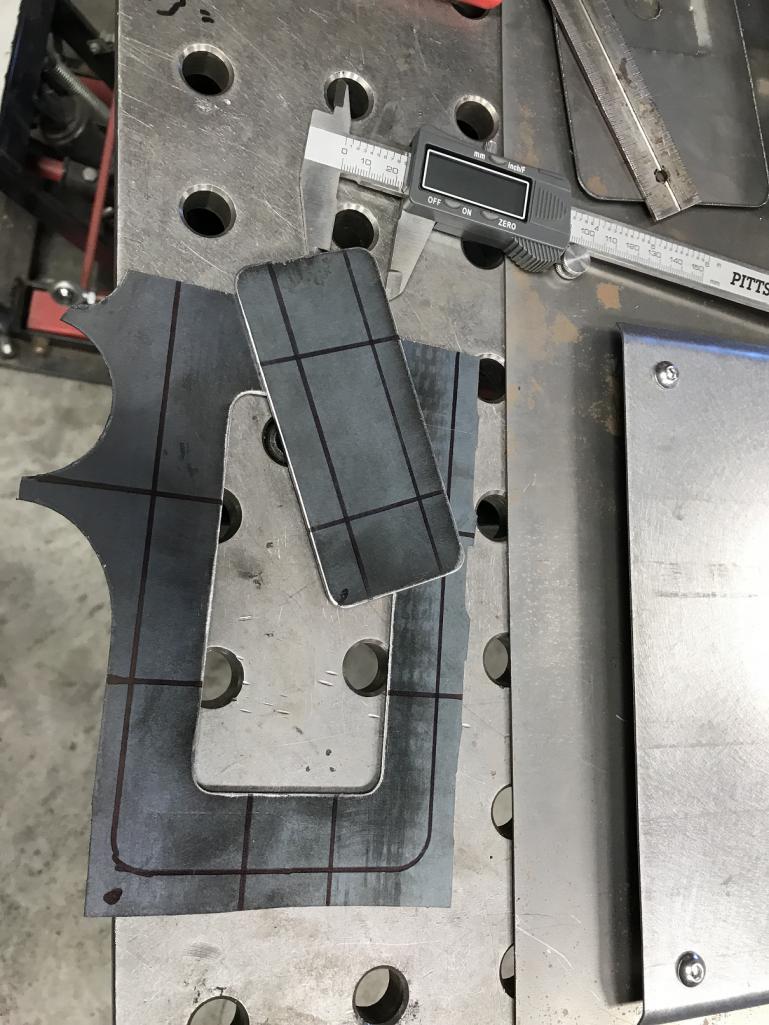 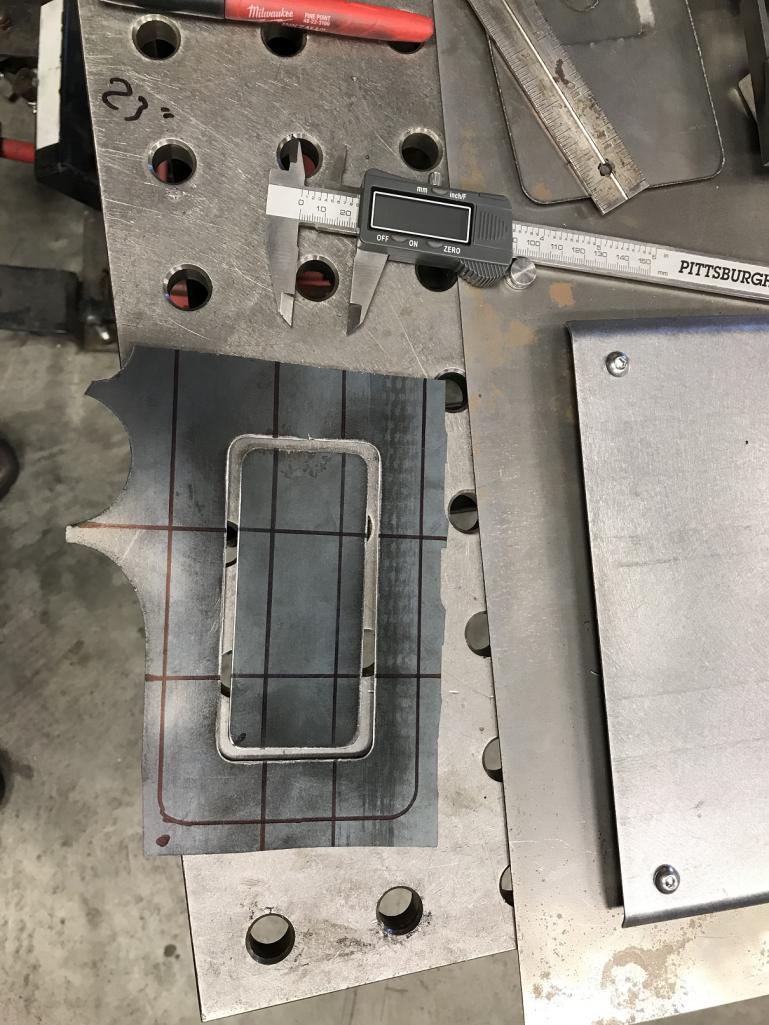
|
|
|
|
| tygaboy |
Aug 26 2018, 06:21 PM
Post
#1184
|
|
914 Guru Group: Members Posts: 5,819 Joined: 6-October 15 From: Petaluma, CA Member No.: 19,241 Region Association: Northern California |
Into the press and out comes a tidy little part!
And yes, I installed the grommets AFTER pressing... (IMG:style_emoticons/default/poke.gif) Attached thumbnail(s) 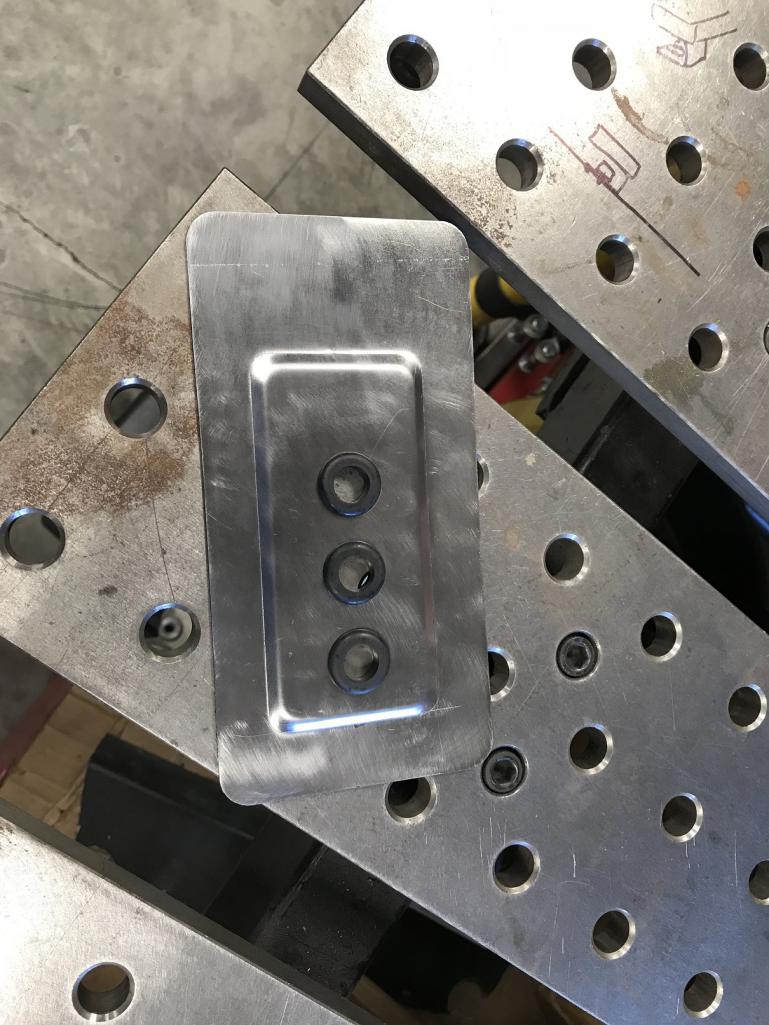
|
|
|
|
| tygaboy |
Aug 26 2018, 06:22 PM
Post
#1185
|
|
914 Guru Group: Members Posts: 5,819 Joined: 6-October 15 From: Petaluma, CA Member No.: 19,241 Region Association: Northern California |
A couple more items checked off the to-do list.
Attached thumbnail(s) 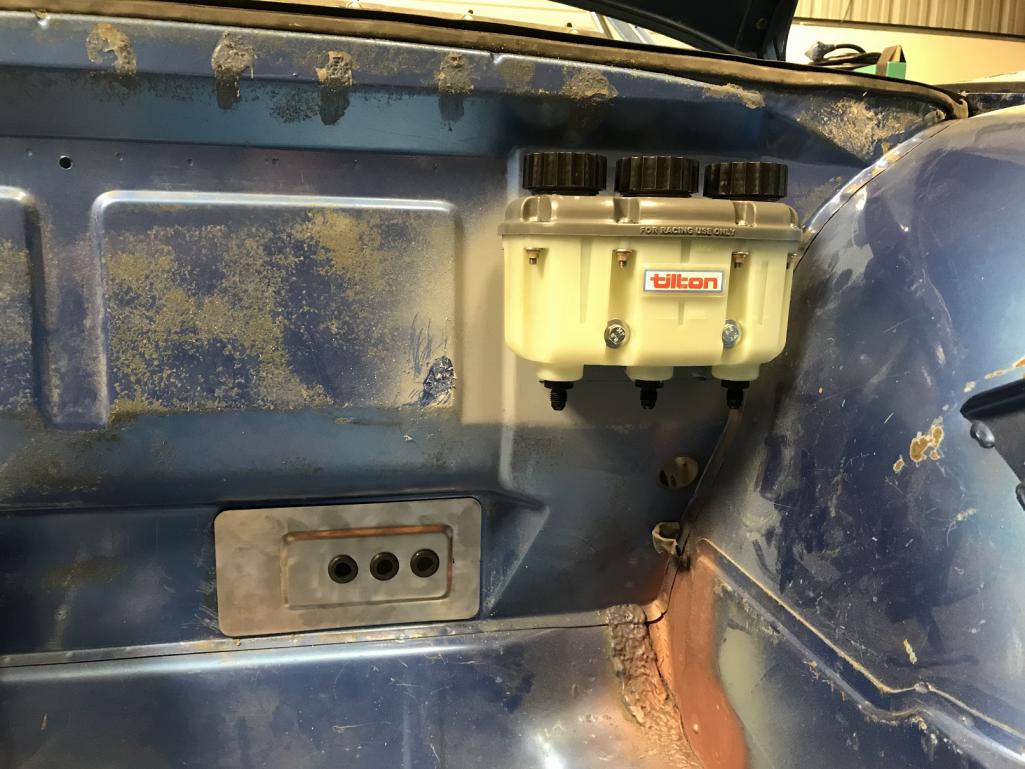
|
|
|
|
| 914forme |
Aug 26 2018, 07:44 PM
Post
#1186
|
|
Times a wastin', get wrenchin'! Group: Members Posts: 3,899 Joined: 24-July 04 From: Dayton, Ohio Member No.: 2,388 Region Association: None |
Chris a question for you, are you clamping the sheet before pressing like you would if you where hammer forming? Just wondering how your get a nice finished part. Or is it a bit rough and the run it through a planning hammer or lots of hammer and dolly work. Wheel them, just wondering wanting to learn a bit.
|
 |
|
| tygaboy |
Aug 26 2018, 09:14 PM
Post
#1187
|
|
914 Guru Group: Members Posts: 5,819 Joined: 6-October 15 From: Petaluma, CA Member No.: 19,241 Region Association: Northern California |
QUOTE(914forme @ Aug 26 2018, 06:44 PM) Chris a question for you, are you clamping the sheet before pressing like you would if you where hammer forming? Just wondering how your get a nice finished part. Or is it a bit rough and the run it through a planning hammer or lots of hammer and dolly work. Wheel them, just wondering wanting to learn a bit. Stephen - I measure and mark the panel so I know how to position it over the "open" lower die. Then I set that "insert" piece on top of the panel, doing my best to align those cross marks, and then press it, forcing that insert down into the panel, creating the raised section. The press does all the stretching and flattens the part all at the same time. No secondary operations needed. I figured someone might be interested so... here's the video of the part being made. https://www.youtube.com/watch?v=G16Q0V4LXww And @Andyrew , there's a good look at the press you were asking about. |
|
|
|
| Andyrew |
Aug 26 2018, 11:17 PM
Post
#1188
|
|
Spooling.... Please wait Group: Members Posts: 13,380 Joined: 20-January 03 From: Riverbank, Ca Member No.: 172 Region Association: Northern California |
Nice! I remember that being there. It's able to do anlog more than I thought it would!!
|
|
|
|
| tygaboy |
Sep 2 2018, 07:43 AM
Post
#1189
|
|
914 Guru Group: Members Posts: 5,819 Joined: 6-October 15 From: Petaluma, CA Member No.: 19,241 Region Association: Northern California |
Sharpie transfer punch, a few holes, find some suitable screws and it's all done.
Attached thumbnail(s) 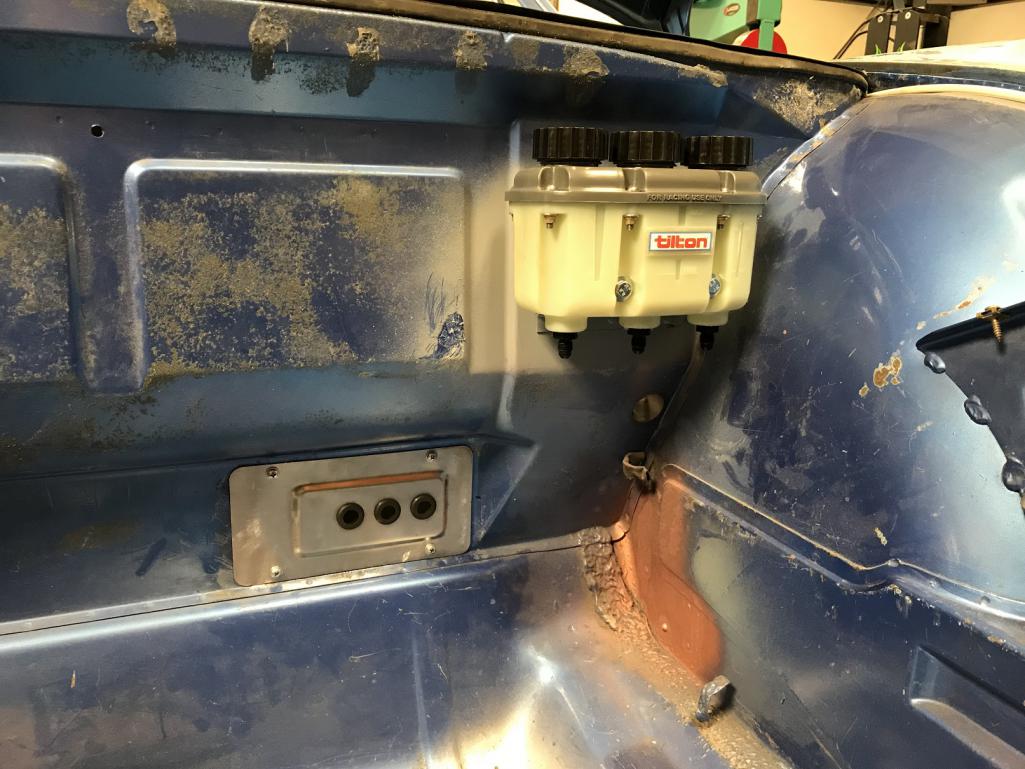
|
|
|
|
| tygaboy |
Sep 2 2018, 07:45 AM
Post
#1190
|
|
914 Guru Group: Members Posts: 5,819 Joined: 6-October 15 From: Petaluma, CA Member No.: 19,241 Region Association: Northern California |
Then moved on to making a new plate to mount the in-tank fuel pump. This will get welded to the tank in place of the filler, which will be relocated.
Using the plasma table really does feel like cheating. Attached thumbnail(s) 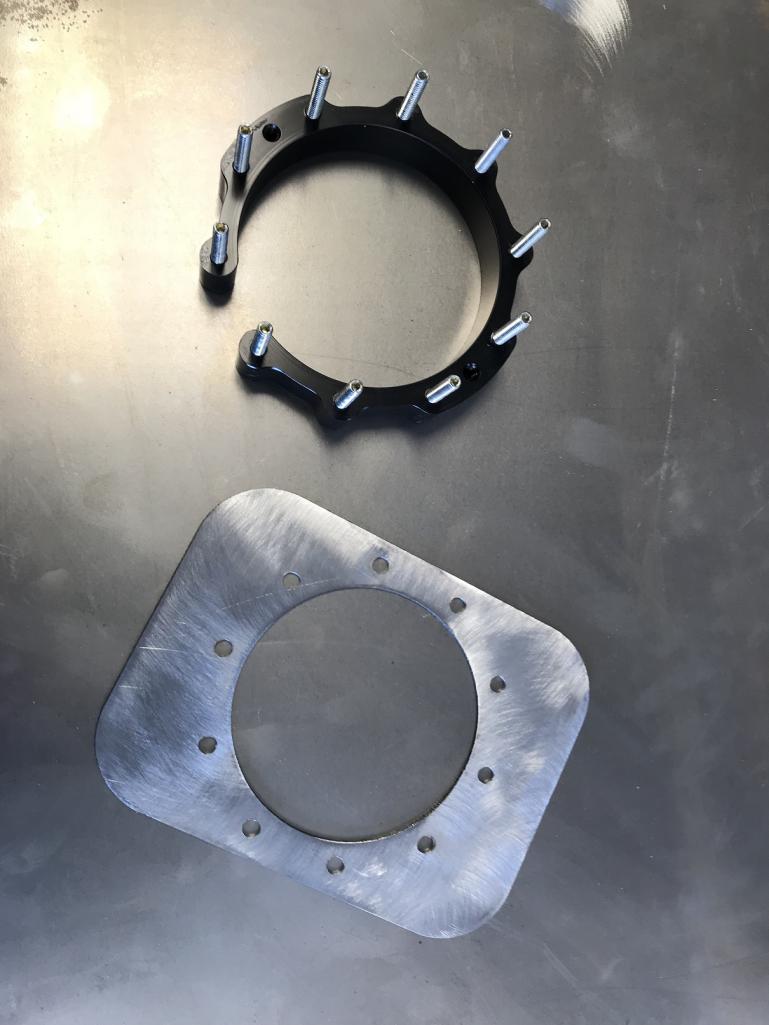 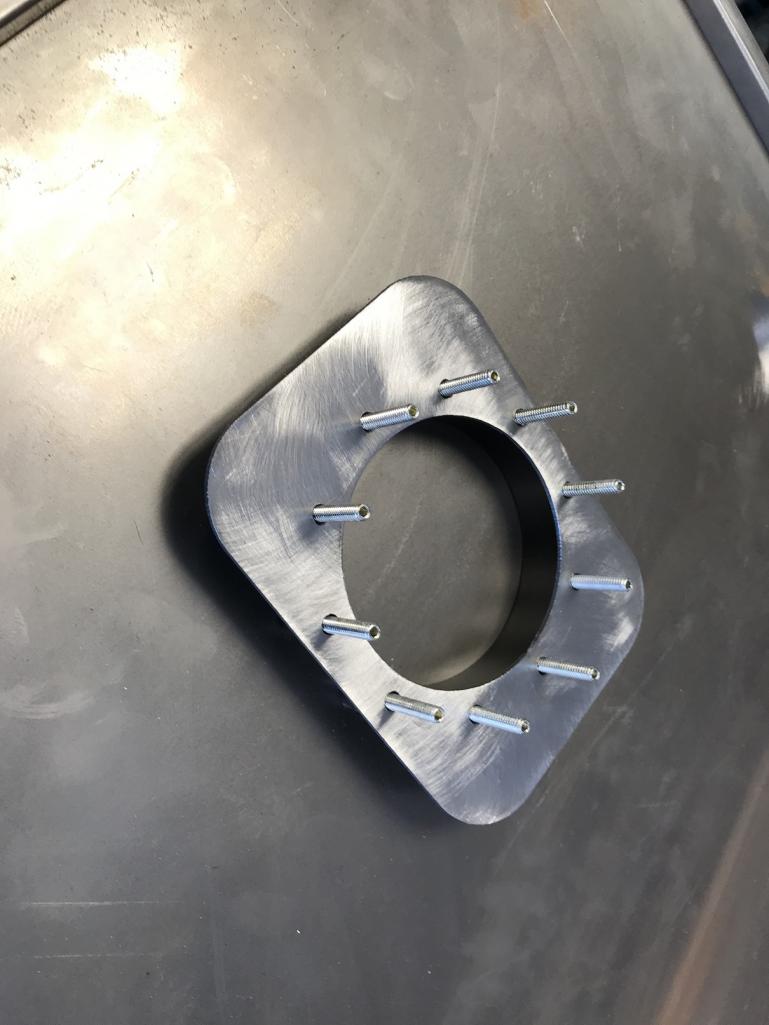
|
|
|
|
| tygaboy |
Sep 2 2018, 07:46 AM
Post
#1191
|
|
914 Guru Group: Members Posts: 5,819 Joined: 6-October 15 From: Petaluma, CA Member No.: 19,241 Region Association: Northern California |
It'll go about here. I'll be ordering a new tank, too.
Attached thumbnail(s) 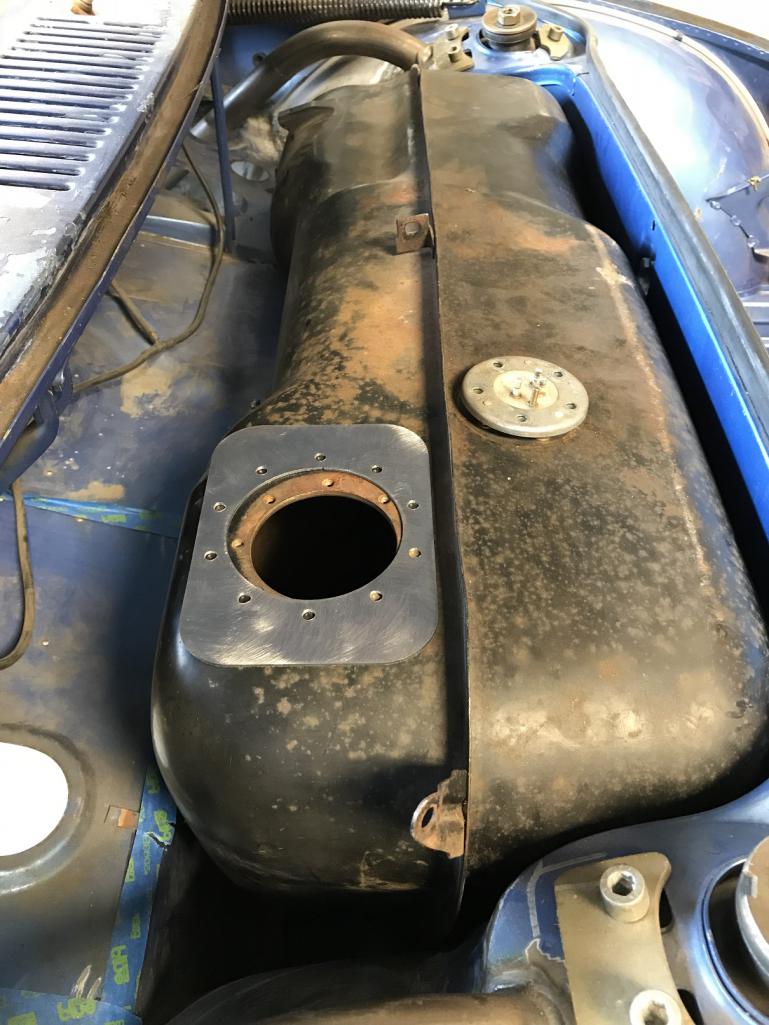
|
|
|
|
| ValcoOscar |
Sep 2 2018, 07:52 AM
Post
#1192
|
|
Garage Life Group: Members Posts: 2,612 Joined: 19-November 13 From: SoCal Member No.: 16,669 Region Association: Southern California |
QUOTE(tygaboy @ Sep 2 2018, 06:45 AM) Then moved on to making a new plate to mount the in-tank fuel pump. This will get welded to the tank in place of the filler, which will be relocated. Using the plasma table really does feel like cheating. Nice Chris- If using a plasma table makes you a feel like a cheater, I'm like Kent. A repeat offender relying on some of my shop talent when pressed. Your creativity is mind blowing. Love this thread. Oscar @76-914 |
|
|
|
| tygaboy |
Sep 2 2018, 10:53 AM
Post
#1193
|
|
914 Guru Group: Members Posts: 5,819 Joined: 6-October 15 From: Petaluma, CA Member No.: 19,241 Region Association: Northern California |
QUOTE(ValcoOscar @ Sep 2 2018, 06:52 AM) QUOTE(tygaboy @ Sep 2 2018, 06:45 AM) Then moved on to making a new plate to mount the in-tank fuel pump. This will get welded to the tank in place of the filler, which will be relocated. Using the plasma table really does feel like cheating. Nice Chris- If using a plasma table makes you a feel like a cheater, I'm like Kent. A repeat offender relying on some of my shop talent when pressed. Your creativity is mind blowing. Love this thread. Oscar @76-914 Oscar - You are too kind... Thanks for the generous compliment. |
|
|
|
| tygaboy |
Sep 2 2018, 02:20 PM
Post
#1194
|
|
914 Guru Group: Members Posts: 5,819 Joined: 6-October 15 From: Petaluma, CA Member No.: 19,241 Region Association: Northern California |
More panel fab. This time, its the piece that'll serve as the front bulkhead for the fuel lines.
I'm figuring out better processes for pressing the raised sections: I cut the female piece sized exactly the same as the panel. Then I just sharpied where the male piece needs to sit. Much simpler to set up and virtually guarantees a great result. Attached thumbnail(s) 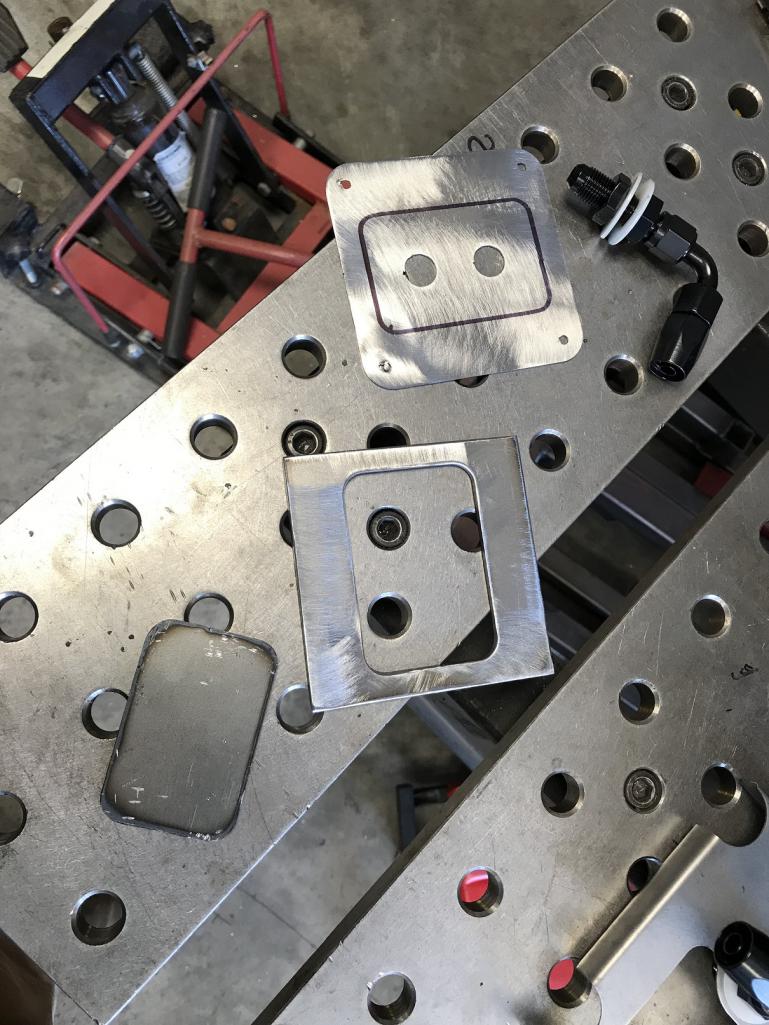 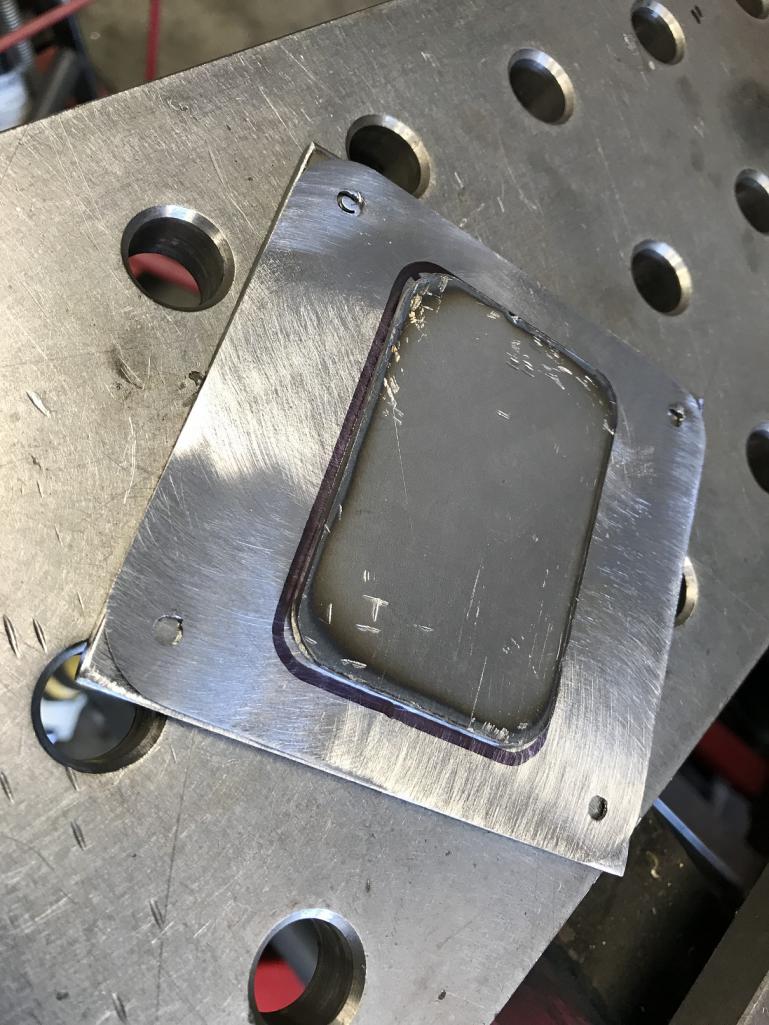
|
|
|
|
| tygaboy |
Sep 2 2018, 02:22 PM
Post
#1195
|
|
914 Guru Group: Members Posts: 5,819 Joined: 6-October 15 From: Petaluma, CA Member No.: 19,241 Region Association: Northern California |
PRESS and...
Presto! (see what I did there? (IMG:style_emoticons/default/laugh.gif) ) Turned out nicely. Attached thumbnail(s) 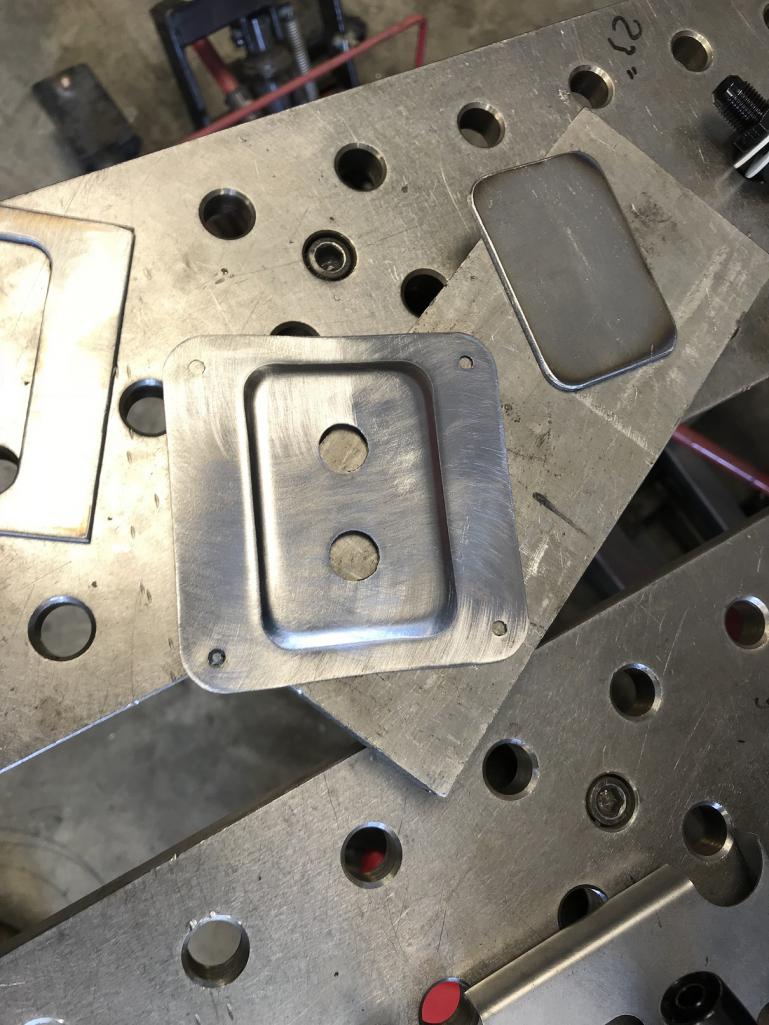
|
|
|
|
| tygaboy |
Sep 2 2018, 02:24 PM
Post
#1196
|
|
914 Guru Group: Members Posts: 5,819 Joined: 6-October 15 From: Petaluma, CA Member No.: 19,241 Region Association: Northern California |
Next, it's time to fit the fittings to see how they fit. Hoping they won't give me fits.... wait, what?
Attached thumbnail(s) 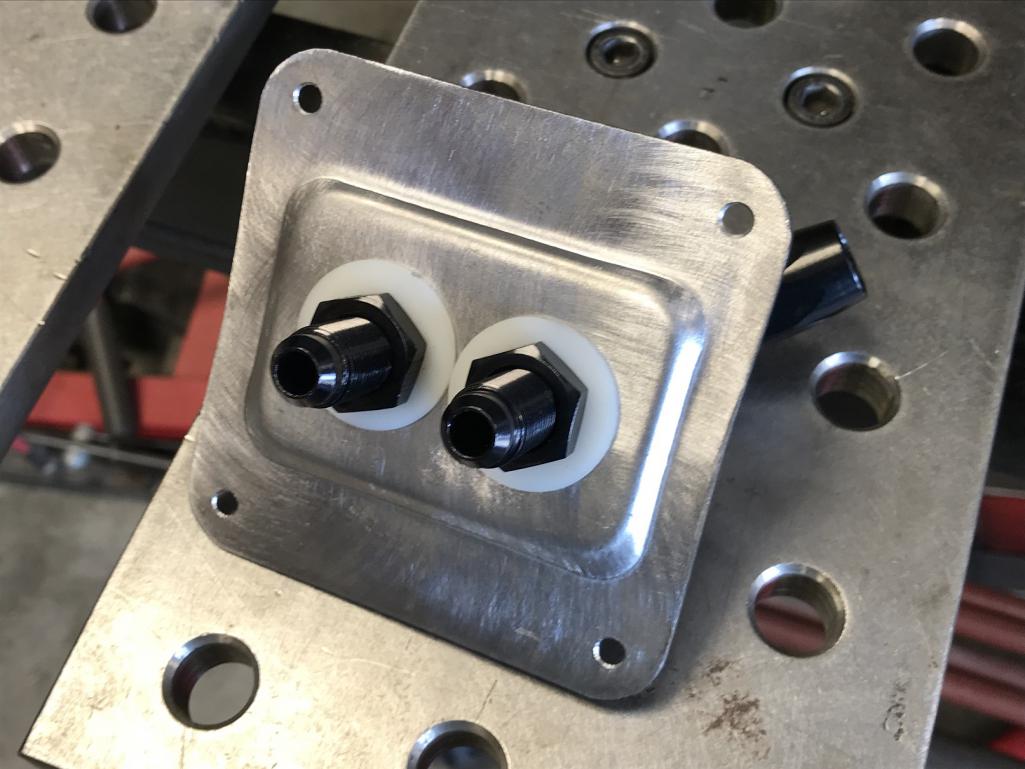 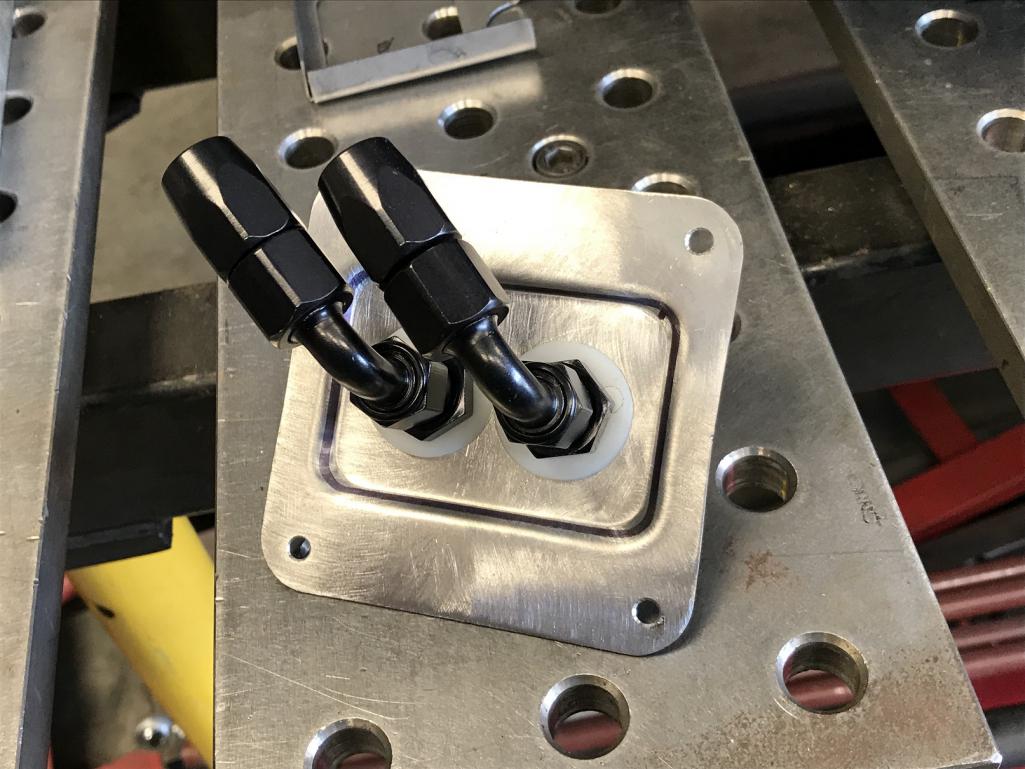
|
|
|
|
| tygaboy |
Sep 2 2018, 02:25 PM
Post
#1197
|
|
914 Guru Group: Members Posts: 5,819 Joined: 6-October 15 From: Petaluma, CA Member No.: 19,241 Region Association: Northern California |
Just set in place to see what's what. The panel will sit a bit higher once it's bolted in, but you get the idea.
Attached thumbnail(s) 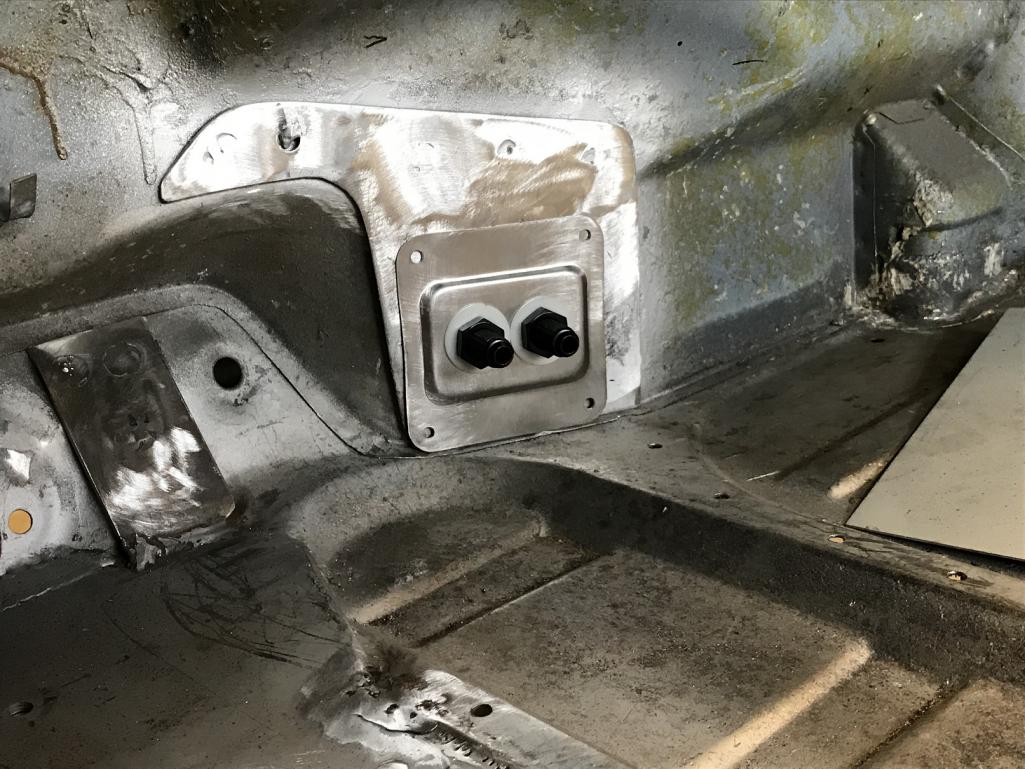
|
|
|
|
| tygaboy |
Sep 2 2018, 02:28 PM
Post
#1198
|
|
914 Guru Group: Members Posts: 5,819 Joined: 6-October 15 From: Petaluma, CA Member No.: 19,241 Region Association: Northern California |
And the tank side. It'll be soft lines from here up to the pump. One supply, one return.
Attached thumbnail(s) 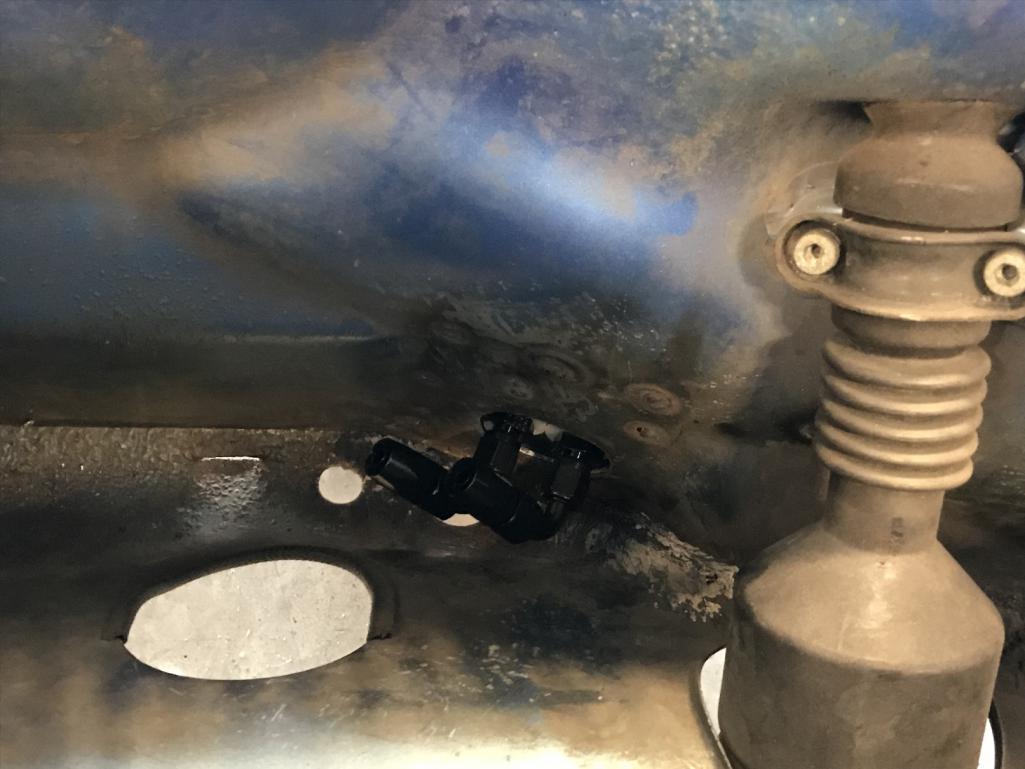
|
|
|
|
| 914forme |
Sep 2 2018, 03:49 PM
Post
#1199
|
|
Times a wastin', get wrenchin'! Group: Members Posts: 3,899 Joined: 24-July 04 From: Dayton, Ohio Member No.: 2,388 Region Association: None |
Okay I got it, the picture left out one detail, the upper upper die, or that flat piece that sets onto of the 10ga plate that presses down.
I like the setup here, and the bulk head for the fuel lines. Same general setup going inlace at the back of the cabin? And if you think a plasma table is cheating then keep right on doing it, as the end product is worth the "cheat". |
|
|
|
| tygaboy |
Sep 2 2018, 04:03 PM
Post
#1200
|
|
914 Guru Group: Members Posts: 5,819 Joined: 6-October 15 From: Petaluma, CA Member No.: 19,241 Region Association: Northern California |
"Tunnel Vision"
The stiffening plate at the front is 10 ga - thick enough to support threads. So a quick mark/drill/tap and the bulkhead is finished. Attached thumbnail(s) 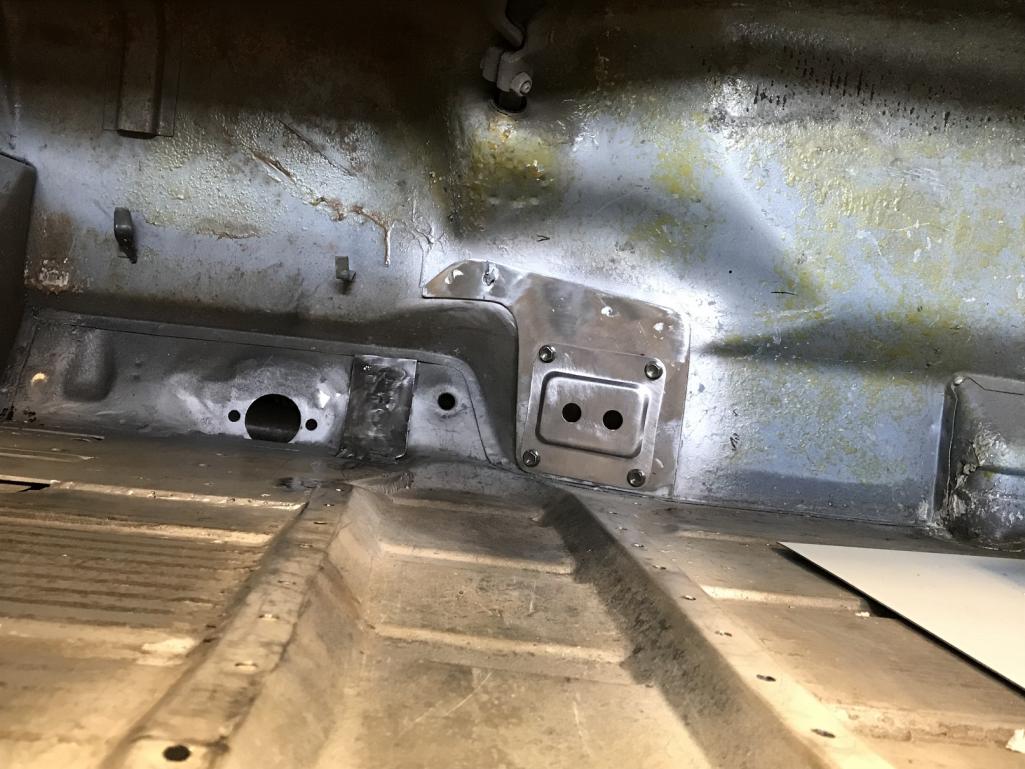
|
|
|
|
|
1 User(s) are reading this topic (1 Guests and 0 Anonymous Users)
0 Members:

|
Lo-Fi Version | Time is now: 29th April 2026 - 10:07 AM |
Invision Power Board
v9.1.4 © 2026 IPS, Inc.