|
|
|
Porsche, and the Porsche crest are registered trademarks of Dr. Ing. h.c. F. Porsche AG.
This site is not affiliated with Porsche in any way. Its only purpose is to provide an online forum for car enthusiasts. All other trademarks are property of their respective owners. |
|
|

  |

| tygaboy |
 Dec 2 2018, 04:11 PM Dec 2 2018, 04:11 PM
Post
#1361
|
|
914 Guru  Group: Members Posts: 5,819 Joined: 6-October 15 From: Petaluma, CA Member No.: 19,241 Region Association: Northern California |
The remnants of sneaking up on the desired fit.
I always snip then pick up the off cut. You DO NOT want to step on one of those things, believe me. Then to get the desired corner radius, I lay the edge on the 1" tube and use the nylon mallet to just drop the edge of the part. Attached thumbnail(s) 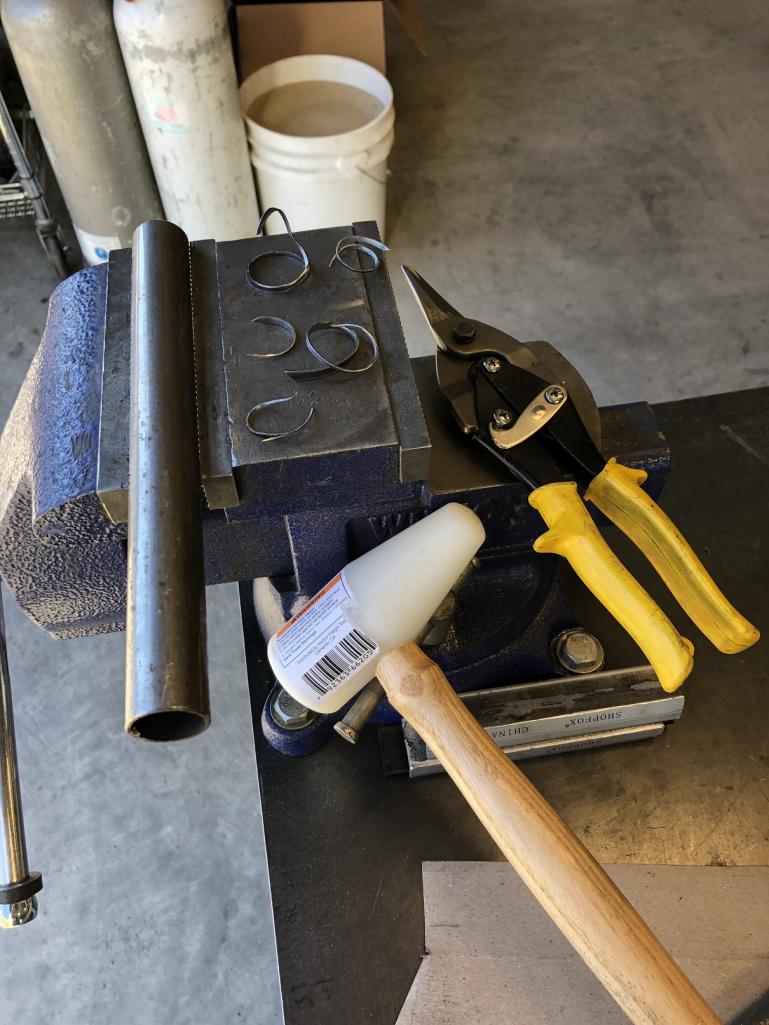
|
   |

 
|
| tygaboy |
Dec 2 2018, 04:13 PM
Post
#1362
|
|
914 Guru Group: Members Posts: 5,819 Joined: 6-October 15 From: Petaluma, CA Member No.: 19,241 Region Association: Northern California |
Nearly ready for tacking in place. A little bit more fitting to do. I still need to work the corners at the lower edge of the piece.
Attached thumbnail(s) 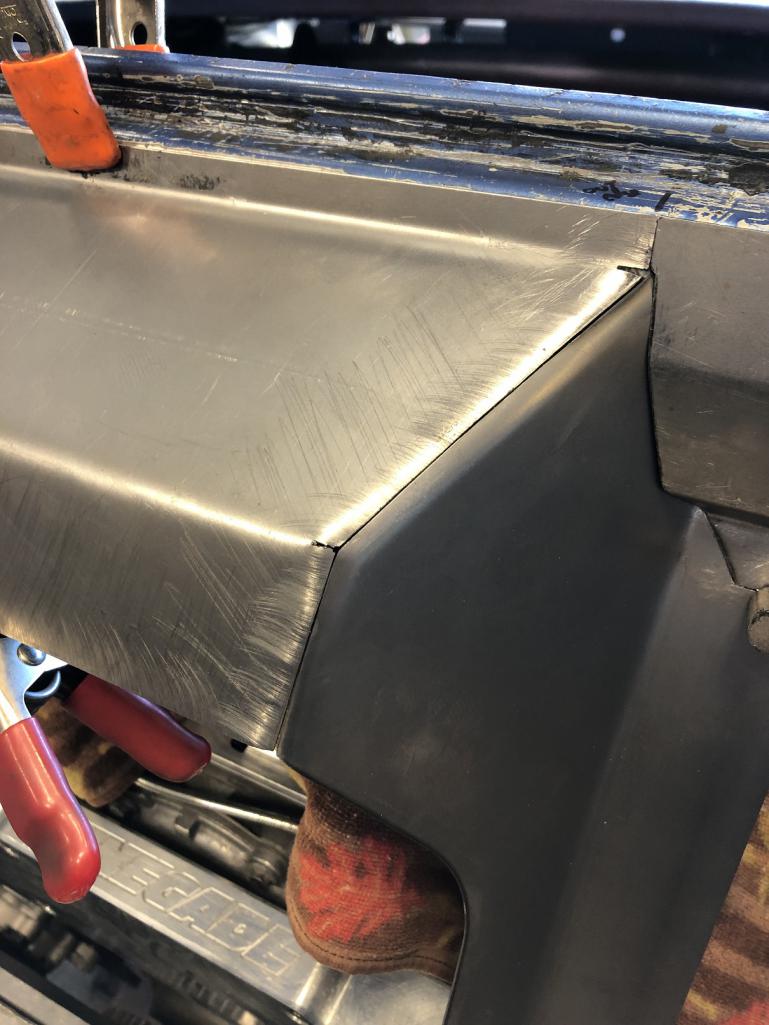 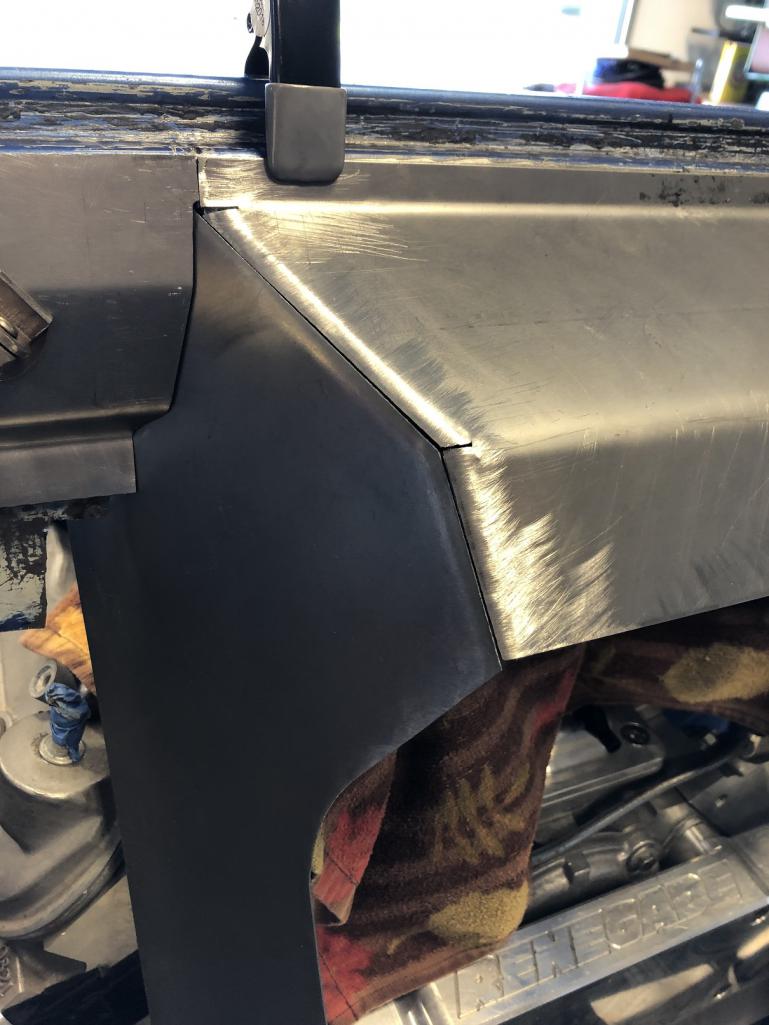
|
|
|
|
| tygaboy |
Dec 2 2018, 04:14 PM
Post
#1363
|
|
914 Guru Group: Members Posts: 5,819 Joined: 6-October 15 From: Petaluma, CA Member No.: 19,241 Region Association: Northern California |
And the overall, as it sits at this point.
Attached thumbnail(s) 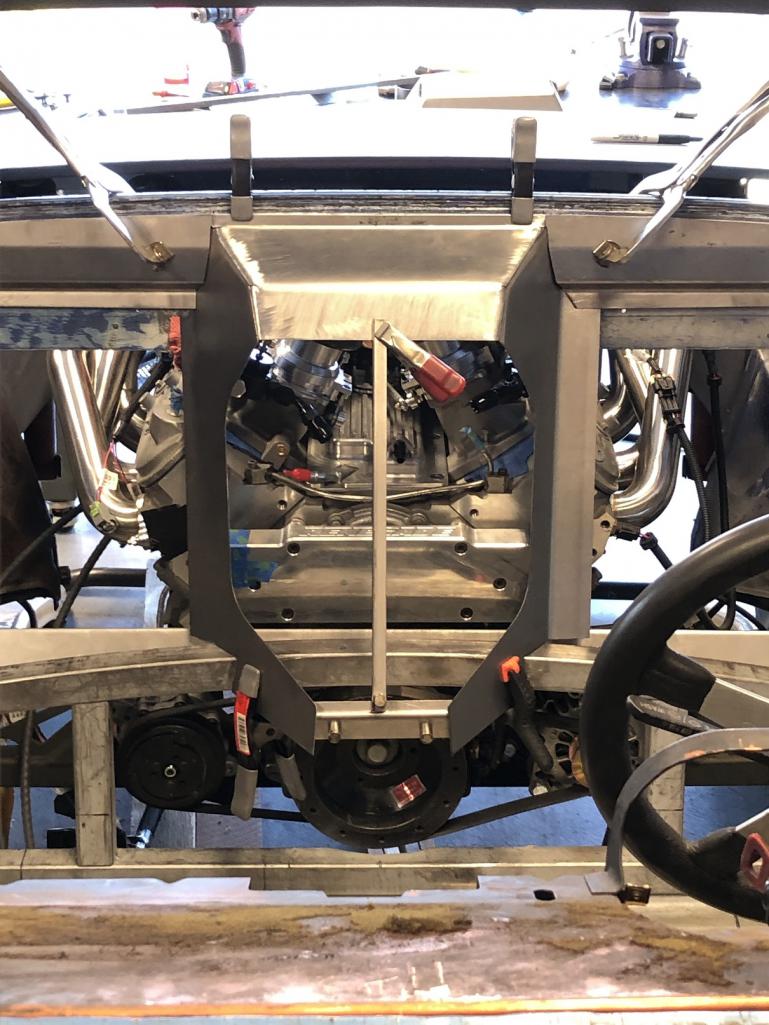
|
|
|
|
| tygaboy |
Dec 2 2018, 04:18 PM
Post
#1364
|
|
914 Guru Group: Members Posts: 5,819 Joined: 6-October 15 From: Petaluma, CA Member No.: 19,241 Region Association: Northern California |
Am I the only one seeing a similarity?
Attached image(s) 
|
|
|
|
| Matty900 |
Dec 2 2018, 04:21 PM
Post
#1365
|
|
Senior Member Group: Members Posts: 1,304 Joined: 21-February 15 From: Oregon Member No.: 18,454 Region Association: Pacific Northwest |
QUOTE(tygaboy @ Nov 30 2018, 05:40 PM)  To quote AC/DC: "Back in Black" Some stock parts, some of the items I fabbed. After nothing but raw surfaces, it's so nice to see things in a final finish. Headlight pieces should be grey (IMG:style_emoticons/default/poke.gif) Just kidding. Looks Awesome as usual Chris! Also, I think it is called (IMG:style_emoticons/default/welder.gif) Tygaboy Syndrome |
|
|
|
| dan10101 |
Dec 2 2018, 06:07 PM
Post
#1366
|
|
TORQUE-o-holic Group: Members Posts: 1,140 Joined: 29-April 03 From: Eagle Point, Or Member No.: 626 Region Association: Pacific Northwest |
QUOTE(tygaboy @ Dec 2 2018, 02:07 PM) QUOTE(dan10101 @ Dec 1 2018, 07:06 PM) I'd say there was a therapy group for all problems, but I'm afraid yours is unique. (IMG:style_emoticons/default/poke.gif) @dan10101 - Yours has to be my favorite entry on this build thread! (IMG:style_emoticons/default/av-943.gif) And, it would seem, based on those self-identifying with this same affliction, you've helped spotlight a larger population in need of some sort of help. In true 914 World fashion, I suppose we need to hold a contest to name this disease. I'll start with a few that immediately popped into my head: - Refab-itis - Do-overism - Jesusmanjustgetonwithitwouldyou Syndrome Have at it, gents. I feel another t-shirt design coming on... Whatever the name put to this disease, I would be glad to hold an online group therapy session for all those in need. After all I am fully trained in auto therapy I watched a youtube video on it once (maybe twice). |
|
|
|
| Andyrew |
Dec 3 2018, 08:25 AM
Post
#1367
|
|
Spooling.... Please wait Group: Members Posts: 13,380 Joined: 20-January 03 From: Riverbank, Ca Member No.: 172 Region Association: Northern California |
QUOTE(tygaboy @ Dec 2 2018, 02:13 PM) Nearly ready for tacking in place. A little bit more fitting to do. I still need to work the corners at the lower edge of the piece. (IMG:style_emoticons/default/blink.gif) That fit is incredible! Are you going to weld these pieces? Because if so, and take this with the right light, that seems to be an excessive amount of fitting (IMG:style_emoticons/default/poke.gif) I normally LIKE ~ 1/16" gap for butt welding but it looks like your going to tig these pieces with no filler rod! |
|
|
|
| ChrisFoley |
Dec 3 2018, 09:54 AM
Post
#1368
|
|
I am Tangerine Racing Group: Members Posts: 8,020 Joined: 29-January 03 From: Bolton, CT Member No.: 209 Region Association: None |
QUOTE(tygaboy @ Dec 2 2018, 05:11 PM) ... Then to get the desired corner radius, I lay the edge on the 1" tube and use the nylon mallet to just drop the edge of the part. What, no handmade leather faced wooden slapper? Shame on you. |
 |
|
| tygaboy |
Dec 5 2018, 11:55 AM
Post
#1369
|
|
914 Guru Group: Members Posts: 5,819 Joined: 6-October 15 From: Petaluma, CA Member No.: 19,241 Region Association: Northern California |
In the category of "while I'm at it...", I decided to see if I could up my design for the firewall doghouse and stamp in some recesses for the cover panel and its fasteners.
@914forme Stephen, here's an example of what you asked about in your PM: The blue lines are the raw panel. The white lines are edges of the male/female die set. The gap between them is ~2x the material thickness. Just a guess for the first attempt. If it works, great! If not, it's back to the drawing board and I change the size of the gap. (Or, it may not work out at all and I go another direction.) The larger purple ovals are slots that I can use to align the panel in the die set. I hope to do a trial stamping later today. Fingers crossed...! Attached thumbnail(s) 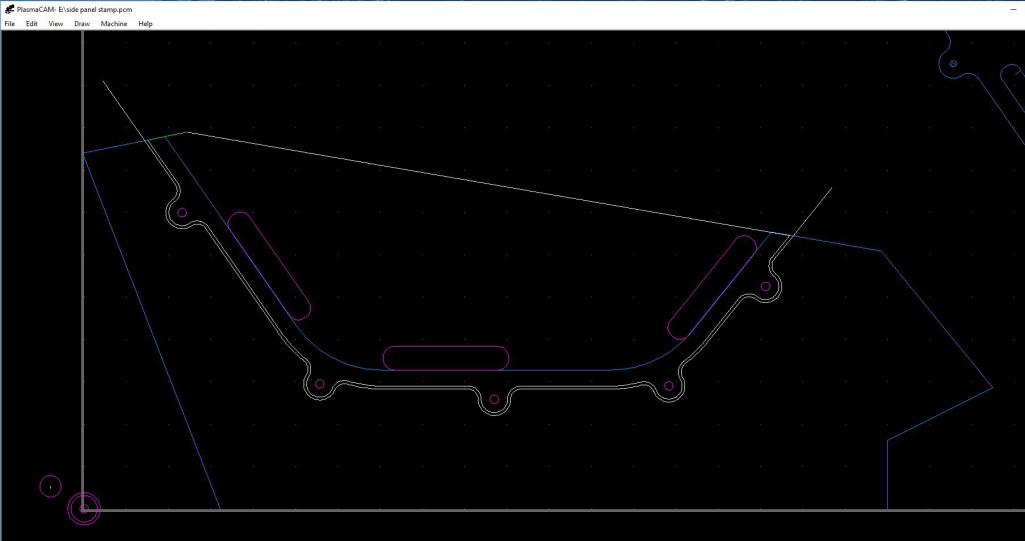
|
|
|
|
| tygaboy |
Dec 5 2018, 11:59 AM
Post
#1370
|
|
914 Guru Group: Members Posts: 5,819 Joined: 6-October 15 From: Petaluma, CA Member No.: 19,241 Region Association: Northern California |
QUOTE(ChrisFoley @ Dec 3 2018, 07:54 AM) QUOTE(tygaboy @ Dec 2 2018, 05:11 PM) ... Then to get the desired corner radius, I lay the edge on the 1" tube and use the nylon mallet to just drop the edge of the part. What, no handmade leather faced wooden slapper? Shame on you. It's true: I'm a slacker.... |
|
|
|
| bbrock |
Dec 5 2018, 01:30 PM
Post
#1371
|
|
914 Guru Group: Members Posts: 5,269 Joined: 17-February 17 From: Montana Member No.: 20,845 Region Association: Rocky Mountains |
QUOTE(tygaboy @ Dec 5 2018, 10:55 AM) In the category of "while I'm at it...", I decided to see if I could up my design for the firewall doghouse and stamp in some recesses for the cover panel and its fasteners. Yeah, good thinking because up until now this design was looking pretty half-assed. (IMG:style_emoticons/default/screwy.gif) (IMG:style_emoticons/default/lol-2.gif) |
|
|
|
| tygaboy |
Dec 5 2018, 02:41 PM
Post
#1372
|
|
914 Guru Group: Members Posts: 5,819 Joined: 6-October 15 From: Petaluma, CA Member No.: 19,241 Region Association: Northern California |
A quick trip to the metal shop for some 12 gauge plate, a bit of plasma table and some edge finishing and we have the die set.
The die material thickness determines the depth of the stamping. I want the step to be thicker as I want to make the removable cover out of .050 aluminum (maybe thicker) and I also wanted some clearance for the fasteners. Let's see how this turns out... Attached thumbnail(s) 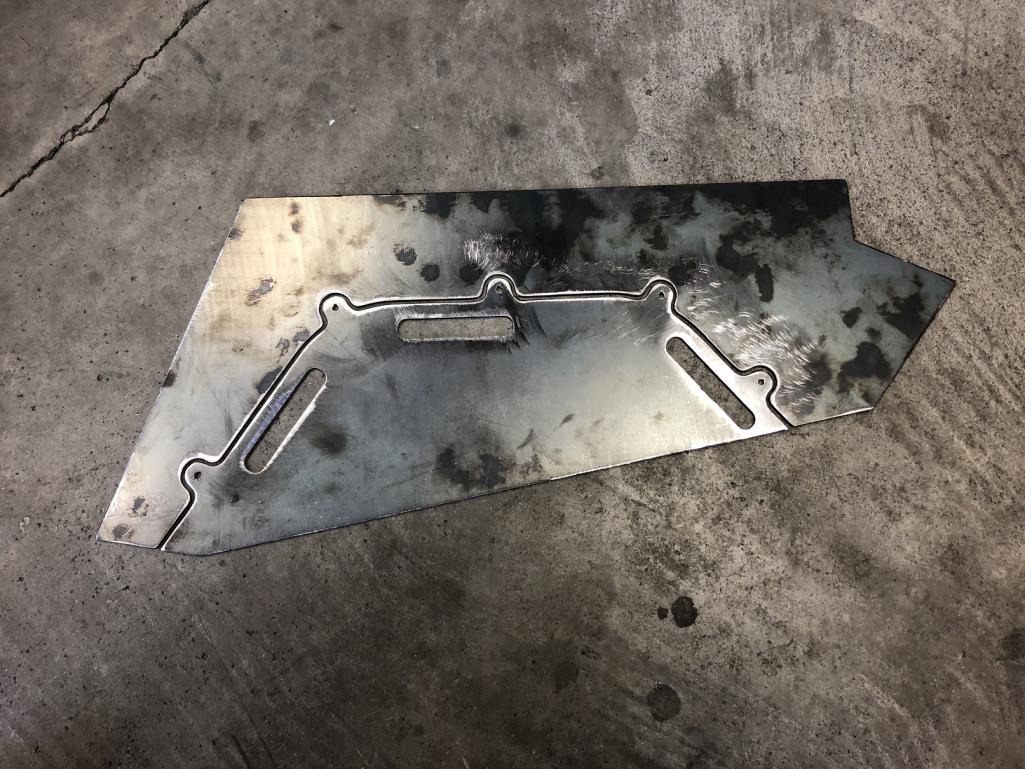
|
|
|
|
| tygaboy |
Dec 5 2018, 03:04 PM
Post
#1373
|
|
914 Guru Group: Members Posts: 5,819 Joined: 6-October 15 From: Petaluma, CA Member No.: 19,241 Region Association: Northern California |
Clamp the raw panel to the lower die, position the upper die, using the alignment slots and place in press.
(Note that the die that's under the panel is cut to the same outer dimension as the panel. This makes is simple to get the die and panel all nicely aligned.) Cross fingers, say a prayer, twirl around 3 times while chanting to the fabrication gods... Then hit the "go" button! Attached thumbnail(s) 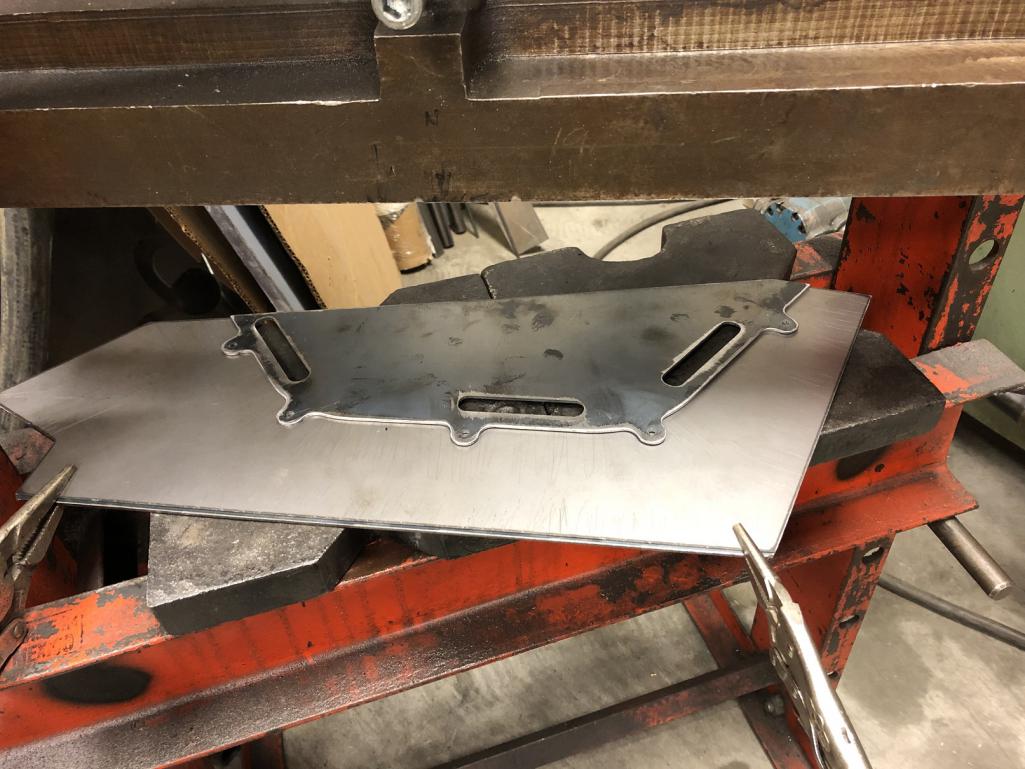
|
|
|
|
| tygaboy |
Dec 5 2018, 03:07 PM
Post
#1374
|
|
914 Guru Group: Members Posts: 5,819 Joined: 6-October 15 From: Petaluma, CA Member No.: 19,241 Region Association: Northern California |
Fresh out of the press. Hmmm... I see a bit of a non flat spot at the nub at the 10:30 ish position.
Attached thumbnail(s) 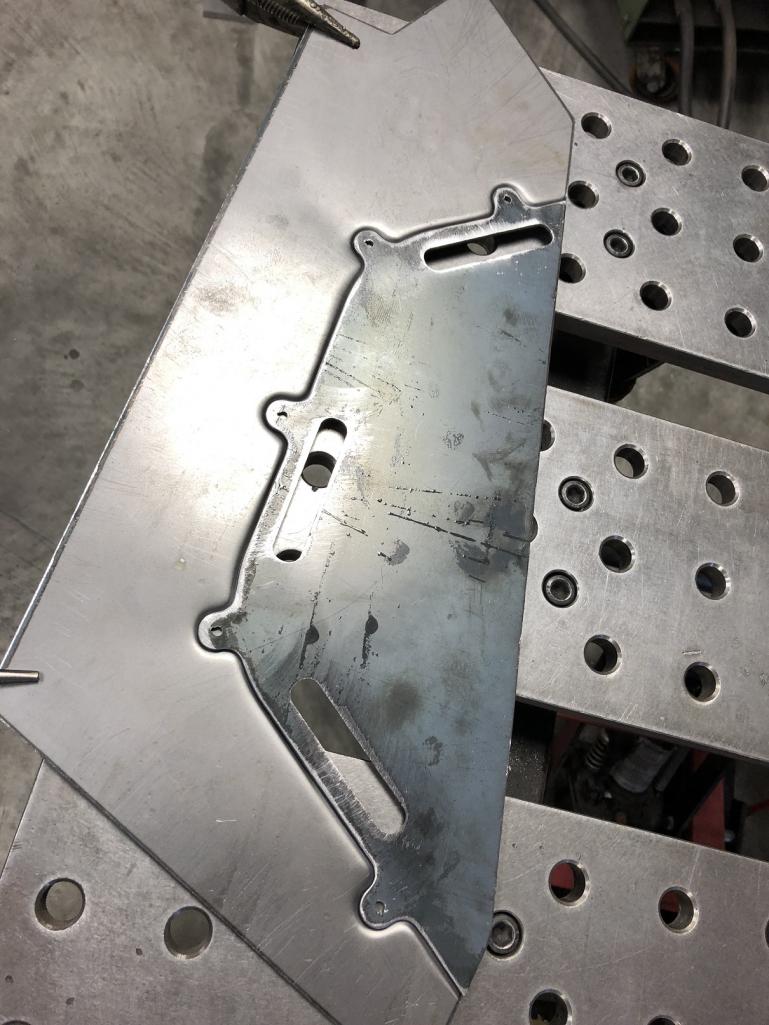
|
|
|
|
| tygaboy |
Dec 5 2018, 03:07 PM
Post
#1375
|
|
914 Guru Group: Members Posts: 5,819 Joined: 6-October 15 From: Petaluma, CA Member No.: 19,241 Region Association: Northern California |
Yep, not quite right in that one area.
Attached thumbnail(s) 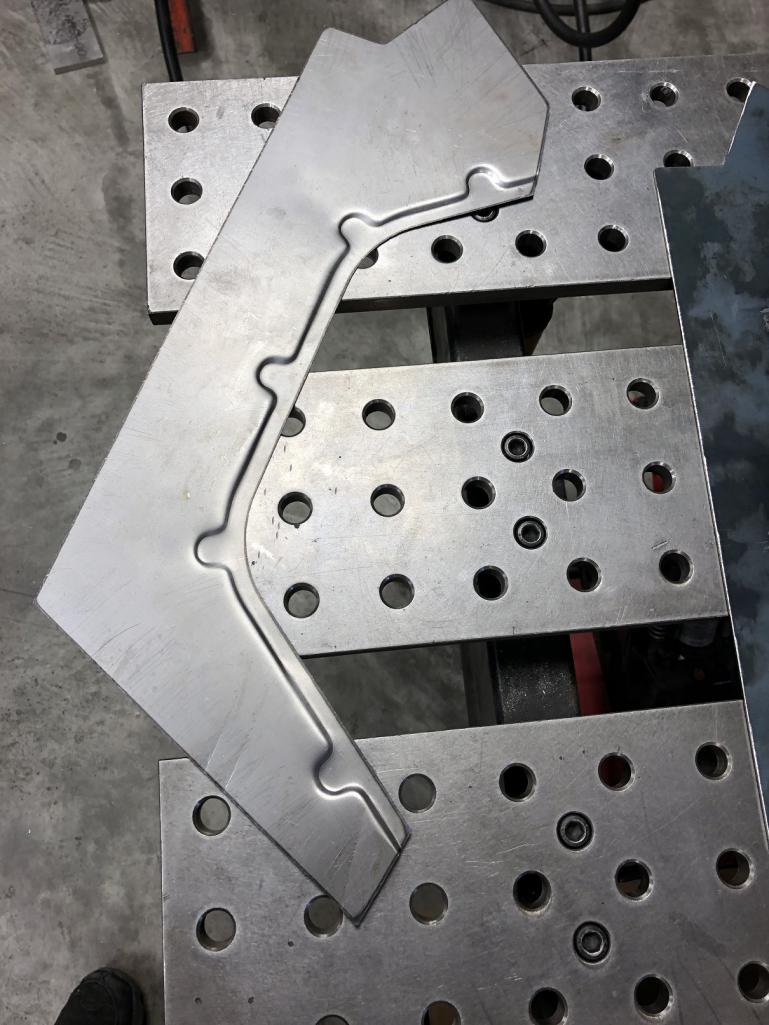
|
|
|
|
| tygaboy |
Dec 5 2018, 03:08 PM
Post
#1376
|
|
914 Guru Group: Members Posts: 5,819 Joined: 6-October 15 From: Petaluma, CA Member No.: 19,241 Region Association: Northern California |
What to do? I reassembled everything and put it back in the press. I went nub-by-nub and pressed each area again! What do you know... It worked! (IMG:style_emoticons/default/cheer.gif)
It is pretty neat to be figuring out how to do this sort of thing. I really like what it adds to the overall design. Attached thumbnail(s) 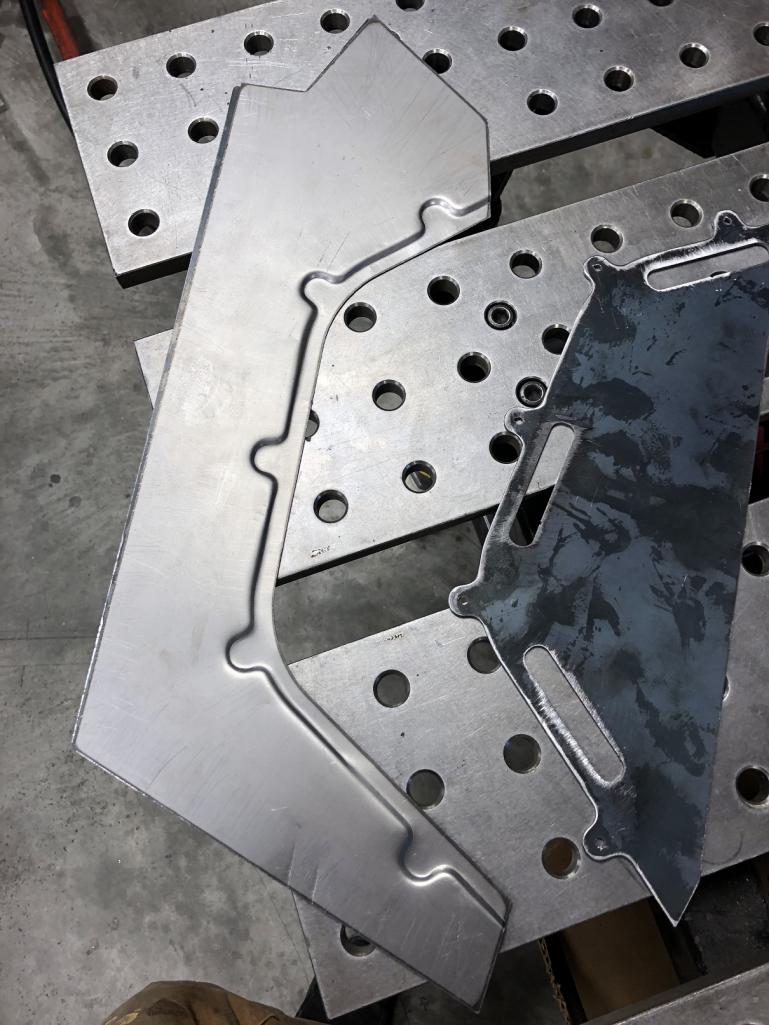
|
|
|
|
| tygaboy |
Dec 5 2018, 03:49 PM
Post
#1377
|
|
914 Guru Group: Members Posts: 5,819 Joined: 6-October 15 From: Petaluma, CA Member No.: 19,241 Region Association: Northern California |
And with a successful proof of concept, I figured I'd see if I could update the existing panels. It's a bit trickier in that I'd already fit them and added some bends. You can see that the die ended up just a bit off and one side of the fastener indent is sharper than the other.
And now that I see where the fastener indents actually end up on the trimmed and fit part, I think I'll cut a new die set and move them to "better" locations. The upper- and lower-most indents need to be farther away from the ends of the panel, IMHO. In all, a great learning experience. I proved to myself that I can execute this technique on a reasonably complex shape. I have a few other places on the car that I can use this sort of thing, too. I'm calling today a success. (IMG:style_emoticons/default/beerchug.gif) Attached thumbnail(s) 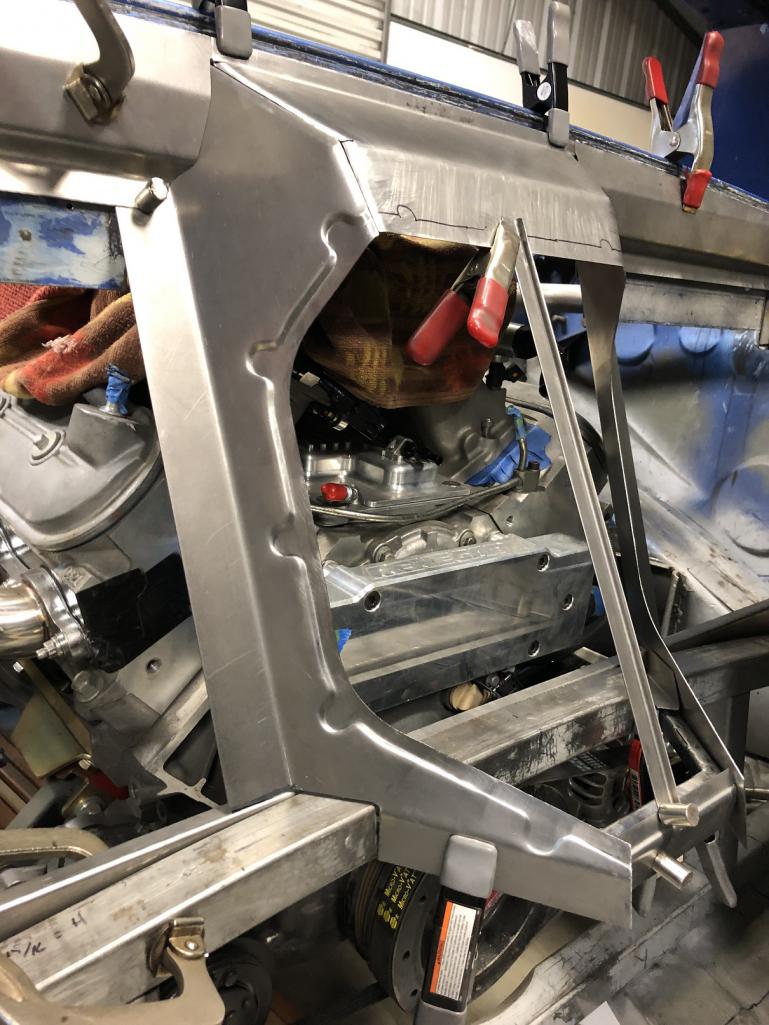
|
|
|
|
| 914forme |
Dec 5 2018, 06:22 PM
Post
#1378
|
|
Times a wastin', get wrenchin'! Group: Members Posts: 3,899 Joined: 24-July 04 From: Dayton, Ohio Member No.: 2,388 Region Association: None |
(IMG:style_emoticons/default/agree.gif) (IMG:style_emoticons/default/aktion035.gif) That is a great looking (IMG:style_emoticons/default/drooley.gif)
Thanks Chris the PM explains the process and the pictures filed in the blanks. We will talk at some point (IMG:style_emoticons/default/shades.gif) (IMG:style_emoticons/default/idea.gif) Off to do a bit of calculating, measuring, and then order some Steel and Aluminum, I really need to upgrade my press. |
|
|
|
| tygaboy |
Dec 6 2018, 05:31 PM
Post
#1379
|
|
914 Guru Group: Members Posts: 5,819 Joined: 6-October 15 From: Petaluma, CA Member No.: 19,241 Region Association: Northern California |
Some more analysis led me to updating the die set. I was after three changes:
- move the upper- and lower-most fastener recesses farther away from the corners - less depth in the step for the removable panel - a tighter radius on that step So I redesigned the die and narrowed the gap between the pieces. I also made the male die with an opening and some slots, thinking this might make aligning things a bit simpler. The last change was that I used 14 gauge vs the 12 gauge of the first set. Clearly, one of the only times I go for function over form! (IMG:style_emoticons/default/shades.gif) Attached thumbnail(s) 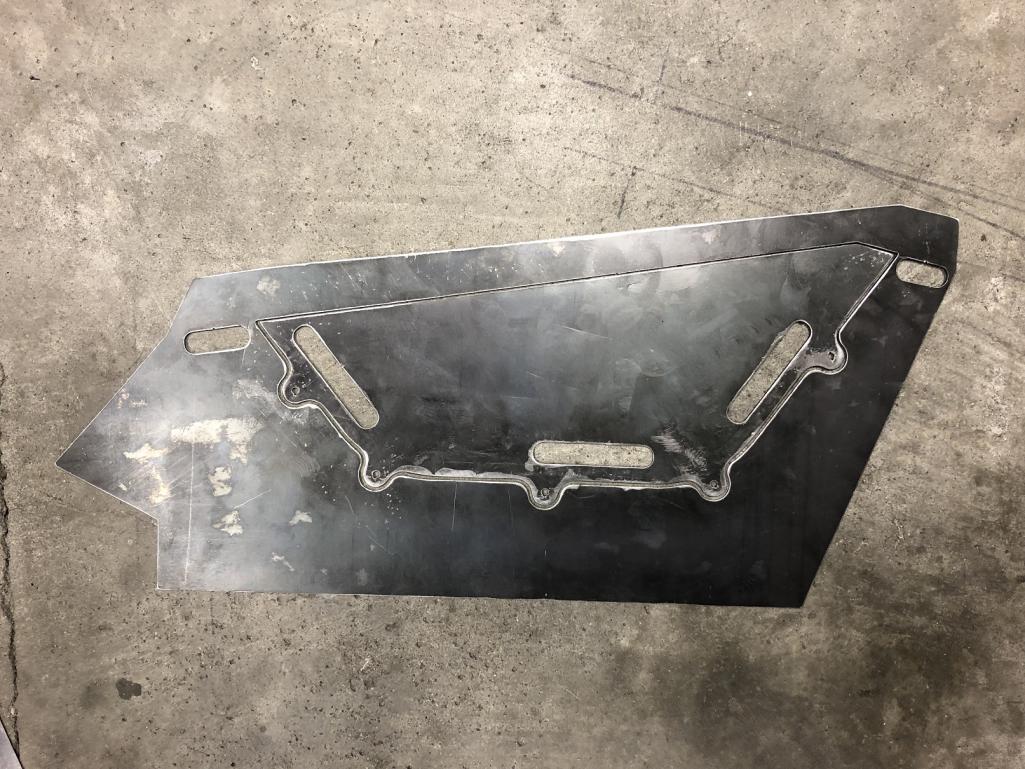 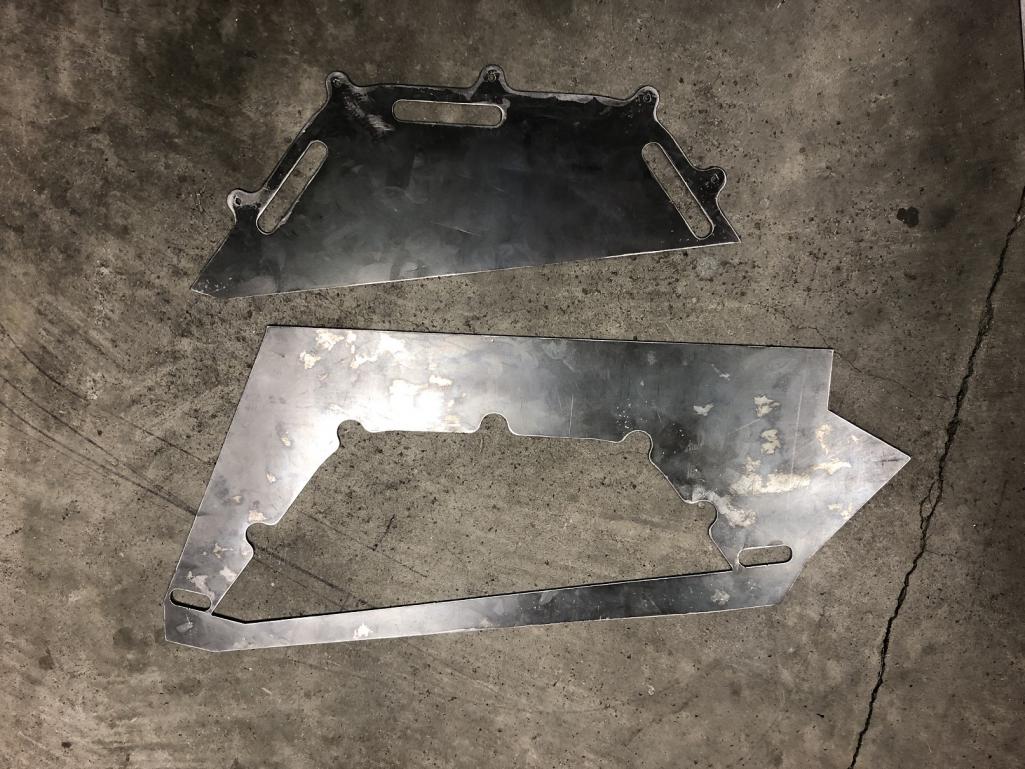
|
|
|
|
| tygaboy |
Dec 6 2018, 05:37 PM
Post
#1380
|
|
914 Guru Group: Members Posts: 5,819 Joined: 6-October 15 From: Petaluma, CA Member No.: 19,241 Region Association: Northern California |
I figured out a couple tricks that really helped: I used two blocks of 1" aluminum to sandwich the dies. These provided nice, smooth surfaces to back up the dies.
This was important in that I have to use both sides of the die set to make the mirror image side panels. These blocks eliminated any change of marring any of the die surfaces that would end up being stamped into the panels. Anyway, here they are. The step is much more crisp and the fastener areas more even. I'm really happy with how these turned out. Attached thumbnail(s) 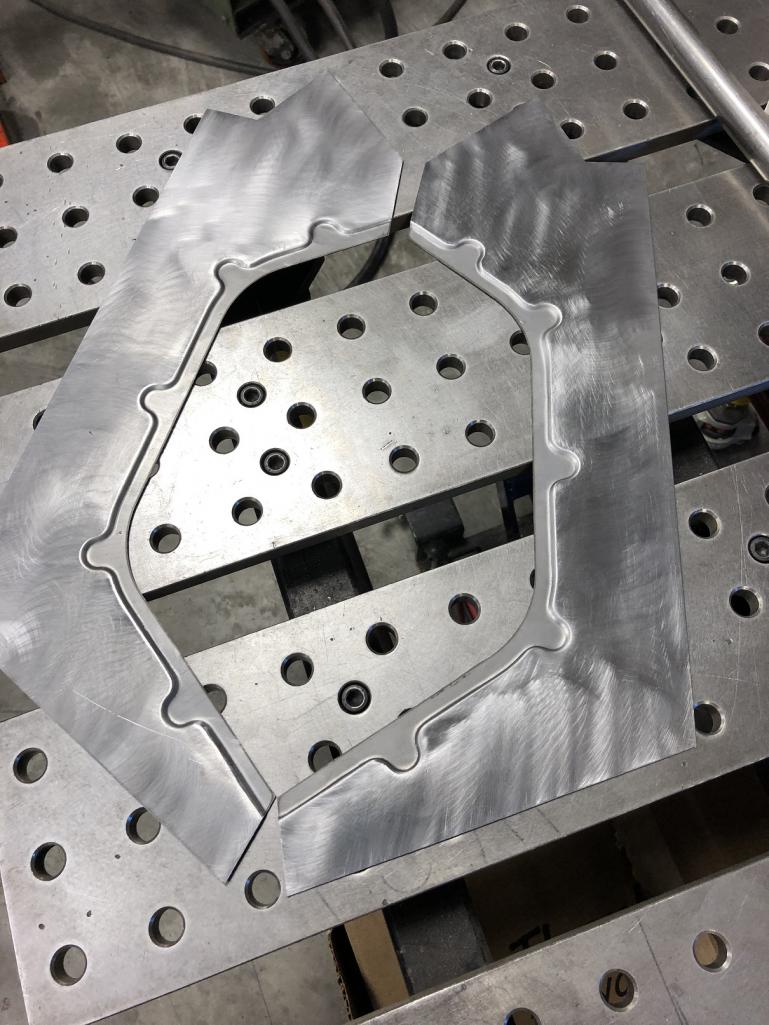 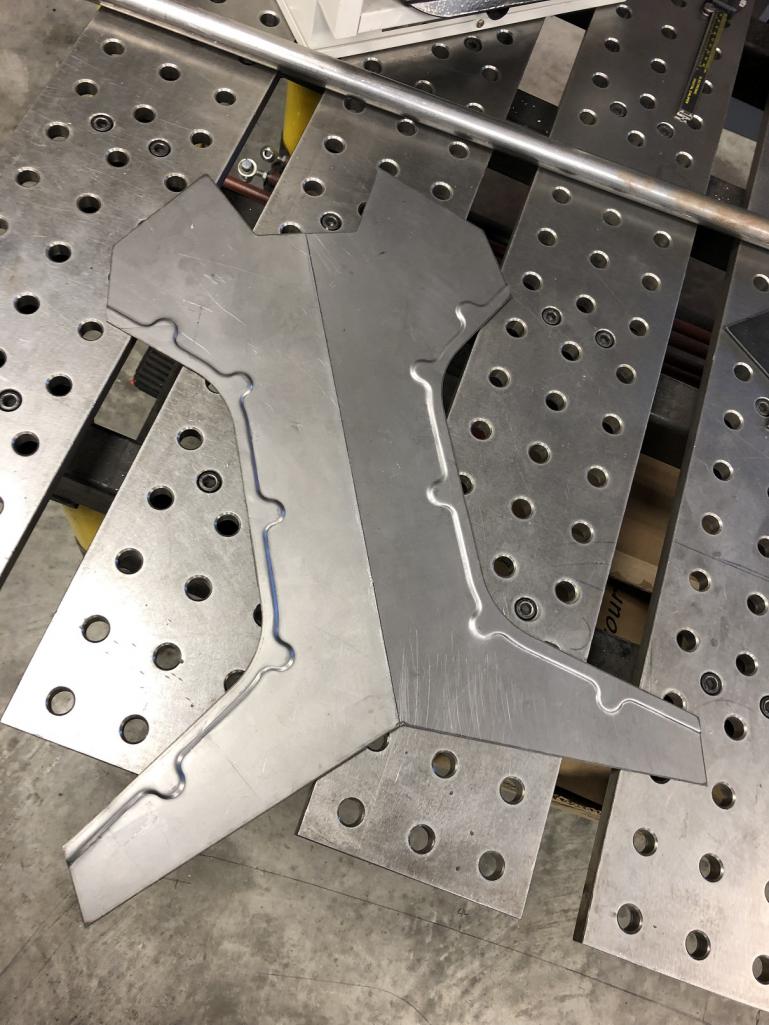
|
|
|
|
|
3 User(s) are reading this topic (3 Guests and 0 Anonymous Users)
0 Members:

|
Lo-Fi Version | Time is now: 29th April 2026 - 03:05 PM |
Invision Power Board
v9.1.4 © 2026 IPS, Inc.