|
|
|
Porsche, and the Porsche crest are registered trademarks of Dr. Ing. h.c. F. Porsche AG.
This site is not affiliated with Porsche in any way. Its only purpose is to provide an online forum for car enthusiasts. All other trademarks are property of their respective owners. |
|
|

  |

| Krieger |
 May 13 2019, 08:51 PM May 13 2019, 08:51 PM
Post
#1601
|
|
Advanced Member  Group: Members Posts: 4,825 Joined: 24-May 04 From: Santa Rosa CA Member No.: 2,104 Region Association: None |
I am relieved too! (IMG:style_emoticons/default/biggrin.gif)
|
   |

 
|
| tygaboy |
May 14 2019, 12:25 PM
Post
#1602
|
|
914 Guru Group: Members Posts: 5,680 Joined: 6-October 15 From: Petaluma, CA Member No.: 19,241 Region Association: Northern California |
QUOTE(Krieger @ May 13 2019, 07:51 PM)  Well, then I suppose it's good I called them reliefs and not depressions! (IMG:style_emoticons/default/poke.gif) (IMG:style_emoticons/default/laugh.gif) |
 |
|
| tygaboy |
May 14 2019, 12:29 PM
Post
#1603
|
|
914 Guru Group: Members Posts: 5,680 Joined: 6-October 15 From: Petaluma, CA Member No.: 19,241 Region Association: Northern California |
Today I got the rivnuts installed so the removable cover can officially be removed!
Then I started playing with fasteners: - Countersunk washer with a flathead? - Countersunk washer with button head? - Just a button head? (Geez, talk about a first world problem...) Attached thumbnail(s) 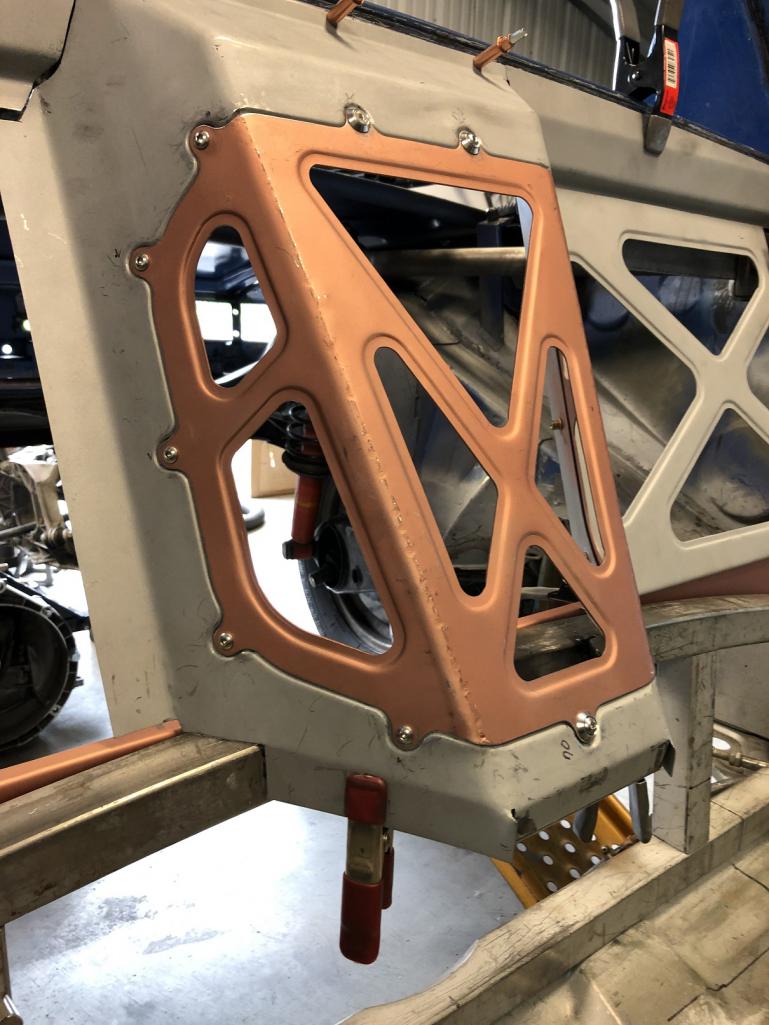 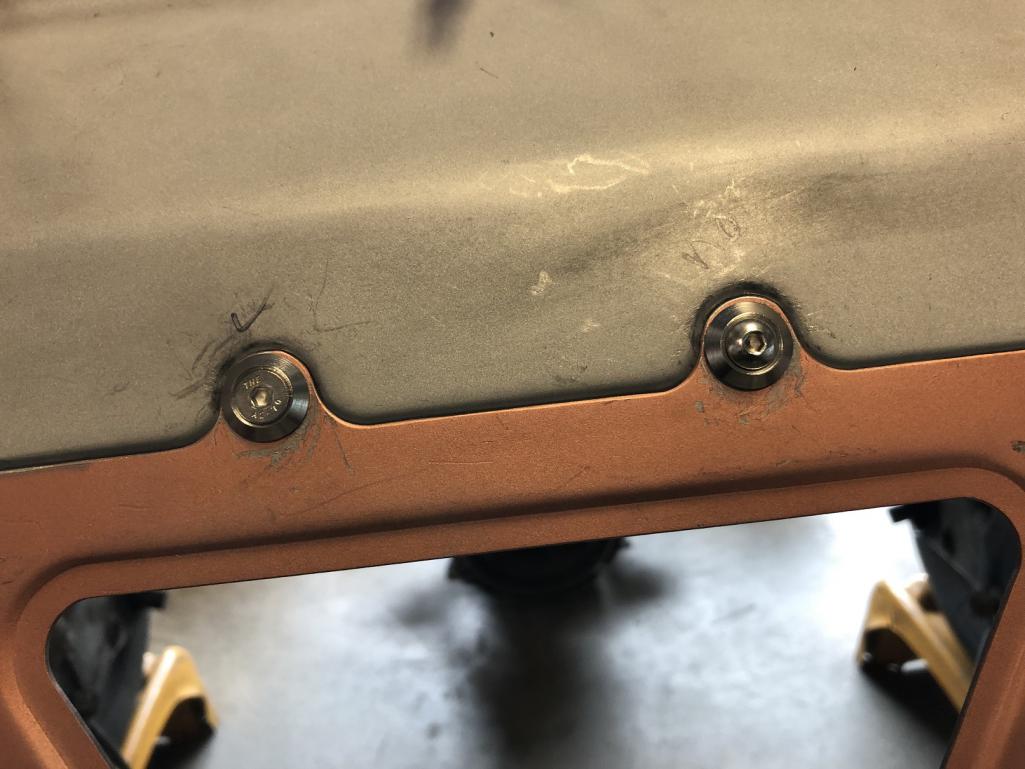
|
|
|
|
| Andyrew |
May 14 2019, 01:00 PM
Post
#1604
|
|
Spooling.... Please wait Group: Members Posts: 13,380 Joined: 20-January 03 From: Riverbank, Ca Member No.: 172 Region Association: Northern California |
Countersunk washer with a flathead is my favorite (IMG:style_emoticons/default/smile.gif)
|
|
|
|
| tygaboy |
May 17 2019, 05:22 PM
Post
#1605
|
|
914 Guru Group: Members Posts: 5,680 Joined: 6-October 15 From: Petaluma, CA Member No.: 19,241 Region Association: Northern California |
With the upper fire wall pretty much set to go, I moved to the lower section.
I wasn't in love with the center panel I'd made earlier so... Here's the latest version in comparison. I enlarged the shifter cable pass through assembly and redesigned some of the main panel. It's a much better fit. And there's the obvious matchy-match stamping/stiffening design. As with most of the upper firewall, this won't be able to be seen unless the seats are out of the car. But I really enjoy the details and the design, cutting, fitting and welding are all great practice for things that will be more visible. Attached thumbnail(s) 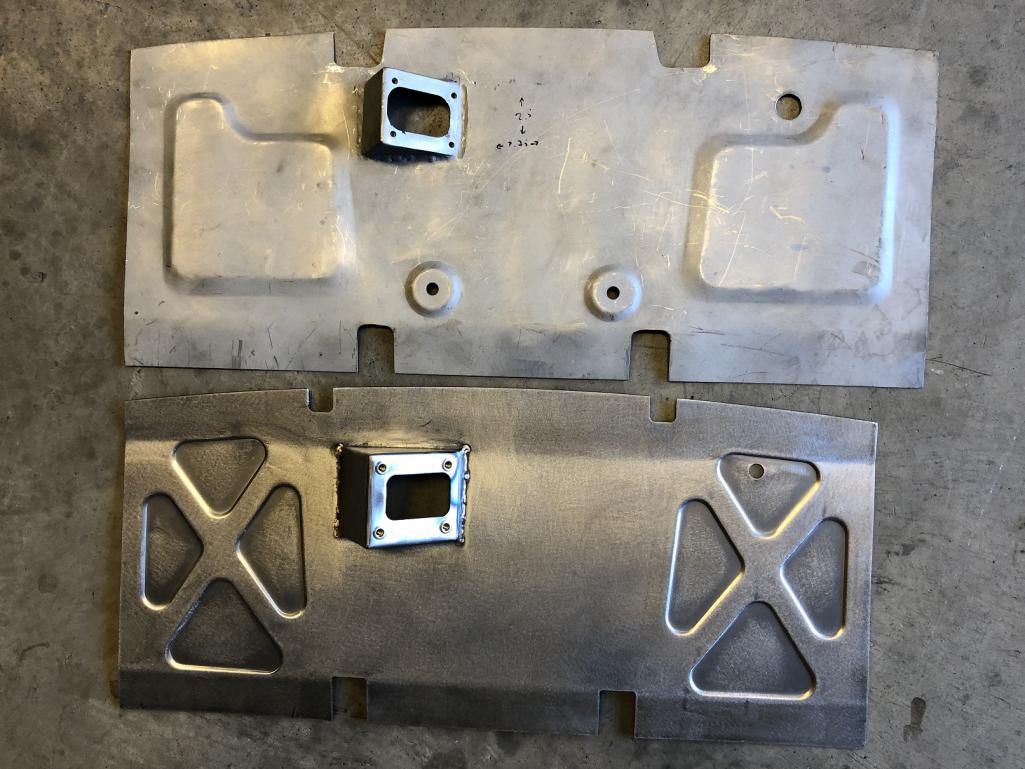
|
|
|
|
| tygaboy |
May 17 2019, 05:22 PM
Post
#1606
|
|
914 Guru Group: Members Posts: 5,680 Joined: 6-October 15 From: Petaluma, CA Member No.: 19,241 Region Association: Northern California |
Mocked in place.
Note that I've also started a new version of the console so you're seeing the rear part of the lower section, which is all I have done so far. Attached thumbnail(s) 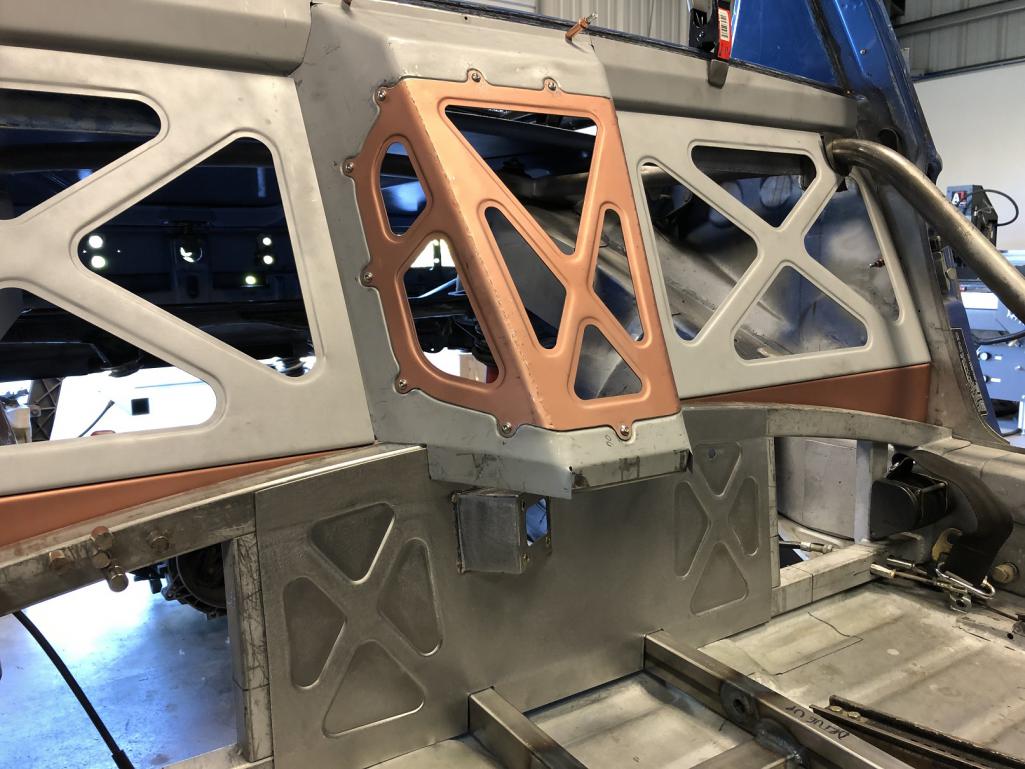 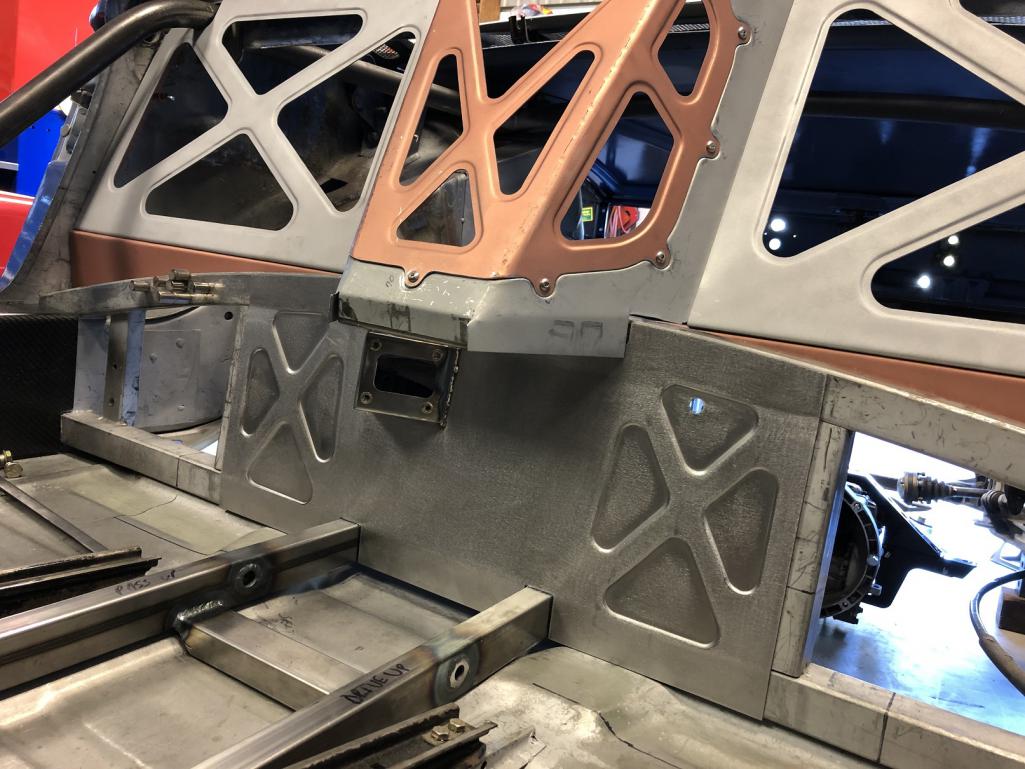
|
|
|
|
| tygaboy |
May 17 2019, 05:27 PM
Post
#1607
|
|
914 Guru Group: Members Posts: 5,680 Joined: 6-October 15 From: Petaluma, CA Member No.: 19,241 Region Association: Northern California |
And here are details on the updated shifter cable pass-through:
- rivnuts instead of nut welded on the back - it gets a nice little rubber seal around the opening - there a split grommets that go around the shift cables and are then captured by this contraption. - the final cover piece helps seal the seam of the grommet plate and every thing gets held in place by the button heads. Fiddly, you say? Sounds about right for me! (IMG:style_emoticons/default/laugh.gif) Attached thumbnail(s) 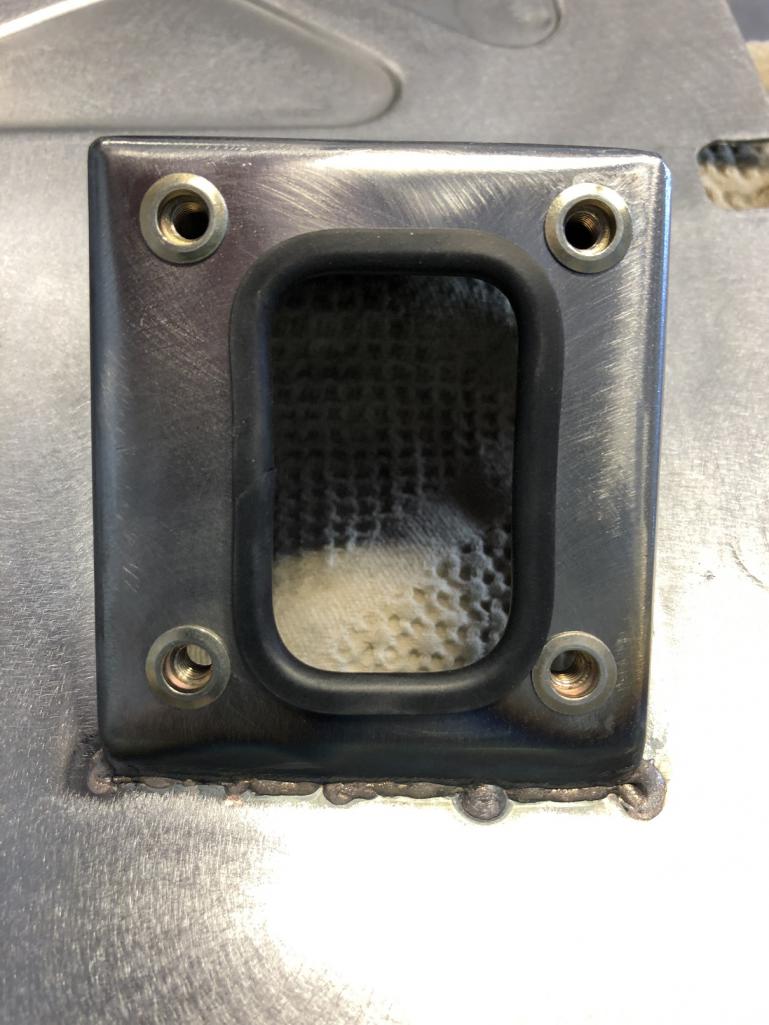 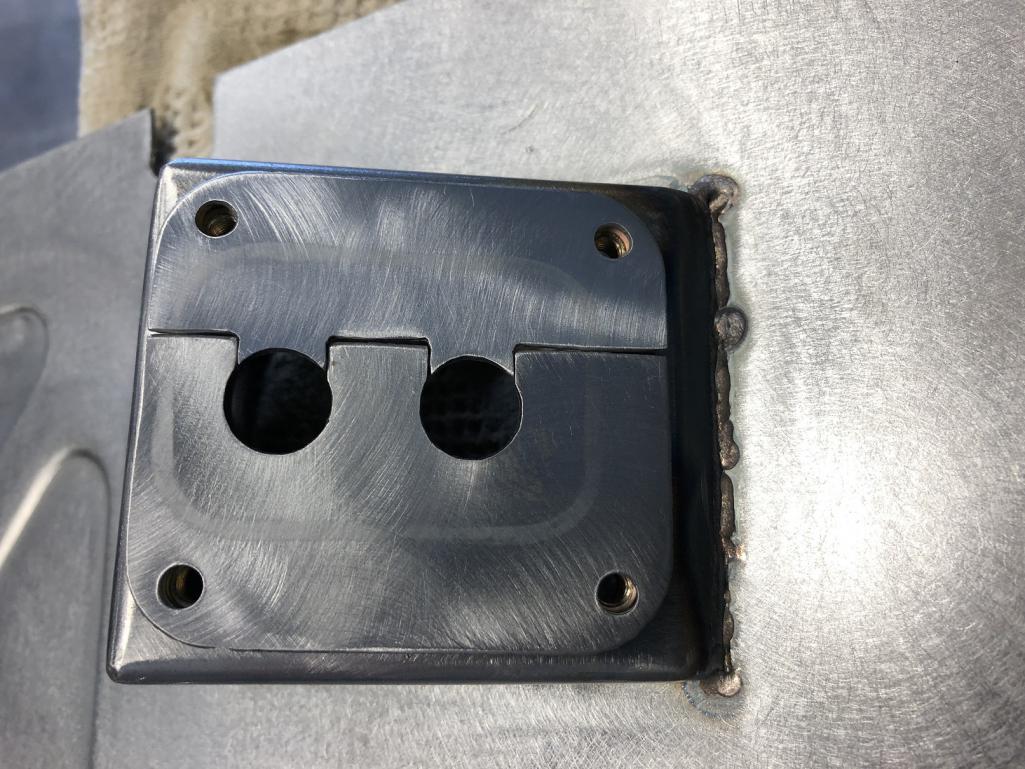 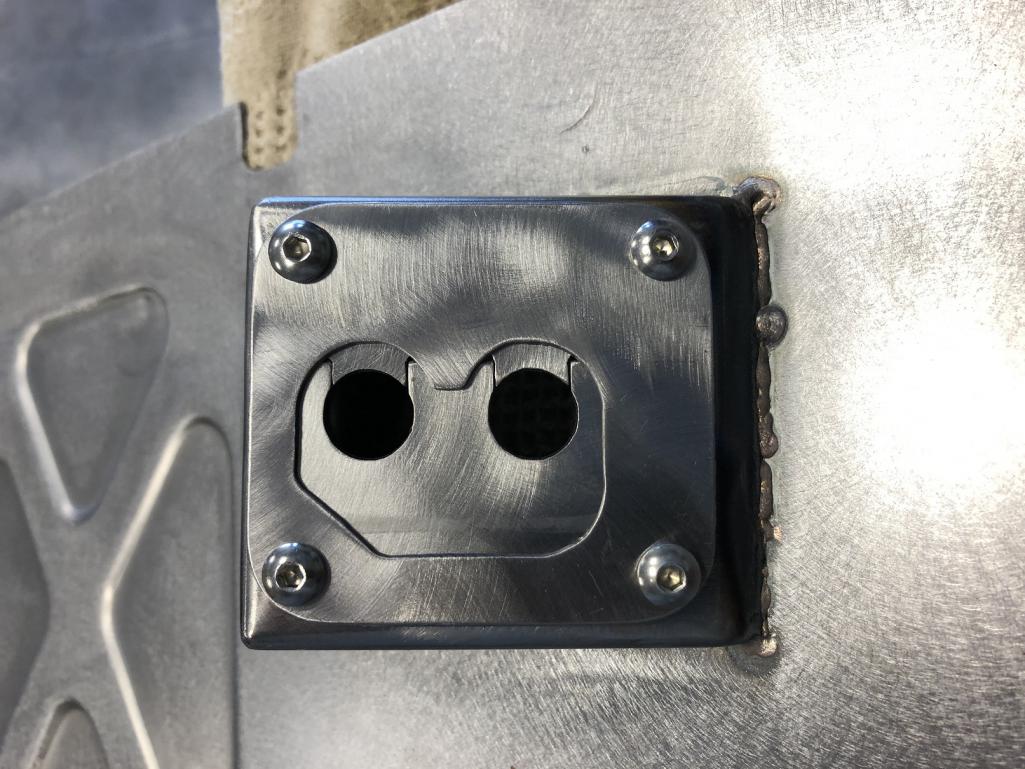
|
|
|
|
| Andyrew |
May 17 2019, 08:25 PM
Post
#1608
|
|
Spooling.... Please wait Group: Members Posts: 13,380 Joined: 20-January 03 From: Riverbank, Ca Member No.: 172 Region Association: Northern California |
Jealous!!
Very nice work there! Never thought of going about a pass through in that fashion. That's just perfect and simple! |
|
|
|
| tygaboy |
May 20 2019, 06:27 PM
Post
#1609
|
|
914 Guru Group: Members Posts: 5,680 Joined: 6-October 15 From: Petaluma, CA Member No.: 19,241 Region Association: Northern California |
Got the V2 console base done today.
Attached thumbnail(s)  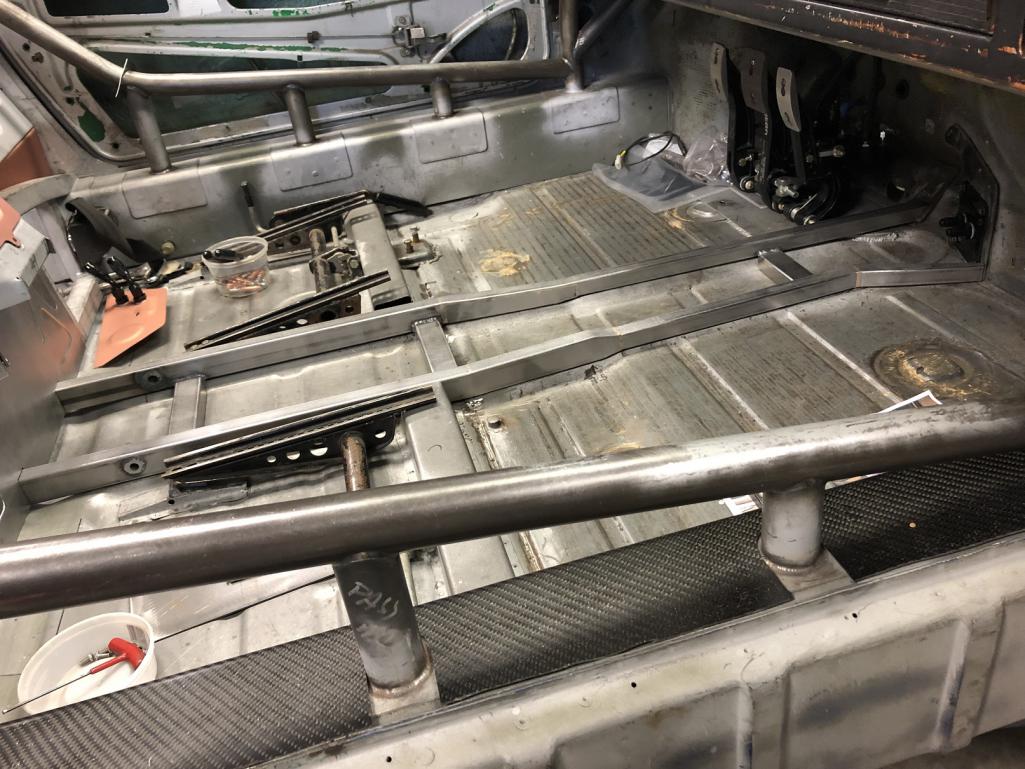
|
|
|
|
| tygaboy |
May 21 2019, 04:51 PM
Post
#1610
|
|
914 Guru Group: Members Posts: 5,680 Joined: 6-October 15 From: Petaluma, CA Member No.: 19,241 Region Association: Northern California |
I'm trying a new-ish approach: Pick one task/item to accomplish each day.
Or, cheat and break things into smaller task so each one can be accomplished in a day! It gives me a far greater sense that I'm getting things done. Yesterday, it was the new console lower frame. Today, it's the bulkhead at the top of the console. In mocking things up, it became clear that the slight downward tip the bulkhead frame has is going to make it that much more fiddly to route the hard lines for the fuel. I'd have to bend them over 90 degrees (total) unless that bulkhead was flat or tipped the other way. So... I cut up the bulkhead panel I'd made earlier, made a new outer and used silicon bronze rod with the TIG to resolve the problem. And in keeping with the "it's always something", the rear-most edge of this bulkhead will be fitted to the top of the curved firewall cross member. Hard to see much in the pic but it sits in contact all the way around: Flat up front, curved in the back. (Hey, that sorta reminds me of my Jr. Prom date! (IMG:style_emoticons/default/lol-2.gif) ) Attached thumbnail(s) 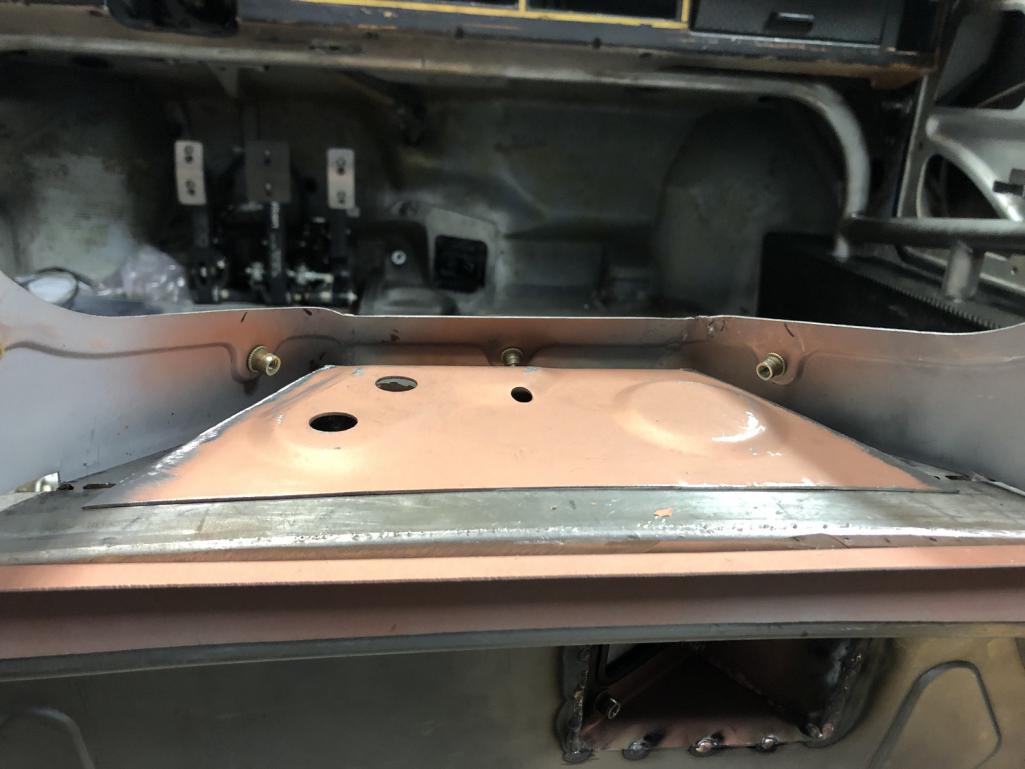
|
|
|
|
| tygaboy |
May 21 2019, 04:53 PM
Post
#1611
|
|
914 Guru Group: Members Posts: 5,680 Joined: 6-October 15 From: Petaluma, CA Member No.: 19,241 Region Association: Northern California |
Here's the completed bulkhead panel as it'll be spot welded to the bulkhead frame.
Attached thumbnail(s) 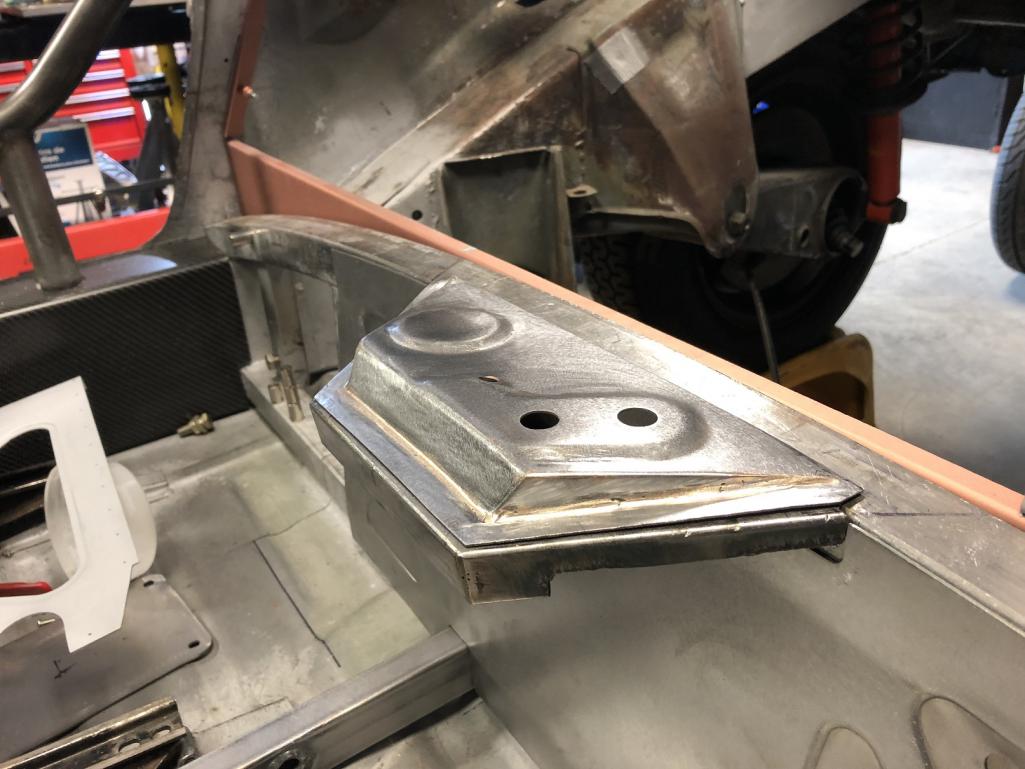
|
|
|
|
| tygaboy |
May 21 2019, 04:54 PM
Post
#1612
|
|
914 Guru Group: Members Posts: 5,680 Joined: 6-October 15 From: Petaluma, CA Member No.: 19,241 Region Association: Northern California |
You can see the angle I now have vs what it would be if I hadn't wedged it.
Attached thumbnail(s) 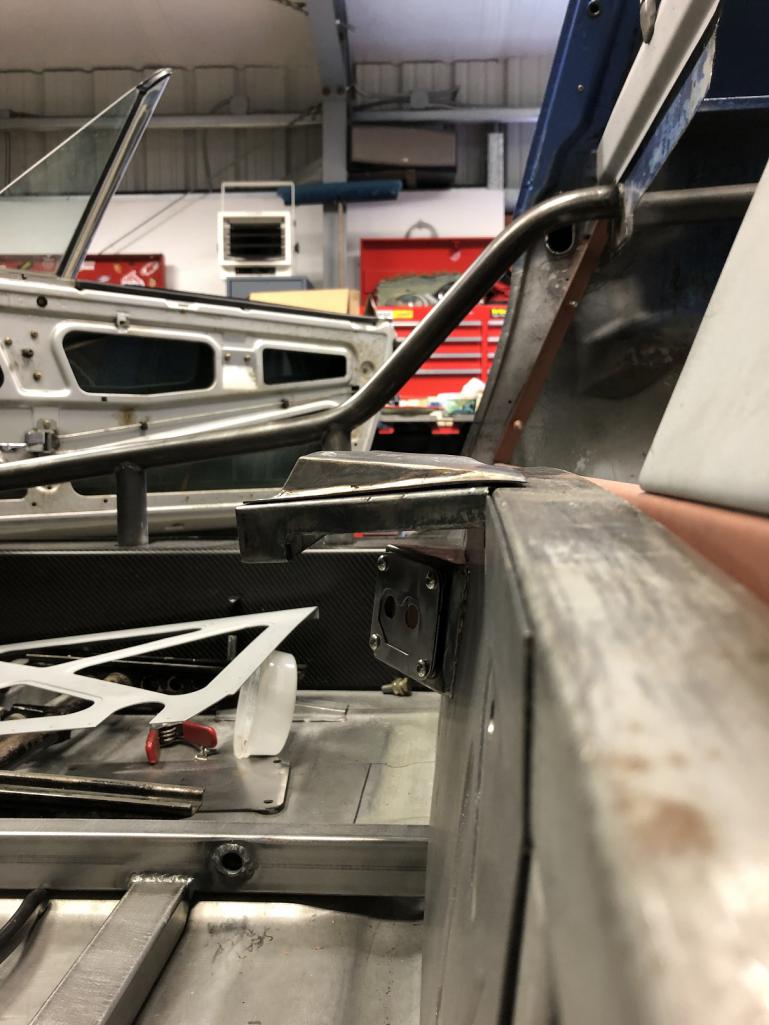
|
|
|
|
| tygaboy |
May 21 2019, 04:57 PM
Post
#1613
|
|
914 Guru Group: Members Posts: 5,680 Joined: 6-October 15 From: Petaluma, CA Member No.: 19,241 Region Association: Northern California |
And with the doghouse cover fitted. Yaaaa! All the fasteners clear!
For the nit-pickers (I'm the biggest one, remember), yes, this creates a bit of a "trench" around the panel where crap can collect. I'm calling it my custom hell hole! I'll do some head scratching to see if I can't come up with some sort of something to minimize or prevent things getting in there. Attached thumbnail(s) 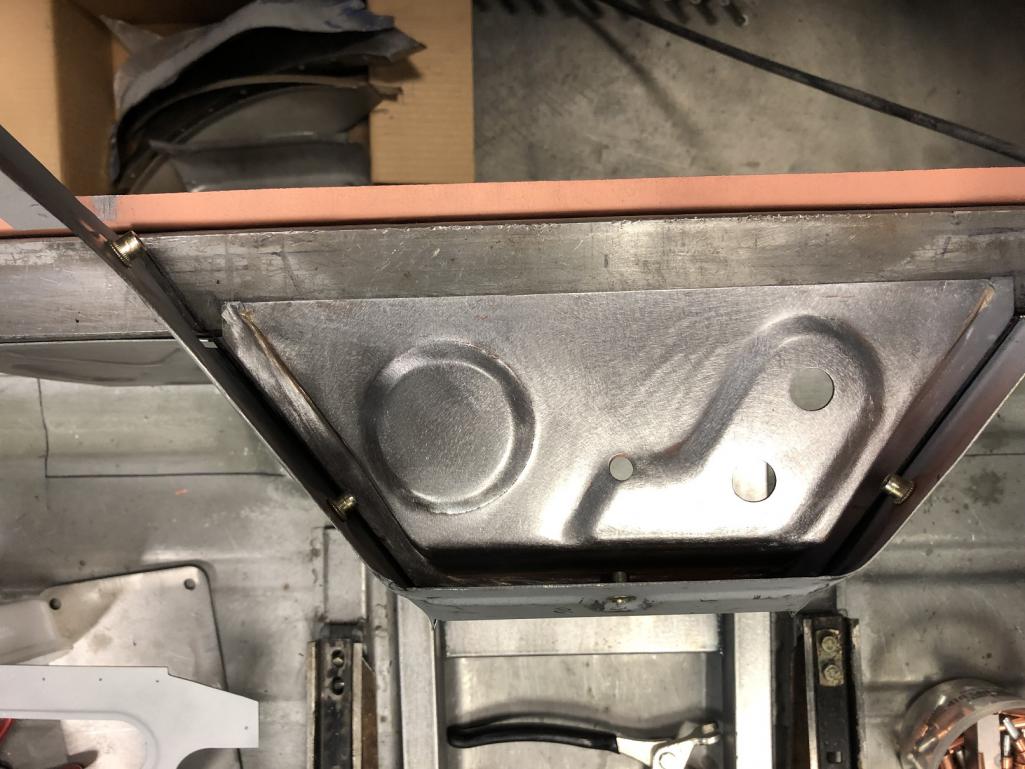
|
|
|
|
| Andyrew |
May 21 2019, 05:15 PM
Post
#1614
|
|
Spooling.... Please wait Group: Members Posts: 13,380 Joined: 20-January 03 From: Riverbank, Ca Member No.: 172 Region Association: Northern California |
Looks good!!!
There are so many areas on the car that catch crap already.... What's one more? And small goals turn into big goals (IMG:style_emoticons/default/smile.gif) |
|
|
|
| Nogoodwithusernames |
May 22 2019, 01:52 PM
Post
#1615
|
|
Member Group: Members Posts: 292 Joined: 31-May 16 From: Sutter, CA Member No.: 20,051 Region Association: None |
I like checking in on this thread. Awesome work happening.
Have you considered what McMaster calls "Truss Head" screws? They look to be lower profile and cleaner than standard button head screws without the rounded under edge. QUOTE(tygaboy @ May 14 2019, 11:29 AM) Today I got the rivnuts installed so the removable cover can officially be removed! Then I started playing with fasteners: - Countersunk washer with a flathead? - Countersunk washer with button head? - Just a button head? (Geez, talk about a first world problem...) |
|
|
|
| tygaboy |
May 22 2019, 05:13 PM
Post
#1616
|
|
914 Guru Group: Members Posts: 5,680 Joined: 6-October 15 From: Petaluma, CA Member No.: 19,241 Region Association: Northern California |
QUOTE(Nogoodwithusernames @ May 22 2019, 12:52 PM) I like checking in on this thread. Awesome work happening. Have you considered what McMaster calls "Truss Head" screws? They look to be lower profile and cleaner than standard button head screws without the rounded under edge. QUOTE(tygaboy @ May 14 2019, 11:29 AM) Today I got the rivnuts installed so the removable cover can officially be removed! Then I started playing with fasteners: - Countersunk washer with a flathead? - Countersunk washer with button head? - Just a button head? (Geez, talk about a first world problem...) Thanks for the kind words. I'll check out truss heads, thanks for "heads" up! (IMG:style_emoticons/default/lol-2.gif) |
|
|
|
| tygaboy |
May 22 2019, 05:28 PM
Post
#1617
|
|
914 Guru Group: Members Posts: 5,680 Joined: 6-October 15 From: Petaluma, CA Member No.: 19,241 Region Association: Northern California |
Today's project was to throw out all of yesterday's work! I felt I could do a better job on the design of the center, lower firewall. Version II was better but didn't really address some of the issues I knew would bug me later on:
- with all the components in place, it's really fiddly to get the shifter cable cover plates on. - the fuel lines would have to cross over the brake and hydraulic clutch lines somewhere before they got to the firewall panel. - It was going to be fiddly (meaning not a lot of room) attaching the fuel lines to both sides of the bulkhead fittings. Not easy to access from underneath yesterday's panel, nor easy to get to them on the top side. So, Version III it is. - This moves the shifter cable cover plates right out front - It creates room under the shifter cables so the fuel lines can run up the passenger side while the brake and clutch lines run up the driver side, eliminating the cross over - I can more easily get to all the bulkhead fittings (those holes aren't yet in the panel, nor are those for the brake, clutch or throttle cable) - It eliminates the "trench" that yesterday's panel created I still have a couple stampings/hole for the above mentioned systems lines and final fitting to do but hopefully the new design is clear. And I sliced up V2 and reused the outer sections as well as the shifter cable pop out. No sense doing EVERYTHING over again! (IMG:style_emoticons/default/happy11.gif) This first pic show things in place with the "old" console. I needed to use this as it has the shifter mounts that I needed to verify the new location for the cable pass through. Attached thumbnail(s) 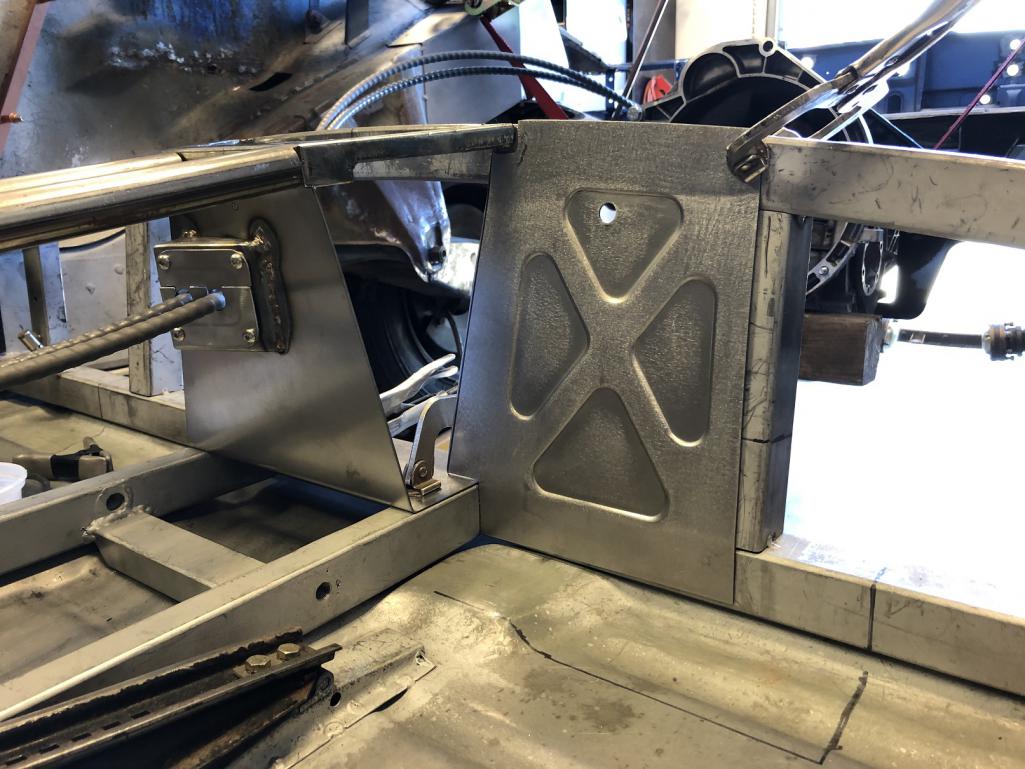
|
|
|
|
| tygaboy |
May 22 2019, 05:31 PM
Post
#1618
|
|
914 Guru Group: Members Posts: 5,680 Joined: 6-October 15 From: Petaluma, CA Member No.: 19,241 Region Association: Northern California |
I was able to get the pass through pop-out's angles set correctly so that the cables are relaxed in both horizontal and vertical planes and essentially float right through the cover plates. (IMG:style_emoticons/default/smilie_pokal.gif)
Attached thumbnail(s) 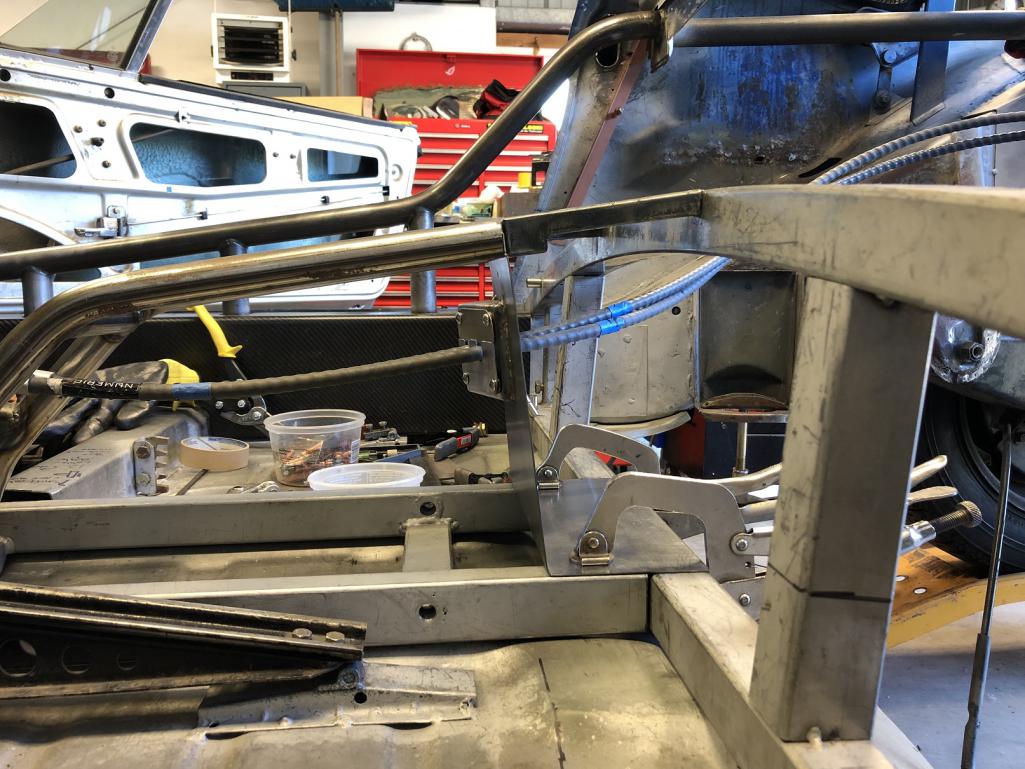 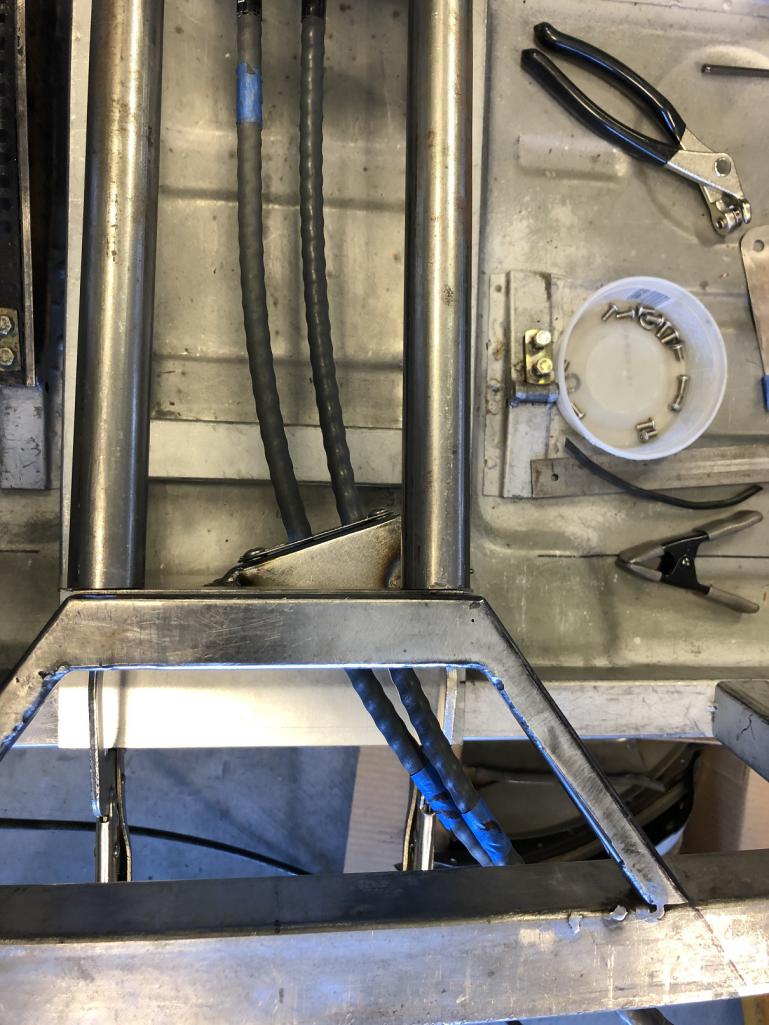
|
|
|
|
| tygaboy |
May 22 2019, 05:33 PM
Post
#1619
|
|
914 Guru Group: Members Posts: 5,680 Joined: 6-October 15 From: Petaluma, CA Member No.: 19,241 Region Association: Northern California |
And here's after all the welding is done and finished, along with the latest version of the console base. Getting there. Slowly, but getting there.
Attached thumbnail(s) 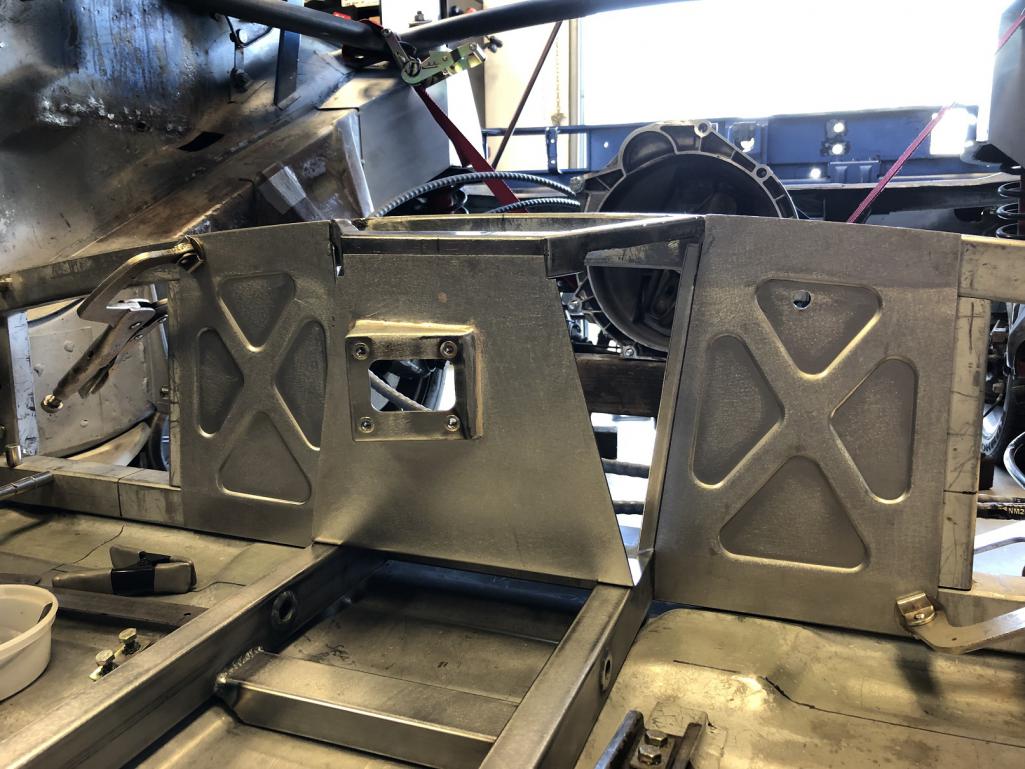
|
|
|
|
| AZBanks |
May 23 2019, 01:40 PM
Post
#1620
|
|
Senior Member Group: Members Posts: 1,069 Joined: 7-December 05 From: New River, AZ Member No.: 5,245 Region Association: Southwest Region |
Amazing work. I keep coming back to this thread for inspiration.
I am amazed by what you are doing but can't help but feel that you are a a shoe-in to win the 2914 build-off challenge. (IMG:style_emoticons/default/sawzall-smiley.gif) (IMG:style_emoticons/default/first.gif) |
|
|
|
|
1 User(s) are reading this topic (1 Guests and 0 Anonymous Users)
0 Members:

|
Lo-Fi Version | Time is now: 5th November 2025 - 01:39 PM |
Invision Power Board
v9.1.4 © 2025 IPS, Inc.