|
|
|
Porsche, and the Porsche crest are registered trademarks of Dr. Ing. h.c. F. Porsche AG.
This site is not affiliated with Porsche in any way. Its only purpose is to provide an online forum for car enthusiasts. All other trademarks are property of their respective owners. |
|
|

  |

| tygaboy |
 May 31 2019, 06:28 PM May 31 2019, 06:28 PM
Post
#1681
|
|
914 Guru  Group: Members Posts: 5,680 Joined: 6-October 15 From: Petaluma, CA Member No.: 19,241 Region Association: Northern California |
QUOTE(sixnotfour @ May 31 2019, 09:47 AM)  you have great plans , Im sure, I saw this on FB ..spyder in Portugal.. (IMG:style_emoticons/default/idea.gif) Thanks for the heads up on this one. I hadn't seen it. I don't think I'll pad or upholster my dash unless I do some sort of thin perlon-ish thing on the upper section, just to soften it a bit, eliminate glare, etc. |
   |

 
|
| motoTrooper |
Jun 2 2019, 09:45 AM
Post
#1682
|
|
Newbie Group: Members Posts: 39 Joined: 18-March 16 From: Palo Alto Member No.: 19,774 Region Association: None |
QUOTE(tygaboy @ May 31 2019, 02:36 PM) And yes, I still have to run power to the starter. OK, so it looks like I will have one wire in the tunnel. Or does anyone make a wireless starter? (IMG:style_emoticons/default/happy11.gif) Found you a wireless starter! Just need to add (another) artistic access hole to the firewall...  |
 |
|
| billium01 |
Jun 2 2019, 11:43 AM
Post
#1683
|
|
Member Group: Members Posts: 136 Joined: 12-April 13 Member No.: 15,764 Region Association: None |
Looks incredible! That brainbox is something else. Thanks for posting in such detail. Been wondering about routing shift cables and stuff like that.
|
|
|
|
| tygaboy |
Jun 2 2019, 05:04 PM
Post
#1684
|
|
914 Guru Group: Members Posts: 5,680 Joined: 6-October 15 From: Petaluma, CA Member No.: 19,241 Region Association: Northern California |
QUOTE(motoTrooper @ Jun 2 2019, 08:45 AM) QUOTE(tygaboy @ May 31 2019, 02:36 PM) And yes, I still have to run power to the starter. OK, so it looks like I will have one wire in the tunnel. Or does anyone make a wireless starter? (IMG:style_emoticons/default/happy11.gif) Found you a wireless starter! Just need to add (another) artistic access hole to the firewall... Perfect! But then I'd have to have a full time helper who could spin the thing! |
|
|
|
| tygaboy |
Jun 2 2019, 05:17 PM
Post
#1685
|
|
914 Guru Group: Members Posts: 5,680 Joined: 6-October 15 From: Petaluma, CA Member No.: 19,241 Region Association: Northern California |
I started working on closing the lower fire wall, focusing on the recess (you know I love recess!) for the seat belt retractors that have been relocated here.
With this piece fabbed and mocked in place, it really became clear that the stamped end pieces I cut off the earlier version weren't going to work. From a design perspective, the scale of the stamping wasn't working with the upper fire wall panels. Plus, I would have had another piece between these and the outer retractor recess. So. Time to start on Lower Firewall, version 2.5. Attached thumbnail(s) 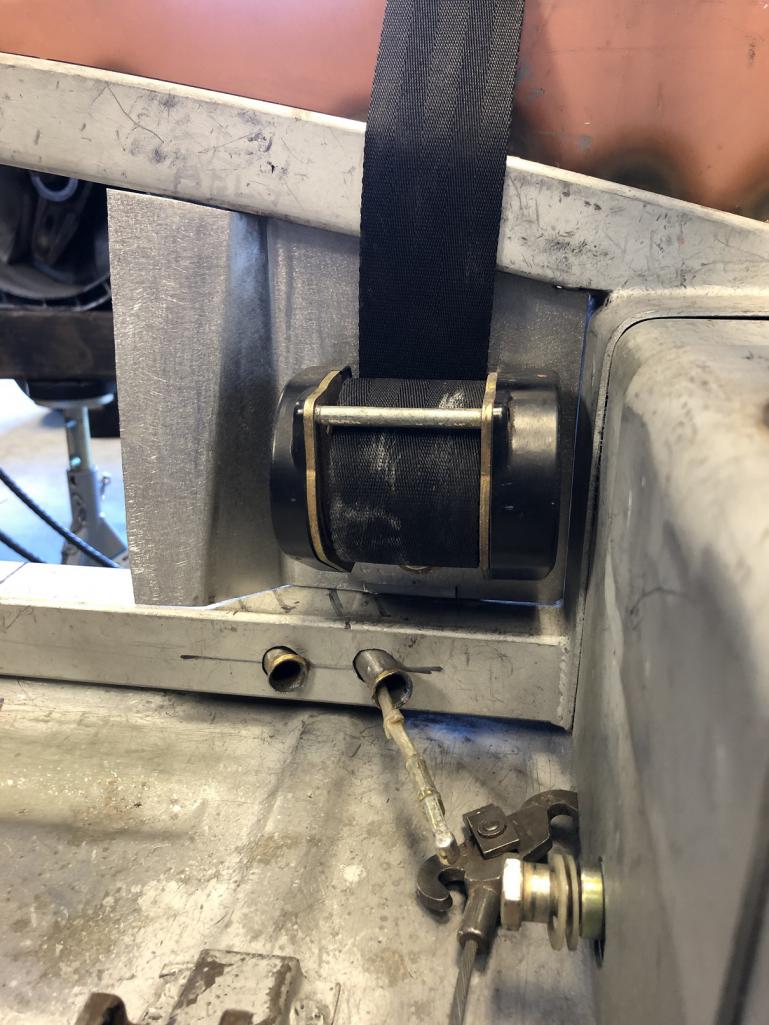 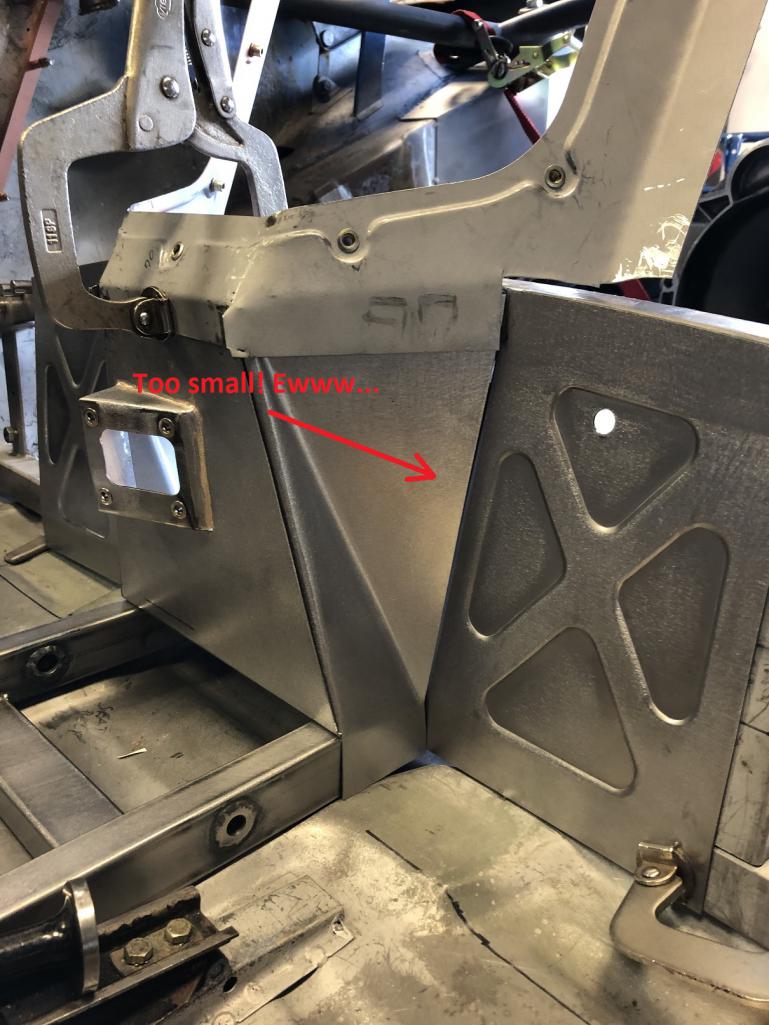
|
|
|
|
| tygaboy |
Jun 2 2019, 05:19 PM
Post
#1686
|
|
914 Guru Group: Members Posts: 5,680 Joined: 6-October 15 From: Petaluma, CA Member No.: 19,241 Region Association: Northern California |
Design and plasma cut the new, wider blanks. Mock them into position, just for fun.
You can see they're about 2x as wide as those pieces they replace. Plus, with this new approach, I only need one panel on each side to close from the firewall to the retractor recess. Attached thumbnail(s) 
|
|
|
|
| tygaboy |
Jun 2 2019, 05:27 PM
Post
#1687
|
|
914 Guru Group: Members Posts: 5,680 Joined: 6-October 15 From: Petaluma, CA Member No.: 19,241 Region Association: Northern California |
And after noodling a bit, I decided to try a new design approach on the stamping die.
I'm going to weld the male components on to each side to come up with the needed reversibility. The pieces I'm stamping don't have openings so I can't bolt the die components together. In the past, I've relied on careful placement of the male components and then praying things didn't move when I was setting everything in the press. This new approach is more work up front but makes the stamping process a near no-brainer. Worth it to get the better result, IMO. Yes, things are still bolted together here but I'm only doing that to locate everything. I unbolt one and plug weld that hole, then remove the other and weld it. Note that I've got the male components bolted to each side so one plug weld attaches both sides' male die. Attached thumbnail(s) 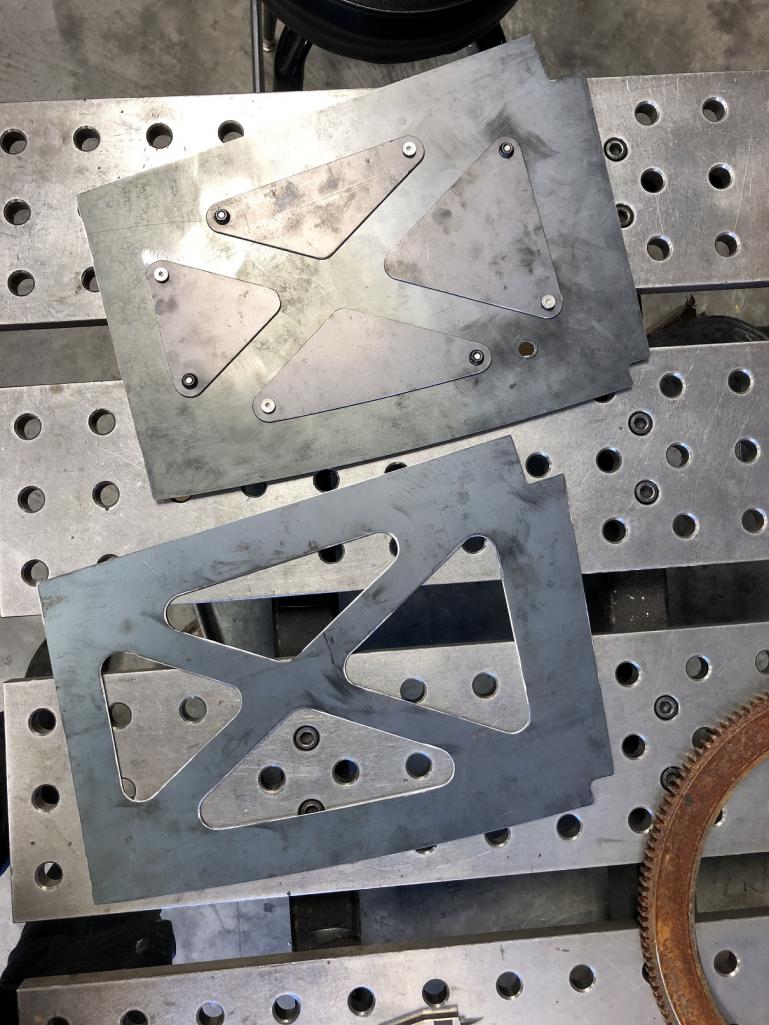
|
|
|
|
| tygaboy |
Jun 2 2019, 05:29 PM
Post
#1688
|
|
914 Guru Group: Members Posts: 5,680 Joined: 6-October 15 From: Petaluma, CA Member No.: 19,241 Region Association: Northern California |
And here's the female component of the stamping die set in place, just so I could verify I like the way things will look.
Visually, I think it "fits" with the upper fire wall far better than the smaller pieces. And after all this, as with much of the upper fire wall, this will only be visible with the seats removed from the car. But hey, I'll know it's there. Attached thumbnail(s) 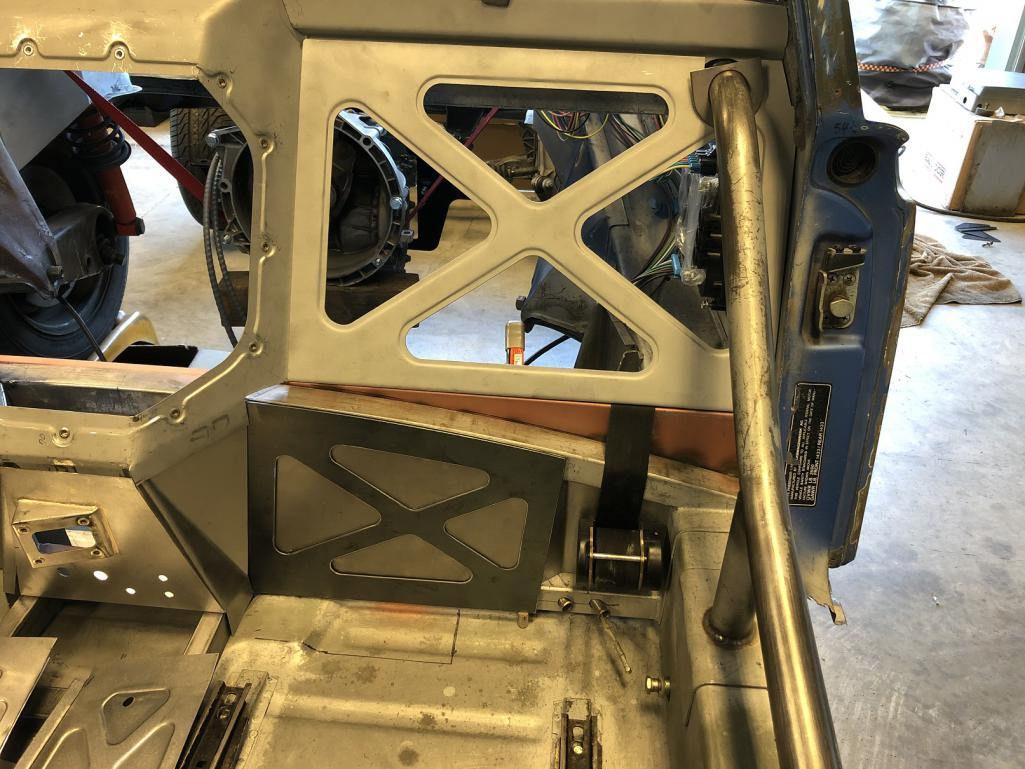
|
|
|
|
| tygaboy |
Jun 3 2019, 05:35 PM
Post
#1689
|
|
914 Guru Group: Members Posts: 5,680 Joined: 6-October 15 From: Petaluma, CA Member No.: 19,241 Region Association: Northern California |
I finalized the stamping die and went to town on the new outer lowers.
Each of these pieces has to sit flush against an upright that supports the arched cross member so to allow that, the embossing steps outward. It may not look like it in this pic, but trust me, they poke into the cabin area. I think all I have left is to fab the passenger side retractor recess and I'll be ready to do the final install of this fire wall! (IMG:style_emoticons/default/cheer.gif) Attached thumbnail(s) 
|
|
|
|
| Dion |
Jun 4 2019, 05:18 AM
Post
#1690
|
|
RN Group: Members Posts: 2,918 Joined: 16-September 04 From: Audubon,PA Member No.: 2,766 Region Association: MidAtlantic Region |
That looks fantastic. I like the industrial nuances with
the many different angles/protrusions. It adds a ton of visual interest as well as I’m sure torsional rigidity. Awesome Chris! Rock on (IMG:style_emoticons/default/aktion035.gif) Cheers man. |
|
|
|
| defianty |
Jun 4 2019, 05:51 AM
Post
#1691
|
|
Senior Member Group: Members Posts: 659 Joined: 9-August 06 From: Essex, UK Member No.: 6,621 Region Association: None |
Beautiful, it's going to be such a shame to cover it up!
|
|
|
|
| tygaboy |
Jun 4 2019, 05:36 PM
Post
#1692
|
|
914 Guru Group: Members Posts: 5,680 Joined: 6-October 15 From: Petaluma, CA Member No.: 19,241 Region Association: Northern California |
Thanks guys. The compliments and critiques always help keep me motivated.
Today I was able to fab the passenger side retractor recess panel. So here, for the first time, for your viewing pleasure (or head shaking/finger pointing or snickering), are all the pieces of the firewall. Don't miss the mock up of the two power leads in the driver side retractor recess. Keen eyed folk will note that the rubber grommet I'm using is the one that normally seals the windshield washer rubber tubes as they pass through the dash! Recycling at its finest! (IMG:style_emoticons/default/laugh.gif) Anyone know if these are still available new? I didn't see them on the 914 Rubber site. Anyway, getting the fire wall to this point took WAY longer than I'd ever have thought. My need to see things in place before I'm sure I like them certainly didn't help. But I have to say that I'm glad I didn't settle for any of the earlier versions. I'm pretty happy with things as they stand. Next, I need to finish fabrication of the tunnel/tunnel cover and tie it all in with the fire wall. I expect to make major progress on that this week. Attached thumbnail(s) 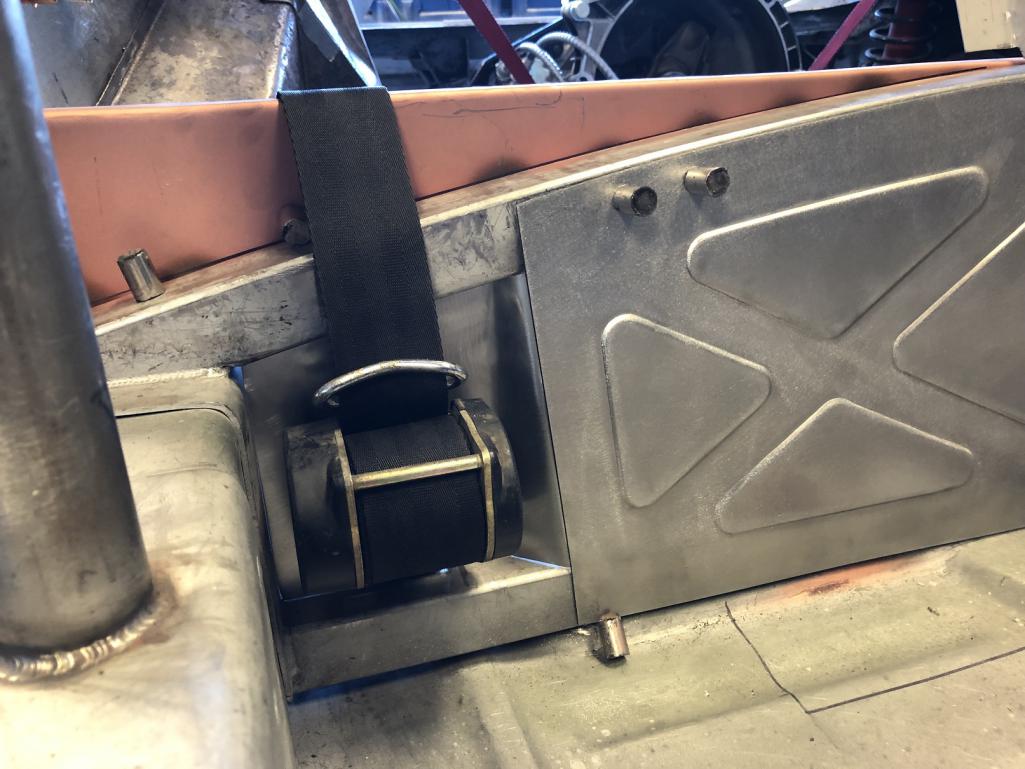 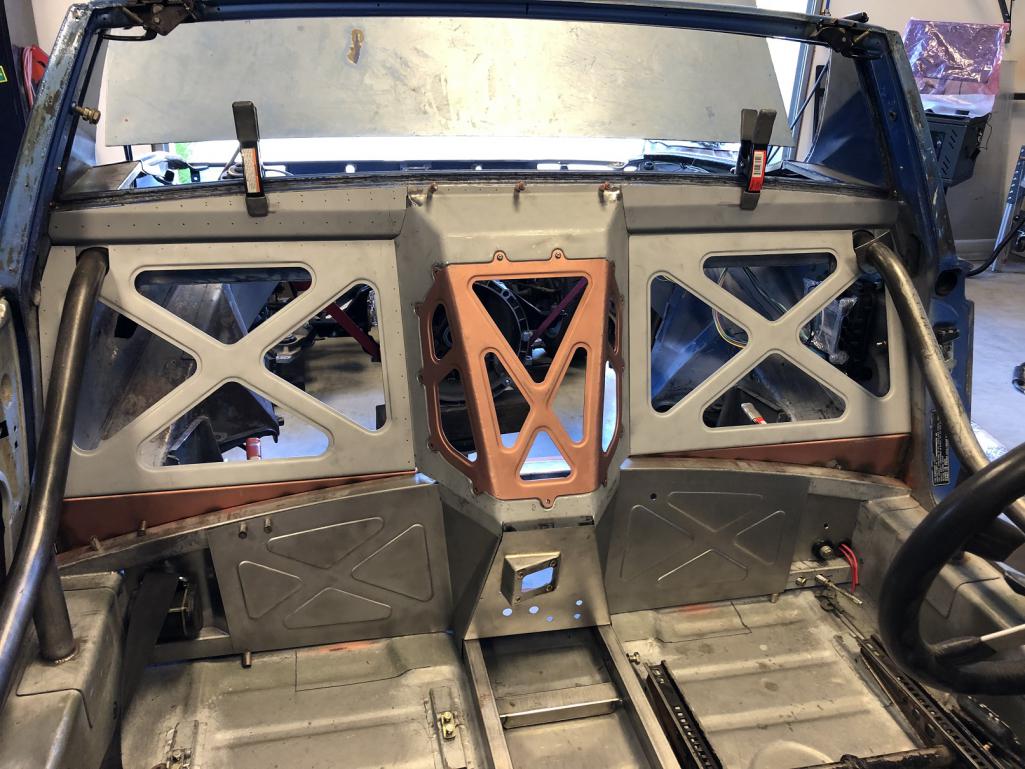
|
|
|
|
| Krieger |
Jun 4 2019, 06:45 PM
Post
#1693
|
|
Advanced Member Group: Members Posts: 4,825 Joined: 24-May 04 From: Santa Rosa CA Member No.: 2,104 Region Association: None |
(IMG:style_emoticons/default/piratenanner.gif) (IMG:style_emoticons/default/first.gif) looks amazing!
|
|
|
|
| Andyrew |
Jun 4 2019, 08:19 PM
Post
#1694
|
|
Spooling.... Please wait Group: Members Posts: 13,380 Joined: 20-January 03 From: Riverbank, Ca Member No.: 172 Region Association: Northern California |
|
|
|
|
| Cairo94507 |
Jun 5 2019, 07:35 AM
Post
#1695
|
|
Michael Group: Members Posts: 10,486 Joined: 1-November 08 From: Auburn, CA Member No.: 9,712 Region Association: Northern California |
Love the receptacle for the seat belts. I can't wait to see it the next time I come over. (IMG:style_emoticons/default/beerchug.gif)
|
|
|
|
| horizontally-opposed |
Jun 5 2019, 07:45 AM
Post
#1696
|
|
Advanced Member Group: Members Posts: 3,456 Joined: 12-May 04 From: San Francisco Member No.: 2,058 Region Association: None |
That firewall is art.
And you're going to cover it? (IMG:style_emoticons/default/poke.gif) Mad, mad skills. |
|
|
|
| tygaboy |
Jun 5 2019, 05:27 PM
Post
#1697
|
|
914 Guru Group: Members Posts: 5,680 Joined: 6-October 15 From: Petaluma, CA Member No.: 19,241 Region Association: Northern California |
Time to get serious! There's something I find somehow calming about a panel held in place with Clecos.
Maybe it's just me...? Attached thumbnail(s) 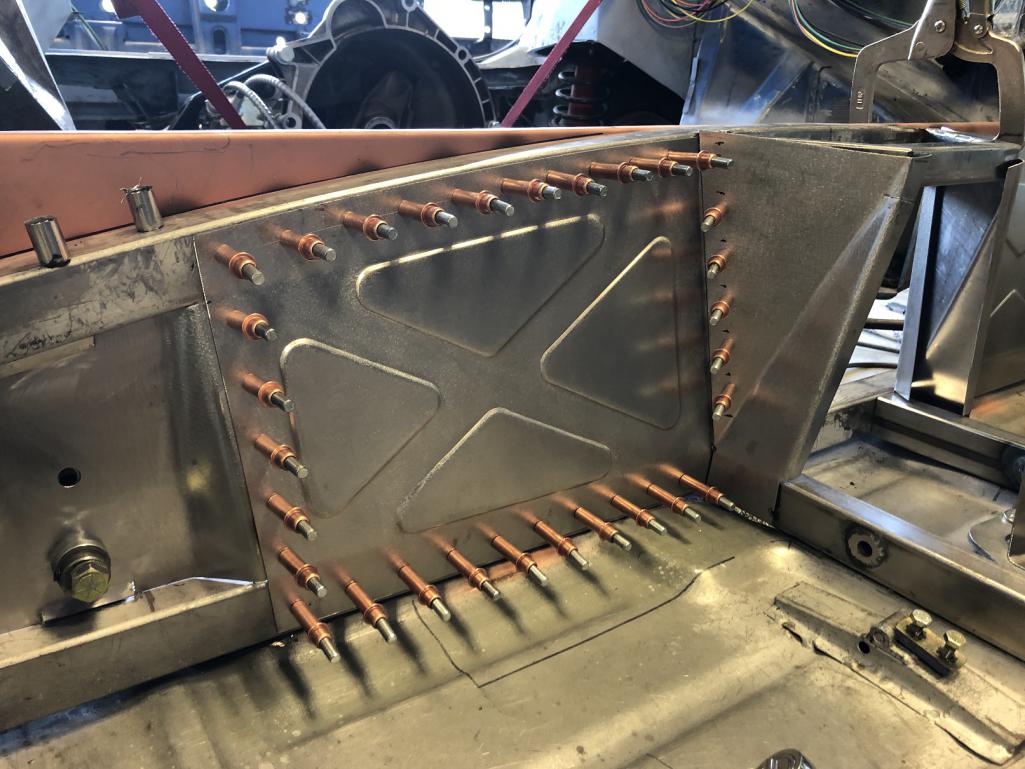
|
|
|
|
| tygaboy |
Jun 5 2019, 05:33 PM
Post
#1698
|
|
914 Guru Group: Members Posts: 5,680 Joined: 6-October 15 From: Petaluma, CA Member No.: 19,241 Region Association: Northern California |
A 90 degree day is a perfect time to tackle out of position marking, drilling and hand riveting.
I'm using CherryMax structural rivets, which is why you're not seeing a hollow head. The center shaft remains in place and makes these WAY stronger than the usual pop rivets. Note that I have not riveted the areas that attach any of these panels to the chassis. It's kinda cool in that I can now/still pull the entire passenger side lower fire wall out as a unit. Next, I'll do the same on the driver's side. Attached thumbnail(s) 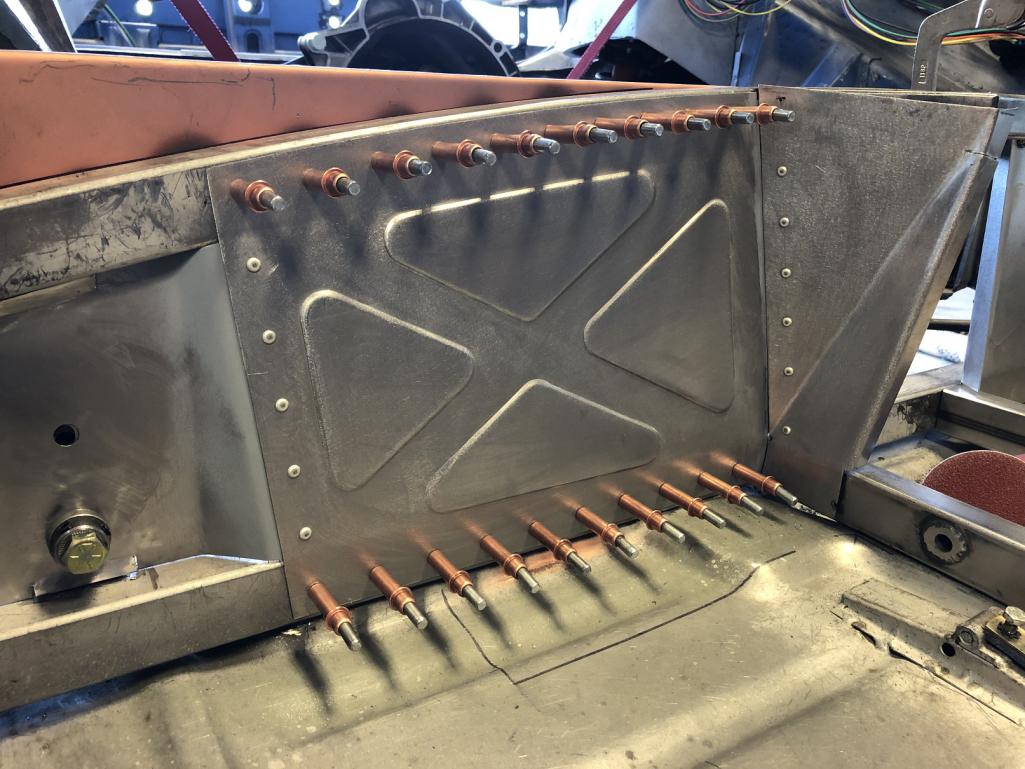
|
|
|
|
| tygaboy |
Jun 5 2019, 10:40 PM
Post
#1699
|
|
914 Guru Group: Members Posts: 5,680 Joined: 6-October 15 From: Petaluma, CA Member No.: 19,241 Region Association: Northern California |
You /6 guys can keep your left-side ignition switches!
The InfinityBox system doesn't require a traditional key. It's sorta like a modern car where a system-matched fob is used to energize the system. Without it, the entire electrical system is dead - it's not possible to power anything. So, here's what I decided to do! Honda S2000 starter button. Wired to the MasterCell, a single push turns on the ignition, a push and hold turns on ignition and fuel pump, then fires the starter. Hold until it starts then release, and you're off! Press again and everything shuts down. Yes, I give up the security provided by the steering lock, but I just think this is too cool. If anyone's interested, I can post details on making this fit. Attached thumbnail(s) 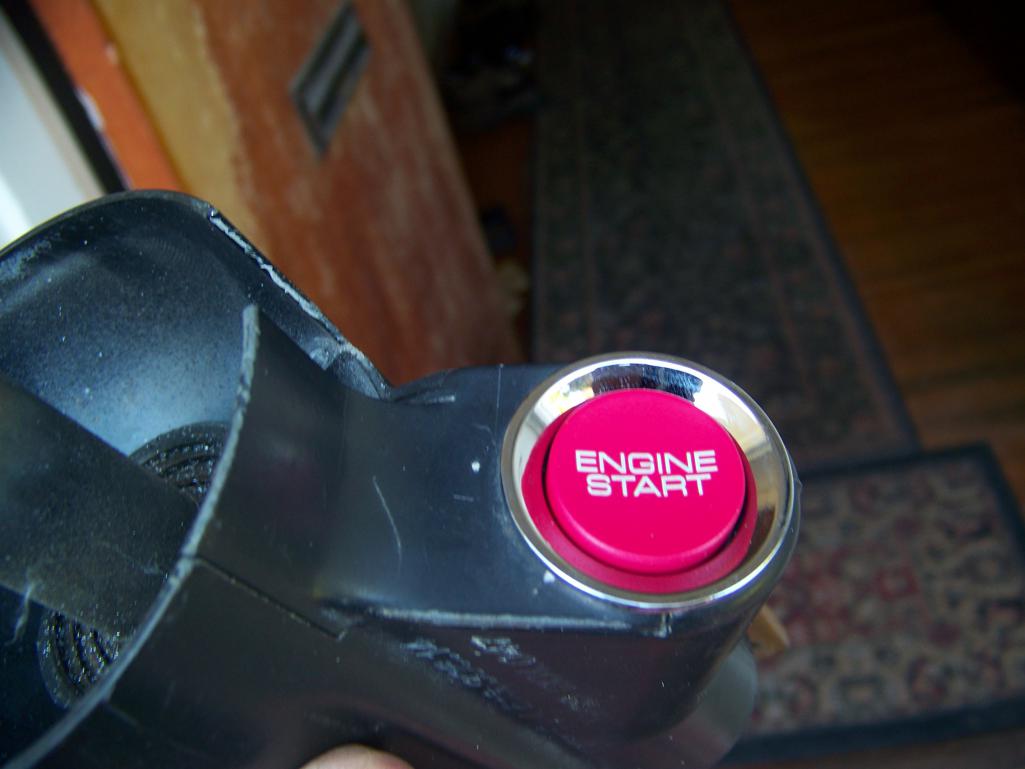
|
|
|
|
| Krieger |
Jun 5 2019, 11:12 PM
Post
#1700
|
|
Advanced Member Group: Members Posts: 4,825 Joined: 24-May 04 From: Santa Rosa CA Member No.: 2,104 Region Association: None |
That's an awesome starter switch! It looks like a great fit! Was it a lot of work?
|
|
|
|
|
1 User(s) are reading this topic (1 Guests and 0 Anonymous Users)
0 Members:

|
Lo-Fi Version | Time is now: 5th November 2025 - 09:47 AM |
Invision Power Board
v9.1.4 © 2025 IPS, Inc.