|
|
|
Porsche, and the Porsche crest are registered trademarks of Dr. Ing. h.c. F. Porsche AG.
This site is not affiliated with Porsche in any way. Its only purpose is to provide an online forum for car enthusiasts. All other trademarks are property of their respective owners. |
|
|

  |

| tygaboy |
 Jun 6 2019, 02:25 PM Jun 6 2019, 02:25 PM
Post
#1701
|
|
914 Guru  Group: Members Posts: 5,680 Joined: 6-October 15 From: Petaluma, CA Member No.: 19,241 Region Association: Northern California |
I wasn't happy with the way the lower outer panel edge just ended and how it sorta forced the rivet line to stop. So I made a little extension that I silicone brazed on to the seatbelt recess panel.
I still have a bit of clean up to do but to me, this looks a lot more complete. Of course, this means I now have to do the same thing for the top area. It's always something... (IMG:style_emoticons/default/wacko.gif) Attached thumbnail(s) 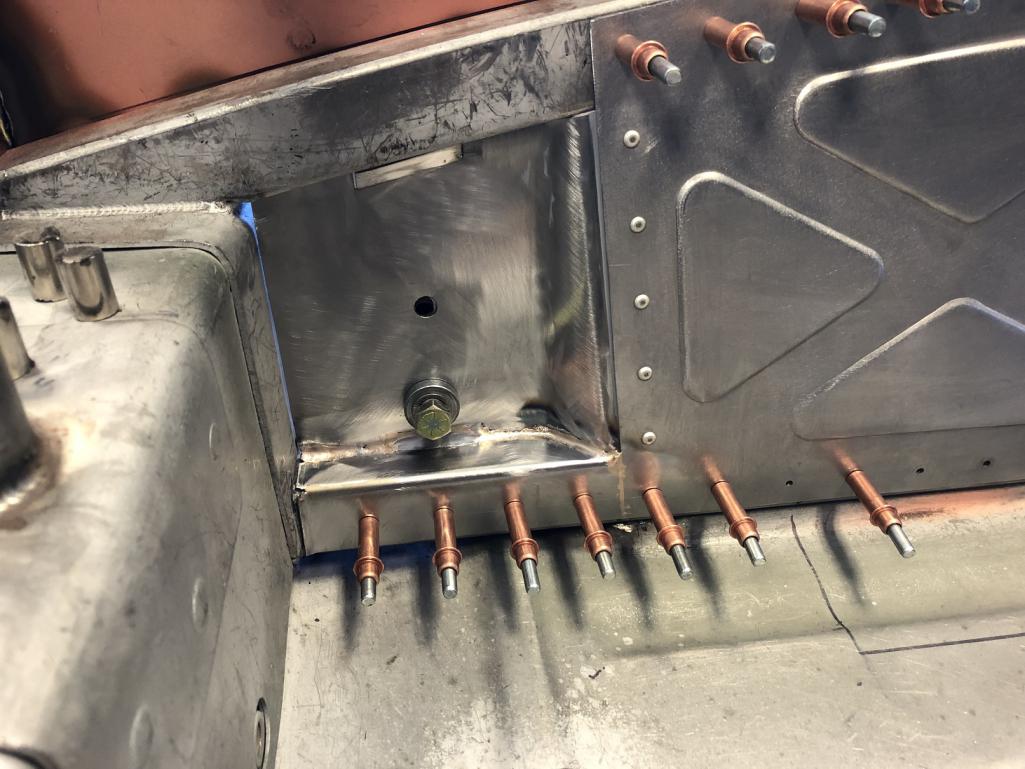
|
   |

 
|
| tygaboy |
Jun 6 2019, 02:28 PM
Post
#1702
|
|
914 Guru Group: Members Posts: 5,680 Joined: 6-October 15 From: Petaluma, CA Member No.: 19,241 Region Association: Northern California |
QUOTE(Krieger @ Jun 5 2019, 10:12 PM)  That's an awesome starter switch! It looks like a great fit! Was it a lot of work? @Krieger - Not too bad. Let me point out that I used an early steering column. I didn't even know there was a difference. Here's a pic of the one that came in my '75. Completely different and if I'd only seen this version, I doubt I would even have thought to try. Attached thumbnail(s) 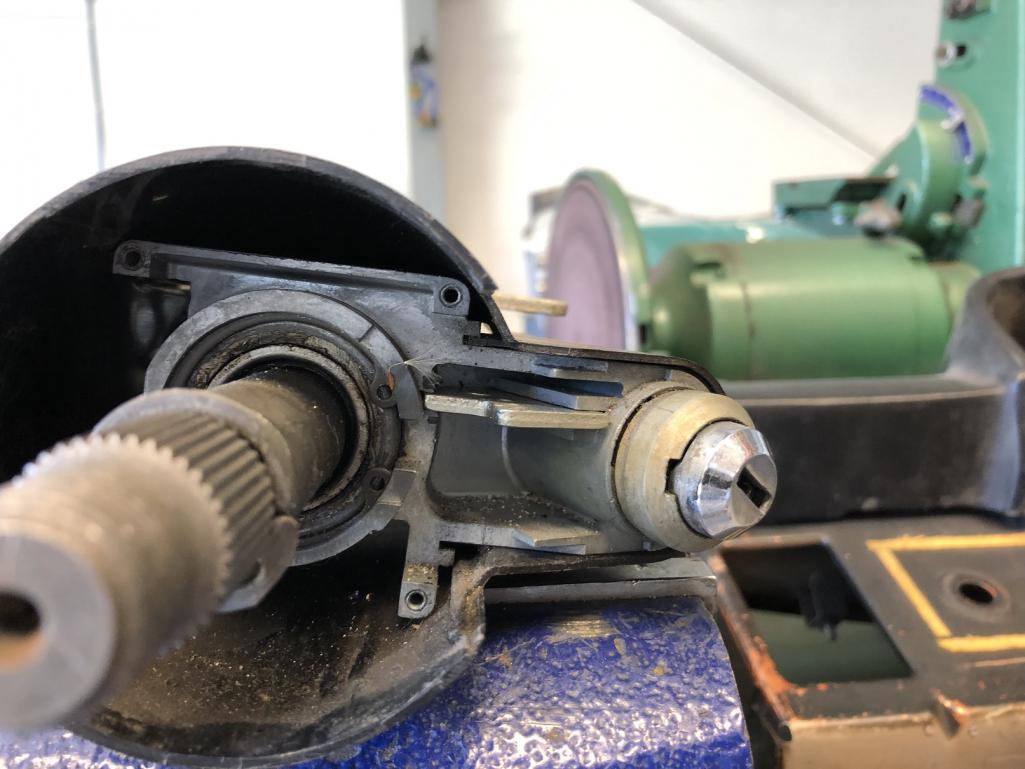
|
|
|
|
| tygaboy |
Jun 6 2019, 02:31 PM
Post
#1703
|
|
914 Guru Group: Members Posts: 5,680 Joined: 6-October 15 From: Petaluma, CA Member No.: 19,241 Region Association: Northern California |
This is the early column.
The start button unit has locating ridges that run down it's length. Clearance had to be cut for these. A small Dremmel made pretty quick work of this. Attached thumbnail(s) 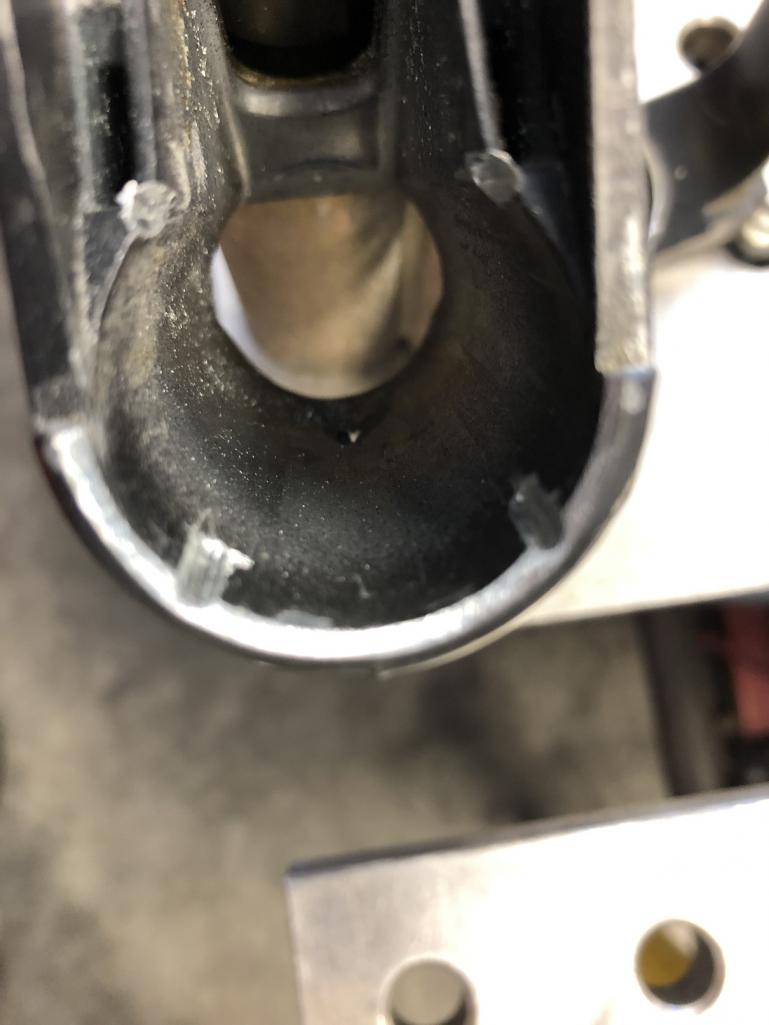
|
|
|
|
| tygaboy |
Jun 6 2019, 02:33 PM
Post
#1704
|
|
914 Guru Group: Members Posts: 5,680 Joined: 6-October 15 From: Petaluma, CA Member No.: 19,241 Region Association: Northern California |
Then the locating ridges needed to be trimmed to length to allow the unit to fit in the column. But a gap needed to be cut at the upper area of the ridge that the column's removable switch plate/retainer cover would use to hold the start button unit in place.
Attached thumbnail(s) 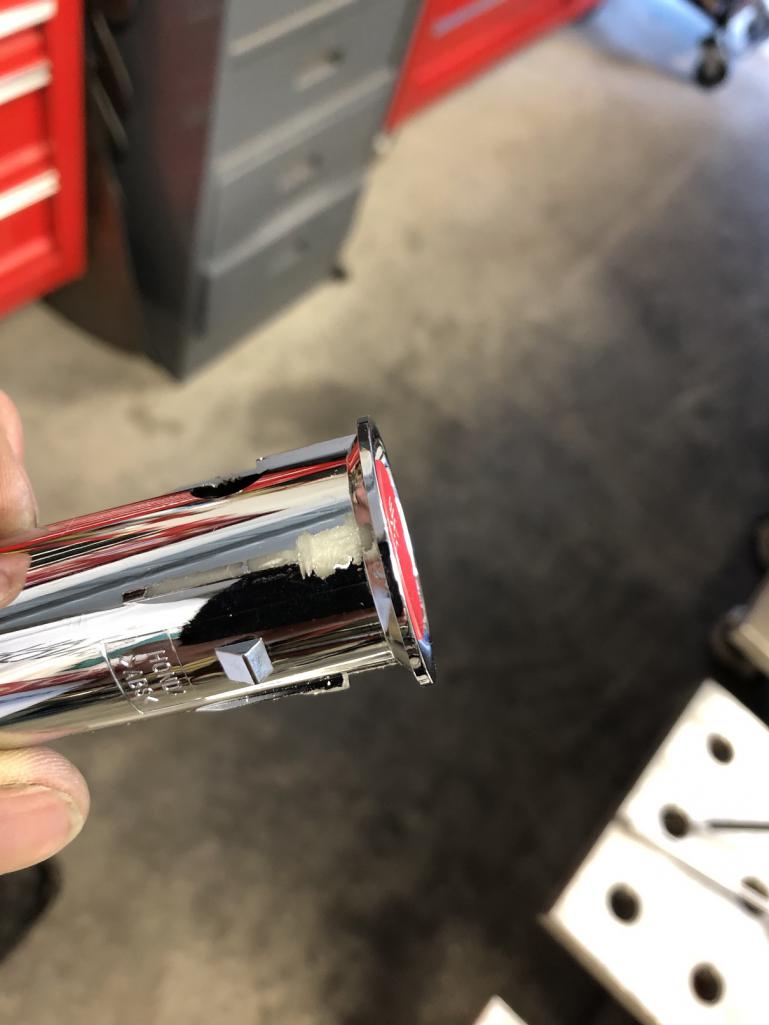
|
|
|
|
| tygaboy |
Jun 6 2019, 02:34 PM
Post
#1705
|
|
914 Guru Group: Members Posts: 5,680 Joined: 6-October 15 From: Petaluma, CA Member No.: 19,241 Region Association: Northern California |
Here's how the retainer plate locates / locks in with the start button unit.
Attached thumbnail(s) 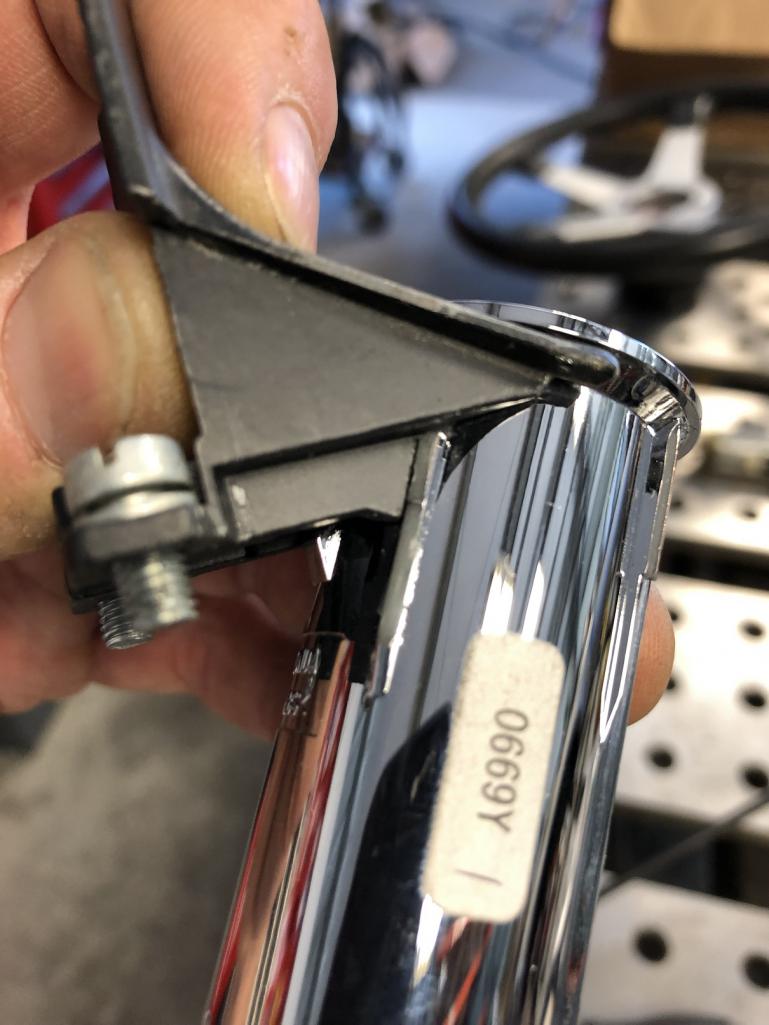
|
|
|
|
| tygaboy |
Jun 6 2019, 02:36 PM
Post
#1706
|
|
914 Guru Group: Members Posts: 5,680 Joined: 6-October 15 From: Petaluma, CA Member No.: 19,241 Region Association: Northern California |
Into the column it goes!
Attached thumbnail(s) 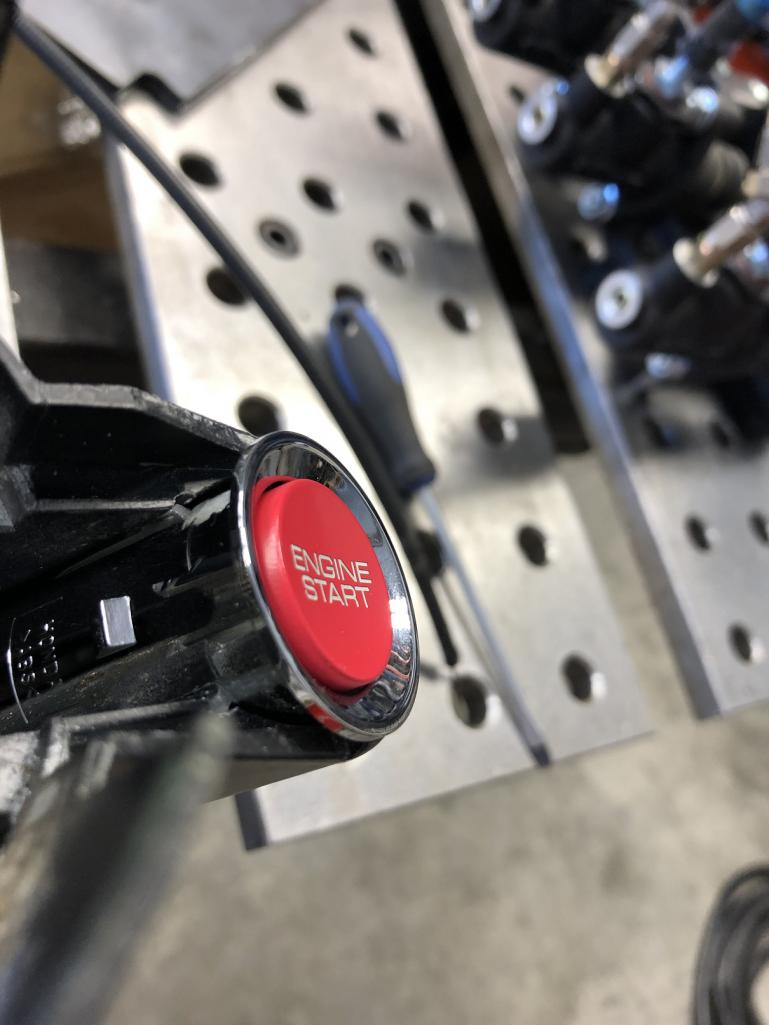
|
|
|
|
| tygaboy |
Jun 6 2019, 02:36 PM
Post
#1707
|
|
914 Guru Group: Members Posts: 5,680 Joined: 6-October 15 From: Petaluma, CA Member No.: 19,241 Region Association: Northern California |
On goes the retainer.
Attached thumbnail(s) 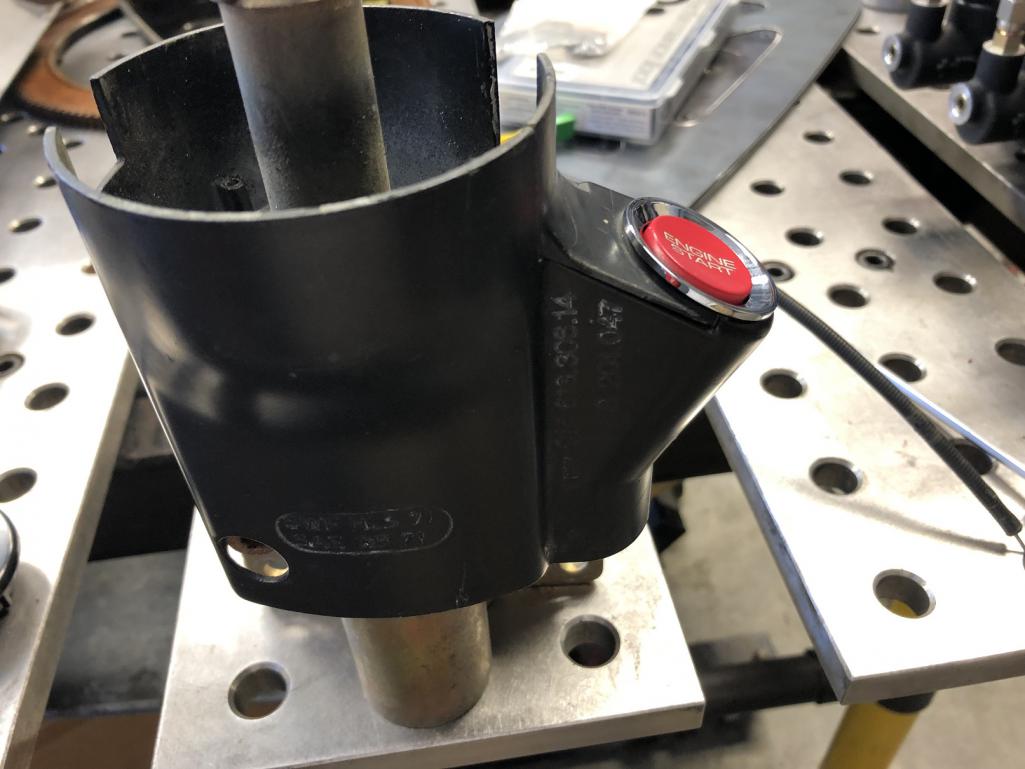
|
|
|
|
| tygaboy |
Jun 6 2019, 02:36 PM
Post
#1708
|
|
914 Guru Group: Members Posts: 5,680 Joined: 6-October 15 From: Petaluma, CA Member No.: 19,241 Region Association: Northern California |
And into the car! (IMG:style_emoticons/default/aktion035.gif)
Attached thumbnail(s) 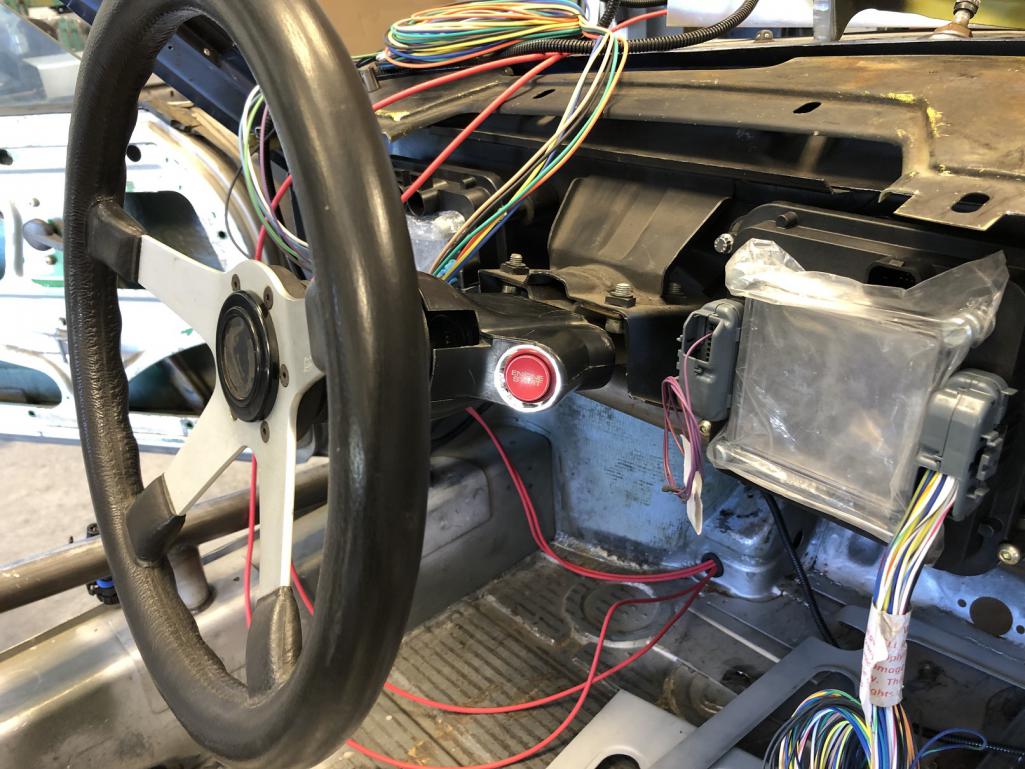
|
|
|
|
| tygaboy |
Jun 6 2019, 05:26 PM
Post
#1709
|
|
914 Guru Group: Members Posts: 5,680 Joined: 6-October 15 From: Petaluma, CA Member No.: 19,241 Region Association: Northern California |
Let the console fabrication begin! That center trim panel is just a mock up to check dimensions.
I still have some designing to do but at this point, I think I'm going to make most all of this upper console section removable. Maybe do a frame under it to support the shifter and this just becomes a cover. (IMG:style_emoticons/default/idea.gif) Decisions, decisions. Attached thumbnail(s) 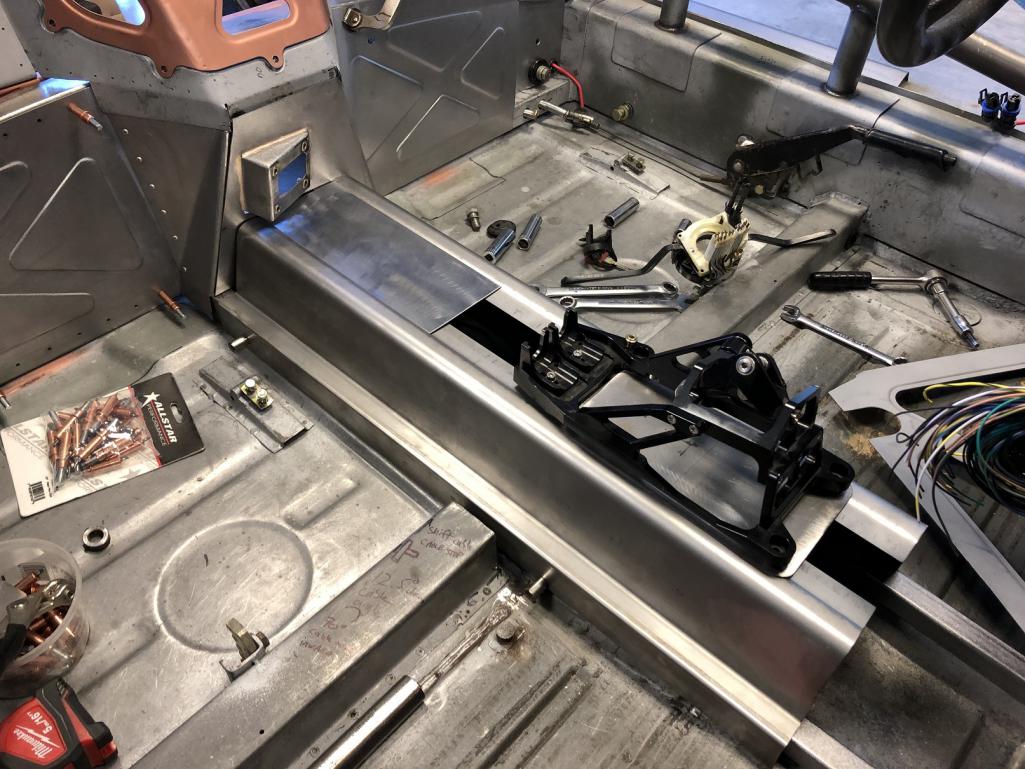
|
|
|
|
| Cairo94507 |
Jun 6 2019, 09:23 PM
Post
#1710
|
|
Michael Group: Members Posts: 10,486 Joined: 1-November 08 From: Auburn, CA Member No.: 9,712 Region Association: Northern California |
That looks really nice Chris. (IMG:style_emoticons/default/beerchug.gif)
|
 |
|
| tygaboy |
Jun 7 2019, 10:07 PM
Post
#1711
|
|
914 Guru Group: Members Posts: 5,680 Joined: 6-October 15 From: Petaluma, CA Member No.: 19,241 Region Association: Northern California |
One for the tool whores: Looking to create nice, evenly spaced holes? Forget measuring and get a rivet fan. It makes this almost impossible to screw up.
I scribe a line the distance in from the edge that I want (no less than 3x the rivet diameter) then set the rivet fan to the desired spacing. Lay the fan's holes right on top of the scribe line and poke a Sharpie in the hole. Come back and mark the spots with a spring loaded center punch then drill the holes. Don't use the fan as a drill guide! Attached thumbnail(s) 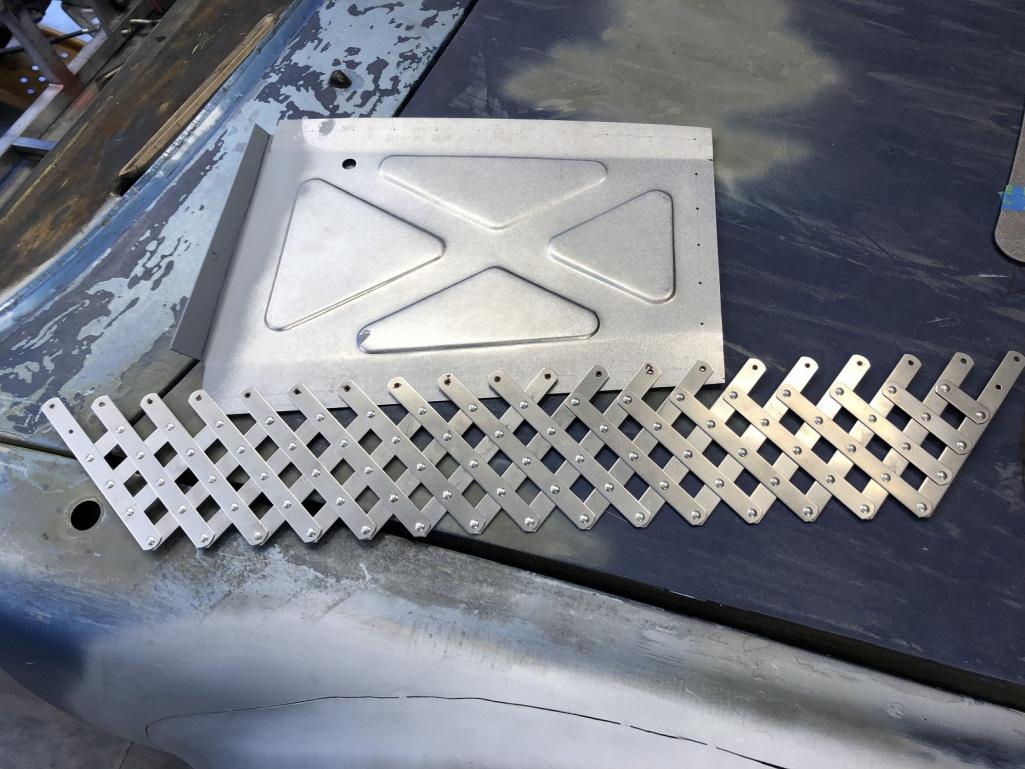
|
|
|
|
| tygaboy |
Jun 7 2019, 10:08 PM
Post
#1712
|
|
914 Guru Group: Members Posts: 5,680 Joined: 6-October 15 From: Petaluma, CA Member No.: 19,241 Region Association: Northern California |
Driver side lower outer partially done.
Attached thumbnail(s) 
|
|
|
|
| tygaboy |
Jun 10 2019, 06:26 PM
Post
#1713
|
|
914 Guru Group: Members Posts: 5,680 Joined: 6-October 15 From: Petaluma, CA Member No.: 19,241 Region Association: Northern California |
I made some pretty good progress on the console today. I've moved to a much simpler design. I think with all the stamping, a fairly plain console works better.
I fabbed the rear supports for the shifter and used them to locate the rear console panels. Then I worked up the front sections. Now it's a simple matter of playing "connect the dots". Here, the rear panels are in final position - the shifter is bolted down to the rear mounts - and I've set set the other pieces in rough position, just to get a feel for how things fit and look. I like it. It looks much cleaner than the previous version. Easier to paint or cover with carpet, etc. Note that all this console sheet metal will be removable so I can service the stuff that runs in this new tunnel. And yes, those are mock up circles for the cup holders! (IMG:style_emoticons/default/beerchug.gif) (rootbeer, that is!) Attached thumbnail(s) 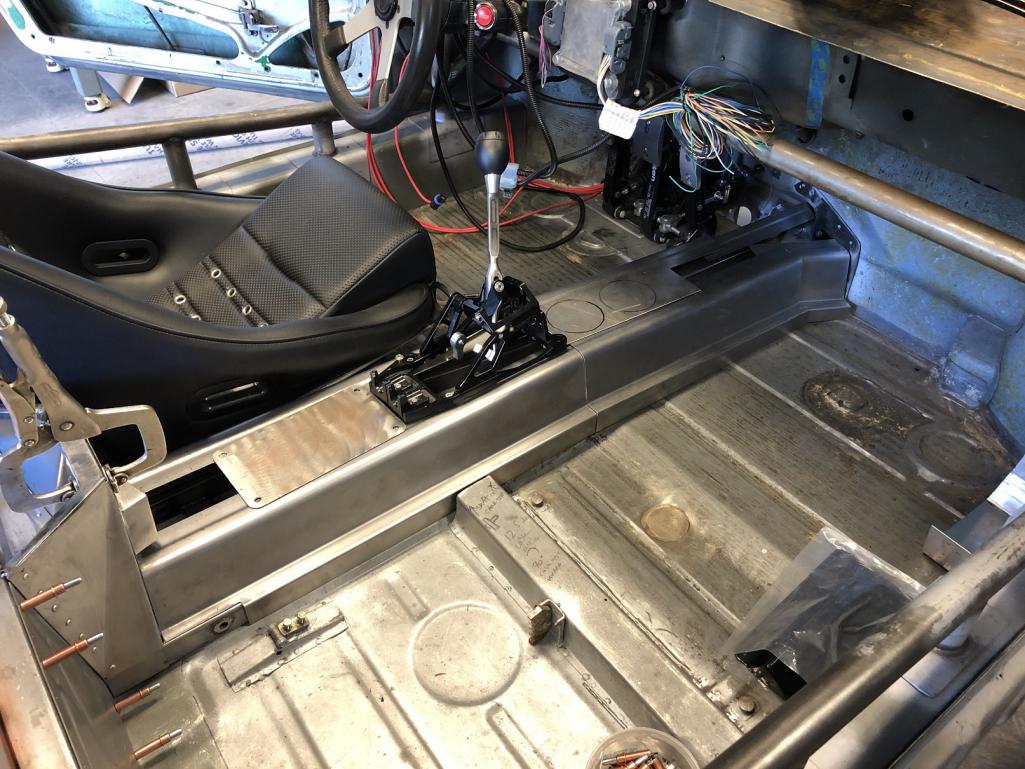
|
|
|
|
| tygaboy |
Jun 10 2019, 06:32 PM
Post
#1714
|
|
914 Guru Group: Members Posts: 5,680 Joined: 6-October 15 From: Petaluma, CA Member No.: 19,241 Region Association: Northern California |
The final version will have a "cover panel" that runs front to back that sits down in the recessed area and is riveted in place.
Attached thumbnail(s) 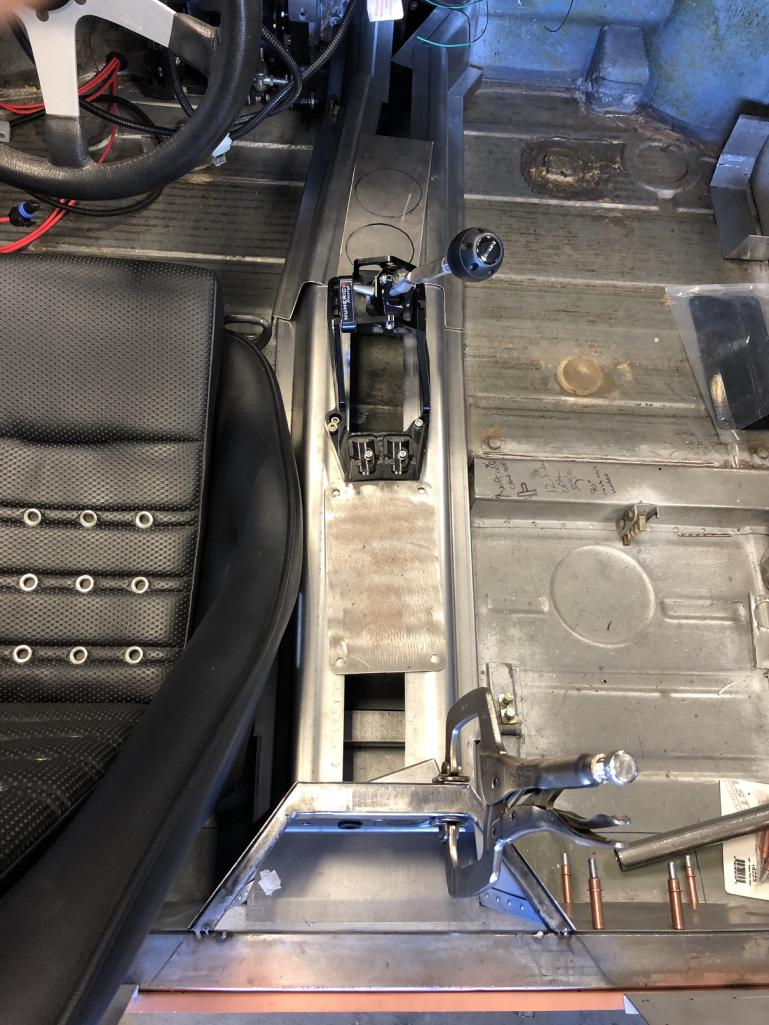
|
|
|
|
| Andyrew |
Jun 11 2019, 08:32 AM
Post
#1715
|
|
Spooling.... Please wait Group: Members Posts: 13,380 Joined: 20-January 03 From: Riverbank, Ca Member No.: 172 Region Association: Northern California |
Thats starting to look really nice!!!
|
|
|
|
| Krieger |
Jun 11 2019, 02:03 PM
Post
#1716
|
|
Advanced Member Group: Members Posts: 4,825 Joined: 24-May 04 From: Santa Rosa CA Member No.: 2,104 Region Association: None |
Awesome! (IMG:style_emoticons/default/first.gif)
|
|
|
|
| tygaboy |
Jun 11 2019, 03:07 PM
Post
#1717
|
|
914 Guru Group: Members Posts: 5,680 Joined: 6-October 15 From: Petaluma, CA Member No.: 19,241 Region Association: Northern California |
I want to be able to run the car without the console cover so I needed a shifter support stand of some kind. Here's what I came up with.
The console cover sit right on top of it. Still a little bit of trimming to finish it up. Attached thumbnail(s) 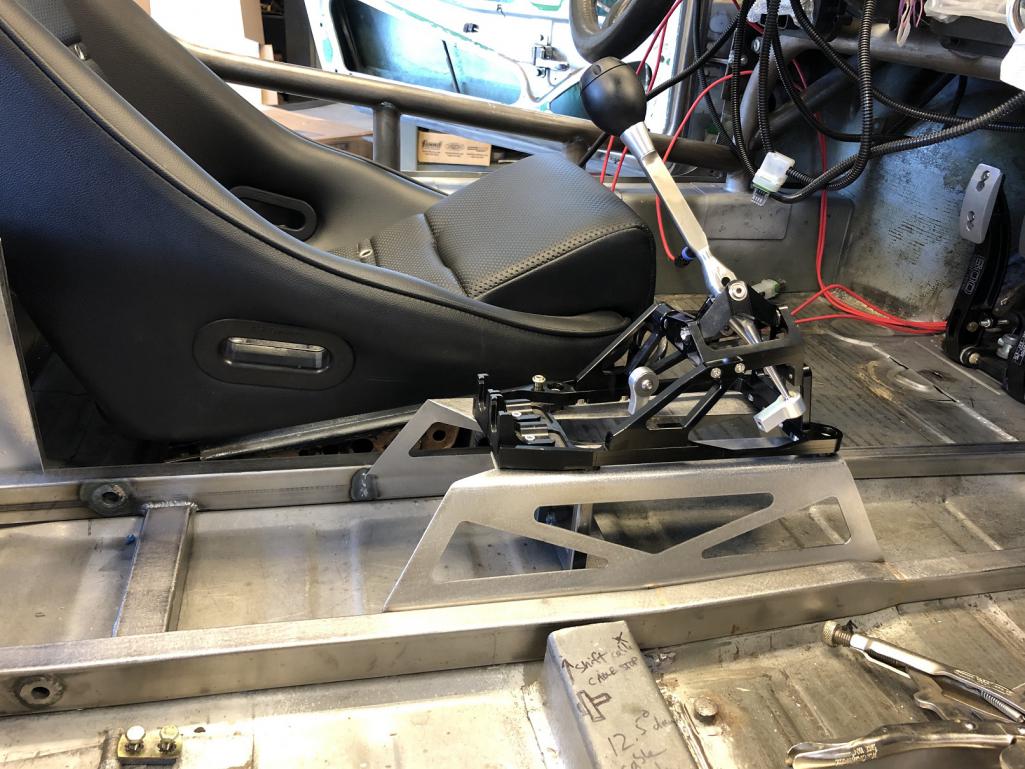
|
|
|
|
| tygaboy |
Jun 17 2019, 05:32 PM
Post
#1718
|
|
914 Guru Group: Members Posts: 5,680 Joined: 6-October 15 From: Petaluma, CA Member No.: 19,241 Region Association: Northern California |
Nearly-major milestone: Almost ready for final install of the fire wall panels. (IMG:style_emoticons/default/piratenanner.gif)
Attached thumbnail(s) 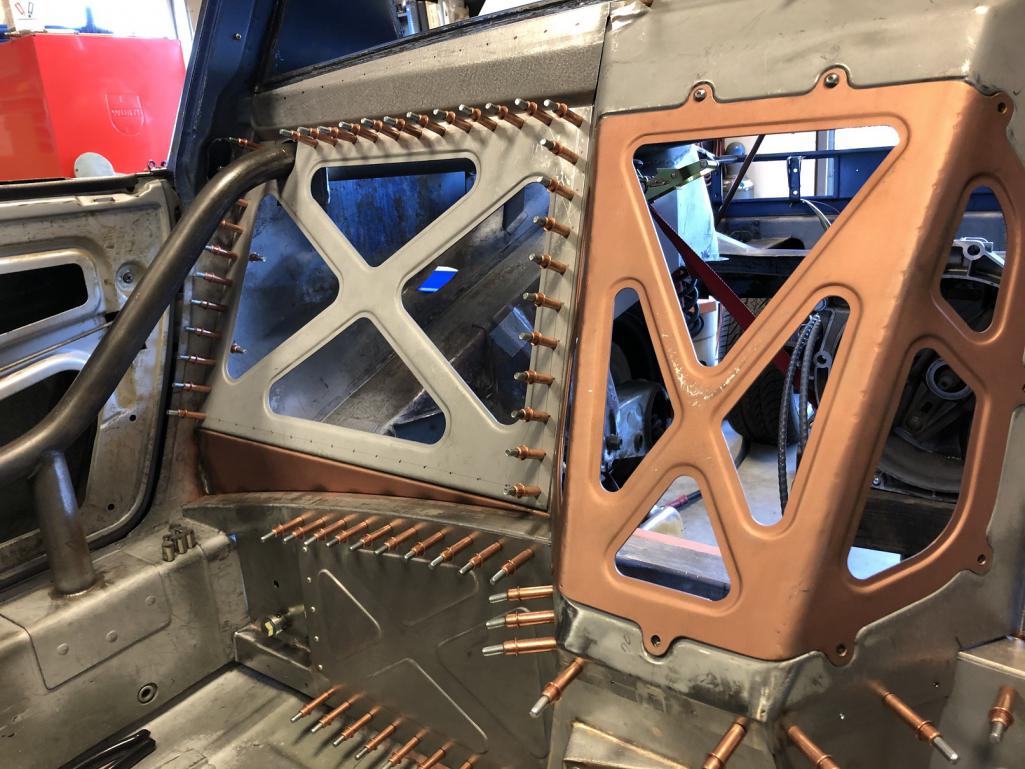
|
|
|
|
| tygaboy |
Jun 18 2019, 12:23 PM
Post
#1719
|
|
914 Guru Group: Members Posts: 5,680 Joined: 6-October 15 From: Petaluma, CA Member No.: 19,241 Region Association: Northern California |
Door bar trim panel, version 2. I added the upper lip / bend. I think it looks more finished than just the upper edge ending in line with the main fire wall panel.
Attached thumbnail(s) 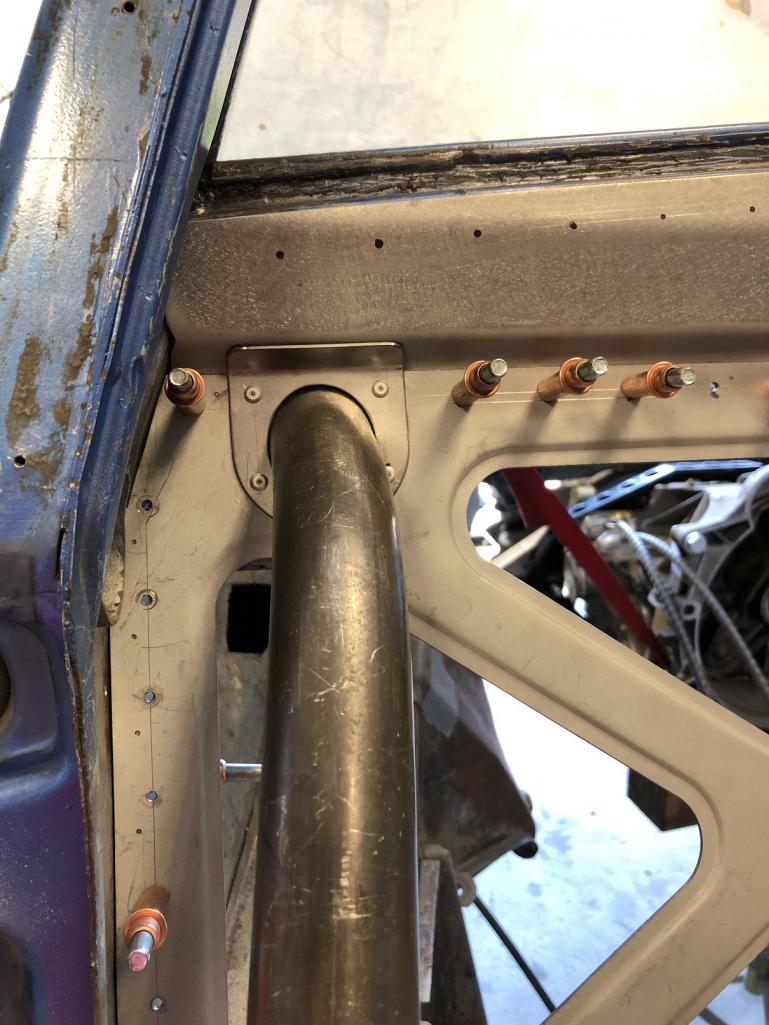
|
|
|
|
| tygaboy |
Jun 18 2019, 06:08 PM
Post
#1720
|
|
914 Guru Group: Members Posts: 5,680 Joined: 6-October 15 From: Petaluma, CA Member No.: 19,241 Region Association: Northern California |
Passenger side lower / upper outer added. See post #1701 for a pic of what it looked like before. This looks far more integrated, IMO.
On to the driver side to do the same. Attached thumbnail(s) 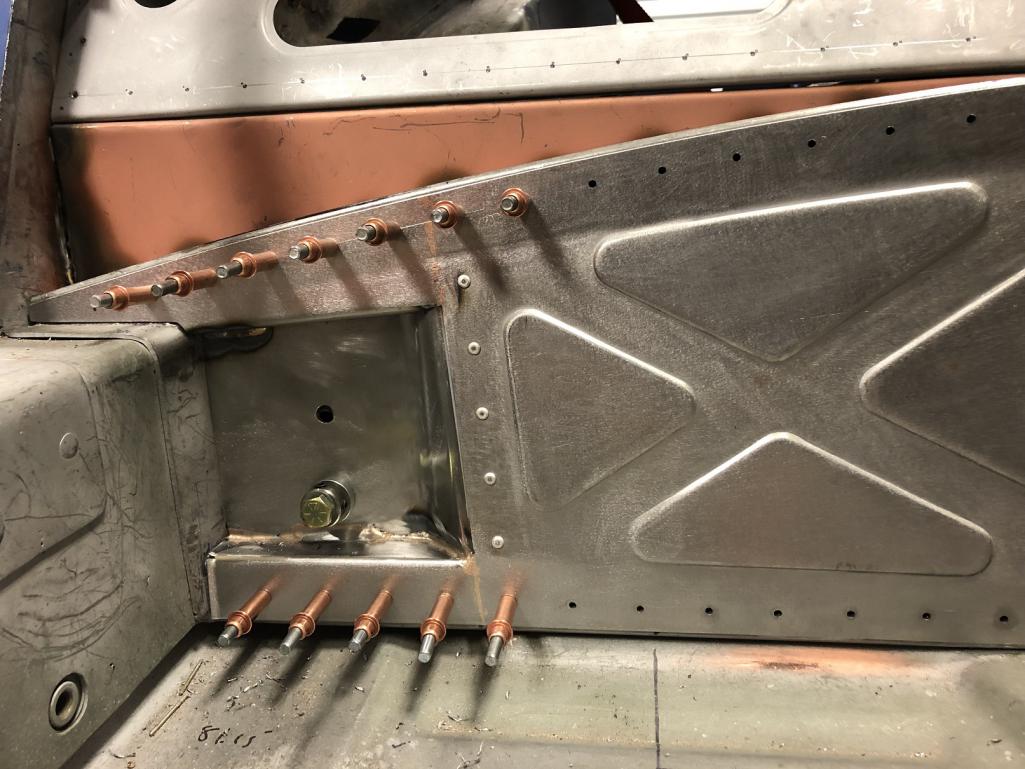
|
|
|
|
|
1 User(s) are reading this topic (1 Guests and 0 Anonymous Users)
0 Members:

|
Lo-Fi Version | Time is now: 5th November 2025 - 09:47 AM |
Invision Power Board
v9.1.4 © 2025 IPS, Inc.