|
|
|
Porsche, and the Porsche crest are registered trademarks of Dr. Ing. h.c. F. Porsche AG.
This site is not affiliated with Porsche in any way. Its only purpose is to provide an online forum for car enthusiasts. All other trademarks are property of their respective owners. |
|
|

  |

| tygaboy |
 Jul 12 2019, 04:57 PM Jul 12 2019, 04:57 PM
Post
#1741
|
|
914 Guru  Group: Members Posts: 5,680 Joined: 6-October 15 From: Petaluma, CA Member No.: 19,241 Region Association: Northern California |
I decided to upgrade the steering wheel to something that allowed even better gauge visibility. This is a 350mm Momo Mod 78. The "straight across the top then drop", three spoke set up is a big improvement over the previous wheel - without moving my head at all, there's virtually no part of any of the gauges I can't see. The Momo hub is on the way so pardon my manual positioning in that last pic...
And in keeping with the "RaceRod" theme, I decided to eliminate the stock, column-based turn signal and wiper switches in favor of "remote" steering wheel buttons. The Infinity Box electrics allow for programming such that I can have momentary switches that trigger the signals and the brain will cancel them after X seconds or not at all, if the brake lights are on. Same deal with headlights: I can have a high beam switch on the wheel that can either flash-to-pass the brights or turn them on/off. Beyond signals and hi beam, I'm not sure if I'll have other functions accessible from the wheel, so I made a couple button plates. It's simple enough to add or remove space for more or less buttons. Attached thumbnail(s) 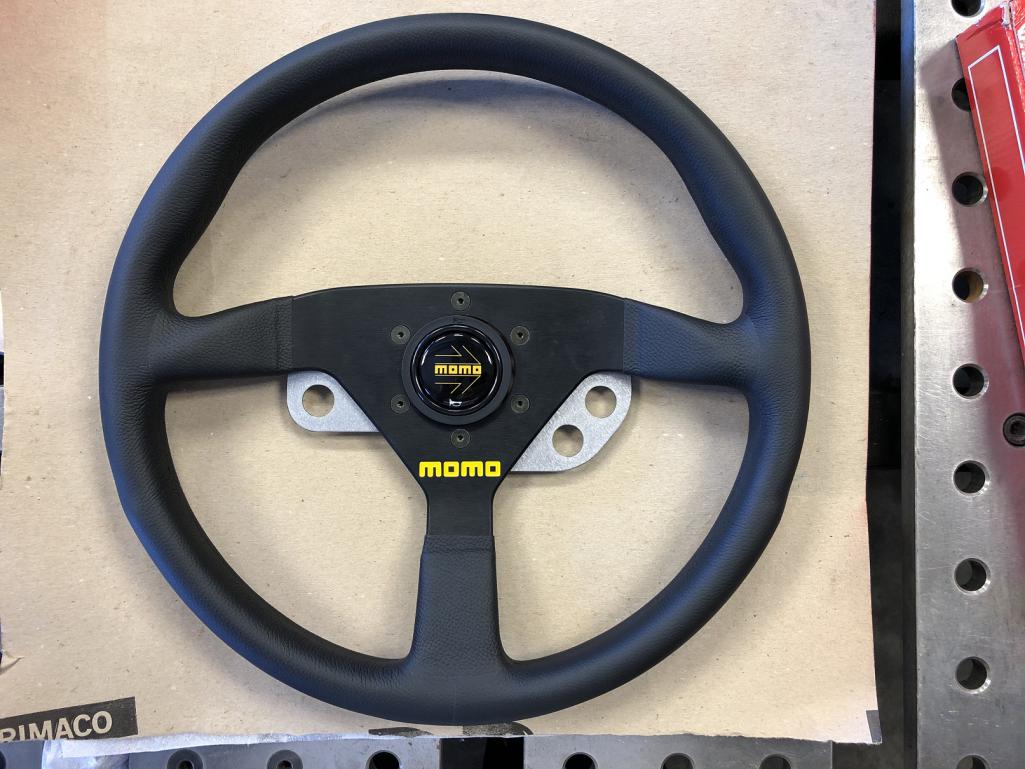  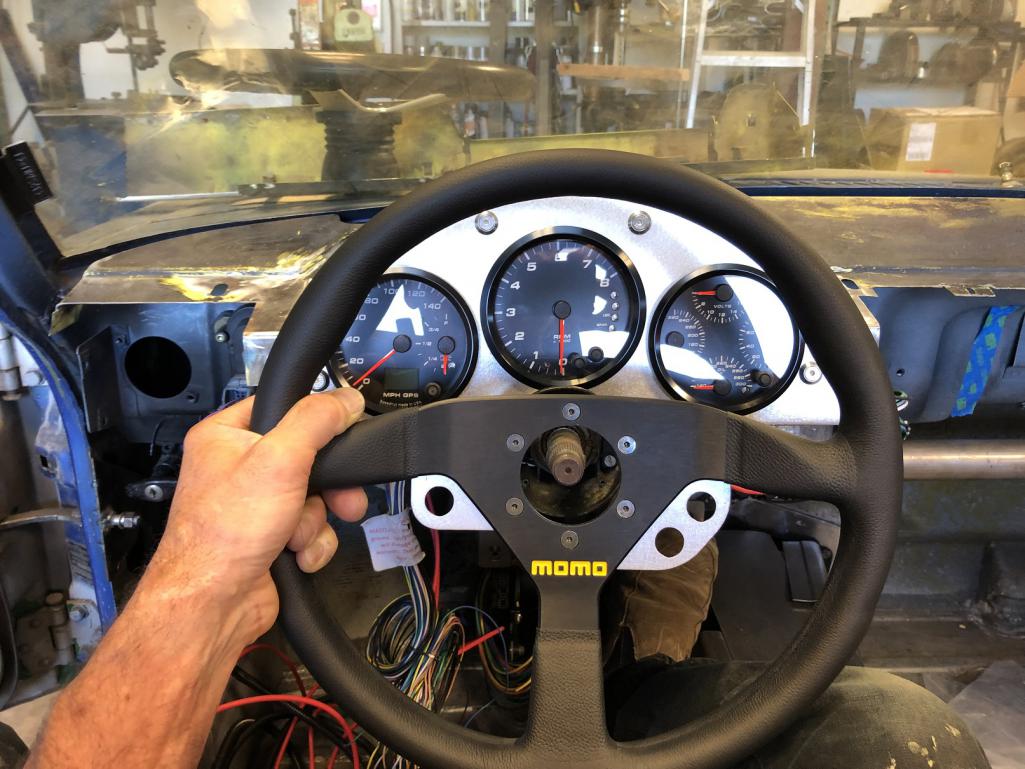
|
   |

 
|
| FourBlades |
Jul 13 2019, 08:04 AM
Post
#1742
|
|
From Wreck to Rockin Group: Members Posts: 2,056 Joined: 3-December 07 From: Brevard, FL Member No.: 8,414 Region Association: South East States |
Gauge cluster and wheel works together like a factory set up! 88 more pages until the first test drive! (IMG:style_emoticons/default/evilgrin.gif) |
|
|
|
| tygaboy |
Jul 16 2019, 09:14 PM
Post
#1743
|
|
914 Guru Group: Members Posts: 5,680 Joined: 6-October 15 From: Petaluma, CA Member No.: 19,241 Region Association: Northern California |
Major milestone completed today. The engine ran again for the first time since I got it from Tony @Cracker .
Presenting the dyno results for one LS3 with ITBs. 518 hp 463 lb/ft I think that ought to about do it. https://www.youtube.com/watch?v=zJqF9IebGWY Attached thumbnail(s) 
|
|
|
|
| Krieger |
Jul 16 2019, 11:27 PM
Post
#1744
|
|
Advanced Member Group: Members Posts: 4,825 Joined: 24-May 04 From: Santa Rosa CA Member No.: 2,104 Region Association: None |
(IMG:style_emoticons/default/ohmy.gif). holy shit, your exhaust is glowing! Congratulations!
|
|
|
|
| dan10101 |
Jul 17 2019, 01:23 AM
Post
#1745
|
|
TORQUE-o-holic Group: Members Posts: 1,140 Joined: 29-April 03 From: Eagle Point, Or Member No.: 626 Region Association: Pacific Northwest |
Awesome!
You're gonna like that!! (IMG:style_emoticons/default/aktion035.gif) |
|
|
|
| Andyrew |
Jul 17 2019, 05:45 AM
Post
#1746
|
|
Spooling.... Please wait Group: Members Posts: 13,380 Joined: 20-January 03 From: Riverbank, Ca Member No.: 172 Region Association: Northern California |
|
|
|
|
| Cairo94507 |
Jul 17 2019, 06:48 AM
Post
#1747
|
|
Michael Group: Members Posts: 10,486 Joined: 1-November 08 From: Auburn, CA Member No.: 9,712 Region Association: Northern California |
I absolutely can not wait to see that engine in your car. Of course hearing it would be the icing on the cake. (IMG:style_emoticons/default/beerchug.gif)
|
 |
|
| bbrock |
Jul 17 2019, 07:19 AM
Post
#1748
|
|
914 Guru Group: Members Posts: 5,269 Joined: 17-February 17 From: Montana Member No.: 20,845 Region Association: Rocky Mountains |
That ought to be enough to get you into low earth orbit (IMG:style_emoticons/default/w00t2.gif)
|
|
|
|
| tygaboy |
Jul 18 2019, 10:55 AM
Post
#1749
|
|
914 Guru Group: Members Posts: 5,680 Joined: 6-October 15 From: Petaluma, CA Member No.: 19,241 Region Association: Northern California |
Yep, I'm really happy with the dyno results! Seeing it run certainly jacks up the motivation to get it on the road.
But I couldn't help myself on another redo: Over time, I started to notice (and dislike) the way the shape of upper/outer fire wall panels just died when they ran into the dog house. (in the 2nd pic) So I sliced the cap off the dog house and started on a piece that carries that line all the way across the fire wall. Form over function triumphs again... Attached thumbnail(s) 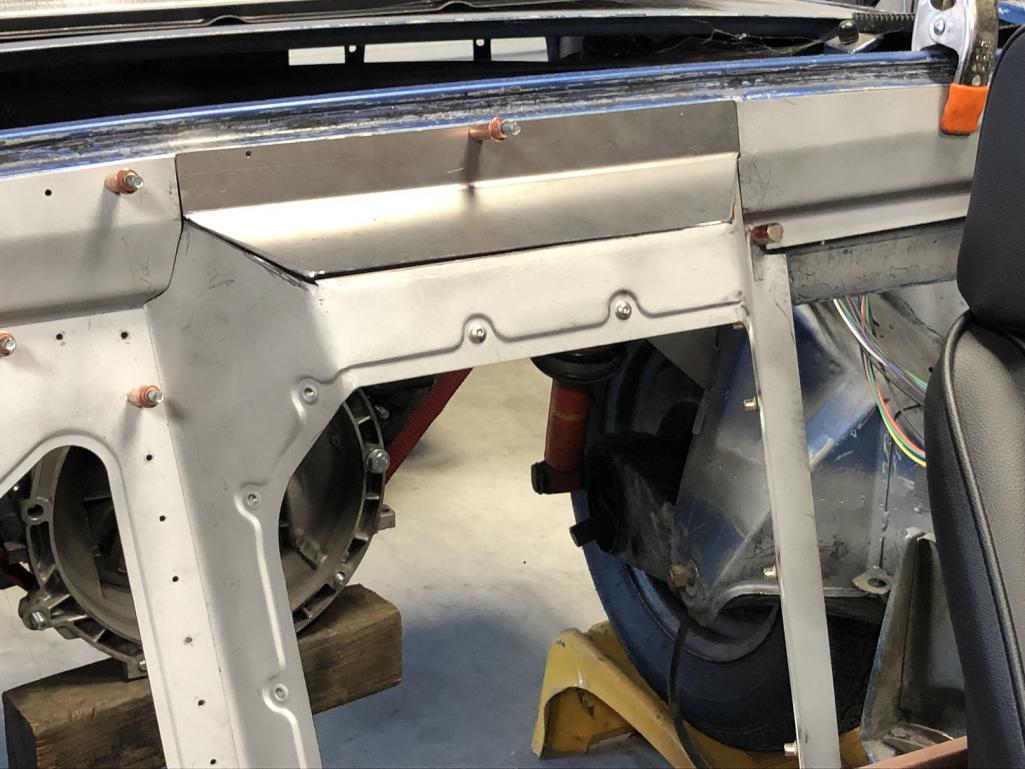 Attached image(s) 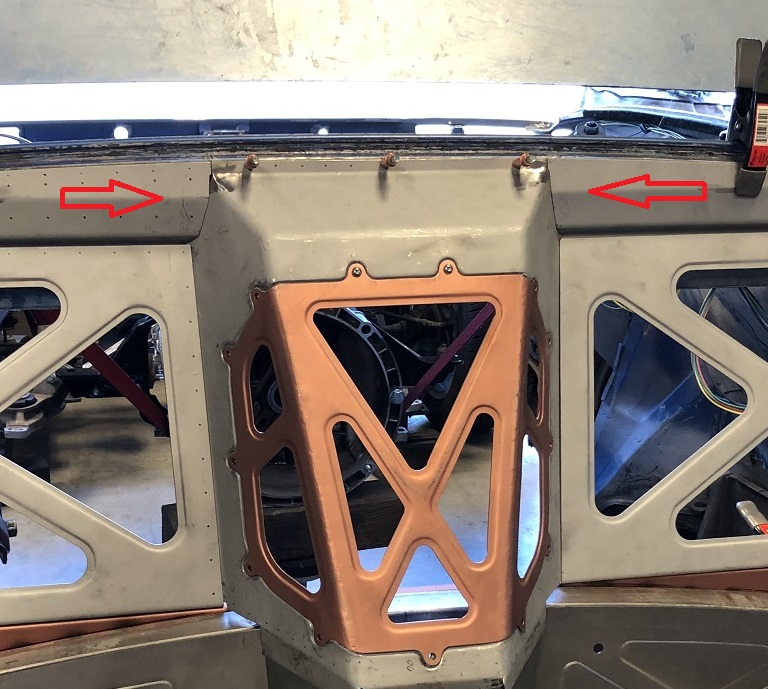
|
|
|
|
| tygaboy |
Jul 18 2019, 05:56 PM
Post
#1750
|
|
914 Guru Group: Members Posts: 5,680 Joined: 6-October 15 From: Petaluma, CA Member No.: 19,241 Region Association: Northern California |
And I need to select the needed switches so I ordered a few different kinds to determine what I like. Initial plan is looking like this pic: stealth black for the turn signals with something different for the high beam.
The final switches will likely be sourced from the same manufacturer but I do think I'll mix up the look. Attached thumbnail(s) 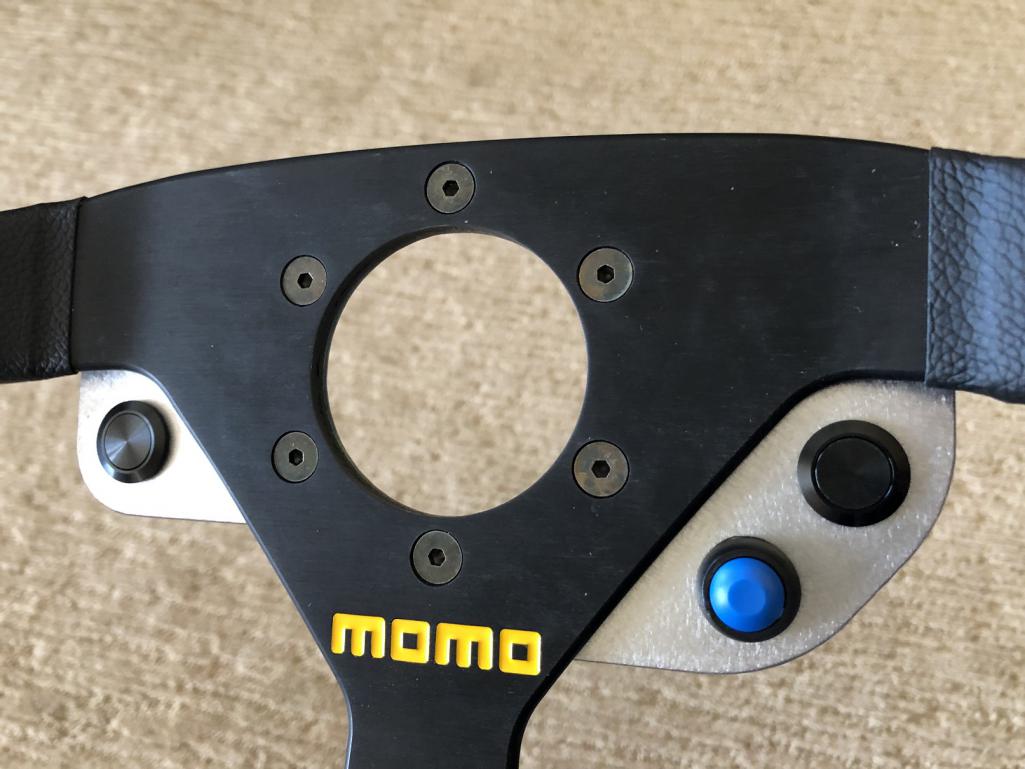 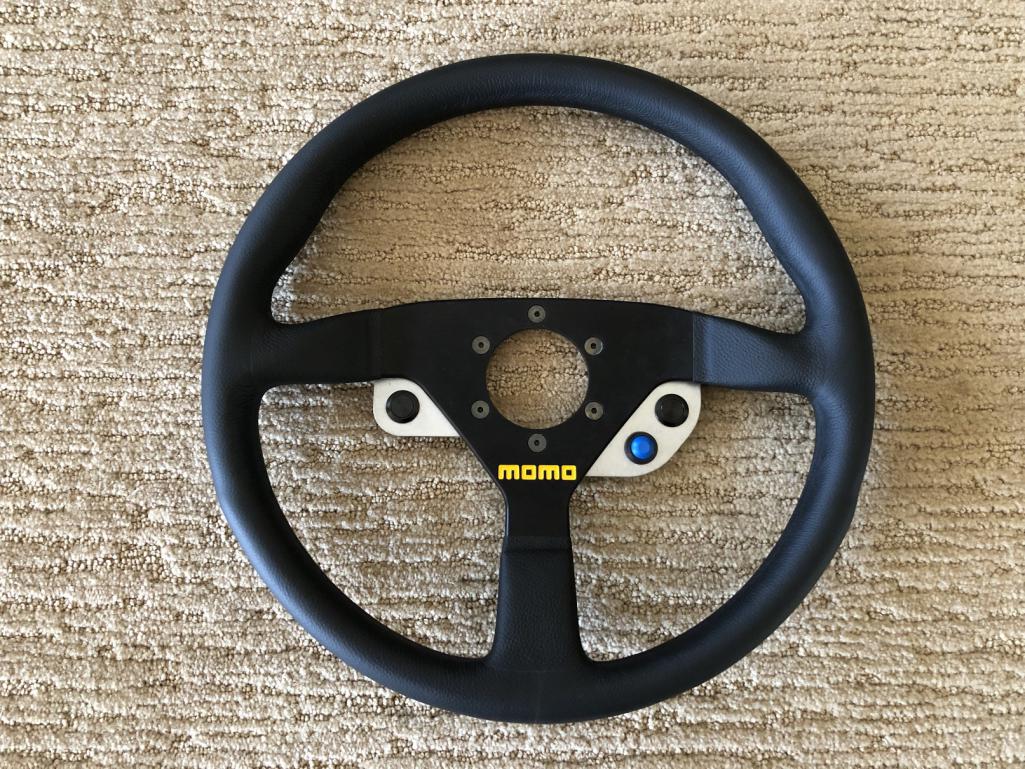
|
|
|
|
| 914forme |
Jul 18 2019, 07:07 PM
Post
#1751
|
|
Times a wastin', get wrenchin'! Group: Members Posts: 3,896 Joined: 24-July 04 From: Dayton, Ohio Member No.: 2,388 Region Association: None |
switch faces plastic or aluminum. Either way it could be cnc milled or laser etched. If AL, I would Cerakote them then laser etch the symbols into them for what they are. You can do some very neat stuff with CeraKote and lasers.
|
|
|
|
| tygaboy |
Jul 21 2019, 10:49 AM
Post
#1752
|
|
914 Guru Group: Members Posts: 5,680 Joined: 6-October 15 From: Petaluma, CA Member No.: 19,241 Region Association: Northern California |
@914forme Stephen - The switches are AL but I think I'm going to leave them "blank", at least for now.
And the Momo hub came in so here's the wheel all set to go. It's working out just as I'd hoped. Attached thumbnail(s) 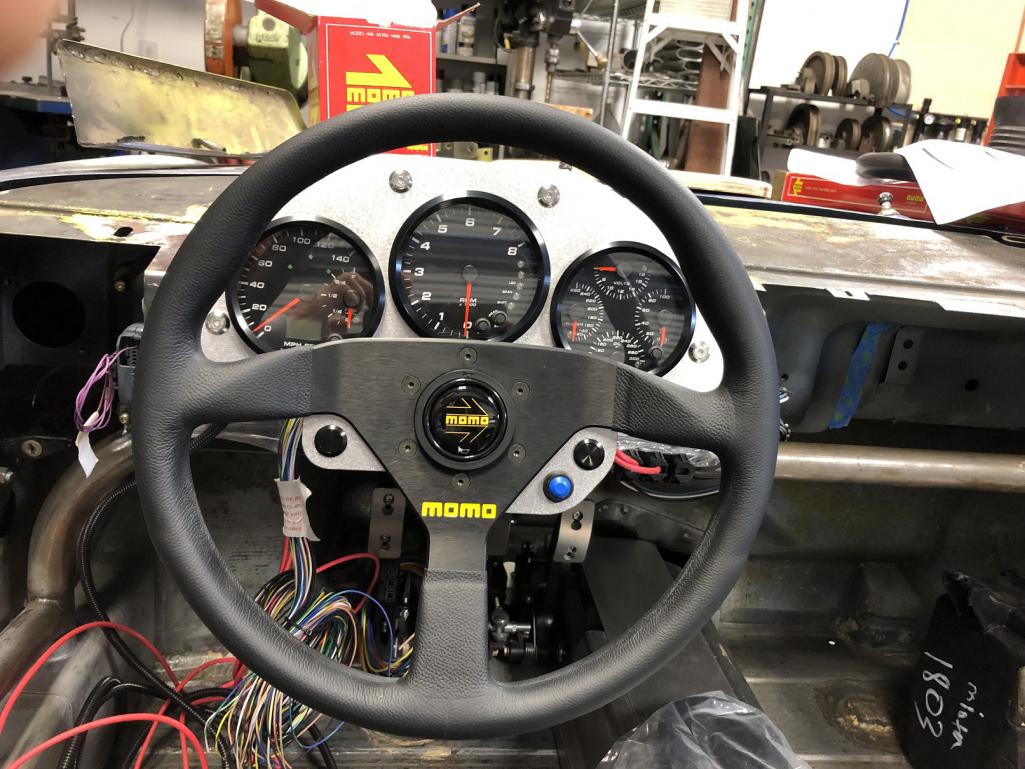
|
|
|
|
| tygaboy |
Jul 21 2019, 05:06 PM
Post
#1753
|
|
914 Guru Group: Members Posts: 5,680 Joined: 6-October 15 From: Petaluma, CA Member No.: 19,241 Region Association: Northern California |
Today I got the reshaped dog house upper panel welded in.
Attached thumbnail(s) 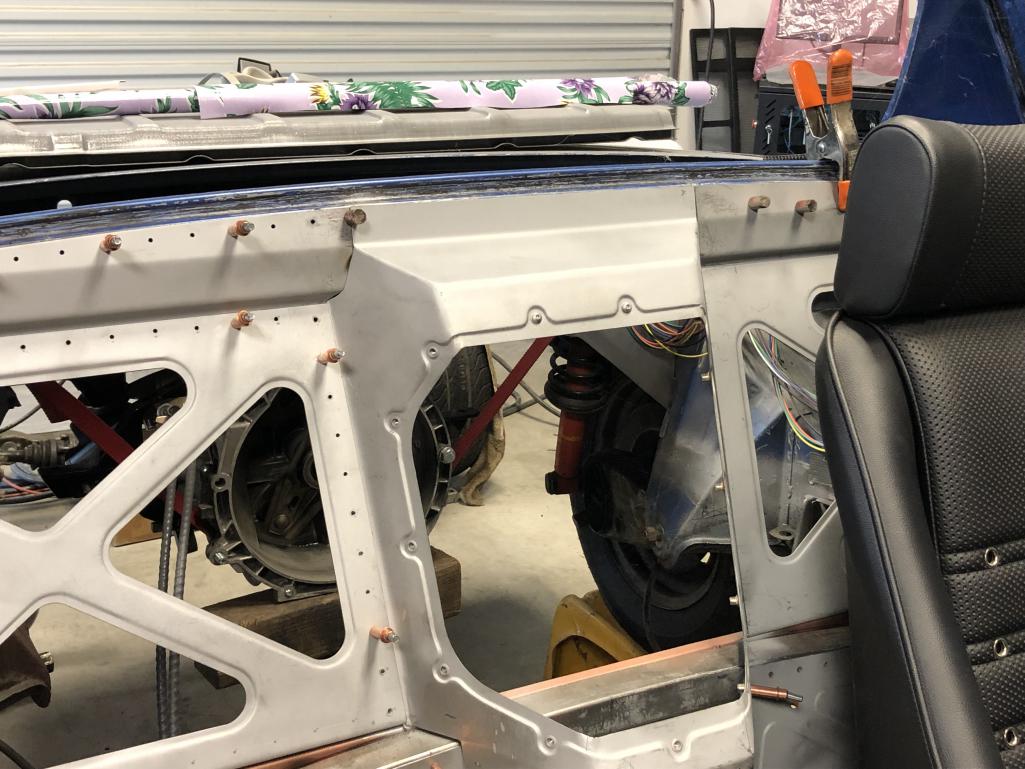
|
|
|
|
| Morph914 |
Jul 21 2019, 08:42 PM
Post
#1754
|
|
Member Group: Members Posts: 435 Joined: 22-August 16 From: St Augustine, FL Member No.: 20,326 Region Association: South East States |
As always, recent mods looking great Chris!
With all that horse power and as light as this car will be, you might have to load the trunk with lead weights to hook it up. |
|
|
|
| tygaboy |
Jul 22 2019, 05:27 PM
Post
#1755
|
|
914 Guru Group: Members Posts: 5,680 Joined: 6-October 15 From: Petaluma, CA Member No.: 19,241 Region Association: Northern California |
Time to get all the fire wall panels prep'd for install.
I want all the rivets to align vertically. The fun part is that the rivet line on the main panels is level but the line in the upper panel is slightly curved. This means I can't just set the rivet fan to the same distance since the rivet line on the curve is longer. So, I used the laser level, positioned it appropriately for each rivet and marked directly, vertically above each main panel rivet. It's always a bit more complicated than you think it'll be... Attached thumbnail(s) 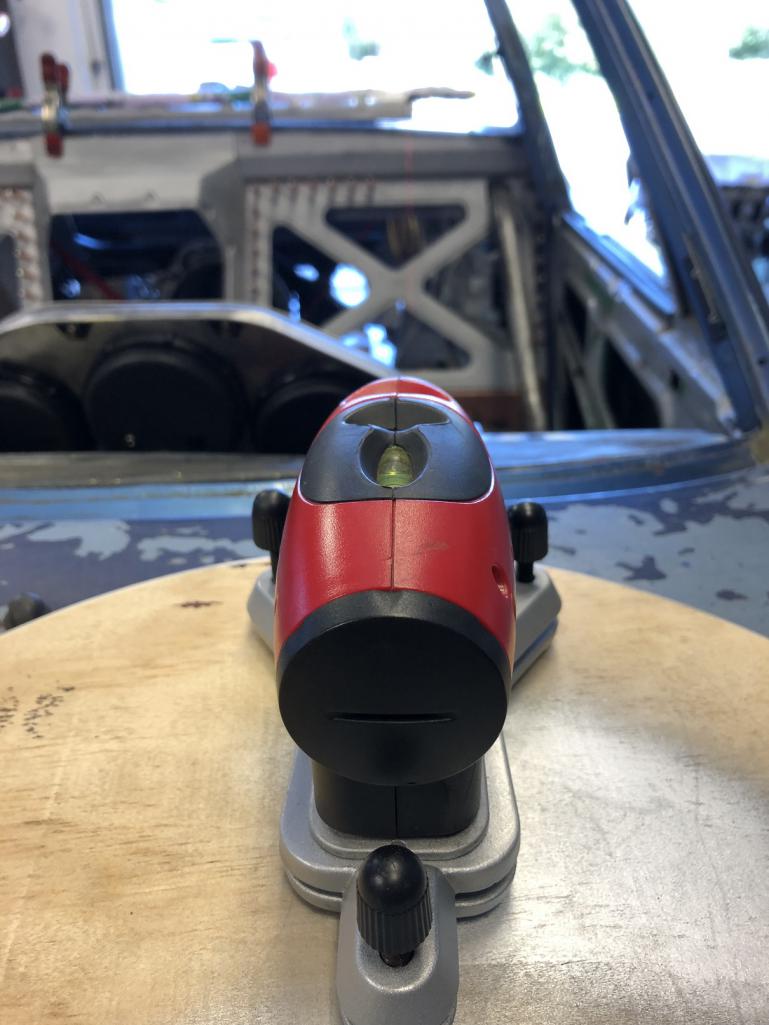 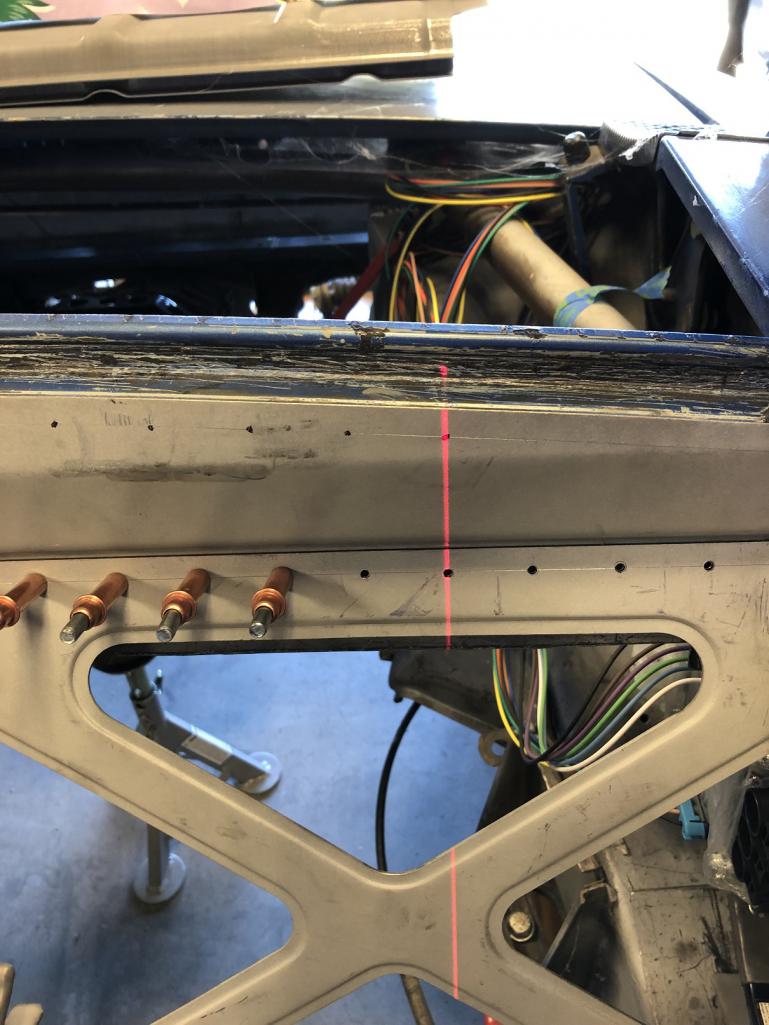
|
|
|
|
| tygaboy |
Jul 22 2019, 05:29 PM
Post
#1756
|
|
914 Guru Group: Members Posts: 5,680 Joined: 6-October 15 From: Petaluma, CA Member No.: 19,241 Region Association: Northern California |
I reshaped the corner radius on the new dog house upper panel then marked and drilled the doghouse for rivets.
My wife was quite funny when she saw all this in process. Her comment: "Well, you sure know the drill..." (IMG:style_emoticons/default/lol-2.gif) @Andyrew , I hope you got that Cleco stock! Attached thumbnail(s) 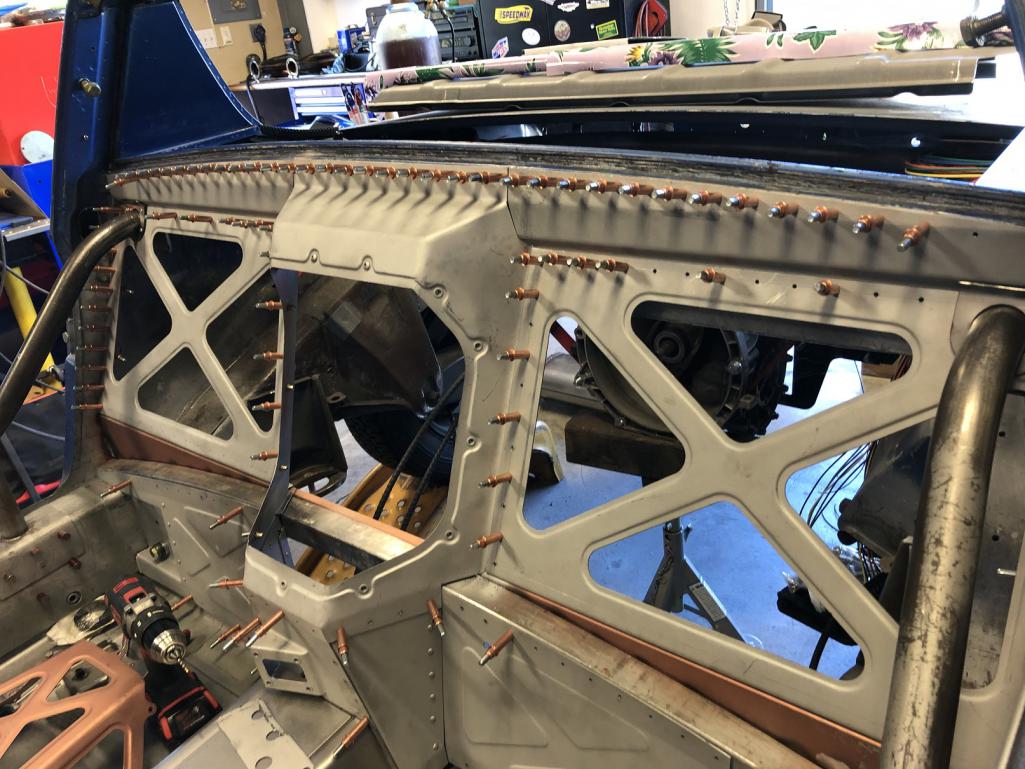
|
|
|
|
| tygaboy |
Jul 22 2019, 05:32 PM
Post
#1757
|
|
914 Guru Group: Members Posts: 5,680 Joined: 6-October 15 From: Petaluma, CA Member No.: 19,241 Region Association: Northern California |
QUOTE(Morph914 @ Jul 21 2019, 07:42 PM)  As always, recent mods looking great Chris! With all that horse power and as light as this car will be, you might have to load the trunk with lead weights to hook it up. @Morph914 Thanks John! I know, right? It should be "interesting" with this set up. And how's your build coming along? |
|
|
|
| Andyrew |
Jul 22 2019, 06:40 PM
Post
#1758
|
|
Spooling.... Please wait Group: Members Posts: 13,380 Joined: 20-January 03 From: Riverbank, Ca Member No.: 172 Region Association: Northern California |
QUOTE(tygaboy @ Jul 22 2019, 04:29 PM) I reshaped the corner radius on the new dog house upper panel then marked and drilled the doghouse for rivets. My wife was quite funny when she saw all this in process. Her comment: "Well, you sure know the drill..." (IMG:style_emoticons/default/lol-2.gif) @Andyrew , I hope you got that Cleco stock! (IMG:style_emoticons/default/drooley.gif) I think you should leave them in there permanently! |
|
|
|
| Morph914 |
Jul 22 2019, 08:30 PM
Post
#1759
|
|
Member Group: Members Posts: 435 Joined: 22-August 16 From: St Augustine, FL Member No.: 20,326 Region Association: South East States |
QUOTE(tygaboy @ Jul 22 2019, 06:32 PM) QUOTE(Morph914 @ Jul 21 2019, 07:42 PM) As always, recent mods looking great Chris! With all that horse power and as light as this car will be, you might have to load the trunk with lead weights to hook it up. @Morph914 Thanks John! I know, right? It should be "interesting" with this set up. And how's your build coming along? It’s going well, my goal was to get the tub into epoxy before the humidity hit, and I was able to do that. So what little body work there is to do will be completed in the fall when cooler and drier weather come back. To keep the momentum, I am going through all the parts cleaning, painting, replacing bushings, bearings, etc., Hoping to paint this winter. I do feel a little guilty already having the car to this point after following some of the builds, like Brent’s. Thanks to you for selling me a dry car! (IMG:style_emoticons/default/aktion035.gif) Cheers |
|
|
|
| tygaboy |
Jul 23 2019, 04:46 PM
Post
#1760
|
|
914 Guru Group: Members Posts: 5,680 Joined: 6-October 15 From: Petaluma, CA Member No.: 19,241 Region Association: Northern California |
I have a lot of little things to finish. Necessary but not too exciting.
Today, it was fabbing the little extension panels for the driver side lower fire wall so that panel extends all the way to the long, above and below the seat belt retractor recess. I also took the opportunity to braze in the e-brake guide tubes. It's all coming along. Attached thumbnail(s) 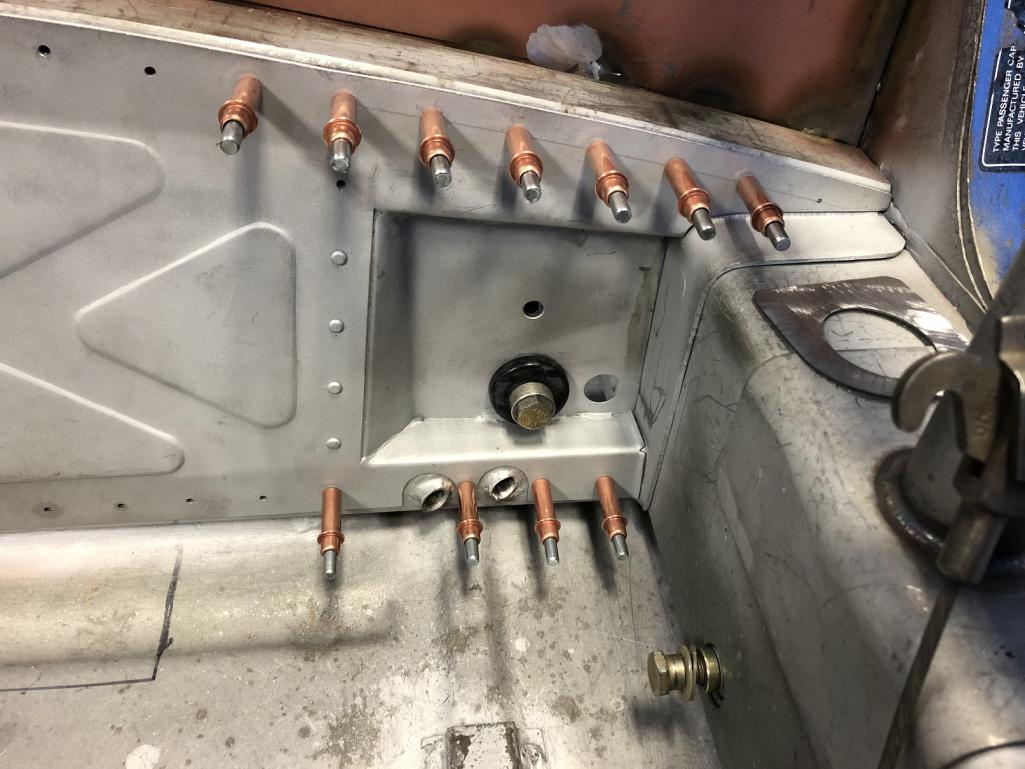
|
|
|
|
|
7 User(s) are reading this topic (7 Guests and 0 Anonymous Users)
0 Members:

|
Lo-Fi Version | Time is now: 5th November 2025 - 07:31 AM |
Invision Power Board
v9.1.4 © 2025 IPS, Inc.