|
|
|
Porsche, and the Porsche crest are registered trademarks of Dr. Ing. h.c. F. Porsche AG.
This site is not affiliated with Porsche in any way. Its only purpose is to provide an online forum for car enthusiasts. All other trademarks are property of their respective owners. |
|
|

  |

| tygaboy |
 Jan 16 2020, 03:16 PM Jan 16 2020, 03:16 PM
Post
#2201
|
|
914 Guru  Group: Members Posts: 5,826 Joined: 6-October 15 From: Petaluma, CA Member No.: 19,241 Region Association: Northern California |
I'll post one more of these then stop. It's essentially the same on each one: the flare ends aren't even close to what they need to be, they aren't symmetrical, side to side, etc.
This next one is a good example of that. Note how the one I did earlier looks and how it has a straight shot inboard from where the lip terminates, This other one has a totally different shape there, almost like a chunk was taken out. Attached thumbnail(s) 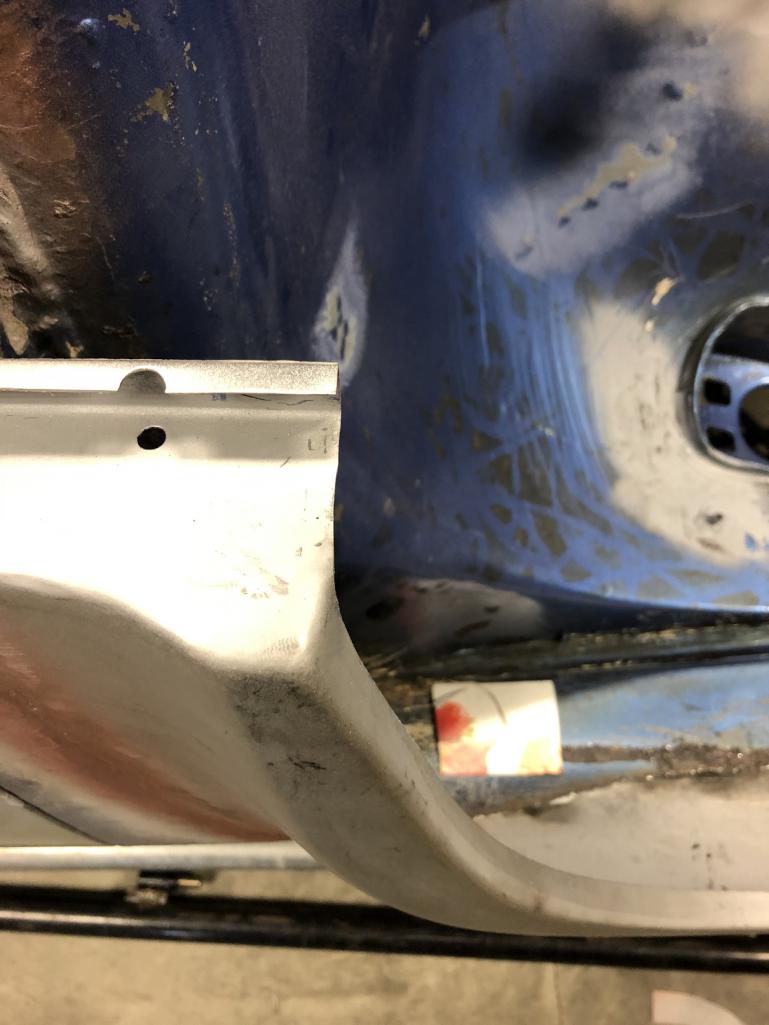 
|
   |

 
|
| tygaboy |
Jan 16 2020, 03:20 PM
Post
#2202
|
|
914 Guru Group: Members Posts: 5,826 Joined: 6-October 15 From: Petaluma, CA Member No.: 19,241 Region Association: Northern California |
Anyway, first I hammered the lower area flat and into shape to match that first angled portion of the chassis, then clamped the dolly in place and added the crease needed to match the lower portion of the chassis.
Attached thumbnail(s) 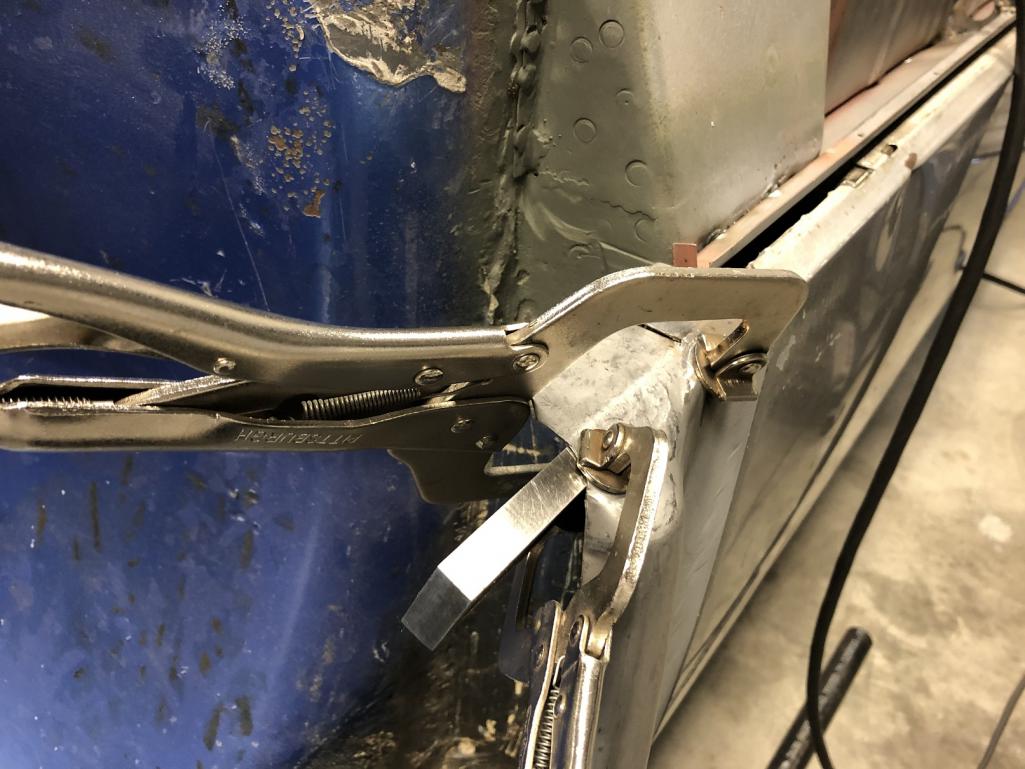
|
|
|
|
| tygaboy |
Jan 16 2020, 03:21 PM
Post
#2203
|
|
914 Guru Group: Members Posts: 5,826 Joined: 6-October 15 From: Petaluma, CA Member No.: 19,241 Region Association: Northern California |
Get things to this point...
Attached thumbnail(s) 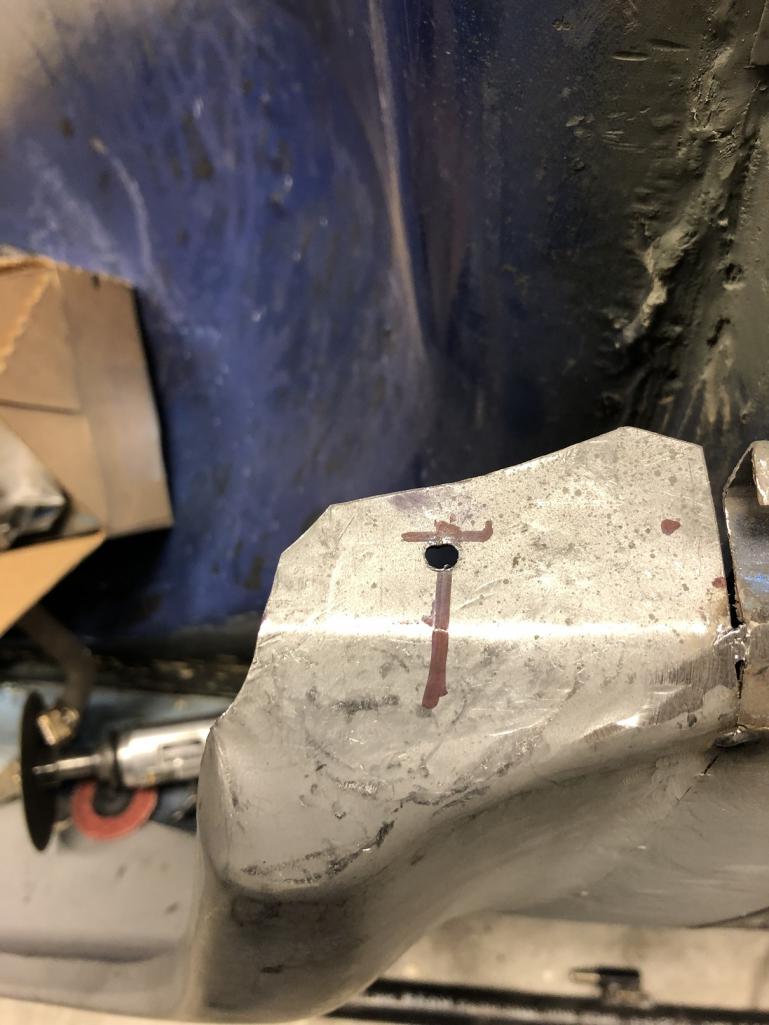
|
|
|
|
| tygaboy |
Jan 16 2020, 03:22 PM
Post
#2204
|
|
914 Guru Group: Members Posts: 5,826 Joined: 6-October 15 From: Petaluma, CA Member No.: 19,241 Region Association: Northern California |
The original factory piece I cut off wasn't going to work so I bent up a channel and tacked in into place.
Here you can also see the "patch" I made to address that missing chunk. Attached thumbnail(s) 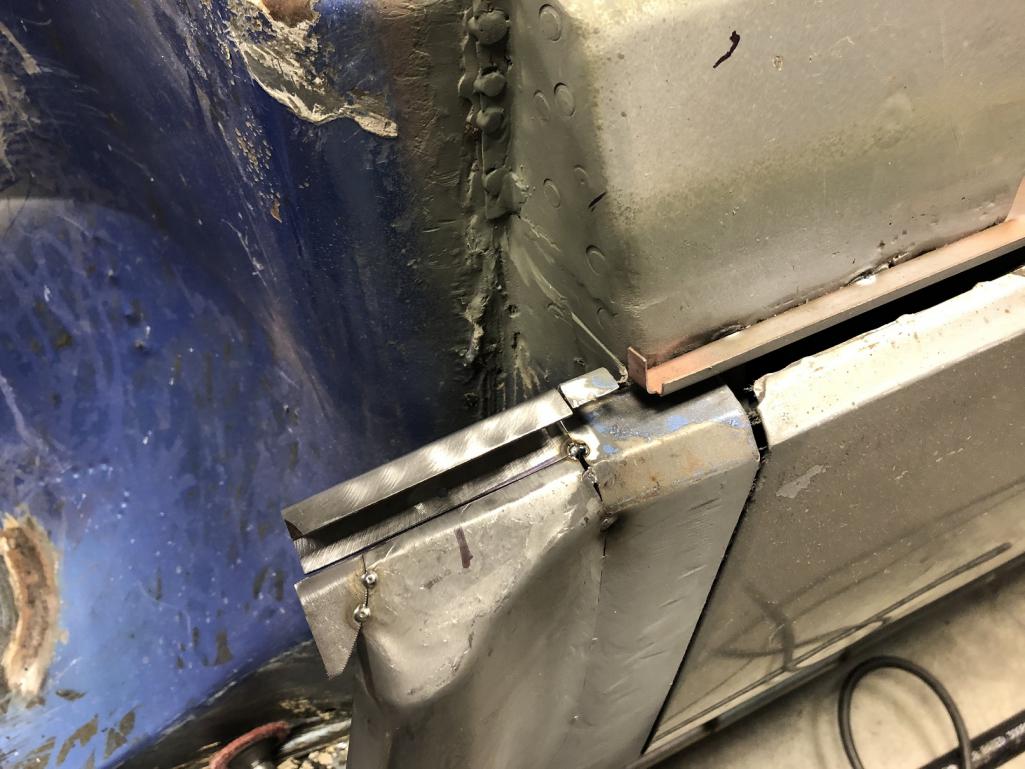
|
|
|
|
| tygaboy |
Jan 16 2020, 03:24 PM
Post
#2205
|
|
914 Guru Group: Members Posts: 5,826 Joined: 6-October 15 From: Petaluma, CA Member No.: 19,241 Region Association: Northern California |
Next, I made a template of the other side that I used to determine final size and shape for this side.
Attached thumbnail(s) 
|
|
|
|
| tygaboy |
Jan 16 2020, 03:25 PM
Post
#2206
|
|
914 Guru Group: Members Posts: 5,826 Joined: 6-October 15 From: Petaluma, CA Member No.: 19,241 Region Association: Northern California |
Tack, hammer, trim, grind. Getting there.
Attached thumbnail(s) 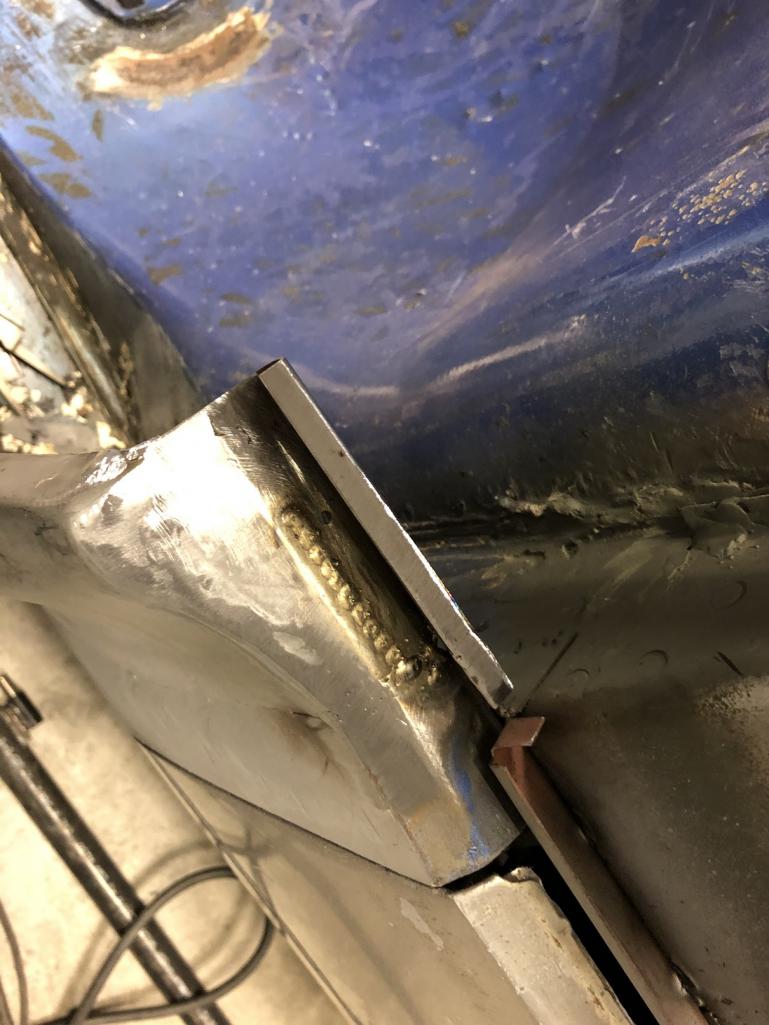 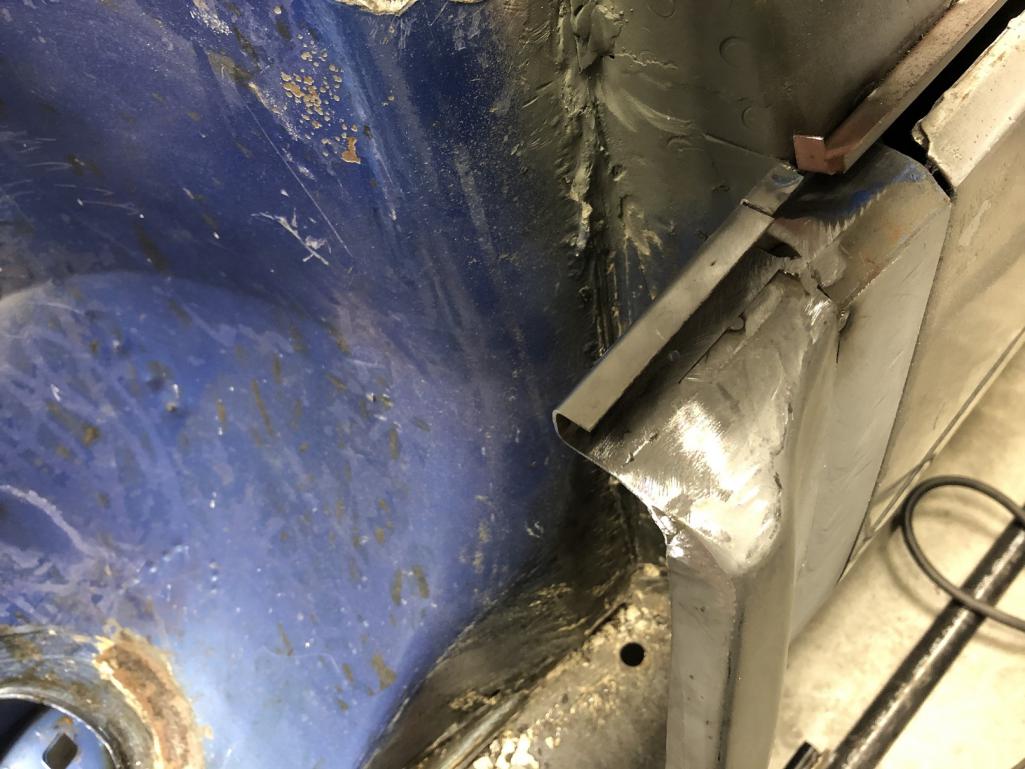
|
|
|
|
| tygaboy |
Jan 16 2020, 03:26 PM
Post
#2207
|
|
914 Guru Group: Members Posts: 5,826 Joined: 6-October 15 From: Petaluma, CA Member No.: 19,241 Region Association: Northern California |
A bit more fine tuning and I'll call this area done.
Attached thumbnail(s) 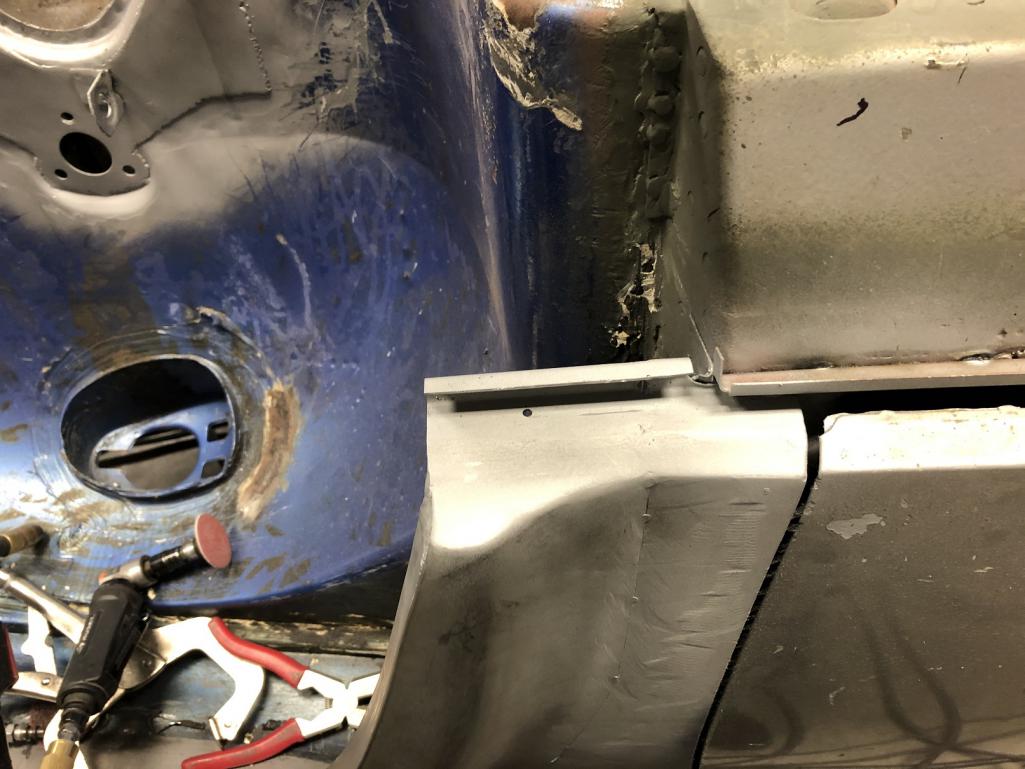
|
|
|
|
| Andyrew |
Jan 16 2020, 10:59 PM
Post
#2208
|
|
Spooling.... Please wait Group: Members Posts: 13,380 Joined: 20-January 03 From: Riverbank, Ca Member No.: 172 Region Association: Northern California |
Wow Chris! Your on a whole other level with this perfection! This car is going to be simply stunning!
|
|
|
|
| tygaboy |
Jan 27 2020, 01:39 PM
Post
#2209
|
|
914 Guru Group: Members Posts: 5,826 Joined: 6-October 15 From: Petaluma, CA Member No.: 19,241 Region Association: Northern California |
Since I was never going to use them, today I fabbed the needed pieces and plated over the jack post areas.
Then it was welding on the Patrick Motorsports toe adjuster attachment blocks. I even remembered to drill the clearance hole for the bolt before I welded it on! I still need to weld the joint between the top of the plate and the chassis. Attached thumbnail(s) 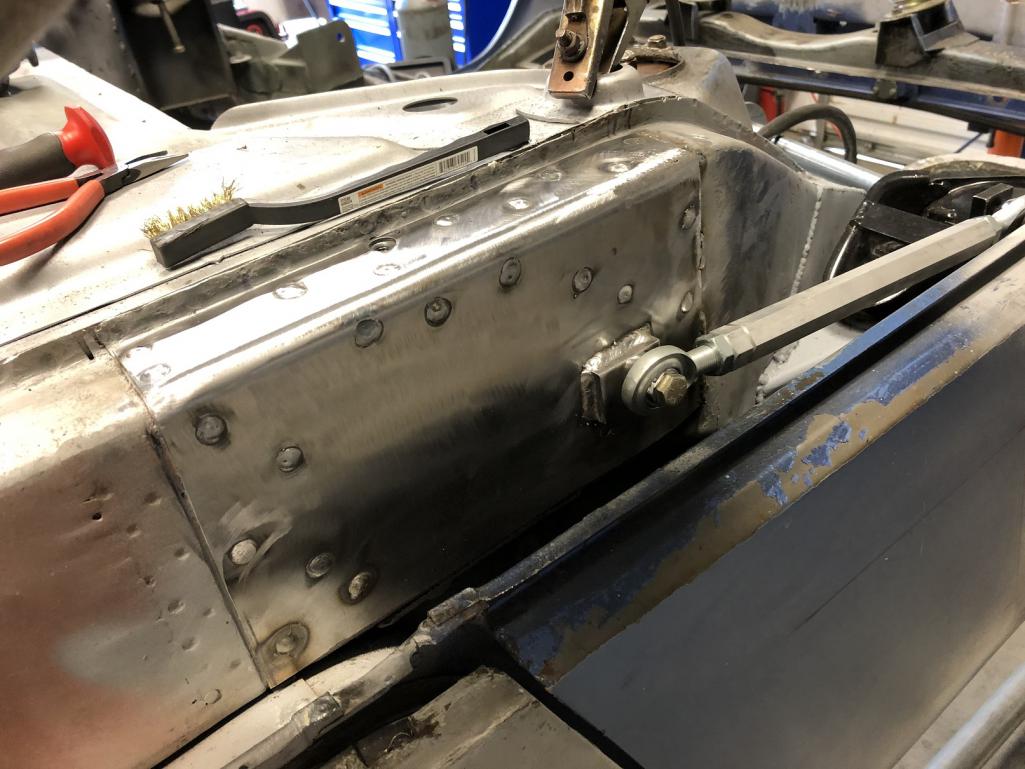
|
|
|
|
| tomeric914 |
Jan 27 2020, 02:01 PM
Post
#2210
|
|
One Lap of America in a 914! Group: Members Posts: 1,324 Joined: 25-May 08 From: Syracuse, NY Member No.: 9,101 Region Association: North East States |
Great metal fabrication porn @tygaboy !
|
|
|
|
| tygaboy |
Jan 27 2020, 06:04 PM
Post
#2211
|
|
914 Guru Group: Members Posts: 5,826 Joined: 6-October 15 From: Petaluma, CA Member No.: 19,241 Region Association: Northern California |
Both sides complete! And note that these toe adjusters usually run parallel to the chassis/ground. But with the Tangerine pickups raising things up 2", I get this nice sloping install.
I'm slowly ticking off these to-do's and should have all the chassis fab complete in a couple weeks, fingers crossed. (IMG:style_emoticons/default/welder.gif) Attached thumbnail(s) 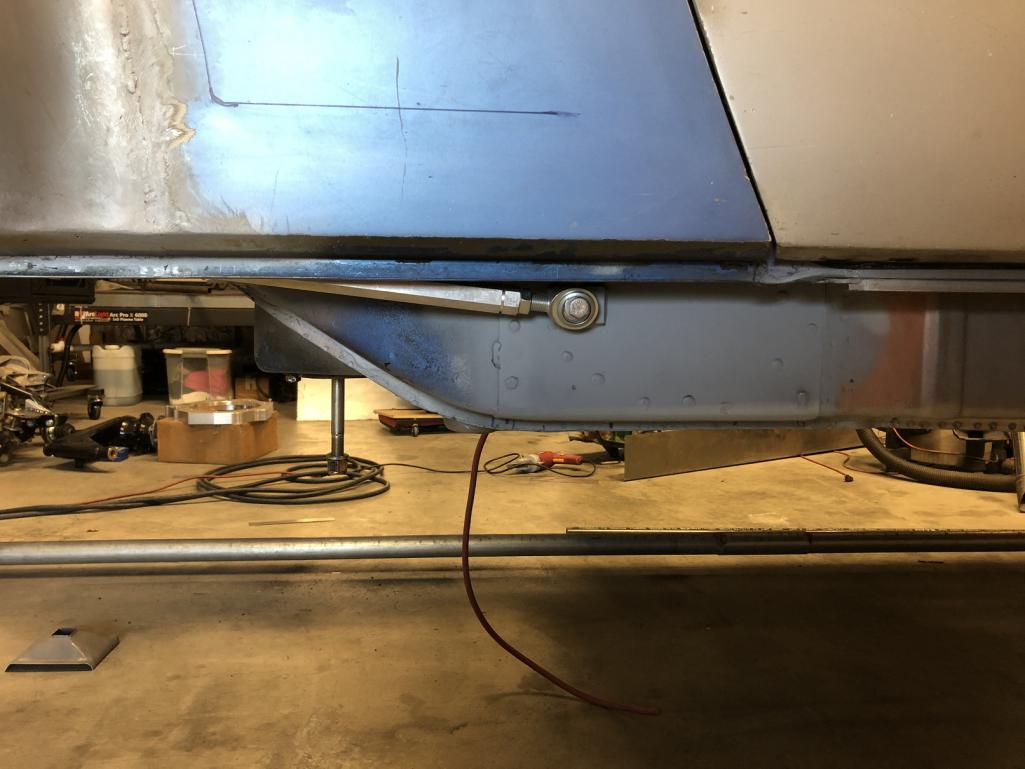 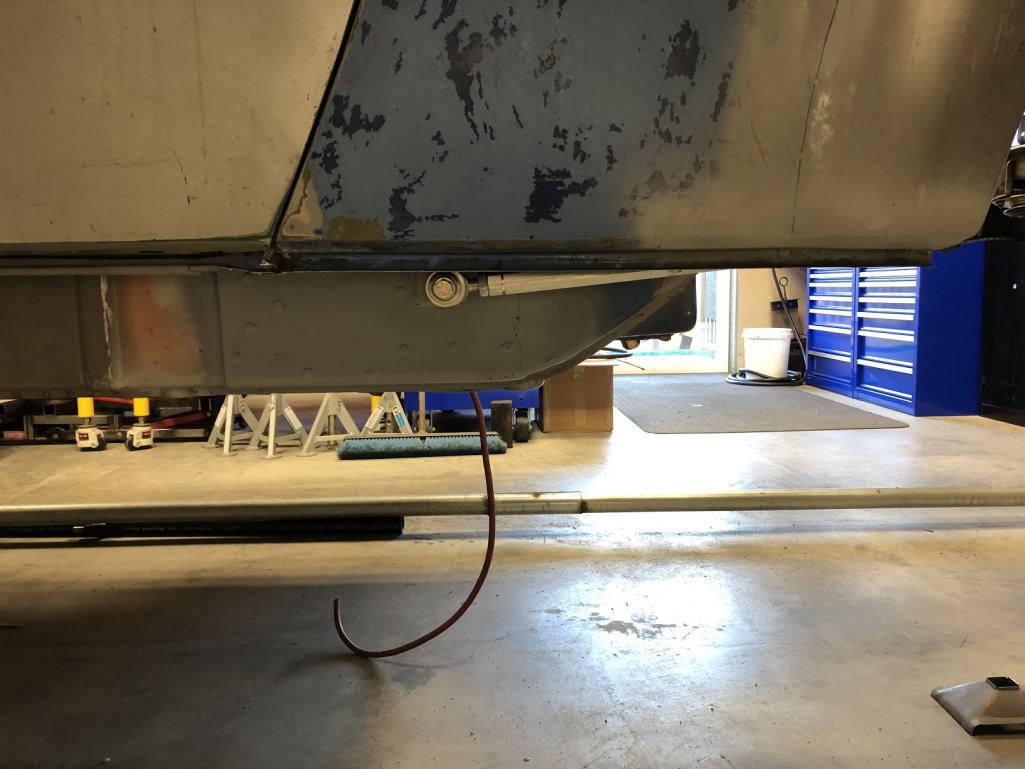
|
|
|
|
| Andyrew |
Jan 28 2020, 10:30 AM
Post
#2212
|
|
Spooling.... Please wait Group: Members Posts: 13,380 Joined: 20-January 03 From: Riverbank, Ca Member No.: 172 Region Association: Northern California |
Two weeks and your done with your chassis? Whats after the chassis? Engine/trans mounting?
(IMG:style_emoticons/default/popcorn[1].gif) |
|
|
|
| tygaboy |
Jan 28 2020, 12:59 PM
Post
#2213
|
|
914 Guru Group: Members Posts: 5,826 Joined: 6-October 15 From: Petaluma, CA Member No.: 19,241 Region Association: Northern California |
QUOTE(Andyrew @ Jan 28 2020, 08:30 AM)  Two weeks and your done with your chassis? Whats after the chassis? Engine/trans mounting? (IMG:style_emoticons/default/popcorn[1].gif) @Andyrew - the engine/trans mounting are all done, as is the exhaust. That said, the drive train has to be installed again so I can finish all the little stuff like where the ECU and coils will mount, things like that. Once the chassis is finished, it's off to media blasting and primer/sealer. |
|
|
|
| Andyrew |
Jan 28 2020, 03:00 PM
Post
#2214
|
|
Spooling.... Please wait Group: Members Posts: 13,380 Joined: 20-January 03 From: Riverbank, Ca Member No.: 172 Region Association: Northern California |
QUOTE(tygaboy @ Jan 28 2020, 10:59 AM) QUOTE(Andyrew @ Jan 28 2020, 08:30 AM) Two weeks and your done with your chassis? Whats after the chassis? Engine/trans mounting? (IMG:style_emoticons/default/popcorn[1].gif) @Andyrew - the engine/trans mounting are all done, as is the exhaust. That said, the drive train has to be installed again so I can finish all the little stuff like where the ECU and coils will mount, things like that. Once the chassis is finished, it's off to media blasting and primer/sealer. (IMG:style_emoticons/default/piratenanner.gif) Cant wait to see it! |
|
|
|
| tygaboy |
Jan 31 2020, 05:31 PM
Post
#2215
|
|
914 Guru Group: Members Posts: 5,826 Joined: 6-October 15 From: Petaluma, CA Member No.: 19,241 Region Association: Northern California |
Back to working on things that aren't part of any other 914! Uninteresting to most, I know, but I have to get it done and I may as well document it.
Today was fabbing a piece to close off between the engine compartment and interior. This opening was created when I removed the stock firewall and added the removable access panel. I need to seal off between that curved top area of the firewall and the upper portion of the access panel's frame, just above the upper attachment points. Attached thumbnail(s) 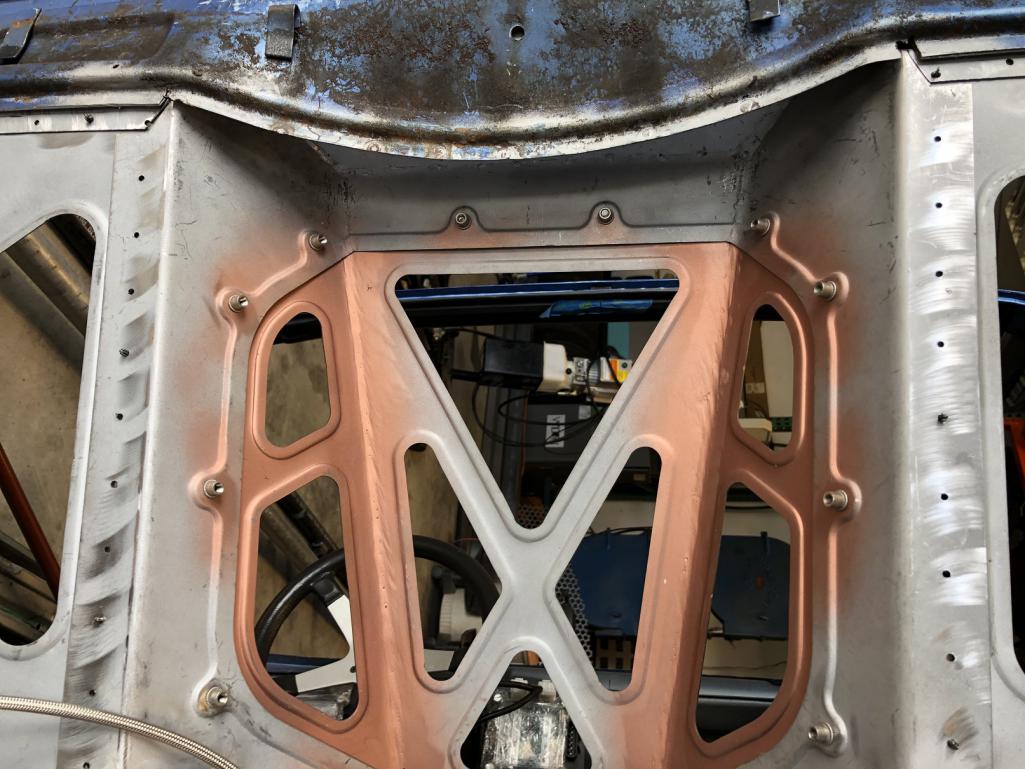
|
|
|
|
| tygaboy |
Jan 31 2020, 05:36 PM
Post
#2216
|
|
914 Guru Group: Members Posts: 5,826 Joined: 6-October 15 From: Petaluma, CA Member No.: 19,241 Region Association: Northern California |
I had part of the firewall from a donor/parts car so I sliced off the area that matches the lip of the firewall curved section. I cleaned everything up, flipped the piece upside down and used the spot welder to attach it on the inside of the firewall's curve.
Note I now have a nice little return to which I can weld a panel! Attached thumbnail(s) 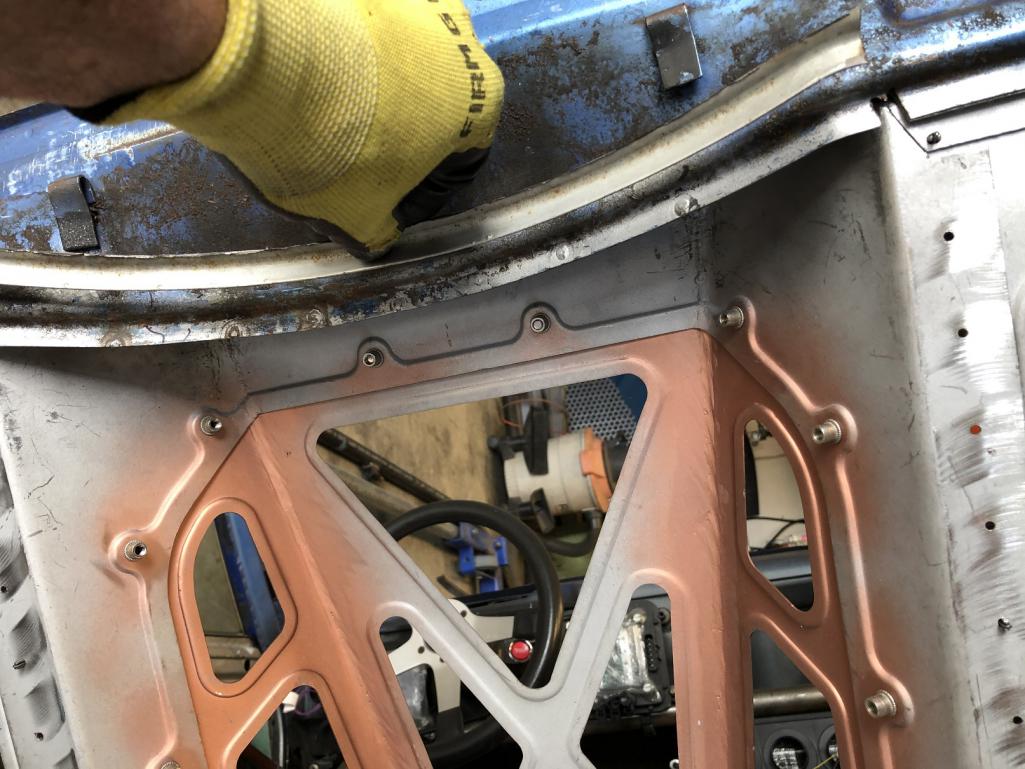 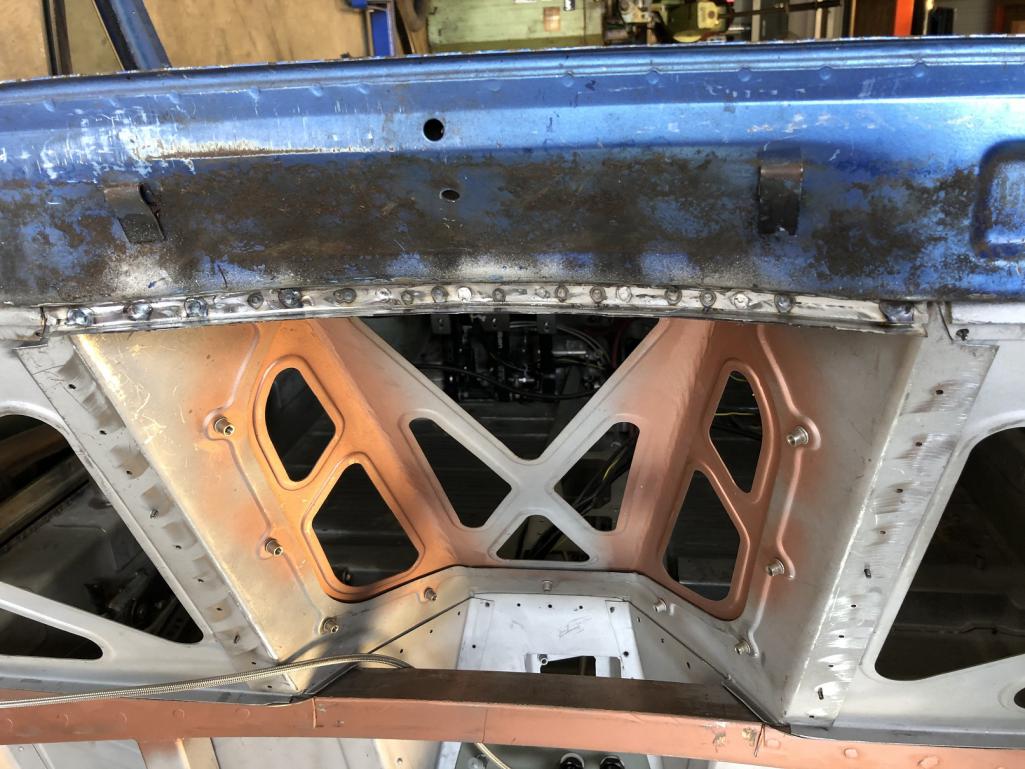
|
|
|
|
| tygaboy |
Jan 31 2020, 05:44 PM
Post
#2217
|
|
914 Guru Group: Members Posts: 5,826 Joined: 6-October 15 From: Petaluma, CA Member No.: 19,241 Region Association: Northern California |
Next, I made a quick template to get the panel shape and used that to cut a piece of 18 ga to fit. Because this panel is mounted at an angle, and against a curve, I bent it accordingly.
I then bend up a couple flanges, determined where they needed to be and spot welded them to the panel. Then I used the bead roller to tip a slight flange into the curved edge of the panel so it would lay at the same angle as the curved piece I'd spot welded on earlier. I'll add a flange on the front edge, too. The curved edge will be spot welded on but I'll use structural panel bond on the faces of the flanges where they attach to the access panel frame piece. Attached thumbnail(s) 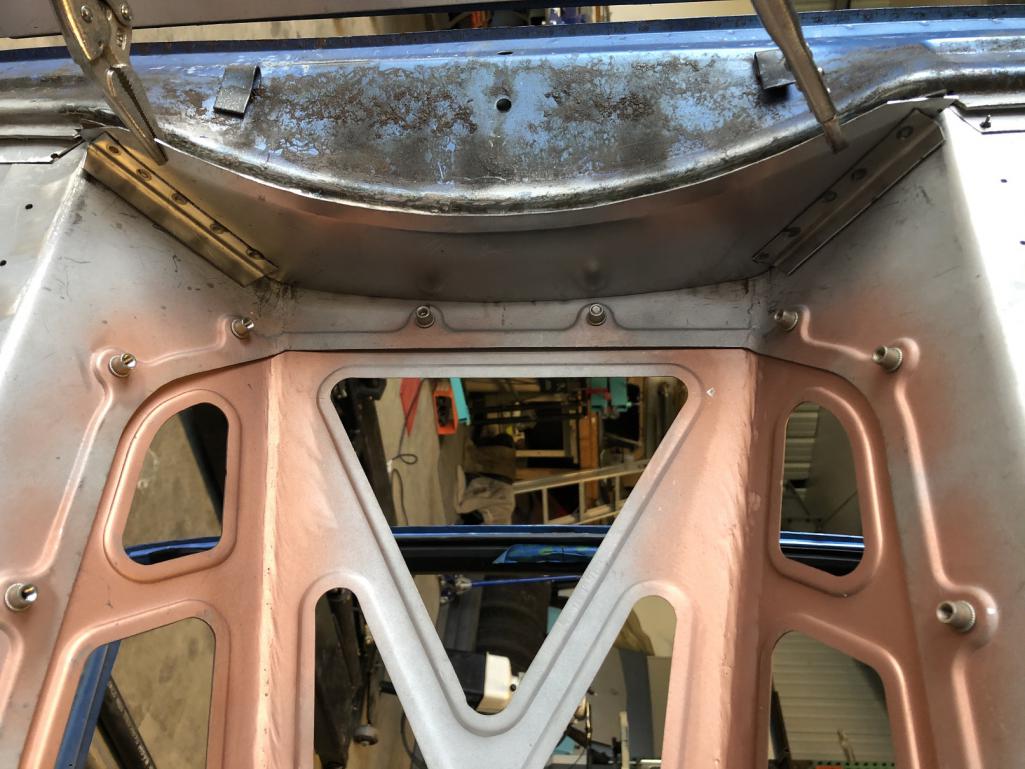
|
|
|
|
| Cairo94507 |
Feb 1 2020, 08:56 AM
Post
#2218
|
|
Michael Group: Members Posts: 10,643 Joined: 1-November 08 From: Auburn, CA Member No.: 9,712 Region Association: Northern California |
|
|
|
|
| tygaboy |
Feb 4 2020, 04:48 PM
Post
#2219
|
|
914 Guru Group: Members Posts: 5,826 Joined: 6-October 15 From: Petaluma, CA Member No.: 19,241 Region Association: Northern California |
MAJOR MILESTONES!
- the console frame is welded in - the floor has been plug welded to the console frame - the lower parts of the fire wall have been bonded in This is my first time trying something like this. I figure there's no kill like overkill so I'm using 3M structural adhesive to attach the fire wall panels. I'm not doing the rivets until after things are painted as I want the rivets to contrast with the paint. Riveting on fresh paint... I'm so looking forward to that! (IMG:style_emoticons/default/blink.gif) I understand this stuff is pretty incredible. A buddy of mine said, "You realize that you'll NEVER get those panels apart. It's stronger than spot welding." Fine by me! So here we go... Attached thumbnail(s) 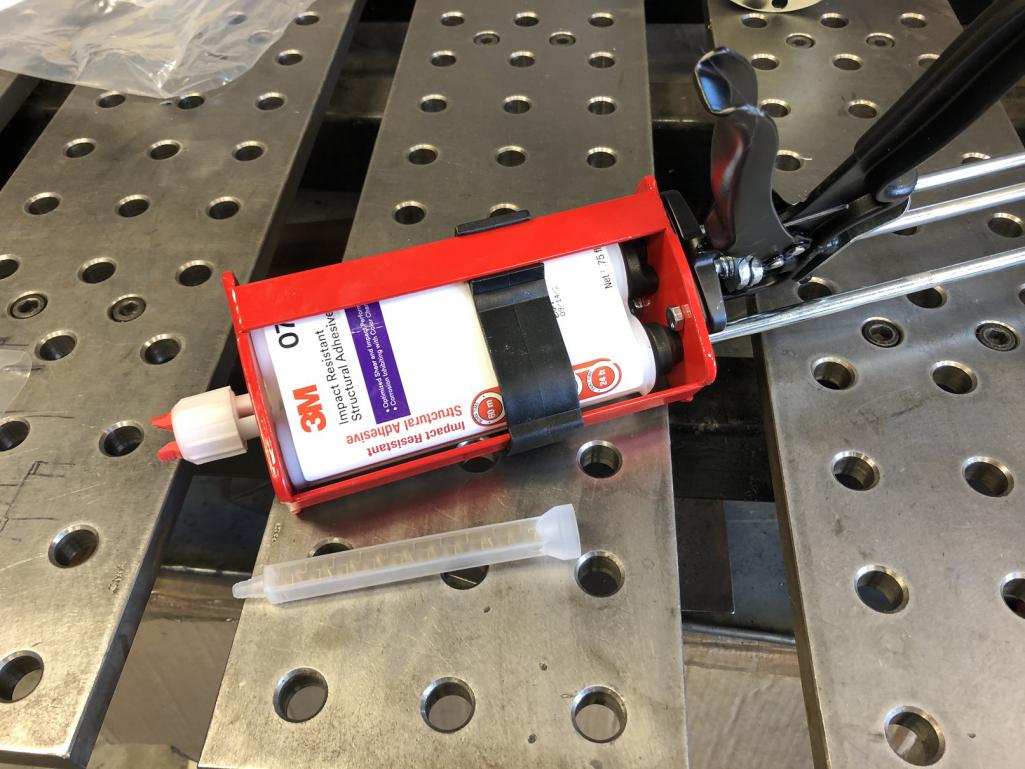
|
|
|
|
| tygaboy |
Feb 4 2020, 04:58 PM
Post
#2220
|
|
914 Guru Group: Members Posts: 5,826 Joined: 6-October 15 From: Petaluma, CA Member No.: 19,241 Region Association: Northern California |
Apply the adhesive to both surfaces and tool it out with an acid brush. Add another small bead to one surface to be sure there is plenty of adhesive and any potential voids are filled while the parts are clamped and curing.
The lower section here is made up of three separate pieces and a number of mating surfaces had to be prepared ahead of fitting. This adhesive has a working time of 60 minutes so I felt like I had plenty of time. I still felt a bit nervous but it went pretty well. After everything was in place and clamped, I double checked and cleaned out all the rivet holes and decided to use Clecos only in those that had no sign of adhesive in them. That's why some holes aren't being used. Bonding in a Cleco wouldn't be good. Once things were aligned, clamp, clamp, clamp and wait 24 hours for a full cure. Again, not too exciting for most of you but a HUGE deal to me. After all this time, the fire wall is being permanently installed! (IMG:style_emoticons/default/cheer.gif) Attached thumbnail(s) 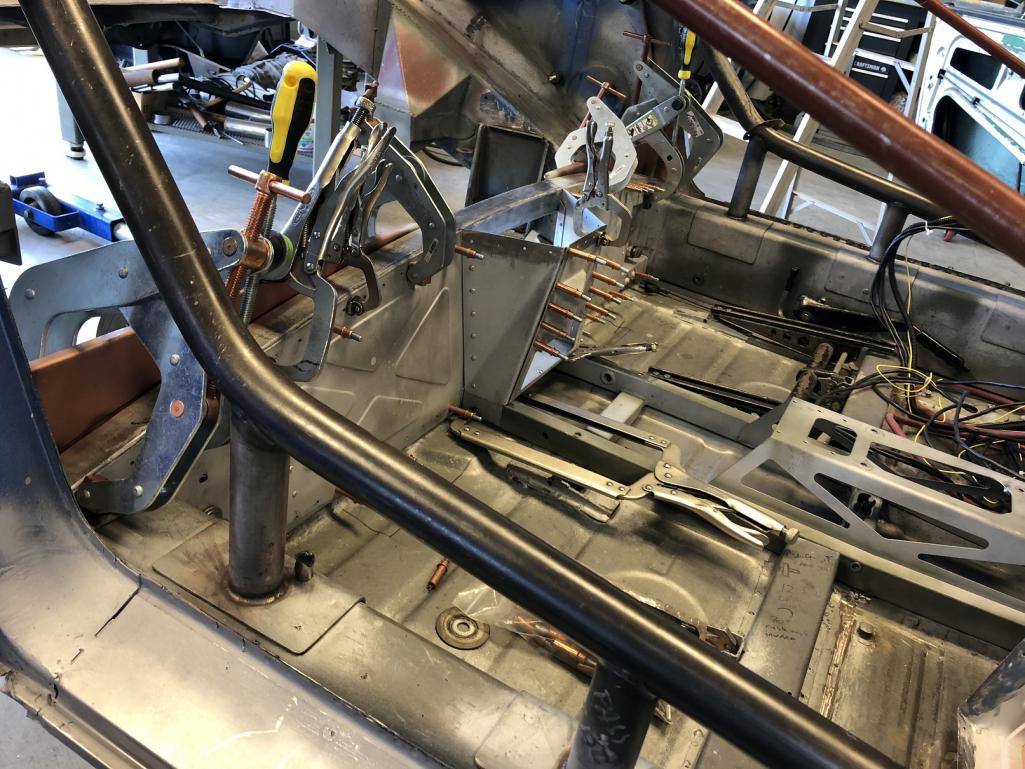 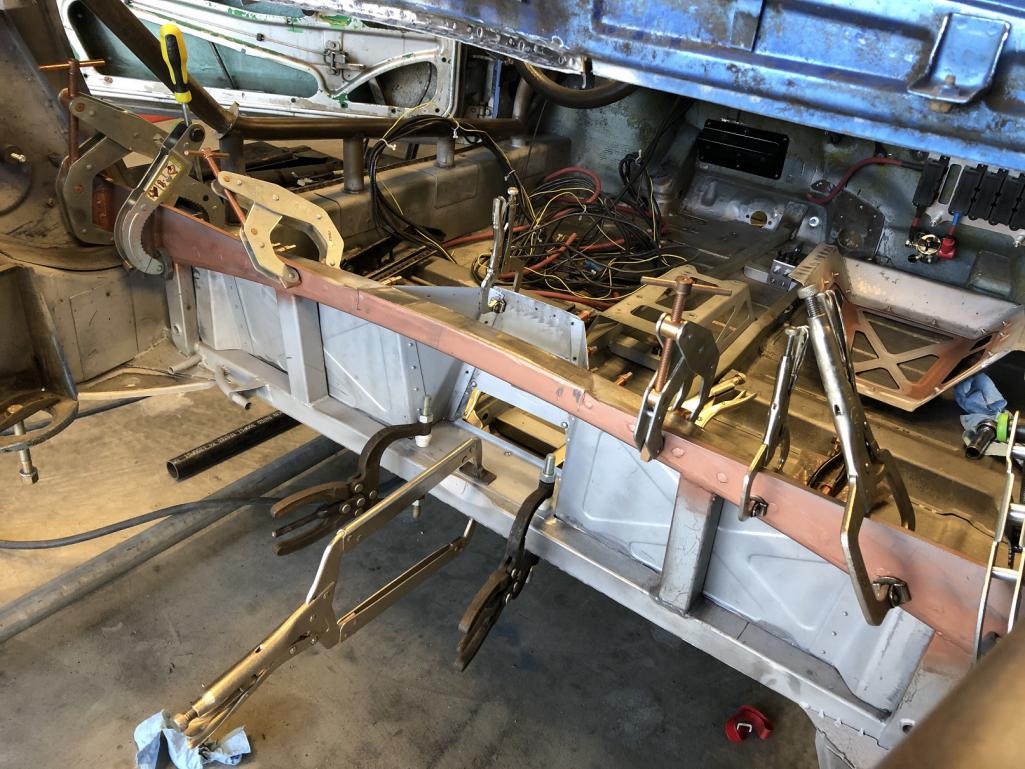
|
|
|
|
|
2 User(s) are reading this topic (2 Guests and 0 Anonymous Users)
0 Members:

|
Lo-Fi Version | Time is now: 26th May 2026 - 04:17 PM |
Invision Power Board
v9.1.4 © 2026 IPS, Inc.