|
|
|
Porsche, and the Porsche crest are registered trademarks of Dr. Ing. h.c. F. Porsche AG.
This site is not affiliated with Porsche in any way. Its only purpose is to provide an online forum for car enthusiasts. All other trademarks are property of their respective owners. |
|
|

  |

| Krieger |
 Feb 27 2020, 09:29 PM Feb 27 2020, 09:29 PM
Post
#2341
|
|
Advanced Member  Group: Members Posts: 4,869 Joined: 24-May 04 From: Santa Rosa CA Member No.: 2,104 Region Association: None |
|
   |

 
|
| horizontally-opposed |
Feb 27 2020, 10:39 PM
Post
#2342
|
|
Advanced Member Group: Members Posts: 3,456 Joined: 12-May 04 From: San Francisco Member No.: 2,058 Region Association: None |
I suppose now would be a bad time to say I just remembered something about a 944 roof section offering a very viable option for putting a steel roof on a 914? (IMG:style_emoticons/default/unsure.gif)
(IMG:style_emoticons/default/lol-2.gif) |
 |
|
| tygaboy |
Feb 27 2020, 11:24 PM
Post
#2343
|
|
914 Guru Group: Members Posts: 5,844 Joined: 6-October 15 From: Petaluma, CA Member No.: 19,241 Region Association: Northern California |
QUOTE(horizontally-opposed @ Feb 27 2020, 08:39 PM)  I suppose now would be a bad time to say I just remembered something about a 944 roof section offering a very viable option for putting a steel roof on a 914? (IMG:style_emoticons/default/unsure.gif) (IMG:style_emoticons/default/lol-2.gif) @horizontally-opposed Pete - Yep, but they need widening to fully fit so in the end, it's metal work of some sort or other. Here's an in-process pic of how one was done. Attached image(s) 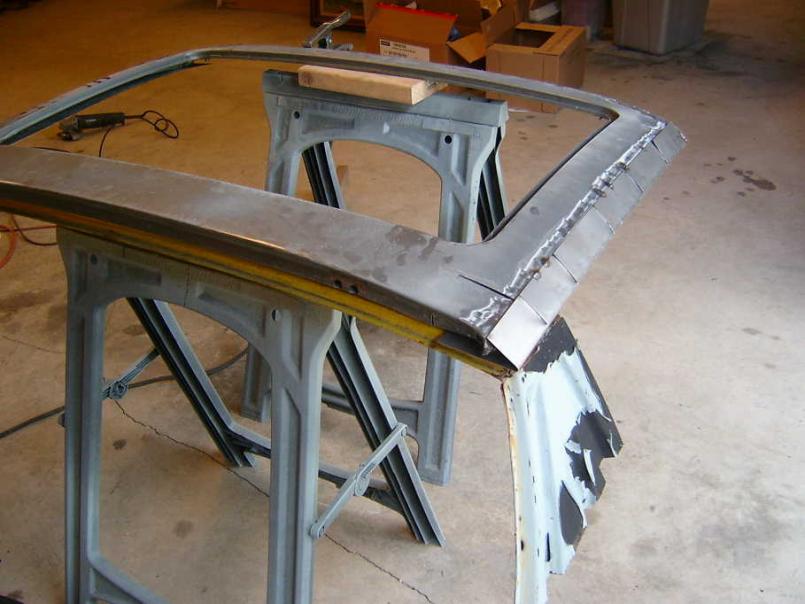
|
|
|
|
| 914forme |
Feb 28 2020, 01:30 PM
Post
#2344
|
|
Times a wastin', get wrenchin'! Group: Members Posts: 3,899 Joined: 24-July 04 From: Dayton, Ohio Member No.: 2,388 Region Association: None |
(IMG:style_emoticons/default/agree.gif) Yes they do, and I have a section I would ship to you. With a great sunroof.
|
|
|
|
| tygaboy |
Feb 28 2020, 06:52 PM
Post
#2345
|
|
914 Guru Group: Members Posts: 5,844 Joined: 6-October 15 From: Petaluma, CA Member No.: 19,241 Region Association: Northern California |
QUOTE(914forme @ Feb 28 2020, 11:30 AM) (IMG:style_emoticons/default/agree.gif) Yes they do, and I have a section I would ship to you. With a great sunroof. @914forme - Stephen - Probably it would appeal to those who want an open roof AND a stiffer chassis... Let me noodle on it a while and I'll let you know. And, let's see how the current plan progresses. |
|
|
|
| tygaboy |
Feb 28 2020, 06:56 PM
Post
#2346
|
|
914 Guru Group: Members Posts: 5,844 Joined: 6-October 15 From: Petaluma, CA Member No.: 19,241 Region Association: Northern California |
I fabbed my first go at the drip rail. I used 16ga as I wanted something thicker than 18. I'm hoping I can put a bit of a radius on the edge.
Obviously, there's a LOT more work but overall, the project seems to be coming along pretty well. Not that I'm counting the chickens, mind you. Attached thumbnail(s) 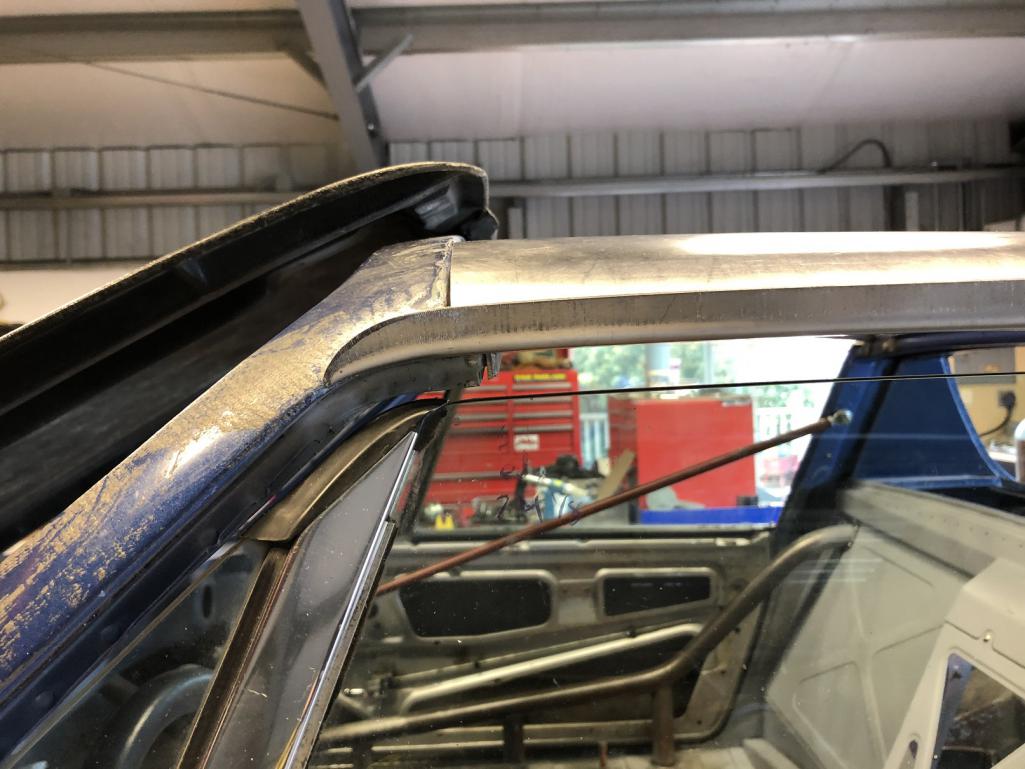
|
|
|
|
| tygaboy |
Feb 28 2020, 06:59 PM
Post
#2347
|
|
914 Guru Group: Members Posts: 5,844 Joined: 6-October 15 From: Petaluma, CA Member No.: 19,241 Region Association: Northern California |
The pieces are only sitting in place, being held by a few magnets, and they have only been very roughly trimmed so don't judge the quality of the fit just yet!
Again, LOTS more to go but it's at least starting to show what it'll look like. Attached thumbnail(s) 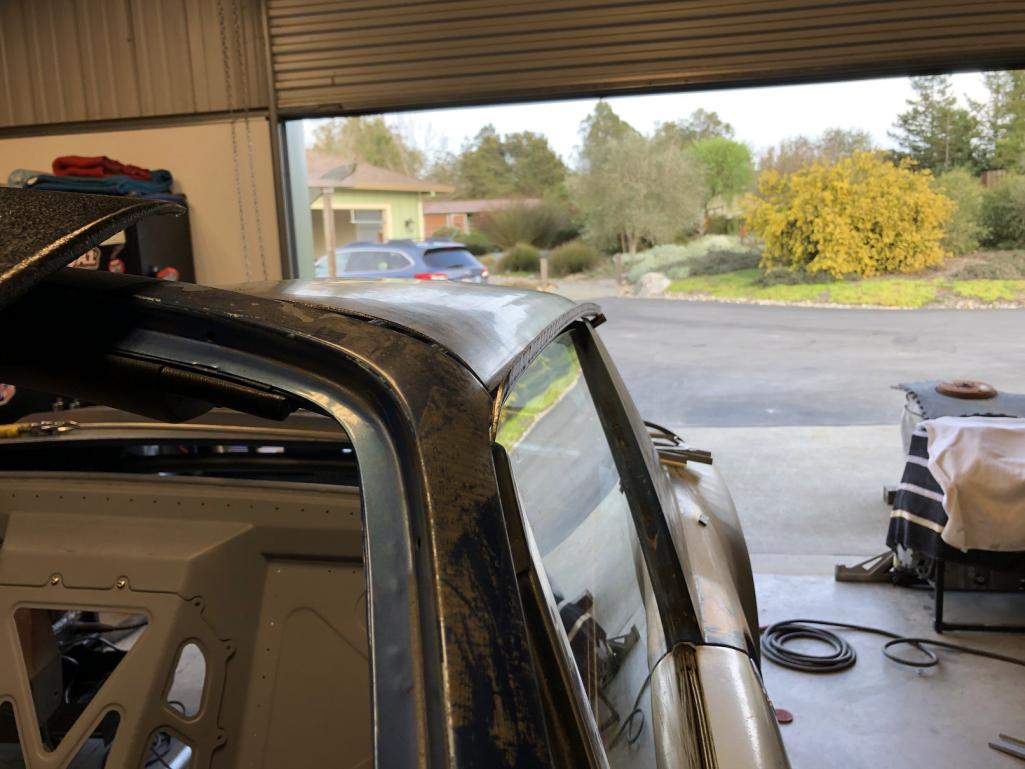 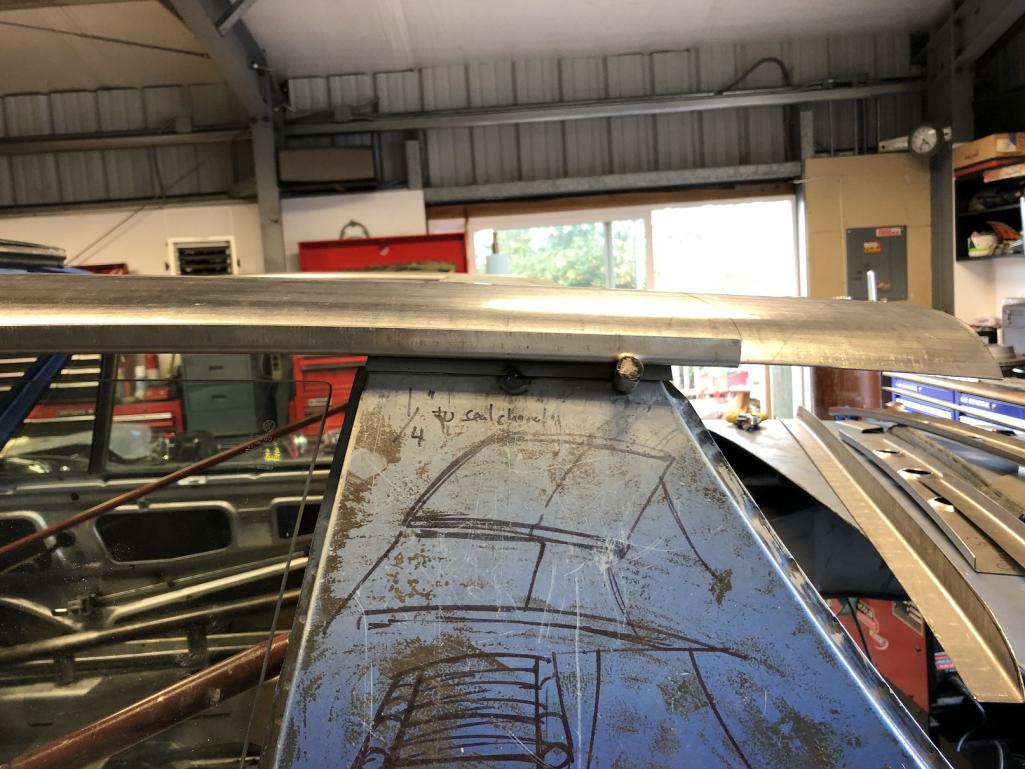 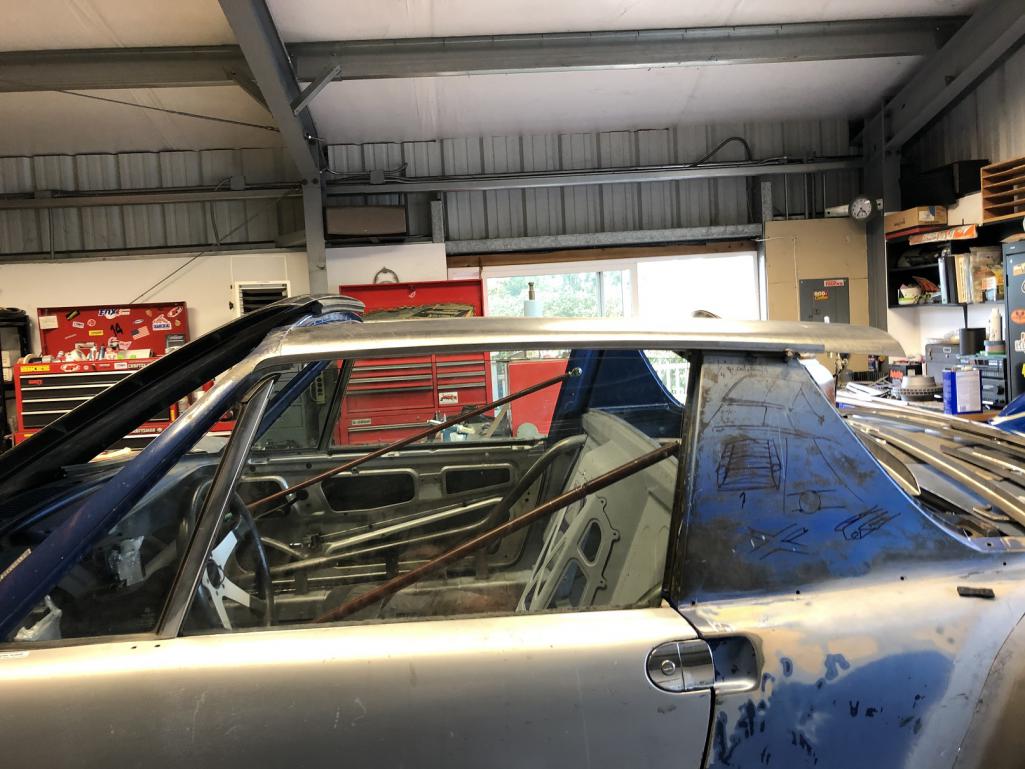  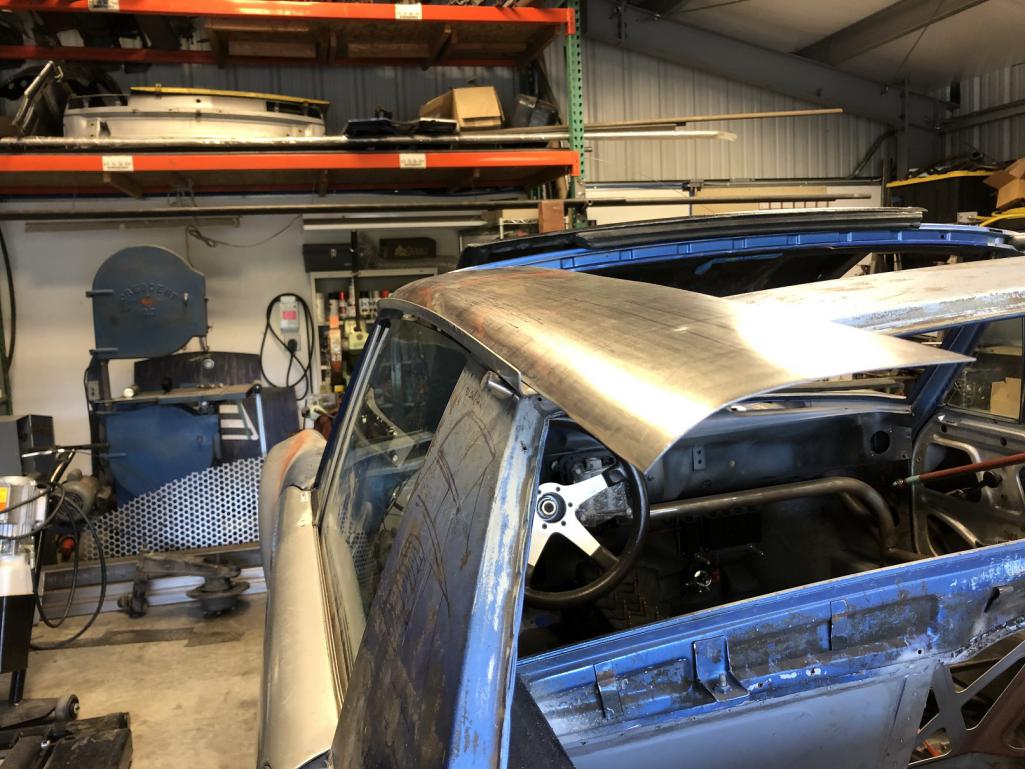
|
|
|
|
| tygaboy |
Feb 29 2020, 05:10 PM
Post
#2348
|
|
914 Guru Group: Members Posts: 5,844 Joined: 6-October 15 From: Petaluma, CA Member No.: 19,241 Region Association: Northern California |
I simply have to get better at thinking ahead... This time, it was the fact that the window seal needs more width that I allowed, given the position it sits in. Since the edge of the roof has a curve to it and the window is straight (tilted in a bit, but straight), the seal channel has a bit of curve, as well. My earlier piece didn't allow the seal to sit where it needs to be.
So, a wider one it is! (IMG:style_emoticons/default/sawzall-smiley.gif) (IMG:style_emoticons/default/smash.gif) Attached thumbnail(s) 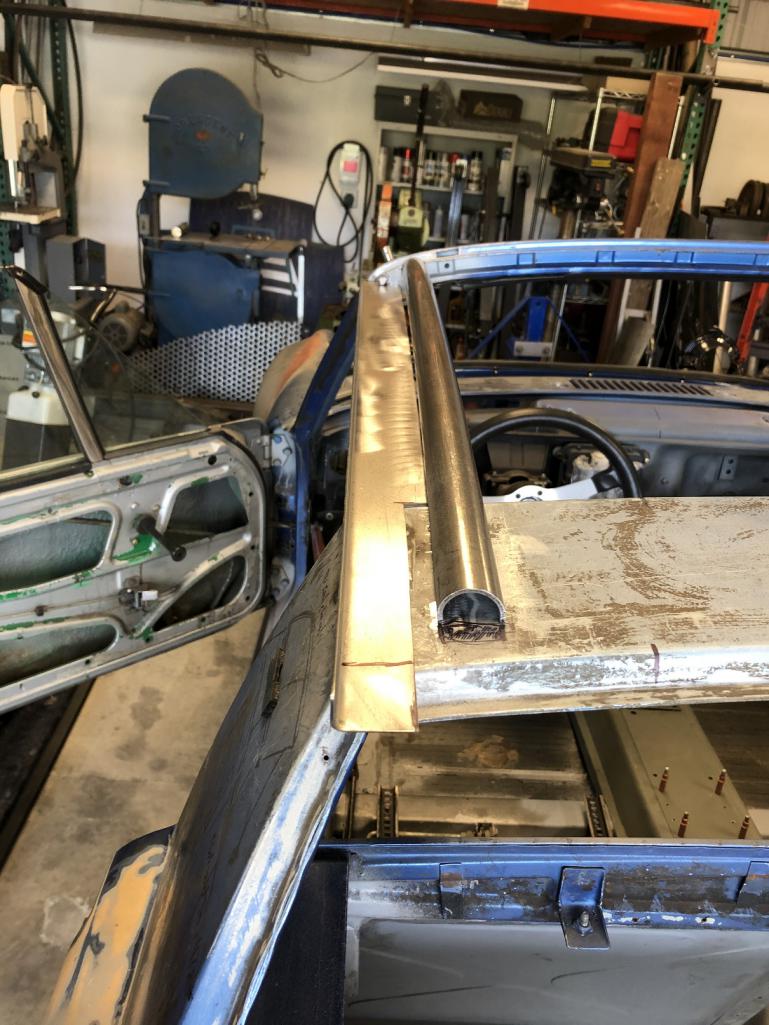
|
|
|
|
| tygaboy |
Feb 29 2020, 05:14 PM
Post
#2349
|
|
914 Guru Group: Members Posts: 5,844 Joined: 6-October 15 From: Petaluma, CA Member No.: 19,241 Region Association: Northern California |
On this latest version, the height of the side of the rail looks too tall to me so I'll trim it a bit.
Also, I'm still working out how I want to have the drip rail die into the windshield post. I kinda like the way it's sitting now and how it starts inboard from the edge of the pillar. We'll see. Attached thumbnail(s) 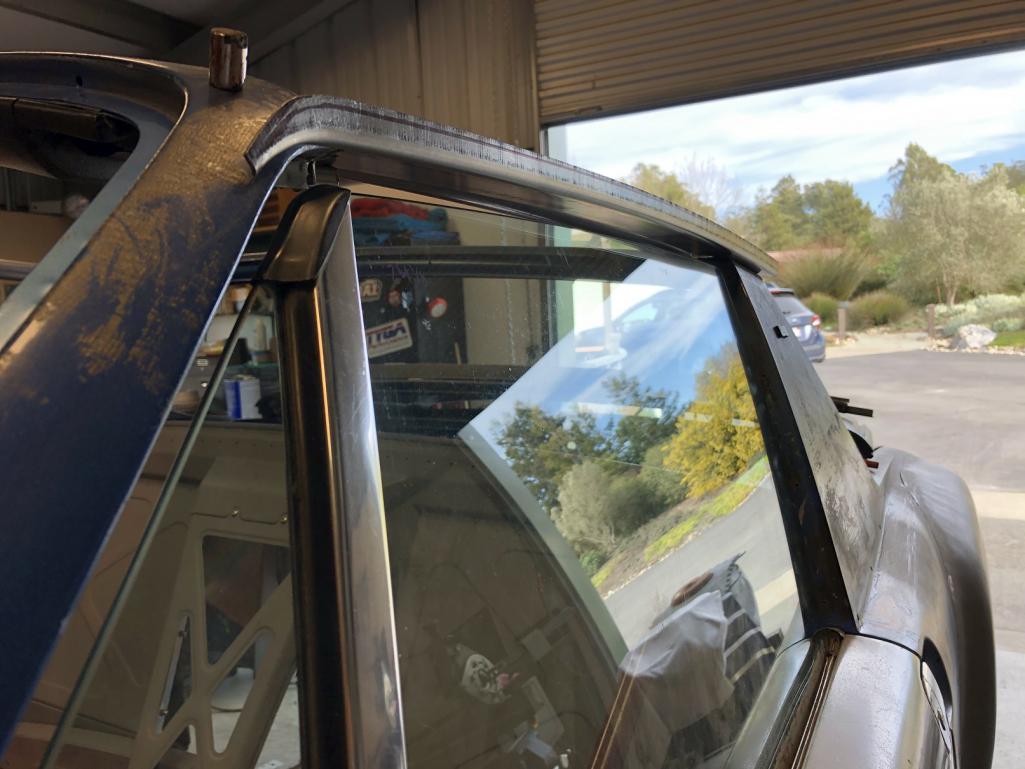
|
|
|
|
| tygaboy |
Feb 29 2020, 05:21 PM
Post
#2350
|
|
914 Guru Group: Members Posts: 5,844 Joined: 6-October 15 From: Petaluma, CA Member No.: 19,241 Region Association: Northern California |
One fiddly thing is going to be what I think of as the "intermediate" rail. This is just a test with a piece of scrap but you see what it needs to do:
- weld to the drip rail's horizontal surface - provide an angled surface for the roof skin to attach to and tie the skin to the drip rail. I want to keep the drip channel pretty narrow, which doesn't leave a lot of horizontal surface on the intermediate rail to weld to the drip rail. This one should be fun. (IMG:style_emoticons/default/blink.gif) Attached thumbnail(s) 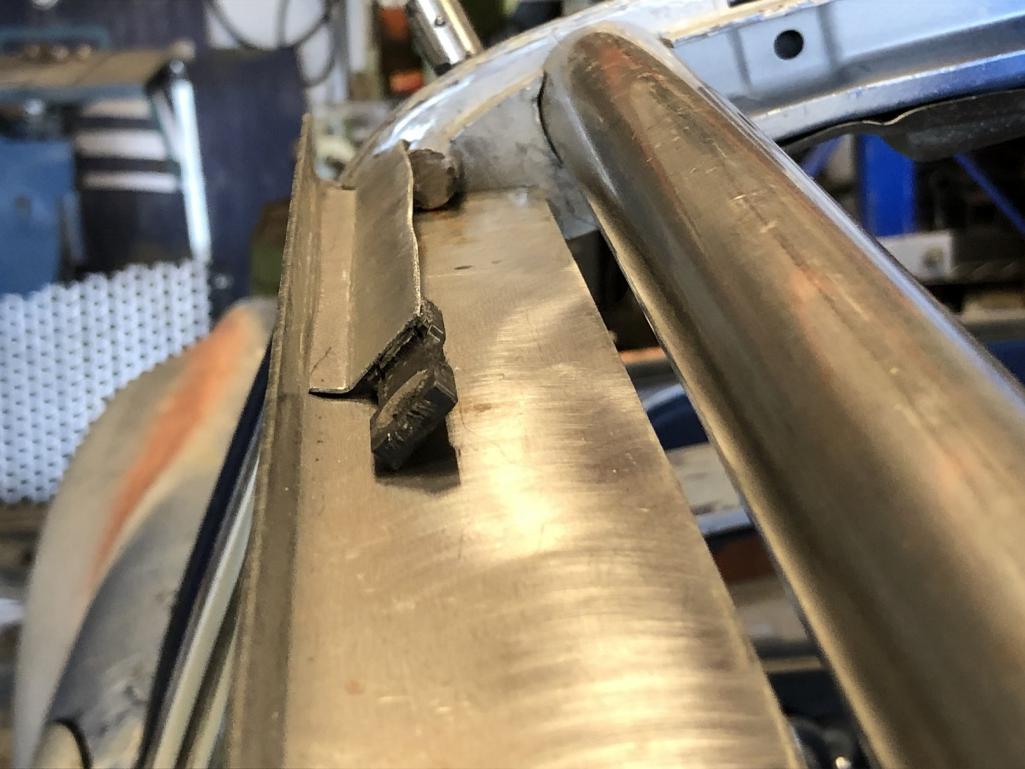
|
|
|
|
| 914forme |
Feb 29 2020, 08:32 PM
Post
#2351
|
|
Times a wastin', get wrenchin'! Group: Members Posts: 3,899 Joined: 24-July 04 From: Dayton, Ohio Member No.: 2,388 Region Association: None |
Outstanding work, (IMG:style_emoticons/default/popcorn[1].gif)
|
|
|
|
| tygaboy |
Mar 1 2020, 10:19 AM
Post
#2352
|
|
914 Guru Group: Members Posts: 5,844 Joined: 6-October 15 From: Petaluma, CA Member No.: 19,241 Region Association: Northern California |
Ooooof. My head is starting to hurt.
In looking at various 916/916 replica roofs, it appears they move the drip rail inboard by frenching it into the windshield pillar, then reshape the outside edges of the roof's curve, either subtly or dramatically - see pics for a couple versions. In any case, it seems the reason is to retain the original width of the roof. Do I care/will it look "off" if my roof is a bit wider than stock? (IMG:style_emoticons/default/huh.gif) (IMG:style_emoticons/default/blink.gif) (IMG:style_emoticons/default/confused24.gif) If you need me, I'll be in the shop thinking about options. And just a heads up: If I don't come up with something I feel I can accomplish (well) in some sort of reasonable time frame, I may just abandon the fixed roof in an effort to actually get this car "done". Attached image(s)  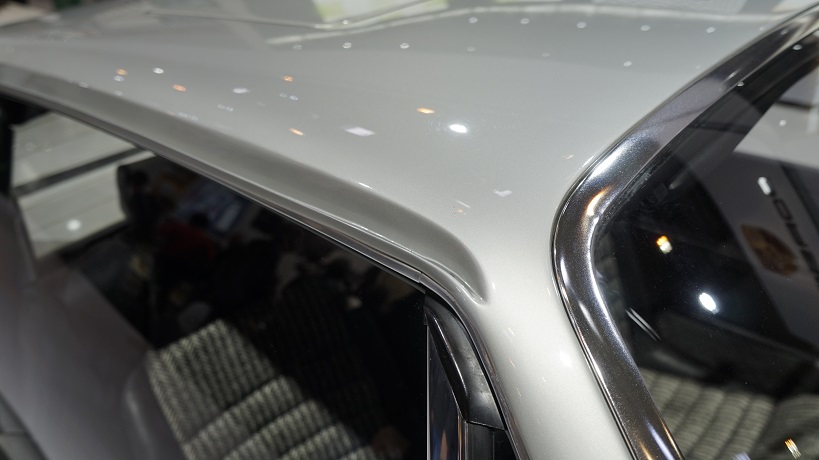 
|
|
|
|
| tygaboy |
Mar 2 2020, 06:36 PM
Post
#2353
|
|
914 Guru Group: Members Posts: 5,844 Joined: 6-October 15 From: Petaluma, CA Member No.: 19,241 Region Association: Northern California |
Another day with far more thinking than doing. Probably an approach I should use more!
A big thanks to @ChrisFoley , who was kind enough to take a couple calls from me and allow me to pick his brain re: his experience with these steel roofs. He helped clarify a major issue I was stuck on. With this improved understanding, I went after what I've come to call "the dreaded rear corner". This is where virtually every piece ends up intersecting. I did my best to channel the Beatles "Come Together" and actually, it seemed to work out! Note that the drip rail is a practice piece and will be remade, now that I've determined all the dimensions. But here it is with the drip rail/seal mount surface and the rear closing panel sitting in place. I also installed the targa stainless trim to be sure I fully understand the way everything fits/looks. Attached thumbnail(s) 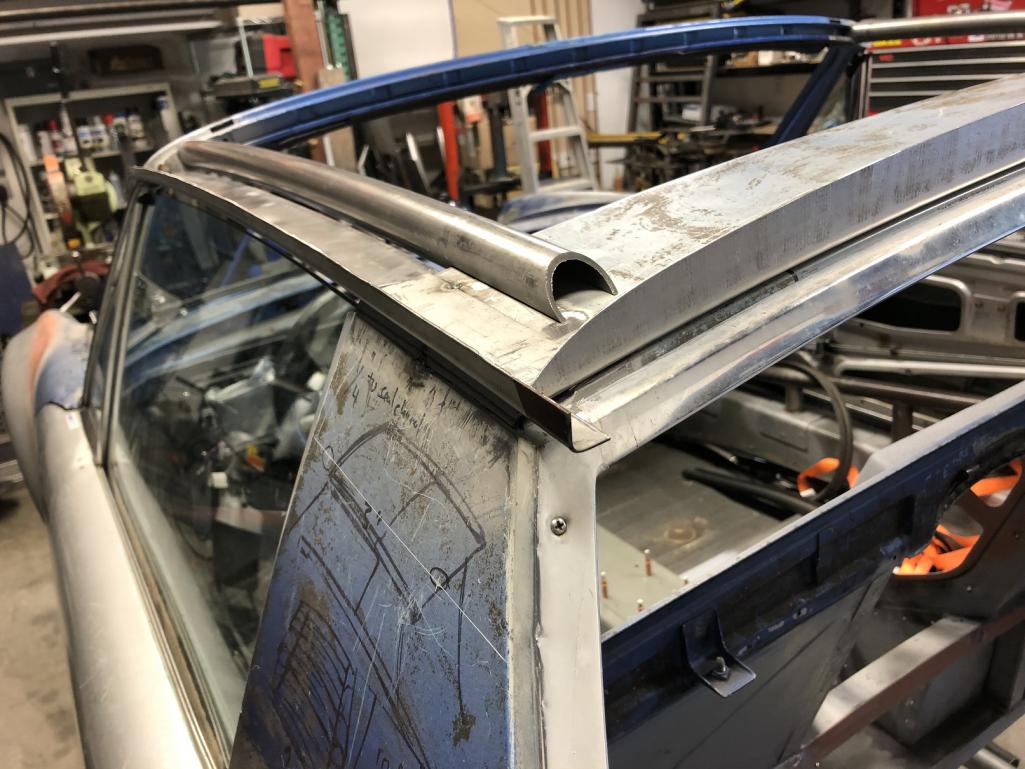 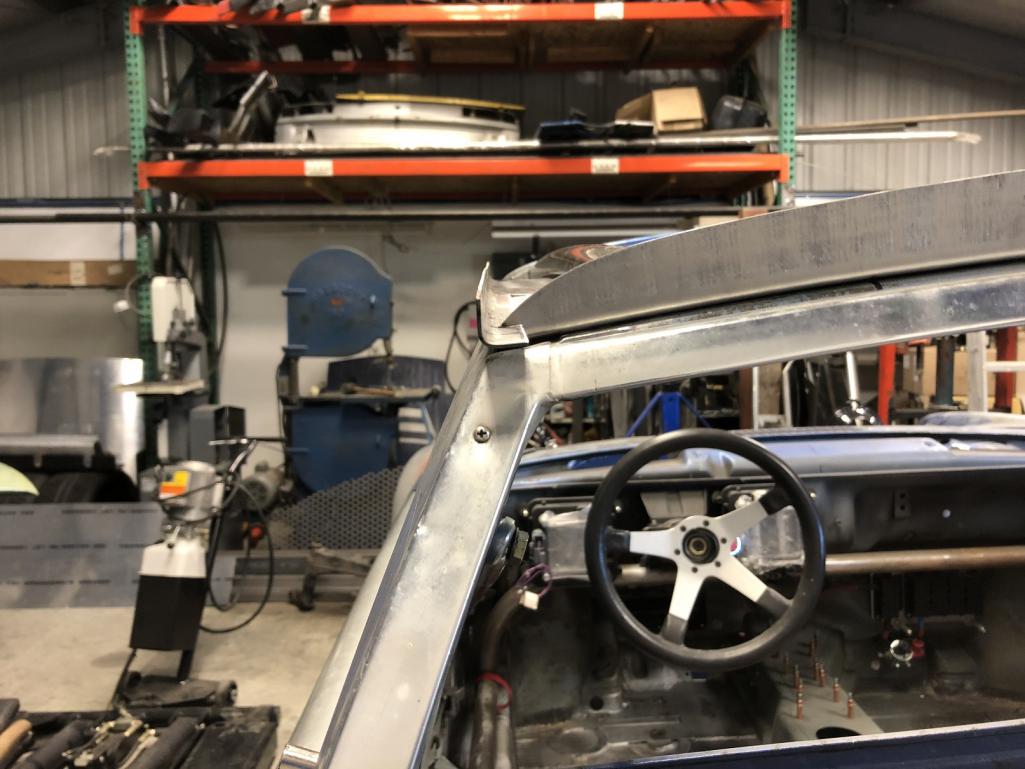
|
|
|
|
| tygaboy |
Mar 2 2020, 06:40 PM
Post
#2354
|
|
914 Guru Group: Members Posts: 5,844 Joined: 6-October 15 From: Petaluma, CA Member No.: 19,241 Region Association: Northern California |
Next, I went after the horizontal return/overhang that will support the rear of the roof skin. It follows the shape of the closing panel and will then be welded to the drip rail.
Trimming remains to be done but things did "come together"! I think I'm liking this. Attached thumbnail(s) 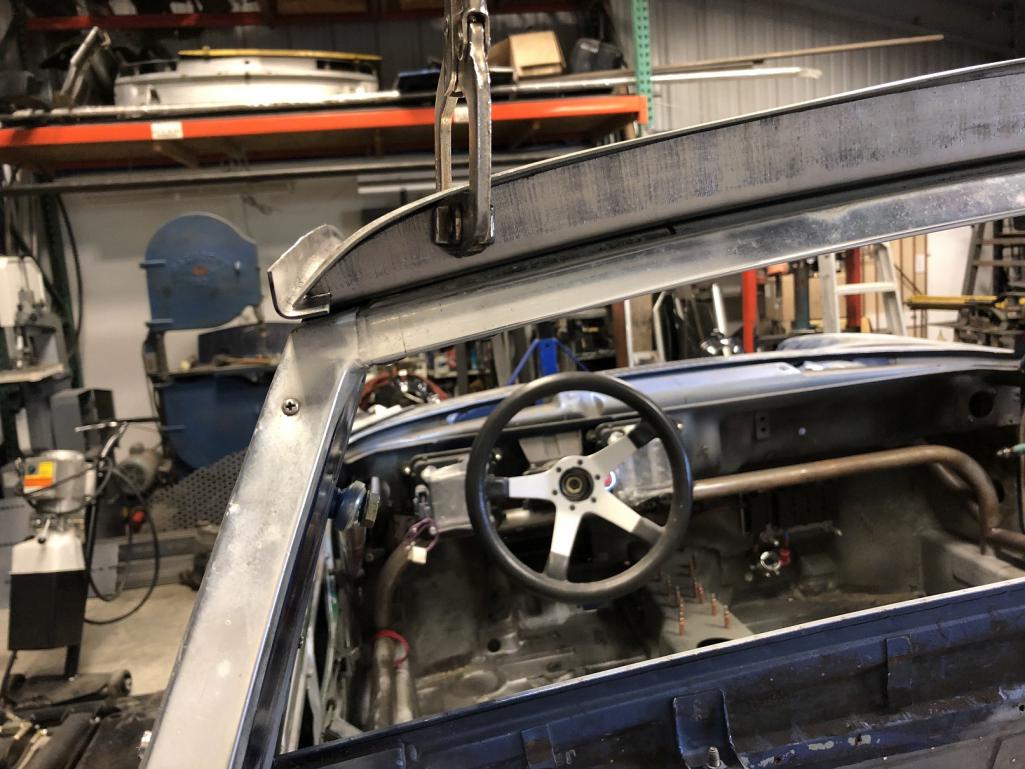 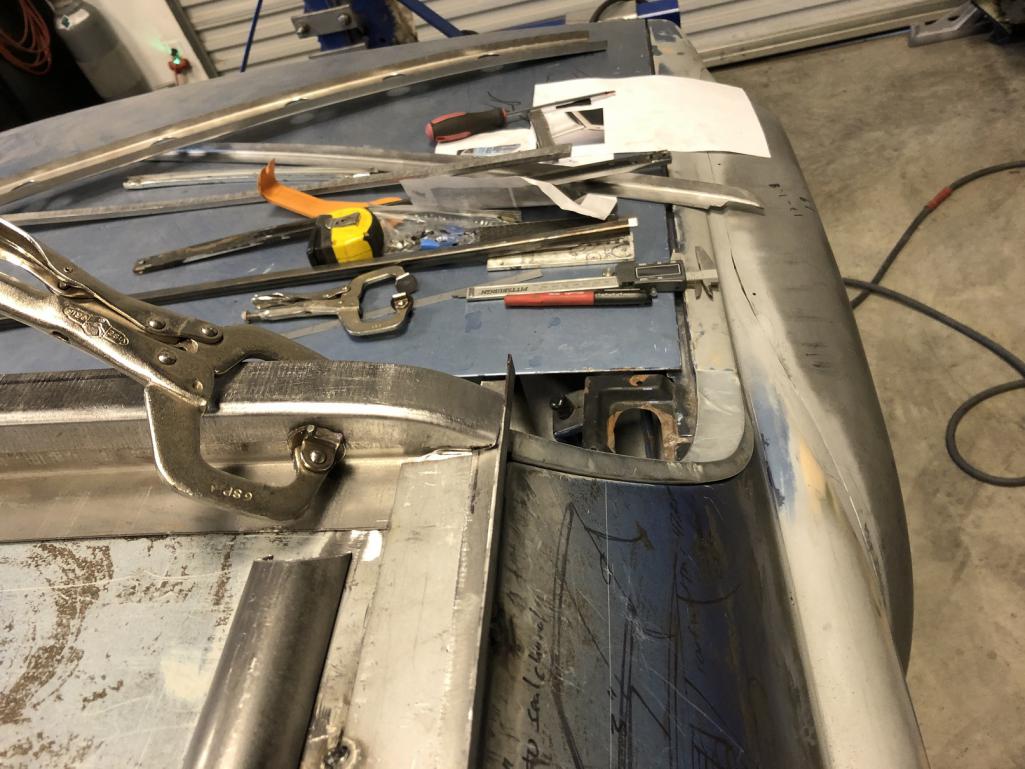
|
|
|
|
| Krieger |
Mar 2 2020, 09:48 PM
Post
#2355
|
|
Advanced Member Group: Members Posts: 4,869 Joined: 24-May 04 From: Santa Rosa CA Member No.: 2,104 Region Association: None |
Lookin' good! I don't know if this is true or not, but I remember hearing that the windshield frame to body joint wasn't that strong. Maybe grab the top of the window frame and try pushing it fore and aft. Hopefully what I heard was wrong.
|
|
|
|
| sixnotfour |
Mar 2 2020, 10:50 PM
Post
#2356
|
|
914 Wizard Group: Members Posts: 11,291 Joined: 12-September 04 Member No.: 2,744 Region Association: NineFourteenerVille |
QUOTE(Krieger @ Mar 2 2020, 08:48 PM) Lookin' good! I don't know if this is true or not, but I remember hearing that the windshield frame to body joint wasn't that strong. Maybe grab the top of the window frame and try pushing it fore and aft. Hopefully what I heard was wrong. like this on my loweGT, done by AA... Attached image(s) 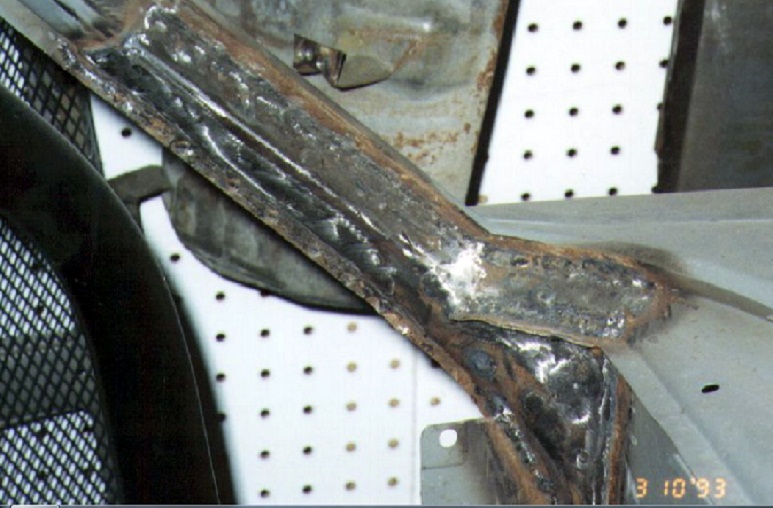
|
|
|
|
| 914forme |
Mar 3 2020, 06:52 AM
Post
#2357
|
|
Times a wastin', get wrenchin'! Group: Members Posts: 3,899 Joined: 24-July 04 From: Dayton, Ohio Member No.: 2,388 Region Association: None |
(IMG:style_emoticons/default/agree.gif) But in the end I don't think it is much of an issue. I spent a lot of time on this one (IMG:style_emoticons/default/idea.gif) , then I said F'it, grabbed the 944 roof I had sitting on the floor, and a spare A pillar I bought. and started (IMG:style_emoticons/default/sawzall-smiley.gif)
The 944 and the 914 have the exact same gauge metal in the A pillar. The inner design is slightly different, but not to the point it bugged me. Three pieces welded together with slightly different inner profile. In the end, I thought about making pieces like what was in the Jon Lowe's #40 tribute 914. I spent some serious time around that car and build. And this is what I came up with. There was a 914 already converted with the 944 roof section. It was running around and driving. I have not heard a thing about A pilar issues, and still have not. And well the people who drove it, said it made a huge difference. So I went with the stop over thinking this shit and moved on to lets weld more into the car. The difference between a GT top and a skinned top is the fact that one is bolted in 4 places, still allows flex to be transferred down the A pillar. And the other is a fully welded top. Every section of the skin becomes its own triangulation point. Overall it would be much stronger, while possibly being lighter. Thus the reason the factory welded on the top to the 916 making it a true coupe. If the factory continued racing development of the 914 chassis, the 916 should have been the platform to go with. It just made that much more sense. Thus the Boxster and Cayman. I will take a Cayman everyday over the Boxster. Response is so much better. Now back to the build (IMG:style_emoticons/default/popcorn[1].gif) |
|
|
|
| tygaboy |
Mar 3 2020, 07:22 PM
Post
#2358
|
|
914 Guru Group: Members Posts: 5,844 Joined: 6-October 15 From: Petaluma, CA Member No.: 19,241 Region Association: Northern California |
@Krieger Andy, I believe I'll be OK without additional stiffening of the A-pillars. As Stephen @914forme points out, others have used a "roof only" approach and nothing seems to have gone wrong. Fingers crossed!
Today was making progress on the X-brace. First I tacked in the targa-to-windshield bars. Boy, just doing that made a huge difference in locking the windshield in place. And that's just with a few tacks! Then it was working out the corner locations for the main brace component. I ran a center line string so I could use it to center the middle speed hole. Attached thumbnail(s) 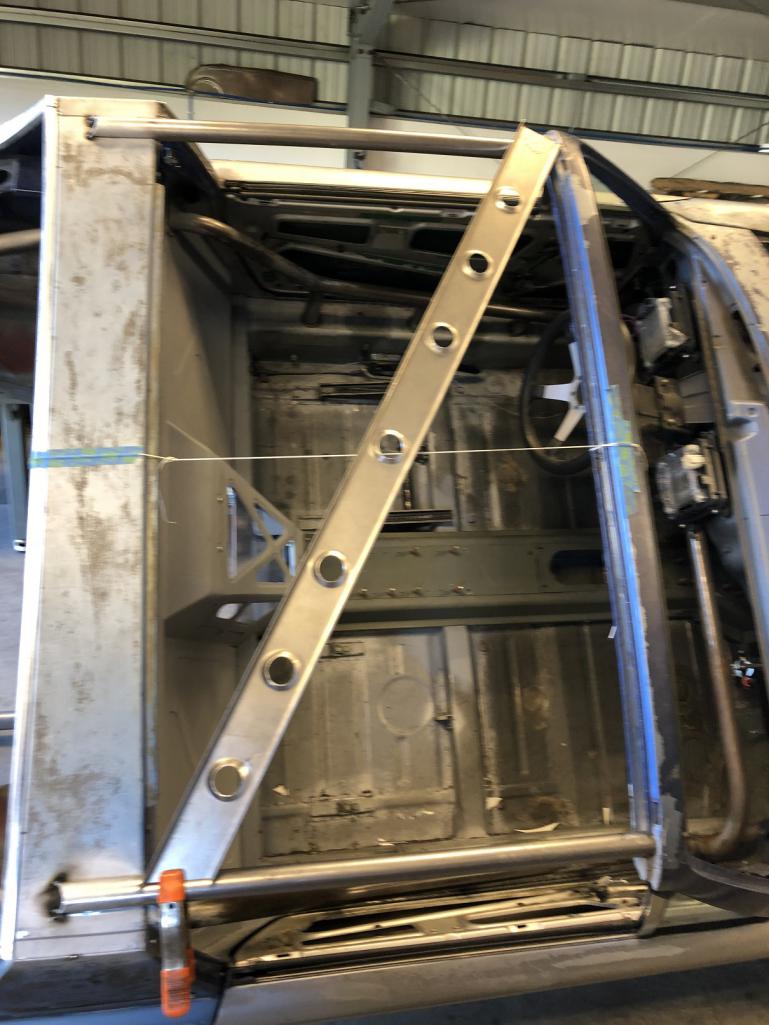 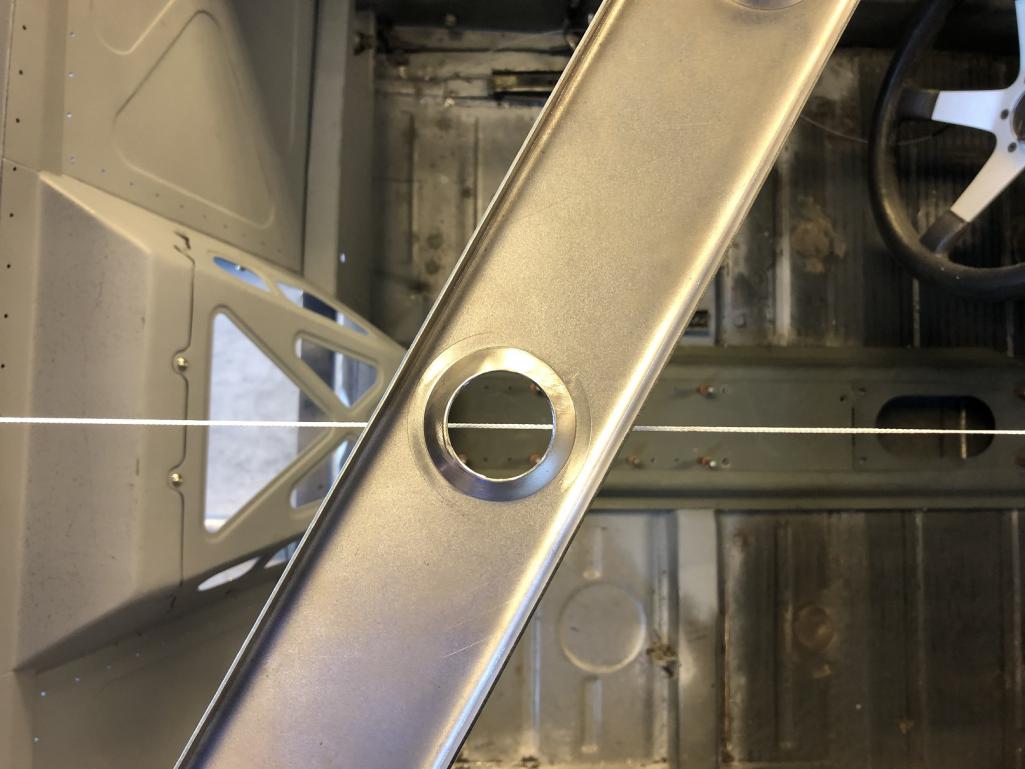
|
|
|
|
| tygaboy |
Mar 3 2020, 07:30 PM
Post
#2359
|
|
914 Guru Group: Members Posts: 5,844 Joined: 6-October 15 From: Petaluma, CA Member No.: 19,241 Region Association: Northern California |
I need it to fit on the bars in such a way that it has the desired clearance to the inner roof skin. I measured from the underside of the bar to the roof, then subtracted the height of the brace plus the amount of clearance I want for the foam/bonding agent. And of course it's a different dimension at the rear than at the front. What fun would it be if it wasn't? (IMG:style_emoticons/default/shades.gif)
Then it was the "fit, trim, check, trim, fit, check, repeat, repeat, repeat..." ad infinitum until it it was where I wanted it. Then I tacked it in. WAAAAY more head clearance than that initial 1.25 cross member tube, @horizontally-opposed ! And I was able to achieve a pretty even gap across the curve of the roof. On to fitting the other two pieces. Attached thumbnail(s) 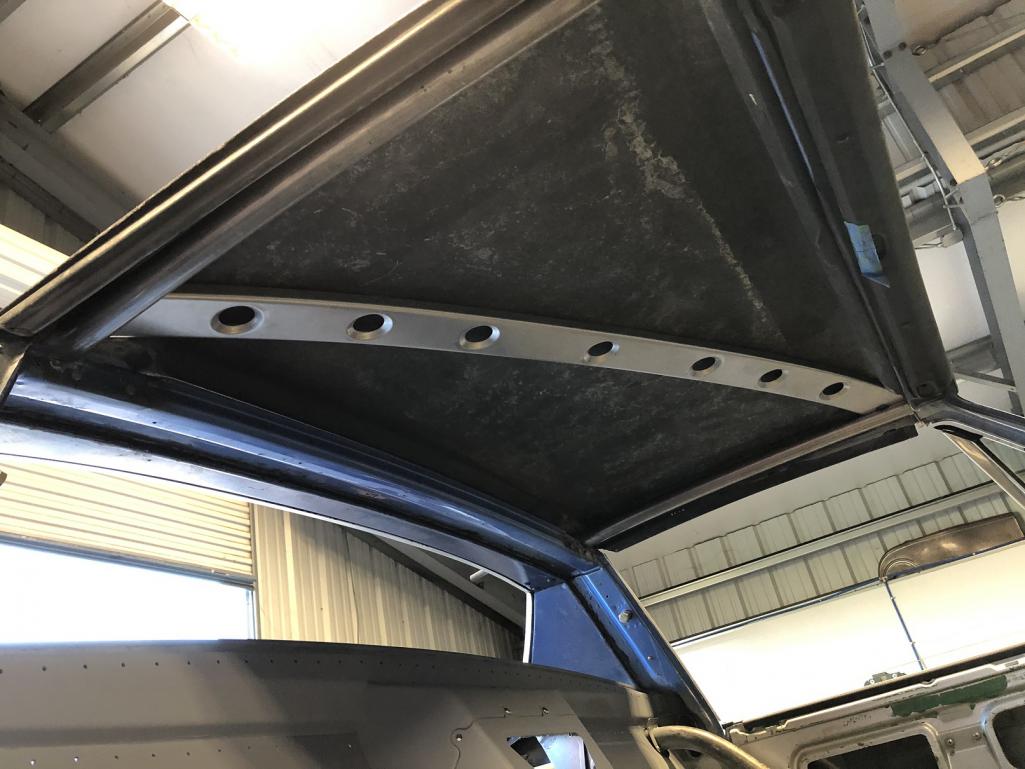 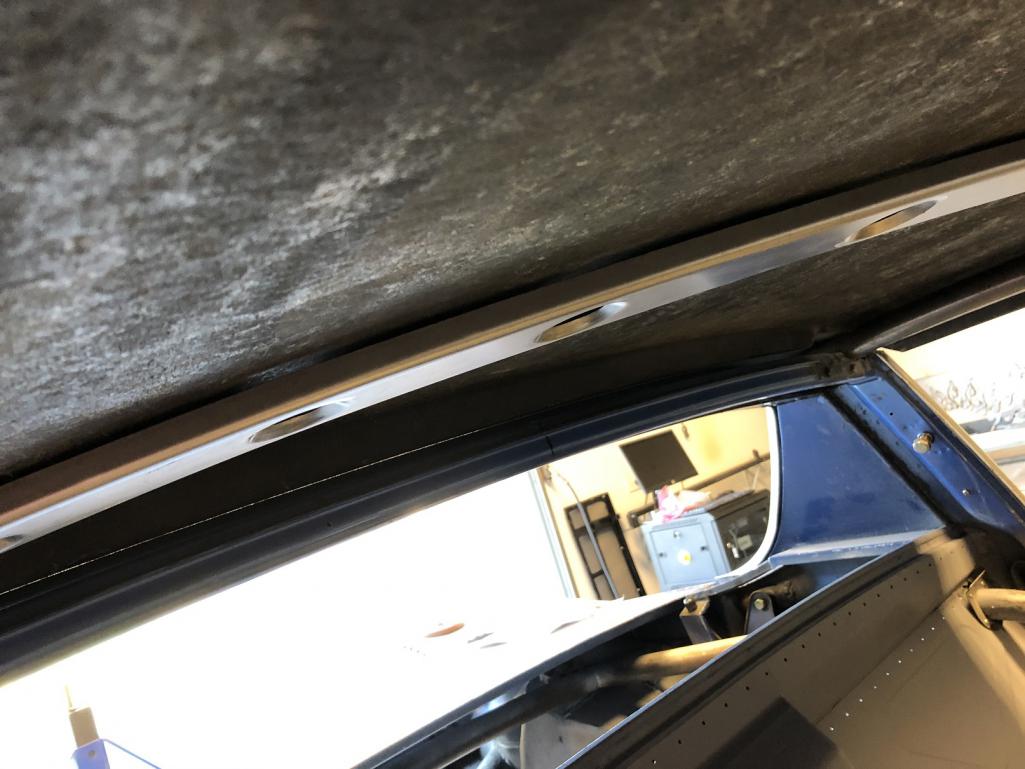
|
|
|
|
| horizontally-opposed |
Mar 3 2020, 08:48 PM
Post
#2360
|
|
Advanced Member Group: Members Posts: 3,456 Joined: 12-May 04 From: San Francisco Member No.: 2,058 Region Association: None |
|
|
|
|
|
2 User(s) are reading this topic (2 Guests and 0 Anonymous Users)
0 Members:

|
Lo-Fi Version | Time is now: 20th July 2026 - 11:03 PM |
Invision Power Board
v9.1.4 © 2026 IPS, Inc.