|
|
|
Porsche, and the Porsche crest are registered trademarks of Dr. Ing. h.c. F. Porsche AG.
This site is not affiliated with Porsche in any way. Its only purpose is to provide an online forum for car enthusiasts. All other trademarks are property of their respective owners. |
|
|

  |

| tygaboy |
 Apr 5 2020, 02:08 PM Apr 5 2020, 02:08 PM
Post
#2461
|
|
914 Guru  Group: Members Posts: 5,805 Joined: 6-October 15 From: Petaluma, CA Member No.: 19,241 Region Association: Northern California |
QUOTE(djway @ Apr 5 2020, 01:00 PM)  Anyway to force some air into that area? I seem to remember various versions of the GT40 having some air ducts entering from the sides. My car has some naca ducts on the side which I plan to run hose to an air box. How about a clear box or roof over you intakes? @djway - Hey now! You're stealing my thunder! (IMG:style_emoticons/default/laugh.gif) Did you sneak into my shop and see the rough sketch of the vents I've got drawn on, just behind the door???? |
   |

 
|
| tygaboy |
Apr 5 2020, 04:22 PM
Post
#2462
|
|
914 Guru Group: Members Posts: 5,805 Joined: 6-October 15 From: Petaluma, CA Member No.: 19,241 Region Association: Northern California |
Time to work on something needed to get this thing on the road: brakes!
With the Tilton pedals and dual brake master cylinders, I have to fab the lines. I started with the fronts. I purchased a roll of brake line tubing and splurged on this cool tubing straightener. Just run the line back and forth a few times and BOOM! The line, she is straight! Attached thumbnail(s) 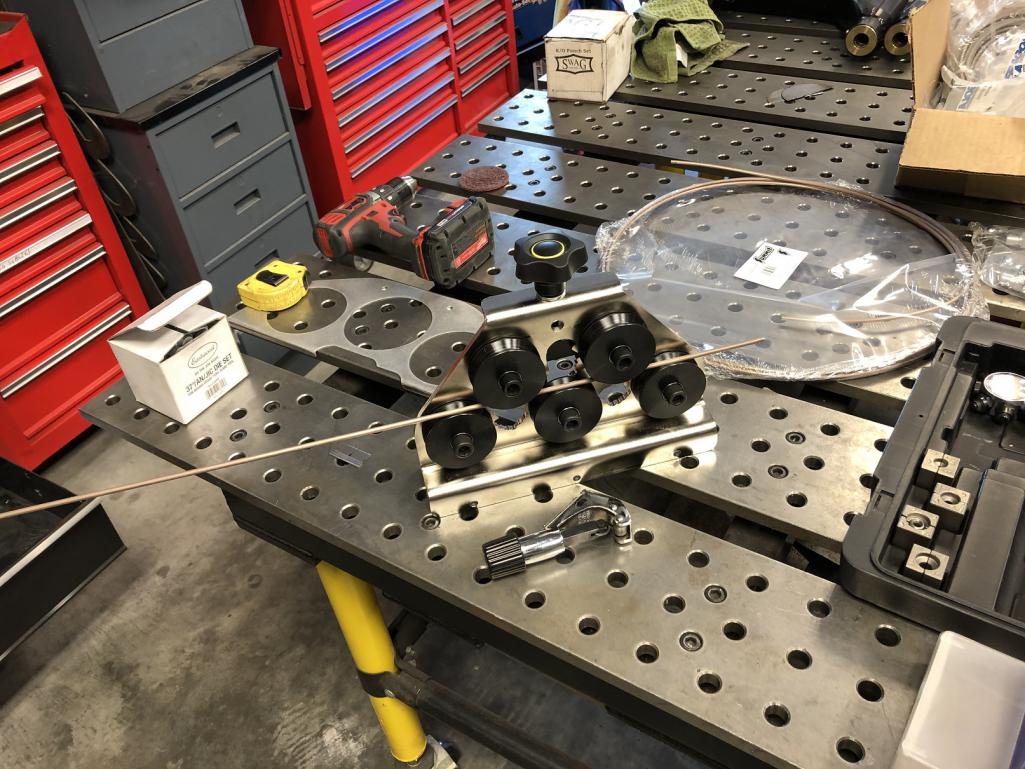
|
|
|
|
| bbrock |
Apr 5 2020, 06:25 PM
Post
#2463
|
|
914 Guru Group: Members Posts: 5,269 Joined: 17-February 17 From: Montana Member No.: 20,845 Region Association: Rocky Mountains |
Always cool new toys to see here. I love it! (IMG:style_emoticons/default/biggrin.gif)
|
|
|
|
| djway |
Apr 5 2020, 06:46 PM
Post
#2464
|
|
Senior Member Group: Members Posts: 787 Joined: 16-October 15 From: Riverside Member No.: 19,266 Region Association: Southern California |
You could have made your own tube straightener for less than 20 dollars with all your cool tools. I built one with just a drill and a vice.
I put the naca ducts in the rockers which flare out so it will be a high pressure area. |
|
|
|
| sixnotfour |
Apr 6 2020, 03:26 AM
Post
#2465
|
|
914 Wizard Group: Members Posts: 11,199 Joined: 12-September 04 Member No.: 2,744 Region Association: NineFourteenerVille |
(IMG:style_emoticons/default/beer3.gif) Ring bros. Camaro
Attached image(s) 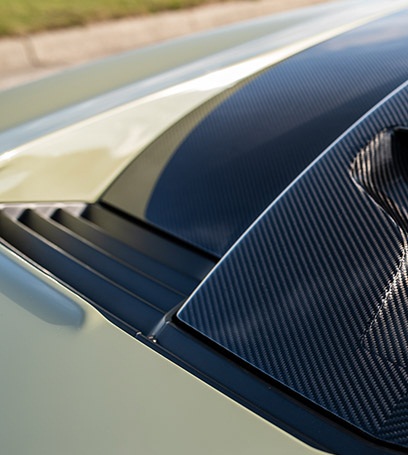
|
 |
|
| tygaboy |
Apr 6 2020, 01:50 PM
Post
#2466
|
|
914 Guru Group: Members Posts: 5,805 Joined: 6-October 15 From: Petaluma, CA Member No.: 19,241 Region Association: Northern California |
QUOTE(sixnotfour @ Apr 6 2020, 02:26 AM) Mmmmmmmm... Ring Bros... (IMG:style_emoticons/default/wub.gif) (IMG:style_emoticons/default/pray.gif) I dream about some day being able to do that level of work. In comparison, I think I'll name my business RookieFab! (IMG:style_emoticons/default/poke.gif) (IMG:style_emoticons/default/happy11.gif) But seriously, I love seeing stuff like that as it motivates me to keep developing the skill set. |
|
|
|
| tygaboy |
Apr 6 2020, 01:54 PM
Post
#2467
|
|
914 Guru Group: Members Posts: 5,805 Joined: 6-October 15 From: Petaluma, CA Member No.: 19,241 Region Association: Northern California |
QUOTE(djway @ Apr 5 2020, 05:46 PM) You could have made your own tube straightener for less than 20 dollars with all your cool tools. I built one with just a drill and a vice. I put the naca ducts in the rockers which flare out so it will be a high pressure area. @djway - Perhaps. But given how much time I spend making these parts and pieces (yes, the multiple iterations don't help!) I've found that in nearly every case, it's waaaaaay less expensive, time wise/tool wise, to buy vs build. |
|
|
|
| tygaboy |
Apr 6 2020, 01:58 PM
Post
#2468
|
|
914 Guru Group: Members Posts: 5,805 Joined: 6-October 15 From: Petaluma, CA Member No.: 19,241 Region Association: Northern California |
Another fiddly set of things to make. This morning, it was the hydraulic clutch hard line from the firewall bulkhead to a yet-to-be-determined spot up near the suspension tower.
I REALLY like those tubing clips. They are from a company called Notchead. Available from Summit in all the common sizes. Very tidy, IMO. I did my best to match all the curves. A bit more fine tuning but it's coming along. Attached thumbnail(s) 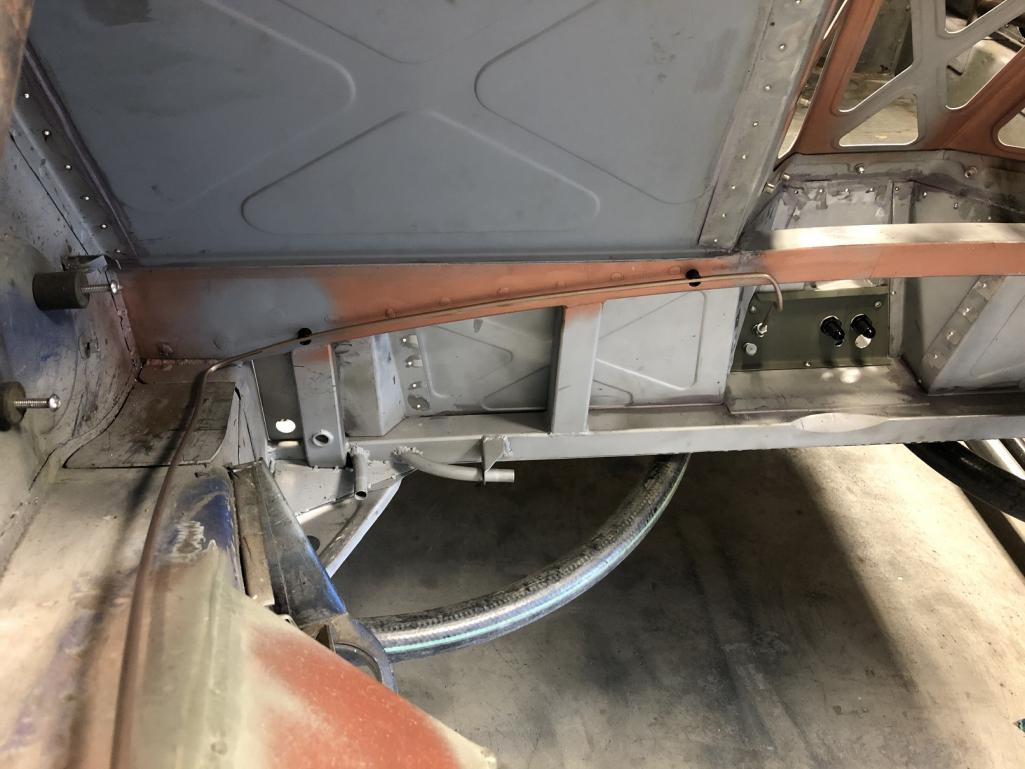 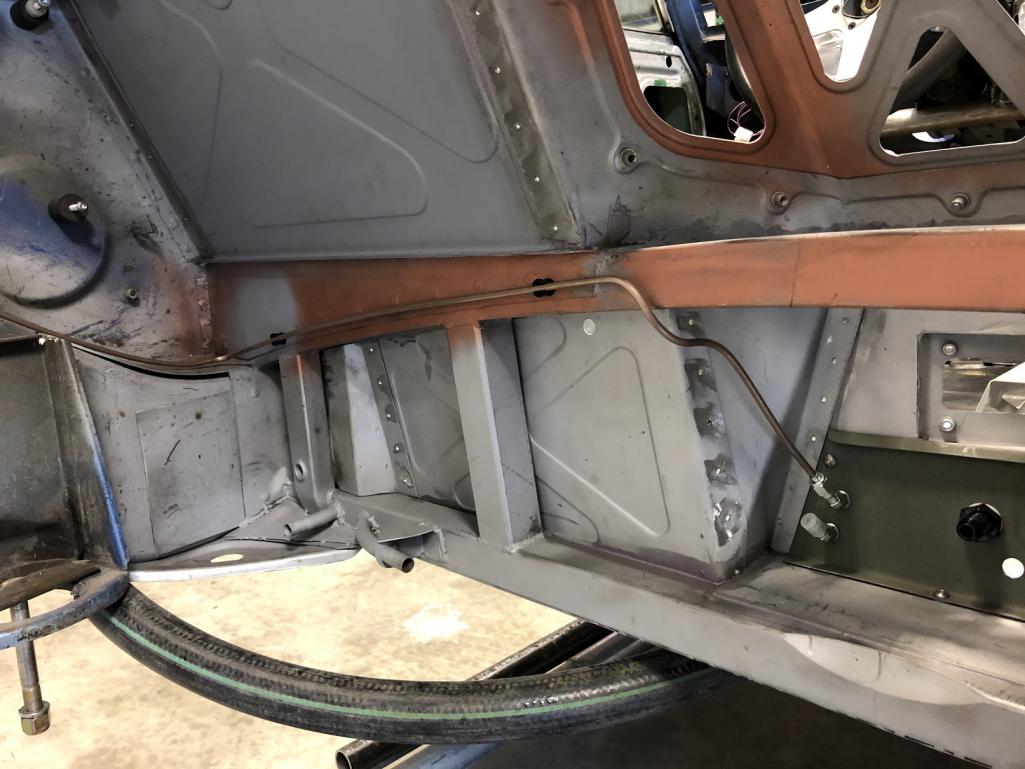
|
|
|
|
| Retroracer |
Apr 6 2020, 03:24 PM
Post
#2469
|
|
Senior Member Group: Members Posts: 655 Joined: 7-July 13 From: Bend OR Member No.: 16,100 Region Association: Pacific Northwest |
Chris - stunning work as always - keep posting!!
A minor observation with the clutch tubing run: by following the structural curves, you just put a high spot in the middle of the run (for air bubbles to collect...)? Might want to rethink that if you get bleeding woes / sponginess.... - Tony |
|
|
|
| tygaboy |
Apr 6 2020, 03:55 PM
Post
#2470
|
|
914 Guru Group: Members Posts: 5,805 Joined: 6-October 15 From: Petaluma, CA Member No.: 19,241 Region Association: Northern California |
QUOTE(Retroracer @ Apr 6 2020, 02:24 PM) Chris - stunning work as always - keep posting!! A minor observation with the clutch tubing run: by following the structural curves, you just put a high spot in the middle of the run (for air bubbles to collect...)? Might want to rethink that if you get bleeding woes / sponginess.... - Tony @Retroracer Tony - Agreed. I was wondering about that, too. But don't the stock rear lines have high points, too? What with the "proportioning" unit? And note the high points of this line's run are the reservoir at the front and the clutch slave cylinder at the rear. But, yes, point taken! |
|
|
|
| Retroracer |
Apr 6 2020, 05:52 PM
Post
#2471
|
|
Senior Member Group: Members Posts: 655 Joined: 7-July 13 From: Bend OR Member No.: 16,100 Region Association: Pacific Northwest |
QUOTE(tygaboy @ Apr 6 2020, 02:55 PM) QUOTE(Retroracer @ Apr 6 2020, 02:24 PM) Chris - stunning work as always - keep posting!! A minor observation with the clutch tubing run: by following the structural curves, you just put a high spot in the middle of the run (for air bubbles to collect...)? Might want to rethink that if you get bleeding woes / sponginess.... - Tony @Retroracer Tony - Agreed. I was wondering about that, too. But don't the stock rear lines have high points, too? What with the "proportioning" unit? And note the high points of this line's run are the reservoir at the front and the clutch slave cylinder at the rear. But, yes, point taken! Yes on the standard rear lines - but physics still applies! Air be lighter than brake fluid, and this project is your opportunity to correct any factory shortcomings on the design - right? (IMG:style_emoticons/default/smile.gif) cylinders, reservoirs as high points are OK - usually that's where the bleed valves are? - Tony |
|
|
|
| djway |
Apr 6 2020, 10:31 PM
Post
#2472
|
|
Senior Member Group: Members Posts: 787 Joined: 16-October 15 From: Riverside Member No.: 19,266 Region Association: Southern California |
QUOTE(tygaboy @ Apr 5 2020, 01:08 PM) QUOTE(djway @ Apr 5 2020, 01:00 PM) Anyway to force some air into that area? I seem to remember various versions of the GT40 having some air ducts entering from the sides. My car has some naca ducts on the side which I plan to run hose to an air box. How about a clear box or roof over you intakes? @djway - Hey now! You're stealing my thunder! (IMG:style_emoticons/default/laugh.gif) Did you sneak into my shop and see the rough sketch of the vents I've got drawn on, just behind the door???? If there ain't no camera footage then NOPE (IMG:style_emoticons/default/happy11.gif) |
|
|
|
| tygaboy |
Apr 8 2020, 05:43 PM
Post
#2473
|
|
914 Guru Group: Members Posts: 5,805 Joined: 6-October 15 From: Petaluma, CA Member No.: 19,241 Region Association: Northern California |
Upper is a new design vs what I already made.
More 914-ish? Certainly less roundy. Let's see how this one turns out. Regardless, I'm pretty sure it'll be one of these. Attached thumbnail(s) 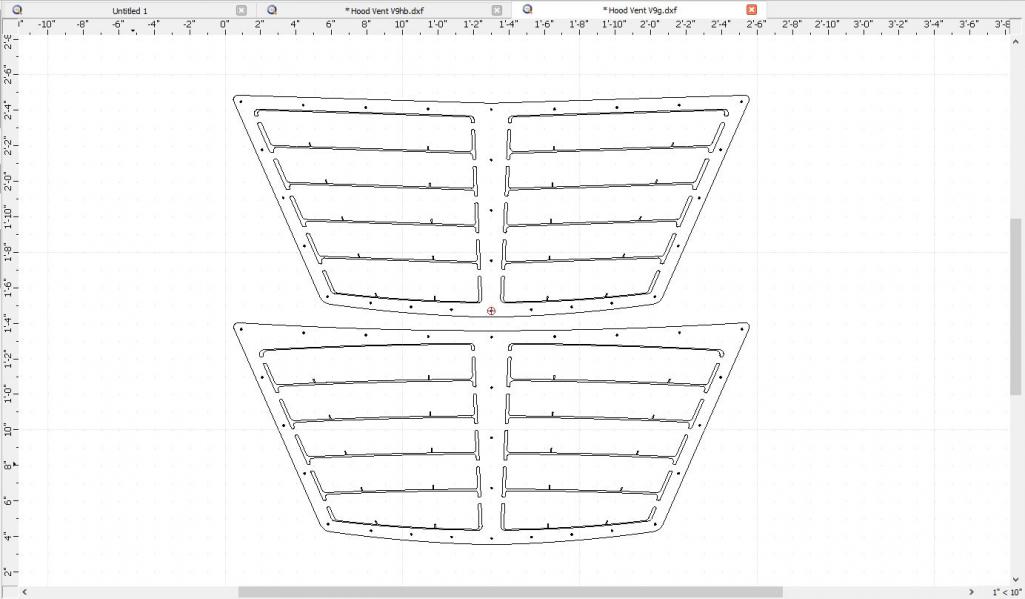
|
|
|
|
| djway |
Apr 8 2020, 05:58 PM
Post
#2474
|
|
Senior Member Group: Members Posts: 787 Joined: 16-October 15 From: Riverside Member No.: 19,266 Region Association: Southern California |
Can you sweep the trailing corners a little bit more to match the trailing corners of the hood?
|
|
|
|
| tygaboy |
Apr 8 2020, 06:38 PM
Post
#2475
|
|
914 Guru Group: Members Posts: 5,805 Joined: 6-October 15 From: Petaluma, CA Member No.: 19,241 Region Association: Northern California |
QUOTE(djway @ Apr 8 2020, 04:58 PM) Can you sweep the trailing corners a little bit more to match the trailing corners of the hood? @djway I'd tried that on an earlier design that I never posted. I didn't like it. Plus, I think I'm going to mount it from underneath so at this point, it's all about the vents, not the frame shape. Again, still have some looking/thinking to do. |
|
|
|
| Krieger |
Apr 8 2020, 10:44 PM
Post
#2476
|
|
Advanced Member Group: Members Posts: 4,853 Joined: 24-May 04 From: Santa Rosa CA Member No.: 2,104 Region Association: None |
I like your second design better. I think it will look better with the curve on the aft end of the hood. On the first design the outside ends of the rear most vents looks to be sweeping forward slightly.
|
|
|
|
| dakotaewing |
Apr 9 2020, 11:28 AM
Post
#2477
|
|
Senior Member Group: Members Posts: 1,167 Joined: 8-July 03 From: DeSoto, Tx Member No.: 897 Region Association: Southwest Region |
Sorry if it has already been asked...
What software are you using to design and plug-in cuts for your plasma table ? |
|
|
|
| tygaboy |
Apr 9 2020, 01:00 PM
Post
#2478
|
|
914 Guru Group: Members Posts: 5,805 Joined: 6-October 15 From: Petaluma, CA Member No.: 19,241 Region Association: Northern California |
QUOTE(dakotaewing @ Apr 9 2020, 10:28 AM) Sorry if it has already been asked... What software are you using to design and plug-in cuts for your plasma table ? @dakotaewing - For the 2D design, I use QCAD. Available for free download. I really like it as I found it easy to learn and use. But anything that can create a suitable .dxf file would work. Once the .dxf is ready to cut, I use SheetCam (also available free) to create the needed cut paths and generate the G-code that the plasma table uses. Both of these came installed on the Linix computer that I purchased with my ArcLight table. |
|
|
|
| tygaboy |
Apr 9 2020, 01:07 PM
Post
#2479
|
|
914 Guru Group: Members Posts: 5,805 Joined: 6-October 15 From: Petaluma, CA Member No.: 19,241 Region Association: Northern California |
QUOTE(Krieger @ Apr 8 2020, 09:44 PM) I like your second design better. I think it will look better with the curve on the aft end of the hood. On the first design the outside ends of the rear most vents looks to be sweeping forward slightly. @Krieger Andy - Agreed. The tricky part that I can't model or visualize until I see it on the car is the fact that when I bend up the vanes, they take on the angle, across their length, of where they connect to the main frame. (IMG:style_emoticons/default/blink.gif) Hard to explain, at least for me. It may be that I'll end up adding a slight curve to the upper edge of the vanes, then move their outer attachment points downward so that when they are bent, their upper edge matches the curve across the hood, more like the version I already made. Thank God I'm retired and have an understanding wife! |
|
|
|
| tygaboy |
Apr 9 2020, 01:16 PM
Post
#2480
|
|
914 Guru Group: Members Posts: 5,805 Joined: 6-October 15 From: Petaluma, CA Member No.: 19,241 Region Association: Northern California |
Another for the tool whores: Eastwood flaring tool.
This thing is pretty awesome. It comes with the 45 degree set up but I have a combo of AN (37 degree) and DIN bubble flares throughout the car so I had to get the AN die set, too. Anyone local to me that needs to make lines is welcome to borrow. Attached thumbnail(s) 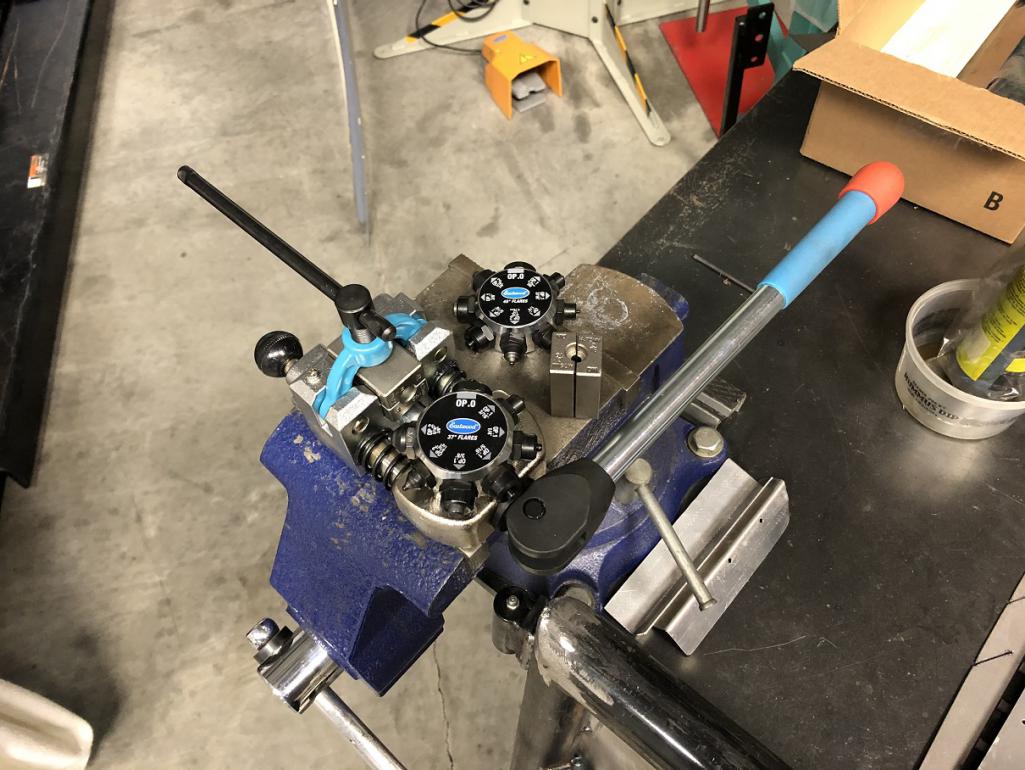
|
|
|
|
|
8 User(s) are reading this topic (8 Guests and 0 Anonymous Users)
0 Members:

|
Lo-Fi Version | Time is now: 17th April 2026 - 01:36 AM |
Invision Power Board
v9.1.4 © 2026 IPS, Inc.