|
|
|
Porsche, and the Porsche crest are registered trademarks of Dr. Ing. h.c. F. Porsche AG.
This site is not affiliated with Porsche in any way. Its only purpose is to provide an online forum for car enthusiasts. All other trademarks are property of their respective owners. |
|
|

  |

| tygaboy |
 May 6 2020, 10:13 PM May 6 2020, 10:13 PM
Post
#2601
|
|
914 Guru  Group: Members Posts: 5,827 Joined: 6-October 15 From: Petaluma, CA Member No.: 19,241 Region Association: Northern California |
QUOTE(live free & drive @ May 6 2020, 05:54 PM)  Retro -I don't know if you are an ID guy, but I am, and was thinking along the same lines. For example this car is well integrated as a whole thought and includes similar vents to those that you propose: http://www.914world.com/bbs2/index.php?showtopic=333845 @live free & drive - I had looked at vents in that same location. Even had it all drawn out on the hood. Those would be a ton simpler than Tony's because, like the center vent, those are "just" in the outer, open area of the stock hood frame structure. Hence their shape. Tony's design will take substantial reworking of the hood support structure, at least. But isn't the cool stuff always more work?? |
   |

 
|
| Andyrew |
May 7 2020, 01:51 AM
Post
#2602
|
|
Spooling.... Please wait Group: Members Posts: 13,380 Joined: 20-January 03 From: Riverbank, Ca Member No.: 172 Region Association: Northern California |
Love the design of the hood exit!
With a proper shroud pushing the air up and to the side I doubt there will be any loss of airflow. Good thing about this kind of thing, is it wont prevent you from finishing the engine install, and test driving the car. You can easily drive it with the hood off till you finalize your hood exit/shroud solution. Also Chris I love the building the louvers into the chassis. If you make the shroud strong enough you can easily put a large duffel bag in the front. |
|
|
|
| 914forme |
May 7 2020, 06:36 AM
Post
#2603
|
|
Times a wastin', get wrenchin'! Group: Members Posts: 3,899 Joined: 24-July 04 From: Dayton, Ohio Member No.: 2,388 Region Association: None |
Tony's design is sound, restructure of the hood is well, or could be the issue. I do not see it as an issue for you. It is opportunity.
since you have that small CNC machine and you have the skills to use it, ah just cut new hood structure in layers, and either molten bond them in Modren version of het and fire. Or do it out of Aluminum to keep it light, Rivet the layers together, you can discretely TIG them, and bond a skin of your choice over the top. Make the side vents their own structure like you suggest. Good duck work, and proper exit in low pressure will insure decent cooling. Lots of math involved. Proper ratio requires decimals, but 2 to 1 ratio will work. Inlet open, after rad bigger, after fans even bigger. Fans at the ends of the runs would provide negative pressure through the entire system, make things a bit more efficient. As always love the build and the ideas that come from it. Chris you do you, and keep (IMG:style_emoticons/default/aktion035.gif) you are dealing with all sorts of fun math here, but to get it into simpler terms, do not forget a lot of your testing has been done. 4 years worth of it, all right here.. Find a good low-pressure are for the exit, and have hun. In reality for us hobby level enthusiasts, it is a crap shoot unless you want to spend lots of time in CAD, and then have access to flow simulators. Even then your model has to be superb. LOL a few GO Pros, and some yarn, and tape, still a great set of tools for figuring out what is going on. There is a reason why they are still used today. |
|
|
|
| tygaboy |
May 7 2020, 07:48 AM
Post
#2604
|
|
914 Guru Group: Members Posts: 5,827 Joined: 6-October 15 From: Petaluma, CA Member No.: 19,241 Region Association: Northern California |
You know what would make this whole vent thing way easier?
1. Lose the fuel tank bulkhead, replace with "suitable" shock tower bracing 2. Fab the TonyVents (tm) 3. Design/fab the AndyrewDuct System (tm) 4. Build a custom shaped aluminum fuel tank 5. Fabricate hood The nice thing is that, as @Andyrew points out, I can work on this as a separate project, perhaps mocking it up/proving it out on one of the parts cars, then fit it to my build... (IMG:style_emoticons/default/idea.gif) EDIT: I take back the above. I just ran out to look at the car and I don't think all that would really help. The shock towers are what's really in the way. A bit more head scratching will be required! Now, if it was a tube chassis with A-arms, that'd be a different story... (IMG:style_emoticons/default/stirthepot.gif) |
|
|
|
| Andyrew |
May 7 2020, 03:28 PM
Post
#2605
|
|
Spooling.... Please wait Group: Members Posts: 13,380 Joined: 20-January 03 From: Riverbank, Ca Member No.: 172 Region Association: Northern California |
QUOTE(tygaboy @ May 7 2020, 06:48 AM) 3. Design/fab the AndyrewDuct System (tm) Do I get temp royalties for each degree of temp lost from the patented duct system? (IMG:style_emoticons/default/biggrin.gif) |
|
|
|
| tygaboy |
May 7 2020, 04:41 PM
Post
#2606
|
|
914 Guru Group: Members Posts: 5,827 Joined: 6-October 15 From: Petaluma, CA Member No.: 19,241 Region Association: Northern California |
QUOTE(Andyrew @ May 7 2020, 02:28 PM) QUOTE(tygaboy @ May 7 2020, 06:48 AM) 3. Design/fab the AndyrewDuct System (tm) Do I get temp royalties for each degree of temp lost from the patented duct system? (IMG:style_emoticons/default/biggrin.gif) @Andyrew - Nice try, but no. You're now a sponsor so you pay ME! (IMG:style_emoticons/default/happy11.gif) |
|
|
|
| Andyrew |
May 7 2020, 04:50 PM
Post
#2607
|
|
Spooling.... Please wait Group: Members Posts: 13,380 Joined: 20-January 03 From: Riverbank, Ca Member No.: 172 Region Association: Northern California |
QUOTE(tygaboy @ May 7 2020, 03:41 PM) QUOTE(Andyrew @ May 7 2020, 02:28 PM) QUOTE(tygaboy @ May 7 2020, 06:48 AM) 3. Design/fab the AndyrewDuct System (tm) Do I get temp royalties for each degree of temp lost from the patented duct system? (IMG:style_emoticons/default/biggrin.gif) @Andyrew - Nice try, but no. You're now a sponsor so you pay ME! (IMG:style_emoticons/default/happy11.gif) (IMG:style_emoticons/default/beer.gif) I've got the beer next time (IMG:style_emoticons/default/smile.gif) |
|
|
|
| tygaboy |
May 7 2020, 04:59 PM
Post
#2608
|
|
914 Guru Group: Members Posts: 5,827 Joined: 6-October 15 From: Petaluma, CA Member No.: 19,241 Region Association: Northern California |
Finished up all the plumbing in the console. All soft lines fabbed, pressure tested and installed.
Attached thumbnail(s) 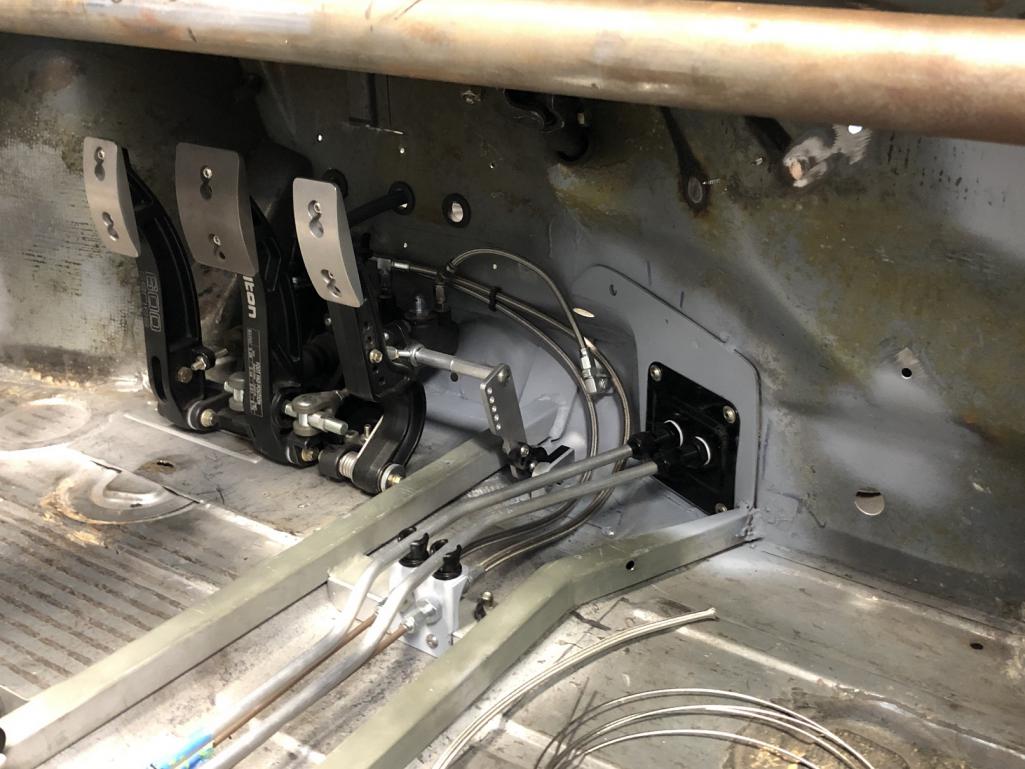
|
|
|
|
| tygaboy |
May 14 2020, 05:19 PM
Post
#2609
|
|
914 Guru Group: Members Posts: 5,827 Joined: 6-October 15 From: Petaluma, CA Member No.: 19,241 Region Association: Northern California |
I'm waiting for some components needed for the wiring so thought I'd attend to a couple items that just weren't doing it for me. Today it was the clamp for the GT headlight cable splitter.
The kit doesn't come with anything as it's not known where the splitter might be mounted. Version 1 was a cheap-out move on my part, using a standard p-clamp that bolts to a threaded insert I welded to the underside of the inner fender. Nothing really wrong with it as it's simple and light weight. Perfect for a race car but zero cool factor. Attached thumbnail(s) 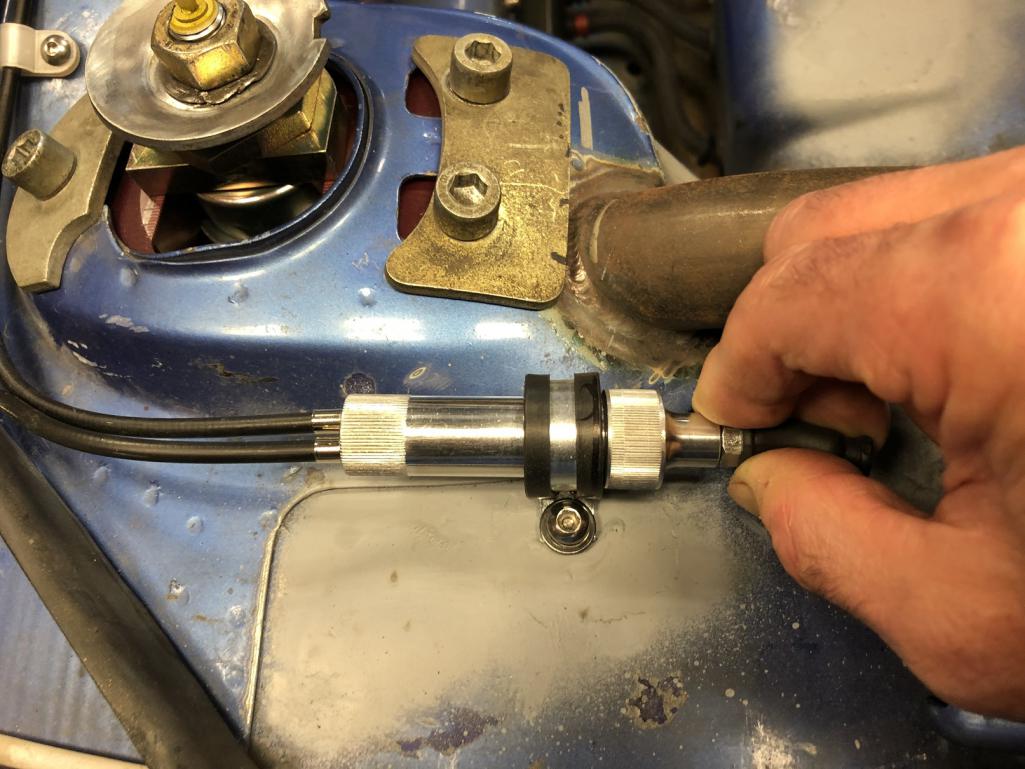
|
|
|
|
| tygaboy |
May 14 2020, 05:24 PM
Post
#2610
|
|
914 Guru Group: Members Posts: 5,827 Joined: 6-October 15 From: Petaluma, CA Member No.: 19,241 Region Association: Northern California |
So a bit of mill work and I have a spiffy clamp that earns some style points and is more in keeping with the vibe I'm after.
It's the little things... Attached thumbnail(s) 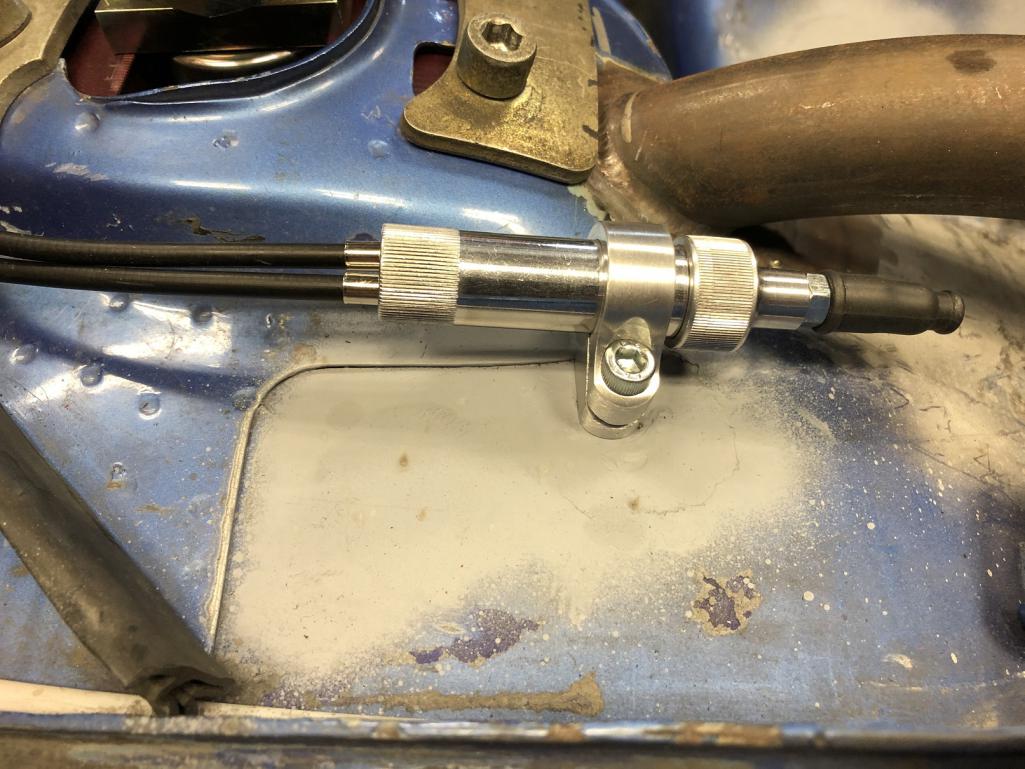 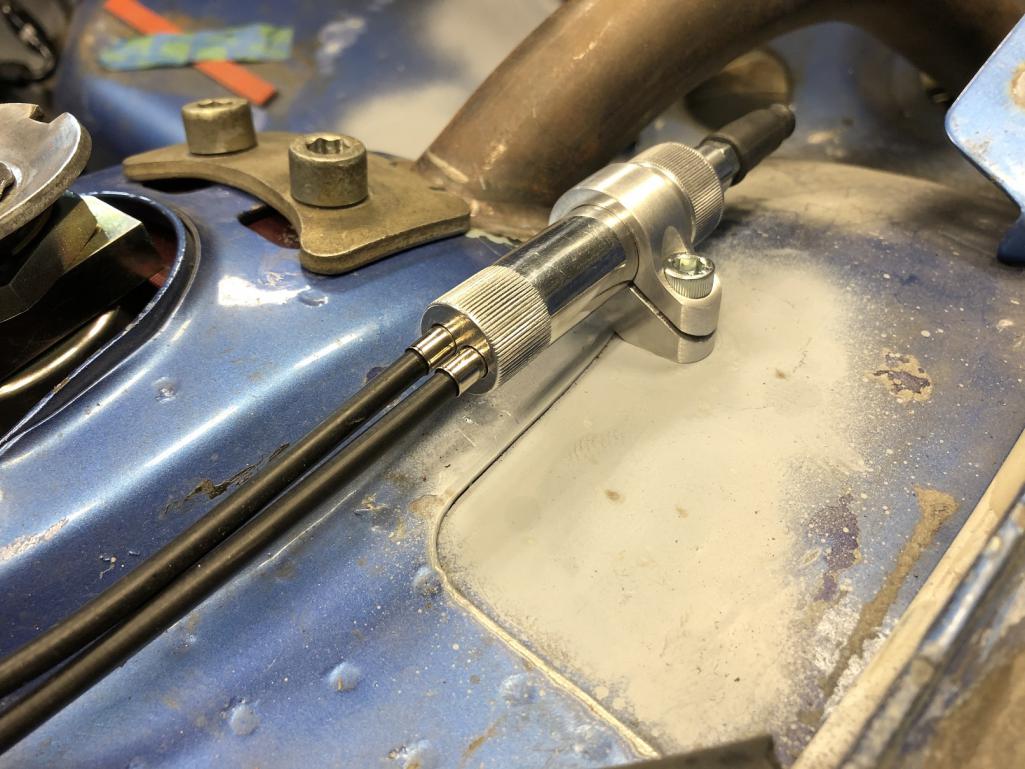
|
|
|
|
| djway |
May 14 2020, 06:14 PM
Post
#2611
|
|
Senior Member Group: Members Posts: 787 Joined: 16-October 15 From: Riverside Member No.: 19,266 Region Association: Southern California |
Did you work in Aerospace? That’s cool.
|
|
|
|
| tygaboy |
May 15 2020, 05:51 PM
Post
#2612
|
|
914 Guru Group: Members Posts: 5,827 Joined: 6-October 15 From: Petaluma, CA Member No.: 19,241 Region Association: Northern California |
The reversed turbo forward headers prevent me from using the stock "on the valve cover" coil mounting locations. Plus, I'd like to hide as much stuff as possible.
After much "will they fit here? No. How about here? No...", I realized if I packaged them in pairs, vs as a group of four (as is typical), I'd have more locations to choose from. So I designed, cut and bent up a test version "2-up" mount. Yep, this will work! I'll finish cutting the rest of them tomorrow and then go after the attachment points. Attached thumbnail(s) 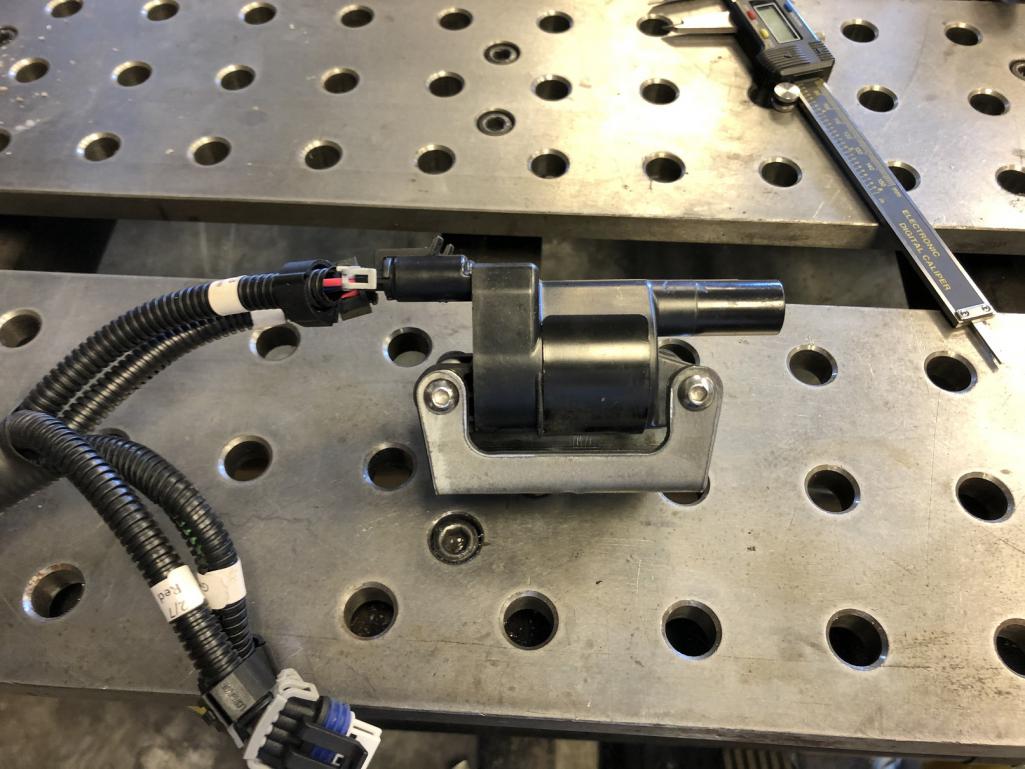 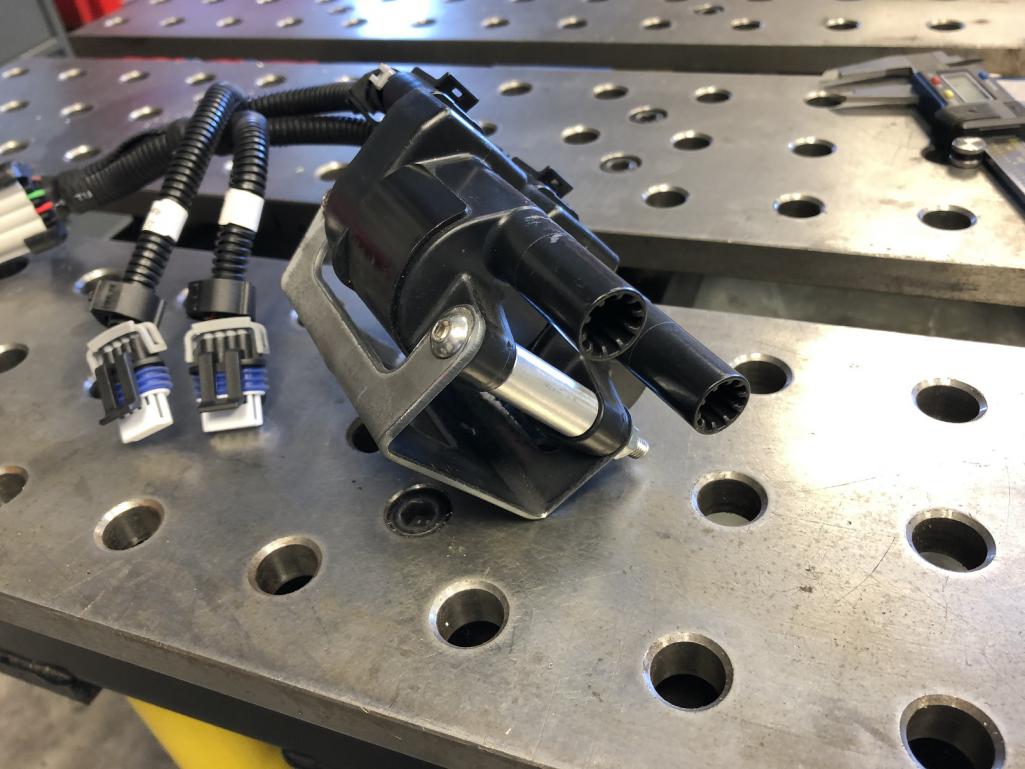 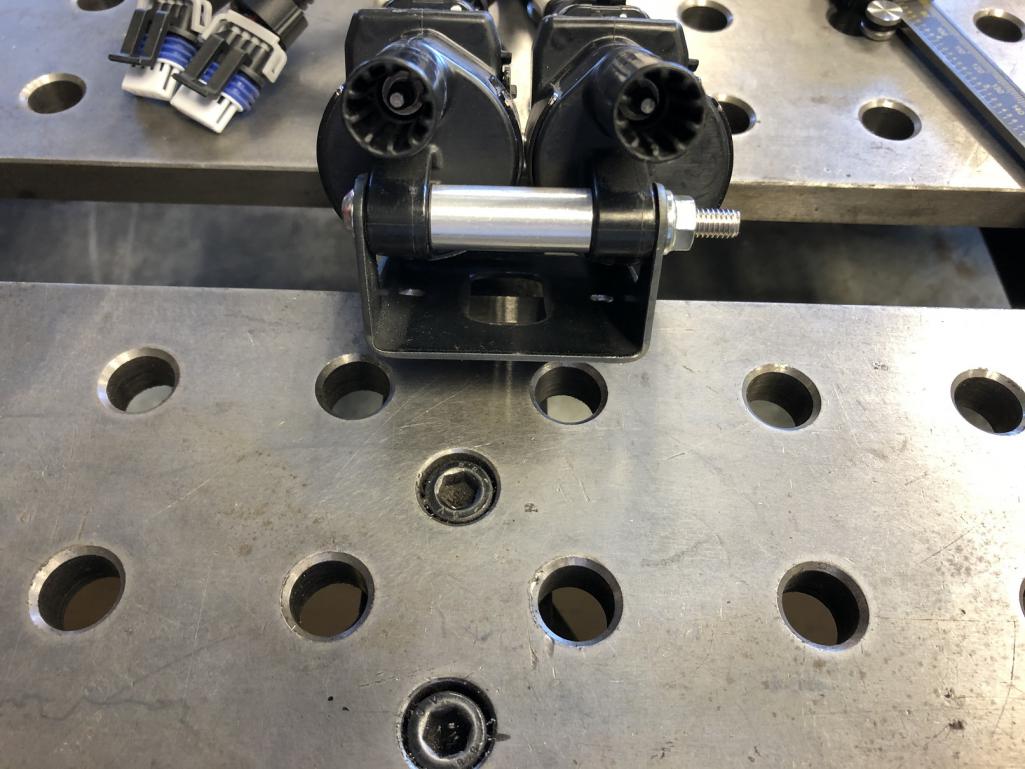
|
|
|
|
| Mueller |
May 15 2020, 06:02 PM
Post
#2613
|
|
914 Freak! Group: Members Posts: 17,155 Joined: 4-January 03 From: Antioch, CA Member No.: 87 Region Association: None |
Getting closer! Nice coil bracket.
|
|
|
|
| tygaboy |
May 16 2020, 04:45 PM
Post
#2614
|
|
914 Guru Group: Members Posts: 5,827 Joined: 6-October 15 From: Petaluma, CA Member No.: 19,241 Region Association: Northern California |
Passenger side coil brackets done and installed. Locating them on the engine cross bar nicely hides them, along with the plug wires.
RE: the driver side, I'm swapping to a different water pump, which also mounts on the engine cross bar. I'll need to get the new pump fit then determine what sort of room I have for the coils. Of course, I could always mount the pump somewhere else... (IMG:style_emoticons/default/idea.gif) Attached thumbnail(s) 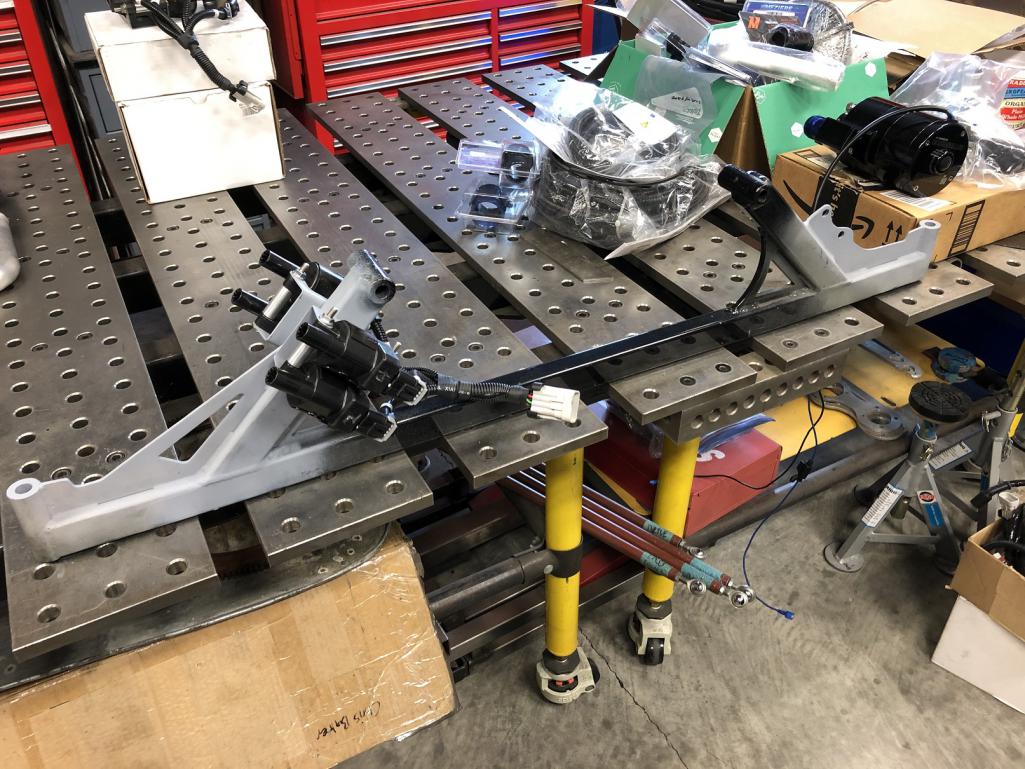 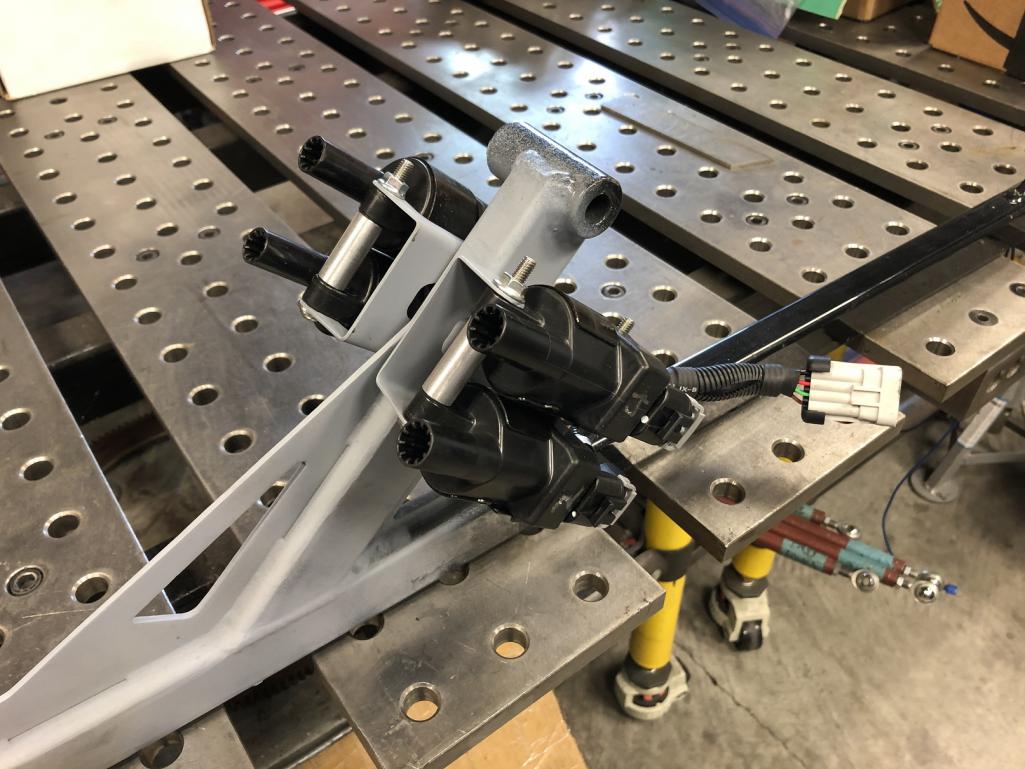
|
|
|
|
| tygaboy |
May 16 2020, 04:55 PM
Post
#2615
|
|
914 Guru Group: Members Posts: 5,827 Joined: 6-October 15 From: Petaluma, CA Member No.: 19,241 Region Association: Northern California |
One thing I (thankfully!) planned for is that in order to install the alternator, I need to get to a bolt that is essentially unaccessible - unless there's a hole in the firewall.
If you at earlier posts, you'll see a smaller hole that I'd designed into that panel when it was plasma cut. Today, I opened it up to final size. A solid grommet seals the hole and is easily removable when I need to get to the allen head bolt. Attached thumbnail(s) 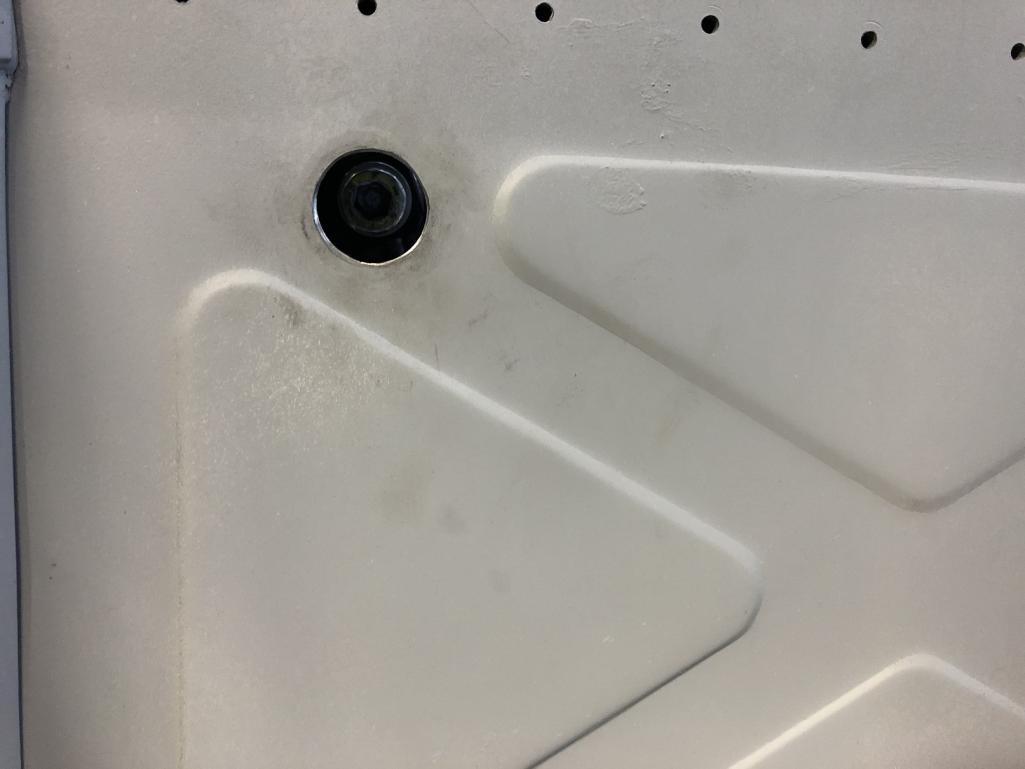 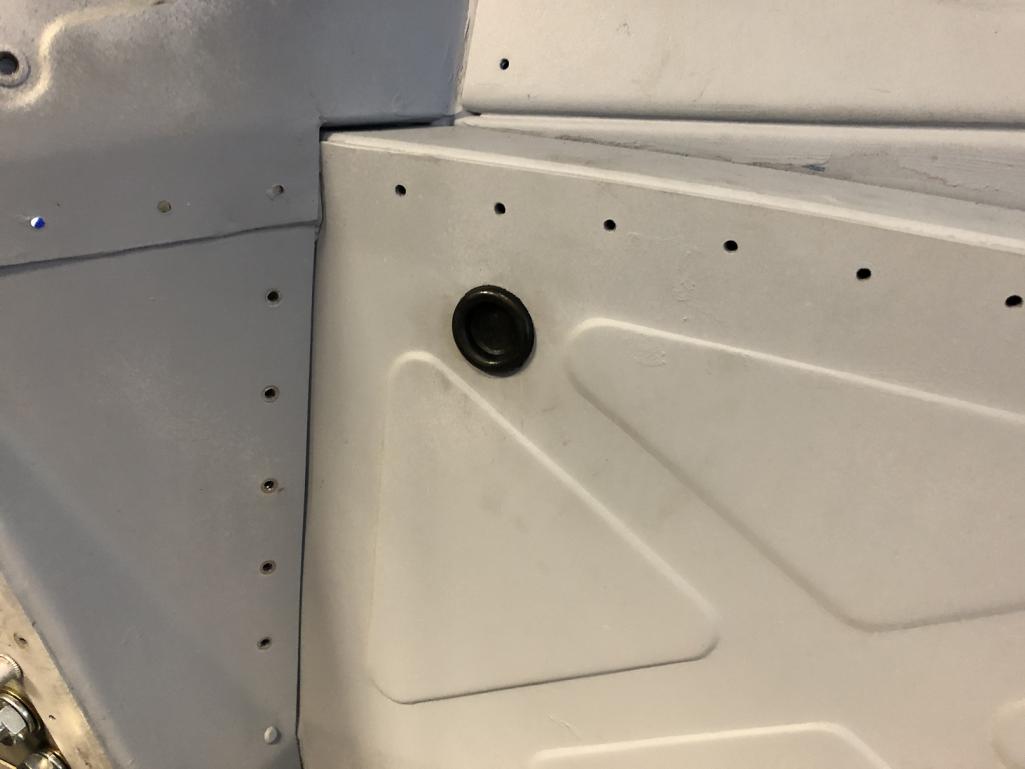
|
|
|
|
| tygaboy |
May 18 2020, 05:42 PM
Post
#2616
|
|
914 Guru Group: Members Posts: 5,827 Joined: 6-October 15 From: Petaluma, CA Member No.: 19,241 Region Association: Northern California |
OK, enough of the custom stuff for now. How about some actual Porsche parts?
911 e-brakes refurbed and installed. Attached thumbnail(s) 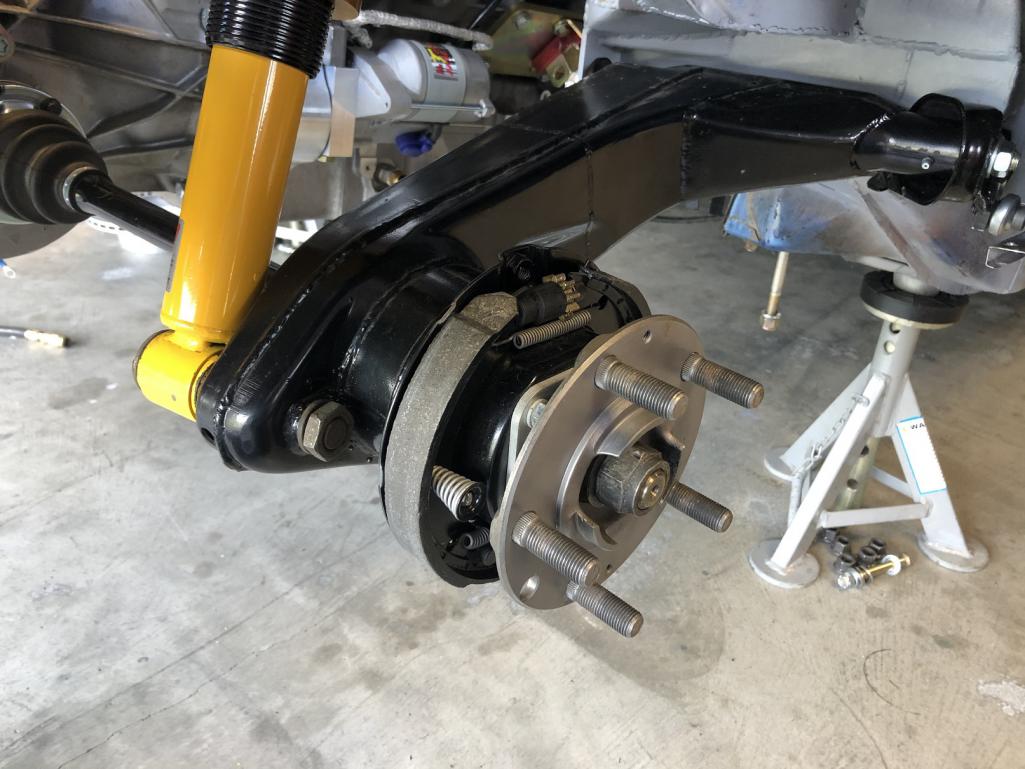
|
|
|
|
| Andyrew |
May 18 2020, 09:43 PM
Post
#2617
|
|
Spooling.... Please wait Group: Members Posts: 13,380 Joined: 20-January 03 From: Riverbank, Ca Member No.: 172 Region Association: Northern California |
Coils aren't to close to the headers?
|
|
|
|
| tygaboy |
May 20 2020, 04:23 PM
Post
#2618
|
|
914 Guru Group: Members Posts: 5,827 Joined: 6-October 15 From: Petaluma, CA Member No.: 19,241 Region Association: Northern California |
QUOTE(Andyrew @ May 18 2020, 08:43 PM) Coils aren't to close to the headers? @Andyrew - Nope. With the "up and back" headers, I have tons of room. Attached thumbnail(s) 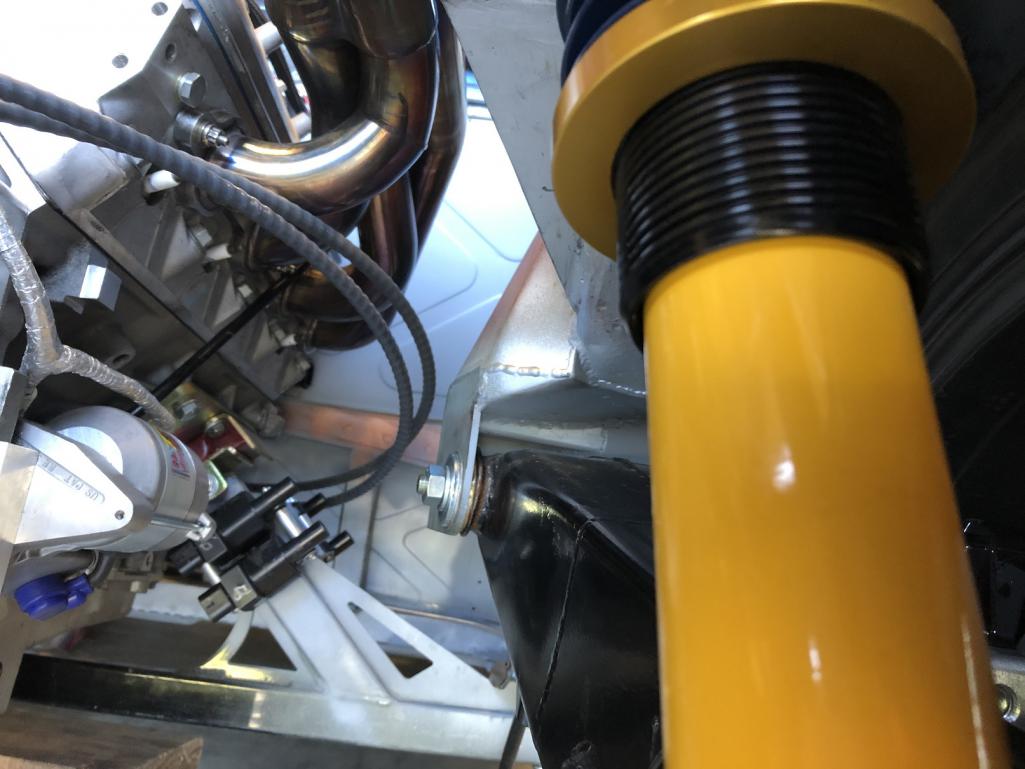
|
|
|
|
| tygaboy |
May 20 2020, 04:25 PM
Post
#2619
|
|
914 Guru Group: Members Posts: 5,827 Joined: 6-October 15 From: Petaluma, CA Member No.: 19,241 Region Association: Northern California |
E-brakes all hooked up and working, though the passenger side cable stay has yet to be added.
Boxster rear calipers installed. A couple more brake line fittings to complete and all the hydraulic systems will be done. That's a major to-do about to be crossed off the list. Attached thumbnail(s) 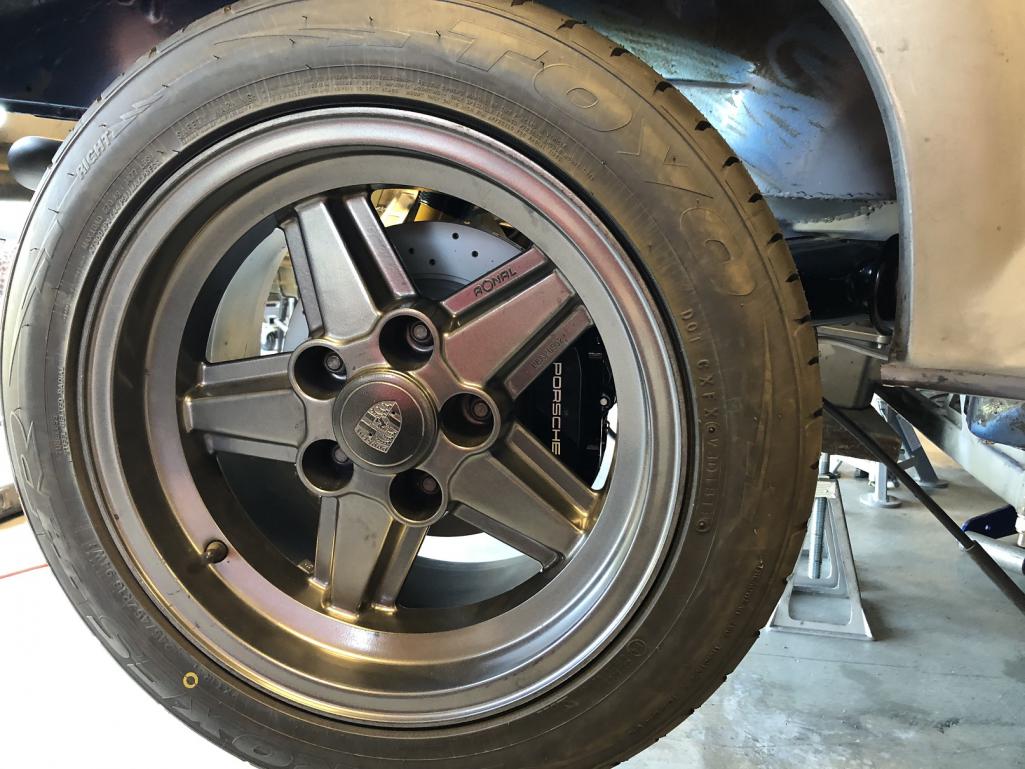
|
|
|
|
| tygaboy |
May 20 2020, 04:38 PM
Post
#2620
|
|
914 Guru Group: Members Posts: 5,827 Joined: 6-October 15 From: Petaluma, CA Member No.: 19,241 Region Association: Northern California |
Change of plan on the electronics. As I was getting ready to go on the Infinity Box wiring, it just seemed like I was running into limited packaging options and losing more interior space than I wanted to... so I sold it and will be using a more traditional chassis harness.
And as far as the steering wheel buttons, I decided I didn't want a curly cord set up. I opted to go with this: Summit Technologies "Raptor Pro". It's an 8-channel wireless button set up where each button controls a separate solid state relay. Each button can be programmed to be momentary, latching or flashing. With this set up, I can eliminate essentially all the switches from the dash. It's super sanitary; no wires, not even hardly a bump on the back side of the wheel. The kit comes with colored graphic labels for the buttons - turn signals, horn, lights, high beam, flash to pass, wipers, etc. I need to settle into which buttons I want to do what then I'll get things labeled. Note that the pic doesn't really reflect how things look when seated in the car. The top buttons do block a bit of the lower area of the outer gauges but not the operating ranges of the gauges so I think it'll be fine. Attached thumbnail(s) 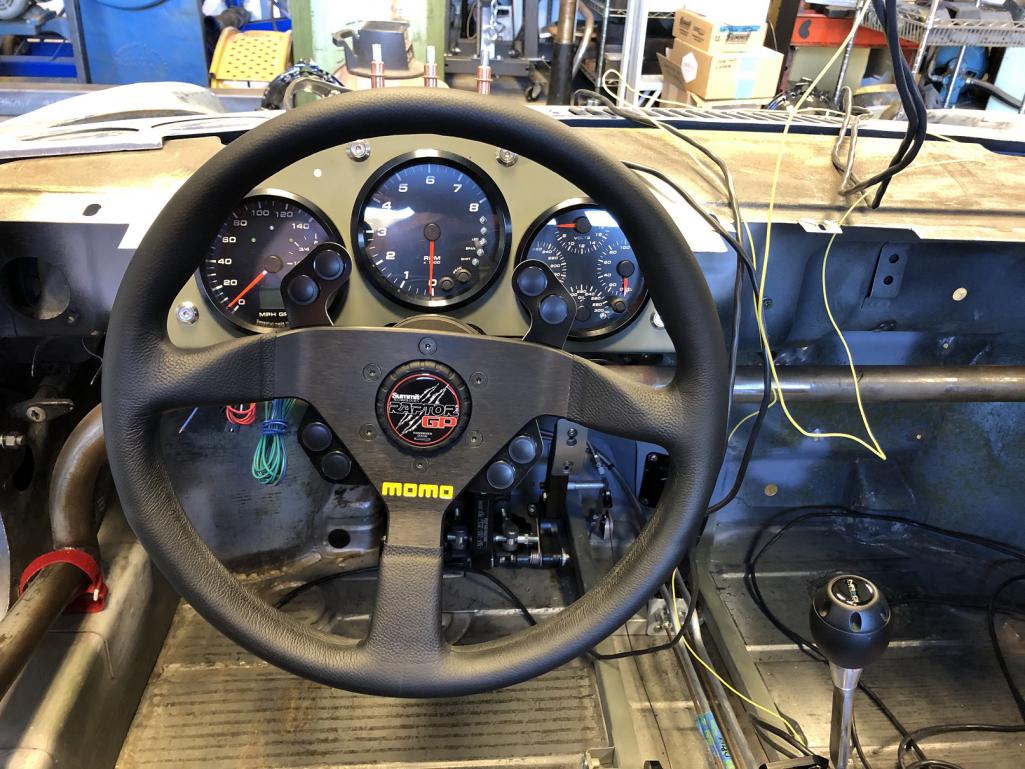 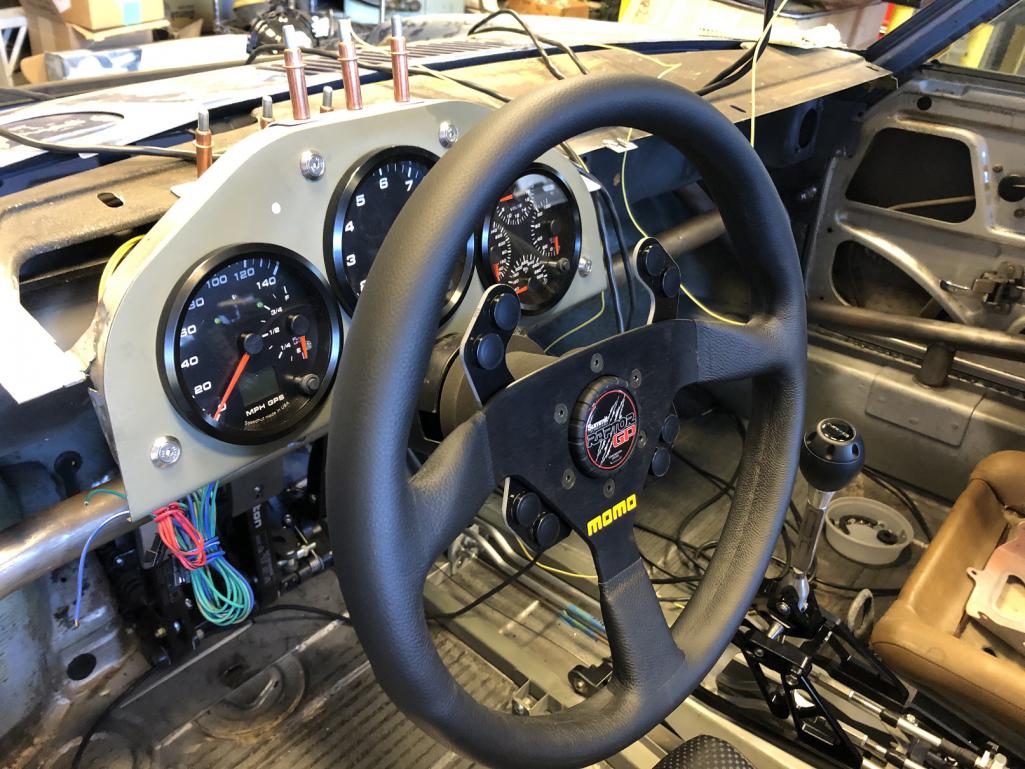 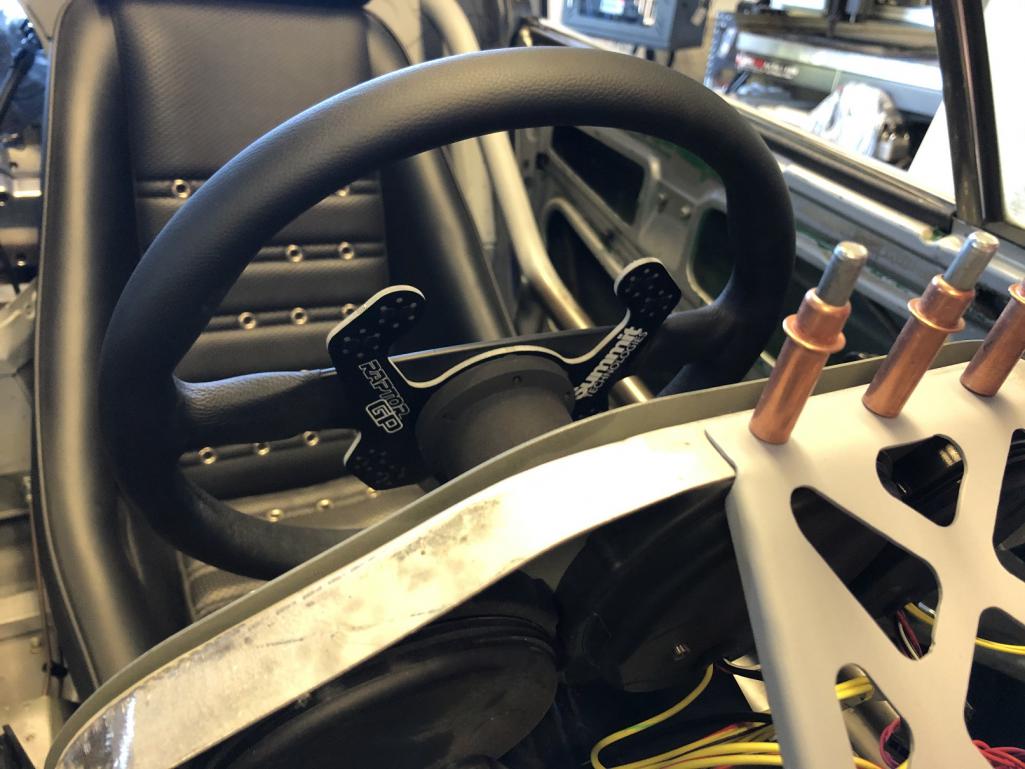
|
|
|
|
|
1 User(s) are reading this topic (1 Guests and 0 Anonymous Users)
0 Members:

|
Lo-Fi Version | Time is now: 15th June 2026 - 11:05 PM |
Invision Power Board
v9.1.4 © 2026 IPS, Inc.