|
|
|
Porsche, and the Porsche crest are registered trademarks of Dr. Ing. h.c. F. Porsche AG.
This site is not affiliated with Porsche in any way. Its only purpose is to provide an online forum for car enthusiasts. All other trademarks are property of their respective owners. |
|
|

  |

| tygaboy |
 Feb 17 2017, 03:48 PM Feb 17 2017, 03:48 PM
Post
#301
|
|
914 Guru  Group: Members Posts: 5,817 Joined: 6-October 15 From: Petaluma, CA Member No.: 19,241 Region Association: Northern California |
And here's another example of why I'm never going to make money doing this:
I needed a piece that angled up from the driver's side runner up to the load plate. This required a compound set of cuts - one to get the "up" angle, the other to get the "over" angle. Then, because of the "up" I needed to get the length right so the top of this piece intersects with the runner at the right spot, Then it's time to trim the lower edge so it ends up at 1.5" tall at the angle so it mates with the front of the runner... (IMG:style_emoticons/default/blink.gif) And I must say, it's dead nuts on! (IMG:style_emoticons/default/aktion035.gif) I'm pretty impressed with myself. Yes, I still have to trim the other end but that's a single angle so no worries there. That said: What you aren't seeing are the other 3 attempts/fails and 2 hours of "practice" that preceded the final piece. (IMG:style_emoticons/default/huh.gif) It seems like every piece I make has something "special" about it that requires me to learn something new or use a rarely used skill. Don't get me wrong, I still love it. I just hate wasting the materials, consumables and time. I guess that's "experience", huh? Attached thumbnail(s) 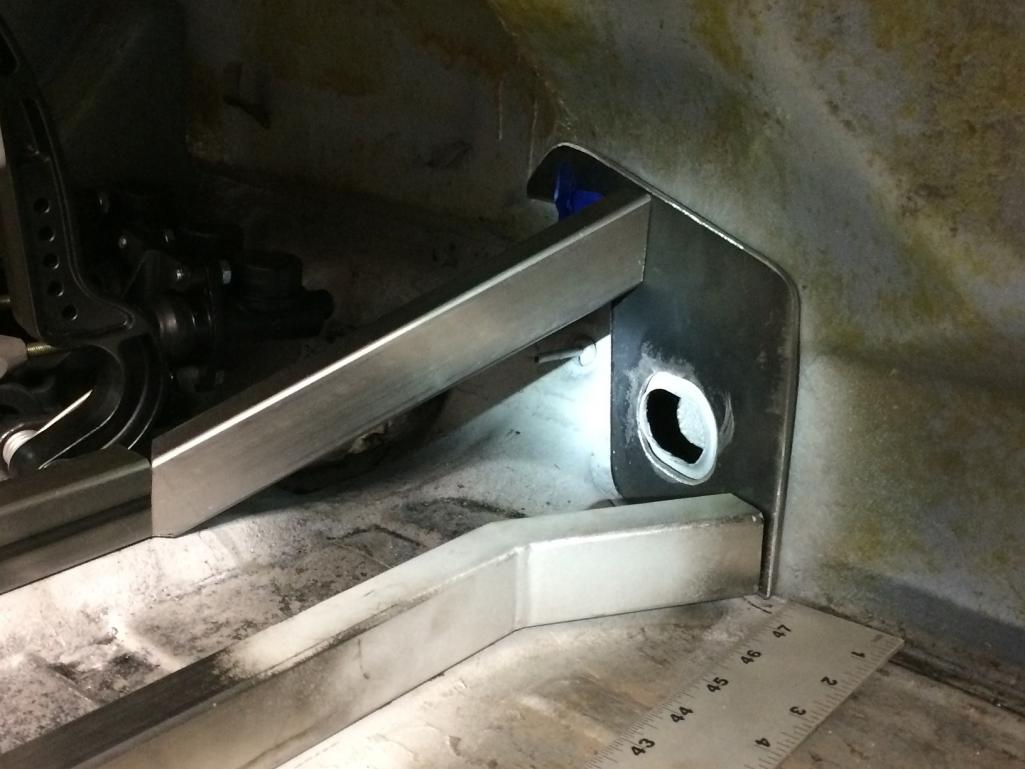
|
   |

 
|
| ChrisFoley |
Feb 17 2017, 04:08 PM
Post
#302
|
|
I am Tangerine Racing Group: Members Posts: 8,019 Joined: 29-January 03 From: Bolton, CT Member No.: 209 Region Association: None |
That's nothing.
You should see the challenges my dad faces every day with his Ryan restoration. In many cases he doesn't have a sample, and the blueprints don't match pictures of original parts. His fuel tank took more than 250 hours of labor, as well as an extra sheet of aluminum. |
 |
|
| tygaboy |
Feb 17 2017, 06:31 PM
Post
#303
|
|
914 Guru Group: Members Posts: 5,817 Joined: 6-October 15 From: Petaluma, CA Member No.: 19,241 Region Association: Northern California |
Mocking in some other parts, just to get a feel for where things may sorta go. It's starting to look like a place I'd want to spend some time!
If only we could build with cardboard... Attached thumbnail(s) 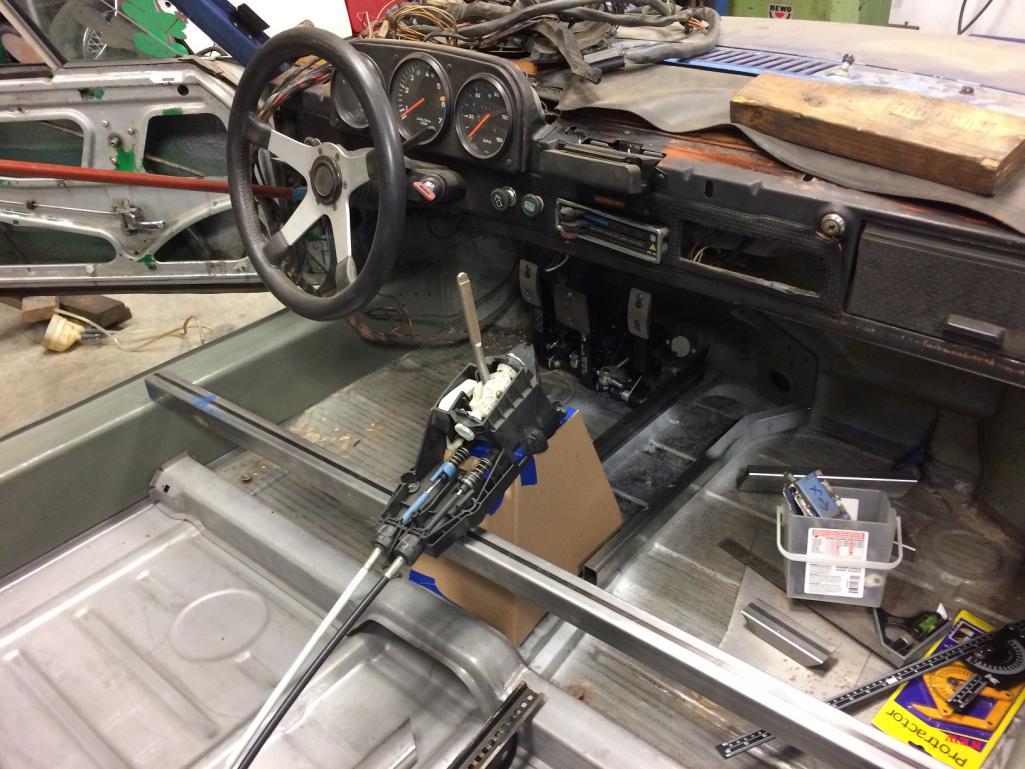
|
|
|
|
| tygaboy |
Feb 17 2017, 06:35 PM
Post
#304
|
|
914 Guru Group: Members Posts: 5,817 Joined: 6-October 15 From: Petaluma, CA Member No.: 19,241 Region Association: Northern California |
I confess that I succumbed to peer pressure. I just couldn't take people using the term "short" in relation to any of my stuff.
Tangerine Racing came through with an instant shipment of just the tall (long?) tower pieces! Thanks Chris! The plan is to get them fully installed tomorrow. (IMG:style_emoticons/default/welder.gif) Attached thumbnail(s) 
|
|
|
|
| tygaboy |
Feb 17 2017, 06:41 PM
Post
#305
|
|
914 Guru Group: Members Posts: 5,817 Joined: 6-October 15 From: Petaluma, CA Member No.: 19,241 Region Association: Northern California |
Teaser shot. Where, oh where, do you suppose the exhaust is going to exit the car?
Out the top of the trunk, 918 style? (IMG:style_emoticons/default/sunglasses.gif) Through the rear panel? (IMG:style_emoticons/default/idea.gif) Or do I have something else in mind...? (IMG:style_emoticons/default/shades.gif) (If I've shared my plan with you, don't spill the beans, please.) Attached thumbnail(s) 
|
|
|
|
| Cracker |
Feb 17 2017, 06:47 PM
Post
#306
|
|
Advanced Member Group: Members Posts: 2,148 Joined: 2-February 10 From: Atlanta (area) Member No.: 11,316 Region Association: South East States |
Peanut gallery: I hate to have to tell you Chris but your exhaust manifolds are wrong side up... (IMG:style_emoticons/default/poke.gif)
T |
|
|
|
| mgp4591 |
Feb 18 2017, 05:00 AM
Post
#307
|
|
914 Guru Group: Members Posts: 5,923 Joined: 1-August 12 From: Salt Lake City Ut Member No.: 14,748 Region Association: Intermountain Region |
QUOTE(tygaboy @ Feb 17 2017, 05:41 PM)  Teaser shot. Where, oh where, do you suppose the exhaust is going to exit the car? Out the top of the trunk, 918 style? (IMG:style_emoticons/default/sunglasses.gif) Through the rear panel? (IMG:style_emoticons/default/idea.gif) Or do I have something else in mind...? (IMG:style_emoticons/default/shades.gif) (If I've shared my plan with you, don't spill the beans, please.) I'll bite... you're going to run them through your custom bulkhead and out behind the rear fenderwells on the side - custom heat plates with pipes will look purty kuhl... (IMG:style_emoticons/default/idea.gif) (IMG:style_emoticons/default/lol-2.gif) (IMG:style_emoticons/default/popcorn[1].gif) |
|
|
|
| tygaboy |
Feb 18 2017, 07:09 PM
Post
#308
|
|
914 Guru Group: Members Posts: 5,817 Joined: 6-October 15 From: Petaluma, CA Member No.: 19,241 Region Association: Northern California |
Well... I FINALLY completed what I said I'd complete in the time I said I'd complete it.
The goal was to get the shock tower tops in. And they are in ! Here're a couple action photos of the event. Attached thumbnail(s) 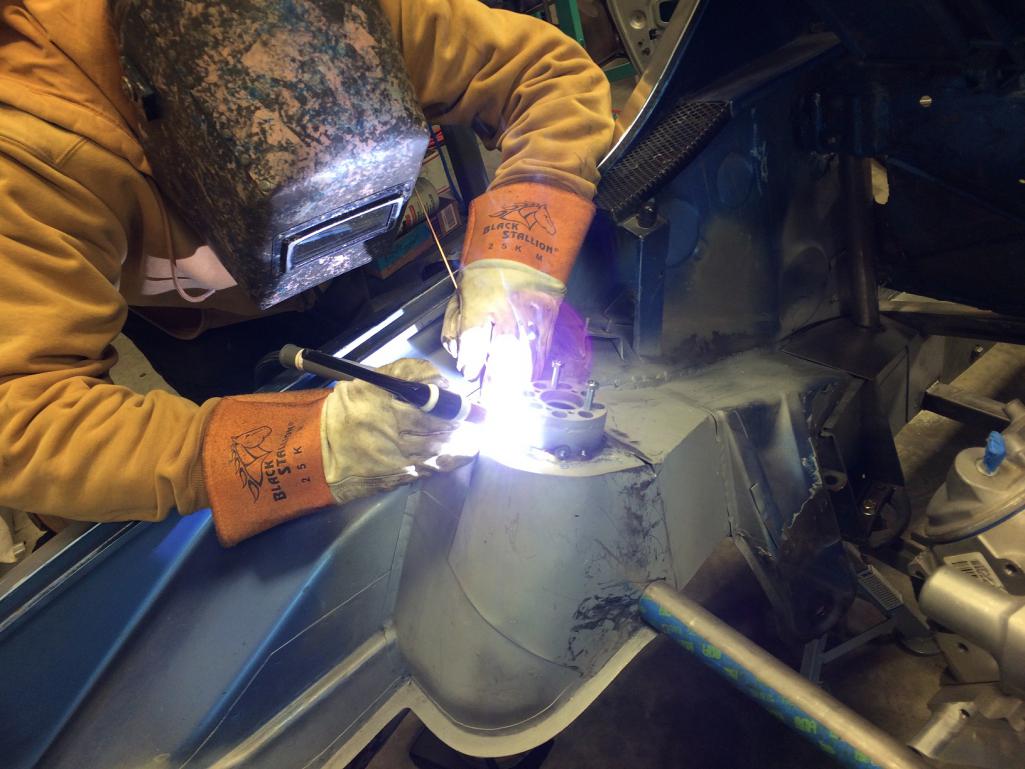 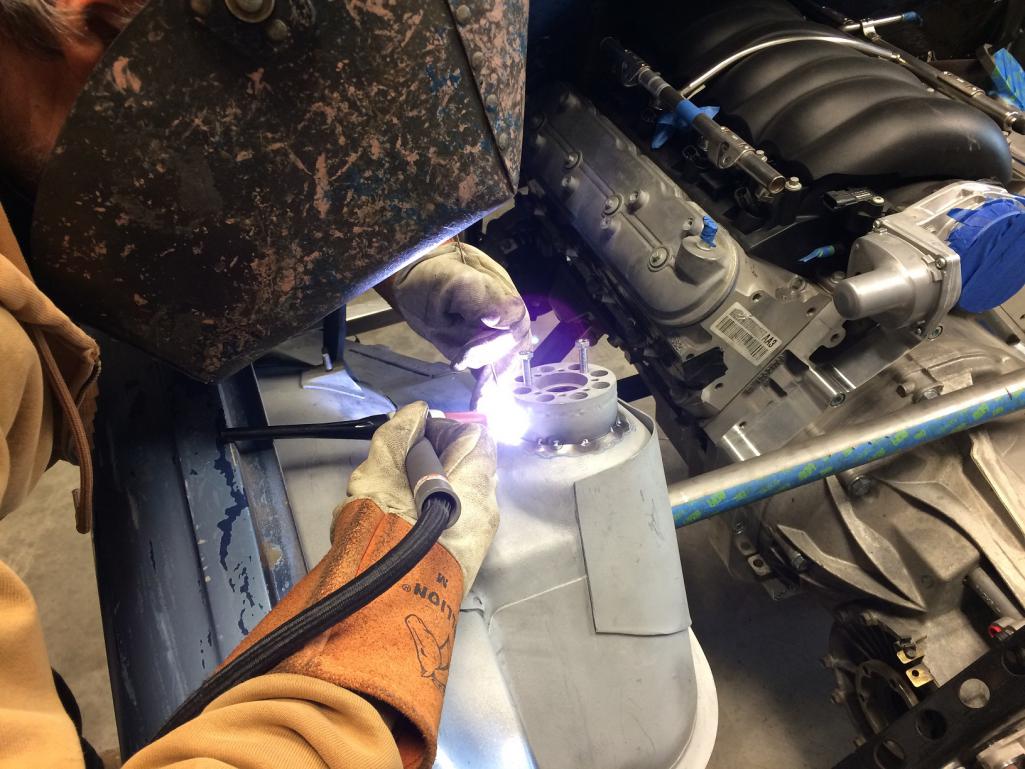
|
|
|
|
| tygaboy |
Feb 18 2017, 07:11 PM
Post
#309
|
|
914 Guru Group: Members Posts: 5,817 Joined: 6-October 15 From: Petaluma, CA Member No.: 19,241 Region Association: Northern California |
And, not only are the towers in, so are the top cross bar load pads and the cross bar!
Major milestone. (IMG:style_emoticons/default/cheer.gif) Attached thumbnail(s) 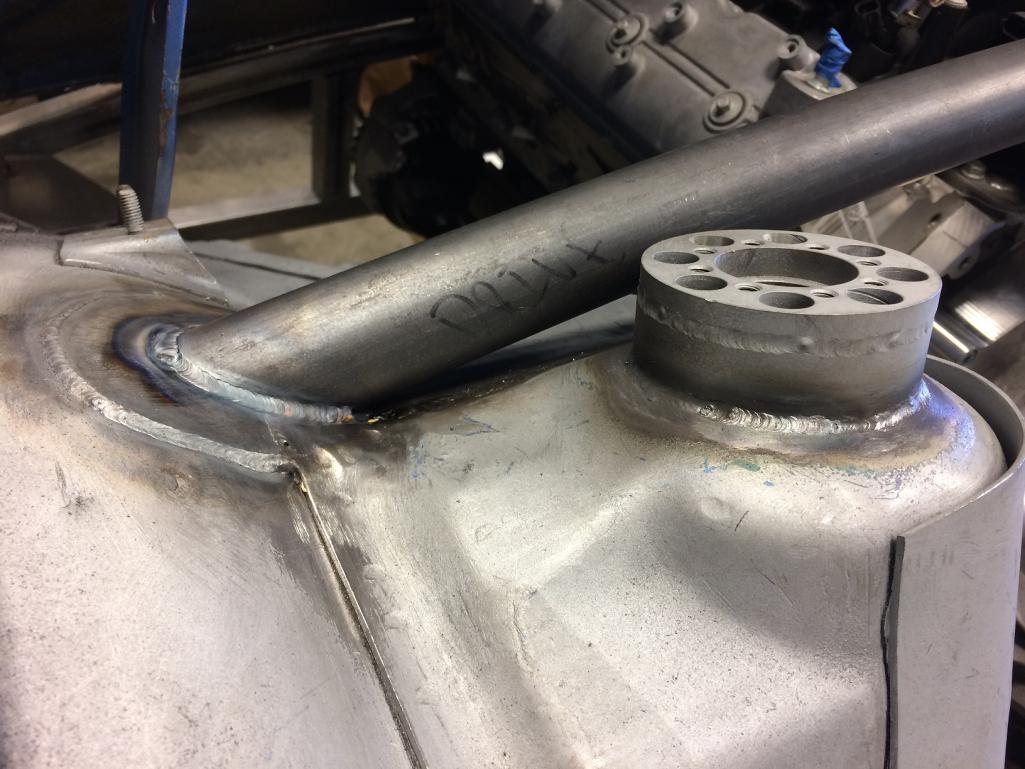
|
|
|
|
| Cracker |
Feb 18 2017, 07:23 PM
Post
#310
|
|
Advanced Member Group: Members Posts: 2,148 Joined: 2-February 10 From: Atlanta (area) Member No.: 11,316 Region Association: South East States |
Now I am really impressed - you can weld and take pictures at the same time! (IMG:style_emoticons/default/cheer.gif)
Looks great Chris! T |
|
|
|
| Andyrew |
Feb 18 2017, 09:48 PM
Post
#311
|
|
Spooling.... Please wait Group: Members Posts: 13,380 Joined: 20-January 03 From: Riverbank, Ca Member No.: 172 Region Association: Northern California |
Tig! Some high dollar welding there!
I really hope you build your exhaust similar to a 918 (IMG:style_emoticons/default/smile.gif) I love that look in a mid engine car. |
|
|
|
| tygaboy |
Feb 20 2017, 10:57 AM
Post
#312
|
|
914 Guru Group: Members Posts: 5,817 Joined: 6-October 15 From: Petaluma, CA Member No.: 19,241 Region Association: Northern California |
When words collide:
I hope I don't offend the fabrication gods by running one of my MIG welds up against one of Martin's TIGs. Maybe not quite as pretty, but I am getting better. This is the lower fire wall crossbar and was one of those "out of position" welds - laying on the ground, one arm wrapped around the long, triggering with my left hand and guiding the tip with my right, arms all akimbo... but I'll take it. As I improve, I keep turning the MIG up to hotter settings and moving faster. This seems to give me the best results. Anyone else having this experience? Maybe I just started way too cold...? Attached thumbnail(s) 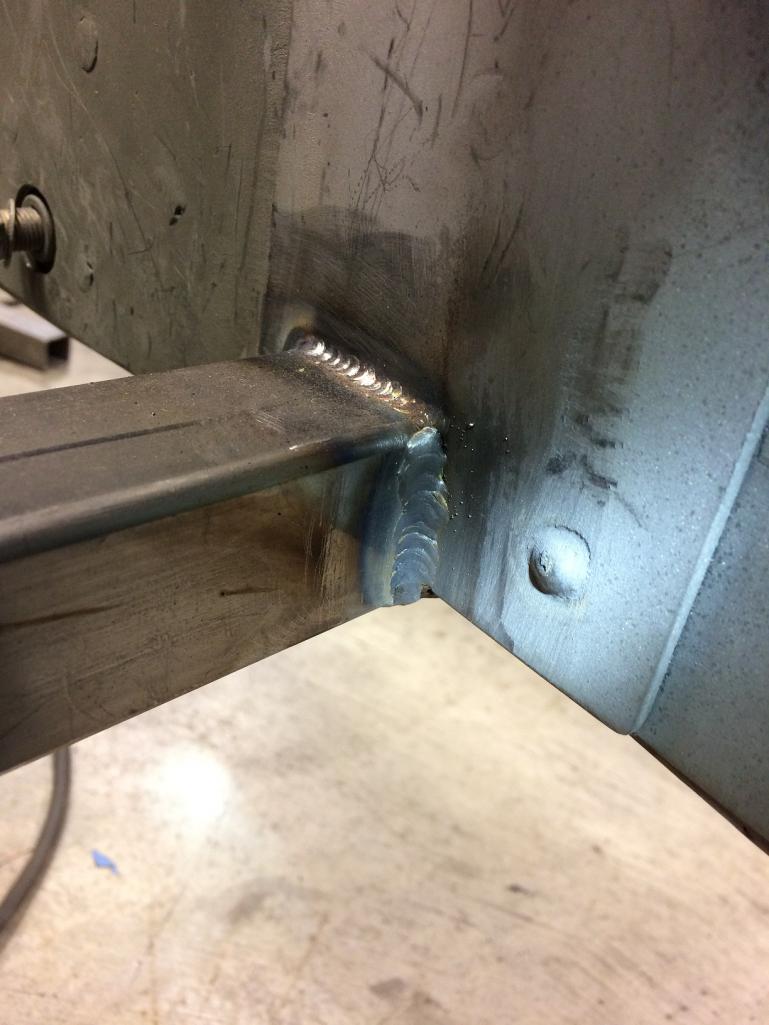
|
|
|
|
| Andyrew |
Feb 20 2017, 05:49 PM
Post
#313
|
|
Spooling.... Please wait Group: Members Posts: 13,380 Joined: 20-January 03 From: Riverbank, Ca Member No.: 172 Region Association: Northern California |
^ I love welding clean thick steel Nothing more satisfying than making dimes with a mig.
Judging by your heat marks your welds should have good penetration, at least that horizontal piece. You didnt make great penetration on your vertical weld to the firewall. |
|
|
|
| tygaboy |
Feb 20 2017, 06:35 PM
Post
#314
|
|
914 Guru Group: Members Posts: 5,817 Joined: 6-October 15 From: Petaluma, CA Member No.: 19,241 Region Association: Northern California |
QUOTE(Andyrew @ Feb 20 2017, 03:49 PM) ^ I love welding clean thick steel Nothing more satisfying than making dimes with a mig. Judging by your heat marks your welds should have good penetration, at least that horizontal piece. You didnt make great penetration on your vertical weld to the firewall. Yep, I was noticing that. I think I'll do another pass. Like I said, the out-of-position stuff is such fun. A little off on the angle when I couldn't quite get my line of sight where I wish I could have... |
|
|
|
| tygaboy |
Feb 20 2017, 06:46 PM
Post
#315
|
|
914 Guru Group: Members Posts: 5,817 Joined: 6-October 15 From: Petaluma, CA Member No.: 19,241 Region Association: Northern California |
On to floor fitment. With the custom lower fire wall comes mods to the rear floor panel. Long story short, the floor is about 1" too long in just the perfect way so the flat that needs to spot weld to the bottom of the lower cross bar juuuuuuust misses.
What to do? There were probably a few ways to deal with this but here's what I did. This pic shows all the gaps I have to address. The lines outline where the cross bar lands on the stock floor and you can see that the only contacts are at that raised section at the bottom of the pic. The rear of the bar just barely kisses that raised edge most of the way across but not nearly enough to be secure. Attached thumbnail(s) 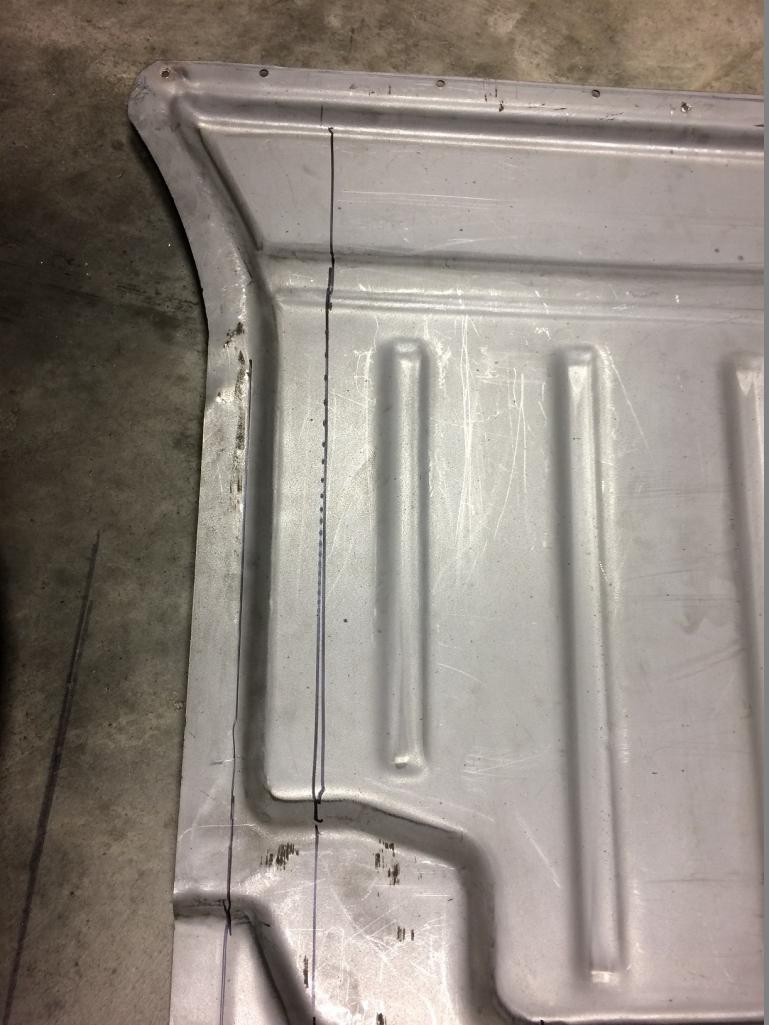
|
|
|
|
| tygaboy |
Feb 20 2017, 06:48 PM
Post
#316
|
|
914 Guru Group: Members Posts: 5,817 Joined: 6-October 15 From: Petaluma, CA Member No.: 19,241 Region Association: Northern California |
I opted to move the lip in by about 1". So a bit of guestimeasuring (IMG:style_emoticons/default/lol-2.gif) and cut the thing into pieces.
Attached thumbnail(s) 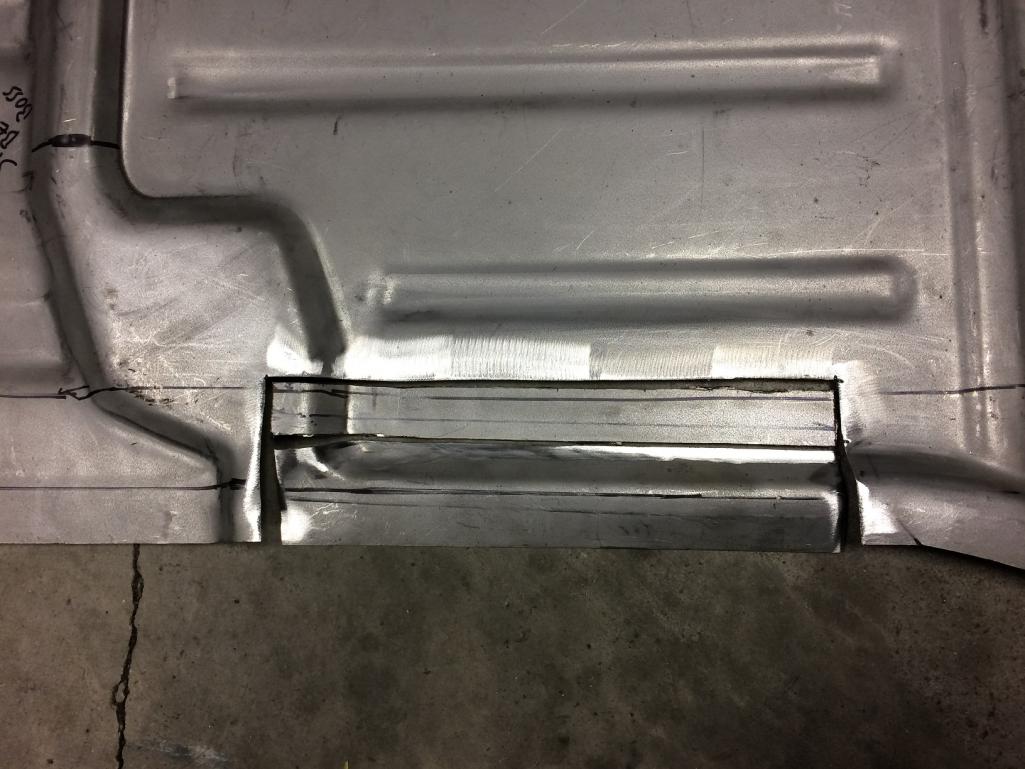
|
|
|
|
| tygaboy |
Feb 20 2017, 06:50 PM
Post
#317
|
|
914 Guru Group: Members Posts: 5,817 Joined: 6-October 15 From: Petaluma, CA Member No.: 19,241 Region Association: Northern California |
Remove that middle piece, slide the lip section into place and (IMG:style_emoticons/default/welder.gif) (IMG:style_emoticons/default/welder.gif)
A bit of weld dressing and Phase 1, passenger side is done. Attached thumbnail(s) 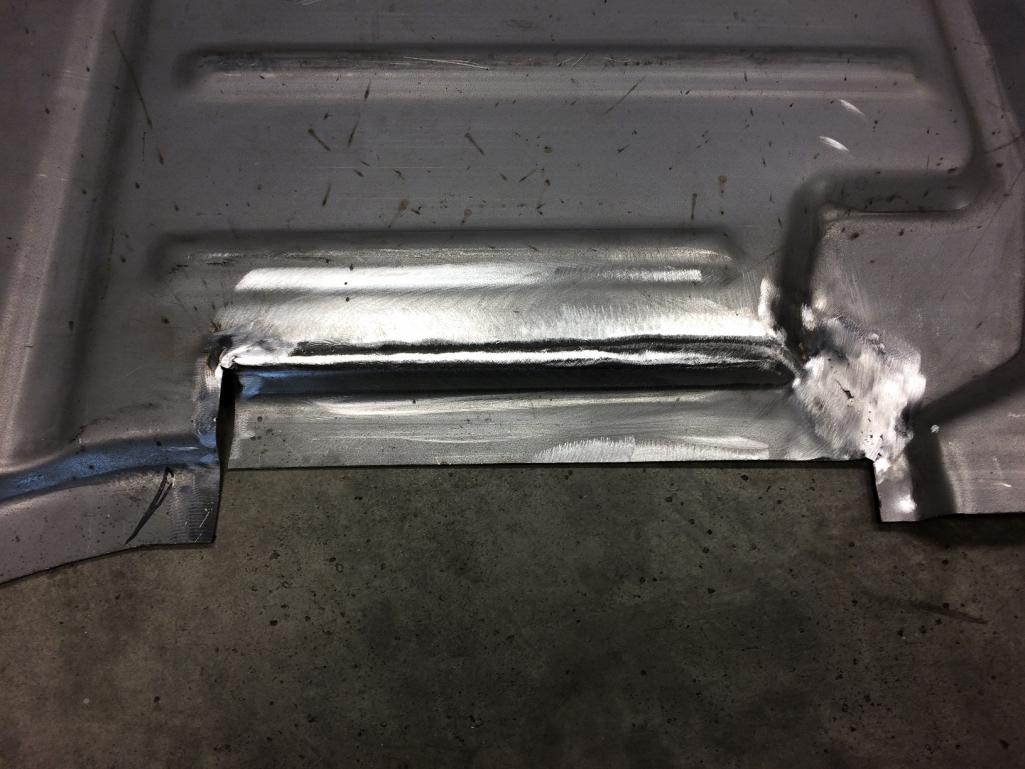
|
|
|
|
| tygaboy |
Feb 20 2017, 06:56 PM
Post
#318
|
|
914 Guru Group: Members Posts: 5,817 Joined: 6-October 15 From: Petaluma, CA Member No.: 19,241 Region Association: Northern California |
Then it got fun. Thankfully, I'm learning patience as I get older. I knew I need to preserve the outer most edge at each outside corner as that material is needed when it comes time to spot weld the jacking donut triangles in place.
But I have that odd gap at the left edge of the piece I moved forward. (see above pic) So, I figured I could "reverse" that corner that's just to the left of the gap and tie it to the moved section. It's hard to explain but I ended up doing some hammer and dolly work to pound that corner back into itself and out the other side. Then I welded the seam... Pics probably make it easier. Top pic is the stock shapes (driver side) Bottom pic is what I now have (passenger side) (Pardon the wet primer...) Attached thumbnail(s) 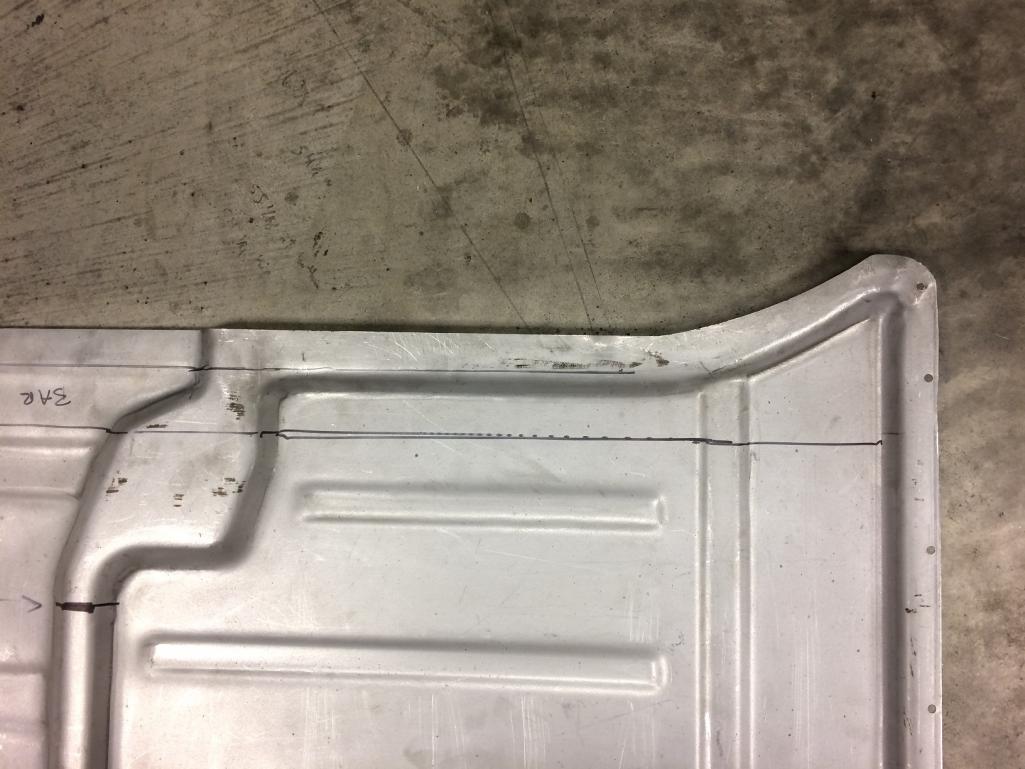 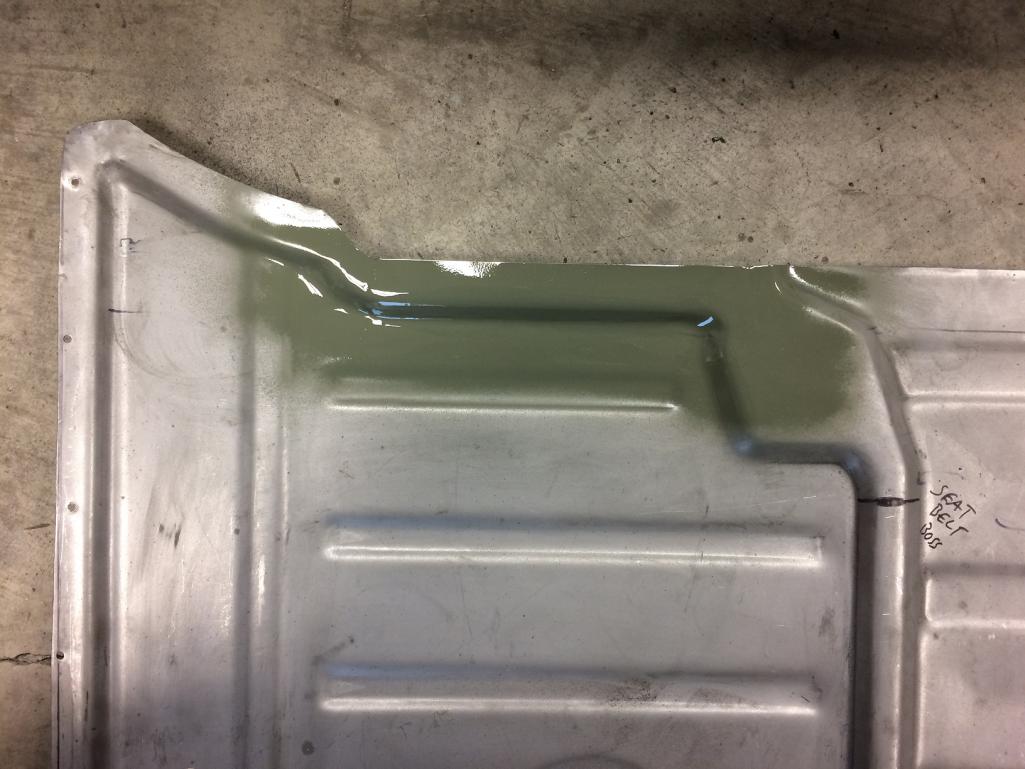
|
|
|
|
| 914forme |
Feb 20 2017, 06:58 PM
Post
#319
|
|
Times a wastin', get wrenchin'! Group: Members Posts: 3,899 Joined: 24-July 04 From: Dayton, Ohio Member No.: 2,388 Region Association: None |
QUOTE(tygaboy @ Feb 17 2017, 07:35 PM) I confess that I succumbed to peer pressure. I just couldn't take people using the term "short" in relation to any of my stuff. Tangerine Racing came through with an instant shipment of just the tall (long?) tower pieces! Thanks Chris! The plan is to get them fully installed tomorrow. (IMG:style_emoticons/default/welder.gif) (IMG:style_emoticons/default/poke.gif) Look really good (IMG:style_emoticons/default/poke.gif) Now do a hard top conversion. (IMG:style_emoticons/default/poke.gif) |
|
|
|
| tygaboy |
Feb 20 2017, 07:02 PM
Post
#320
|
|
914 Guru Group: Members Posts: 5,817 Joined: 6-October 15 From: Petaluma, CA Member No.: 19,241 Region Association: Northern California |
It now fits nicely, with plenty of contact with the lower cross bar.
And that section at the top of the pic that curves out, away from the crossbar is where the jack donut triangle edge sits, as seen-ish in the 2nd pic. I'll add a bar that triangulates from the cross bar back to the long to support that "curving out section" so I have a robust jacking point. Attached thumbnail(s)  
|
|
|
|
|
2 User(s) are reading this topic (2 Guests and 0 Anonymous Users)
0 Members:

|
Lo-Fi Version | Time is now: 28th April 2026 - 07:22 AM |
Invision Power Board
v9.1.4 © 2026 IPS, Inc.