|
|
|
Porsche, and the Porsche crest are registered trademarks of Dr. Ing. h.c. F. Porsche AG.
This site is not affiliated with Porsche in any way. Its only purpose is to provide an online forum for car enthusiasts. All other trademarks are property of their respective owners. |
|
|

  |

| Andyrew |
 Jun 5 2021, 06:39 PM Jun 5 2021, 06:39 PM
Post
#3581
|
|
Spooling.... Please wait  Group: Members Posts: 13,380 Joined: 20-January 03 From: Riverbank, Ca Member No.: 172 Region Association: Northern California |
Fun stuff Chris!! That Holley dash will be great!!
Show us some of the firewall stuff if you can! |
   |

 
|
| bbrock |
Jun 5 2021, 09:24 PM
Post
#3582
|
|
914 Guru Group: Members Posts: 5,269 Joined: 17-February 17 From: Montana Member No.: 20,845 Region Association: Rocky Mountains |
QUOTE(tygaboy @ Jun 4 2021, 06:06 PM)  I dare you to make it plain. (IMG:style_emoticons/default/happy11.gif) |
|
|
|
| djway |
Jun 6 2021, 03:02 AM
Post
#3583
|
|
Senior Member Group: Members Posts: 787 Joined: 16-October 15 From: Riverside Member No.: 19,266 Region Association: Southern California |
Keep blazing trails, I'm taking notes.
I too dare you to go plain (IMG:style_emoticons/default/wink.gif) said the metal porn sadist to the tool whore masochist. |
|
|
|
| tygaboy |
Jun 6 2021, 04:46 PM
Post
#3584
|
|
914 Guru Group: Members Posts: 5,679 Joined: 6-October 15 From: Petaluma, CA Member No.: 19,241 Region Association: Northern California |
Not that I didn't like the look of the SpeedHut gauges but given I have an ashtray delete dash top (not installed yet) and there will nothing on the dash, no switches and probably not even a glove box, this "nothing there" gauge panel looks like it's the perfect compliment to the build: super clean and simple. And it'll really disappear once I paint the panel black.
I like it! Attached thumbnail(s) 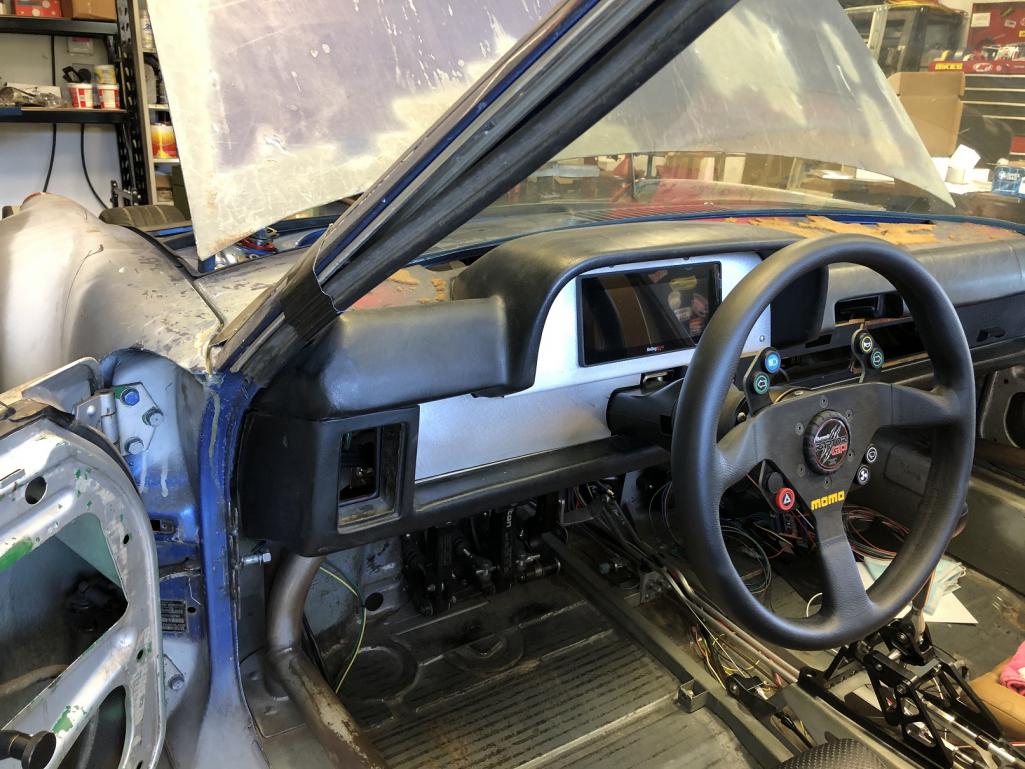 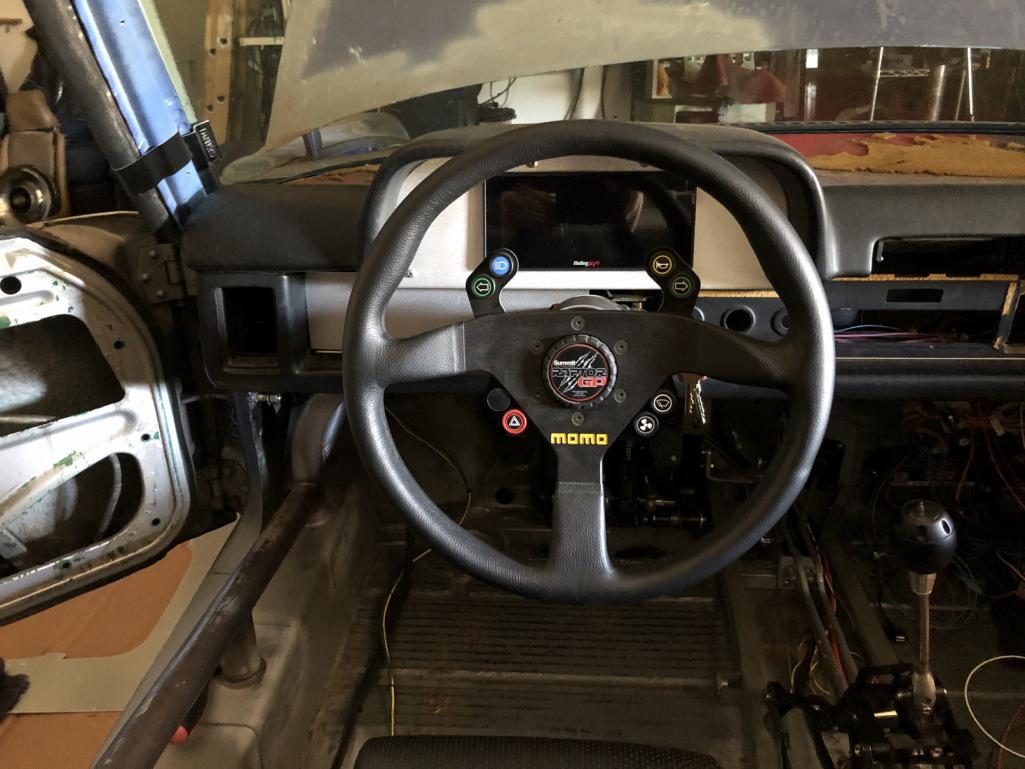
|
|
|
|
| Cairo94507 |
Jun 6 2021, 04:54 PM
Post
#3585
|
|
Michael Group: Members Posts: 10,485 Joined: 1-November 08 From: Auburn, CA Member No.: 9,712 Region Association: Northern California |
Hi @tygaboy Chris. I like the multiple options for that gauge pod. I need to come up and check it out in person. (IMG:style_emoticons/default/beerchug.gif)
|
|
|
|
| Retroracer |
Jun 6 2021, 06:05 PM
Post
#3586
|
|
Senior Member Group: Members Posts: 645 Joined: 7-July 13 From: Bend OR Member No.: 16,100 Region Association: Pacific Northwest |
QUOTE(tygaboy @ Jun 6 2021, 03:46 PM) And it'll really disappear once I paint the panel black. Agree. An overlay panel of clear polycarbonate - with a cut out to suit the control panel, so that it sits flush - over the black backing panel might blend it in even more....? - Tony |
|
|
|
| tygaboy |
Jun 7 2021, 05:39 PM
Post
#3587
|
|
914 Guru Group: Members Posts: 5,679 Joined: 6-October 15 From: Petaluma, CA Member No.: 19,241 Region Association: Northern California |
Today's lesson is "How to Make a 914 Look Big".
The Red Barn is going to be a bit crowded for the next few days and my focus will be on fabbing a new firewall for the Radical. But with such a cool shop mate, I think my car will be OK! Plus, I just treated it to a set of Toyo RA1s so I'll tolerate no complaints. Attached thumbnail(s) 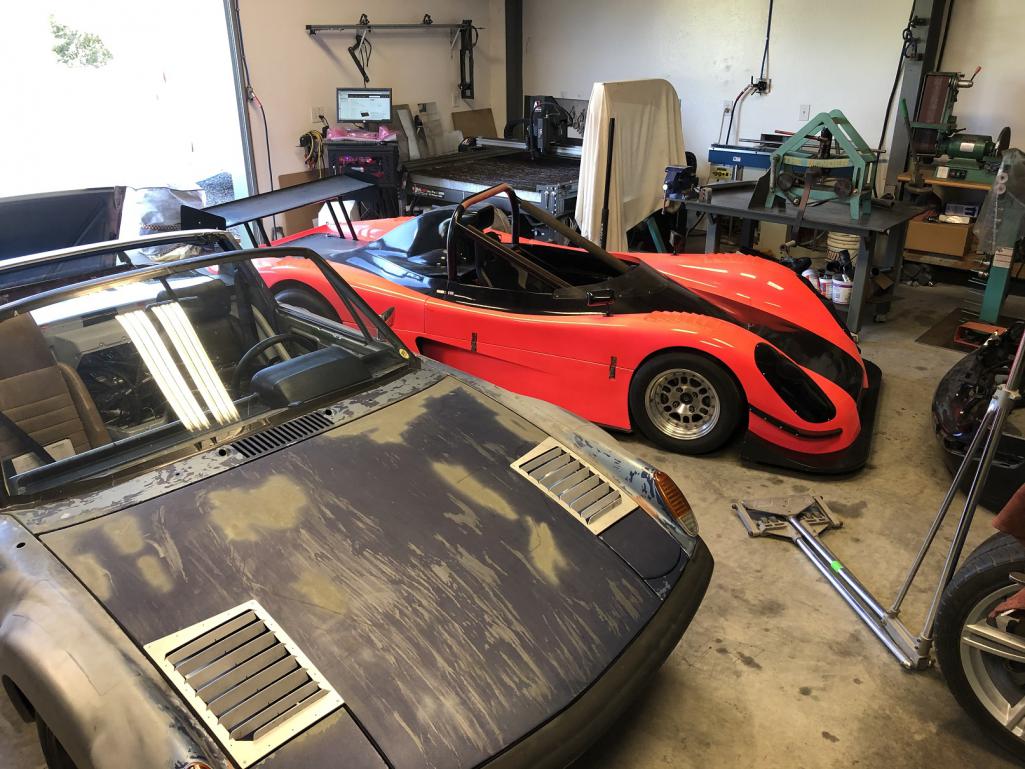 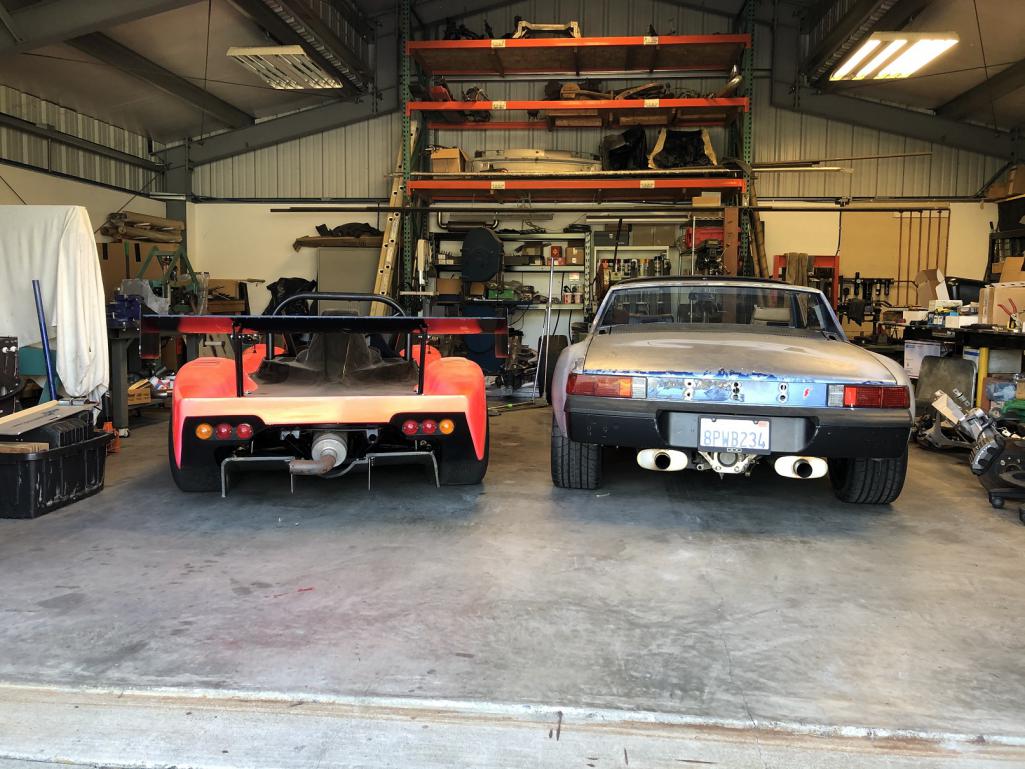
|
|
|
|
| tygaboy |
Jun 7 2021, 06:57 PM
Post
#3588
|
|
914 Guru Group: Members Posts: 5,679 Joined: 6-October 15 From: Petaluma, CA Member No.: 19,241 Region Association: Northern California |
QUOTE(Retroracer @ Jun 6 2021, 05:05 PM) QUOTE(tygaboy @ Jun 6 2021, 03:46 PM) And it'll really disappear once I paint the panel black. Agree. An overlay panel of clear polycarbonate - with a cut out to suit the control panel, so that it sits flush - over the black backing panel might blend it in even more....? - Tony @Retroracer Tony - Interesting. Let me first see how it looks on a black panel. What I could really use your help with is coming up with a suitable door card design. Let's touch base soon? |
|
|
|
| Retroracer |
Jun 7 2021, 08:51 PM
Post
#3589
|
|
Senior Member Group: Members Posts: 645 Joined: 7-July 13 From: Bend OR Member No.: 16,100 Region Association: Pacific Northwest |
QUOTE(tygaboy @ Jun 7 2021, 05:57 PM) QUOTE(Retroracer @ Jun 6 2021, 05:05 PM) QUOTE(tygaboy @ Jun 6 2021, 03:46 PM) And it'll really disappear once I paint the panel black. Agree. An overlay panel of clear polycarbonate - with a cut out to suit the control panel, so that it sits flush - over the black backing panel might blend it in even more....? - Tony @Retroracer Tony - Interesting. Let me first see how it looks on a black panel. What I could really use your help with is coming up with a suitable door card design. Let's touch base soon? Surely! |
|
|
|
| Rand |
Jun 9 2021, 03:04 PM
Post
#3590
|
|
Cross Member Group: Members Posts: 7,413 Joined: 8-February 05 From: OR Member No.: 3,573 Region Association: None |
Damned fat pig.
perspective |
|
|
|
| tygaboy |
Jun 18 2021, 08:55 AM
Post
#3591
|
|
914 Guru Group: Members Posts: 5,679 Joined: 6-October 15 From: Petaluma, CA Member No.: 19,241 Region Association: Northern California |
Fuel tank V3: Live and learn.
That giant fuel cap that seemed like a great idea? Turns out that in order to fill the tank, I have to use my hand to release the pump handle's fill neck seal/trigger contraption to get the pump to flow. Better is that in order to comfortably do that, my head ends up under the hood, right above the unsealed filler. I decided I didn't want to breath fumes like that... So. I bought a new tank ($212 shipped - from Parts Geek, of all places) and started over. My goal with this version is no welding on the tank. The big filler cap required that I mod the tank to create a large enough flat mounting surface. Not required with this smaller filler - and it worked out great. I think it looks good, too. On to fitting the in-tank pump, which looks like it, too, can be installed with no welding. Attached thumbnail(s) 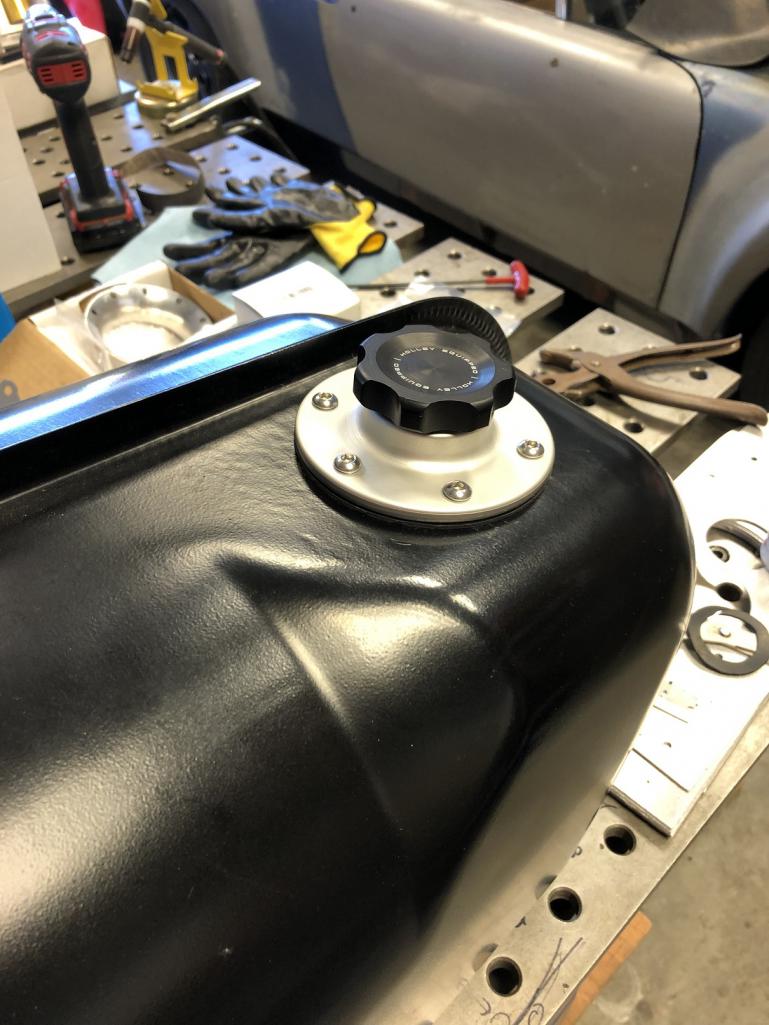
|
|
|
|
| Andyrew |
Jun 18 2021, 10:36 AM
Post
#3592
|
|
Spooling.... Please wait Group: Members Posts: 13,380 Joined: 20-January 03 From: Riverbank, Ca Member No.: 172 Region Association: Northern California |
Wow, thats a great price for a tank! Filler cap looks nice (IMG:style_emoticons/default/smile.gif)
|
|
|
|
| andys |
Jun 18 2021, 11:35 AM
Post
#3593
|
|
Advanced Member Group: Members Posts: 2,165 Joined: 21-May 03 From: Valencia, CA Member No.: 721 Region Association: None |
QUOTE(tygaboy @ Jun 18 2021, 06:55 AM) Fuel tank V3: Live and learn. That giant fuel cap that seemed like a great idea? Turns out that in order to fill the tank, I have to use my hand to release the pump handle's fill neck seal/trigger contraption to get the pump to flow. Better is that in order to comfortably do that, my head ends up under the hood, right above the unsealed filler. I decided I didn't want to breath fumes like that... So. I bought a new tank ($212 shipped - from Parts Geek, of all places) and started over. My goal with this version is no welding on the tank. The big filler cap required that I mod the tank to create a large enough flat mounting surface. Not required with this smaller filler - and it worked out great. I think it looks good, too. On to fitting the in-tank pump, which looks like it, too, can be installed with no welding. Chris, That Holley fill cap, is it located in the same place as the original Porsche fill cap? Are you going to add a vent and expansion tank? What are you doing for the fuel pump and its location? I'm currently adding a small Holley fill cap, but in the same position as you did with your original large flat fill cap. The tank surface is not very flat in this area, so I'm not sure how to get a good seal with the Holley o-ring. I'll probably machine a steel split ring to back it up. In the stock fill cap location, I'm installing a FiTech drop in fuel pump module with an adapter ring for a bolt in configuration (no welding). I'll shoot some photos to share. Andys |
|
|
|
| Cairo94507 |
Jun 18 2021, 11:43 AM
Post
#3594
|
|
Michael Group: Members Posts: 10,485 Joined: 1-November 08 From: Auburn, CA Member No.: 9,712 Region Association: Northern California |
@tygaboy - That looks amazing. I must admit putting fuel in my tank requires me to contort my body as I hold the collar on the fuel nozzle up so it will flow fuel into the tank. I really do not like doing that. (IMG:style_emoticons/default/beerchug.gif)
|
|
|
|
| Retroracer |
Jun 18 2021, 12:20 PM
Post
#3595
|
|
Senior Member Group: Members Posts: 645 Joined: 7-July 13 From: Bend OR Member No.: 16,100 Region Association: Pacific Northwest |
Chris - is that Holley cap vented? How does air get back into the tank as fuel is used (or is that dealt with somewhere else in the system)? Curious,
- Tony |
|
|
|
| andys |
Jun 18 2021, 01:12 PM
Post
#3596
|
|
Advanced Member Group: Members Posts: 2,165 Joined: 21-May 03 From: Valencia, CA Member No.: 721 Region Association: None |
Here are the photos of the Holley fill cap, the FiTech pump module, and adapter. Sorry for the crappy back yard rusty fuel tank, but you get the picture.
Andys Attached thumbnail(s) 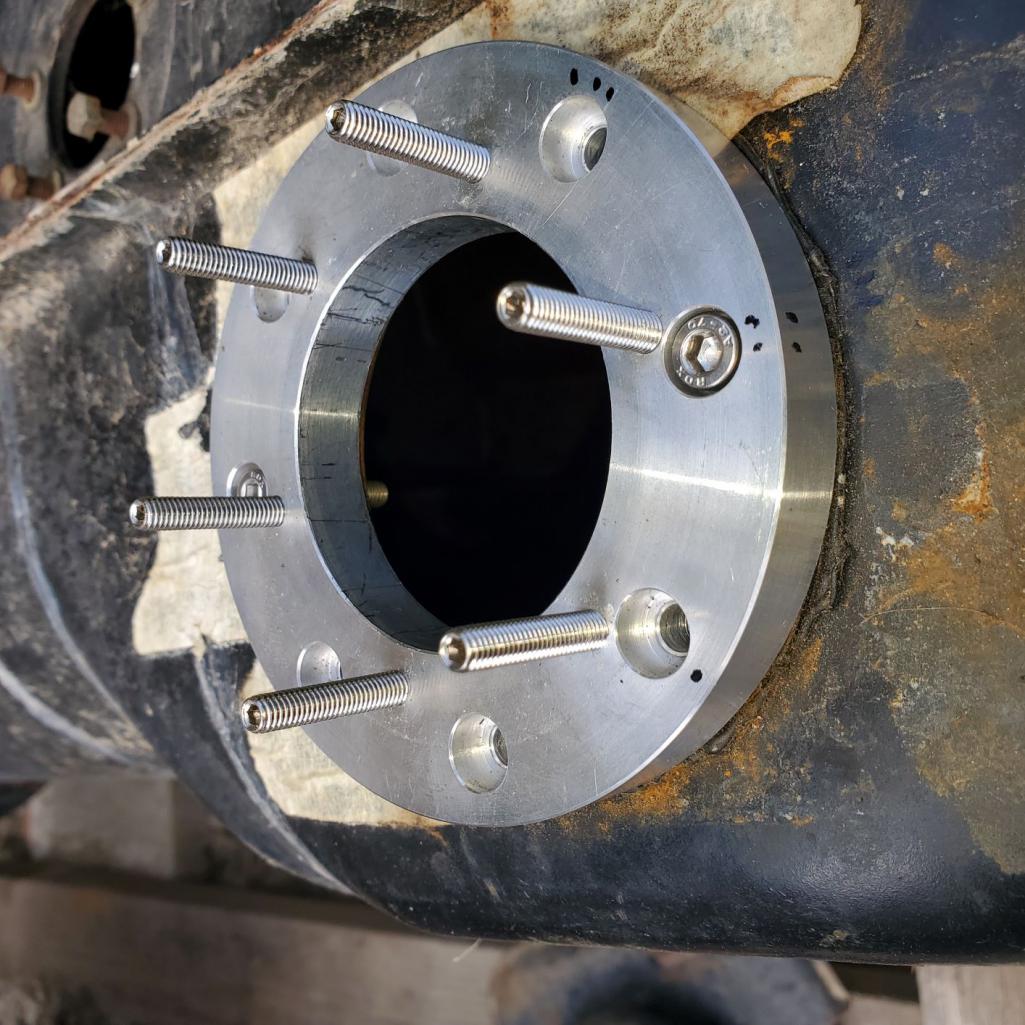 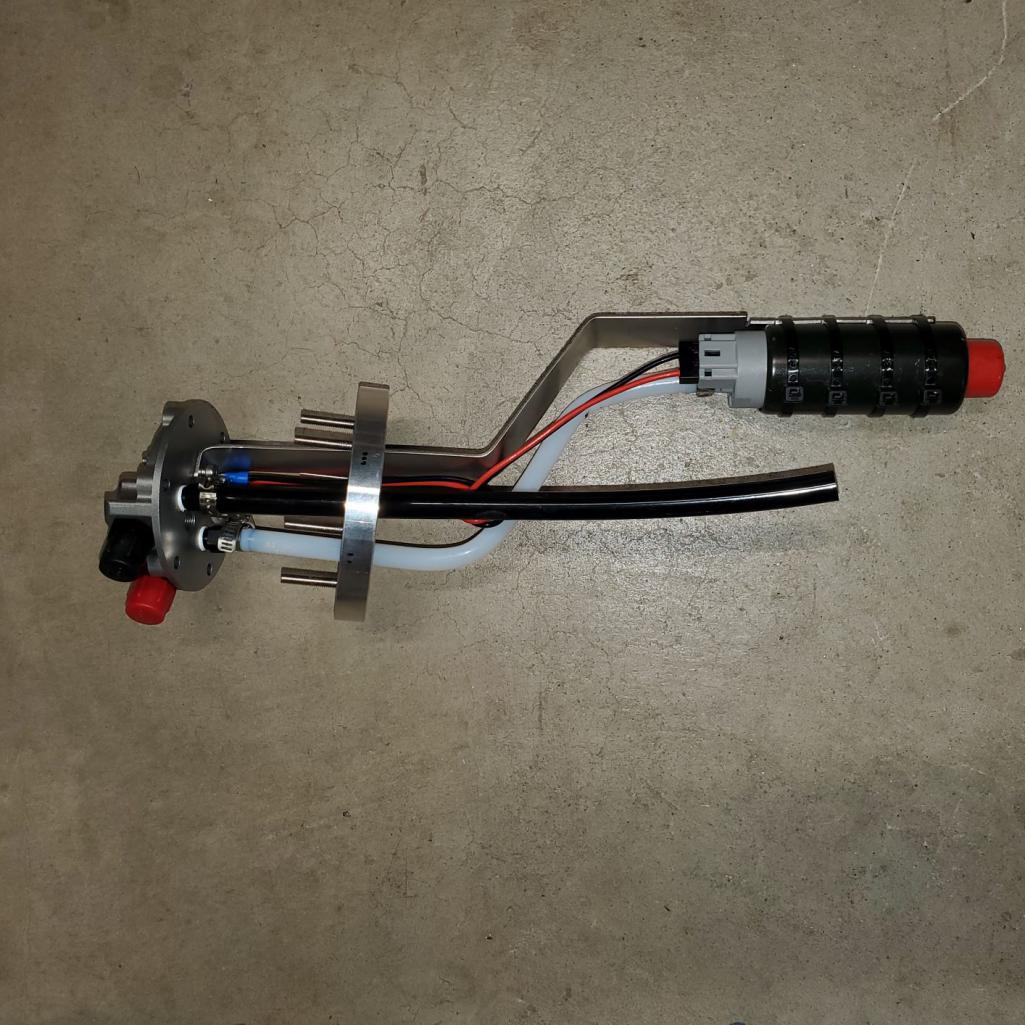 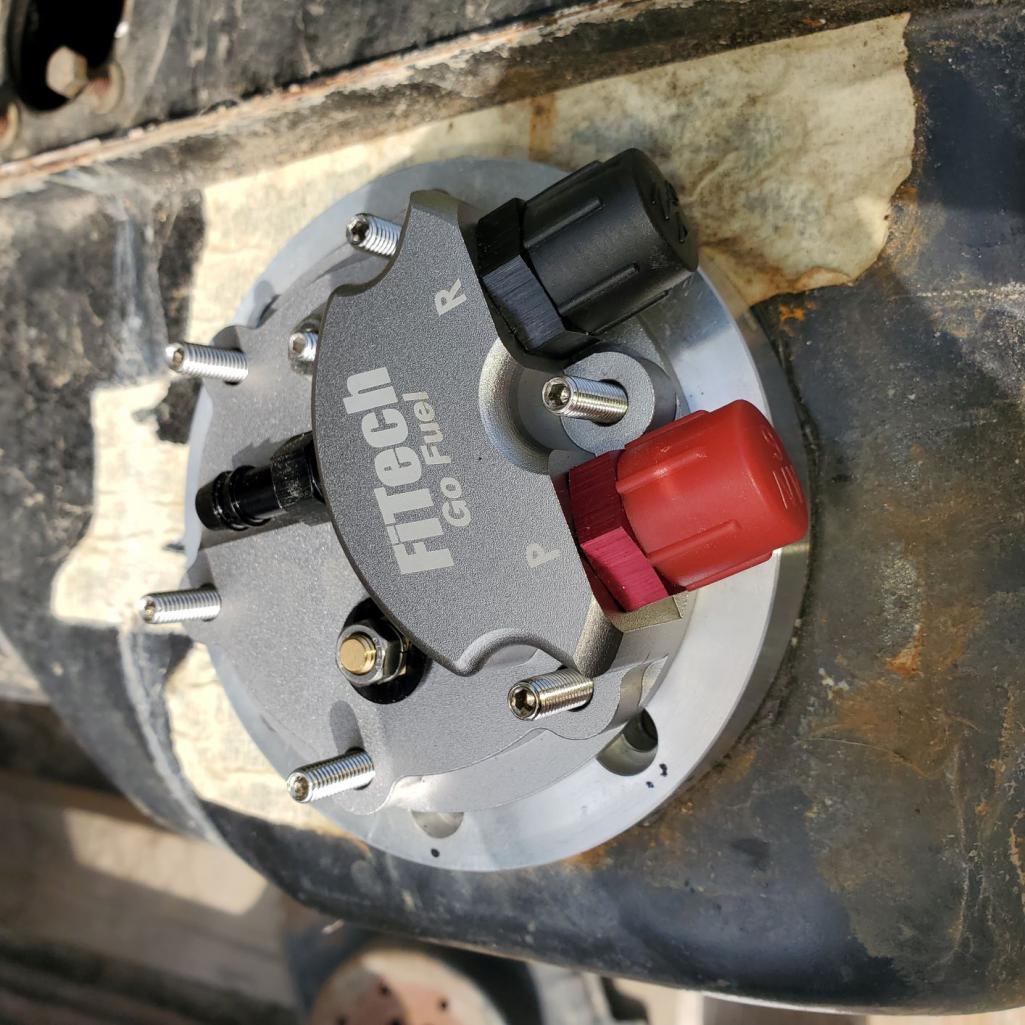 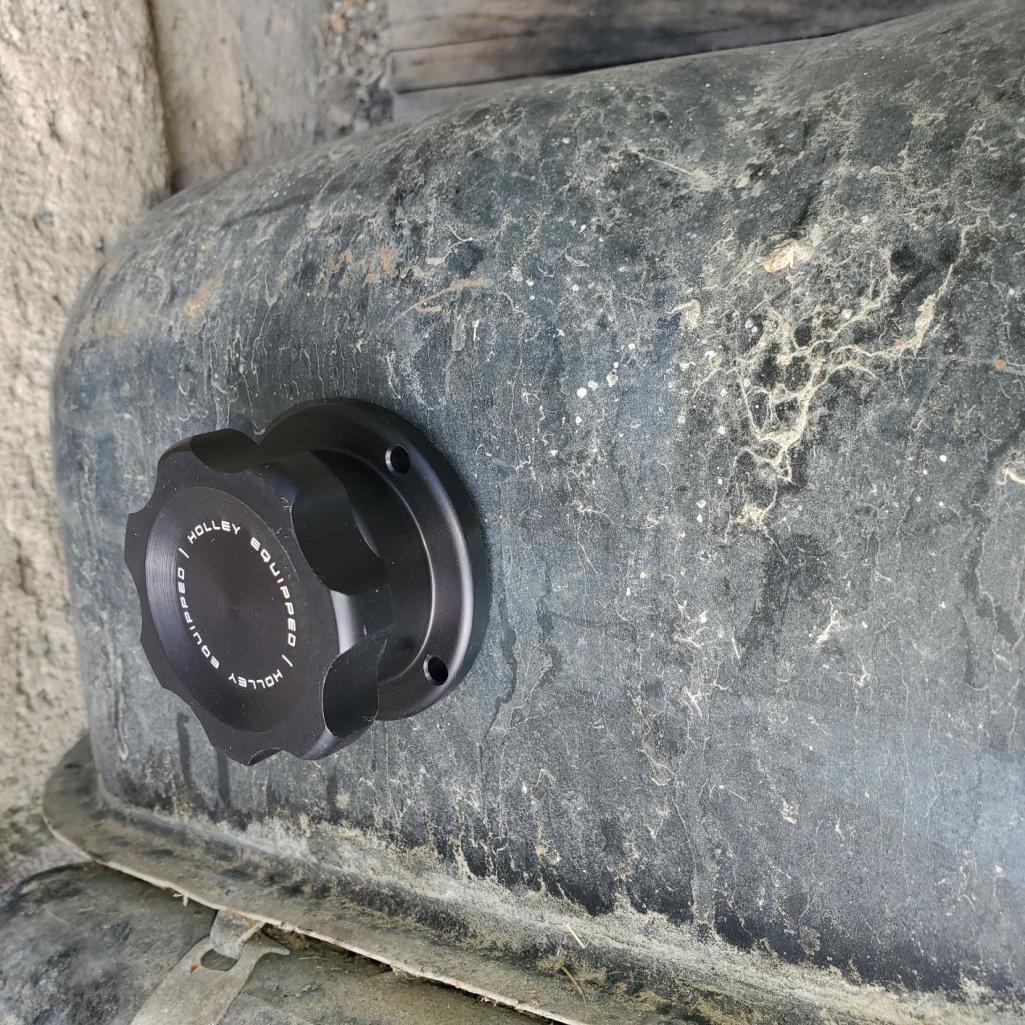
|
|
|
|
| tygaboy |
Jun 18 2021, 02:02 PM
Post
#3597
|
|
914 Guru Group: Members Posts: 5,679 Joined: 6-October 15 From: Petaluma, CA Member No.: 19,241 Region Association: Northern California |
@Retroracer @andys
The cap is mounted on the driver side, on the flat forward of the tank seam. I made a split ring with some sealed nuts welded on to it, slipped it into position then tacked the edge of the ring to the tank. Then got some fuel proof gasket material and made a suitable sealing ring. Seems to work fine. My cap is not vented as I run an AeroMotive Phantom 340 in-tank pump and the assembly has a vent outlet. See pic. Not my car, just a suitable pic. Andy, isn't that a vent tube connector on the back side of your pump? My pump assembly mounts (essentially) where the original filler was. I still run the standard fuel level sensor. Attached thumbnail(s) 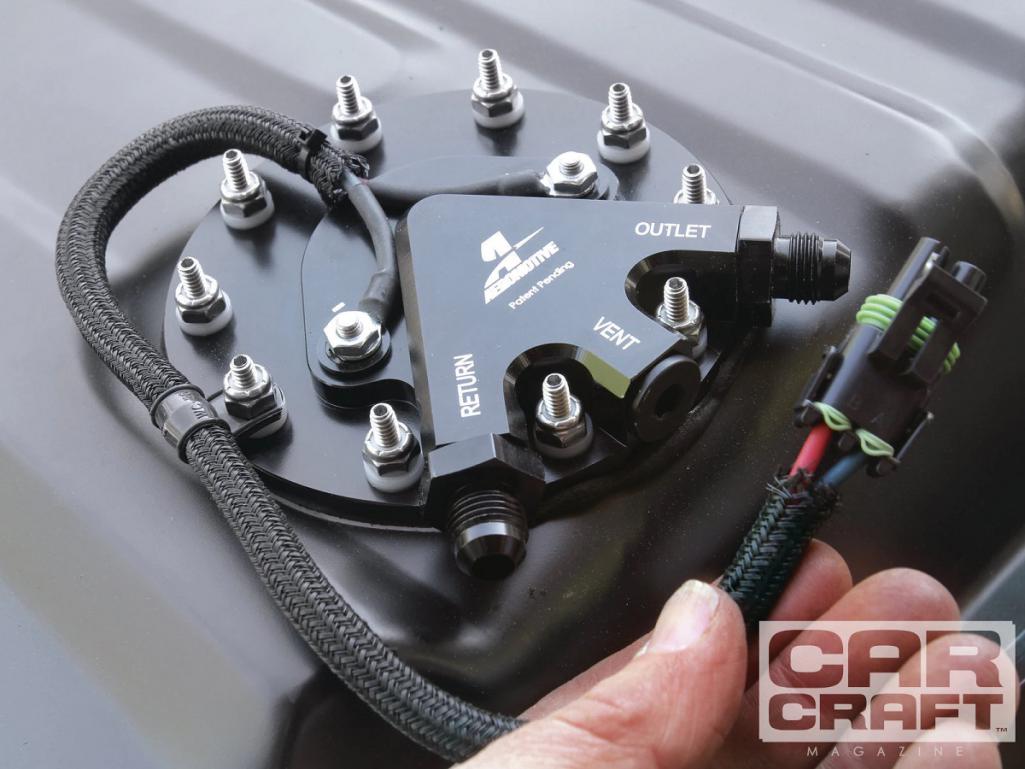 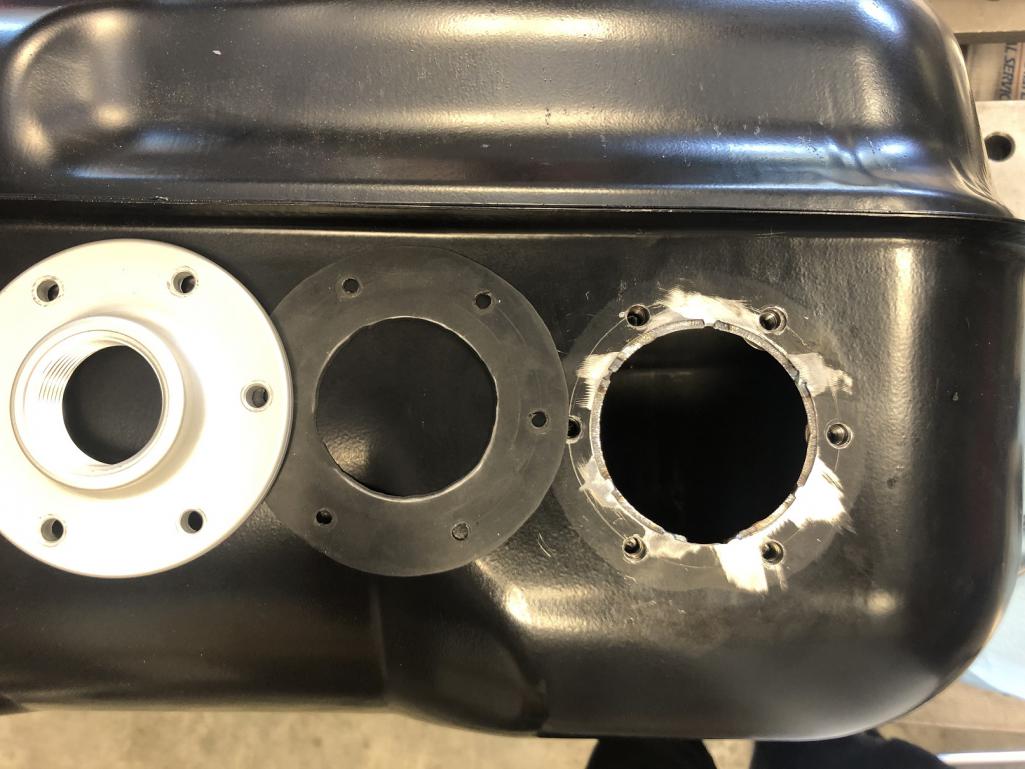
|
|
|
|
| tygaboy |
Jun 18 2021, 02:22 PM
Post
#3598
|
|
914 Guru Group: Members Posts: 5,679 Joined: 6-October 15 From: Petaluma, CA Member No.: 19,241 Region Association: Northern California |
QUOTE(andys @ Jun 18 2021, 10:35 AM) Chris, That Holley fill cap, is it located in the same place as the original Porsche fill cap? Are you going to add a vent and expansion tank? What are you doing for the fuel pump and its location? I'm currently adding a small Holley fill cap, but in the same position as you did with your original large flat fill cap. The tank surface is not very flat in this area, so I'm not sure how to get a good seal with the Holley o-ring. I'll probably machine a steel split ring to back it up. In the stock fill cap location, I'm installing a FiTech drop in fuel pump module with an adapter ring for a bolt in configuration (no welding). I'll shoot some photos to share. Andys @andys I tried that same, small Holley cap set up but REALLY didn't like how small the base was. I ended up buying a cap assembly from BAM. Here's the link on Amazon. Looks out of stock now but... https://www.amazon.com/Aluminum-Bolt-Tank-F...d/dp/B019H6M8YI The good news is the base uses the same thread pitch so the Holley cap swaps right in and you get the super cool, SEMA winning, silver/black contrast! (IMG:style_emoticons/default/lol-2.gif) |
|
|
|
| andys |
Jun 18 2021, 02:38 PM
Post
#3599
|
|
Advanced Member Group: Members Posts: 2,165 Joined: 21-May 03 From: Valencia, CA Member No.: 721 Region Association: None |
Chris,
So you are modifying/welding your new fuel tank to fit both the AeroMotive module and the fill cap. BTW, did you fab the filler neck? I couldn't find one like it. My good tank (in the car) has some fuel in it, so I'll avoid any welding. I'll only be drilling for the Holley filler neck. I'll probably add some small flat head screws topside to hold the split ring in place. Yes, the FiTech has a vent fitting; I'd still like to run an expansion tank if it's doable. Nice work, as usual, Chris. Andys |
|
|
|
| FL000 |
Jun 18 2021, 03:09 PM
Post
#3600
|
|
Member Group: Members Posts: 476 Joined: 31-January 12 From: Lancaster, CA Member No.: 14,076 Region Association: Southern California |
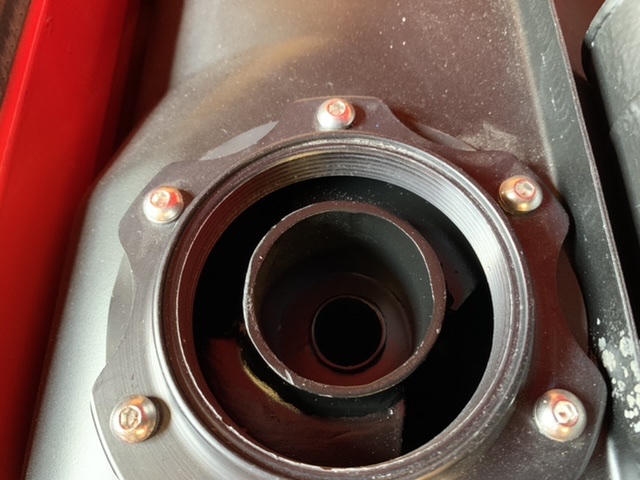
I had the same concern with my cap so I added this to it, which slips in first and uses 4 of the bolts to hold it in place.
 |
|
|
|
|
1 User(s) are reading this topic (1 Guests and 0 Anonymous Users)
0 Members:

|
Lo-Fi Version | Time is now: 4th November 2025 - 04:20 AM |
Invision Power Board
v9.1.4 © 2025 IPS, Inc.