|
|
|
Porsche, and the Porsche crest are registered trademarks of Dr. Ing. h.c. F. Porsche AG.
This site is not affiliated with Porsche in any way. Its only purpose is to provide an online forum for car enthusiasts. All other trademarks are property of their respective owners. |
|
|

  |

| tygaboy |
 Nov 2 2021, 06:11 PM Nov 2 2021, 06:11 PM
Post
#3741
|
|
914 Guru  Group: Members Posts: 5,844 Joined: 6-October 15 From: Petaluma, CA Member No.: 19,241 Region Association: Northern California |
Before and after.
ITBs are cool, but overall? I'll take after. Attached image(s) 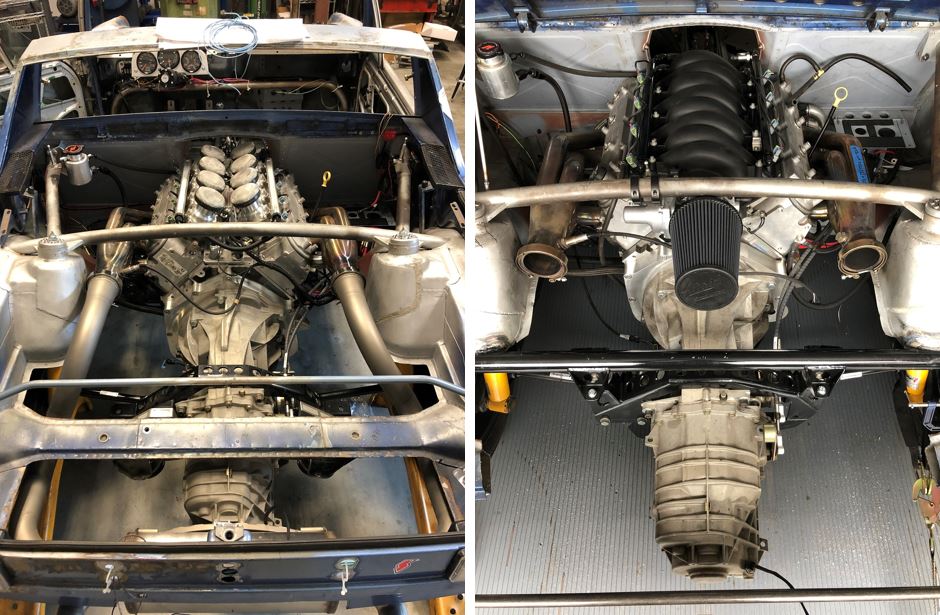
|
   |

 
|
| Rand |
Nov 2 2021, 07:56 PM
Post
#3742
|
|
Cross Member Group: Members Posts: 7,415 Joined: 8-February 05 From: OR Member No.: 3,573 Region Association: None |
I like the after. I just took a nice big clean filtered breath in its honor.
Gotta be better for cooler air intake and measurable tuning too. |
|
|
|
| sixnotfour |
Nov 2 2021, 08:30 PM
Post
#3743
|
|
914 Wizard Group: Members Posts: 11,291 Joined: 12-September 04 Member No.: 2,744 Region Association: NineFourteenerVille |
So Clean , and Easy Tune,,
|
 |
|
| AZBanks |
Nov 2 2021, 09:04 PM
Post
#3744
|
|
Senior Member Group: Members Posts: 1,080 Joined: 7-December 05 From: New River, AZ Member No.: 5,245 Region Association: Southwest Region |
Good design and quality execution is art.
You are: The Picasso of the Puddle The Warhol of Weld The Bob Ross of Bead Just don't go all Van Gogh with the Sawzall. |
|
|
|
| Retroracer |
Nov 2 2021, 11:30 PM
Post
#3745
|
|
Senior Member Group: Members Posts: 664 Joined: 7-July 13 From: Bend OR Member No.: 16,100 Region Association: Pacific Northwest |
Now you have plenty of room for both turbos, and the intercoolers.
(IMG:style_emoticons/default/happy11.gif) - Tony |
|
|
|
| Krieger |
Nov 3 2021, 08:24 AM
Post
#3746
|
|
Advanced Member Group: Members Posts: 4,869 Joined: 24-May 04 From: Santa Rosa CA Member No.: 2,104 Region Association: None |
Paint your new lower transmission bracket an aluminzed silver color to help it blend in to all the aluminum below.
|
|
|
|
| tygaboy |
Nov 3 2021, 08:27 AM
Post
#3747
|
|
914 Guru Group: Members Posts: 5,844 Joined: 6-October 15 From: Petaluma, CA Member No.: 19,241 Region Association: Northern California |
QUOTE(Retroracer @ Nov 2 2021, 10:30 PM)  Now you have plenty of room for both turbos, and the intercoolers. (IMG:style_emoticons/default/happy11.gif) - Tony @RetroRacer Tony, "Both"? Surely, you mean "all four"! (IMG:style_emoticons/default/happy11.gif) Seriously, though. @Krieger Andy may have goaded me into this transmission mount mod but, as you know, it was Tony's design idea that inspired the hood vents. Well, he's also sent me design sketches for two REALLY cool induction system ideas. So... with the trans mount all but done, it's time to get going on one (maybe both!) of his intake/air cleaner ideas. More as I get to it. |
|
|
|
| tygaboy |
Nov 3 2021, 05:36 PM
Post
#3748
|
|
914 Guru Group: Members Posts: 5,844 Joined: 6-October 15 From: Petaluma, CA Member No.: 19,241 Region Association: Northern California |
For those who may wonder what's inside this area of our little cars:
I was cutting out the remainder of the factory trans support cross member, expecting to be greeted by a nice, flat panel all the way to the rear. Nope. Big opening where the cross member attaches. I was surprised by how Porsche designed this junction. There's actually a couple other sheet metal parts involved in this area but I was pretty focused on removing it all so forgot to get pics. I'll snap some when I remove the other side. Interesting engineering. I'm going to leverage some of the design and add some internal structure where my new cross bar attaches to the chassis. Thank you, Porsche! Attached thumbnail(s) 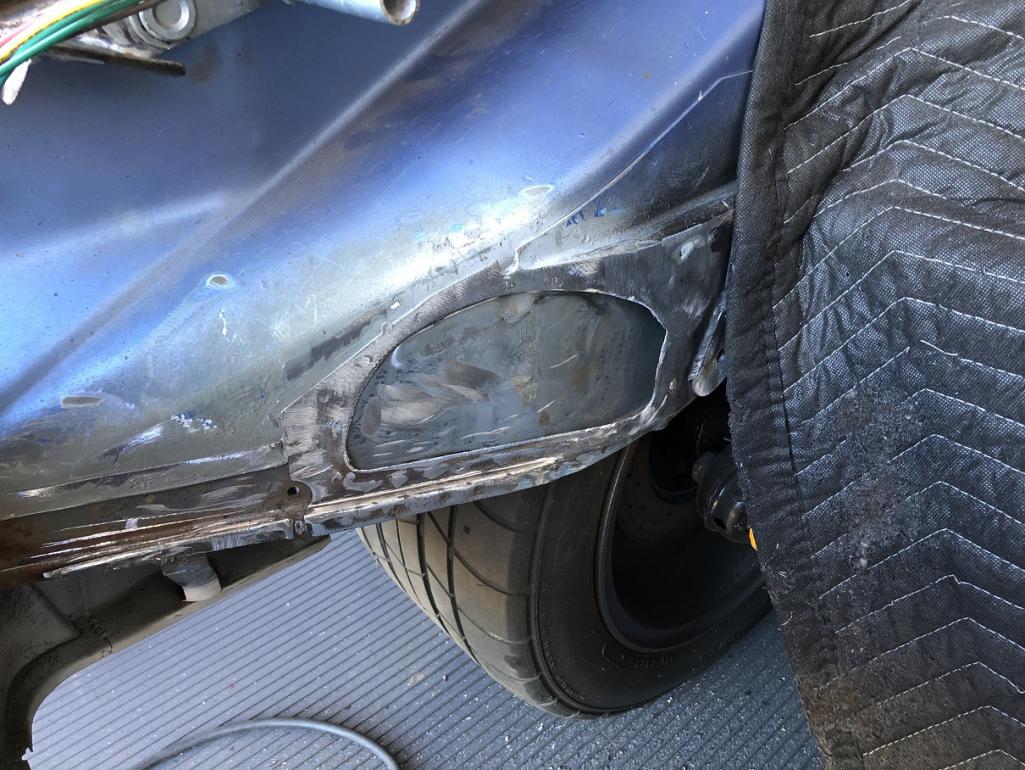
|
|
|
|
| tygaboy |
Nov 4 2021, 05:26 PM
Post
#3749
|
|
914 Guru Group: Members Posts: 5,844 Joined: 6-October 15 From: Petaluma, CA Member No.: 19,241 Region Association: Northern California |
What's going on here? (IMG:style_emoticons/default/happy11.gif)
Removing the factory cross member really opens up the rear of the engine compartment. So much so that I've opted to rethink the exhaust system. I've come up with a couple new designs. This first one is sorta what you see here: The pipes will come together, Siamese straight back about 3-5 inches, then split back to two at 90 degrees and drop down on either side of the trans, enter transversely mounted mufflers then 90 again to go out the back, almost at each corner. The other design is too hard for me to explain so if I mock it up, you'll get pics. Attached thumbnail(s) 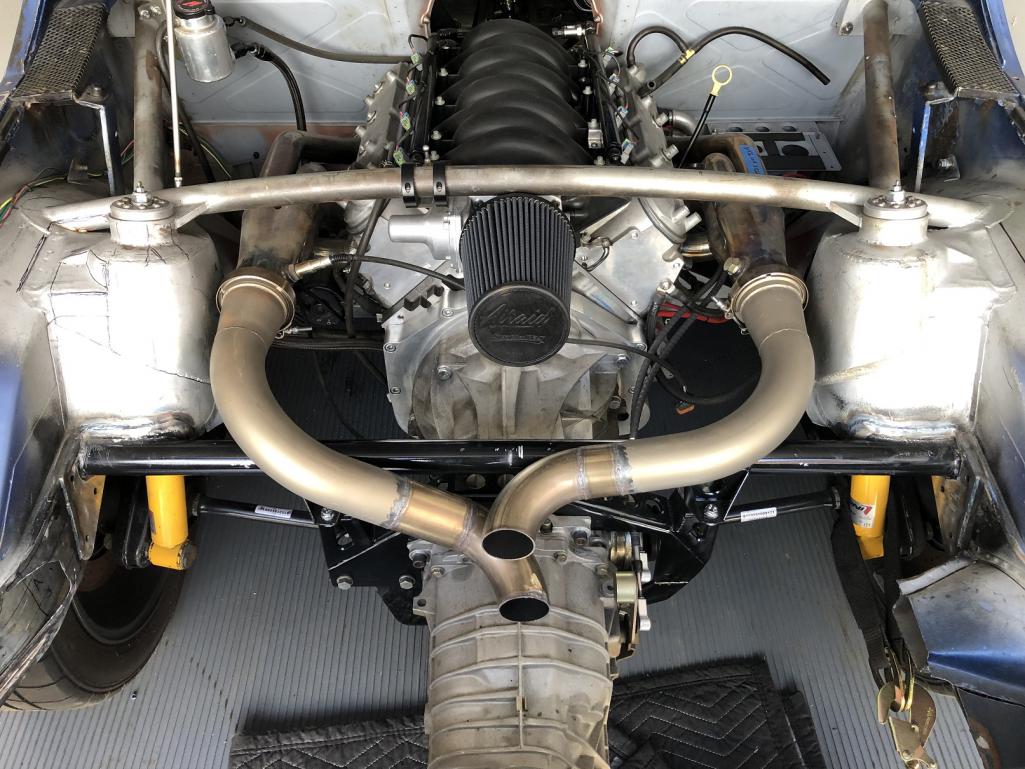
|
|
|
|
| Retroracer |
Nov 4 2021, 07:40 PM
Post
#3750
|
|
Senior Member Group: Members Posts: 664 Joined: 7-July 13 From: Bend OR Member No.: 16,100 Region Association: Pacific Northwest |
So two words to trigger you into a tangent of research, thought and design around a topic:
Blown. Diffusor. - Tony |
|
|
|
| bkrantz |
Nov 4 2021, 08:05 PM
Post
#3751
|
|
914 Guru Group: Members Posts: 8,739 Joined: 3-August 19 From: SW Colorado Member No.: 23,343 Region Association: Rocky Mountains |
Hmm, does design 1 add more heat to the trans than necessary?
|
|
|
|
| tygaboy |
Nov 6 2021, 03:09 PM
Post
#3752
|
|
914 Guru Group: Members Posts: 5,844 Joined: 6-October 15 From: Petaluma, CA Member No.: 19,241 Region Association: Northern California |
I mentioned there's another structural part under the factory trans mount cross brace. And here it is, just before I hacked it out, along with all that other corner sheet metal.
Attached thumbnail(s) 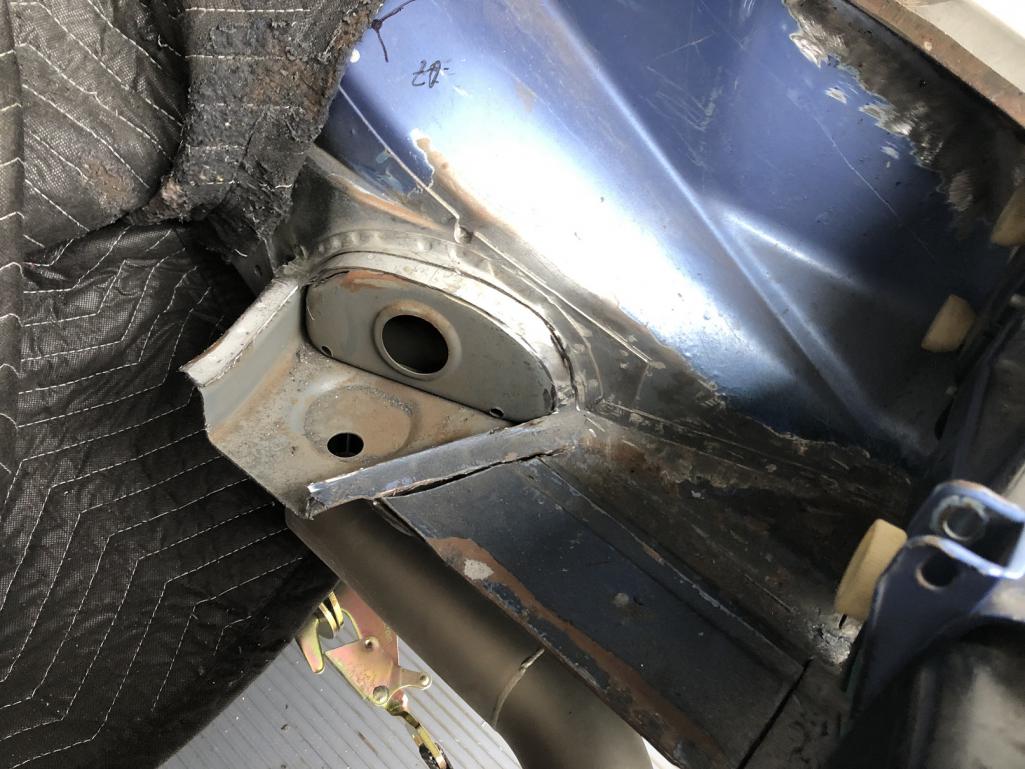
|
|
|
|
| tygaboy |
Nov 6 2021, 03:16 PM
Post
#3753
|
|
914 Guru Group: Members Posts: 5,844 Joined: 6-October 15 From: Petaluma, CA Member No.: 19,241 Region Association: Northern California |
So to help add structure back into this area and more securely support the new transmission cross bar, I opened the chassis forward to the edge of the spreader plate the cross bar welds to. Then I made a simple 90 degree piece of 12ga and plug welded it to the inner part of the chassis. The 90 degree area will get seam welded to the chassis all along that edge, which will also fuse it to the end of that cross bar spreader plate.
Once that's done, I'll fab another plate and weld it over the current opening in the chassis. Attached thumbnail(s) 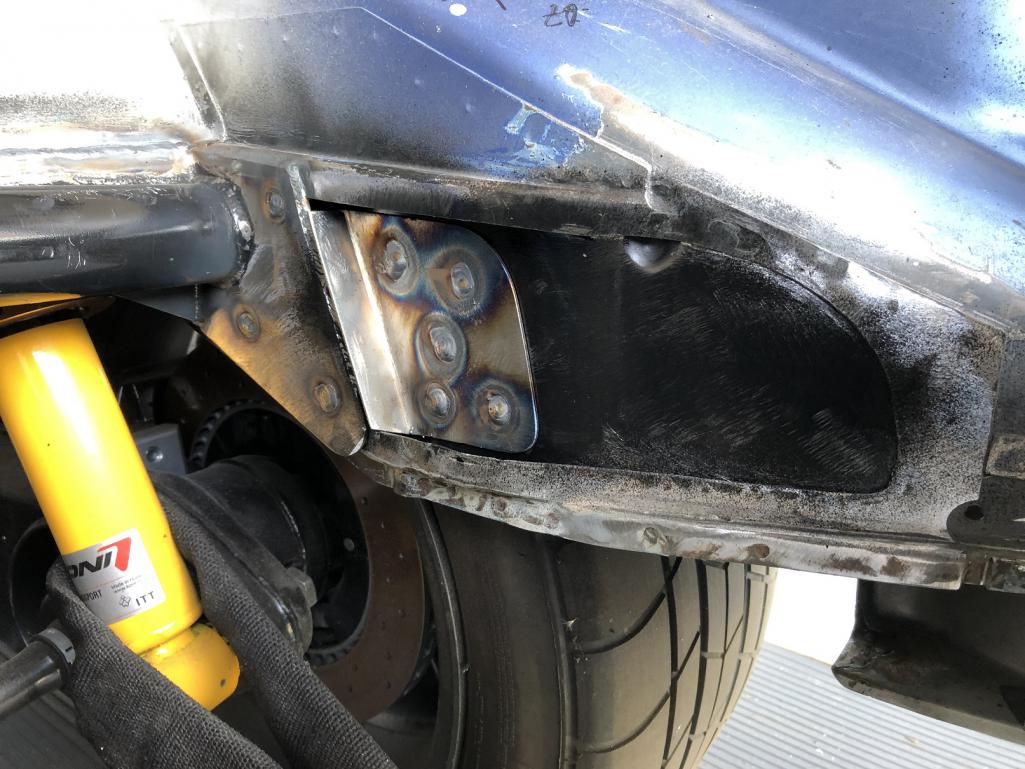
|
|
|
|
| tygaboy |
Nov 6 2021, 03:21 PM
Post
#3754
|
|
914 Guru Group: Members Posts: 5,844 Joined: 6-October 15 From: Petaluma, CA Member No.: 19,241 Region Association: Northern California |
Note that I primered the inside of the chassis, then weld-through primered the back side of the 90 degree plate. Before I close this up with the final plate, I'll also seam weld along the rear edge of this inner plate.
I opted to get some primer on it ahead of those next step, taping off the areas where welding will happen. Attached thumbnail(s) 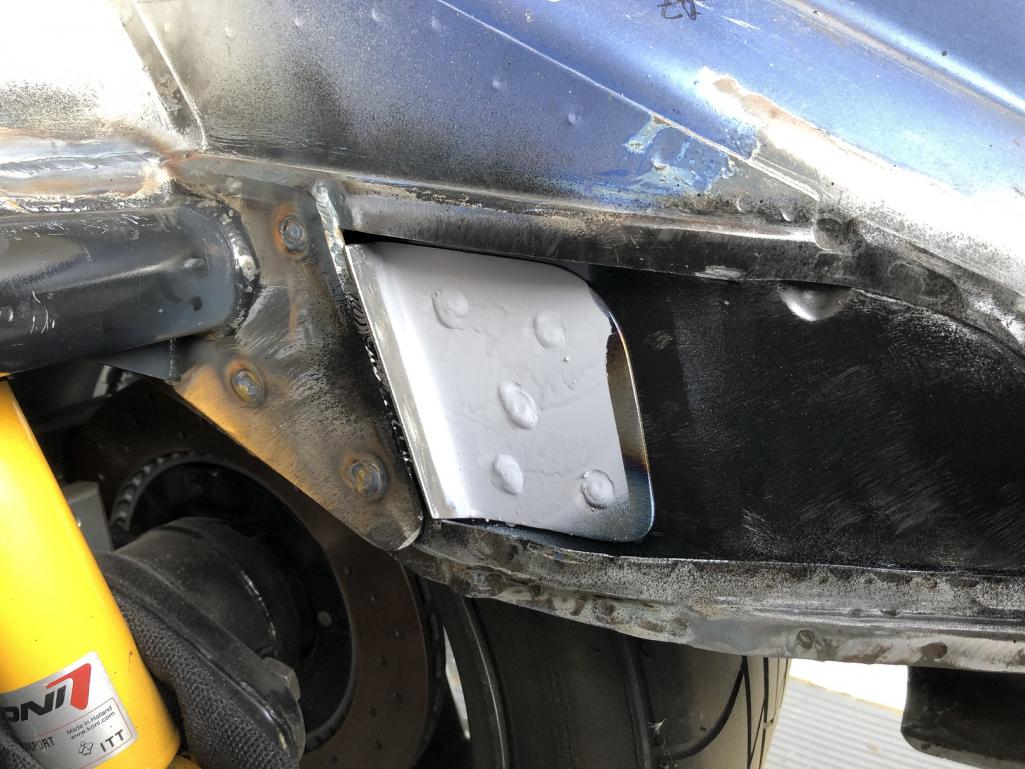
|
|
|
|
| tygaboy |
Nov 6 2021, 03:23 PM
Post
#3755
|
|
914 Guru Group: Members Posts: 5,844 Joined: 6-October 15 From: Petaluma, CA Member No.: 19,241 Region Association: Northern California |
QUOTE(bkrantz @ Nov 4 2021, 07:05 PM) Hmm, does design 1 add more heat to the trans than necessary? @bkrantz - If I do go with this initial design, I would likely add a simple heat shield between the exhaust and trans. It also depends on how high above the trans I opt to go. Lots of decisions yet to be made. |
|
|
|
| andys |
Nov 6 2021, 05:39 PM
Post
#3756
|
|
Advanced Member Group: Members Posts: 2,165 Joined: 21-May 03 From: Valencia, CA Member No.: 721 Region Association: None |
QUOTE(tygaboy @ Nov 4 2021, 04:26 PM) What's going on here? (IMG:style_emoticons/default/happy11.gif) Removing the factory cross member really opens up the rear of the engine compartment. So much so that I've opted to rethink the exhaust system. I've come up with a couple new designs. This first one is sorta what you see here: The pipes will come together, Siamese straight back about 3-5 inches, then split back to two at 90 degrees and drop down on either side of the trans, enter transversely mounted mufflers then 90 again to go out the back, almost at each corner. The other design is too hard for me to explain so if I mock it up, you'll get pics. You of course know this opens up the opportunity to do 180 degree headers. Terry Steward fit up some stock car 180's in his sbc 914 track car some years ago. For me, I'm too impatient to pursue such silliness. You however, seem to embrace these kinds of challenges so consider the seed planted :-) Andys |
|
|
|
| live free & drive |
Nov 6 2021, 08:04 PM
Post
#3757
|
|
Member Group: Members Posts: 216 Joined: 29-June 16 From: New Hampshire Member No.: 20,159 Region Association: None |
|
|
|
|
| tygaboy |
Nov 8 2021, 06:07 PM
Post
#3758
|
|
914 Guru Group: Members Posts: 5,844 Joined: 6-October 15 From: Petaluma, CA Member No.: 19,241 Region Association: Northern California |
Next is to fab the plates to close up the openings. Same routine as usual: cardboard template transferred to steel, cut and trimmed to the pattern.
Then fit it to the car and tune the edges until it fits "everywhere". Wait... there's a bend needed. And the bend is a specific radius. (IMG:style_emoticons/default/idea.gif) 1. Hold the flat panel against the chassis with it correctly positioned at the front 2. Carefully rotate the panel around the bend until the rear section makes contact - and verify it's perfectly aligned and the lower edge lands exactly on the ledge in the chassis 3. Repeat step 2 about 35 times trimming and grinding as needed, all the while convincing yourself the edge tuning you're doing really is what's needed to get the right fit...! (IMG:style_emoticons/default/wacko.gif) 4. Position the panel at the front and mark where the bend needs to begin - one mark at the top of the panel, one mark at the bottom. 5. Rotate the panel around that bend in the chassis until it's flat at the back and mark where the bend ends, same way as the front. 6. Draw some lines to indicate where the bend needs to live 7. Find a suitable surface to use as a die and use a rubber mallet to create the radius bend. (IMG:style_emoticons/default/smash.gif) Simple, no? Attached image(s) 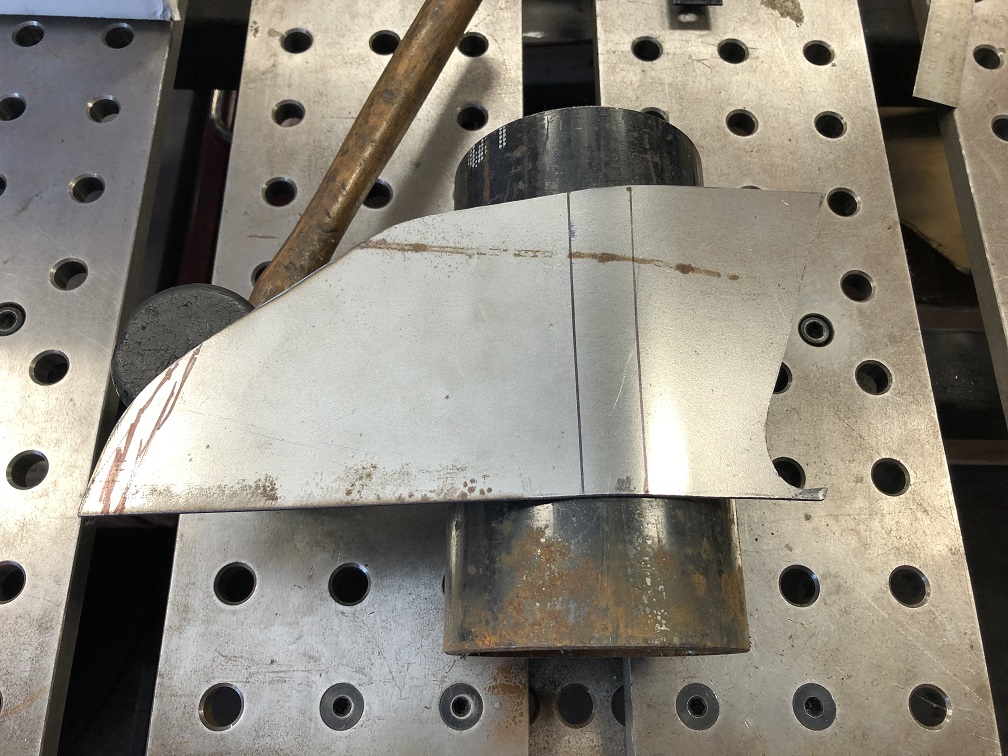 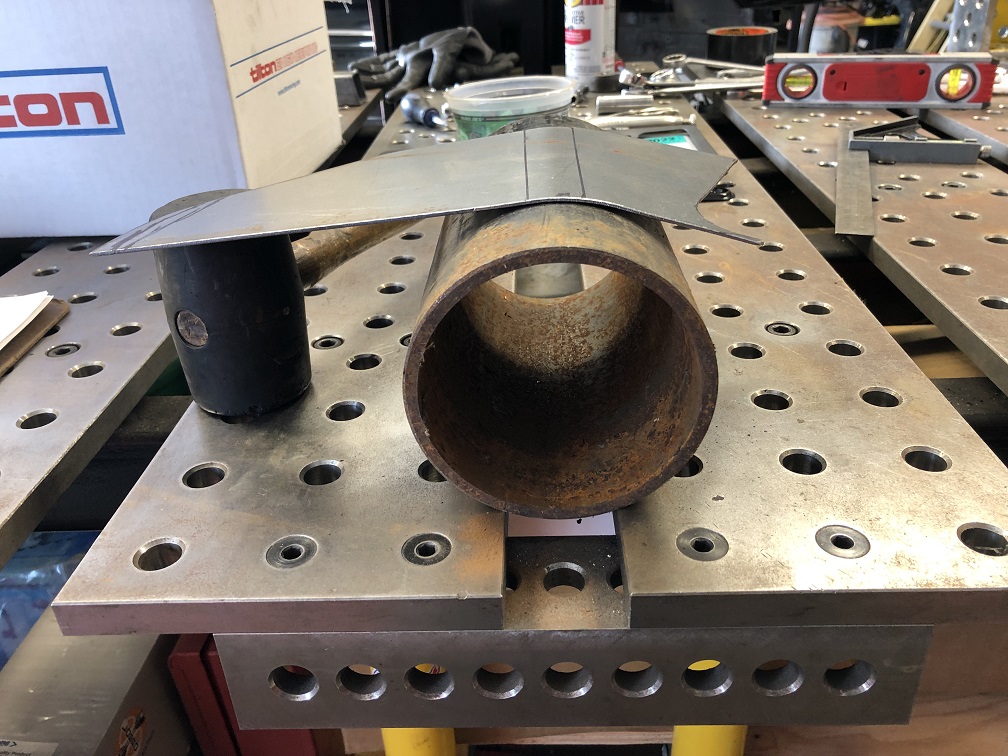
|
|
|
|
| tygaboy |
Nov 8 2021, 06:17 PM
Post
#3759
|
|
914 Guru Group: Members Posts: 5,844 Joined: 6-October 15 From: Petaluma, CA Member No.: 19,241 Region Association: Northern California |
Bend a little and test fit the bent panel knowing it's under bent. Easier/better to sneak up on the correct amount of bend vs. having to un-bend. Ask me how I know... (IMG:style_emoticons/default/laugh.gif)
Note that the clamps are only holding the panel in place for tack welding. They aren't forcing the panel into place. That would be cheating. The general rule I use is that by using only one finger and light pressure, the panel will sit where I want it. Ideally, it fits perfectly with no pressure at all, but I try not to let "perfect" get in the way of "really good". This fit "really good". OK, English majors... It fit really well. (IMG:style_emoticons/default/poke.gif) Now all I have to do is make the other one, just the mirror image. Eesh... Attached image(s) 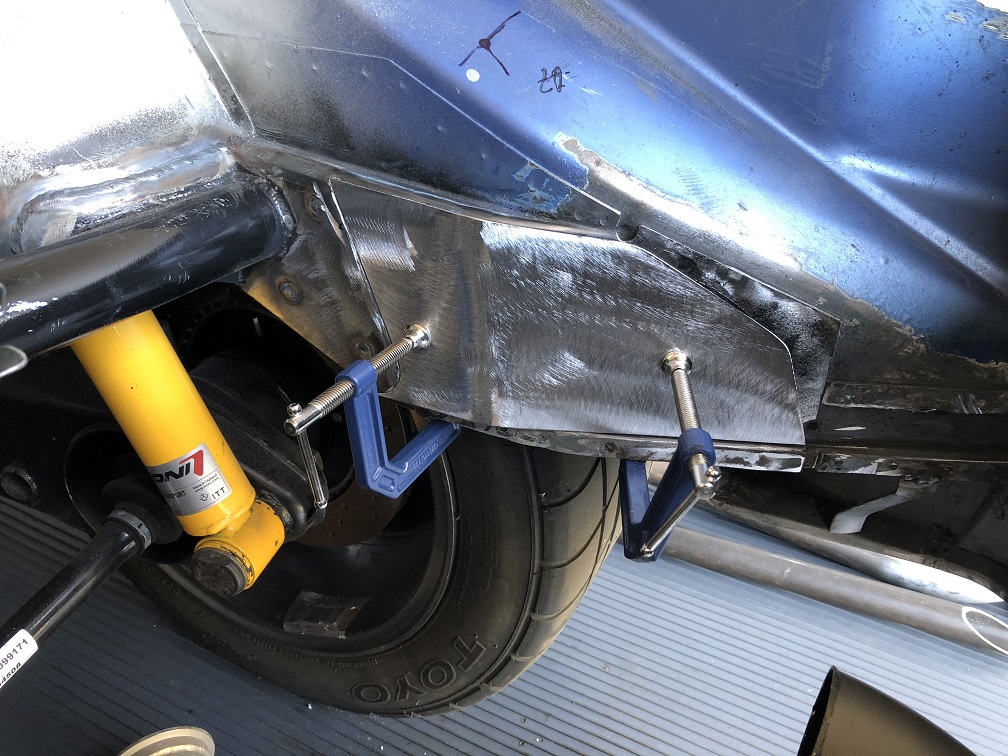 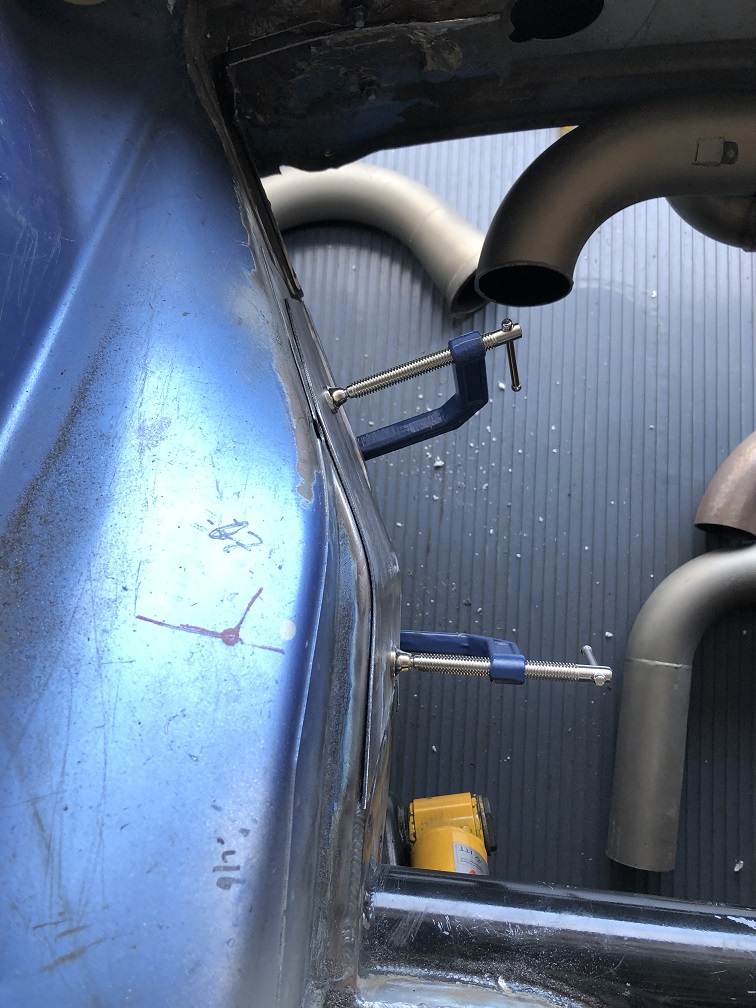
|
|
|
|
| tygaboy |
Nov 8 2021, 06:23 PM
Post
#3760
|
|
914 Guru Group: Members Posts: 5,844 Joined: 6-October 15 From: Petaluma, CA Member No.: 19,241 Region Association: Northern California |
Both closing panels are done and tacked in. Also, as is pretty obvious, it was time to add the X-brace for the transmission mount. Here, the uninterrupted bar is fitted and tacked in and the primary section of the other bar is in process.
Attached thumbnail(s) 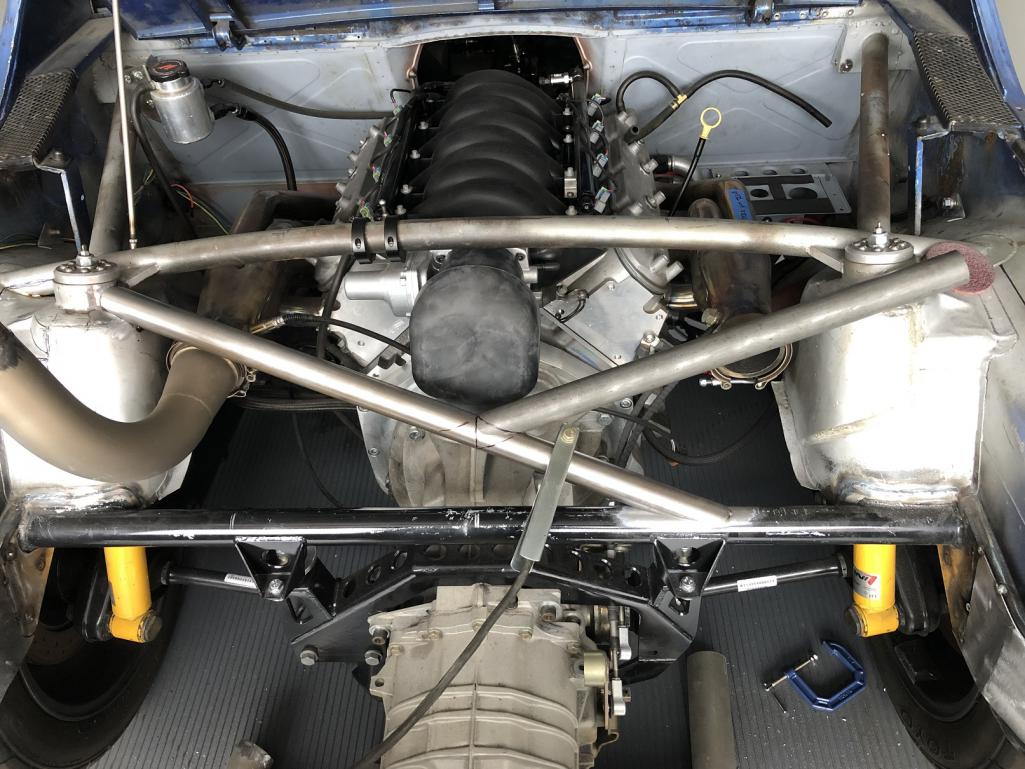
|
|
|
|
|
4 User(s) are reading this topic (4 Guests and 0 Anonymous Users)
0 Members:

|
Lo-Fi Version | Time is now: 20th July 2026 - 07:56 PM |
Invision Power Board
v9.1.4 © 2026 IPS, Inc.