|
|
|
Porsche, and the Porsche crest are registered trademarks of Dr. Ing. h.c. F. Porsche AG.
This site is not affiliated with Porsche in any way. Its only purpose is to provide an online forum for car enthusiasts. All other trademarks are property of their respective owners. |
|
|

  |

| tygaboy |
 Sep 1 2017, 09:32 PM Sep 1 2017, 09:32 PM
Post
#581
|
|
914 Guru  Group: Members Posts: 5,818 Joined: 6-October 15 From: Petaluma, CA Member No.: 19,241 Region Association: Northern California |
So, after all the head scratching, design changes, measuring, cutting, trimming, fitting, mind-changing (thanks Tony...!) and multiple redoing of many parts:
The door bars are tacked in and ready for final welding! Today was 7 hours in a 100+ degree garage... and I can't think of anything I would have enjoyed more! And I couldn't have done it without Martin's help. Having a skilled buddy who actually cares about your build, challenges you and makes you rethink your decisions is something I hope all of you get to experience. What a day... (IMG:style_emoticons/default/beerchug.gif) Attached thumbnail(s) 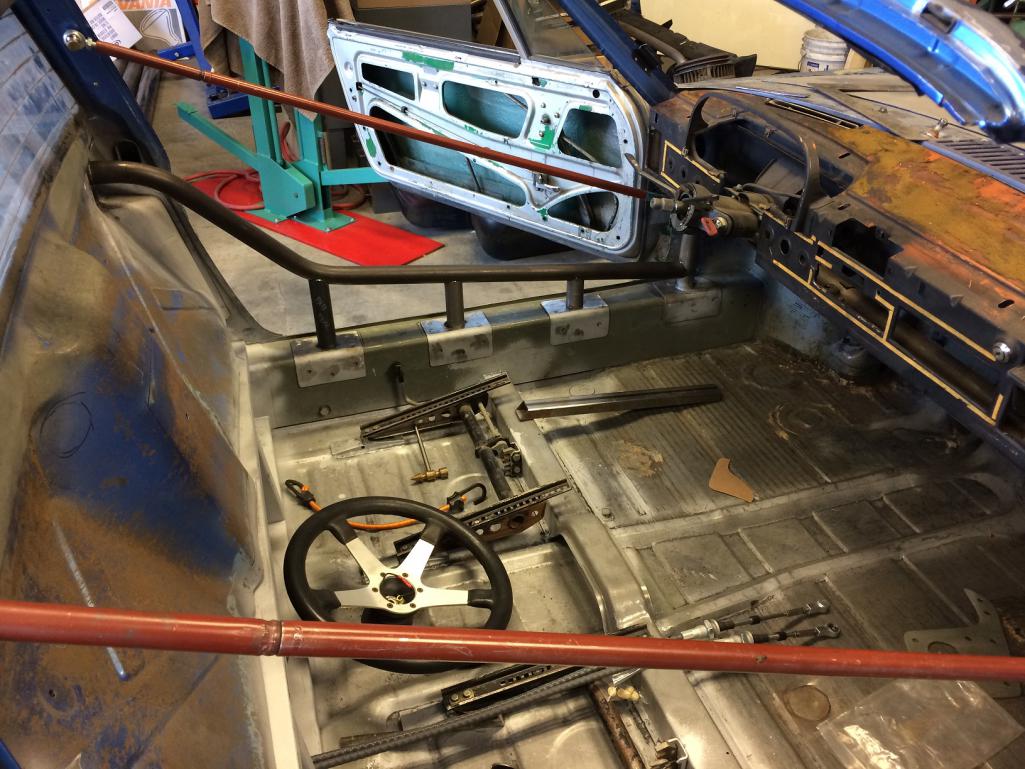 
|
   |

 
|
| Krieger |
Sep 1 2017, 11:24 PM
Post
#582
|
|
Advanced Member Group: Members Posts: 4,853 Joined: 24-May 04 From: Santa Rosa CA Member No.: 2,104 Region Association: None |
(IMG:style_emoticons/default/clap56.gif) Woooo hooooo! It does feel good when you reach these milestones!
|
 |
|
| tygaboy |
Sep 2 2017, 08:22 AM
Post
#583
|
|
914 Guru Group: Members Posts: 5,818 Joined: 6-October 15 From: Petaluma, CA Member No.: 19,241 Region Association: Northern California |
QUOTE(Morph914 @ Sep 1 2017, 12:33 PM)  QUOTE(tygaboy @ Aug 30 2017, 05:55 PM) I'm taking Friday, 9/1 off work to complete welding on the chassis stiffening bars! It'll be a full day but the goal is to get all that done! Fingers crossed. And with that done, I'm nearing the point where I need to pick a color... and that gets me thinking about the overall look. While I love the RSR Fuchs look, this car is clearly not a 914/6 GT tribute so... I'm toying with these 52 Outlaw wheels against the mid 2000s Subaru WRX blue. I think these wheels fit quite nicely with my overall "RaceRod" design. But wheel see... (see what I did there?) (IMG:style_emoticons/default/lol-2.gif) And, the blue/gold is the same combo I used on a custom SV650 I built about 12 years ago. It got a 4 page spread in Cycle World. I was pretty proud of that... plus, I went to Berkeley (Go Bears!) so blue and gold are part of my life... Anyway, decisions, decisions. Until then, I'll be running a set of 7 and 9 x 17 Euromeisters. Love the wheels and the bike! I thought you retired... Interesting point. I was supposed to pull the plug as of the end of June but just couldn't do it. After working since I was 11 years old, the idea of not generating income turned out to be a bigger deal than I'd ever imagined. So I'll continue to be a tax paying 'Merican worker for at least a while longer... |
|
|
|
| mgp4591 |
Sep 2 2017, 12:12 PM
Post
#584
|
|
914 Guru Group: Members Posts: 5,923 Joined: 1-August 12 From: Salt Lake City Ut Member No.: 14,748 Region Association: Intermountain Region |
Anyway, decisions, decisions. Until then, I'll be running a set of 7 and 9 x 17 Euromeisters.
[/quote] You could always paint up the Euromeisters to look like the spendy wheels - you could REALLY retire sooner... (IMG:style_emoticons/default/idea.gif) |
|
|
|
| Rand |
Sep 2 2017, 12:52 PM
Post
#585
|
|
Cross Member Group: Members Posts: 7,415 Joined: 8-February 05 From: OR Member No.: 3,573 Region Association: None |
Clean metal is a beautiful thing. Keep it up. Such a great project.
|
|
|
|
| tygaboy |
Sep 2 2017, 05:56 PM
Post
#586
|
|
914 Guru Group: Members Posts: 5,818 Joined: 6-October 15 From: Petaluma, CA Member No.: 19,241 Region Association: Northern California |
Today was just clean up and organize in prep to get the car back on the rotisserie to finish all the chassis stiffening welding and a couple other items:
I have to fab the the area where the seat belt retractors will bolt in, triangulate behind the firewall to support the jacking donuts, add the front sway bar mounts... things like that. THEN, it's time to tackle the Tangerine rear suspension pick up kit. Won't that be fun... Anyway, I couldn't resist taking a pic of how the door bar all but looks like it's one piece as it passes through the fire wall and runs to the rear suspension tower. I was hoping it'd look like that. (so don't tell anyone it's two pieces!) (IMG:style_emoticons/default/shades.gif) Attached thumbnail(s)  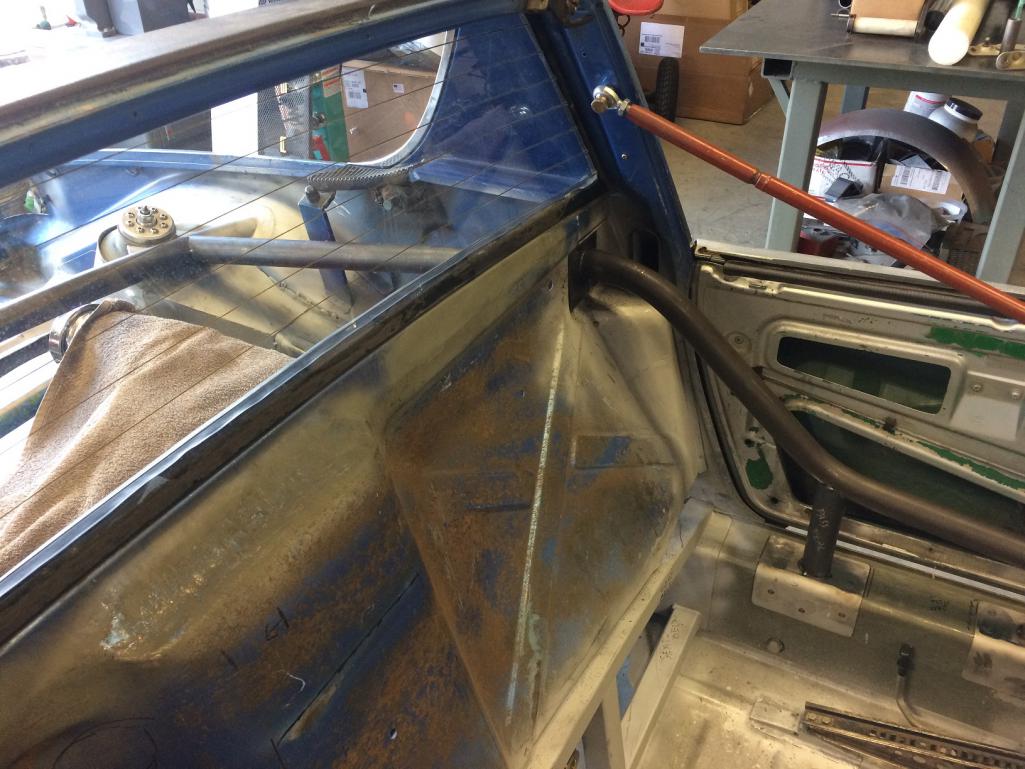
|
|
|
|
| Andyrew |
Sep 2 2017, 11:44 PM
Post
#587
|
|
Spooling.... Please wait Group: Members Posts: 13,380 Joined: 20-January 03 From: Riverbank, Ca Member No.: 172 Region Association: Northern California |
Oh, that IS nice!!
|
|
|
|
| ablesnead |
Sep 3 2017, 12:20 PM
Post
#588
|
|
Member Group: Members Posts: 157 Joined: 16-September 13 From: United States Member No.: 16,395 Region Association: None |
Nice ....sooo glad the shear panel holely , thinngy.was only a faze....looks like it oughta !
|
|
|
|
| tygaboy |
Sep 3 2017, 04:27 PM
Post
#589
|
|
914 Guru Group: Members Posts: 5,818 Joined: 6-October 15 From: Petaluma, CA Member No.: 19,241 Region Association: Northern California |
QUOTE(ablesnead @ Sep 3 2017, 11:20 AM) Nice ....sooo glad the shear panel holely , thinngy.was only a faze....looks like it oughta ! Did I say that was off the table...? (IMG:style_emoticons/default/poke.gif) (IMG:style_emoticons/default/happy11.gif) |
|
|
|
| tygaboy |
Sep 3 2017, 04:46 PM
Post
#590
|
|
914 Guru Group: Members Posts: 5,818 Joined: 6-October 15 From: Petaluma, CA Member No.: 19,241 Region Association: Northern California |
Remember, all this door bar business was required because the original main hoop interfered with the headrests. So, with the door bars in place, I can now get back to fabricating the cross bar.
This will be particularly fun (read: "complicated" And why wouldn't that be the case?) for a couple reasons. The location I need the crossbar to sit isn't in line with the top part of the door bar, meaning I have to put a slight bend into each end so they tip down to meet the door bars. Then, I have to cut the miters on both sides of the crossbar, then slide it into place. Another "one chance to be sure I bend it right and then don't cut it too short" tube... So I made a "cheater bar" that was about a foot long. I played with this until I got the bend and the miter to fit as desired. Something that makes it easier is that when the bender makes a bend, it leaves a witness mark. Well, not so much a mark but you can tell where on the tube the bend starts. That location corresponds with a marker on the bending die. Blah, blah... What it all means is I can use the cheater to measure/mark on the chassis where I want the bend to start. Then I can transfer that location back onto the crossbar. I load the crossbar back into the bender and align the mark with the mark on the bending die and I know I'll get things to go where I want them. Once I have the bends in the cross bar, I set the cheater on it, aligning the bends and know where to cut the notch! Easy, no? (IMG:style_emoticons/default/wacko.gif) Fingers crossed... Anyway, here's the seat in place. Next pic is the cheater bar in mock up on the driver side. Looks good to me. Attached thumbnail(s) 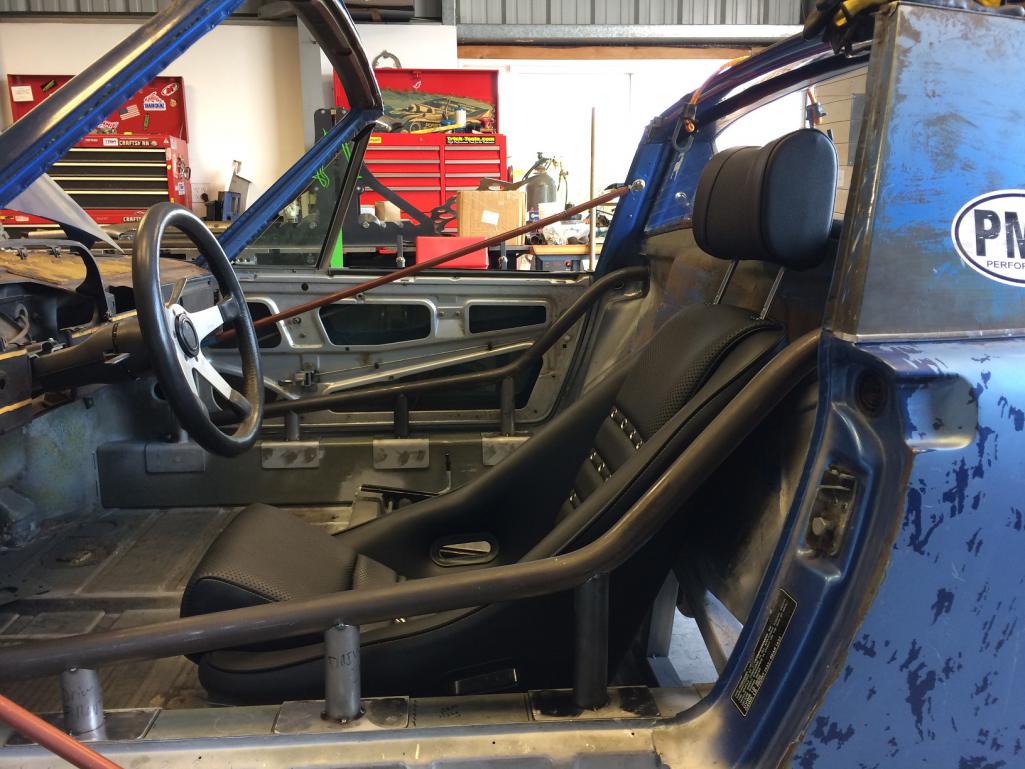 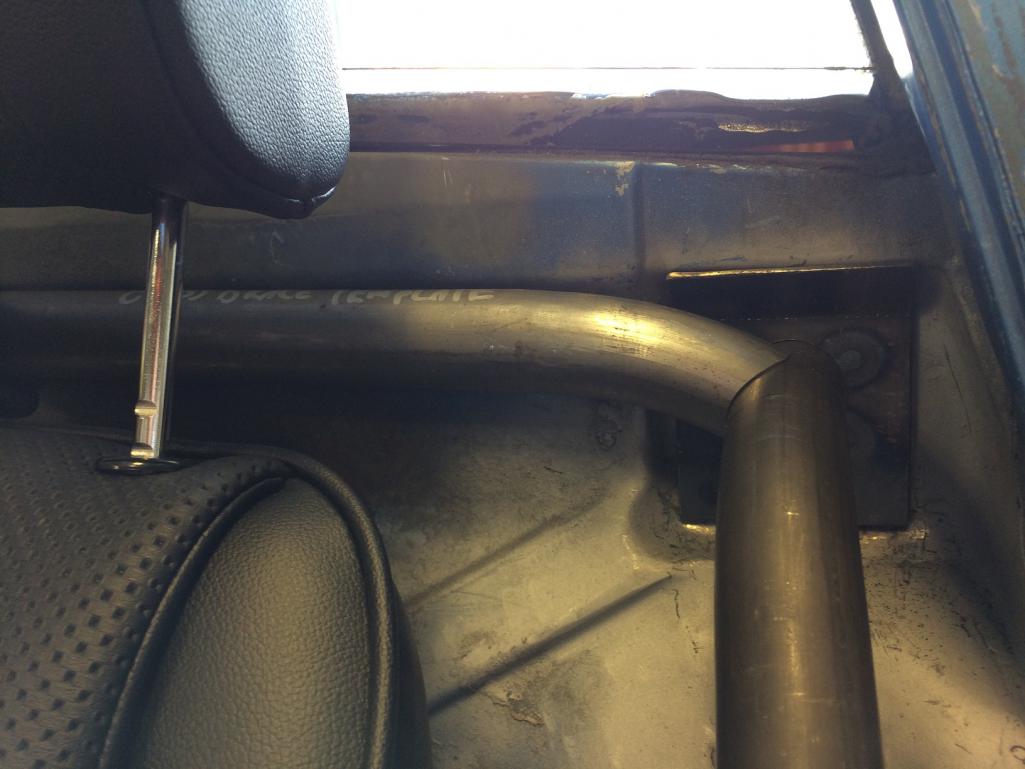
|
|
|
|
| mgp4591 |
Sep 3 2017, 06:03 PM
Post
#591
|
|
914 Guru Group: Members Posts: 5,923 Joined: 1-August 12 From: Salt Lake City Ut Member No.: 14,748 Region Association: Intermountain Region |
Yep, that'll work! I was thinking about your first lower bar and really liked it - this is a great compromise without compromising anything at all. Looks really slick too! What thickness are your sill plates supporting your sidebars?
I've got some of your imagination, just none of your tools! |
|
|
|
| tygaboy |
Sep 3 2017, 10:07 PM
Post
#592
|
|
914 Guru Group: Members Posts: 5,818 Joined: 6-October 15 From: Petaluma, CA Member No.: 19,241 Region Association: Northern California |
QUOTE(mgp4591 @ Sep 3 2017, 05:03 PM) Yep, that'll work! I was thinking about your first lower bar and really liked it - this is a great compromise without compromising anything at all. Looks really slick too! What thickness are your sill plates supporting your sidebars? I've got some of your imagination, just none of your tools! The sill plates under the verticals are from Tangerine Racing. Mr. Foley was kind enough to sell me just the plates. I think they are 12 ga. And remember, I also skinned my longs with a layer of 16 ga. Once I complete all I have planned, I should be in pretty good shape, stiffening wise. |
|
|
|
| tygaboy |
Sep 4 2017, 09:58 PM
Post
#593
|
|
914 Guru Group: Members Posts: 5,818 Joined: 6-October 15 From: Petaluma, CA Member No.: 19,241 Region Association: Northern California |
Got to working in earnest on fitting the cross bar. My plan was essentially fool proof...!
But I proved to be a JUUUUUST enough of a fool to screw up the plan. One has to keep a sense of humor about all this stuff, which I admit is made easier when one is doing it for one's self and not trying to turn a profit. Important item #1: triple check the orientation of the bar so you that after all your careful measurements, you don't accidentally make one of the bends with your custom tube 90 degrees out from the proper orientation. (IMG:style_emoticons/default/wacko.gif) Yup, made that mistake on the one end. Important item #2: While trying to recoup at least the other end of the custom tube, don't use a crappy, hard to read tape measure, then misread it and make the bend in the wrong place. Yup, made that mistake on the other end. (IMG:style_emoticons/default/huh.gif) So... Ended up remaking the custom tube! Almost called it quits after the 2nd major error figuring it was a day of bad karma, but decided to solider on. Here's the custom tube being remade. The good news is it turned out nearly perfect. Measurably better than the first. So maybe this was a good karma day after all...? Attached thumbnail(s) 
|
|
|
|
| tygaboy |
Sep 4 2017, 10:08 PM
Post
#594
|
|
914 Guru Group: Members Posts: 5,818 Joined: 6-October 15 From: Petaluma, CA Member No.: 19,241 Region Association: Northern California |
Then it became "measure like, oh, 35 times, do the same 35 measurements again and then double check the results" before proceeding.
After all that, I cut the notches in each end, which I happily admit I left long, just to be sure. Here's the initial fit, which I expected wouldn't be quite right: the bar is a bit long on each end, preventing it from sliding all the way back into position. The good news is that the center line of the cross bar lines up exactly with the center line on the chassis. I have final fitting yet to do but after 4 hours of working on just this tube, it's nearly there! When done, it'll sit maybe 1/8"+ ahead of the fire wall, leaving just enough room to slip a shoulder harness through. And I'm still working on a design to tie the cross bar more securely to the fire wall. I expect it'll also serve as the starting point for the console. More on that soon. Attached thumbnail(s) 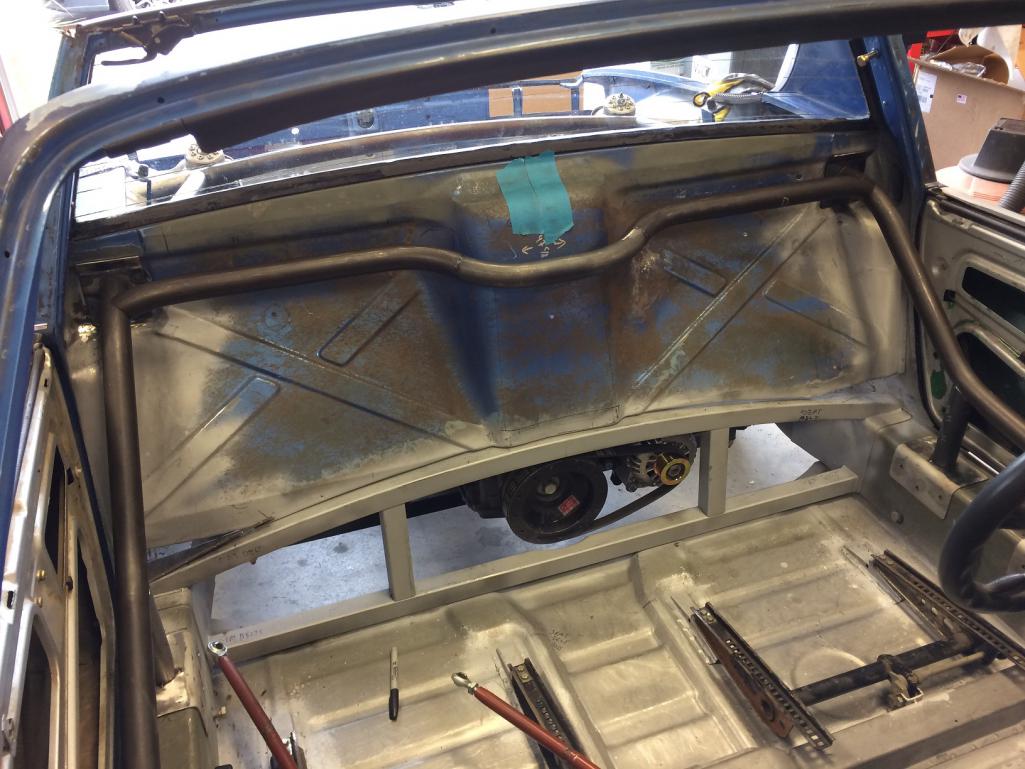 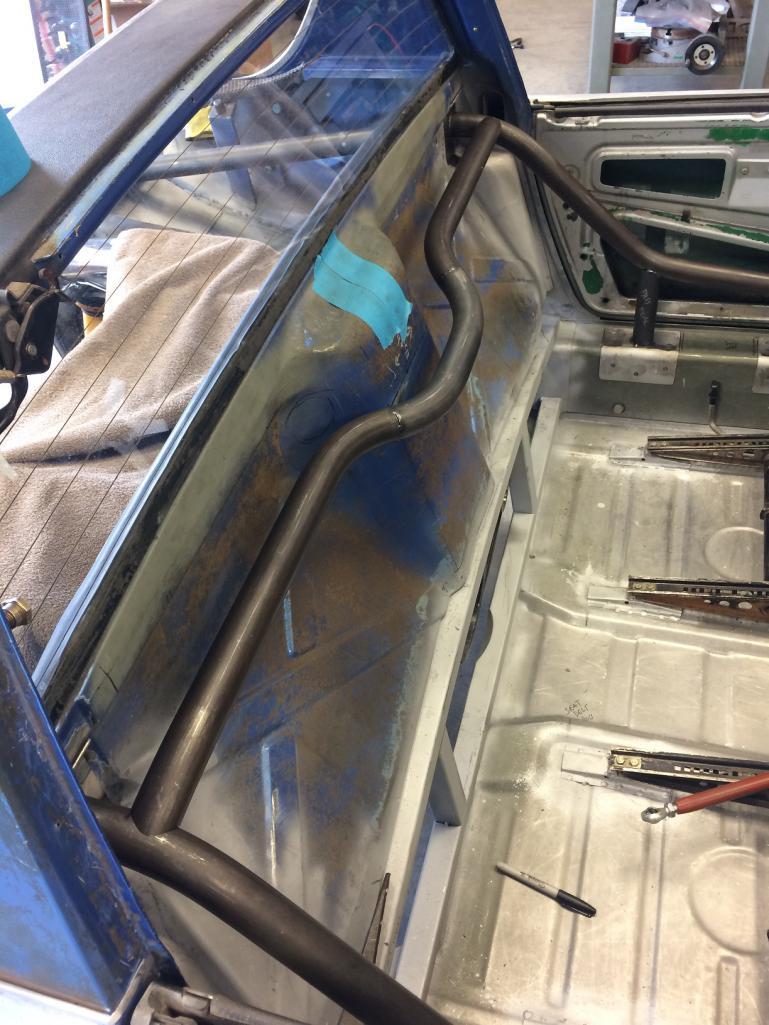
|
|
|
|
| ConeDodger |
Sep 4 2017, 10:14 PM
Post
#595
|
|
Apex killer! Group: Members Posts: 24,422 Joined: 31-December 04 From: Tahoe Area Member No.: 3,380 Region Association: Northern California |
BTW Chris, your rear window is a fairly rare optional rear window defogger type. Pull it and switch it with a plexiglass one so someone can option up their car... (IMG:style_emoticons/default/evilgrin.gif)
|
|
|
|
| tygaboy |
Sep 4 2017, 10:18 PM
Post
#596
|
|
914 Guru Group: Members Posts: 5,818 Joined: 6-October 15 From: Petaluma, CA Member No.: 19,241 Region Association: Northern California |
QUOTE(ConeDodger @ Sep 4 2017, 09:14 PM) BTW Chris, your rear window is a fairly rare optional rear window defogger type. Pull it and switch it with a plexiglass one so someone can option up their car... (IMG:style_emoticons/default/evilgrin.gif) Rob - Great minds, excellent timing, etc. I was about to pull it out and offer it up for sale. While I'm likely going to add A/C to my car, I think others would more highly value the defrost window. |
|
|
|
| Rand |
Sep 4 2017, 10:23 PM
Post
#597
|
|
Cross Member Group: Members Posts: 7,415 Joined: 8-February 05 From: OR Member No.: 3,573 Region Association: None |
Oh man, reminds me of a rear window swap 15 years ago because of wires within. Nobody will use them, best to the CCW types. I hope they make them heat them up! or pshhh
|
|
|
|
| Andyrew |
Sep 5 2017, 08:57 AM
Post
#598
|
|
Spooling.... Please wait Group: Members Posts: 13,380 Joined: 20-January 03 From: Riverbank, Ca Member No.: 172 Region Association: Northern California |
QUOTE(tygaboy @ Sep 4 2017, 09:18 PM) QUOTE(ConeDodger @ Sep 4 2017, 09:14 PM) BTW Chris, your rear window is a fairly rare optional rear window defogger type. Pull it and switch it with a plexiglass one so someone can option up their car... (IMG:style_emoticons/default/evilgrin.gif) Rob - Great minds, excellent timing, etc. I was about to pull it out and offer it up for sale. While I'm likely going to add A/C to my car, I think others would more highly value the defrost window. I have a couple of non heated windows you are welcome to! I was going to chuck them as they were given to me out of the blue and Im trying to clean things up but its hard to throw away good NLA parts.. |
|
|
|
| tygaboy |
Sep 5 2017, 09:12 AM
Post
#599
|
|
914 Guru Group: Members Posts: 5,818 Joined: 6-October 15 From: Petaluma, CA Member No.: 19,241 Region Association: Northern California |
QUOTE(Andyrew @ Sep 5 2017, 07:57 AM) QUOTE(tygaboy @ Sep 4 2017, 09:18 PM) QUOTE(ConeDodger @ Sep 4 2017, 09:14 PM) BTW Chris, your rear window is a fairly rare optional rear window defogger type. Pull it and switch it with a plexiglass one so someone can option up their car... (IMG:style_emoticons/default/evilgrin.gif) Rob - Great minds, excellent timing, etc. I was about to pull it out and offer it up for sale. While I'm likely going to add A/C to my car, I think others would more highly value the defrost window. I have a couple of non heated windows you are welcome to! I was going to chuck them as they were given to me out of the blue and Im trying to clean things up but its hard to throw away good NLA parts.. Two comments: 1. Andrew, I'll take one of those windows. Thanks! 2. All the effort I put into fabrication and I get more comments about a defrost rear window! Gotta love the 914 crowd... (IMG:style_emoticons/default/poke.gif) (IMG:style_emoticons/default/lol-2.gif) |
|
|
|
| tygaboy |
Sep 5 2017, 01:51 PM
Post
#600
|
|
914 Guru Group: Members Posts: 5,818 Joined: 6-October 15 From: Petaluma, CA Member No.: 19,241 Region Association: Northern California |
To final trim the ends of the cross bar, I used an oscillating spindle sander. I'm using 1.5" tubing so simply slip on the 1.5" barrel and away you go.
It worked really well and is super easy to control when you're trying to sneak up on a final dimension. You can even tweak the miter angle a bit, as needed, to get the nicest possible fit. (Insert yet to be invented "grinder" emoji here.) Attached thumbnail(s) 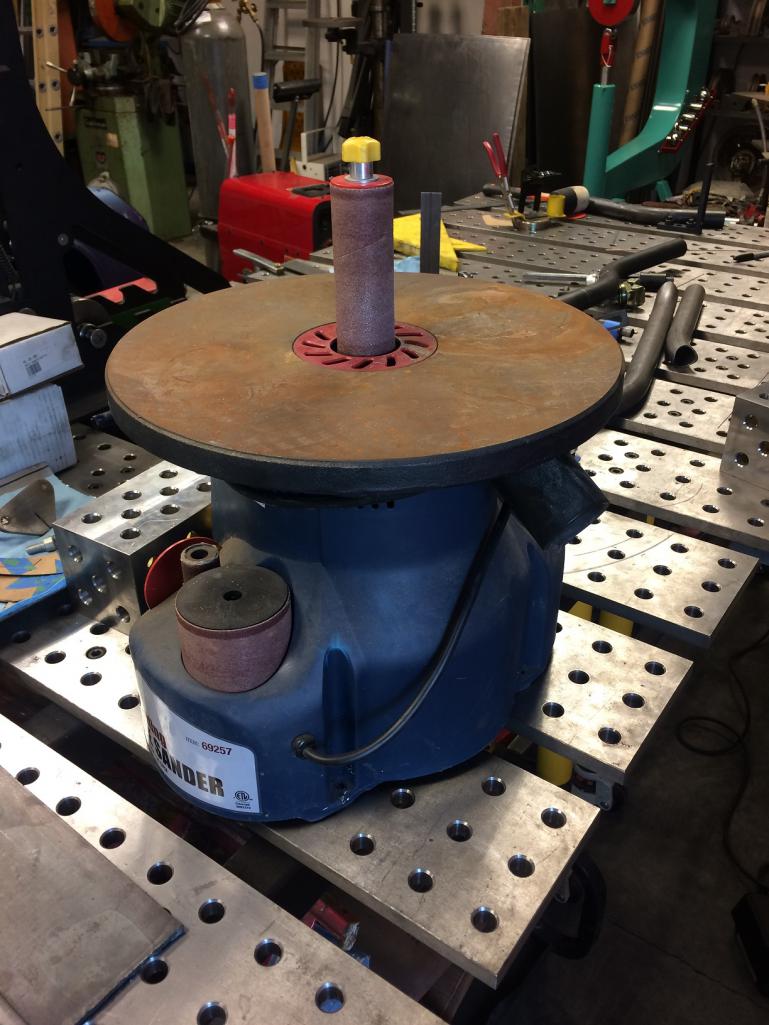
|
|
|
|
|
3 User(s) are reading this topic (3 Guests and 0 Anonymous Users)
0 Members:

|
Lo-Fi Version | Time is now: 28th April 2026 - 06:31 PM |
Invision Power Board
v9.1.4 © 2026 IPS, Inc.