|
|
|
Porsche, and the Porsche crest are registered trademarks of Dr. Ing. h.c. F. Porsche AG.
This site is not affiliated with Porsche in any way. Its only purpose is to provide an online forum for car enthusiasts. All other trademarks are property of their respective owners. |
|
|

  |

| Cracker |
 Dec 16 2017, 07:20 PM Dec 16 2017, 07:20 PM
Post
#821
|
|
Advanced Member  Group: Members Posts: 2,148 Joined: 2-February 10 From: Atlanta (area) Member No.: 11,316 Region Association: South East States |
Your console has "levels"...cool!
Tony |
   |

 
|
| tygaboy |
Dec 17 2017, 09:31 PM
Post
#822
|
|
914 Guru Group: Members Posts: 5,818 Joined: 6-October 15 From: Petaluma, CA Member No.: 19,241 Region Association: Northern California |
I mistakenly took my e-brake remnants to Cary's in OR, but he was kind enough to return them! So part of today was figuring where they'd go. The good news is that with a couple correctly angled holes in the lower cross brace, essentially straight below where they're sitting, these'll end up in the same locations as stock!
Love it... Attached thumbnail(s) 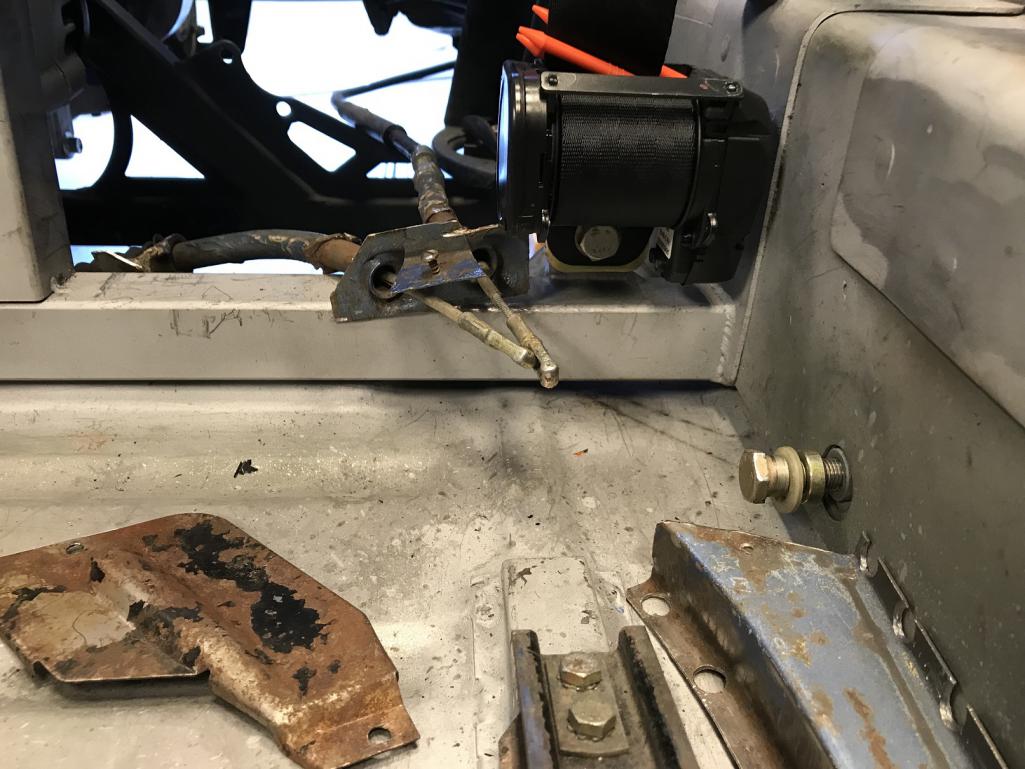
|
|
|
|
| tygaboy |
Dec 17 2017, 09:34 PM
Post
#823
|
|
914 Guru Group: Members Posts: 5,818 Joined: 6-October 15 From: Petaluma, CA Member No.: 19,241 Region Association: Northern California |
Here's the planned location for the e-brake handle. Forward of stock and with no "cut out" but it'll do just fine. And yes, it's rotated forward so once it's welded in, the handle won't touch the floor.
I'll have to lengthen the connection to reach the e-brake cables but that shouldn't be too big a deal. Attached thumbnail(s) 
|
|
|
|
| tygaboy |
Dec 17 2017, 09:35 PM
Post
#824
|
|
914 Guru Group: Members Posts: 5,818 Joined: 6-October 15 From: Petaluma, CA Member No.: 19,241 Region Association: Northern California |
Oh, I also added a small access opening... (IMG:style_emoticons/default/happy11.gif)
Attached thumbnail(s) 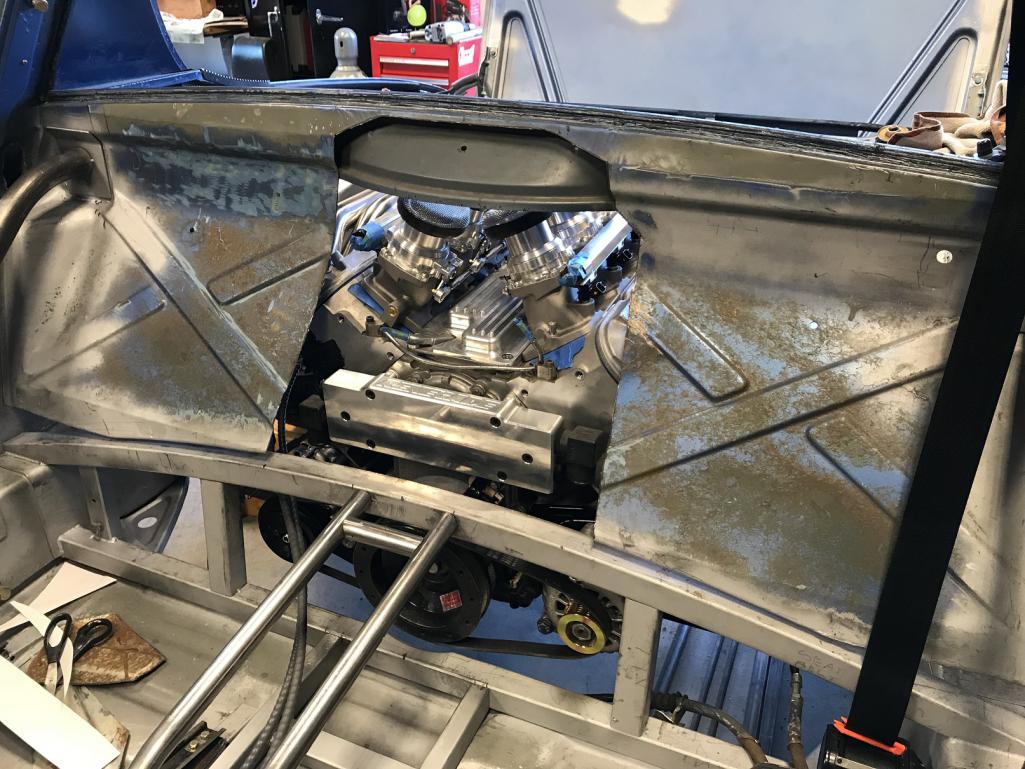
|
|
|
|
| Cracker |
Dec 17 2017, 10:15 PM
Post
#825
|
|
Advanced Member Group: Members Posts: 2,148 Joined: 2-February 10 From: Atlanta (area) Member No.: 11,316 Region Association: South East States |
It did to occur to me until peering through the access panel but I have had issues with those plastic manifold connectors leaking. I'd suggest moving to proper braided lines...sorry for the late notice. Here is mine...its not pretty but its as tidy as I pull off. Come to think of it...the picture below IS your engine! (IMG:style_emoticons/default/biggrin.gif)
Tony 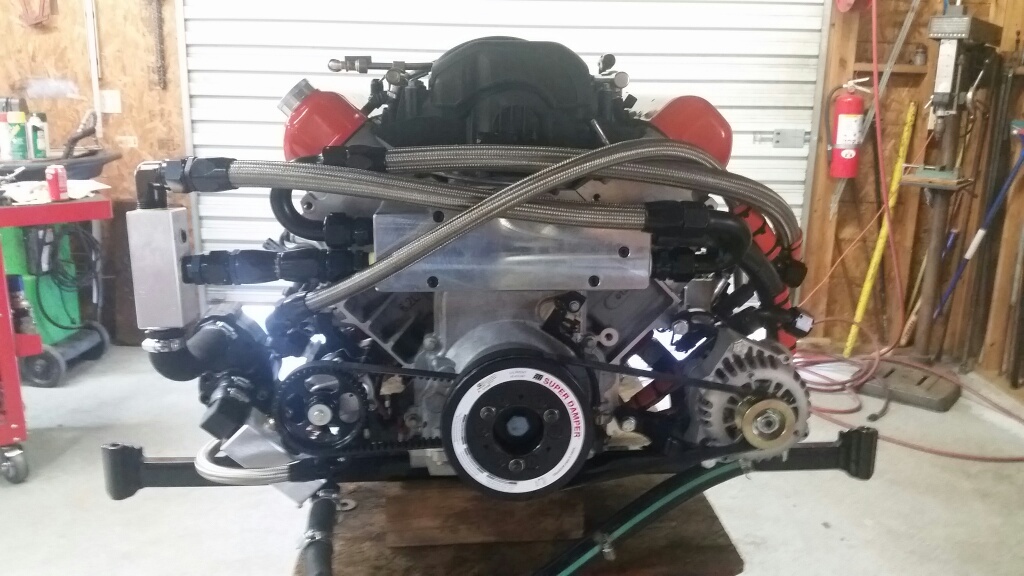 |
|
|
|
| Mueller |
Dec 17 2017, 10:18 PM
Post
#826
|
|
914 Freak! Group: Members Posts: 17,155 Joined: 4-January 03 From: Antioch, CA Member No.: 87 Region Association: None |
That is one plain looking water distribution block, it needs some 3D profiling or pockets or something to match the rest of the motor. (IMG:style_emoticons/default/smile.gif)
|
|
|
|
| tygaboy |
Dec 17 2017, 10:45 PM
Post
#827
|
|
914 Guru Group: Members Posts: 5,818 Joined: 6-October 15 From: Petaluma, CA Member No.: 19,241 Region Association: Northern California |
QUOTE(Mueller @ Dec 17 2017, 08:18 PM)  That is one plain looking water distribution block, it needs some 3D profiling or pockets or something to match the rest of the motor. (IMG:style_emoticons/default/smile.gif) If only I knew someone with a CNC machine... (IMG:style_emoticons/default/poke.gif) |
|
|
|
| Andyrew |
Dec 18 2017, 09:35 AM
Post
#828
|
|
Spooling.... Please wait Group: Members Posts: 13,380 Joined: 20-January 03 From: Riverbank, Ca Member No.: 172 Region Association: Northern California |
QUOTE(tygaboy @ Dec 17 2017, 07:34 PM) Here's the planned location for the e-brake handle. Forward of stock and with no "cut out" but it'll do just fine. And yes, it's rotated forward so once it's welded in, the handle won't touch the floor. I'll have to lengthen the connection to reach the e-brake cables but that shouldn't be too big a deal. Will you be able to grab that with your back against the seat? |
|
|
|
| Andyrew |
Dec 18 2017, 09:37 AM
Post
#829
|
|
Spooling.... Please wait Group: Members Posts: 13,380 Joined: 20-January 03 From: Riverbank, Ca Member No.: 172 Region Association: Northern California |
QUOTE(tygaboy @ Dec 17 2017, 08:45 PM) QUOTE(Mueller @ Dec 17 2017, 08:18 PM) That is one plain looking water distribution block, it needs some 3D profiling or pockets or something to match the rest of the motor. (IMG:style_emoticons/default/smile.gif) If only I knew someone with a CNC machine... (IMG:style_emoticons/default/poke.gif) Or laser etching (IMG:style_emoticons/default/biggrin.gif) (again, Mueller) |
|
|
|
| 914forme |
Dec 18 2017, 08:28 PM
Post
#830
|
|
Times a wastin', get wrenchin'! Group: Members Posts: 3,899 Joined: 24-July 04 From: Dayton, Ohio Member No.: 2,388 Region Association: None |
(IMG:style_emoticons/default/poke.gif) stock hand brake (IMG:style_emoticons/default/confused24.gif) who authorized that (IMG:style_emoticons/default/lol-2.gif)
|
|
|
|
| tygaboy |
Dec 19 2017, 08:38 PM
Post
#831
|
|
914 Guru Group: Members Posts: 5,818 Joined: 6-October 15 From: Petaluma, CA Member No.: 19,241 Region Association: Northern California |
More progress on the "unauthorized" stock e-brake set up... (IMG:style_emoticons/default/shades.gif)
Next step is to braze them in, just like factory. Attached thumbnail(s) 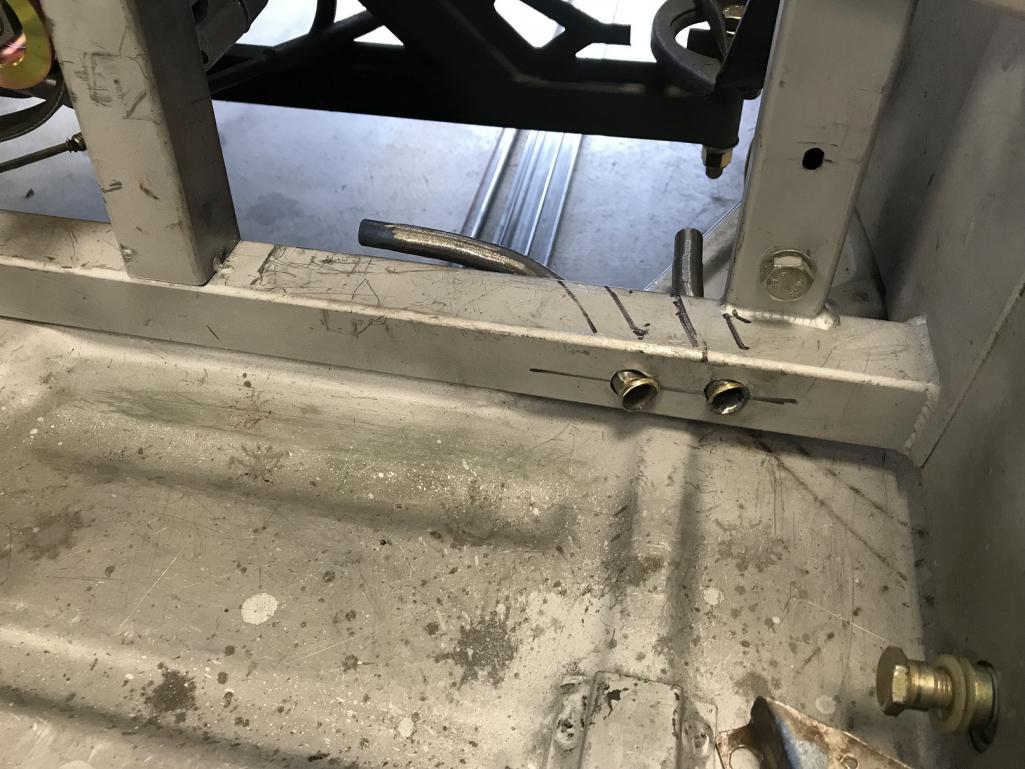
|
|
|
|
| tygaboy |
Dec 19 2017, 08:40 PM
Post
#832
|
|
914 Guru Group: Members Posts: 5,818 Joined: 6-October 15 From: Petaluma, CA Member No.: 19,241 Region Association: Northern California |
Then it was on to fab work related to the "inspection cover" area. The first step is to reinforce the area I removed.
So, out comes the roll bender and some 1/8 steel. Attached thumbnail(s) 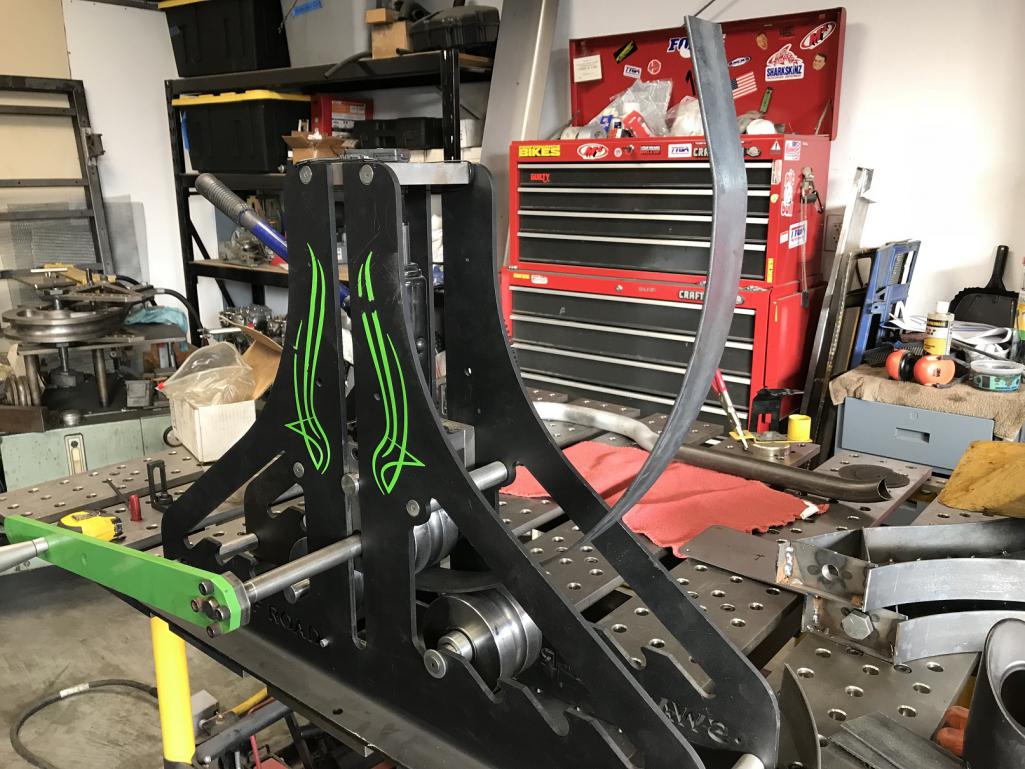
|
|
|
|
| tygaboy |
Dec 19 2017, 08:41 PM
Post
#833
|
|
914 Guru Group: Members Posts: 5,818 Joined: 6-October 15 From: Petaluma, CA Member No.: 19,241 Region Association: Northern California |
In place with some holes for rosette welding to the lip of the rear part of the fire wall.
Attached thumbnail(s) 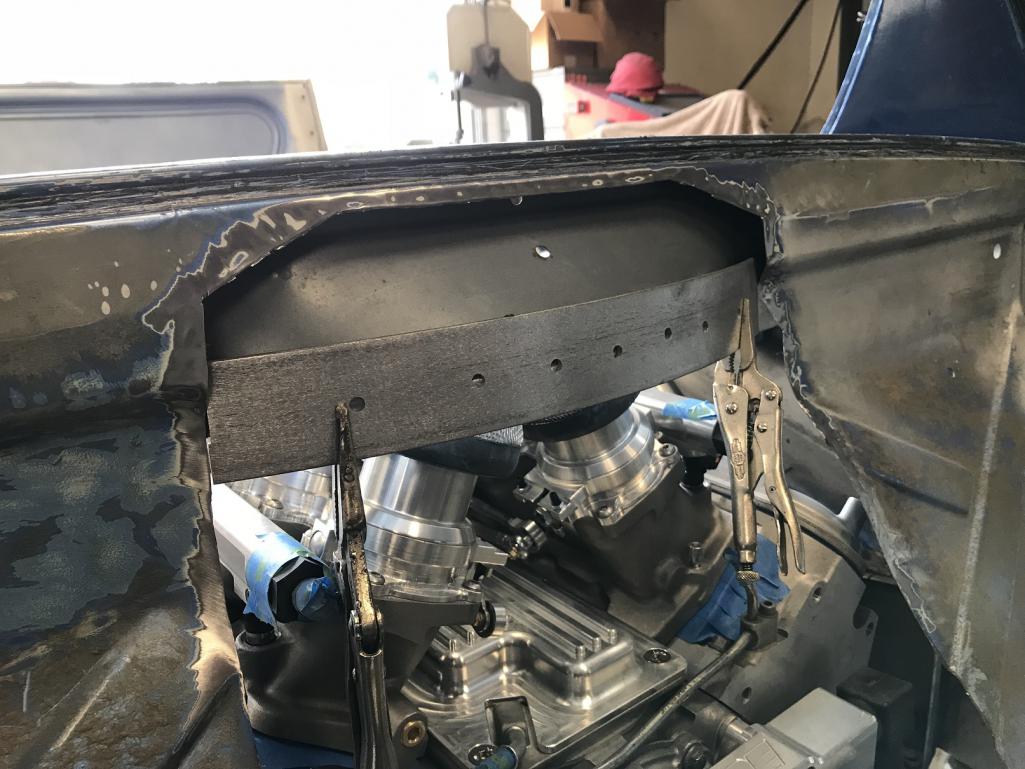
|
|
|
|
| bbrock |
Dec 19 2017, 10:00 PM
Post
#834
|
|
914 Guru Group: Members Posts: 5,269 Joined: 17-February 17 From: Montana Member No.: 20,845 Region Association: Rocky Mountains |
You have the coolest toys. (IMG:style_emoticons/default/aktion035.gif)
|
|
|
|
| jd74914 |
Dec 20 2017, 09:40 AM
Post
#835
|
|
Its alive Group: Members Posts: 4,876 Joined: 16-February 04 From: CT Member No.: 1,659 Region Association: North East States |
QUOTE(tygaboy @ Dec 19 2017, 09:38 PM) Next step is to braze them in, just like factory. Very cool! Have you ever used the Blue Devil SILBRZ rod? It's a silicon bronze TIG brazing rod-not too expensive and works really well if you don't want to drag out the oxy torches and flux. (IMG:style_emoticons/default/smile.gif) |
|
|
|
| tygaboy |
Dec 20 2017, 10:18 AM
Post
#836
|
|
914 Guru Group: Members Posts: 5,818 Joined: 6-October 15 From: Petaluma, CA Member No.: 19,241 Region Association: Northern California |
QUOTE(jd74914 @ Dec 20 2017, 07:40 AM) QUOTE(tygaboy @ Dec 19 2017, 09:38 PM) Next step is to braze them in, just like factory. Very cool! Have you ever used the Blue Devil SILBRZ rod? It's a silicon bronze TIG brazing rod-not too expensive and works really well if you don't want to drag out the oxy torches and flux. (IMG:style_emoticons/default/smile.gif) Yep, just got some bronze rod so will give that a go. Pics soon! |
|
|
|
| tygaboy |
Dec 22 2017, 05:55 PM
Post
#837
|
|
914 Guru Group: Members Posts: 5,818 Joined: 6-October 15 From: Petaluma, CA Member No.: 19,241 Region Association: Northern California |
First reinforcement piece in place. Let's call this one the "inner" reinforcement...
Attached thumbnail(s) 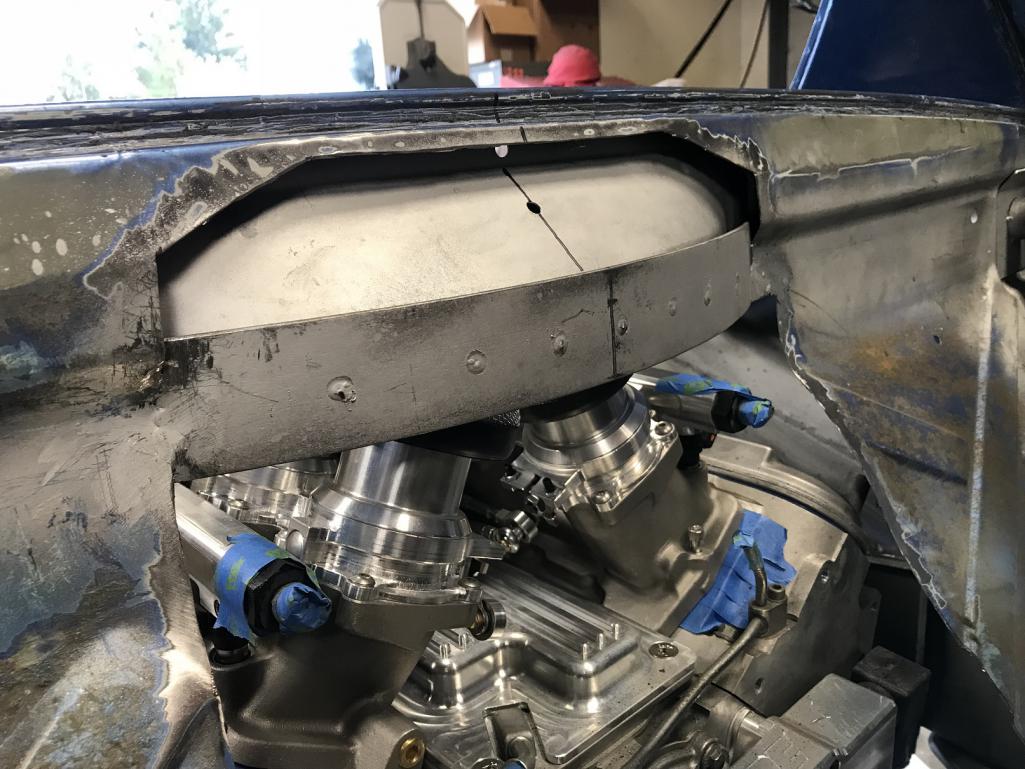
|
|
|
|
| tygaboy |
Dec 22 2017, 06:06 PM
Post
#838
|
|
914 Guru Group: Members Posts: 5,818 Joined: 6-October 15 From: Petaluma, CA Member No.: 19,241 Region Association: Northern California |
...because here comes the "outer" reinforcement. I want this outer piece to be angled at a particular angle so I can use it as a take off for the removable inspection panel.
So, I started with a paper template. The fun part is to make a flat plate end up at angle but have straight edges, the paper pattern needed to be a curve. Plus this needs to be roll bent... More fiddly, fiddly. There was only a little cursing when I screwed up my first attempt. (IMG:style_emoticons/default/headbang.gif) But with more, um "experience", Attempt #2 worked! Attached thumbnail(s) 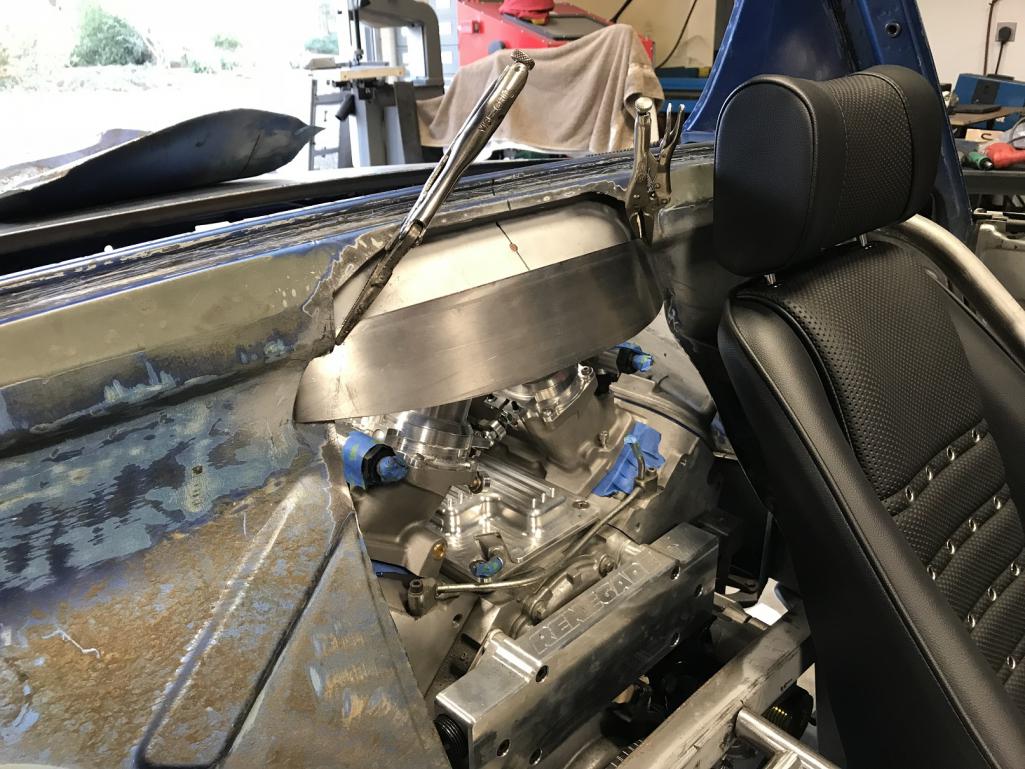 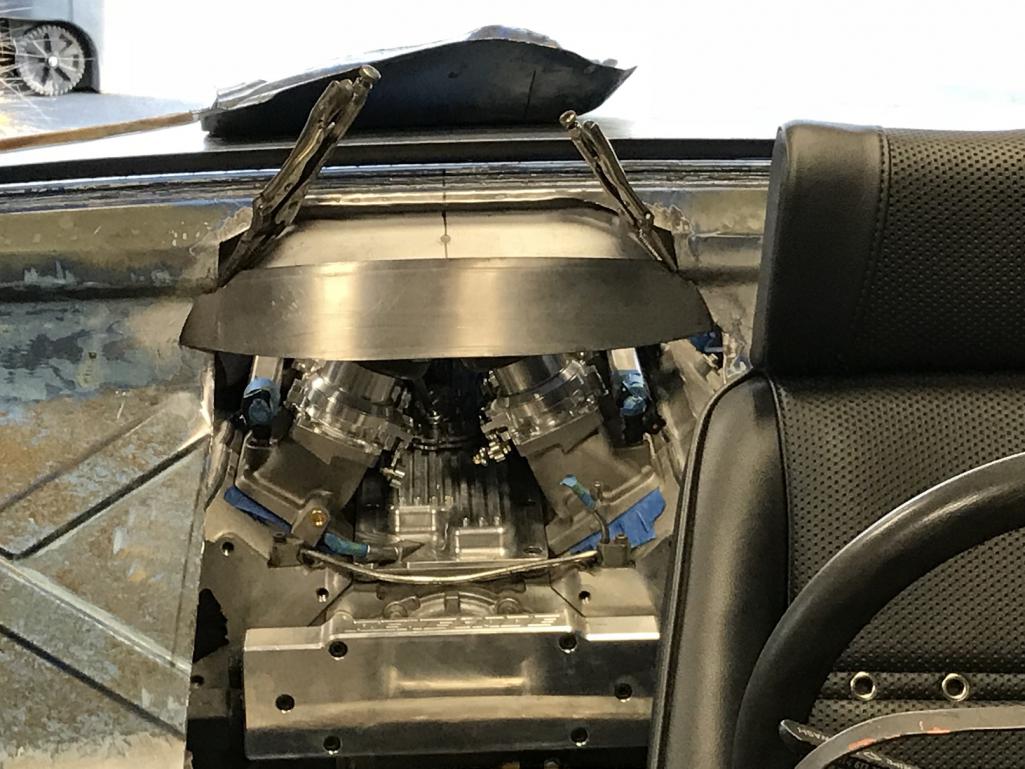
|
|
|
|
| tygaboy |
Dec 22 2017, 06:08 PM
Post
#839
|
|
914 Guru Group: Members Posts: 5,818 Joined: 6-October 15 From: Petaluma, CA Member No.: 19,241 Region Association: Northern California |
And the angle I was after?
The measuring/template making worked! (IMG:style_emoticons/default/aktion035.gif) (the gap you see is because the vice grips pull it ever so slightly out of position...) The angle matches the seat back. Silly, I know but there you go... The real reason I need that angle, or something close to it, is to get the firewall forward enough to clear the fuel lines/fittings. Attached thumbnail(s) 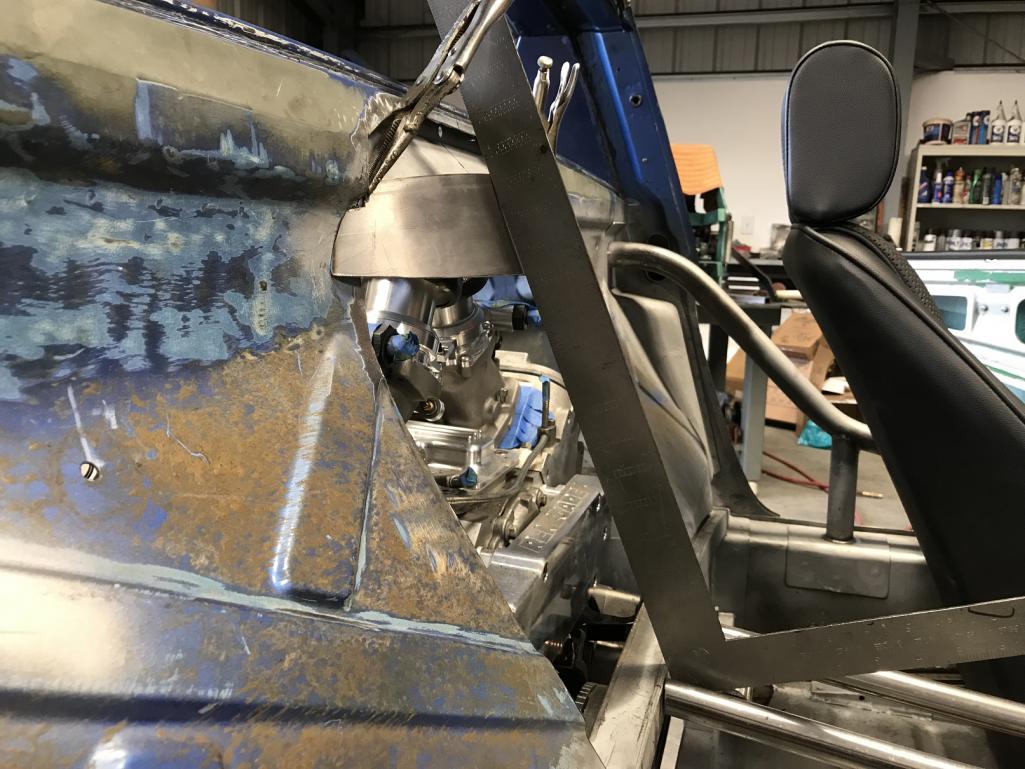
|
|
|
|
| tygaboy |
Dec 22 2017, 06:12 PM
Post
#840
|
|
914 Guru Group: Members Posts: 5,818 Joined: 6-October 15 From: Petaluma, CA Member No.: 19,241 Region Association: Northern California |
And once this is all welded in, I'll redo the cross bar.
I ended up not liking how much the initial design protruded into the interior space. This is much cleaner. And I forgot to mention, I'll plate between the inner and outer reinforcement pieces to tie the whole deal together. In all, it'll be plenty strong for the RaceRod. Attached thumbnail(s) 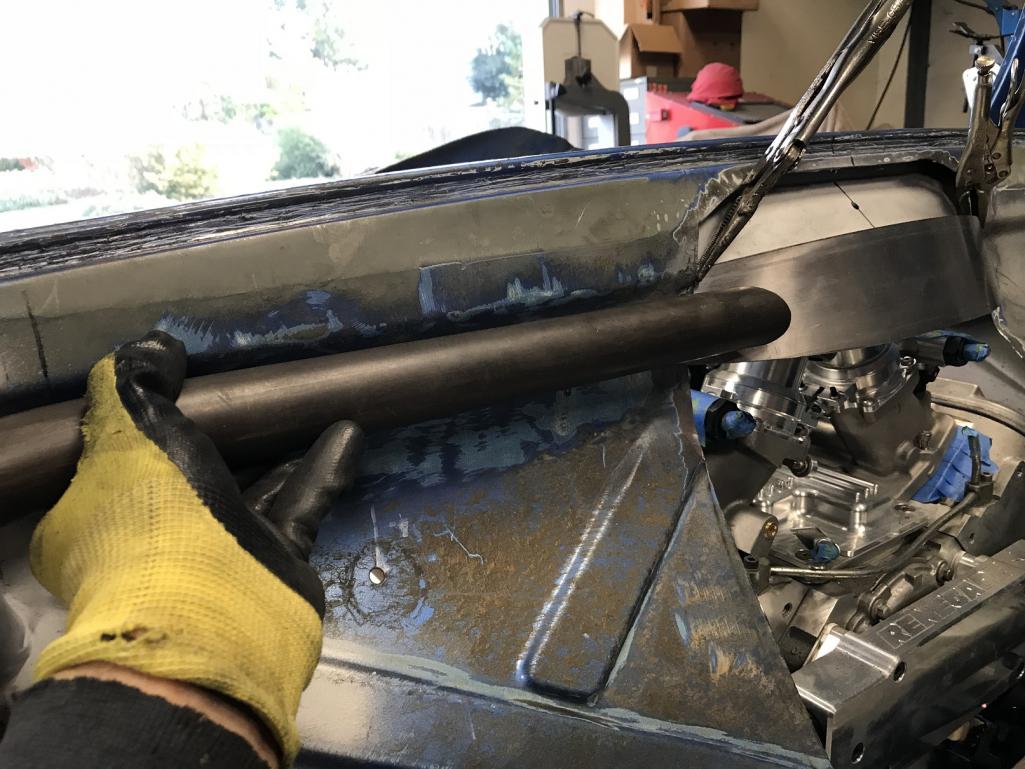
|
|
|
|
|
2 User(s) are reading this topic (2 Guests and 0 Anonymous Users)
0 Members:

|
Lo-Fi Version | Time is now: 29th April 2026 - 01:07 AM |
Invision Power Board
v9.1.4 © 2026 IPS, Inc.