|
|
|
Porsche, and the Porsche crest are registered trademarks of Dr. Ing. h.c. F. Porsche AG.
This site is not affiliated with Porsche in any way. Its only purpose is to provide an online forum for car enthusiasts. All other trademarks are property of their respective owners. |
|
|

  |

| tygaboy |
 Feb 19 2018, 03:57 PM Feb 19 2018, 03:57 PM
Post
#901
|
|
914 Guru  Group: Members Posts: 5,818 Joined: 6-October 15 From: Petaluma, CA Member No.: 19,241 Region Association: Northern California |
After a fair bit of head scratching on the design, I've now (mostly?) thought through the " how should I actually construct the fire wall?" so today I got started on the first of the "real" pieces.
My plan is to build the lower, vertical wall, then frame the critical edge joints to be sure I have fixed points from which I can generate accurate measurements. First I measured and determined the arch and cut the blank for the lower vertical. Plasma table to the rescue! Attached thumbnail(s) 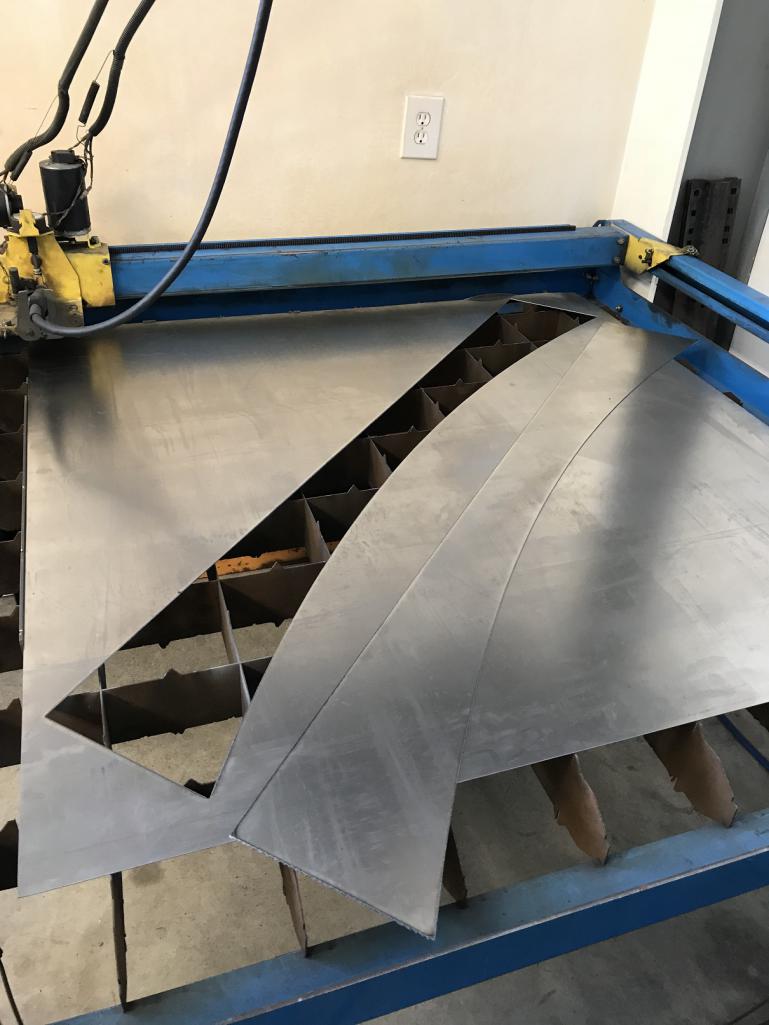
|
   |

 
|
| tygaboy |
Feb 19 2018, 04:02 PM
Post
#902
|
|
914 Guru Group: Members Posts: 5,818 Joined: 6-October 15 From: Petaluma, CA Member No.: 19,241 Region Association: Northern California |
I want to spot weld the vertical lower to the arched cross bar so I need to make a flange across the lower, curved edge.
I set up an appropriate set of dies in the bead roller and in 5 or 6 passes, I have my roughed in flange. Note that when you tip a flange on an inside curve like this, you end up with a flange where the outer most edge is shorter than the rest of the flange, so as the flange edge tips over, that short side causes the piece to curve. These are the sorts of moments where I start to wonder if this will be another "practice piece". (IMG:style_emoticons/default/lol-2.gif) Attached thumbnail(s) 
|
|
|
|
| tygaboy |
Feb 19 2018, 04:07 PM
Post
#903
|
|
914 Guru Group: Members Posts: 5,818 Joined: 6-October 15 From: Petaluma, CA Member No.: 19,241 Region Association: Northern California |
Next, it's off to the shrinker/stretcher. A bit of stretching on the flange (and shrinking when I go to far!) and... She's FLAT! (IMG:style_emoticons/default/cheer.gif)
I still have to tune up the flange edge to get it a bit more crisp but it's looking like this piece will end up in the car! Attached thumbnail(s) 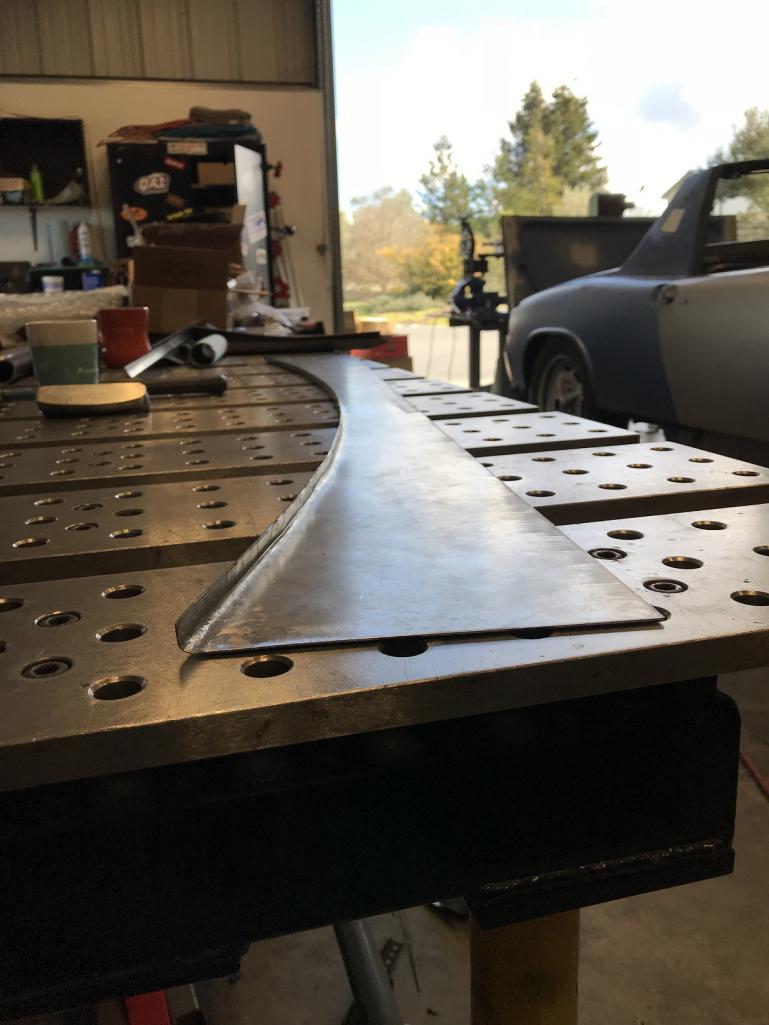
|
|
|
|
| tygaboy |
Feb 19 2018, 04:09 PM
Post
#904
|
|
914 Guru Group: Members Posts: 5,818 Joined: 6-October 15 From: Petaluma, CA Member No.: 19,241 Region Association: Northern California |
There's still a bunch of trimming and fitting (and you can see why I want that flange edge to be a bit more crisp) but I couldn't resist a very loose test fit.
At this point, I'm happy with how it's coming along. Attached thumbnail(s) 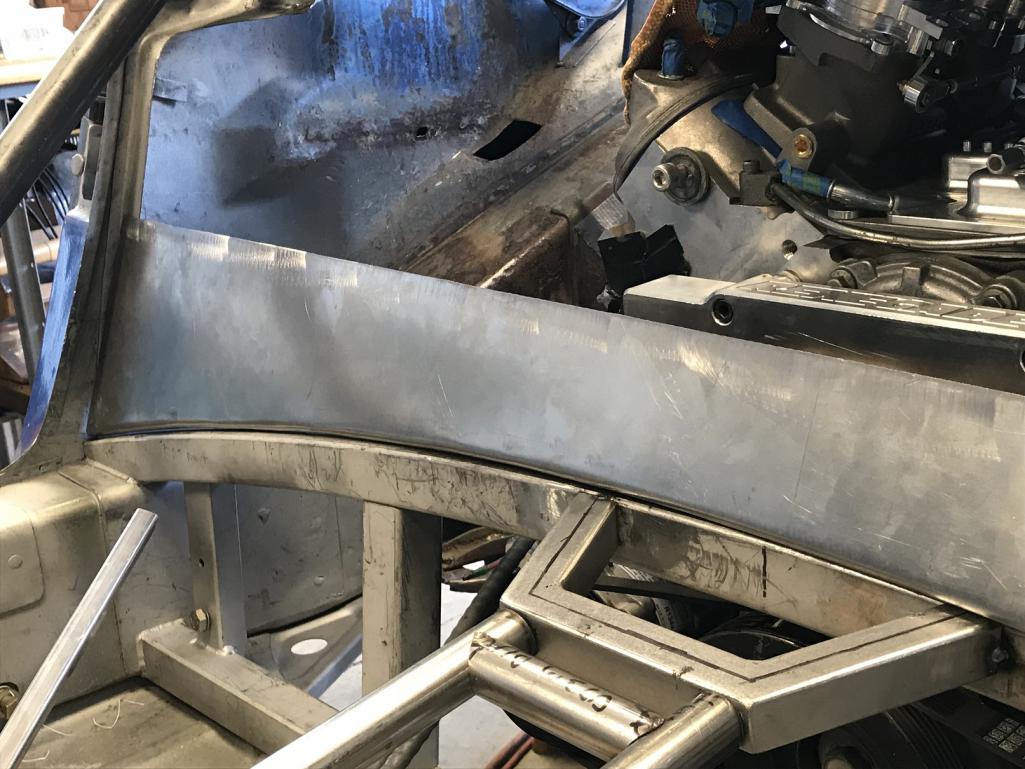
|
|
|
|
| bbrock |
Feb 19 2018, 05:11 PM
Post
#905
|
|
914 Guru Group: Members Posts: 5,269 Joined: 17-February 17 From: Montana Member No.: 20,845 Region Association: Rocky Mountains |
Whoa. Nice fit! (IMG:style_emoticons/default/pray.gif) I know what you mean about shrinking when you stretch too far... or when you meant to stretch but shrink but shoved the piece in the stretcher by mistake. Not that I've ever done that... (IMG:style_emoticons/default/unsure.gif)
|
|
|
|
| tygaboy |
Feb 25 2018, 02:25 PM
Post
#906
|
|
914 Guru Group: Members Posts: 5,818 Joined: 6-October 15 From: Petaluma, CA Member No.: 19,241 Region Association: Northern California |
Spent all day yesterday reorganizing the shop. I have a ton more room! I can use most everything without having to move anything. Much better...
So today was back to the lower fire wall piece. I used a different set of dies on the bead roller and got a much improved, nice crisp edge. The fit is near perfect. Very happy with this! Then it was trimmed to a rough fit so I could locate a bead that the upper pieces will land on. I didn't want "exposed edge" joints so the bead offset will give things what I think will be a more finished look. And yes, I'll be cutting the center section out and routing it forward to form the ledge for the access cover. But I wanted to do the bead work across the entire piece to ensure symmetry. Onward... Attached thumbnail(s) 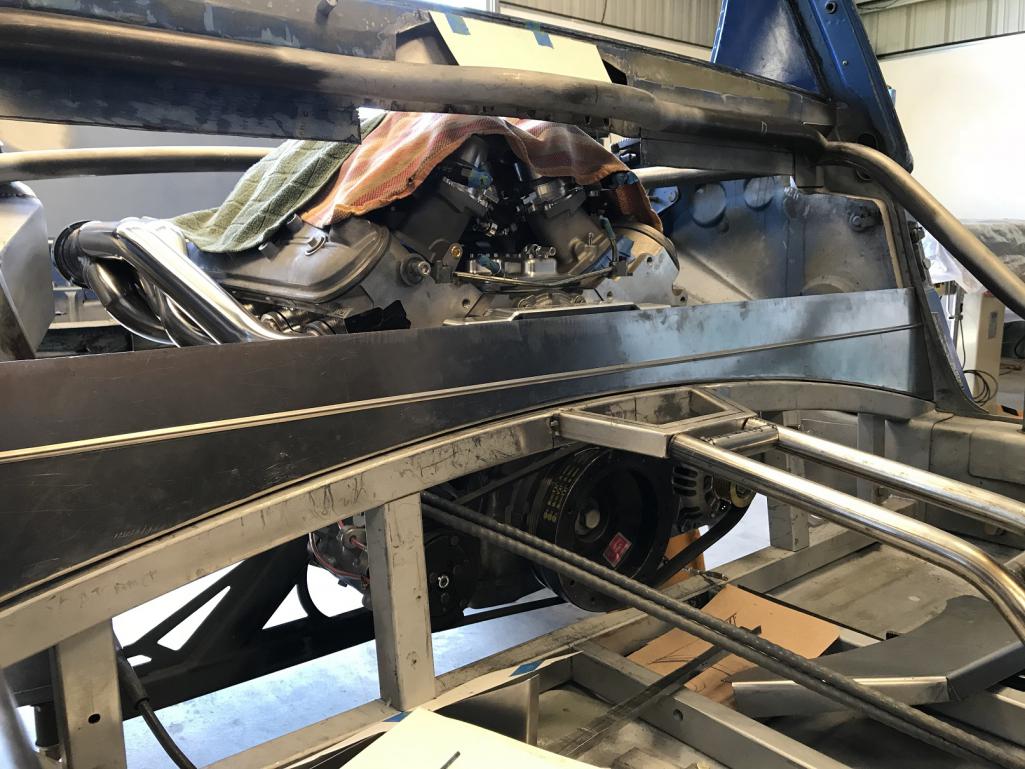
|
|
|
|
| Mueller |
Feb 25 2018, 03:10 PM
Post
#907
|
|
914 Freak! Group: Members Posts: 17,155 Joined: 4-January 03 From: Antioch, CA Member No.: 87 Region Association: None |
I like that version, looks great
|
|
|
|
| tygaboy |
Feb 26 2018, 01:37 PM
Post
#908
|
|
914 Guru Group: Members Posts: 5,818 Joined: 6-October 15 From: Petaluma, CA Member No.: 19,241 Region Association: Northern California |
QUOTE(Mueller @ Feb 25 2018, 01:10 PM)  I like that version, looks great Thanks Mike. And just to be clear, that's the same piece, I just "tuned up" the flange and added the bead. |
|
|
|
| tygaboy |
Feb 26 2018, 01:38 PM
Post
#909
|
|
914 Guru Group: Members Posts: 5,818 Joined: 6-October 15 From: Petaluma, CA Member No.: 19,241 Region Association: Northern California |
An exhaust system for an LS 914. Some assembly required..? (IMG:style_emoticons/default/idea.gif)
The bends are mild steel. I want to fit everything up to be sure it all works as desired, then I'll redo it all in 304 stainless. Attached thumbnail(s) 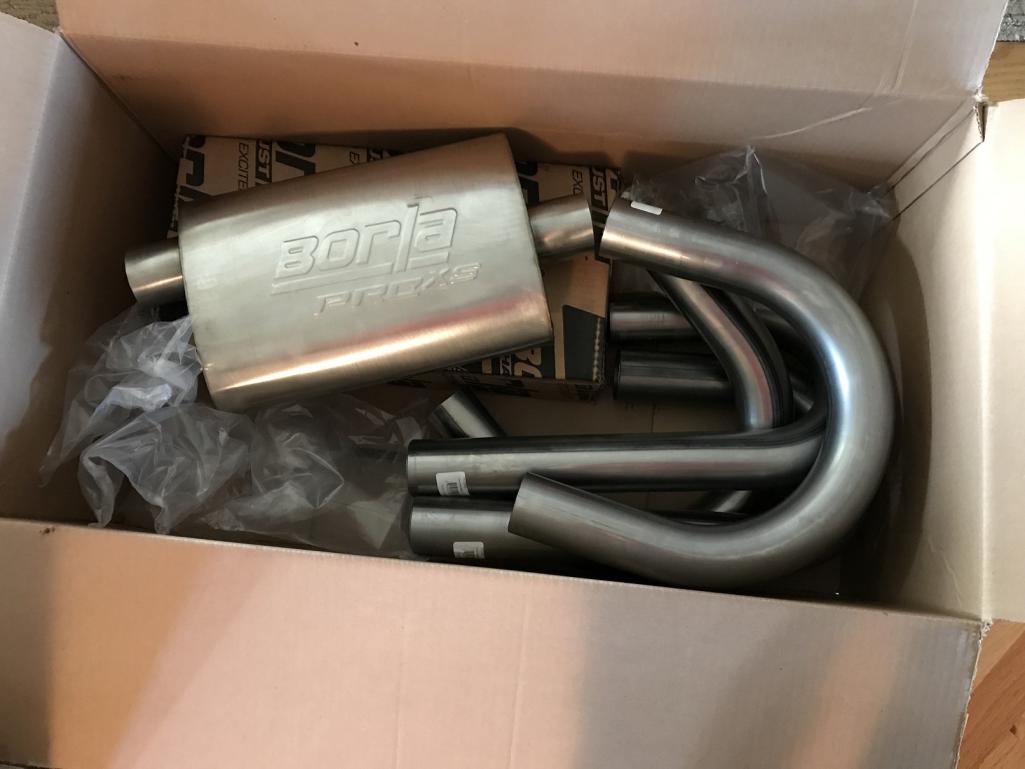
|
|
|
|
| Andyrew |
Feb 26 2018, 02:29 PM
Post
#910
|
|
Spooling.... Please wait Group: Members Posts: 13,380 Joined: 20-January 03 From: Riverbank, Ca Member No.: 172 Region Association: Northern California |
Redo it?
You are one strange cat! I found some good stainless 3" mandrel J pipes on ebay. I found it really easy to weld with the mig and some stainless wire. |
|
|
|
| Mueller |
Feb 26 2018, 02:39 PM
Post
#911
|
|
914 Freak! Group: Members Posts: 17,155 Joined: 4-January 03 From: Antioch, CA Member No.: 87 Region Association: None |
QUOTE(Andyrew @ Feb 26 2018, 12:29 PM) Redo it? You are one strange cat! I found some good stainless 3" mandrel J pipes on ebay. I found it really easy to weld with the mig and some stainless wire. No back purge? |
|
|
|
| tygaboy |
Feb 26 2018, 02:47 PM
Post
#912
|
|
914 Guru Group: Members Posts: 5,818 Joined: 6-October 15 From: Petaluma, CA Member No.: 19,241 Region Association: Northern California |
QUOTE(Andyrew @ Feb 26 2018, 12:29 PM) Redo it? You are one strange cat! Andrew - Meow! Yep, I've proved to myself I rarely like "version 1" of what I build so... When are you coming over to bend up a roll bar? (IMG:style_emoticons/default/poke.gif) And Mike - Yes, it'll all be back purged during final welding. |
|
|
|
| Andyrew |
Feb 26 2018, 03:37 PM
Post
#913
|
|
Spooling.... Please wait Group: Members Posts: 13,380 Joined: 20-January 03 From: Riverbank, Ca Member No.: 172 Region Association: Northern California |
QUOTE(Mueller @ Feb 26 2018, 12:39 PM) QUOTE(Andyrew @ Feb 26 2018, 12:29 PM) Redo it? You are one strange cat! I found some good stainless 3" mandrel J pipes on ebay. I found it really easy to weld with the mig and some stainless wire. No back purge? I didnt back purge it at all and had no issues. I have some welds about 6" from my turbo that havent cracked and the stainless has already rainbowed. Is it medical grade welds? No. But it seems really strong. It welded JUST like standard steel. Lemme see if I can find a pic. |
|
|
|
| Andyrew |
Feb 26 2018, 03:43 PM
Post
#914
|
|
Spooling.... Please wait Group: Members Posts: 13,380 Joined: 20-January 03 From: Riverbank, Ca Member No.: 172 Region Association: Northern California |
(IMG:http://www.914world.com/bbs2/uploads/post-172-1459193534_thumb.jpg)
About 1ft from the turbo, Stainless flange on stainless downpipe (IMG:http://www.914world.com/bbs2/uploads/post-172-1459193267_thumb.jpg) Bunch of these water pipes. All stainless. (IMG:http://www.914world.com/bbs2/uploads/post-172-1458019575_thumb.jpg) (IMG:http://www.914world.com/bbs2/uploads/post-172-1458019532_thumb.jpg) 5 welds here, No issues I would confidently do this again the exact same way. |
|
|
|
| mb911 |
Feb 26 2018, 05:21 PM
Post
#915
|
|
914 Guru Group: Members Posts: 7,753 Joined: 2-January 09 From: Burlington wi Member No.: 9,892 Region Association: Upper MidWest |
Chris looking good..
|
|
|
|
| Dion |
Feb 26 2018, 06:04 PM
Post
#916
|
|
RN Group: Members Posts: 2,926 Joined: 16-September 04 From: Audubon,PA Member No.: 2,766 Region Association: MidAtlantic Region |
QUOTE(tygaboy @ Feb 17 2018, 03:42 PM) This is the current thinking re: the replacement firewall design. The center section (below the cross bar) will be removable. I get all the clearance I need for fuel lines, etc, it's easy to service things that would otherwise be a real pain to get to. I'm still working on the design above the cross bar but I really like the "mini-tub" look that it has going on behind the door bar. (Hey, it is the RaceRod, so I figure it's OK... (IMG:style_emoticons/default/happy11.gif) ) Now, can I duplicate all this in metal and have it look the way I want? (IMG:style_emoticons/default/idea.gif) Wish me luck. Just so cool. It looks evil in a Darth Vader way. Heheh. I really like the way the creases in the center section flow down. Really nice Chris. Have you even determined a colour for this beast yet? |
|
|
|
| tygaboy |
Mar 4 2018, 05:42 PM
Post
#917
|
|
914 Guru Group: Members Posts: 5,818 Joined: 6-October 15 From: Petaluma, CA Member No.: 19,241 Region Association: Northern California |
This weekend was spent on design and practice:
Design: working out the details around how to build the fire wall. I didn't want the various panels to just butt up against each other in the corners, neither inside nor outside corners. Practice: working on the bender, bead roller and shrinker/stretcher to see if I could get the bead I wanted on both inside and outside corners. The good news is that I was able to get what I wanted! In some cases, it was using "mismatched" dies on the bead roller. For whatever reason, I ended up tackling what I figured was the harder one: Bead on an inside corner with a curve. Here it is! (IMG:style_emoticons/default/cheer.gif) Attached thumbnail(s) 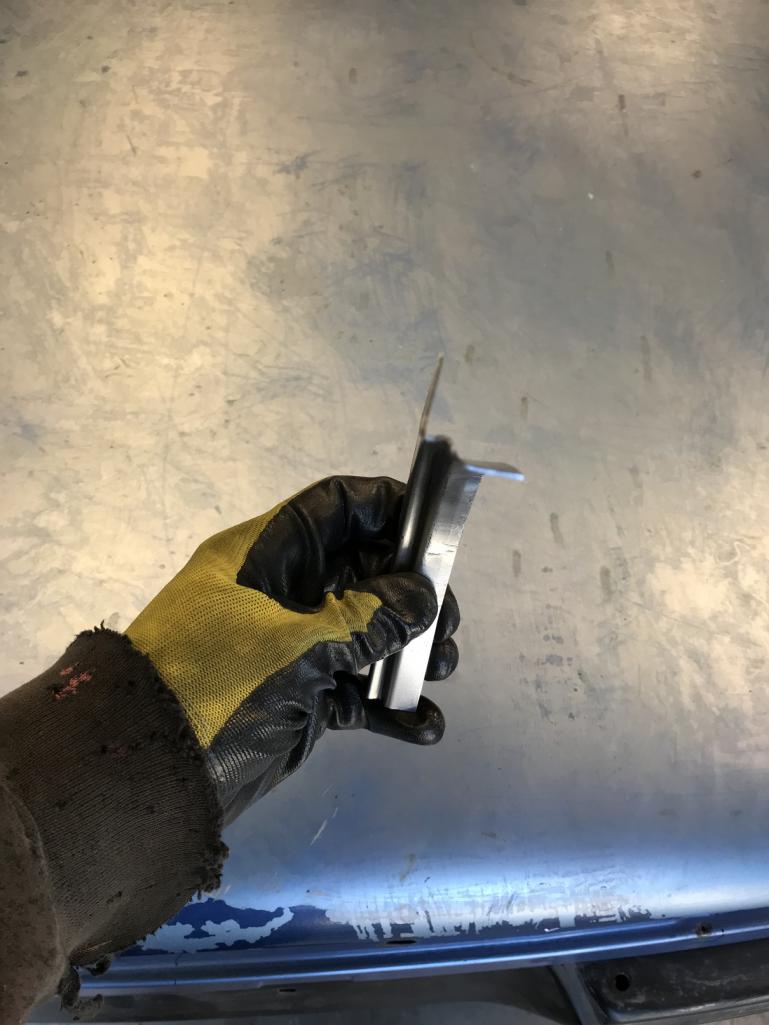
|
|
|
|
| tygaboy |
Mar 4 2018, 05:42 PM
Post
#918
|
|
914 Guru Group: Members Posts: 5,818 Joined: 6-October 15 From: Petaluma, CA Member No.: 19,241 Region Association: Northern California |
And again
Attached thumbnail(s) 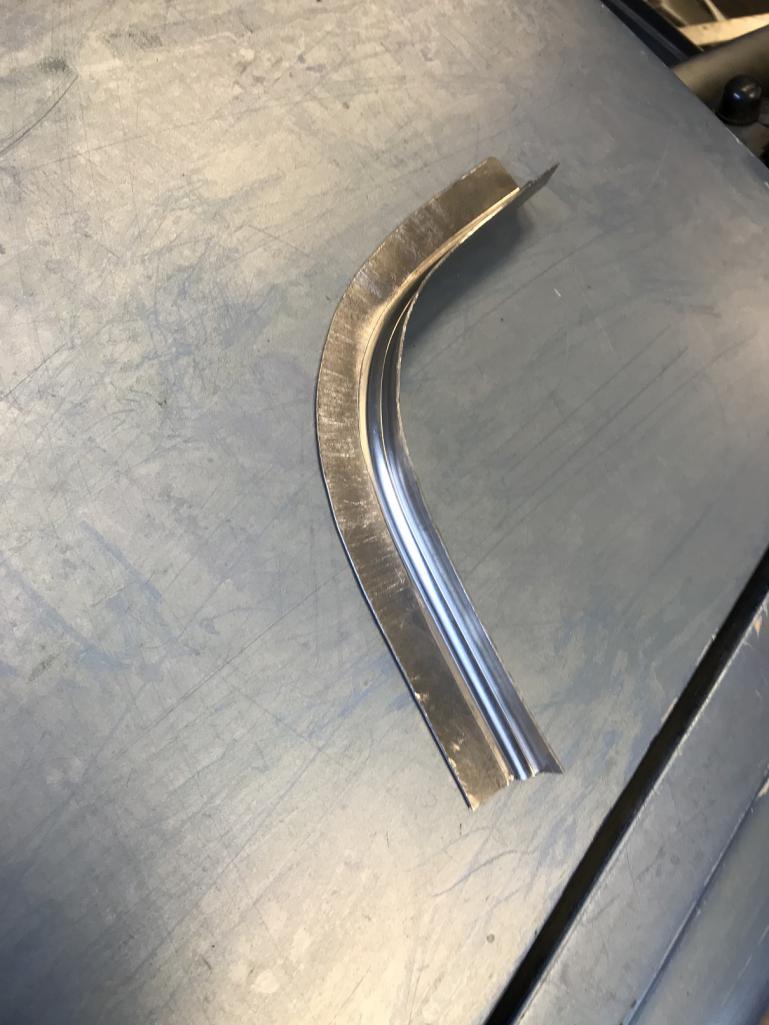
|
|
|
|
| tygaboy |
Mar 4 2018, 05:43 PM
Post
#919
|
|
914 Guru Group: Members Posts: 5,818 Joined: 6-October 15 From: Petaluma, CA Member No.: 19,241 Region Association: Northern California |
And here's how the corner will look with the panels.
I think this will look far more "complete" than panels that just terminate in/at the corners. Attached thumbnail(s) 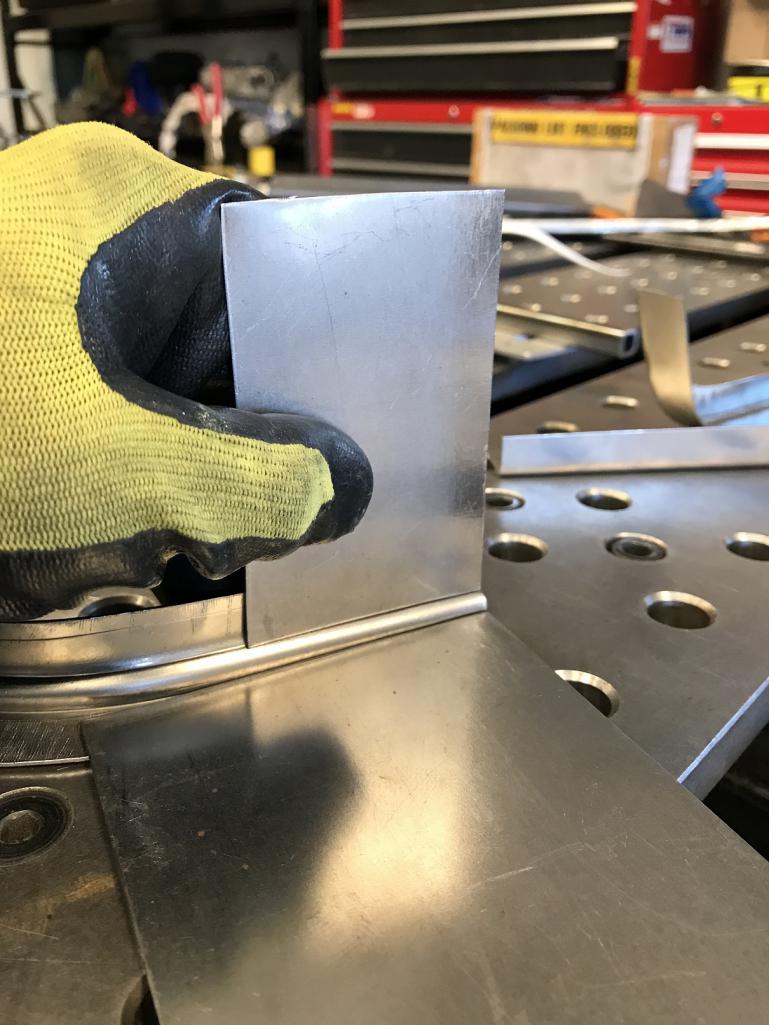
|
|
|
|
| tygaboy |
Mar 4 2018, 05:47 PM
Post
#920
|
|
914 Guru Group: Members Posts: 5,818 Joined: 6-October 15 From: Petaluma, CA Member No.: 19,241 Region Association: Northern California |
Then I went after what will become the flange that will be spot welded to the chassis under the top of the door bar. Here's the sorta test fit. No, I haven't yet removed all of the original firewall... this piece will replace what's left there now.
Hard to see, but its got a bead right at the edge that the panel will sit down into. The next pic makes it a bit more clear. Attached thumbnail(s) 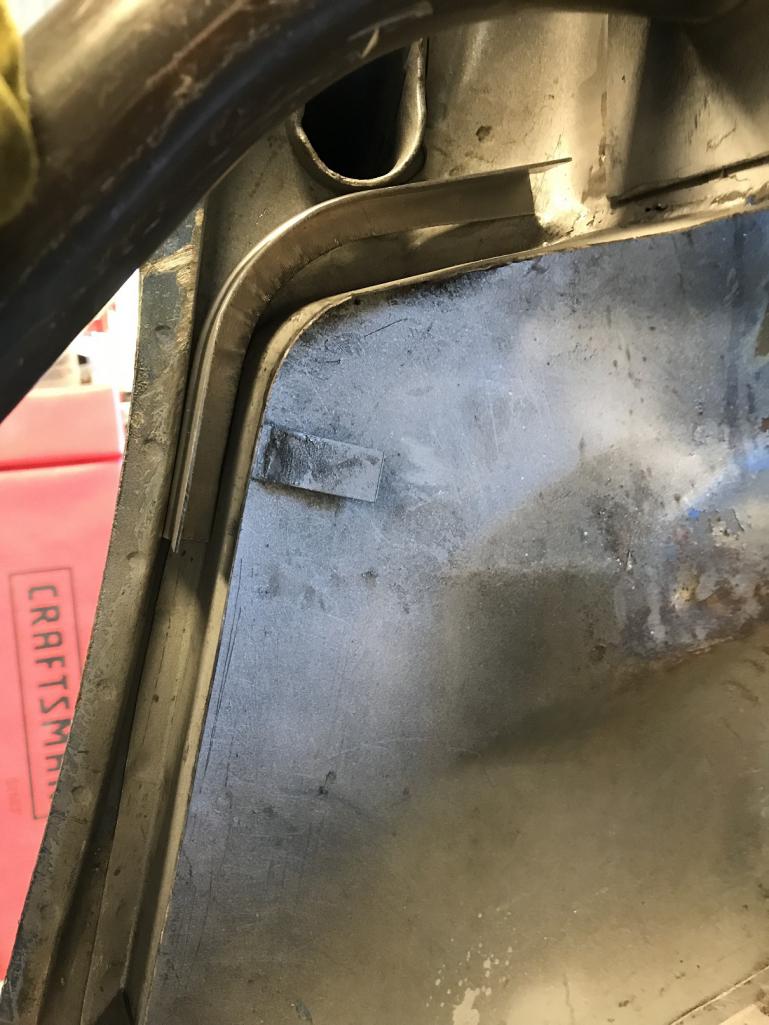
|
|
|
|
|
2 User(s) are reading this topic (2 Guests and 0 Anonymous Users)
0 Members:

|
Lo-Fi Version | Time is now: 29th April 2026 - 03:11 AM |
Invision Power Board
v9.1.4 © 2026 IPS, Inc.