|
|
|
Porsche, and the Porsche crest are registered trademarks of Dr. Ing. h.c. F. Porsche AG.
This site is not affiliated with Porsche in any way. Its only purpose is to provide an online forum for car enthusiasts. All other trademarks are property of their respective owners. |
|
|

  |

| tygaboy |
 Mar 4 2018, 05:50 PM Mar 4 2018, 05:50 PM
Post
#921
|
|
914 Guru  Group: Members Posts: 5,818 Joined: 6-October 15 From: Petaluma, CA Member No.: 19,241 Region Association: Northern California |
Here's that same piece and the initial plan for how it will intersect with the base panel that sits on the curved cross bar, and how the firewall panel will sit inside the beads.
So far, so good. I'm happy with how this design is looking. Just lots of fabbing yet to do. Attached thumbnail(s) 
|
   |

 
|
| tygaboy |
Mar 4 2018, 05:52 PM
Post
#922
|
|
914 Guru Group: Members Posts: 5,818 Joined: 6-October 15 From: Petaluma, CA Member No.: 19,241 Region Association: Northern California |
Then it was on to tacking in the first part of the exhaust:
The reducers are on! Attached thumbnail(s) 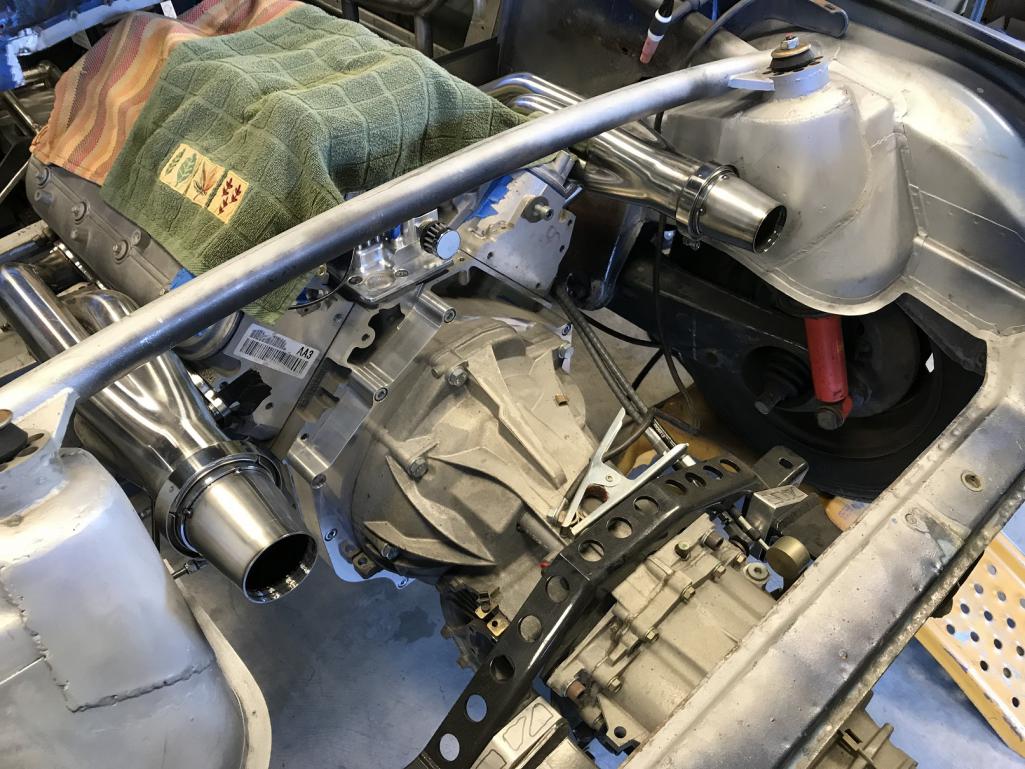
|
|
|
|
| tygaboy |
Mar 4 2018, 05:55 PM
Post
#923
|
|
914 Guru Group: Members Posts: 5,818 Joined: 6-October 15 From: Petaluma, CA Member No.: 19,241 Region Association: Northern California |
Then it was more practice. This time preparing for installing the flares.
The plan is butt welded TIG. This was playing with fusion welding vs using some filler. Then planished with hammer and dolly. Attached thumbnail(s) 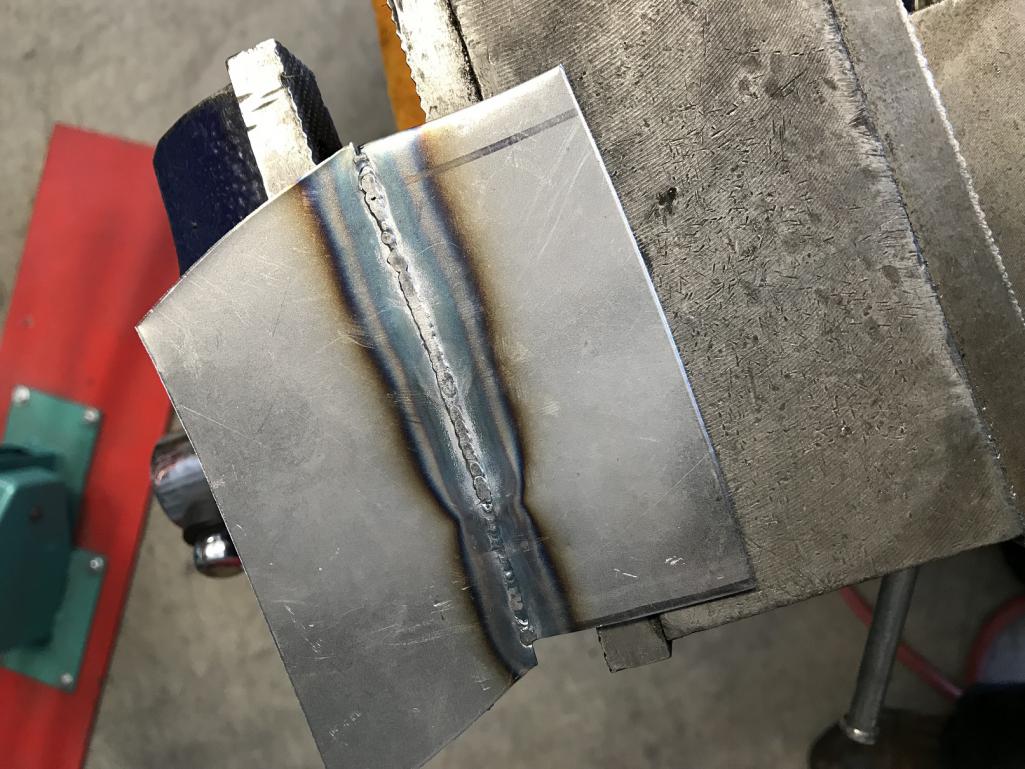
|
|
|
|
| tygaboy |
Mar 4 2018, 05:57 PM
Post
#924
|
|
914 Guru Group: Members Posts: 5,818 Joined: 6-October 15 From: Petaluma, CA Member No.: 19,241 Region Association: Northern California |
And tested to see how it'll look once metal finished. Again, I'm happy with this.
The trick will be to see how it translates from practice on the bench to actual flares on the car... Attached thumbnail(s) 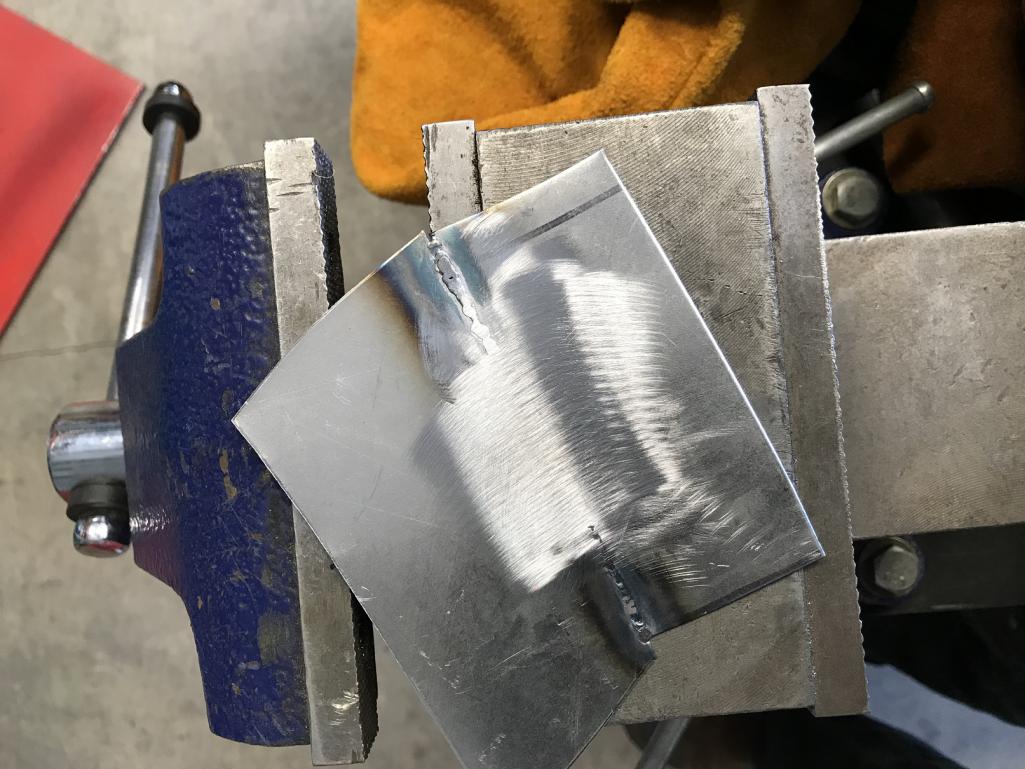
|
|
|
|
| 914forme |
Mar 4 2018, 06:17 PM
Post
#925
|
|
Times a wastin', get wrenchin'! Group: Members Posts: 3,899 Joined: 24-July 04 From: Dayton, Ohio Member No.: 2,388 Region Association: None |
Nice job on the fusion welding there. The only real trick is keeping the joint very tight. Bench to actual welds is always a guessing game. Best of luck.
|
|
|
|
| Mueller |
Mar 5 2018, 08:57 AM
Post
#926
|
|
914 Freak! Group: Members Posts: 17,155 Joined: 4-January 03 From: Antioch, CA Member No.: 87 Region Association: None |
That is just begging to be fired up just like that with the open pipes!
About 6 in the morning ought be the right time I say. |
|
|
|
| Andyrew |
Mar 5 2018, 09:33 AM
Post
#927
|
|
Spooling.... Please wait Group: Members Posts: 13,380 Joined: 20-January 03 From: Riverbank, Ca Member No.: 172 Region Association: Northern California |
That compound curve is gorgeous!
Welds look good with great clarity! I agree with Mike as well, How bout a video? (IMG:style_emoticons/default/smile.gif) |
|
|
|
| tygaboy |
Mar 9 2018, 07:18 PM
Post
#928
|
|
914 Guru Group: Members Posts: 5,818 Joined: 6-October 15 From: Petaluma, CA Member No.: 19,241 Region Association: Northern California |
I wish I could post that the engine runs! It's not even close... So back to the fab stuff:
The tedium of trying to, ahem, "engineer" the firewall. Not too exciting and I've been thinking I should stop posting until I have something "done". Tell me if I'm boring you... As I've gotten farther into the firewall, and having moved the drive train forward 1.5", I determined I want to step out the upper frame to buy a bit more clearance on the engine side. With this latest approach, and the upper piece you see here, with the seat all the way back, it'll juuuuuuust misses contacting the firewall. The upper piece is a working part that is being used to determine the various angles, etc. It'll end up being the official profile for the upper frame. Learning as one goes is fun, if time consuming. Things like learning how much to over bend a flange when you know you're going to add a bead that ends up "unbending" it. But I'm getting better at it. I'd REALLY like to get part of this put in this weekend. Fingers crossed. Attached thumbnail(s) 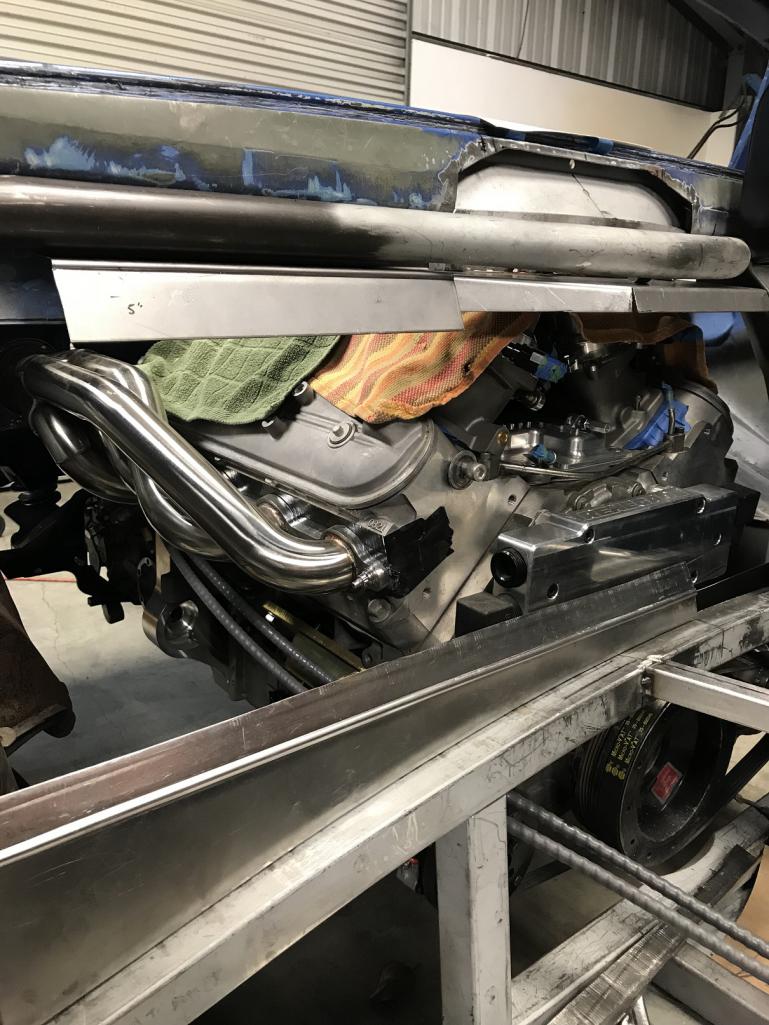
|
|
|
|
| ChrisFoley |
Mar 10 2018, 12:27 PM
Post
#929
|
|
I am Tangerine Racing Group: Members Posts: 8,019 Joined: 29-January 03 From: Bolton, CT Member No.: 209 Region Association: None |
QUOTE(tygaboy @ Mar 4 2018, 07:55 PM)  This was playing with fusion welding vs using some filler. I nearly always prefer to use a little filler wire. The deoxidizers in the filler alloy improve the quality of the weld by reducing the likelihood of porosity. Sometimes .045" TIG wire is too big so I cut pieces of MIG wire and straighten them as best I can. |
|
|
|
| tygaboy |
Mar 10 2018, 03:25 PM
Post
#930
|
|
914 Guru Group: Members Posts: 5,818 Joined: 6-October 15 From: Petaluma, CA Member No.: 19,241 Region Association: Northern California |
Hey Chris - Thanks for the guidance. I was leaning toward filler after seeing how it was working with/without.
Looking forward to meeting you in person in a few weeks! |
|
|
|
| tygaboy |
Mar 10 2018, 03:29 PM
Post
#931
|
|
914 Guru Group: Members Posts: 5,818 Joined: 6-October 15 From: Petaluma, CA Member No.: 19,241 Region Association: Northern California |
I'm making progress on the parts and pieces I'll need and how they'll fit together but all the fiddly little pieces take way longer to make than I'd ever have believed. Thankfully, once I get one side figured out, the other side goes much quicker.
But it really does nicely finish off the edge. Attached thumbnail(s) 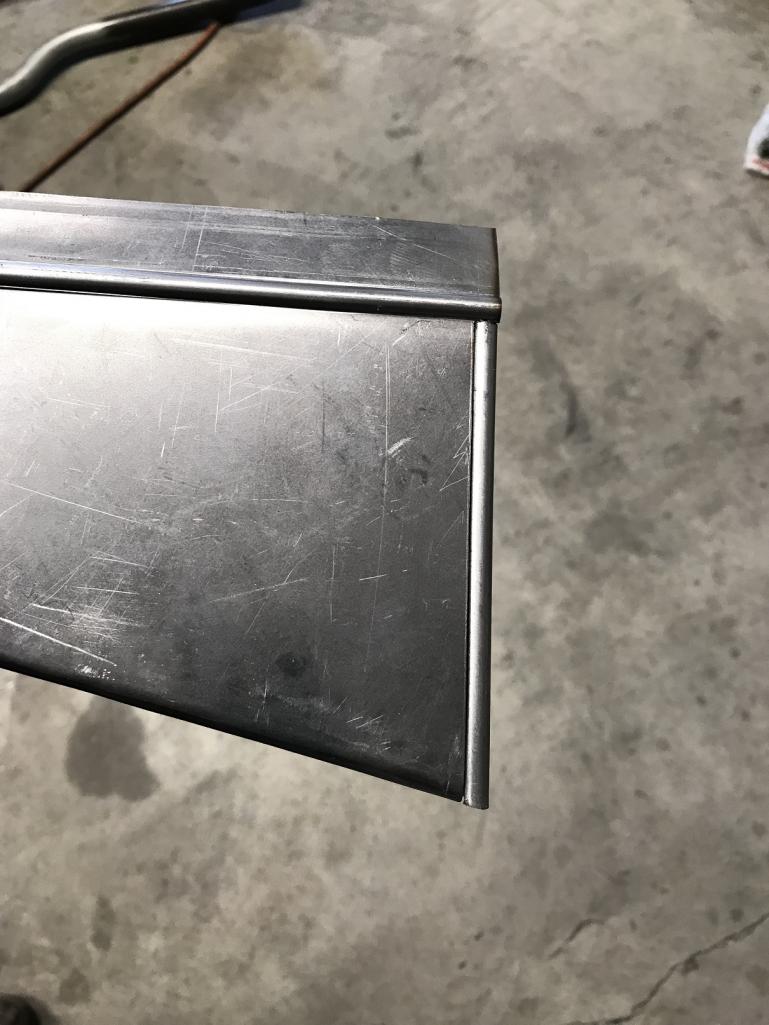
|
|
|
|
| tygaboy |
Mar 10 2018, 03:30 PM
Post
#932
|
|
914 Guru Group: Members Posts: 5,818 Joined: 6-October 15 From: Petaluma, CA Member No.: 19,241 Region Association: Northern California |
Hard to get a good angle but here it is, mocked in place.
It looks better in person. And once it's actually welded in, the edge bead should show up a bit more. Attached thumbnail(s) 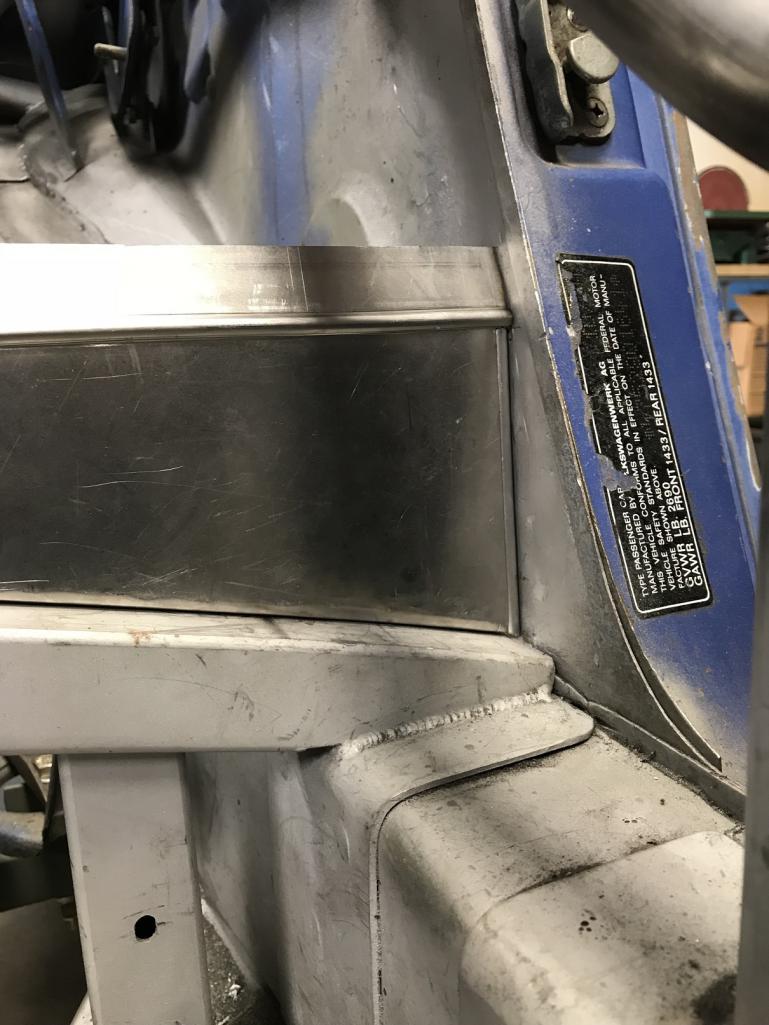
|
|
|
|
| tygaboy |
Mar 17 2018, 05:13 PM
Post
#933
|
|
914 Guru Group: Members Posts: 5,818 Joined: 6-October 15 From: Petaluma, CA Member No.: 19,241 Region Association: Northern California |
Final welding on the tops of the door bars. This had to get done in order to get the fire wall fully designed.
And a bit of "out of position" work! If only it were back on the rotisserie. Attached thumbnail(s) 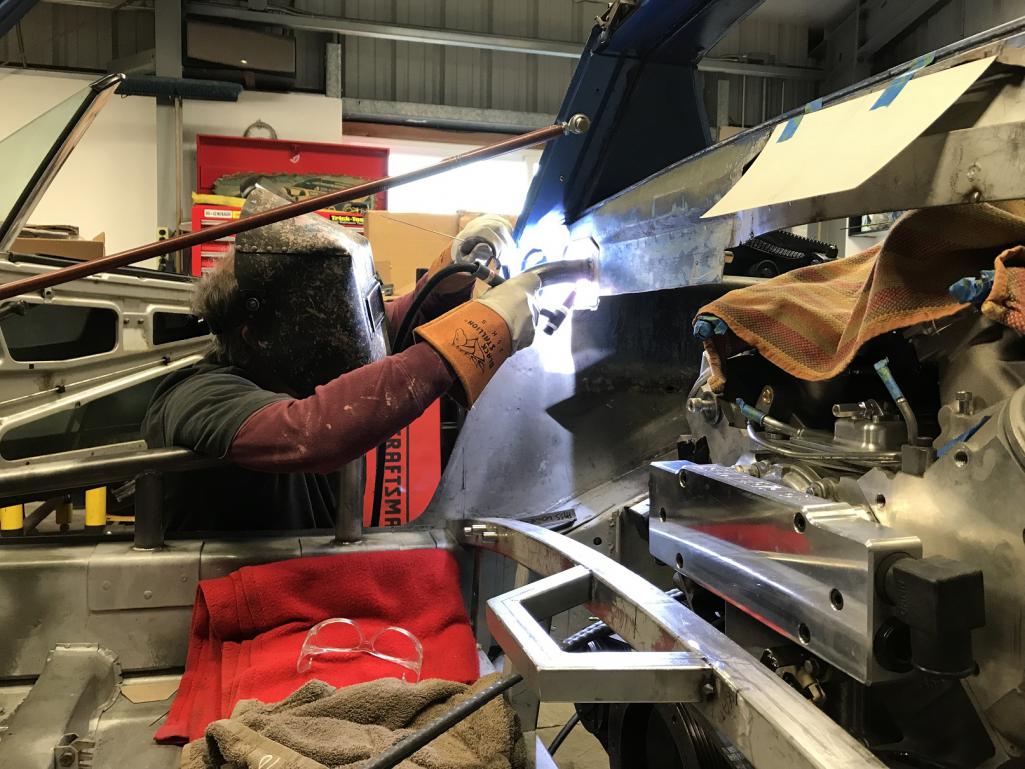 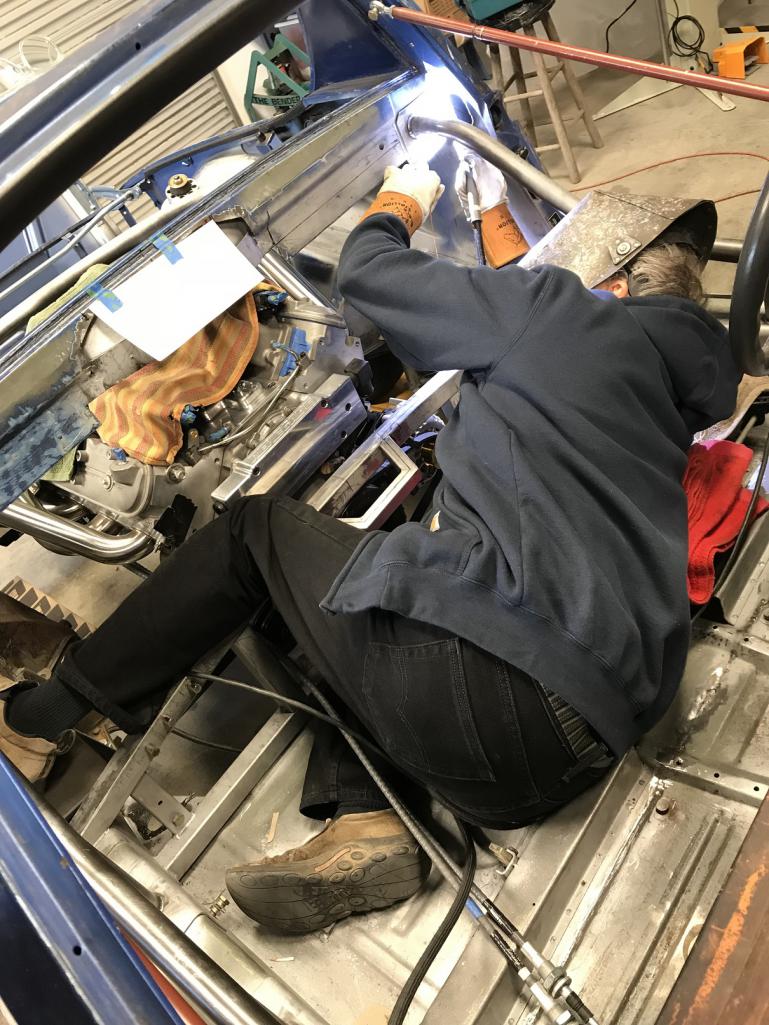
|
|
|
|
| tygaboy |
Mar 17 2018, 05:21 PM
Post
#934
|
|
914 Guru Group: Members Posts: 5,818 Joined: 6-October 15 From: Petaluma, CA Member No.: 19,241 Region Association: Northern California |
The fire wall is turning out to be the most tedious work I've done yet. Every piece has to fit "just so".
It's looking like I'll end up making each piece at least a couple times since on a couple of them, each end will need to be trial fit, tweaked, trial fit, etc. I think the fastest way will be to make each end as a template then transfer the shapes onto a full length blank. If that doesn't work out, I may have to make the ends and splice them together. We'll see. Here, I'm working out how the top frame piece will need to be trimmed to accommodate that fancy little drop at the end of the cross bar. And I'm still playing with bead design and location. Attached thumbnail(s) 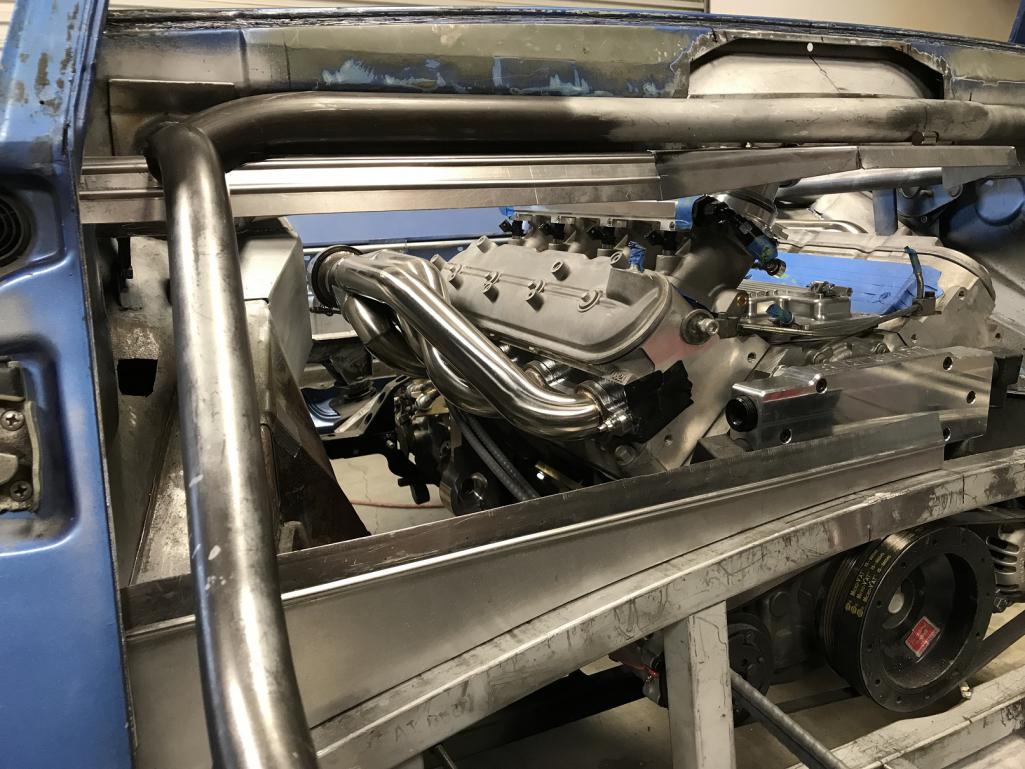 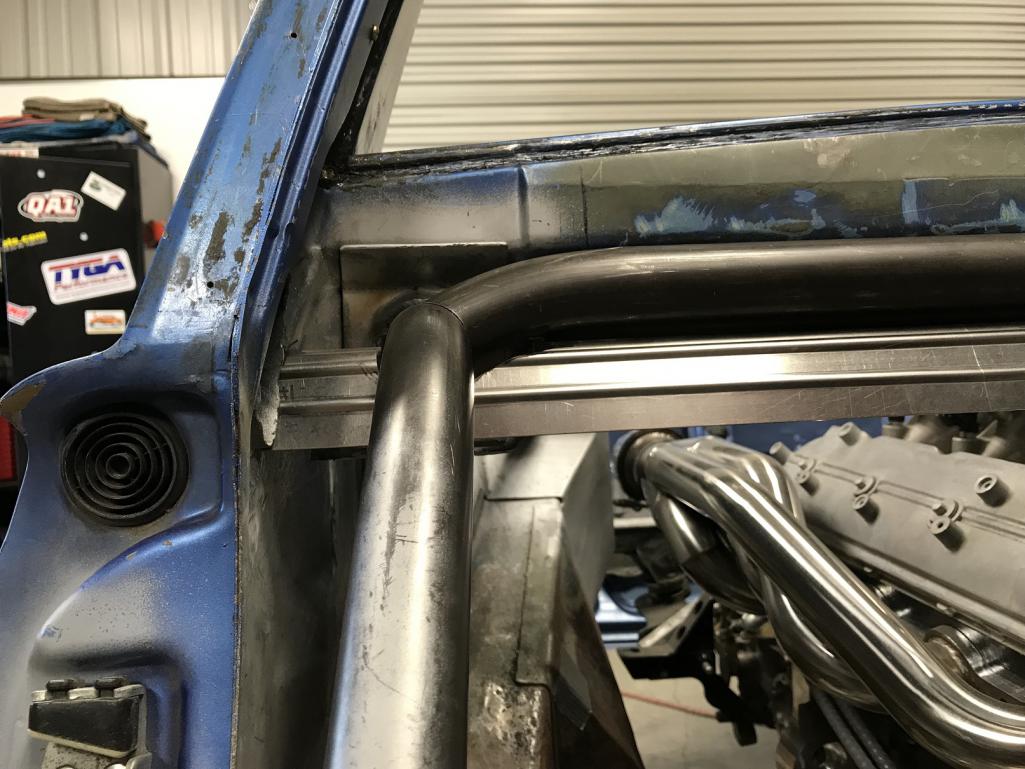
|
|
|
|
| Dion |
Mar 17 2018, 07:55 PM
Post
#935
|
|
RN Group: Members Posts: 2,926 Joined: 16-September 04 From: Audubon,PA Member No.: 2,766 Region Association: MidAtlantic Region |
Looking good as usual. That is one stout chassis.
Kudos Chris. |
|
|
|
| bbrock |
Mar 17 2018, 09:02 PM
Post
#936
|
|
914 Guru Group: Members Posts: 5,269 Joined: 17-February 17 From: Montana Member No.: 20,845 Region Association: Rocky Mountains |
QUOTE(tygaboy @ Mar 17 2018, 05:21 PM) The fire wall is turning out to be the most tedious work I've done yet. This is a bit like trying to wrap my brain around the concept of infinity considering the source. Awesome work as usual. |
|
|
|
| tygaboy |
Mar 18 2018, 10:08 PM
Post
#937
|
|
914 Guru Group: Members Posts: 5,818 Joined: 6-October 15 From: Petaluma, CA Member No.: 19,241 Region Association: Northern California |
As I work through the design, I realize that I need to plan more before fabbing. The latest "duh" moment was realizing that it's better to have flat panels remain in the same plane so as to avoid twisting.
This means rebuilding the upper panel that will live under the cross bar. It needed to be a steeper angle to line up with the rear portion of the console. And as long as things were up for a do-over, I figured I'd rebuild said console rear portion with round tube. This will keep a consistent corner radius over the whole console. At least, that's the plan. Here's the new upper partially formed.I still need to work out all the corner angles. Attached thumbnail(s) 
|
|
|
|
| tygaboy |
Mar 18 2018, 10:09 PM
Post
#938
|
|
914 Guru Group: Members Posts: 5,818 Joined: 6-October 15 From: Petaluma, CA Member No.: 19,241 Region Association: Northern California |
And here's the view from on high, complete with the new, round rear console section.
Attached thumbnail(s) 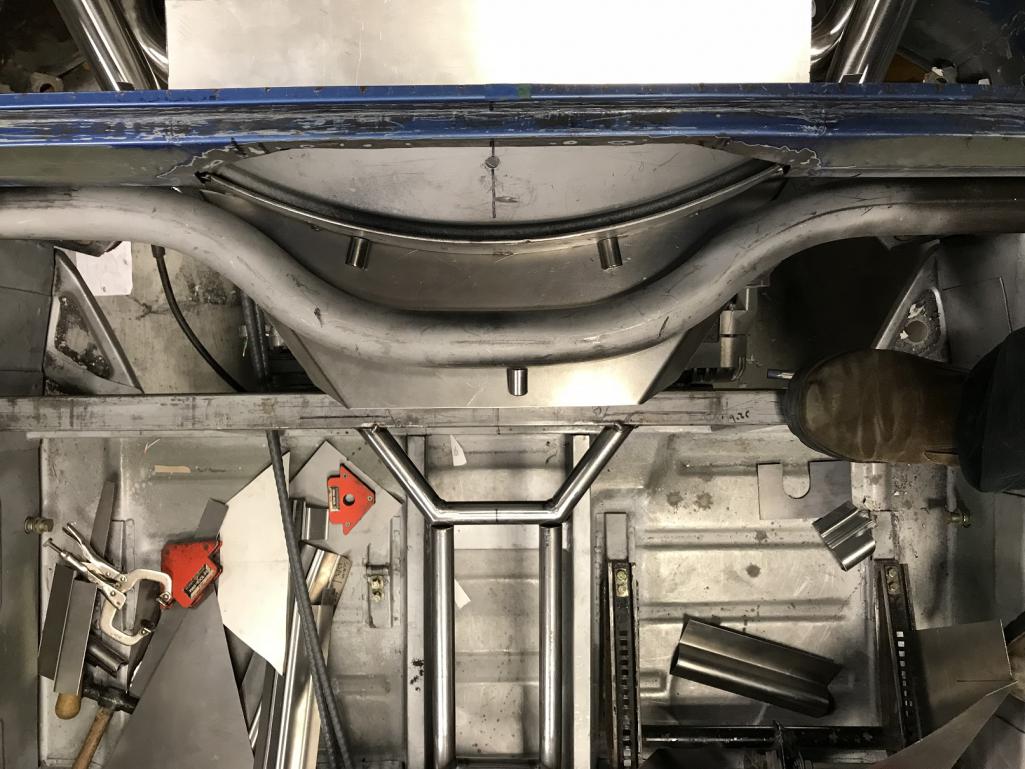
|
|
|
|
| tygaboy |
Mar 18 2018, 10:11 PM
Post
#939
|
|
914 Guru Group: Members Posts: 5,818 Joined: 6-October 15 From: Petaluma, CA Member No.: 19,241 Region Association: Northern California |
The bender in action, fabbing a practice piece to help me understand some of the console-to-fire wall panel connection joints.
https://www.youtube.com/watch?v=TohVH1r0Bts |
|
|
|
| bbrock |
Mar 18 2018, 10:15 PM
Post
#940
|
|
914 Guru Group: Members Posts: 5,269 Joined: 17-February 17 From: Montana Member No.: 20,845 Region Association: Rocky Mountains |
QUOTE(tygaboy @ Mar 18 2018, 10:09 PM) And here's the view from on high, complete with the new, round rear console section. This photo is poster worthy. It's just beautiful. |
|
|
|
|
4 User(s) are reading this topic (4 Guests and 0 Anonymous Users)
0 Members:

|
Lo-Fi Version | Time is now: 29th April 2026 - 04:15 AM |
Invision Power Board
v9.1.4 © 2026 IPS, Inc.