|
|
|
Porsche, and the Porsche crest are registered trademarks of Dr. Ing. h.c. F. Porsche AG.
This site is not affiliated with Porsche in any way. Its only purpose is to provide an online forum for car enthusiasts. All other trademarks are property of their respective owners. |
|
|

  |

| tygaboy |
 Oct 17 2016, 10:56 AM Oct 17 2016, 10:56 AM
Post
#1
|
|
914 Guru  Group: Members Posts: 5,680 Joined: 6-October 15 From: Petaluma, CA Member No.: 19,241 Region Association: Northern California |
Hi World!
Let the games begin! (IMG:style_emoticons/default/piratenanner.gif) As the title says, it's a '75 that's getting an LS3 (Cracker's "old" motor - thanks Tony!) and Boxster 6 speed. Also planned is zippidy doo-dah 911 front suspension with Boxster calipers all around. The rear suspension is getting 911 ebrakes, Tangerine Racing raised pickups and shock towers. I have plans to stiffen the chassis with a partial cage. Doesn't that sound like a great plan? I think so, too! BACKGROUND: I got this as a roller that was purported to be "dry and accident free". And it was! Except for all the rust and the place where it was hit. Yeah, yeah... But it's all good. The seller and I worked everything out. (IMG:style_emoticons/default/beerchug.gif) But our little 914s are full of surprises and isn't that half the fun? So, first up is rust repair time! (IMG:style_emoticons/default/sawzall-smiley.gif) (IMG:style_emoticons/default/sawzall-smiley.gif) (IMG:style_emoticons/default/welder.gif) (IMG:style_emoticons/default/welder.gif) Let's begin with some pics of what I started with. Wish me luck! Wait, forget the luck, wish me SKILL!!! Attached image(s) 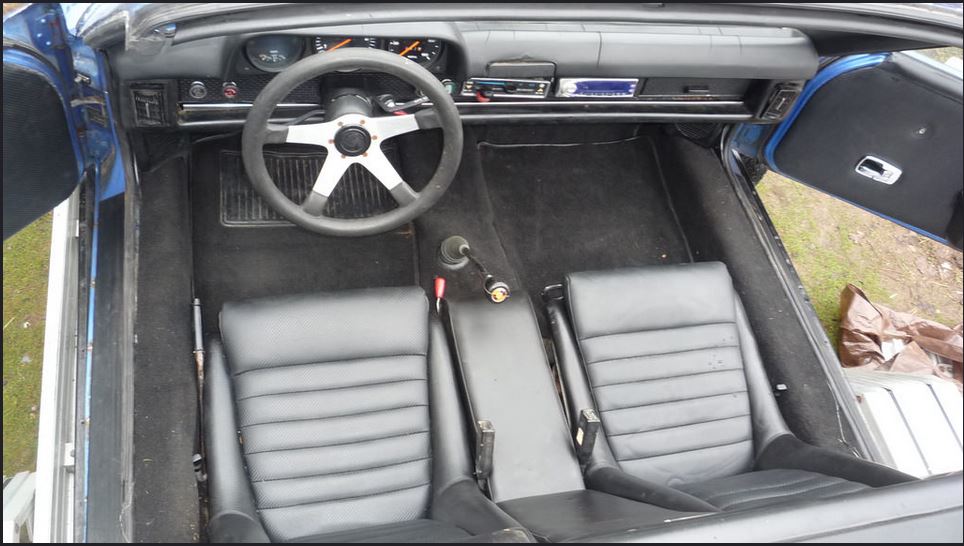 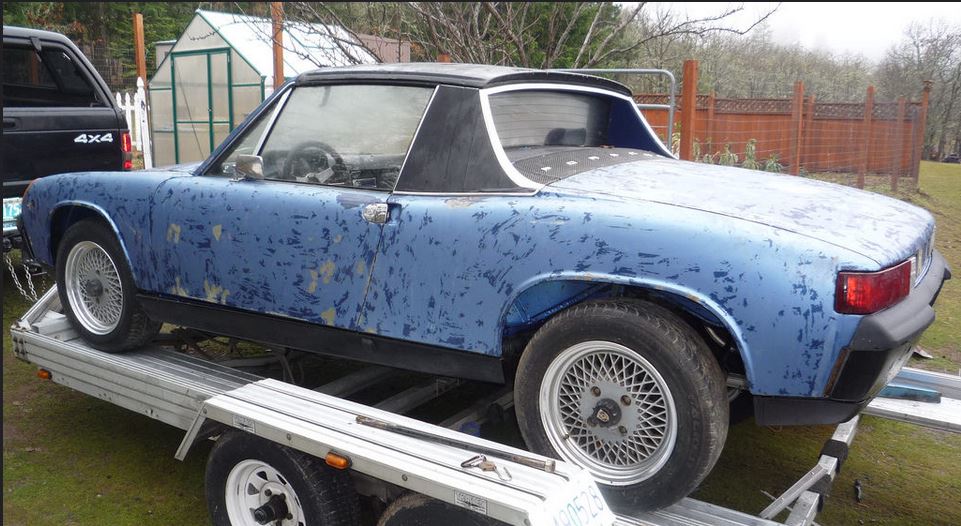
|
   |

 
|
| tygaboy |
Oct 17 2016, 10:58 AM
Post
#2
|
|
914 Guru Group: Members Posts: 5,680 Joined: 6-October 15 From: Petaluma, CA Member No.: 19,241 Region Association: Northern California |
Hey, looks pretty good! Let's have a look under the carpet.
This is encouraging... Attached image(s) 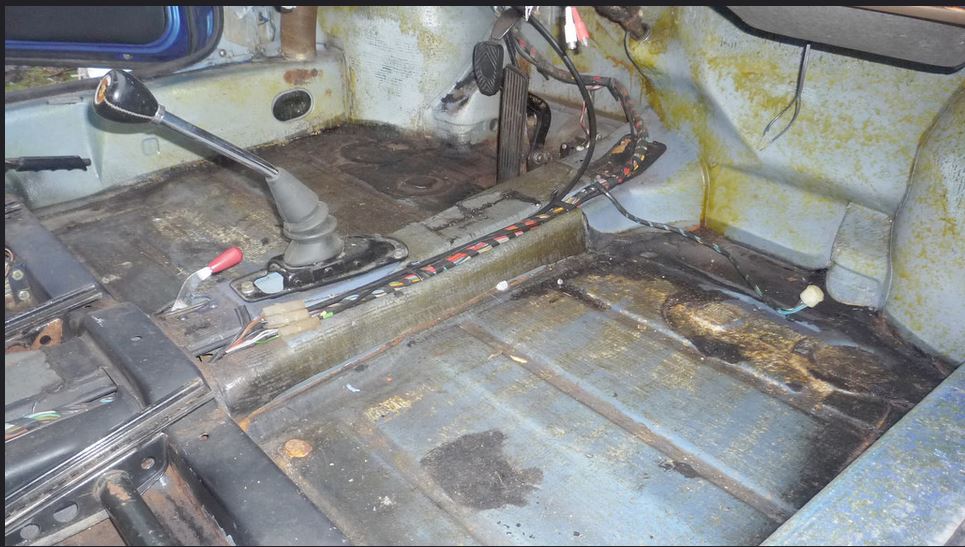
|
|
|
|
| tygaboy |
Oct 17 2016, 11:00 AM
Post
#3
|
|
914 Guru Group: Members Posts: 5,680 Joined: 6-October 15 From: Petaluma, CA Member No.: 19,241 Region Association: Northern California |
How about the hell hole? Hmmm.
Attached image(s) 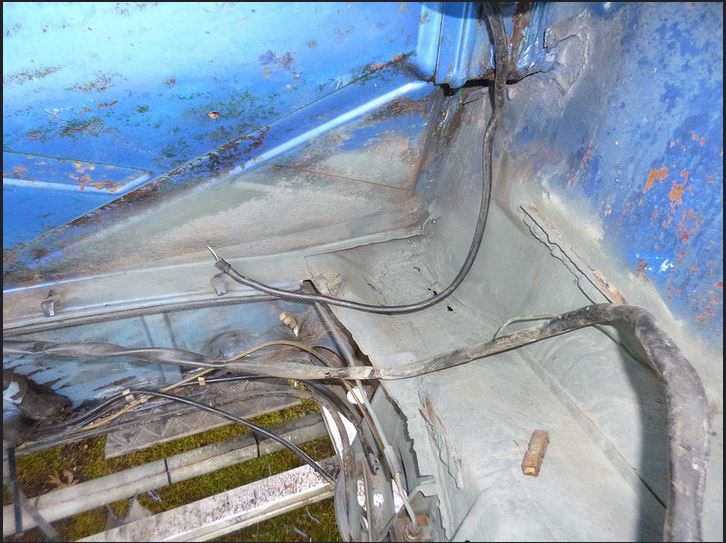
|
|
|
|
| tygaboy |
Oct 17 2016, 11:07 AM
Post
#4
|
|
914 Guru Group: Members Posts: 5,680 Joined: 6-October 15 From: Petaluma, CA Member No.: 19,241 Region Association: Northern California |
The outer longs? Pretty nice! No problem! I mean, how much trouble could possibly be caused by those little hell hole perforations?
Remember the Monty Python and the Holy Grail? Where they have to cross that bridge and get asked "what's your favorite color?" and the first guy answers and gets to cross? Remember what the next knight said? "This is easy!" Remember what happened to him? So let's pull the interior out and remove the tar.... "Hello? Restoration Design?" Attached image(s) 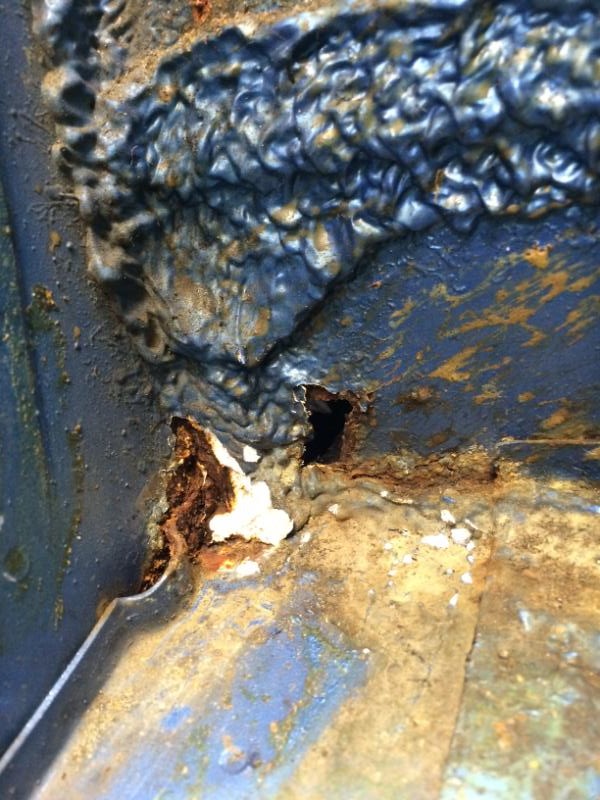 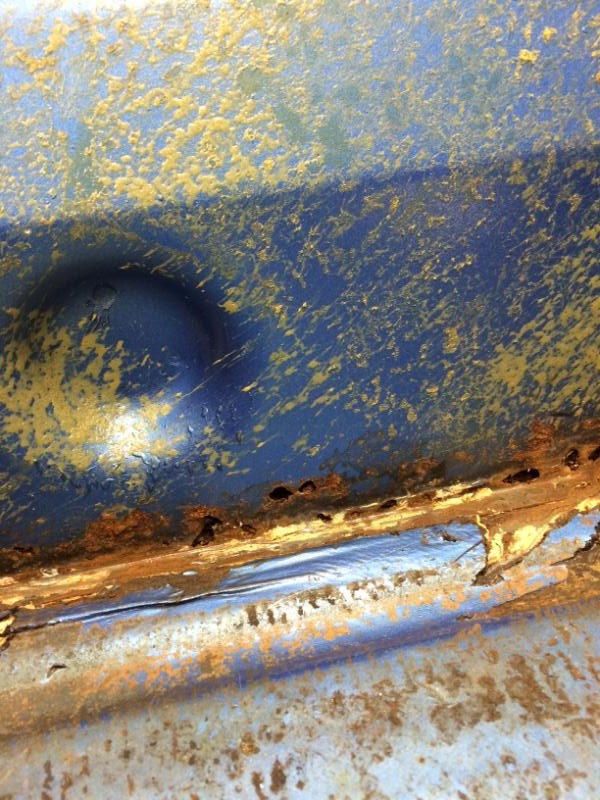 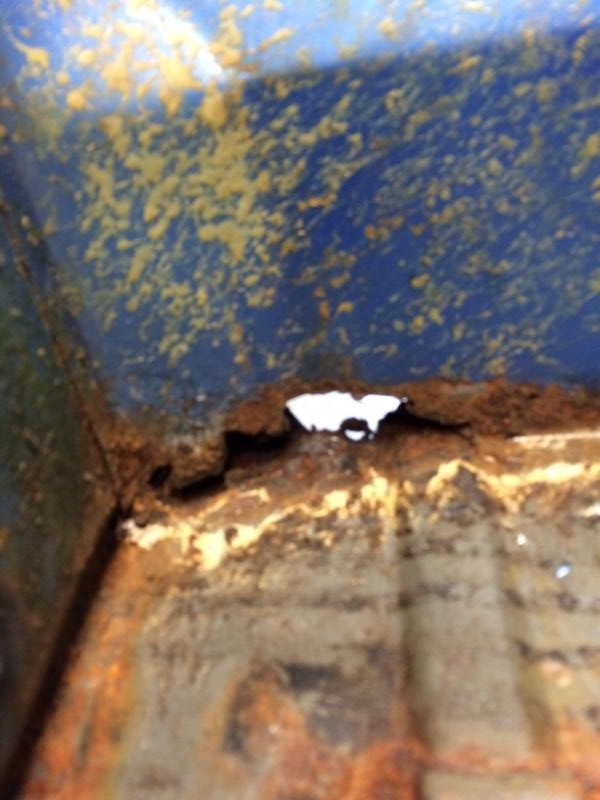 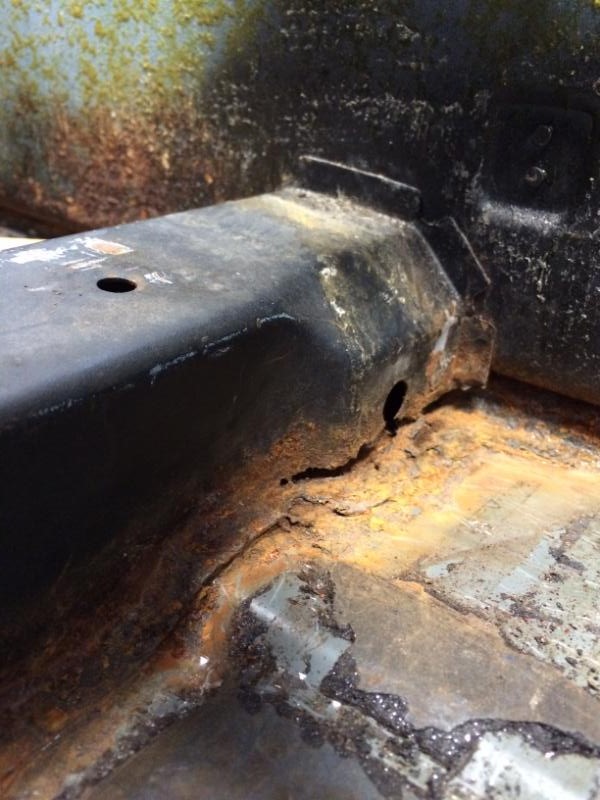
|
|
|
|
| tygaboy |
Oct 17 2016, 11:08 AM
Post
#5
|
|
914 Guru Group: Members Posts: 5,680 Joined: 6-October 15 From: Petaluma, CA Member No.: 19,241 Region Association: Northern California |
Forgot the pic of the outer longs...
Attached image(s) 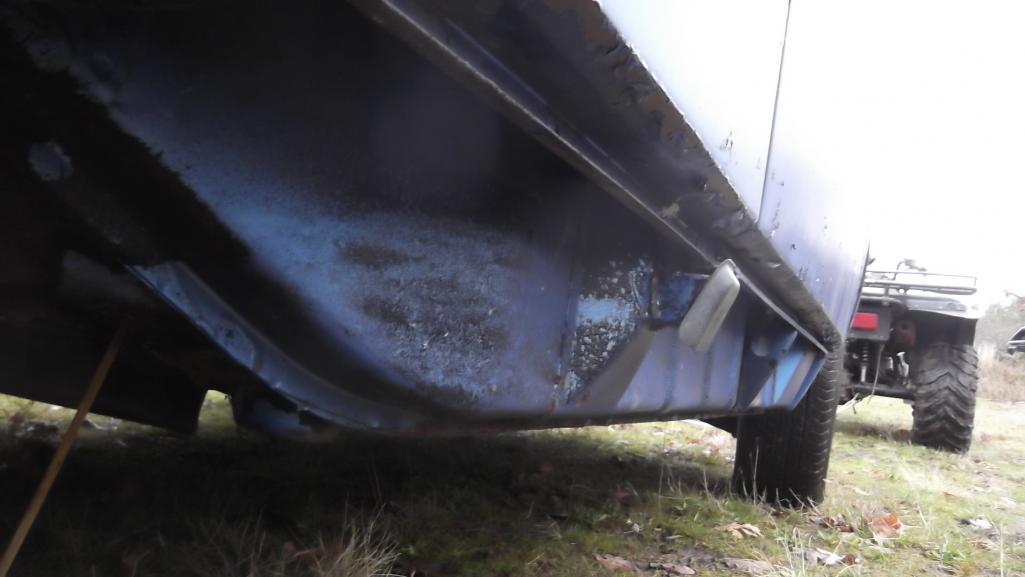 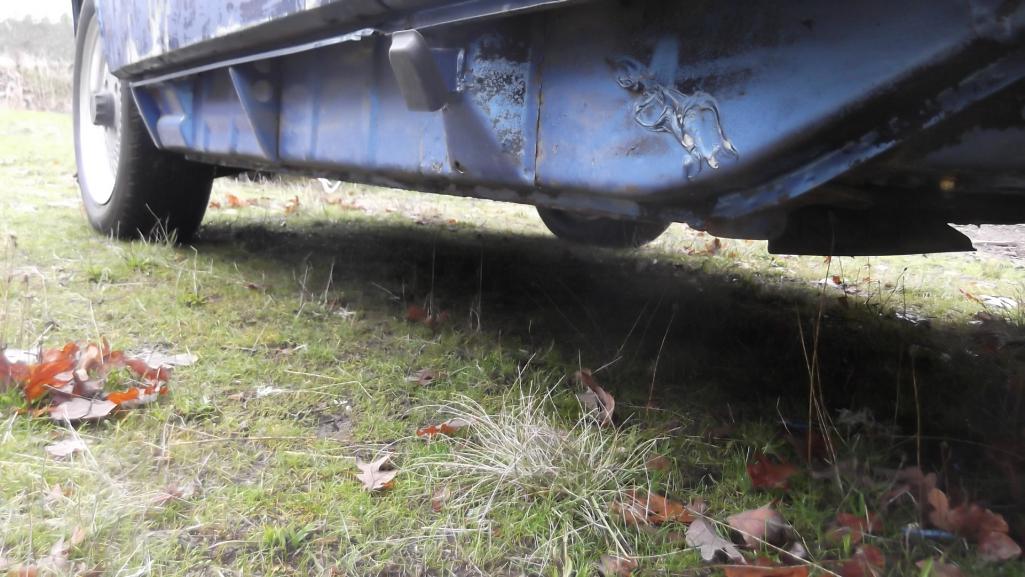
|
|
|
|
| tygaboy |
Oct 17 2016, 11:11 AM
Post
#6
|
|
914 Guru Group: Members Posts: 5,680 Joined: 6-October 15 From: Petaluma, CA Member No.: 19,241 Region Association: Northern California |
A real contributing factor to the rust issue was failed window seals and a horrid non-repair that used some odd goo to try and plug the leaks. So at some point, a PO figured that part of the solution was to add drain holes... ! (IMG:style_emoticons/default/aktion035.gif)
The passenger long rust was exacerbated by water sitting in that area. I would have thought water and hell would cancel each other out! (IMG:style_emoticons/default/lol-2.gif) Attached image(s) 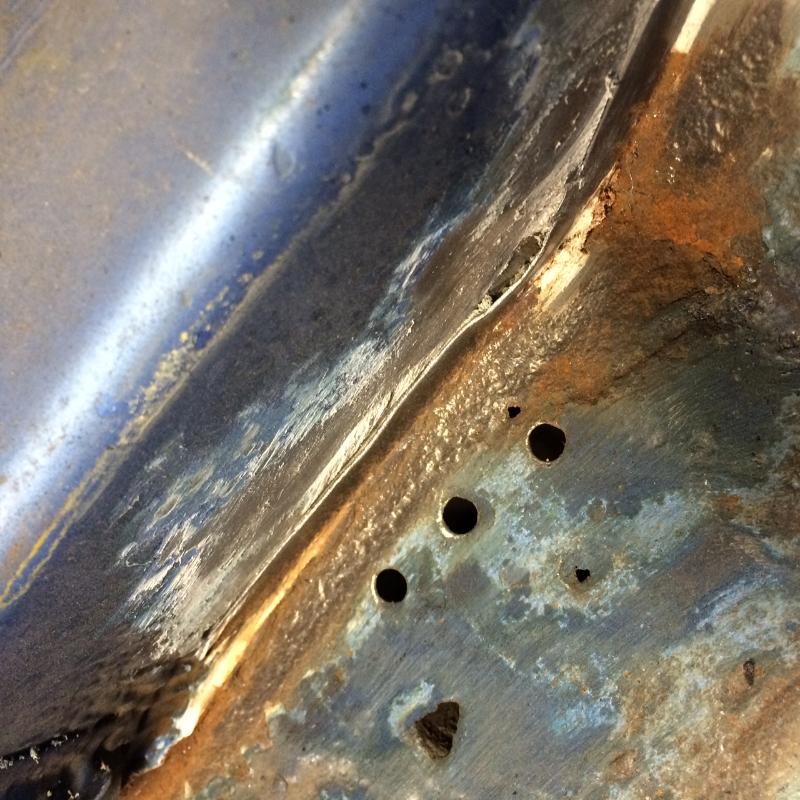 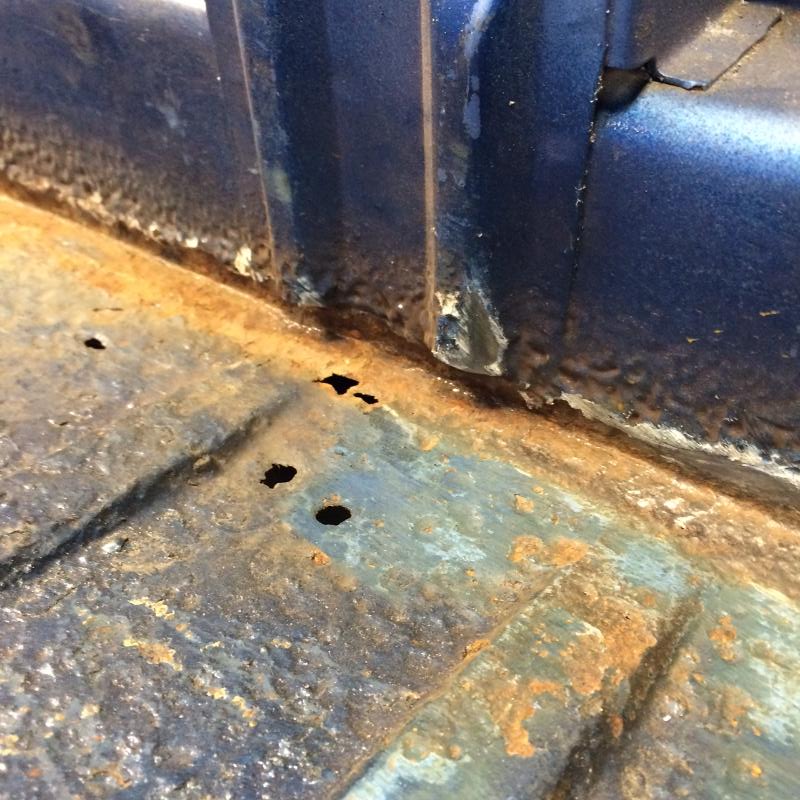
|
|
|
|
| tygaboy |
Oct 17 2016, 11:26 AM
Post
#7
|
|
914 Guru Group: Members Posts: 5,680 Joined: 6-October 15 From: Petaluma, CA Member No.: 19,241 Region Association: Northern California |
So... NOW we'll let the games begin. And I want to start with a disclaimer:
TO EACH, HIS OWN By this I mean, I'm just a guy with an opinion. Doesn't mean I'm right, just that it's what I believe, think, feel, etc. My goal with the car is to do as high quality work as I can muster. In my opinion, that means complete panels vs patching. Plus, some of the "interesting" things I want to do as part of this project are more easily accomplished this way. More on that as I get to it. OK, back to the action. Let's find out where the rust stops and what needs replacing. Turns out it's: - back 1/2 of the floor - seat mount/cross brace - inner firewal - outer firewall - passenger inner long (from a bit ahead of the engine mount to not quite 1/2 way forward) So out comes the bad! (IMG:style_emoticons/default/sawzall-smiley.gif) I was hopeful that the first set of incisions (first pic) would be enough but upon reflection (and given the 400+ hp this chassis is getting) I decided to go all in - or maybe that's "all out"! (2nd pic) Note that I've started fitting the front sleeve. More on that in a bit. Attached thumbnail(s)  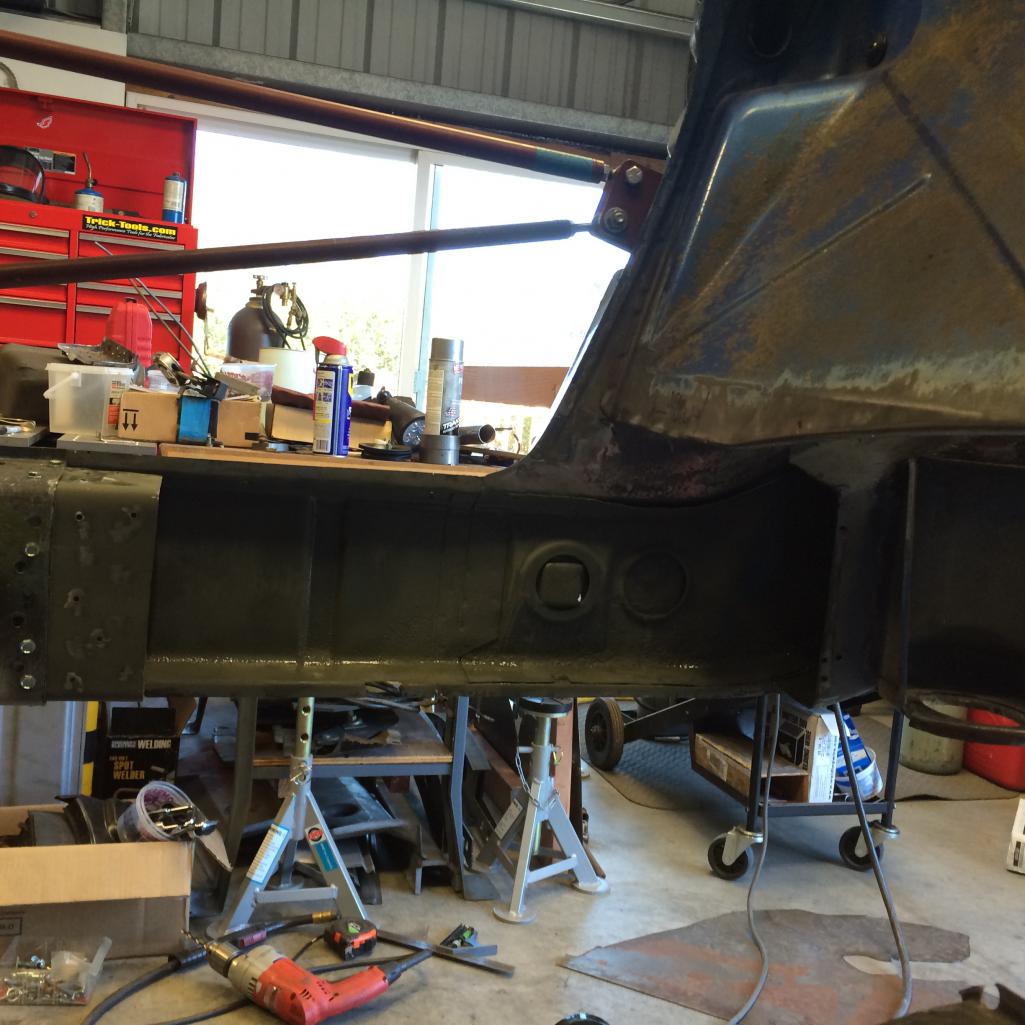
|
|
|
|
| Cracker |
Oct 17 2016, 12:12 PM
Post
#8
|
|
Advanced Member Group: Members Posts: 2,148 Joined: 2-February 10 From: Atlanta (area) Member No.: 11,316 Region Association: South East States |
Good "skill" Chris...do that motor proud! (IMG:style_emoticons/default/poke.gif) I know you do really nice work and I will continue to look forward to the progress posts!
PS: So this means the latest acquisition is on the way out then, correct? Tony |
|
|
|
| tygaboy |
Oct 17 2016, 12:32 PM
Post
#9
|
|
914 Guru Group: Members Posts: 5,680 Joined: 6-October 15 From: Petaluma, CA Member No.: 19,241 Region Association: Northern California |
QUOTE(Cracker @ Oct 17 2016, 11:12 AM)  Good "skill" Chris...do that motor proud! (IMG:style_emoticons/default/poke.gif) I know you do really nice work and I will continue to look forward to the progress posts! PS: So this means the latest acquisition is on the way out then, correct? Tony Tony - I'll do my best! The latest acquisition ('74 1.8) arrived today! http://www.914world.com/bbs2/index.php?showtopic=296591 I'm not sure what I may or may not do to it. For now, the focus will be to get it road-worthy and drive it! |
|
|
|
| Mueller |
Oct 17 2016, 12:55 PM
Post
#10
|
|
914 Freak! Group: Members Posts: 17,155 Joined: 4-January 03 From: Antioch, CA Member No.: 87 Region Association: None |
Whoa, that is going to be a little bit of work!
Nice sized shop so at least you are not hindered by lack of space. Those Enkie wheels look to be in great shape, at least you'll be able to get a few bucks out of those. |
|
|
|
| tygaboy |
Oct 17 2016, 01:00 PM
Post
#11
|
|
914 Guru Group: Members Posts: 5,680 Joined: 6-October 15 From: Petaluma, CA Member No.: 19,241 Region Association: Northern California |
In planning the fabrication of the sleeves needed for the long repair, I noticed I was going to have to deal with a bit of a structural raised section in the bottom of the forward area.
I recently treated myself to a bead roller and was able to put it to good use. Gotta say, having the right tools almost feels like cheating. Nowhere near as much (IMG:style_emoticons/default/smash.gif) I used it to form a nice, tight fit around that raised section then roll over the 90 degree bends to complete the sleeve. Turned out pretty well. Attached image(s) 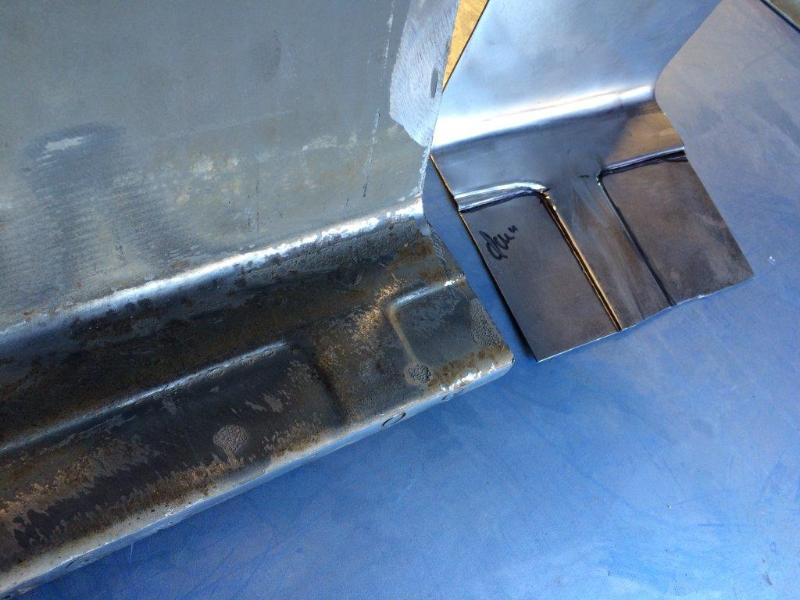 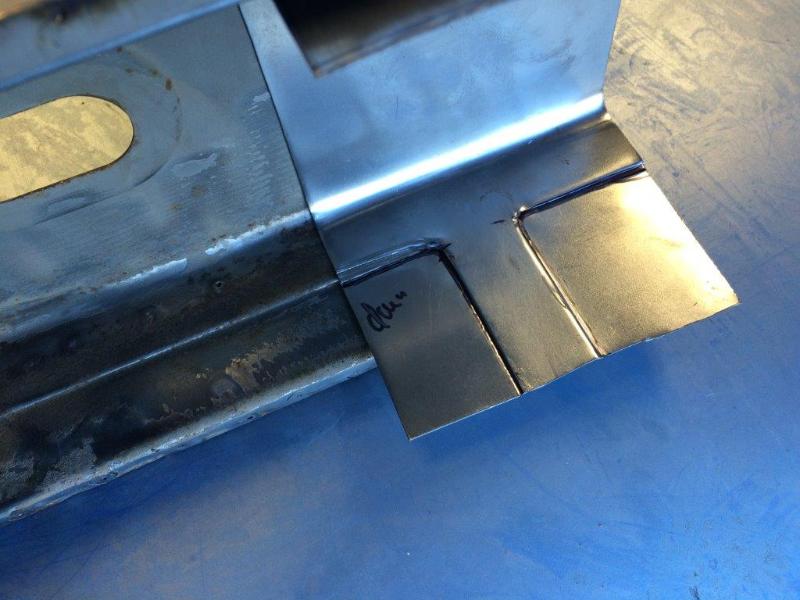
|
|
|
|
| tygaboy |
Oct 17 2016, 01:11 PM
Post
#12
|
|
914 Guru Group: Members Posts: 5,680 Joined: 6-October 15 From: Petaluma, CA Member No.: 19,241 Region Association: Northern California |
I sliced the longitudinal repair section out of my parts car. That was a fair bit of work, in and of itself!
And here's the first goof of documenting my build: I fabbed up the sleeve for the rear part of the long repair. It was FAR more complicated as I had to deal with the raised reinforcement "ribs" that are part of the doubler that runs up the inside of the long, past the engine and inner suspension mount. I was so impressed with myself and how well everything fit that I immediately forgot to take any pics and commenced with tacking things into place... (IMG:style_emoticons/default/headbang.gif) Anyway, here it's trimmed and fit. Also gives a view of what these look like with no inner or outer firewall or back half of the floor! Note the double/triple-up on the door brace. I'm super paranoid about keeping the very nice door gaps this chassis has. I'm using Tangerine Racing's door brace kit. *** Unabashed promotion*** If you need 914 stuff and Tangerine Racing makes it, save yourself a ton of time and just buy it! Chris Foley and his team (and products!) are the best. Back to the build: I used the door brace kit as provided plus added another diagonal from the upper seat belt mount to a plate/bolt that I welded just inside the front of the door opening. This means I have a brace in place but can mount the doors and check gaps! Attached thumbnail(s) 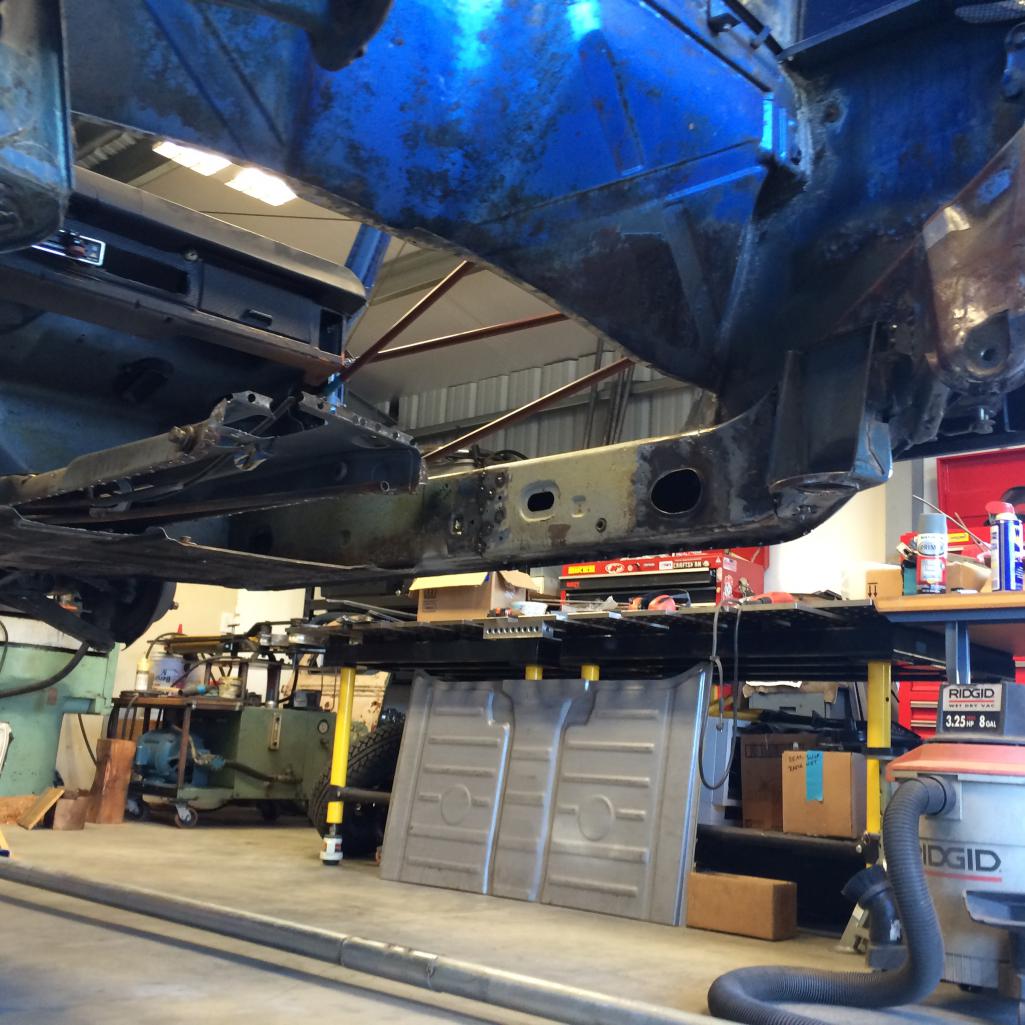
|
|
|
|
| ChrisFoley |
Oct 17 2016, 01:25 PM
Post
#13
|
|
I am Tangerine Racing Group: Members Posts: 8,016 Joined: 29-January 03 From: Bolton, CT Member No.: 209 Region Association: None |
QUOTE(tygaboy @ Oct 17 2016, 03:11 PM) I'm using Tangerine Racing's door brace kit. *** Unabashed promotion*** If you need 914 stuff and Tangerine Racing makes it, save yourself a ton of time and just buy it! Chris Foley and his team (and products!) are the best. Back to the build: I used the door brace kit as provided plus added another diagonal from the upper seat belt mount to a plate/bolt that I welded just inside the front of the door opening. This means I have a brace in place but can mount the doors and check gaps! Thanks Chris! (IMG:style_emoticons/default/smile.gif) I actually have a door brace kit update planned that uses a system much like you described - a welded nut plate inside the A pillar, so the doors can be installed while the chassis is braced. |
|
|
|
| tygaboy |
Oct 17 2016, 01:57 PM
Post
#14
|
|
914 Guru Group: Members Posts: 5,680 Joined: 6-October 15 From: Petaluma, CA Member No.: 19,241 Region Association: Northern California |
QUOTE(Racer Chris @ Oct 17 2016, 12:25 PM) QUOTE(tygaboy @ Oct 17 2016, 03:11 PM) I'm using Tangerine Racing's door brace kit. *** Unabashed promotion*** If you need 914 stuff and Tangerine Racing makes it, save yourself a ton of time and just buy it! Chris Foley and his team (and products!) are the best. Thanks Chris! (IMG:style_emoticons/default/smile.gif) I actually have a door brace kit update planned that uses a system much like you described - a welded nut plate inside the A pillar, so the doors can be installed while the chassis is braced. Mr. Foley! Always a pleasure... Here's my super high-tech design. No doubt yours will be a bit more professional but this worked just fine. Attached thumbnail(s) 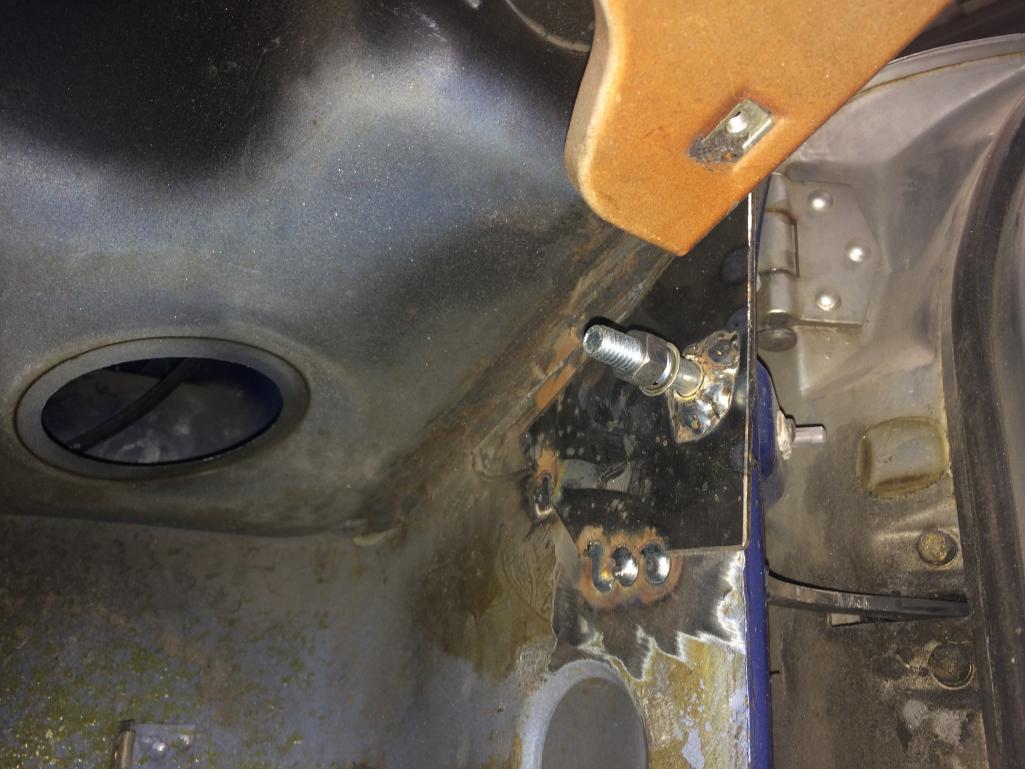
|
|
|
|
| tygaboy |
Oct 17 2016, 02:01 PM
Post
#15
|
|
914 Guru Group: Members Posts: 5,680 Joined: 6-October 15 From: Petaluma, CA Member No.: 19,241 Region Association: Northern California |
Hell hole/long repair welding nearly completed! I opened up holes in the outer skin that allowed me to drill then plug weld the sleeve to the inner reinforcement panel.
A couple of those holes are yet to be closed up. You may have noticed I've eliminated the heater tubes. V8 means no need. This opens the door to some custom fab I want to do: I'm doing an inner long stiffener kit but because the firewalls are out, I can run them from the front of the long all the way to, and a bit past, the suspension console. And I'm planning a center mount ebrake handle so these stiffeners will have no cut outs or heater inspection holes. More as I get to that. Attached thumbnail(s) 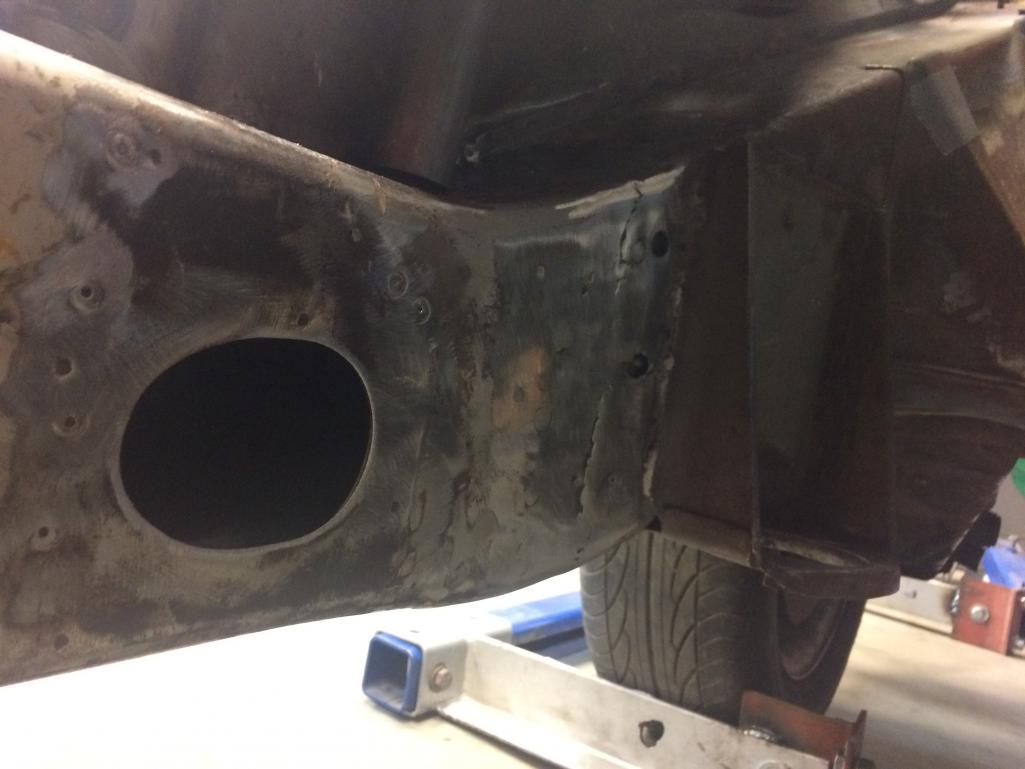
|
|
|
|
| tygaboy |
Oct 17 2016, 02:10 PM
Post
#16
|
|
914 Guru Group: Members Posts: 5,680 Joined: 6-October 15 From: Petaluma, CA Member No.: 19,241 Region Association: Northern California |
My paranoia paid off and another Tangerine product performs as advertised!
The door gaps are uber nice, body lines are spot on and the doors close with zero up/down movement as they latch and unlatch. These are early doors off the parts car and they end up with gaps a bit larger at the rear than the front. If I do run these doors, I'll add a small shim behind the hinges to even up the gap. Also, since the windshield frame can end up tweaked for any number of reasons (being used when entering/exiting the car, etc.), the chassis measurement spec isn't always to be used as gospel. But in combination with other measurements, including door gaps, you can be sure things are where they should be. That said, looky where mine ended up! This would suggest the windshield frame is straight. Attached thumbnail(s) 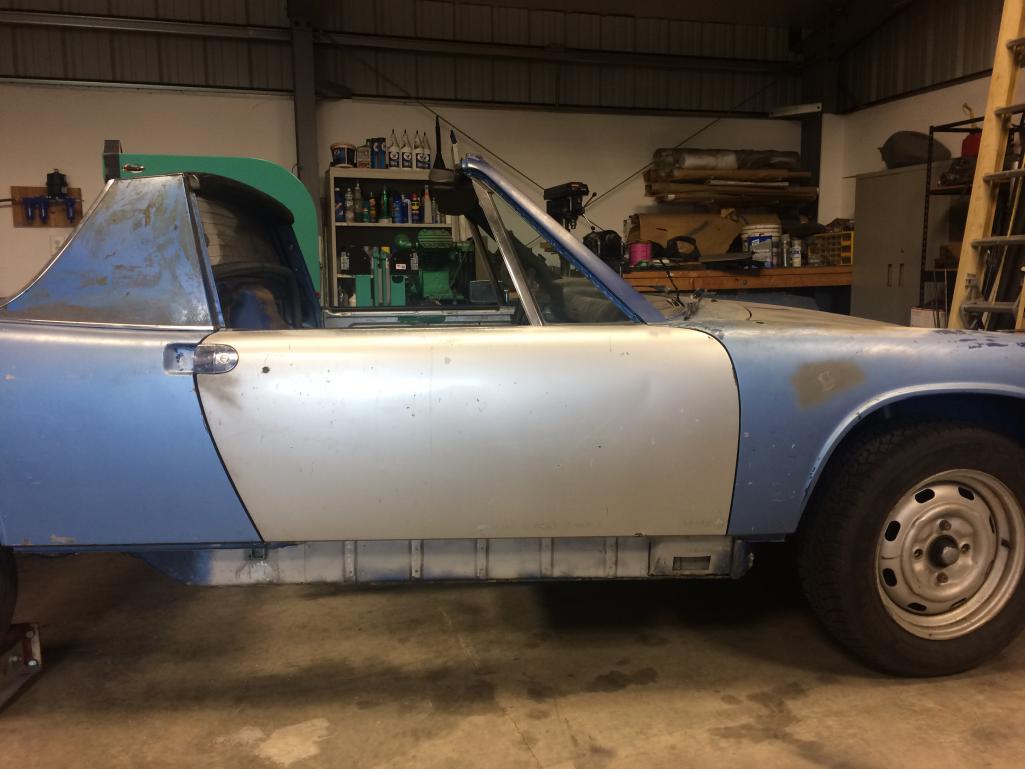 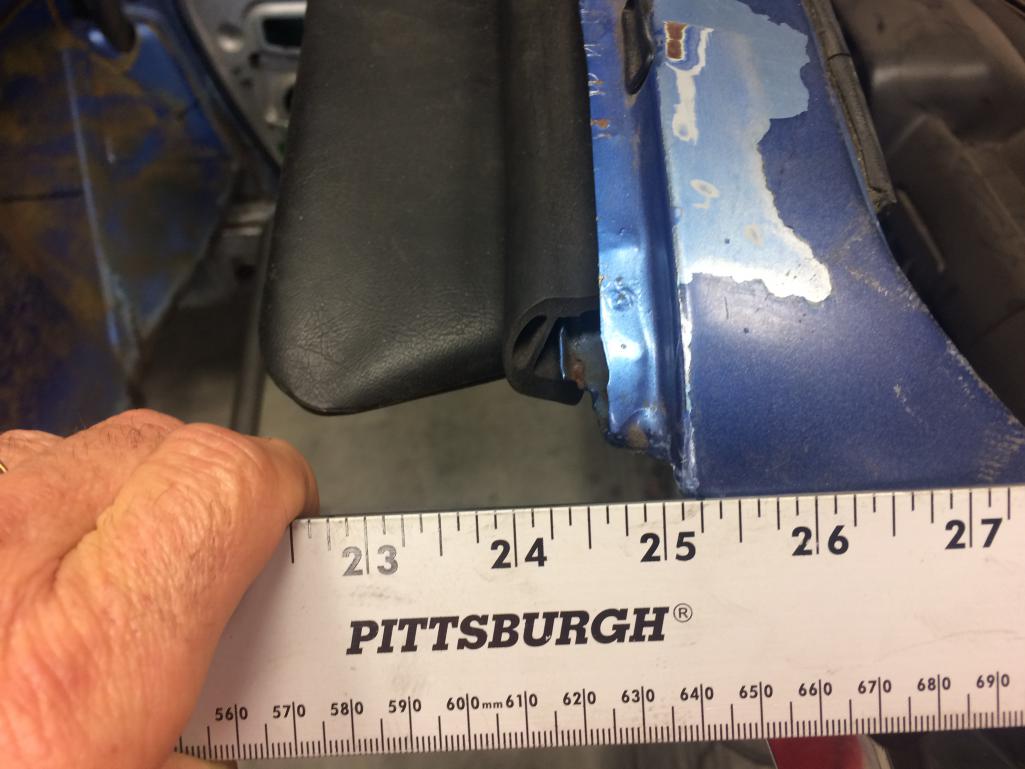
|
|
|
|
| ChrisFoley |
Oct 17 2016, 02:16 PM
Post
#17
|
|
I am Tangerine Racing Group: Members Posts: 8,016 Joined: 29-January 03 From: Bolton, CT Member No.: 209 Region Association: None |
QUOTE(tygaboy @ Oct 17 2016, 03:57 PM) ... Here's my super high-tech design. No doubt yours will be a bit more professional but this worked just fine. Our welded-in-place nut plate won't need to be removed after the work is done. (IMG:style_emoticons/default/piratenanner.gif) |
|
|
|
| tygaboy |
Oct 20 2016, 11:27 AM
Post
#18
|
|
914 Guru Group: Members Posts: 5,680 Joined: 6-October 15 From: Petaluma, CA Member No.: 19,241 Region Association: Northern California |
CHASSIS STIFFENING: Version 1
LS3 = I need to stiffen this chassis. A lot. I'll be adding an inner long kit but also need to do more. So, I started to fab a roll cage. I want this car to retain as much street use ergonomics as possible, plus I want to have a nice interior. To accomplish this, Version 1 of the cage was designed to be a bolt in: A roll hoop with door bars that extended up to just ahead of the door opening and bolt to the top of the long. Something like the one pictured below. This meant I could tuck it tight to the interior but since it comes in and out, I could install the trim panels, do all the other upholstery then bolt in the cage. Attached image(s) 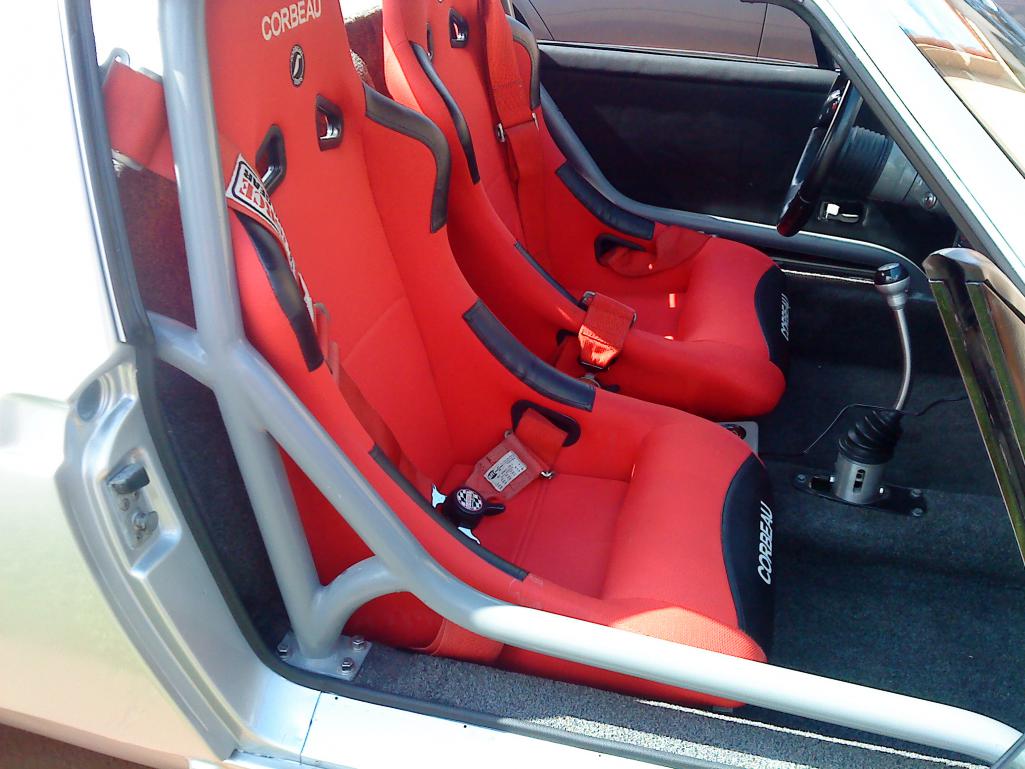
|
|
|
|
| tygaboy |
Oct 20 2016, 11:35 AM
Post
#19
|
|
914 Guru Group: Members Posts: 5,680 Joined: 6-October 15 From: Petaluma, CA Member No.: 19,241 Region Association: Northern California |
CHASSIS STIFFENING:Version 1
From a design perspective, I'm trying to add little things details that may be unique elements. I figured I see how close I could get the roll cage to match the shape of the car. So out comes the roll bender! (IMG:style_emoticons/default/aktion035.gif) Once the curve was where I wanted it, it was measure and bend the legs. I'm happy with how it turned out. Attached image(s)  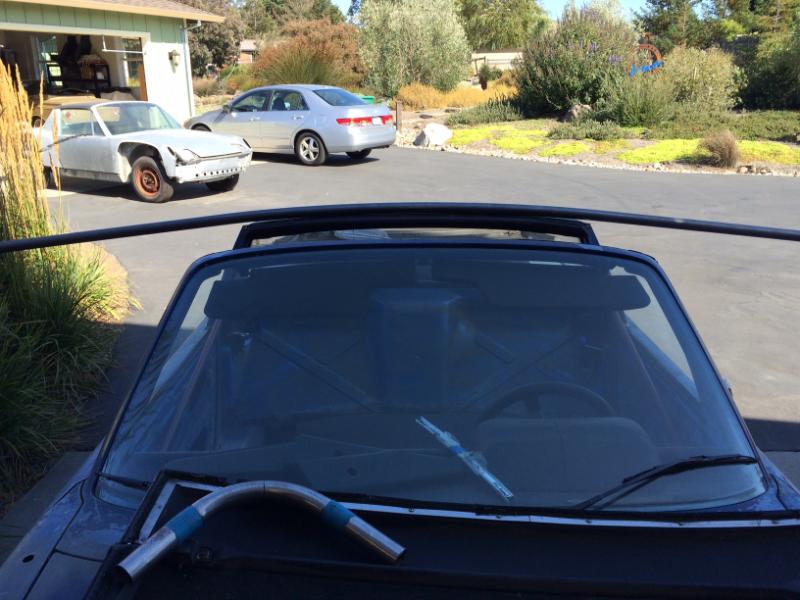 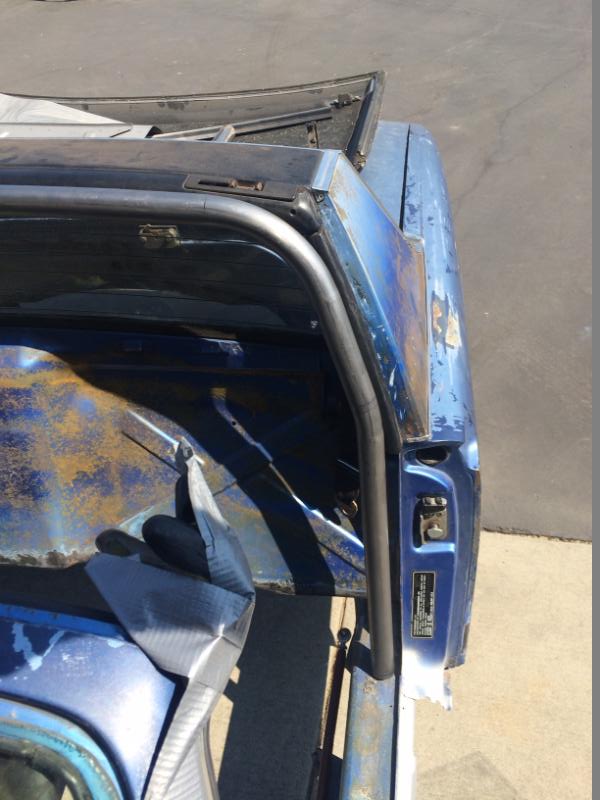
|
|
|
|
| tygaboy |
Oct 20 2016, 11:51 AM
Post
#20
|
|
914 Guru Group: Members Posts: 5,680 Joined: 6-October 15 From: Petaluma, CA Member No.: 19,241 Region Association: Northern California |
CHASSIS STIFFENING: Version II - Change of Plan
As I've been thinking about the bolt in design, I spoke with a number of experienced folks (Chris Foley, Tony/Cracker) and some race car fab buddies and decided I didn't want to go bolt in. But I also didn't want a race car cage with full front hoop, etc. What to do.... I understand the targa structure of our cars are pretty strong and since this is a street car that will see the occasional track day, I decided to build what I'll call a "roadster cage". The main hoop will come up to just below the rear window, it'll have legs back to the top of the long near the suspension consoles. In the cabin, there will be a hoop under the dash and door bars with drops that tie into the tops of the longs. This will all be installed over the inner long stiffener kit. That said, I also wanted to hide as much of this "cage" as I could. So I'm trying something a bit different. A "through the firewall" design! Here's the initial rough-in of the rear hoop. It's roll bent to match the curve of the window opening. The final fit will have the top of the bar just under the window and able to serve as the shoulder harness mount. The window and all stock interior trim can go in/out. I planned to eliminate the back pad so no worries there. Attached thumbnail(s) 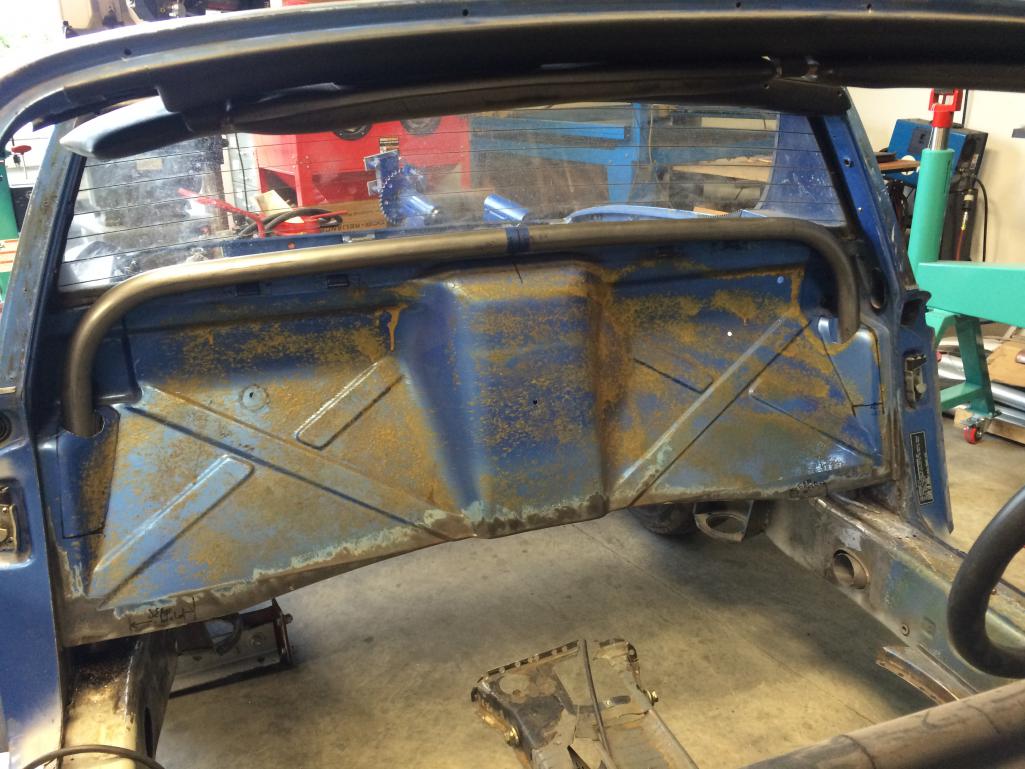 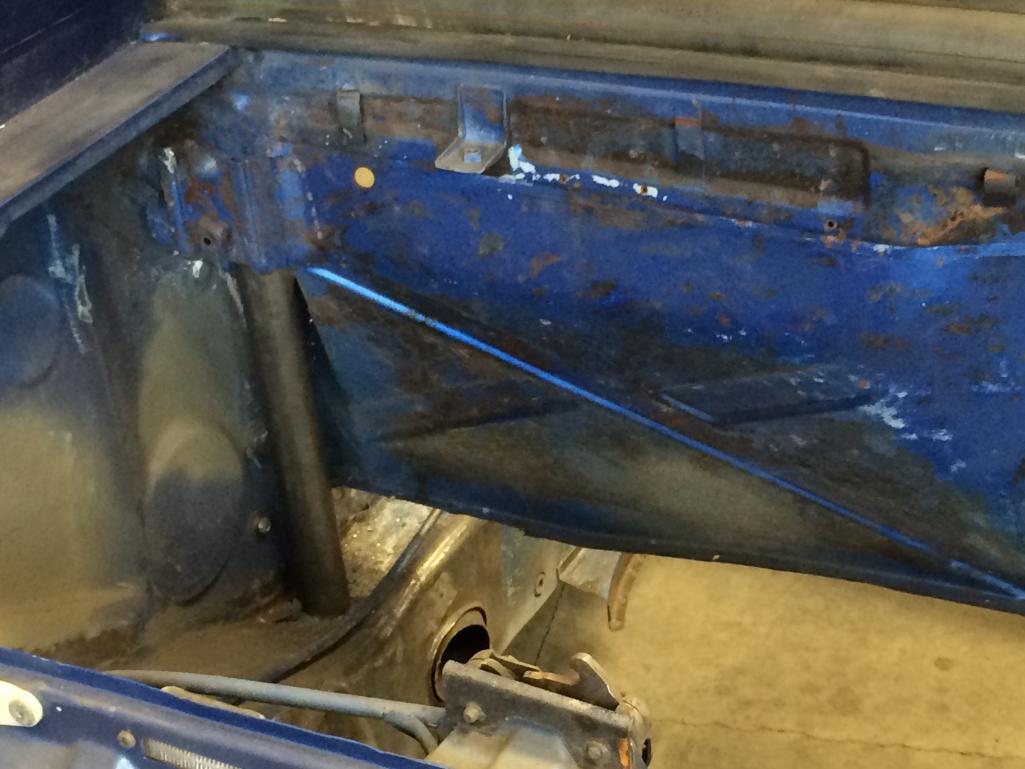
|
|
|
|
|
1 User(s) are reading this topic (1 Guests and 0 Anonymous Users)
0 Members:

|
Lo-Fi Version | Time is now: 5th November 2025 - 12:30 AM |
Invision Power Board
v9.1.4 © 2025 IPS, Inc.