|
|
|
Porsche, and the Porsche crest are registered trademarks of Dr. Ing. h.c. F. Porsche AG.
This site is not affiliated with Porsche in any way. Its only purpose is to provide an online forum for car enthusiasts. All other trademarks are property of their respective owners. |
|
|

  |

| amfab |
 Jan 22 2017, 10:03 PM Jan 22 2017, 10:03 PM
Post
#21
|
|
Member  Group: Members Posts: 401 Joined: 17-May 16 From: Los Angeles Member No.: 20,004 Region Association: None |
QUOTE(Montreal914 @ Jan 21 2017, 08:27 PM)  To give you an idea, the holes for the plug welds on the inner reinforcement kit from maddog are 3" apart length wise and 1 1/2" height wise. I think they are 5/16" diameter (or 3/8"). Keep up the good work (IMG:style_emoticons/default/smash.gif) Thanks Eric, obviously this has turned into a much bigger project since we spoke. Last night as I am grinding the last of the rusted area away at the back of the long, I made a hole big enough to shine a light into the space behind the firewall. There is a bunch of sand in there from sandblasting, so I blow it out. Once cleaned out, I can see into the back, behind the passenger compartment firewall—behind the patches the PO made. It appears that he didn't even bother to cleanup the rusted area at the bottom of the firewall, he just lap-welded a patch over it. You can't see it from the passenger's compartment, but i just can't leave it. Since there are a couple other small places I was going to patch in the firewall, I just said "screw it" and ordered a replacement lower half of the firewall. I figure a fresh firewall bottom will make it easier to attach the floor pan as well. I just really, really need these discoveries to end. They are so demoralizing -Andrew |
   |

 
|
| BeatNavy |
Jan 23 2017, 04:35 AM
Post
#22
|
|
Certified Professional Scapegoat Group: Members Posts: 2,965 Joined: 26-February 14 From: Easton, MD Member No.: 17,042 Region Association: MidAtlantic Region |
QUOTE(amfab @ Jan 22 2017, 11:03 PM) I just said "screw it" and ordered a replacement lower half of the firewall. I figure a fresh firewall bottom will make it easier to attach the floor pan as well. I can't tell by your description - are you doing the inner or outer firewall? Getting the outer firewall fitted and on is particularly tricky with all the tubes you have to route. That's a whole 'nother can o' worms. QUOTE(amfab @ Jan 22 2017, 11:03 PM) I just really, really need these discoveries to end. They are so demoralizing I know the feeling, but you seem to be making rapid progress. It'll feel good when all is said and done. |
 |
|
| amfab |
Jan 23 2017, 11:48 PM
Post
#23
|
|
Member Group: Members Posts: 401 Joined: 17-May 16 From: Los Angeles Member No.: 20,004 Region Association: None |
QUOTE(BeatNavy @ Jan 23 2017, 02:35 AM) I can't tell by your description - are you doing the inner or outer firewall? Its the bottom of the inner firewall. There was rust and the PO patched it at the bottom. It is strong, but once i got a look behind it, I saw that they just welded over the rusted edge. I could just leave it, but I think I should just replace the lower firewall. That way I can get rid of the crud in the space and make certain there are not any holes or metal that needs treatment in that space. I can brush and treat any rust i find, prime it, and then feel good about sealing it back up. It will also give me a fresh tab to attach the floor pan—rather than reattaching that hack-ey patch to the fresh floor pan. Thanks for the encouragement, laying on the cold garage floor after working on it all weekend and discovering this was no fun. -Andrew 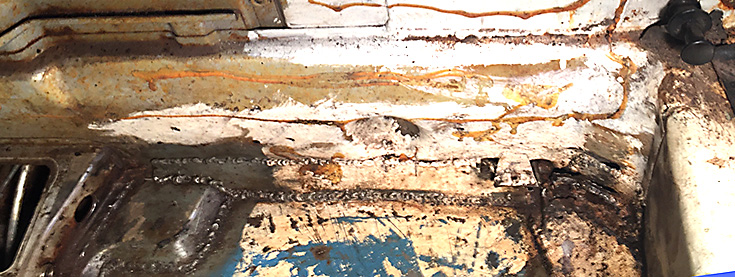 |
|
|
|
| amfab |
Jan 30 2017, 10:39 PM
Post
#24
|
|
Member Group: Members Posts: 401 Joined: 17-May 16 From: Los Angeles Member No.: 20,004 Region Association: None |
You guys intimidate me. I am ok with a TIG, but I get sloppy with a MIG when Im not sitting at a table working on clean metal. I can not seem to get it dialed in.
Its like I get it dialed in then something changes. It does well for a while, then I have issues, then its back to good. Seems like a wire feed issue. I cleaned my wire drive wheel. It seemed to help. Do you guys run .030 or .025? Im using .030 with some standard Lincoln brand mild wire with 75% CO2-24% Argon. My welds should be better. Probably just me, I have been out of practice Anyway, I remade some patch parts because I chaged my mind how I was approaching this. I patched the damaged areas on the inside long. I butt-welded them in. They came out pretty good, but I want to make certain there is enough strength, so I am making an 18 gauge layer that will cover the inner long about 3/4 of the way up, from door post to engine mount. Below is the long before, repaired, and the last one is the shell I am building to reinforce it all. They are not as wavy in reality, The panoramic mode does that 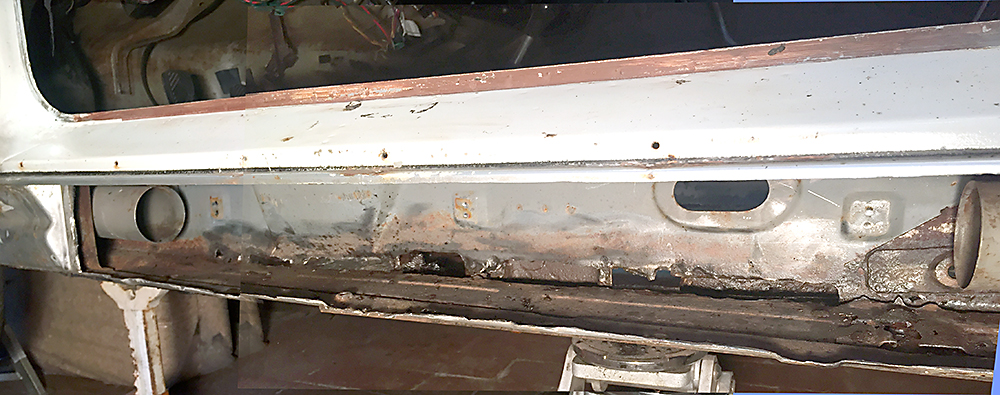  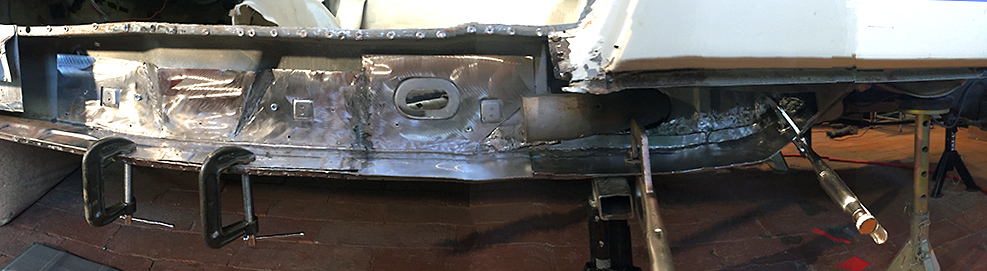 |
|
|
|
| BeatNavy |
Jan 31 2017, 04:50 AM
Post
#25
|
|
Certified Professional Scapegoat Group: Members Posts: 2,965 Joined: 26-February 14 From: Easton, MD Member No.: 17,042 Region Association: MidAtlantic Region |
QUOTE(amfab @ Jan 30 2017, 11:39 PM) Do you guys run .030 or .025? Im using .030 with some standard Lincoln brand mild wire with 75% CO2-24% Argon. My welds should be better. Probably just me, I have been out of practice I'm hardly the authority on this, but I use .030 for structural repairs (like you're doing now) and .025 for body/cosmetic stuff. Yes, that's the gas mixture I use as well. Really good welding has a lot of dependencies: clean metal, proper power/wire feed/gas settings, good technique (requiring lots of practice), good lighting, properly fitted patches, etc, etc. Most of the time I'm missing one or more of these elements, and my results, while functional, won't win any beauty contests. You're moving right along. I'm jealous...I need a heated garage with better light. My projects slow to a crawl in the winter... (IMG:style_emoticons/default/sad.gif) |
|
|
|
| BillC |
Jan 31 2017, 08:15 AM
Post
#26
|
|
Senior Member Group: Members Posts: 735 Joined: 24-April 15 From: Silver Spring, MD Member No.: 18,667 Region Association: MidAtlantic Region |
QUOTE(amfab @ Jan 30 2017, 11:39 PM) You guys intimidate me. I am ok with a TIG, but I get sloppy with a MIG when Im not sitting at a table working on clean metal. I can not seem to get it dialed in. Its like I get it dialed in then something changes. It does well for a while, then I have issues, then its back to good. Seems like a wire feed issue. I cleaned my wire drive wheel. It seemed to help. When was the last time you changed your MIG machine's hose liner? The liner is a wear/maintenance item, and needs to be replaced after a while, usually when the wire feed starts becoming uneven or sticky. It takes quite a while for a liner to wear, so it's one of those things that creeps up on you until all of a sudden you start wondering what happened to your welding. Liners are pretty cheap, the replacement I installed last fall was less than $20 from Amazon. Took about 15 minutes to change, didn't even have to remove the hose from the machine. |
|
|
|
| bretth |
Jan 31 2017, 08:31 AM
Post
#27
|
|
Senior Member Group: Members Posts: 899 Joined: 23-June 15 From: Central TX Member No.: 18,882 Region Association: Southwest Region |
One issue I have encountered while welding with the 2lb spools is that once you get about two 3rds or so into a spool the wire does not cleanly exit the spool anymore. It's like the wire in the middle of the spool is wound into a smaller diameter and has taken on a bend and can't be easily straightened out and gets hung up in the whip. Last time it happened to me I thought for sure that the liner was worn out or something because the welding was all over the place, huge variances in wire speed. As soon I put a new spool on it was like a brand new welder and every weld was smooth and consistent. From now on I only use the larger spools.
|
|
|
|
| amfab |
Jan 31 2017, 01:26 PM
Post
#28
|
|
Member Group: Members Posts: 401 Joined: 17-May 16 From: Los Angeles Member No.: 20,004 Region Association: None |
You guys have me thinking about a few things.
I have an 8 or 10 lb. spool on the welder, so it’s not exactly the 2lb spool problem, but I was wondering about the wire sticking as it unspools. I noticed that the reel is a little loose on the spindle adaptor—it can slop side to side on the adaptor a little. There is a tab to the side of the adaptor that fits into the hole on the reel (see picture). Because it is loose, it seems that the tab could pop out. I do not know if the spindle is driven with the motor, but maybe this has something to do with it. This is odd because its a Lincoln welder with a Lincoln adaptor and Lincoln spool on it. Also, the welder was sitting in my garage for 10 years with this spool on it. Some of the wire on the outside layers was corroded, so I spooled off about 5 lbs. to get to really clean wire. What is the shelf life of this stuff? I do not see any corrosion on the wire. The welder did not have that much time on it before I stopped using it—the stuff I have been doing over the last decade was all TIG. The MIG was not used enough to wear the liner, but can the liners get corroded? Maybe I’ll just buy a liner, a fresh roll of .030 and a roll of .025 just to elminate everything. Any wire brand recommendations? -Andrew  |
|
|
|
| bdstone914 |
Feb 5 2017, 11:18 AM
Post
#29
|
|
bdstone914 Group: Members Posts: 5,323 Joined: 8-November 03 From: Riverside CA Member No.: 1,319 |
Larger hole make the welds easier. 3/8 minimum.
|
|
|
|
| amfab |
Dec 5 2018, 06:58 PM
Post
#30
|
|
Member Group: Members Posts: 401 Joined: 17-May 16 From: Los Angeles Member No.: 20,004 Region Association: None |
OK, here I am about a year later, the project being on hold for a while I have been doing some work the last few months but not updated the thread. I kept discovering the rust one thing at a time and eventually I just gave up and decided to build a six and restore the chassis.
So I stripped the car of all the parts and here are the problem areas I discovered, one thing at a time. I have had a couple people say I should have just tossed the chassis and found one in better shape—and I think they may have been right at some points, but then I was so far into it I figured I would keep going and save one more. Whether it was the right or wrong decision doesn't mater now as I have made it and am moving forward. So here are the problem areas I have addressed or am addressing The inner longs: The prior photos have shown what I have done to those to repair and strengthen. Here is a photo of the patch on the passenger's side showing the inner long. 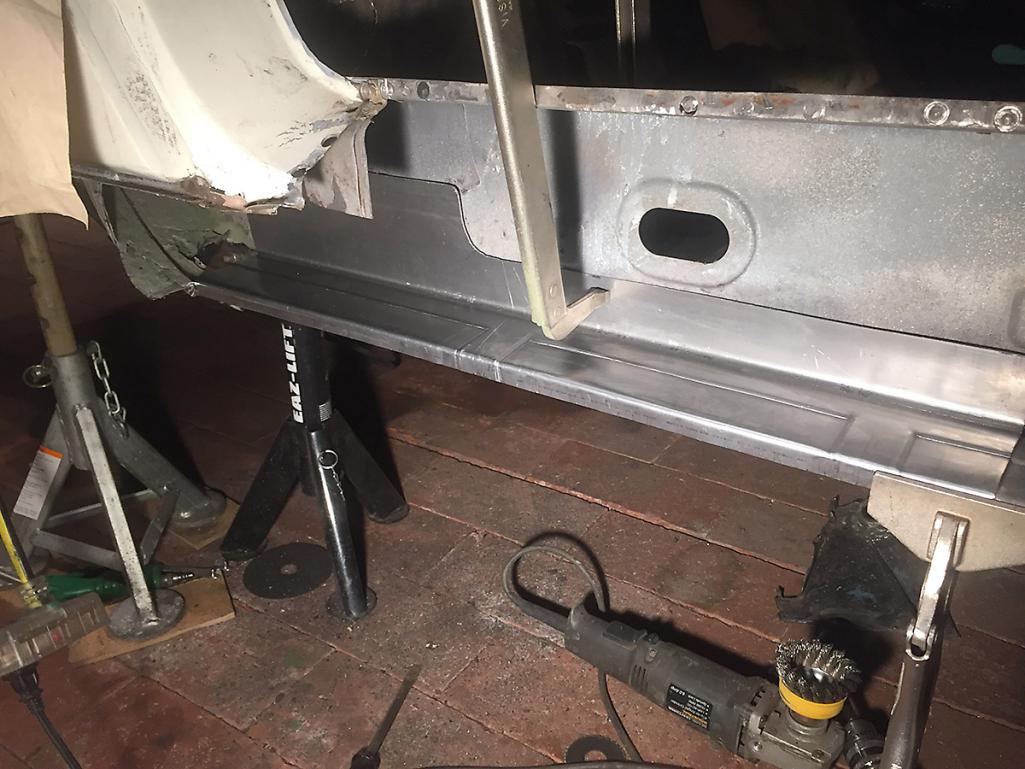 Here is the patch from the inside of the passenger's compartment  After the patching was complete on both sides, I laid another inner reinforcement piece on the bottom and inner side long—on the inside—and coated in Eastwood internal frame coating. 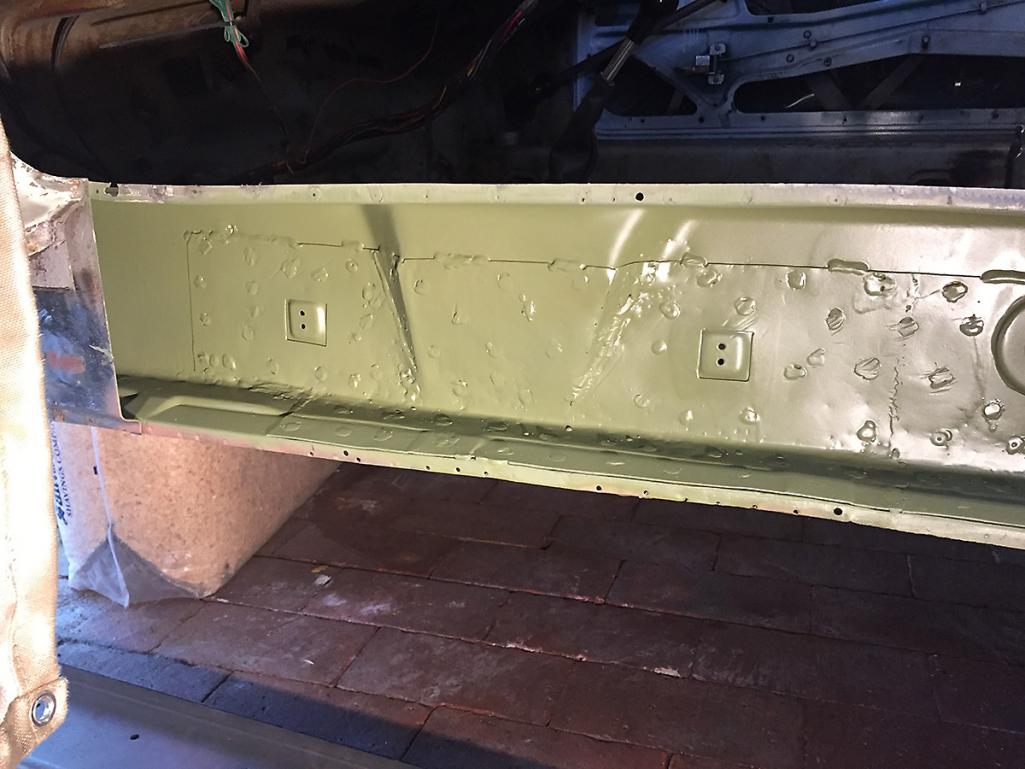 |
|
|
|
| amfab |
Dec 5 2018, 07:01 PM
Post
#31
|
|
Member Group: Members Posts: 401 Joined: 17-May 16 From: Los Angeles Member No.: 20,004 Region Association: None |
The floor pans and outer longs will be replaced by Restoration Design pieces
shown below: 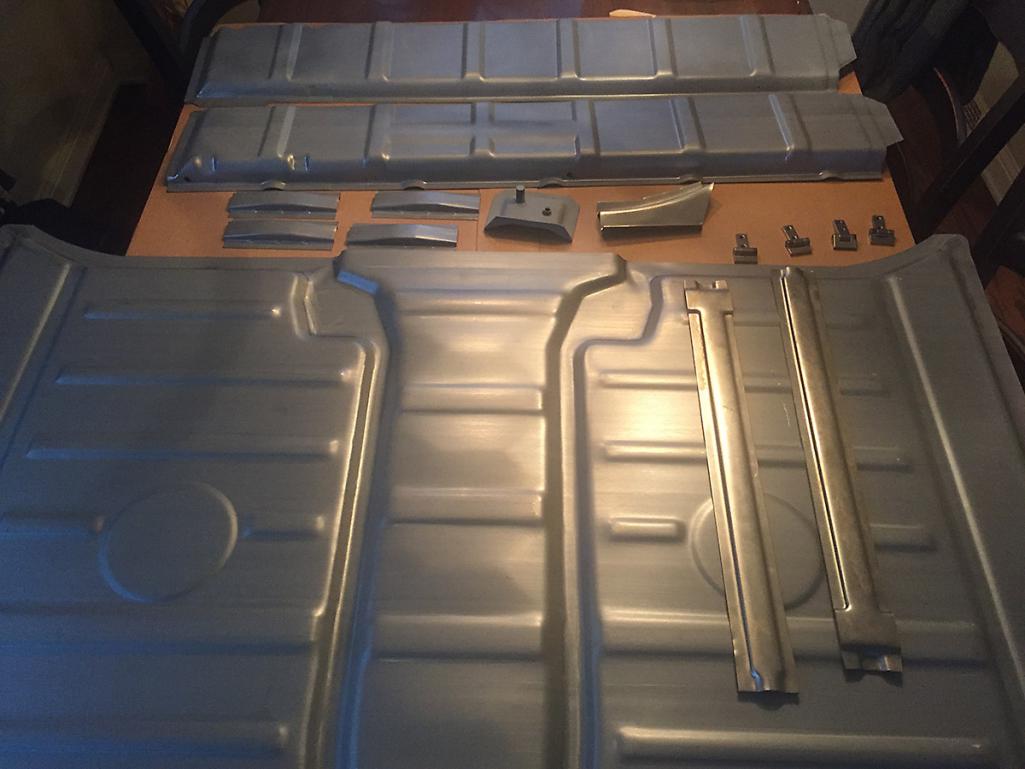 |
|
|
|
| amfab |
Dec 5 2018, 07:13 PM
Post
#32
|
|
Member Group: Members Posts: 401 Joined: 17-May 16 From: Los Angeles Member No.: 20,004 Region Association: None |
The upper firewall had some sloppy patches, so I got a hunk of firewall from another member and have repaired a couple of small holes and then added the new section into what I cut out.
Photos of the P.O. Patches: 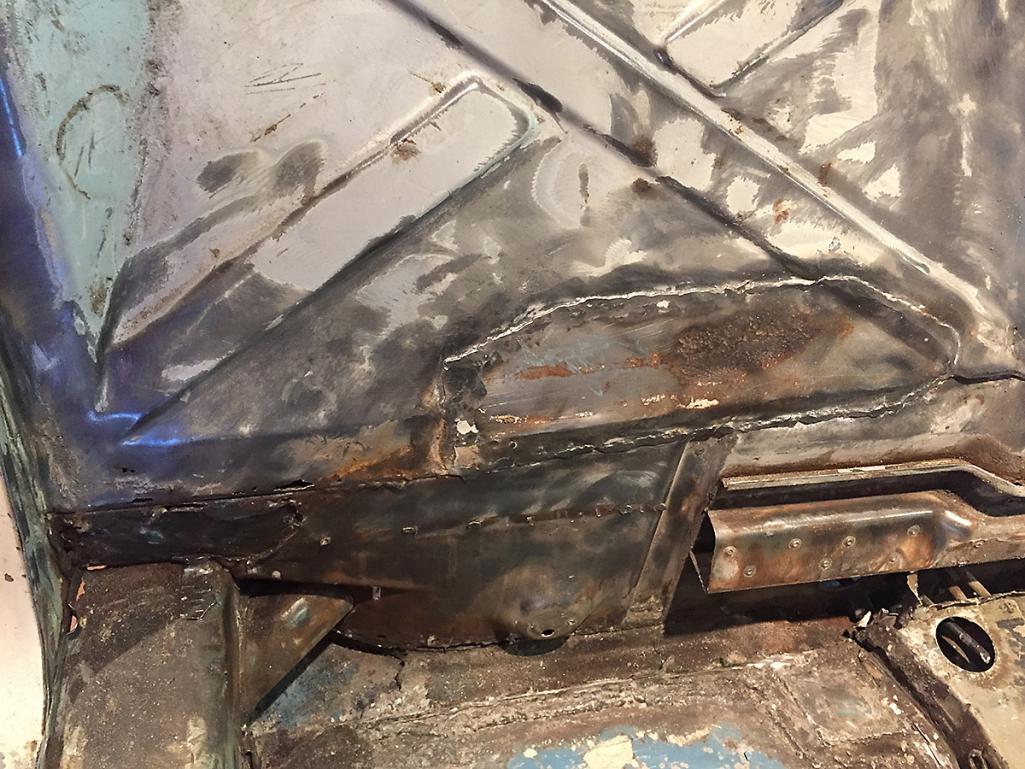 Other Side: 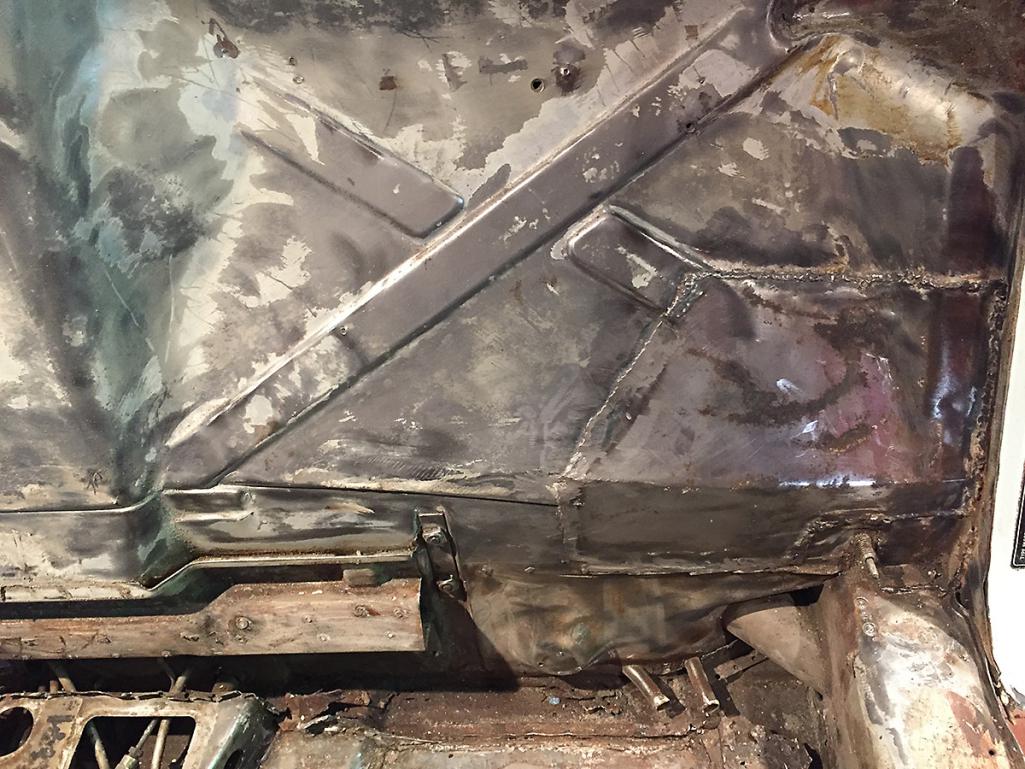 Then I braced and the chassis and cut out a hunk of upper firewall: 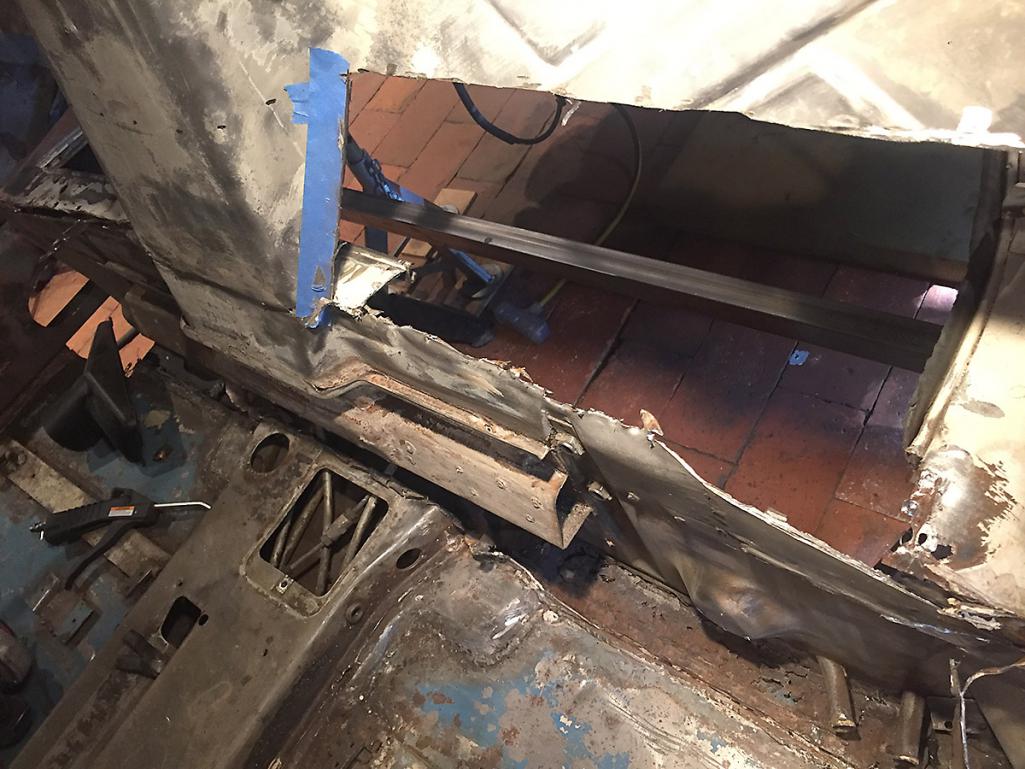 Then I made some minor patches on the "new"hunk of firewall: 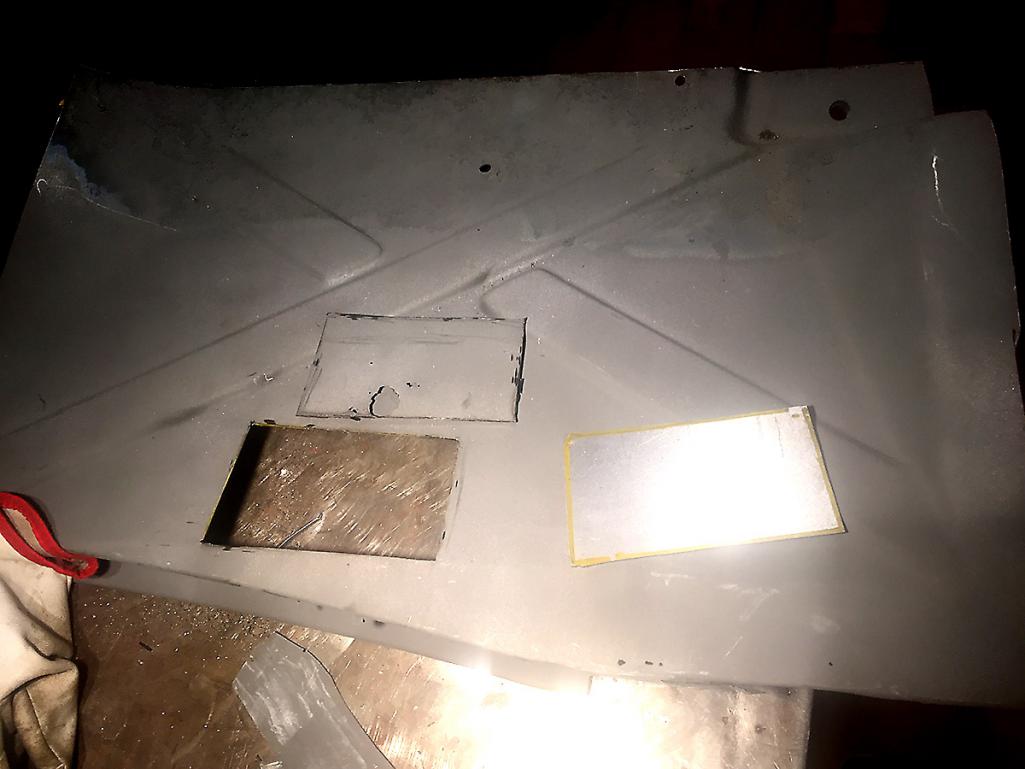 Excuse the sloppy welds: 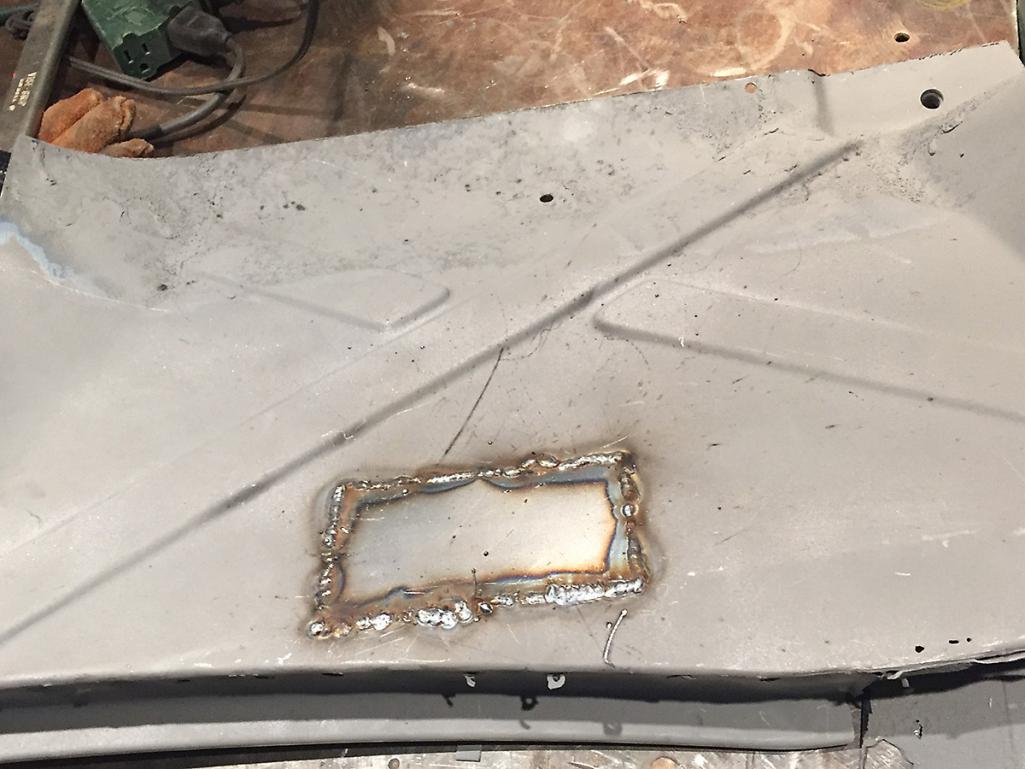 Ground: 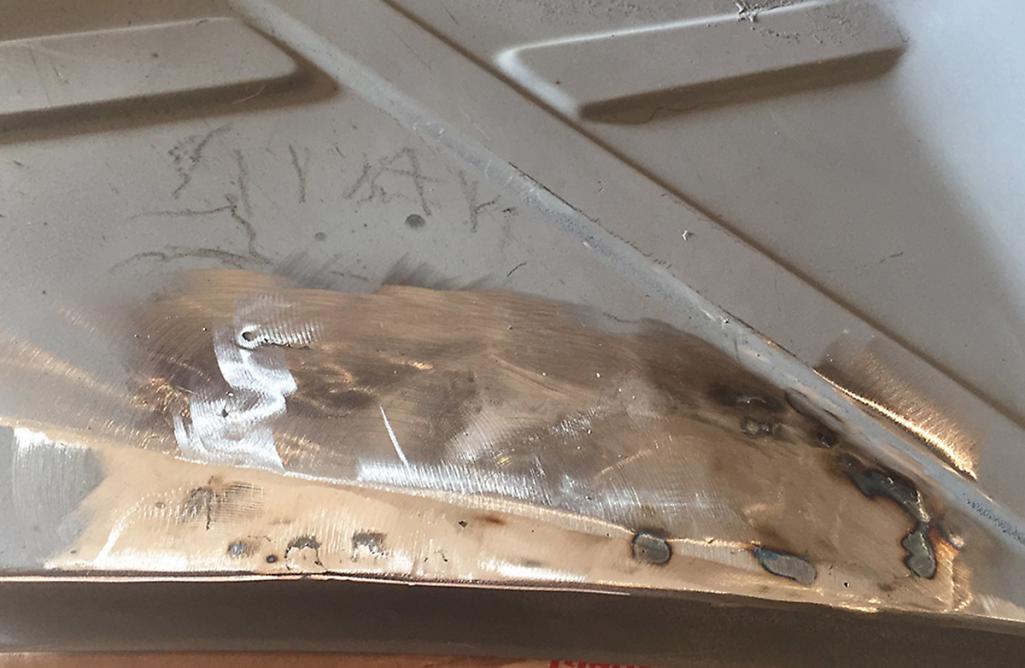 My welding has improved a lot since then, I was using my old Lincoln. I bought a Hobart Handler MVP and it has made quite a difference for me. |
|
|
|
| amfab |
Dec 5 2018, 07:25 PM
Post
#33
|
|
Member Group: Members Posts: 401 Joined: 17-May 16 From: Los Angeles Member No.: 20,004 Region Association: None |
As you can see from the above patch photos the lower inner and outer firewall were trashed so I cut them out and have new RD pieces going in.
 The hellhole and area around it had been repaired badly by a P.O. Lap welds all around. I cut it all out and replaced with part of an inner wheelhouse from AA (RD was out of stock on the part) and a patch piece I made. The color is from the Upol copper weld-through primer 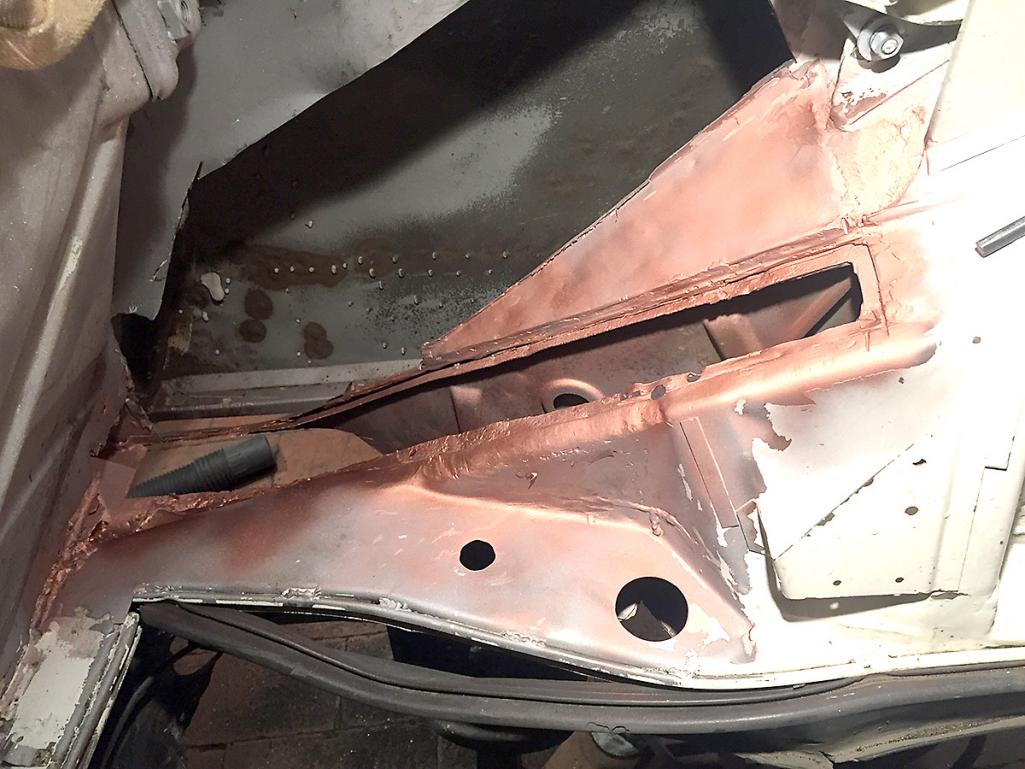 I will have to find a picture of the area with the repairs done |
|
|
|
| amfab |
Dec 5 2018, 07:30 PM
Post
#34
|
|
Member Group: Members Posts: 401 Joined: 17-May 16 From: Los Angeles Member No.: 20,004 Region Association: None |
I was delayed for a few months because of work and because my other two cars were hit within a couple of months of each other. It is very frustrating to have 3 cars and have to rent.
First some guy drove right into the back of my 993 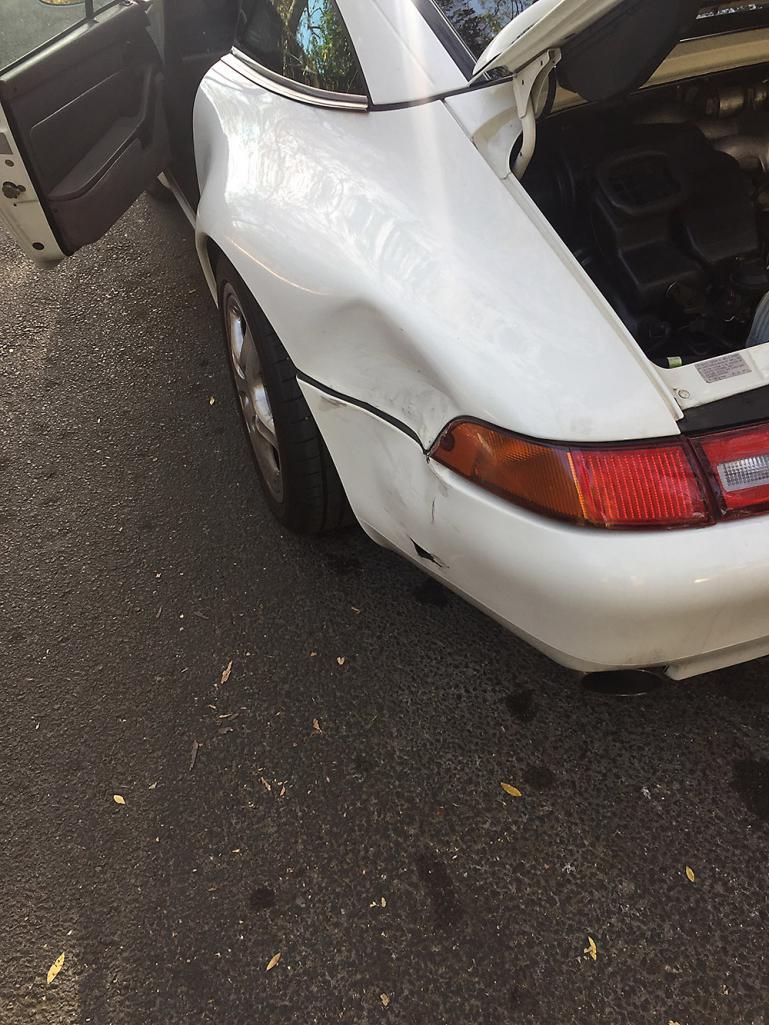 Then someone in a Mercedes decided to make a left turn into my International 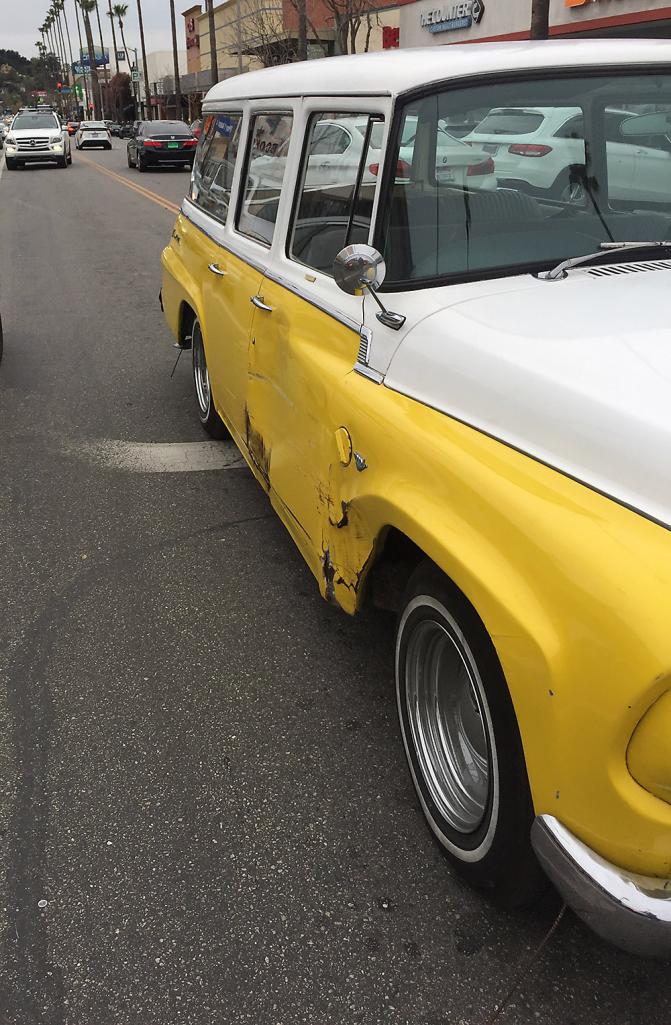 |
|
|
|
| Dion |
Dec 5 2018, 07:38 PM
Post
#35
|
|
RN Group: Members Posts: 2,931 Joined: 16-September 04 From: Shepherdstown, WV Member No.: 2,766 Region Association: MidAtlantic Region |
Sorry about the other cars getting nailed, that sux. I hope insurance helps you out with those. As for the 914... nice work. Glad to see your progress as I’m in a similar boat with regards to the longitudinal. Keep at it! I’m afraid I can’t shed any light on mig welding as I’m still learning myself.
Practice makes perfect... you already have tig skills, that’s great. Good luck on the other vehicles. Cheers, Dion |
|
|
|
| amfab |
Dec 5 2018, 09:04 PM
Post
#36
|
|
Member Group: Members Posts: 401 Joined: 17-May 16 From: Los Angeles Member No.: 20,004 Region Association: None |
Thanks Dion,
I ended up having the 993 repainted. The international is in the shop still. I decided that the easiest way to work on the car was going to be on a dolly—to keep it rigid, or a rotisserie to allow easy access. I emailed back and forth with Jeff Hail a bit who was a great help—Thanks Jeff! I couldn't decide which to do so I did both. I came up with an idea to build a dolly frame for the car out of pallet rack shelving and make it so I could mount the dolly/car on the Rotisserie. Here is the idea I came up with: 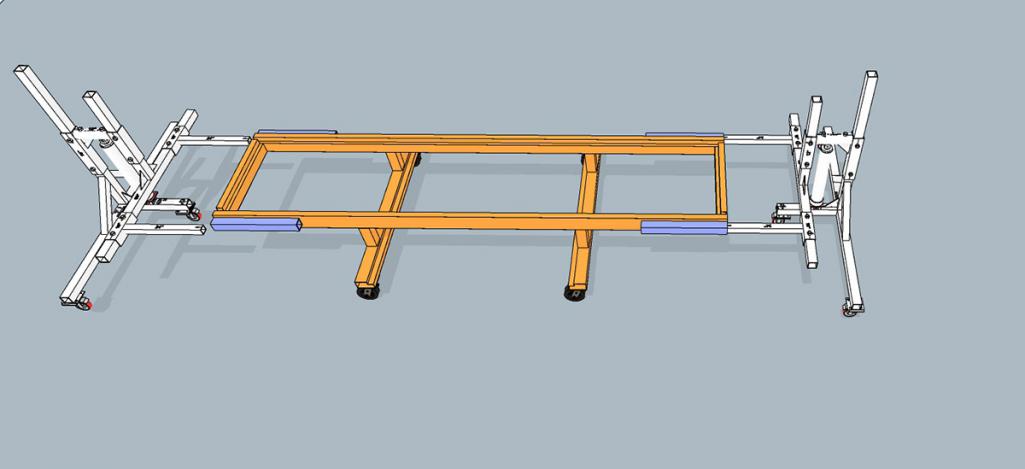 Basically, build a dolly and weld trailer hitch tubes on each corner to receive the arms of the rotisserie. |
|
|
|
| amfab |
Dec 6 2018, 01:29 PM
Post
#37
|
|
Member Group: Members Posts: 401 Joined: 17-May 16 From: Los Angeles Member No.: 20,004 Region Association: None |
I bought some Used Interlake pallet rack shelf support beams—they are 15 gauge and 4.5 x about 2.5 with an extra bend in them so they are really rigid. Buying them used is way cheaper than buying new steel like 2x4 16ga, or 11 ga.
I built a rectangular box out of them that fit under the car and spent a lot of time getting it level and square. 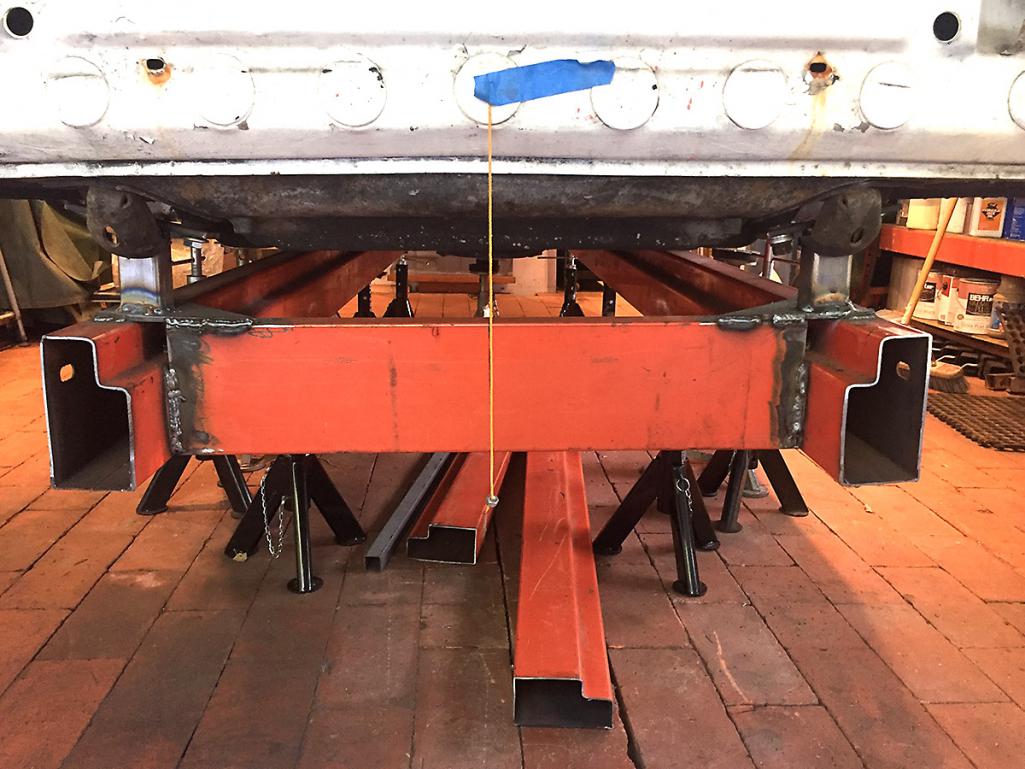 Then I welded trailer hitch tubing on each corner to mount on the rotisserie 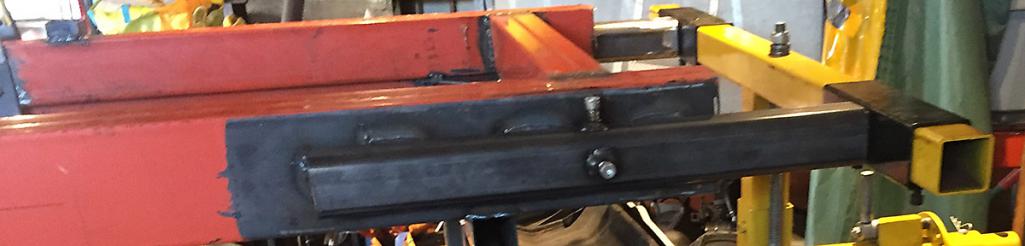 I took a bunch of adjustable jack stands and got the car really level using a laser, then raised the rectangular dolly frame to within a few inches of the bottom of the car making sure it was level with the laser. This took a bunch of adjustable jack stands: 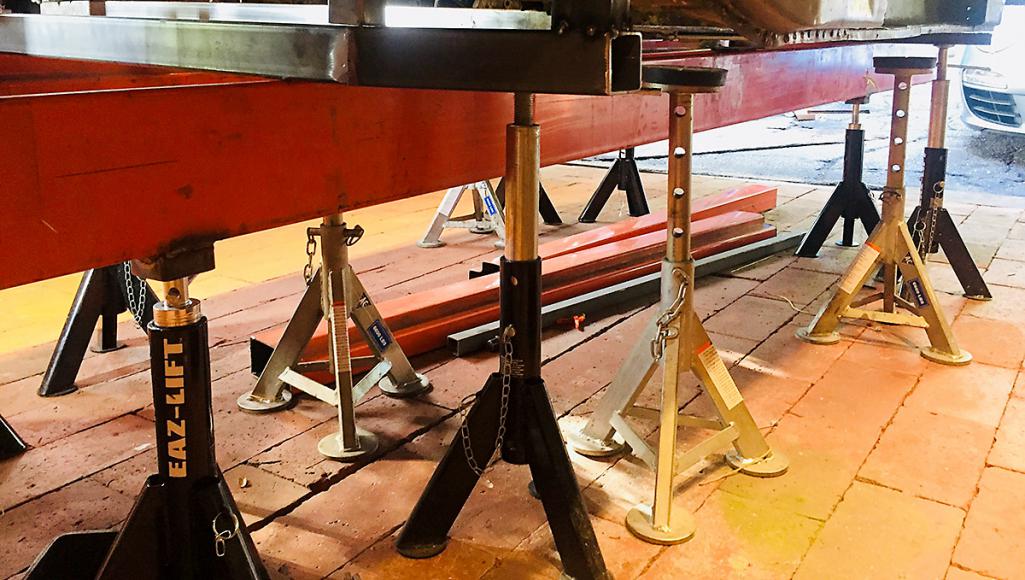 I measured and remeasured and I found the dimensions of the car were surprisingly good. Nothing was much more than 1 mm off. At this point I felt confident enough to cut and weld in the connecting pieces between the Rectangular dolly base and the suspension mounting points. Here are the rear suspension console pieces tacked in. This is when I gave up on my Lincoln 125v and ordered a Hobart 220v welder.  I made connections at the front of the A-Arms (see above), and also the front suspension cross member. I actually welded the dolly frame to the old suspension crossmember as I am going to use an aluminum one when I put the car back together. I made connections at the rear suspension console and the transmission mounts. It took me a few days to do this as I went slowly measuring every time I did any welding. |
|
|
|
| amfab |
Dec 6 2018, 01:35 PM
Post
#38
|
|
Member Group: Members Posts: 401 Joined: 17-May 16 From: Los Angeles Member No.: 20,004 Region Association: None |
Once on the rotisserie the dolly frame really keeps the chassis rigid. I took the door braces out to test it and there was no change in the door gaps, even when rotating.
I put the door braces back in anyway to help when I get to welding in the firewall etc. Here is a picture of it when I pulled it out o the garage to do some spot sandblasting. 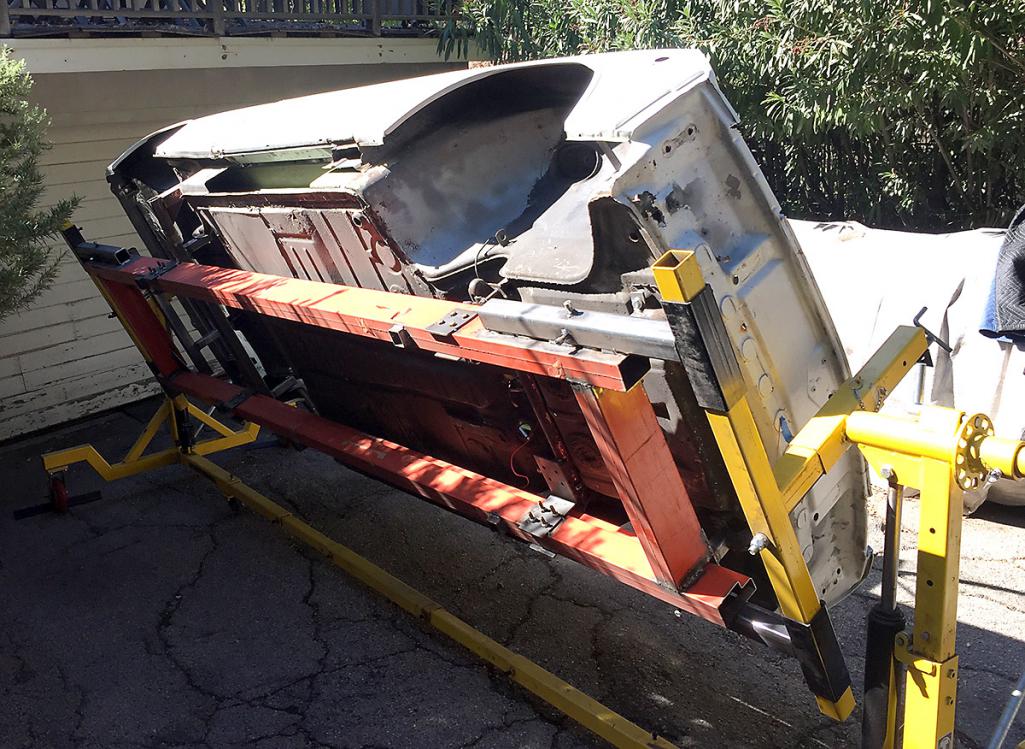 Another: 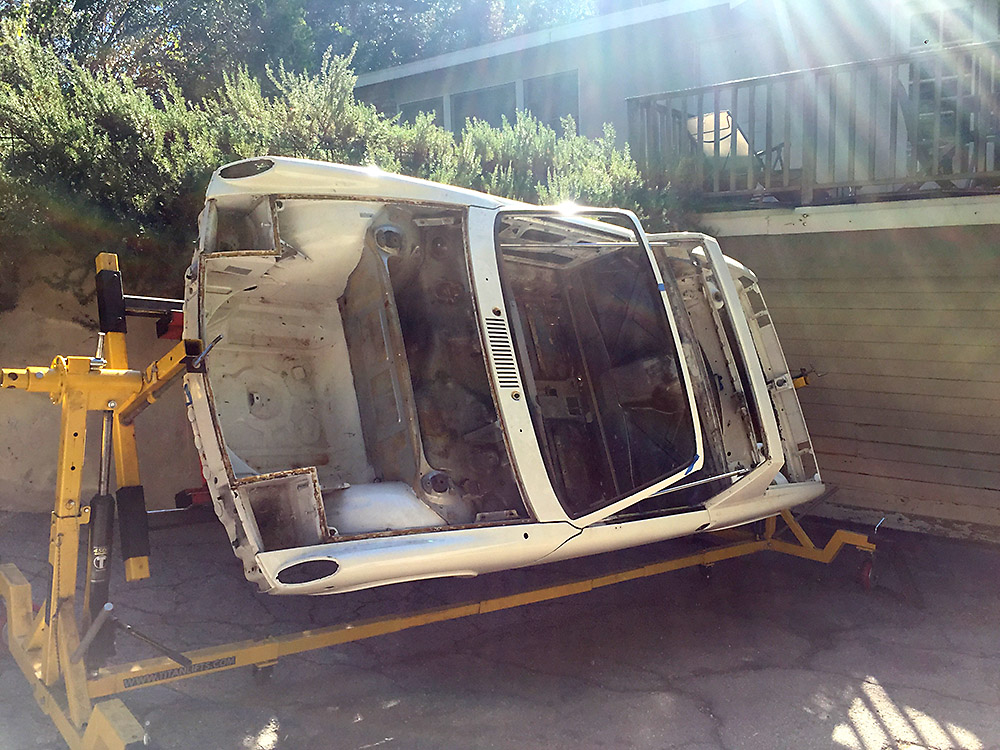 |
|
|
|
| amfab |
Dec 6 2018, 01:42 PM
Post
#39
|
|
Member Group: Members Posts: 401 Joined: 17-May 16 From: Los Angeles Member No.: 20,004 Region Association: None |
I don't know why the P.O. did this. He probably did it when mounting a fuel pump up front. It really defines the term "Hack Job"
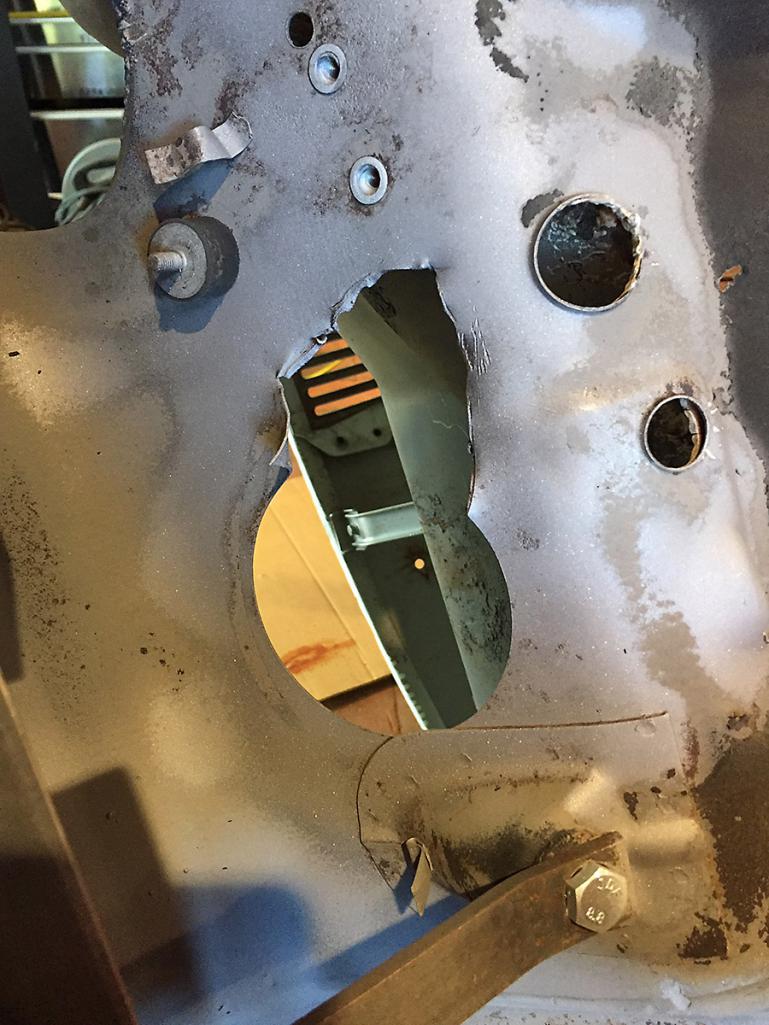 Here is the patch underway: 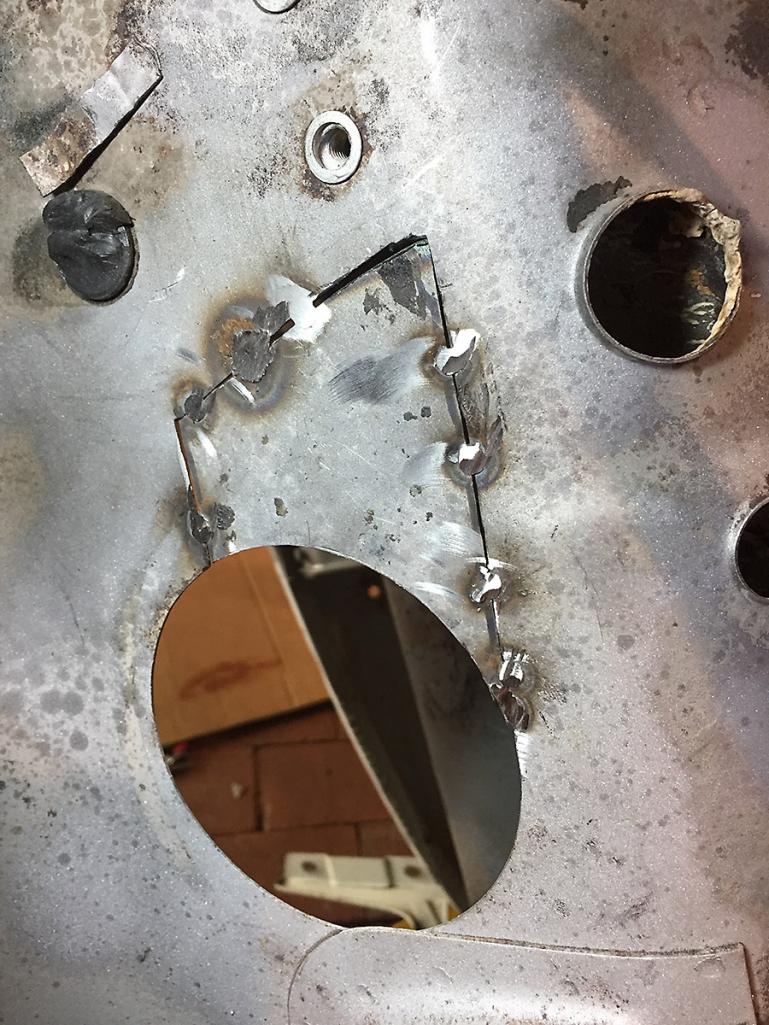 |
|
|
|
| bbrock |
Dec 6 2018, 01:52 PM
Post
#40
|
|
914 Guru Group: Members Posts: 5,269 Joined: 17-February 17 From: Montana Member No.: 20,845 Region Association: Rocky Mountains |
Fantastic work. I absolutely LOVE that dolly-rotisserie hybrid!!! (IMG:style_emoticons/default/pray.gif)
You asked if restoring this tub was the right or wrong thing? I'm 110% certain it was the RIGHT thing. (IMG:style_emoticons/default/smilie_pokal.gif) (IMG:style_emoticons/default/smilie_pokal.gif) |
|
|
|
|
1 User(s) are reading this topic (1 Guests and 0 Anonymous Users)
0 Members:

|
Lo-Fi Version | Time is now: 23rd June 2026 - 04:44 PM |
Invision Power Board
v9.1.4 © 2026 IPS, Inc.