|
|
|
Porsche, and the Porsche crest are registered trademarks of Dr. Ing. h.c. F. Porsche AG.
This site is not affiliated with Porsche in any way. Its only purpose is to provide an online forum for car enthusiasts. All other trademarks are property of their respective owners. |
|
|

  |

| bbrock |
 Aug 21 2019, 09:48 AM Aug 21 2019, 09:48 AM
Post
#1201
|
|
914 Guru  Group: Members Posts: 5,269 Joined: 17-February 17 From: Montana Member No.: 20,845 Region Association: Rocky Mountains |
Thanks guys. Sorry for the silence. I've been busy cleaning a nasty little virus off my computer. Word to the wise, don't download ancient device drivers from a sketchy site. I knew that would be trouble but did it anyway. (IMG:style_emoticons/default/screwy.gif)
The psychology of getting this thing on the ground is very interesting. After two years of looking at the car with the door sills tits high, it was hard to get re accustom to just how low it sits. In fact, I thought there might be something wrong with the front suspension but after measuring the axle height, I found it actually a tad high (IMG:style_emoticons/default/biggrin.gif) The other thing is that looking down on the car instead of up, makes the whole project seem much smaller. There is a glimmer of hope for getting color on the car yet this fall. (IMG:style_emoticons/default/beerchug.gif) |
   |

 
|
| mepstein |
Aug 21 2019, 10:04 AM
Post
#1202
|
|
914-6 GT in waiting Group: Members Posts: 20,685 Joined: 19-September 09 From: Landenberg, PA/Wilmington, DE Member No.: 10,825 Region Association: MidAtlantic Region |
When I drove my car after 26 years of not driving a 914. I couldn't believe how small and low it was.
Of course there weren't so many pick-ups and SUV's on the road back in the day. |
 |
|
| FlacaProductions |
Aug 21 2019, 10:51 AM
Post
#1203
|
|
Advanced Member Group: Members Posts: 2,198 Joined: 24-November 17 From: LA Member No.: 21,628 Region Association: Southern California |
Agreed. I was "between 914's" for 23 years until this past March and I'm amazed at how small and low they actually are. Especially in a "modern" parking lot....
|
|
|
|
| bbrock |
Aug 25 2019, 09:26 PM
Post
#1204
|
|
914 Guru Group: Members Posts: 5,269 Joined: 17-February 17 From: Montana Member No.: 20,845 Region Association: Rocky Mountains |
Plugging along. Yesterday I finished skim coating filler on the chassis and blocking it out. I've block sanded to 120. Wondering if I should go to 220. Plan is to spray with epoxy primer, then high build. Thoughts?
   Filled the dents someone left with their fat ass when they sat on the roll bar. 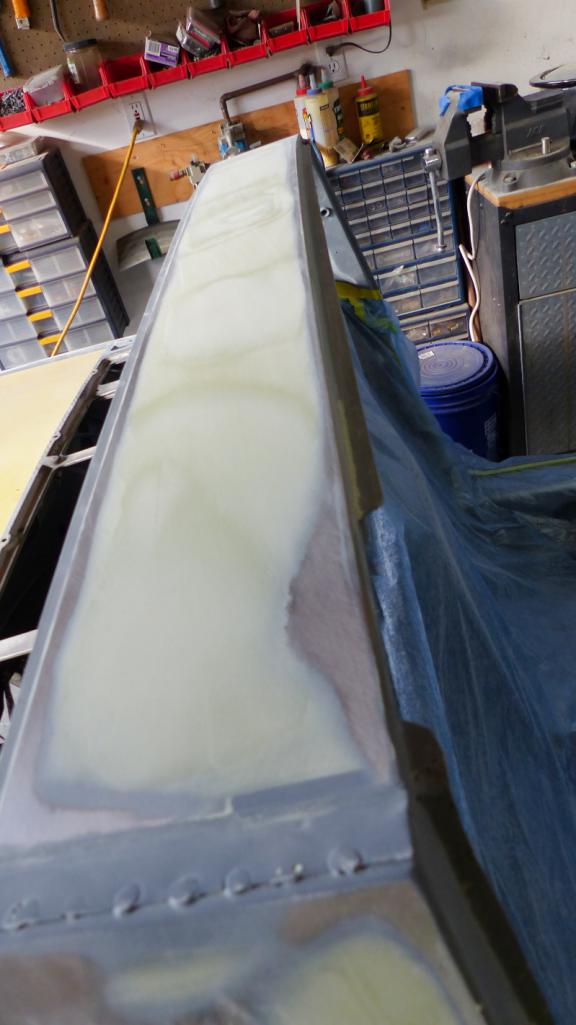 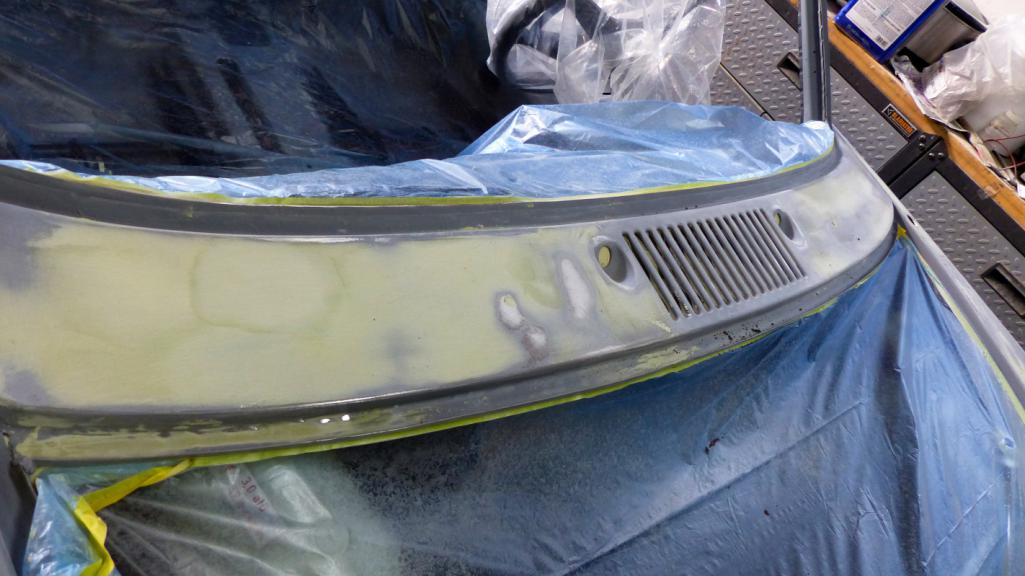 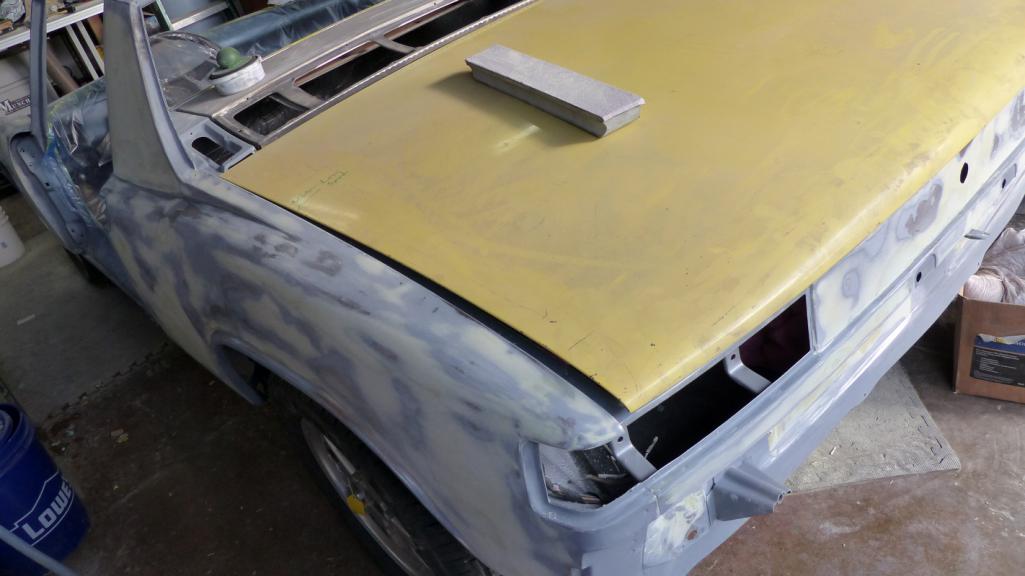 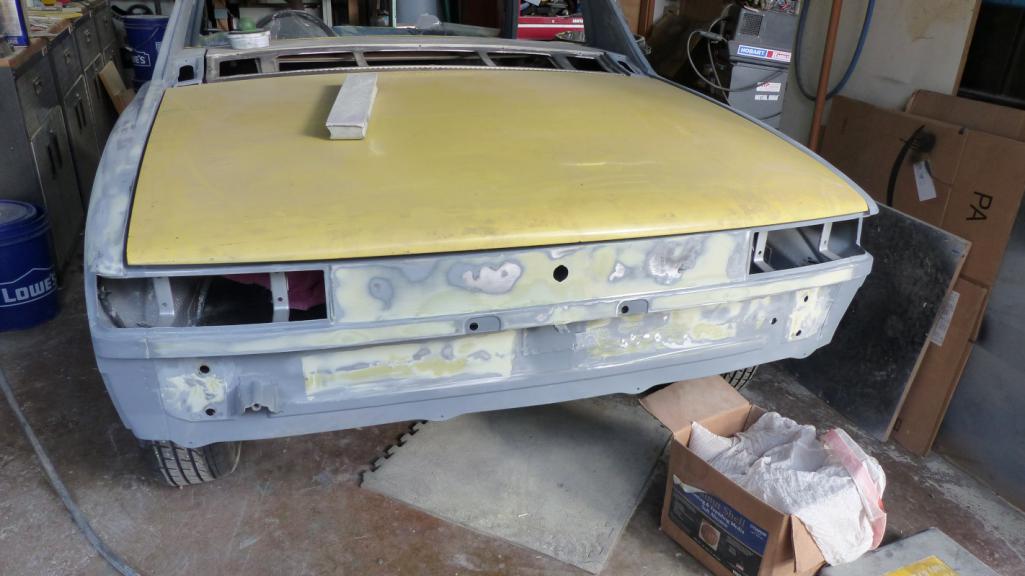 |
|
|
|
| bbrock |
Aug 25 2019, 09:46 PM
Post
#1205
|
|
914 Guru Group: Members Posts: 5,269 Joined: 17-February 17 From: Montana Member No.: 20,845 Region Association: Rocky Mountains |
Today I started on a task I've been dreading - stripping the deck lids. I've had inconsistent luck with paint stripper. I did okay stripping the paint from the underside of the frunk lid but did nothing on the poly coating underneath. I'll have to media blast that off.
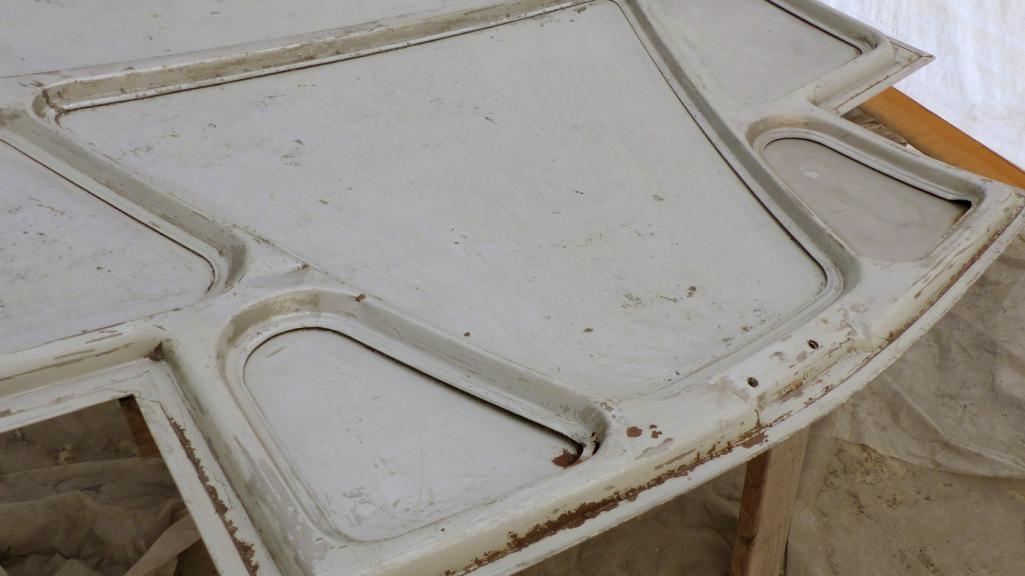 A little damage that will need repair. Looks like someone closed the frunk lid within something in the way. 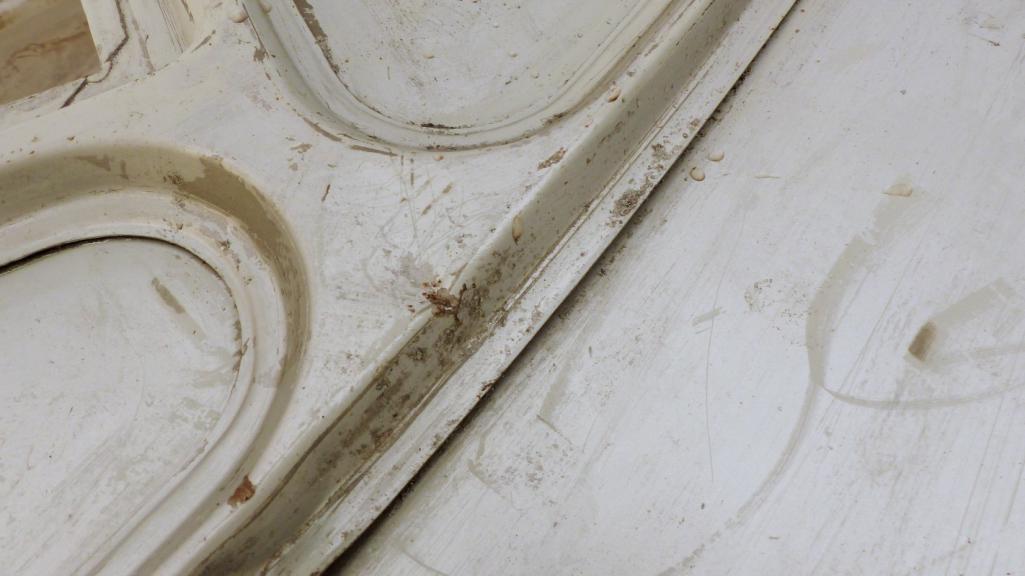 And a small rust hole to plug. 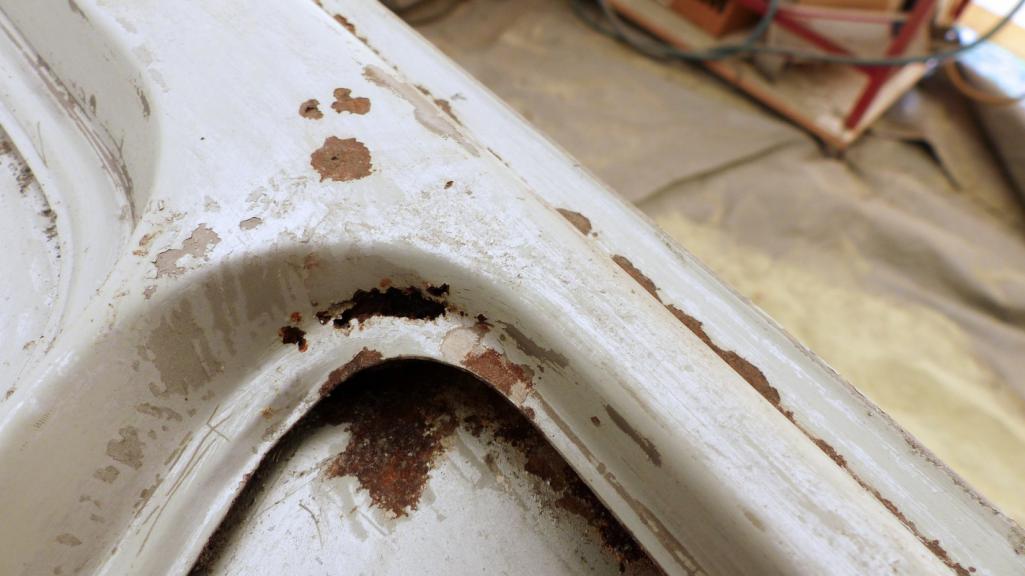 Paint stripper was worthless on the top of the lid. It had multiple layers of primer and high build or filler that the stripper barely phased. I know from stripping the chassis that this stuff is pretty hard to blast too. I used a stripping disc on a grinder, just stripping a small patch in a spot at a time to avoid heating the panel. It took forever but I got it done. 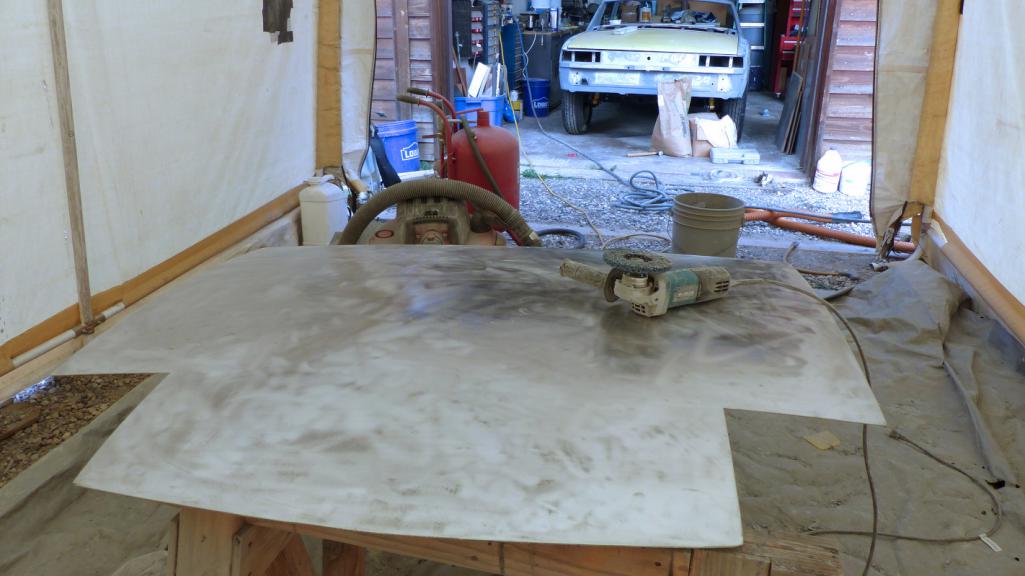 That took most of the day but I had enough time to start on the trunk lid. Better luck with the stripper here. Only two layers of paint to remove.  |
|
|
|
| Superhawk996 |
Aug 26 2019, 05:42 AM
Post
#1206
|
|
914 Guru Group: Members Posts: 7,839 Joined: 25-August 18 From: Woods of N. Idaho Member No.: 22,428 Region Association: Galt's Gulch |
QUOTE(bbrock @ Aug 25 2019, 11:26 PM)  Filled the dents someone left with their fat ass when they sat on the roll bar. Prom Queen? |
|
|
|
| 76-914 |
Aug 26 2019, 08:44 AM
Post
#1207
|
|
Repeat Offender & Resident Subaru Antagonist Group: Members Posts: 13,882 Joined: 23-January 09 From: Temecula, CA Member No.: 9,964 Region Association: Southern California |
Great news. So now that Old Man Winter is peaking around the corner what are your plans for "rodent proofing" since it's on the ground loaded with fresh wiring, etc? (IMG:style_emoticons/default/shades.gif) Or is there a standard regime that mountain dwellers follow regardless of a car's condition?
|
|
|
|
| Jamie |
Aug 26 2019, 09:35 AM
Post
#1208
|
|
Senior Member Group: Members Posts: 1,206 Joined: 13-October 04 From: Georgetown,KY Member No.: 2,939 Region Association: South East States |
QUOTE(FlacaProductions @ Aug 21 2019, 08:51 AM) Agreed. I was "between 914's" for 23 years until this past March and I'm amazed at how small and low they actually are. Especially in a "modern" parking lot.... I really felt small recently when passing a line of semis on the Interstate. In one 3 lane section I was sandwiched between 2 trucks, feeling really small at about 75MPH. My Mom always resisted riding in the 914 when Dad owned it, said that when she looked out the side window all she could see was lug nuts going by! (IMG:style_emoticons/default/w00t.gif) |
|
|
|
| sixnotfour |
Aug 26 2019, 09:48 AM
Post
#1209
|
|
914 Wizard Group: Members Posts: 11,242 Joined: 12-September 04 Member No.: 2,744 Region Association: NineFourteenerVille |
will these spot welds cause a problem with the trim strip ???
Attached image(s) 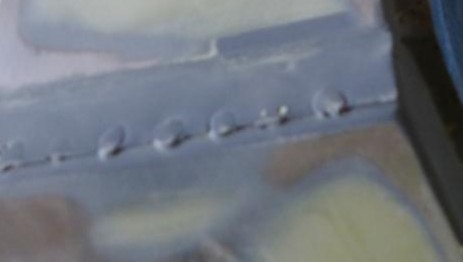
|
|
|
|
| defianty |
Aug 26 2019, 10:46 AM
Post
#1210
|
|
Senior Member Group: Members Posts: 659 Joined: 9-August 06 From: Essex, UK Member No.: 6,621 Region Association: None |
QUOTE(sixnotfour @ Aug 26 2019, 04:48 PM) will these spot welds cause a problem with the trim strip ??? I was just about to say the same. Worth grinding them down just in case. |
|
|
|
| bbrock |
Aug 26 2019, 07:11 PM
Post
#1211
|
|
914 Guru Group: Members Posts: 5,269 Joined: 17-February 17 From: Montana Member No.: 20,845 Region Association: Rocky Mountains |
QUOTE(76-914 @ Aug 26 2019, 08:44 AM) Great news. So now that Old Man Winter is peaking around the corner what are your plans for "rodent proofing" since it's on the ground loaded with fresh wiring, etc? (IMG:style_emoticons/default/shades.gif) Or is there a standard regime that mountain dwellers follow regardless of a car's condition? (IMG:style_emoticons/default/confused24.gif) I'm not sure I've ever seen a mouse around here. Oh wait - that's a damn lie. (IMG:style_emoticons/default/lol-2.gif) They aren't much of a problem in the garage though. We keep a wind-up box trap set all the time and usually they are trapped within an hour of two after getting in the house (always hitchhiking in the DD after it has been parked outside too long). I rarely see droppings in the garage and have never found anything chewed up out there. That said, once I have upholstery in the 914, I'll keep fresh packets of Fresh Cab in it to keep them out. QUOTE(defianty @ Aug 26 2019, 10:46 AM) QUOTE(sixnotfour @ Aug 26 2019, 04:48 PM) will these spot welds cause a problem with the trim strip ??? I was just about to say the same. Worth grinding them down just in case. Now that's the kind of scrutiny I can respect! (IMG:style_emoticons/default/beer.gif) I was looking at those too. They are flatter than the look in the pic and the trim strip fits fine over them, but I'm going to clean them up anyway. The other side needs a little trim on the flange. I'll be going over the whole chassis at least once more before respraying epoxy to clean up those little things. I'm glad you guys brought this up. I just laid the trim on to double-check the fit and discovered the sail panels aren't drilled on the cabin side for the screws for that trim. Wouldn't have been a huge deal but happy to catch it now before the paint goes on (IMG:style_emoticons/default/beerchug.gif) |
|
|
|
| bbrock |
Aug 26 2019, 08:08 PM
Post
#1212
|
|
914 Guru Group: Members Posts: 5,269 Joined: 17-February 17 From: Montana Member No.: 20,845 Region Association: Rocky Mountains |
I had a small, unexpected project last week that turned out well. I pulled out my sun visors with the intention of stripping out the cores to send to Mark for the rebuild GB. After looking at my visors, I decided I couldn't destroy them without giving them another chance to live. Sorry I didn't get before pics, but the vinyl was in good shape although a little stretched and floppy and the foam was crunchy - well the foam that hadn't already disintegrated into fine powder anyway.
I picked up $10 worth of 1/4" thick foam at Wally World and went to work. First step was carefully slicing along the heat seam on the top. I started on the skinny end and sliced a little over half way along the top. This is just enough to be able to coax the wire core out. This pic was taken after the new foam is in but shows the patient sliced open. 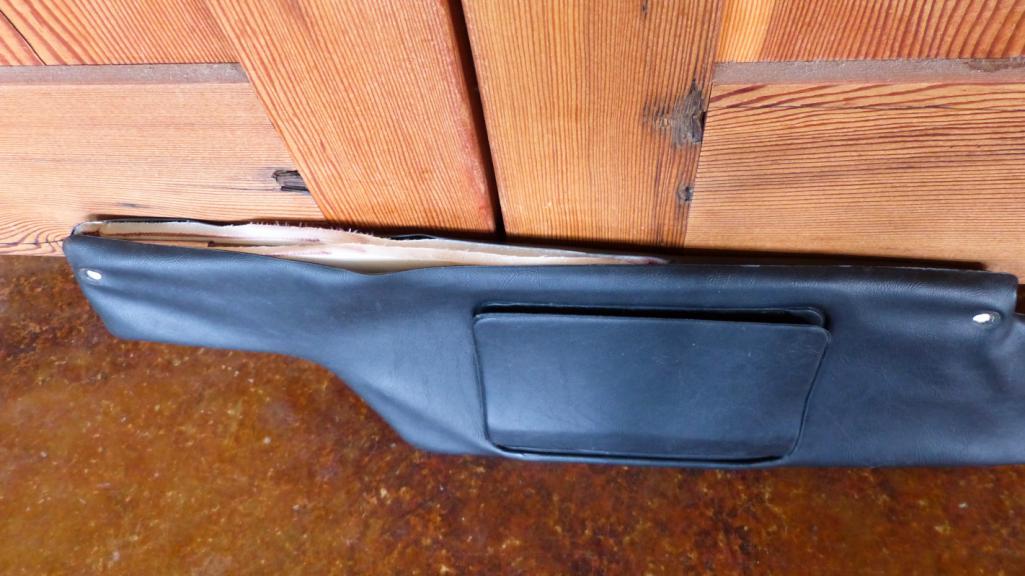 Next was cutting the foam and taping it with double stick tape to the wire frame. This pic shows the wrong way to mark the foam. The right way is to draw an outline around the full vinyl cover because the foam should extend beyond the wire at the bottom a fair amount. I learned the hard way but luckily had enough extra foam to cover my oops. 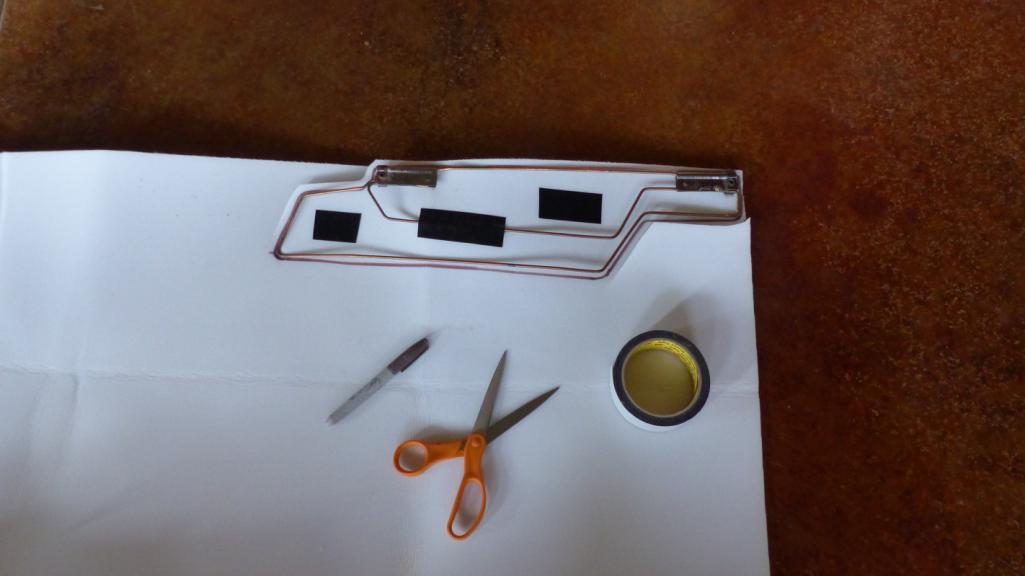 The passenger side gets a cutout on the mirror side of the foam. I had enough of the original foam intact to serve as a template, but it wouldn't be hard to figure it out. The double stick tape works great to hold everything together and appears to be what the factory used. 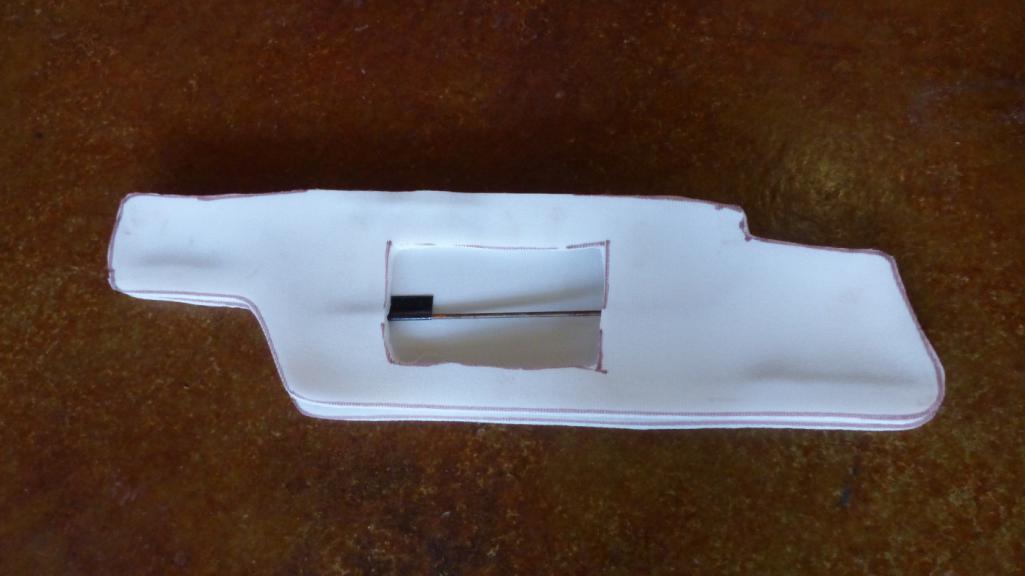 Then it is a matter of stuffing the frame back in the vinyl pouch and gluing it shut. I used Permatex Vinyl Repair Adhesive. I glued the inside of the vinyl to the top of the foam on one side and then tried as best I could to just glue the cut edges together. If I got a little sloppy, I could just rub the overage off. Rubbing the glue or trying to work it after the solvent has flashed (which is quick) leaves little white 'tag's in the adhesive. That's really the only evidence that was left behind and is hidden from view by the windshield frame when the visor is mounted. If I ever buy black vinyl dye for any reason, I will mask the visors and shoot only the seams. That should make the repair completely invisible but is frankly not worth a special expense. 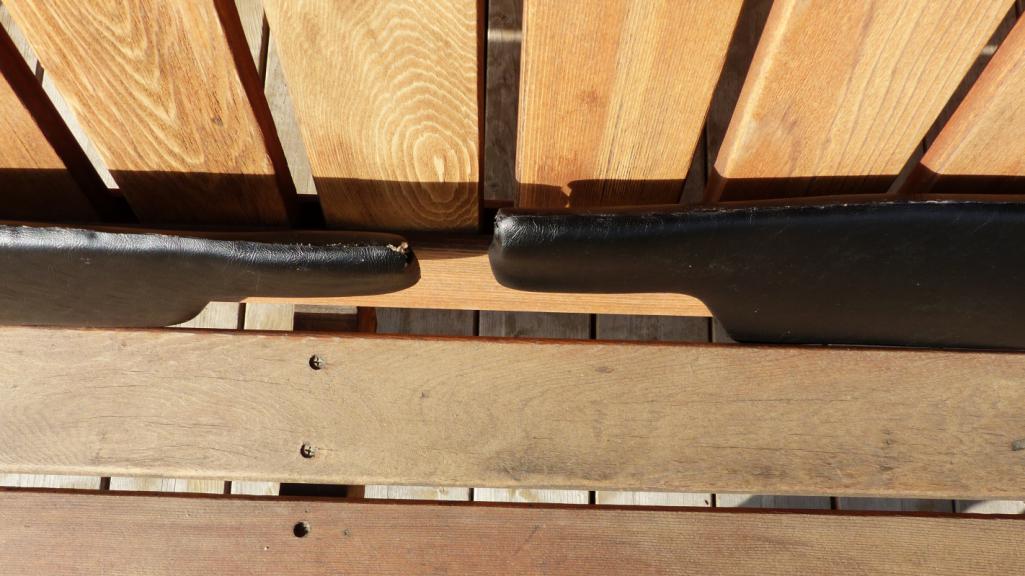 After the adhesive set, I put a damp towel over the visors and hit them several times with a steam iron. I'm kicking myself for not taking before shots because that really tightened up the floppy, baggy visors. Most dramatic was the map pocket that was gaping open before the steam. The last step was a good treatment with 303 Protectant. These bad boys look and feel like new! (IMG:style_emoticons/default/cheer.gif)  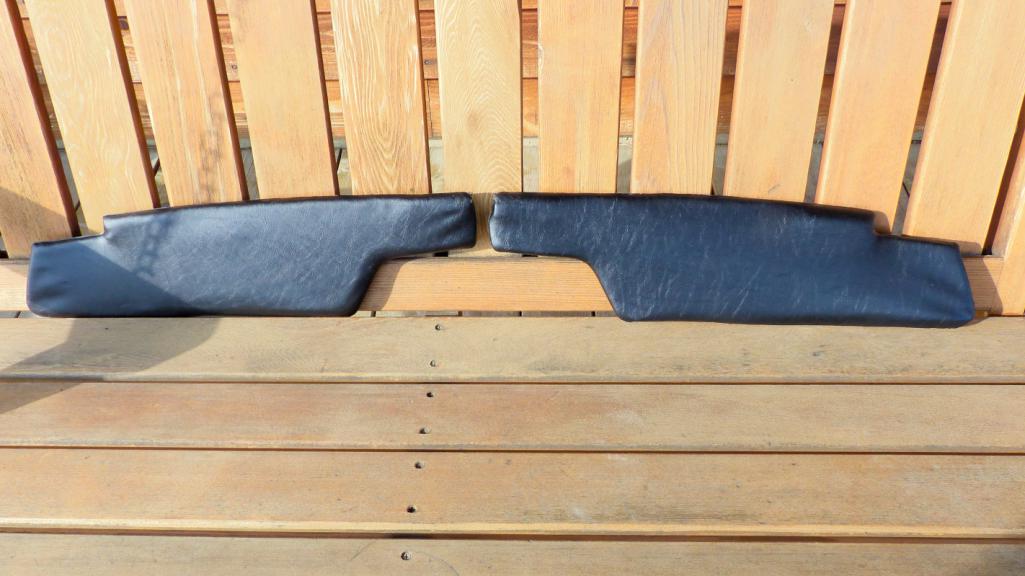 As much as I love Mark's rebuilt visors, I have this originality fetish so I'm quite happy. Plus, it saved me a C-note. |
|
|
|
| 914_7T3 |
Aug 26 2019, 11:11 PM
Post
#1213
|
|
Please forgive me, I'm new to all of this! Group: Members Posts: 1,898 Joined: 3-April 17 From: Los Angeles, CA Member No.: 20,991 Region Association: Southern California |
QUOTE(bbrock @ Aug 26 2019, 07:08 PM) I had a small, unexpected project last week that turned out well. I pulled out my sun visors with the intention of stripping out the cores to send to Mark for the rebuild GB. After looking at my visors, I decided I couldn't destroy them without giving them another chance to live. Sorry I didn't get before pics, but the vinyl was in good shape although a little stretched and floppy and the foam was crunchy - well the foam that hadn't already disintegrated into fine powder anyway. I picked up $10 worth of 1/4" thick foam at Wally World and went to work. First step was carefully slicing along the heat seam on the top. I started on the skinny end and sliced a little over half way along the top. This is just enough to be able to coax the wire core out. This pic was taken after the new foam is in but shows the patient sliced open. Next was cutting the foam and taping it with double stick tape to the wire frame. This pic shows the wrong way to mark the foam. The right way is to draw an outline around the full vinyl cover because the foam should extend beyond the wire at the bottom a fair amount. I learned the hard way but luckily had enough extra foam to cover my oops. The passenger side gets a cutout on the mirror side of the foam. I had enough of the original foam intact to serve as a template, but it wouldn't be hard to figure it out. The double stick tape works great to hold everything together and appears to be what the factory used. Then it is a matter of stuffing the frame back in the vinyl pouch and gluing it shut. I used Permatex Vinyl Repair Adhesive. I glued the inside of the vinyl to the top of the foam on one side and then tried as best I could to just glue the cut edges together. If I got a little sloppy, I could just rub the overage off. Rubbing the glue or trying to work it after the solvent has flashed (which is quick) leaves little white 'tag's in the adhesive. That's really the only evidence that was left behind and is hidden from view by the windshield frame when the visor is mounted. If I ever buy black vinyl dye for any reason, I will mask the visors and shoot only the seams. That should make the repair completely invisible but is frankly not work a special expense. After the adhesive set, I put a damp towel over the visors and hit them several times with a steam iron. I'm kicking myself for not taking before shots because that really tightened up the floppy, baggy visors. Most dramatic was the map pocket that was gaping open before the steam. The last step was a good treatment with 303 Protectant. These bad boys look and feel like new! (IMG:style_emoticons/default/cheer.gif) As much as I love Mark's rebuilt visors, I have this originality fetish so I'm quite happy. Plus, it saved me a C-note. (IMG:style_emoticons/default/blink.gif) (IMG:style_emoticons/default/drooley.gif) Way to go Brent! Glad I didn't filet my second set that is still in half decent condition! They will go in a box for a later date. (it's my spirit line (IMG:style_emoticons/default/wink.gif) |
|
|
|
| raynekat |
Aug 26 2019, 11:40 PM
Post
#1214
|
|
Advanced Member Group: Members Posts: 2,171 Joined: 30-December 14 From: Coeur d'Alene, Idaho Member No.: 18,263 Region Association: Pacific Northwest |
Mad scientist Brent up to it again.
Wow! Nice job on those visors.... |
|
|
|
| Superhawk996 |
Aug 27 2019, 04:48 AM
Post
#1215
|
|
914 Guru Group: Members Posts: 7,839 Joined: 25-August 18 From: Woods of N. Idaho Member No.: 22,428 Region Association: Galt's Gulch |
Nice job Brent. Looks good. (IMG:style_emoticons/default/happy11.gif)
I have so many other things do that I figured outsourcing is the way to go. Plus I wanted Corinthian Leather and I can't really sew! (IMG:style_emoticons/default/laugh.gif) |
|
|
|
| preach |
Aug 27 2019, 03:35 PM
Post
#1216
|
|
Ridge Runner Group: Members Posts: 1,100 Joined: 27-March 10 From: Live Free or Die Member No.: 11,513 Region Association: North East States |
Still loving the attention to (most (IMG:style_emoticons/default/w00t.gif) ) detail in this build. keep it up brother!
|
|
|
|
| bbrock |
Sep 2 2019, 09:23 PM
Post
#1217
|
|
914 Guru Group: Members Posts: 5,269 Joined: 17-February 17 From: Montana Member No.: 20,845 Region Association: Rocky Mountains |
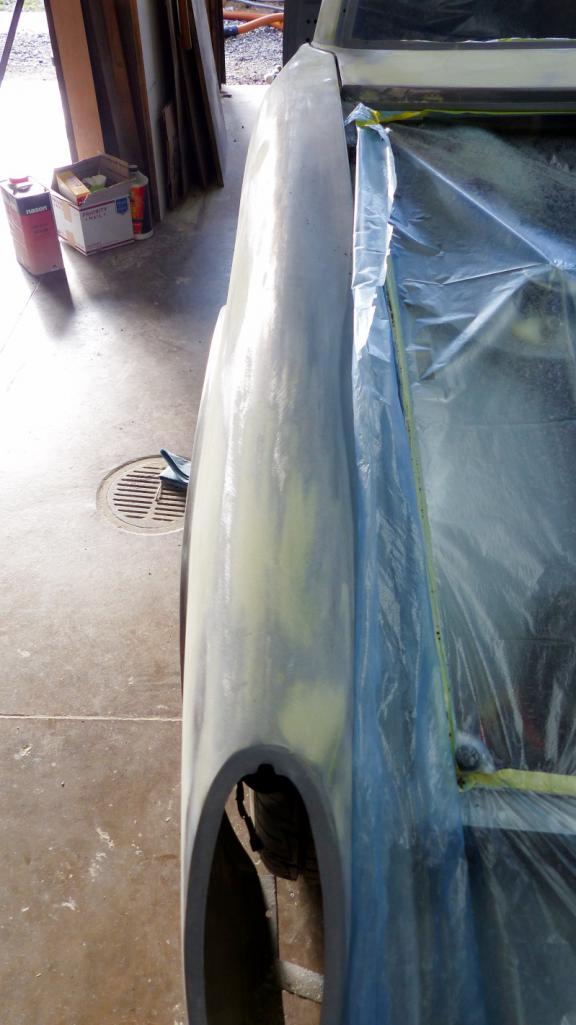
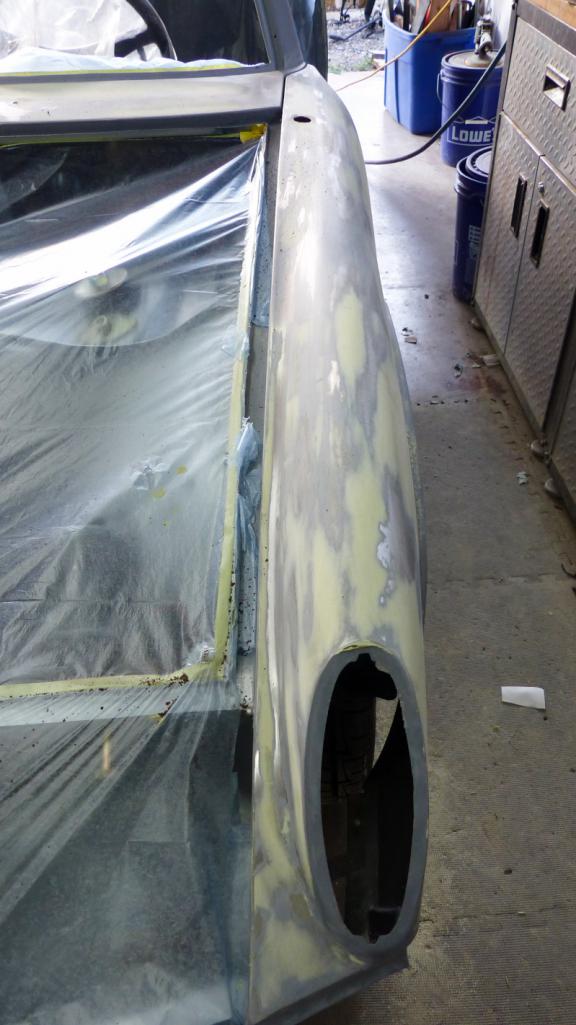
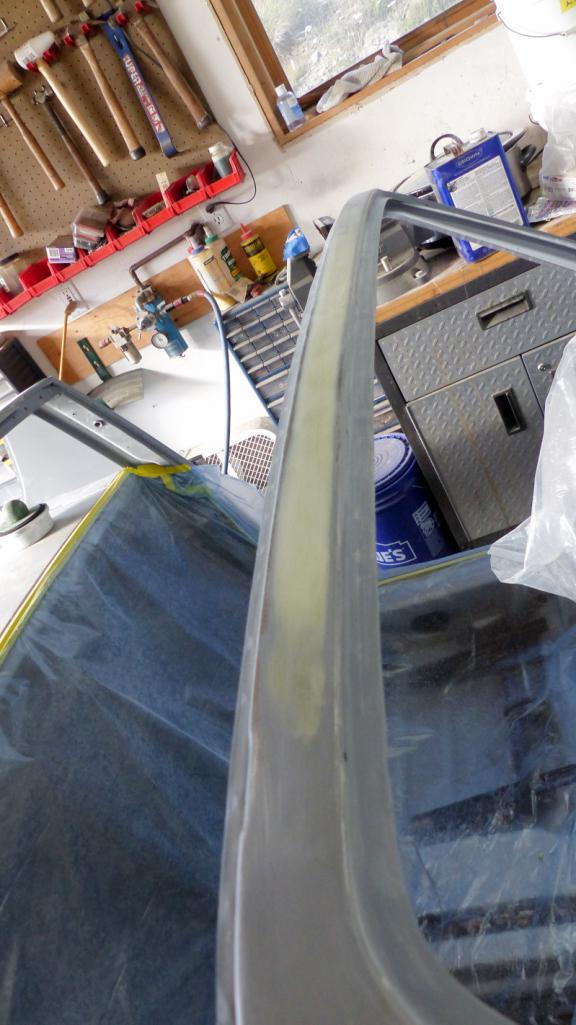
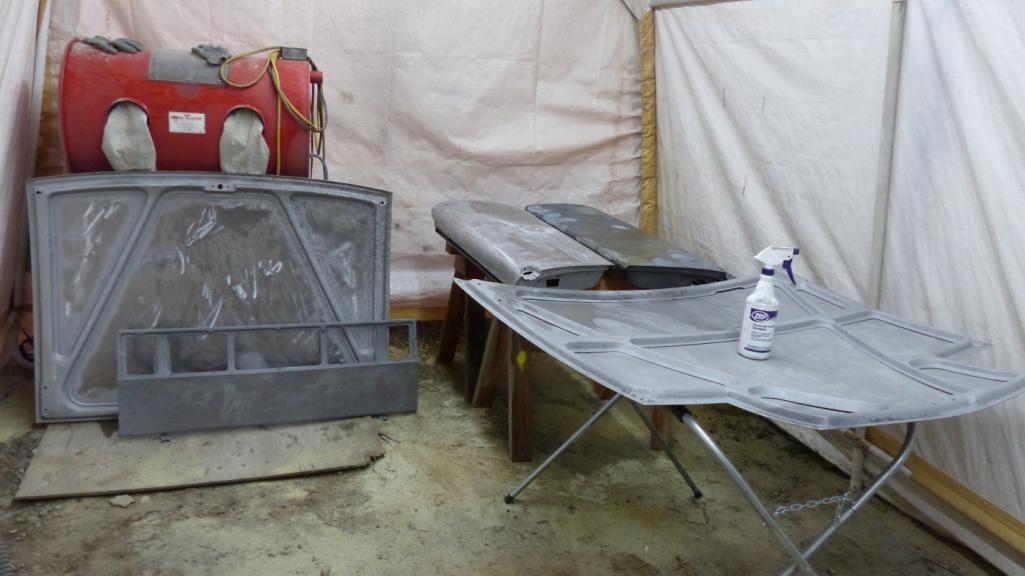
This one pic represents a lot of hard work. Spent most of the weekend stripping down the remaining body panels - doors, deck lids, and engine lid. There's no way around it, stripping paint is miserable work. I used a combination of chemical stripper, stripping wheel on a grinder, sand paper, and glass media blasting. Mostly glass media blasting because as nasty as that job is, I find it less nasty than chemical stripper and does a way better job than the other methods. I finished the last of the blasting about 9am this morning and about killed my compressor in the process. Don't ever buy an oil-free air compressor. They suck. Oh well, feels good to be able to put the pressure blaster into deep storage. I still have about a dozen pieces to blast in the blasting cabinet, but I don't mind that at all. (IMG:style_emoticons/default/monkeydance.gif)
 Despite having to rebuild the cylinders on the POS compressor AGAIN, I managed enough time to get a start on repairing the driver's door. To refresh, it had some nasty drill and slide hammer treatment. (IMG:http://www.914world.com/bbs2/uploads/post-20845-1563770564_thumb.jpg) There wasn't too much I could do to straighten it because the crash bar blocks access to the other side. It would take tools I don't have to metal work that back to health. The best I could do was run the shrinking disc over it a few times to tighten up the metal and even out the wrinkles a bit, then weld the holes shut and fill with the fancy zinc enriched, kevlar reinforced filler. I neglected to take any progress shots but here's how far I got. 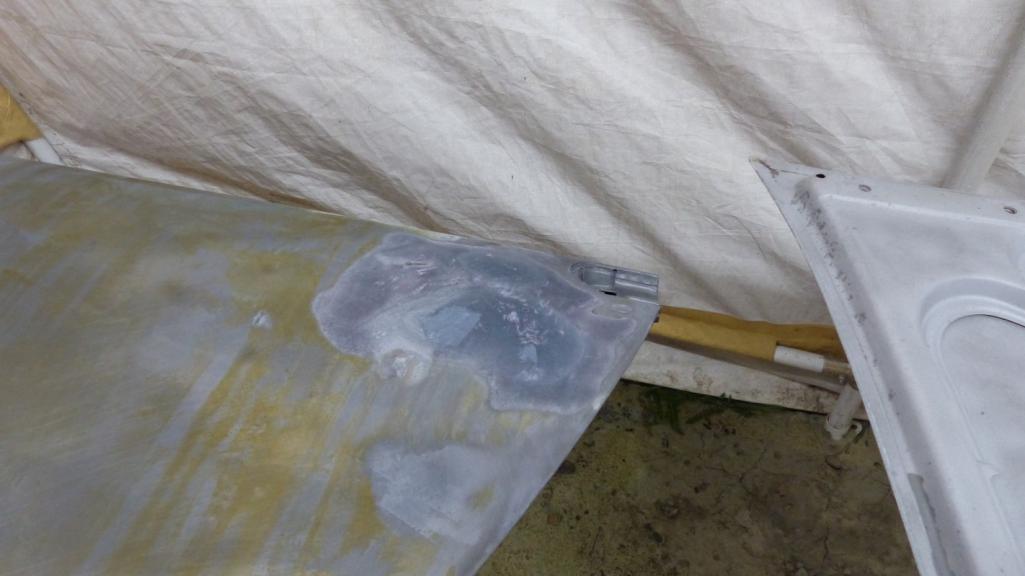 I'm beat, but I won't get any sleep tonight. I'm going to be out all night hiking through marshes in grizzly country under a new moon helping Fish Wildlife and Parks catch cranes. The crazy shit I do... (IMG:style_emoticons/default/screwy.gif) |
|
|
|
| johnlush |
Sep 2 2019, 10:29 PM
Post
#1218
|
|
What's all this then? Group: Members Posts: 376 Joined: 26-May 04 From: Cheyenne, WY Member No.: 2,108 Region Association: Rocky Mountains |
|
|
|
|
| bbrock |
Sep 3 2019, 05:49 PM
Post
#1219
|
|
914 Guru Group: Members Posts: 5,269 Joined: 17-February 17 From: Montana Member No.: 20,845 Region Association: Rocky Mountains |
QUOTE(johnlush @ Sep 2 2019, 10:29 PM) Ha! Thanks. I think that would have to be evil spirit animal though. (IMG:style_emoticons/default/happy11.gif) Got home at 7am. We got close to capturing a crane at our first site but she managed to get airborne just before we could get a net on her. We got skunked the rest of the night but it was fun coming across a couple of huge piles of bear scat while crawling through willow thickets as quietly as possible in the backwater sloughs of the Yellowstone River with headlamps off. Watched hundreds of bats foraging over the water and waded within a few yards of a pair of trumpeter swans. Cranes or no, it was a good night. (IMG:style_emoticons/default/biggrin.gif) This guy has been soaking in the pond next to our house most of the afternoon. This is cooling off on a hot day Montana style. 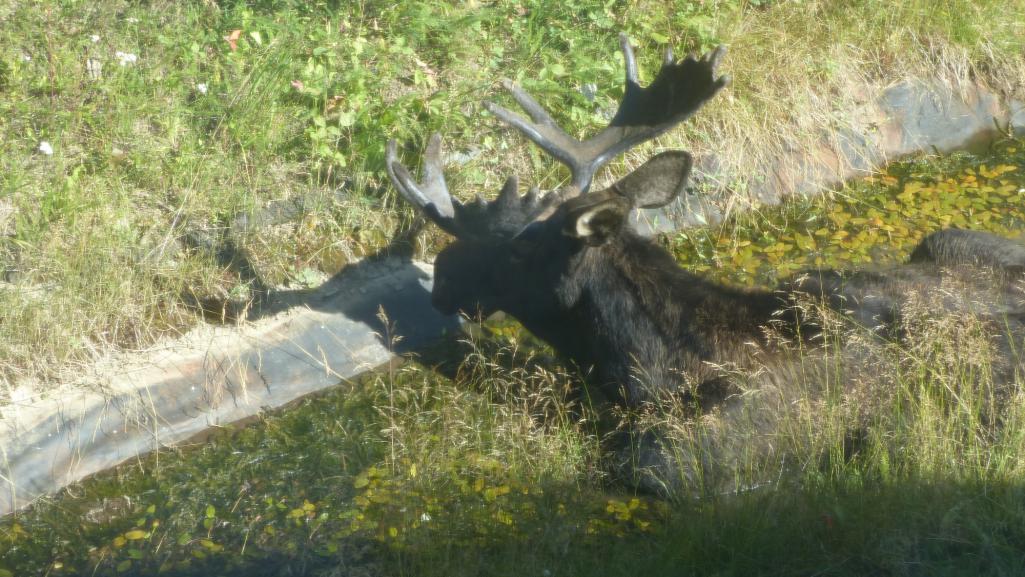 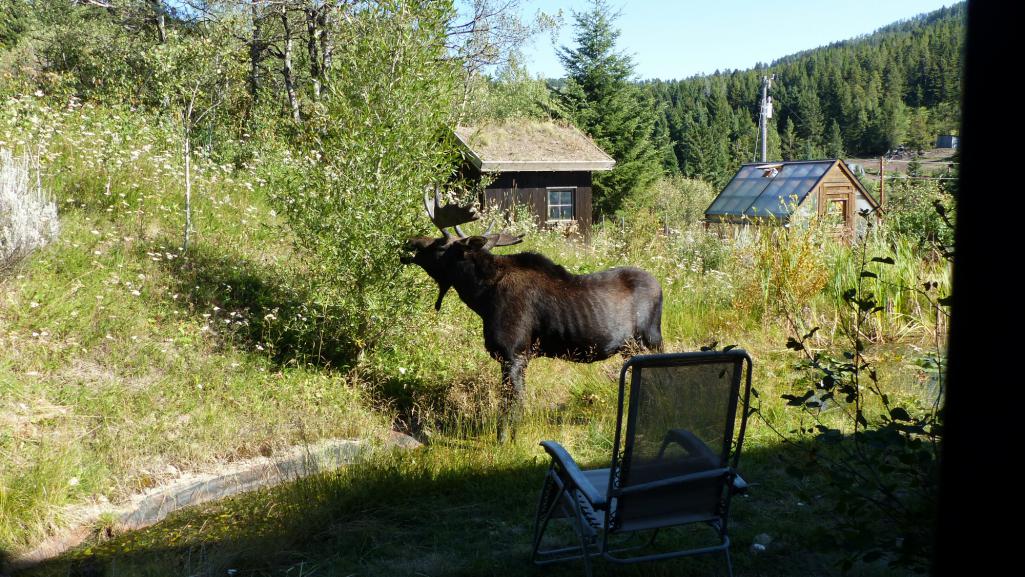 |
|
|
|
| BPic |
Sep 3 2019, 06:30 PM
Post
#1220
|
|
Member Group: Members Posts: 343 Joined: 5-February 18 From: Miami, Florida Member No.: 21,864 Region Association: South East States |
You sir, have the life I always wanted. I took a different route and went more corporate. Many times I wish they hadn’t. Love the photos and the stories please don’t stop posting these. Maybe some day I’ll move to the wilderness and be done with Miami. I envy you.
QUOTE(bbrock @ Sep 3 2019, 07:49 PM) QUOTE(johnlush @ Sep 2 2019, 10:29 PM) Ha! Thanks. I think that would have to be evil spirit animal though. (IMG:style_emoticons/default/happy11.gif) Got home at 7am. We got close to capturing a crane at our first site but she managed to get airborne just before we could get a net on her. We got skunked the rest of the night but it was fun coming across a couple of huge piles of bear scat while crawling through willow thickets as quietly as possible in the backwater sloughs of the Yellowstone River with headlamps off. Watched hundreds of bats foraging over the water and waded within a few yards of a pair of trumpeter swans. Cranes or no, it was a good night. (IMG:style_emoticons/default/biggrin.gif) This guy has been soaking in the pond next to our house most of the afternoon. This is cooling off on a hot day Montana style. |
|
|
|
|
2 User(s) are reading this topic (2 Guests and 0 Anonymous Users)
0 Members:

|
Lo-Fi Version | Time is now: 12th May 2026 - 04:02 PM |
Invision Power Board
v9.1.4 © 2026 IPS, Inc.