|
|
|
Porsche, and the Porsche crest are registered trademarks of Dr. Ing. h.c. F. Porsche AG.
This site is not affiliated with Porsche in any way. Its only purpose is to provide an online forum for car enthusiasts. All other trademarks are property of their respective owners. |
|
|

  |

| johnlush |
 Sep 3 2019, 08:00 PM Sep 3 2019, 08:00 PM
Post
#1221
|
|
What's all this then?  Group: Members Posts: 376 Joined: 26-May 04 From: Cheyenne, WY Member No.: 2,108 Region Association: Rocky Mountains |
That bull moose looks like someone needs to feed him a cheeseburger - or whatever the moose equivalent of that would be. Looks kinda skinny, no?
So what's the crane project about? Sorry for the off-topic questions... |
   |

 
|
| worn |
Sep 3 2019, 08:16 PM
Post
#1222
|
|
Winner of the Utah Twisted Joint Award Group: Members Posts: 3,581 Joined: 3-June 11 From: Madison, WI and North Bend WA Member No.: 13,152 Region Association: Upper MidWest |
Well, if you are gonna offer food, your moose has every reason to stick around. Marmots and ground hogs on the other hand seem to love to chew on plastic. Say my friends ensolite sleeping pad, or perhaps all of the spark plug wires. In the complete privacy of a tent or engine compartment of course.
|
|
|
|
| bbrock |
Sep 3 2019, 08:38 PM
Post
#1223
|
|
914 Guru Group: Members Posts: 5,269 Joined: 17-February 17 From: Montana Member No.: 20,845 Region Association: Rocky Mountains |
QUOTE(johnlush @ Sep 3 2019, 08:00 PM)  That bull moose looks like someone needs to feed him a cheeseburger - or whatever the moose equivalent of that would be. Looks kinda skinny, no? So what's the crane project about? Sorry for the off-topic questions... He's actually in pretty average condition. The ribs showing are more a combination of him being in thin summer coat, stretching up for the willows, and still being fairly young so hasn't bulk up the muscle mass of older bulls. It's also been pretty hot (for here) for the last week which is pretty hard on moose. I wouldn't call him fat, but his hips aren't bony and looks okay to me. We've had the best serviceberry crop this year I have ever seen and he's been stripping them every night for a week so should be getting lots of carbs. The crane project is a US Fish and Wildlife project to put GPS transceivers on cranes in MT, ID, and WY to get better data on migration routes, nesting and staging habitat, etc. I was just doing it for fun. I'm friends with the regional nongame biologist and she called to ask if I wanted to help. Heck yeah, how often do you get a chance to mug a wild crane? Next year we are going to try for the cranes that nest in our valley. They lost their colts this year so left a few weeks earlier than normal. I don't mind the diversions at all. There's more to life than Porsches (IMG:style_emoticons/default/biggrin.gif) @worn Ha! I have a few old sleeping pads that have been chewed on by various critters over the years. (IMG:style_emoticons/default/lol-2.gif) You can add woodrats to that list. Amazing what they will destroy. I lost two sets of spark plug wires in a week to one of them. Deer are pretty fun too. Seems they chew up anything that piques their curiosity. I've lost a lot of research plot markers to those little #$%^ers pulling them out and chewing them up. |
|
|
|
| Superhawk996 |
Sep 4 2019, 06:42 PM
Post
#1224
|
|
914 Guru Group: Members Posts: 7,839 Joined: 25-August 18 From: Woods of N. Idaho Member No.: 22,428 Region Association: Galt's Gulch |
I gotsta get me one of those bogs for the Idaho Moosie's. Not only do you have that amazing Gurgler by the garage to make cool stream noises, you have a Moose bath tub.
I'm continually amazed and oh so jealous! (IMG:style_emoticons/default/beerchug.gif) |
|
|
|
| Gudhjem |
Sep 6 2019, 03:17 PM
Post
#1225
|
|
Member Group: Members Posts: 133 Joined: 29-March 07 From: Castro Valley, CA Member No.: 7,629 Region Association: Northern California |
Just finished reading this thread start to finish over the course of a week. Thanks for the effort in posting all of this detail Brent. I've learned a lot. Car looks fantastic.
|
|
|
|
| bbrock |
Sep 6 2019, 10:15 PM
Post
#1226
|
|
914 Guru Group: Members Posts: 5,269 Joined: 17-February 17 From: Montana Member No.: 20,845 Region Association: Rocky Mountains |
QUOTE(Gudhjem @ Sep 6 2019, 03:17 PM) Just finished reading this thread start to finish over the course of a week. Thanks for the effort in posting all of this detail Brent. I've learned a lot. Car looks fantastic. Thanks! Looks like you've lived this movie yourself! (IMG:style_emoticons/default/beerchug.gif) |
|
|
|
| FourBlades |
Sep 7 2019, 09:14 AM
Post
#1227
|
|
From Wreck to Rockin Group: Members Posts: 2,056 Joined: 3-December 07 From: Brevard, FL Member No.: 8,414 Region Association: South East States |
This is such a great thread and build! You are making really good progress, it gets easier from here in my opinion. Getting the major rust repair and welding done is the trickiest part. Once your prime the whole car you will be super stoked. John |
|
|
|
| bbrock |
Sep 7 2019, 10:50 PM
Post
#1228
|
|
914 Guru Group: Members Posts: 5,269 Joined: 17-February 17 From: Montana Member No.: 20,845 Region Association: Rocky Mountains |
Continued refurbishing the doors today. First up was filling the Swiss cheese left from previous dent repair on the passenger door. It wasn't as bad as the driver's side was.
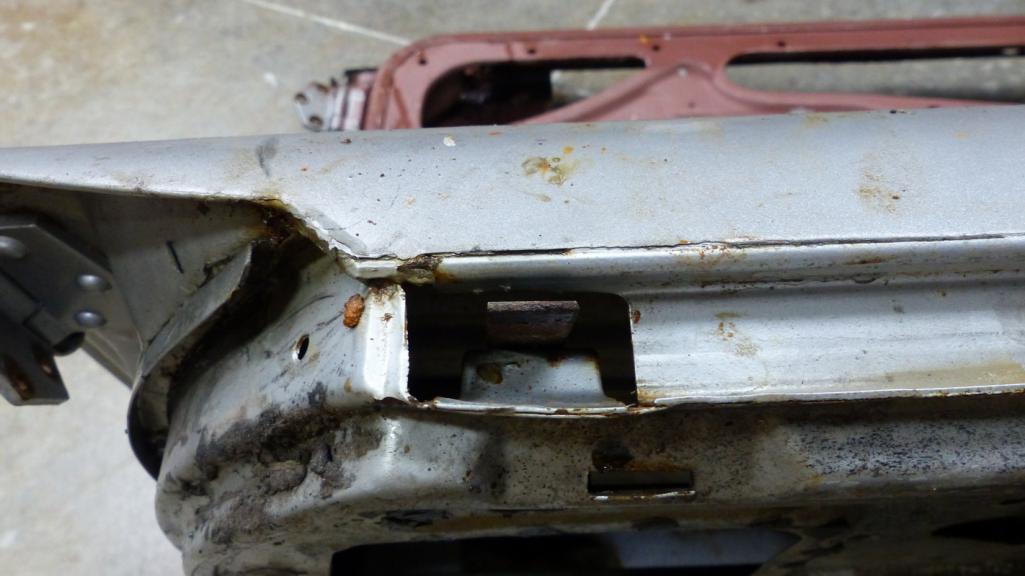
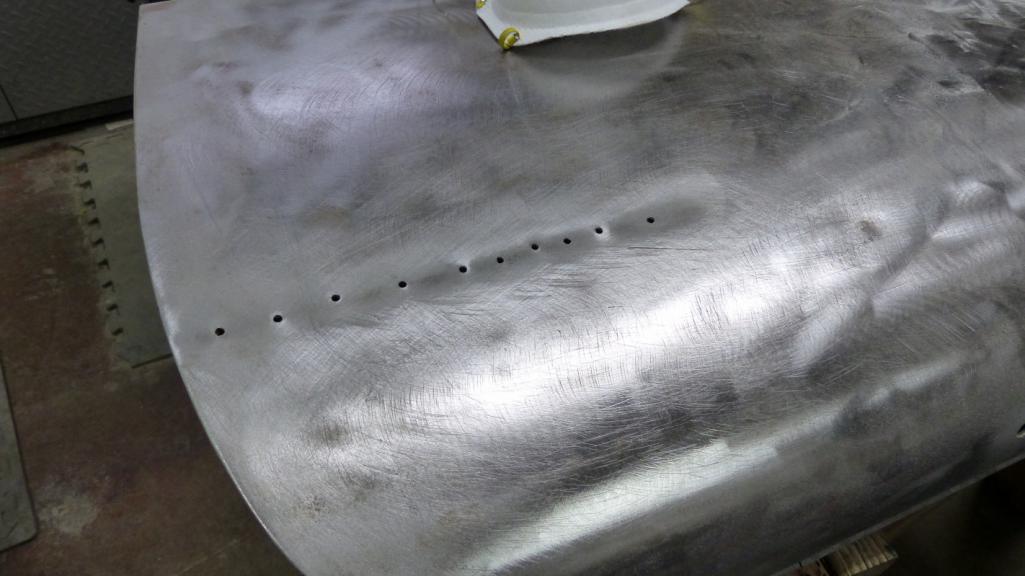 Someone had also drilled the door for an after market mirror so a couple more holes to fill. 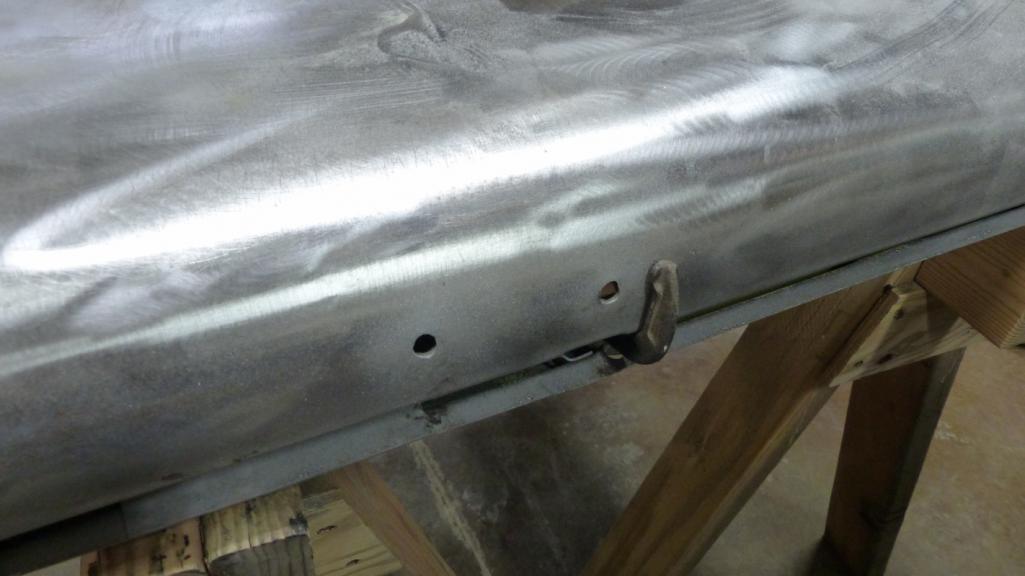 Happy to post intermediate progress shots if someone is dying to see them, but I think the pics of filling holes gets repetitive. Skipping to the finished shots. 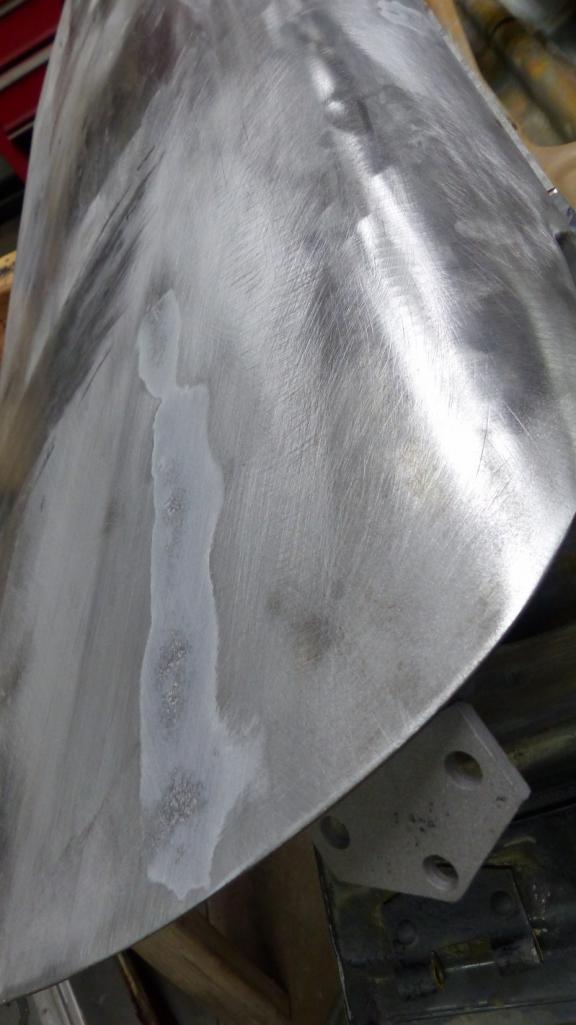 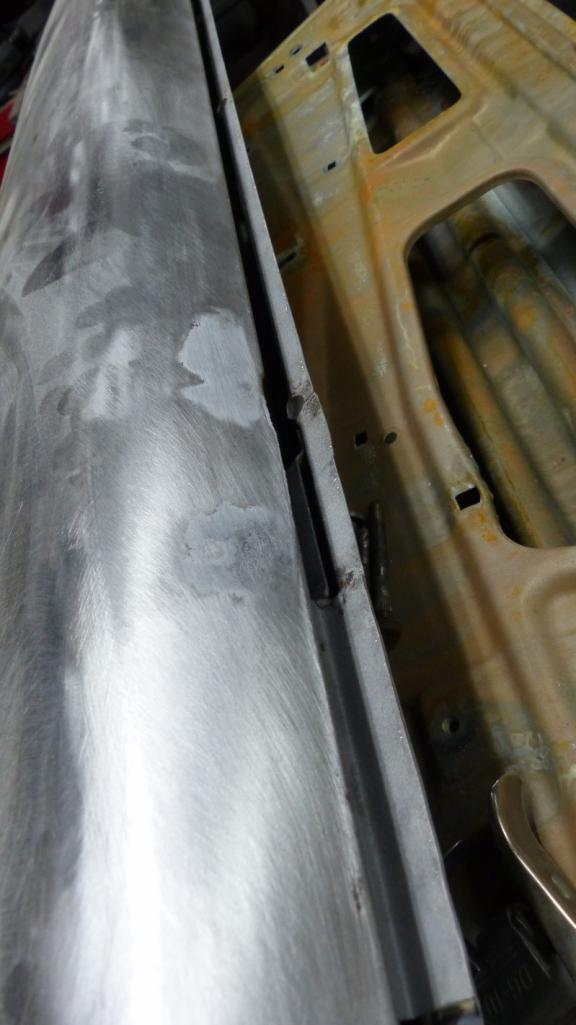 These doors also apparently had speakers in them at some point. Luckily, they didn't cut the doors - just drilled a bunch of screw holes and mangle the flanges a bit. 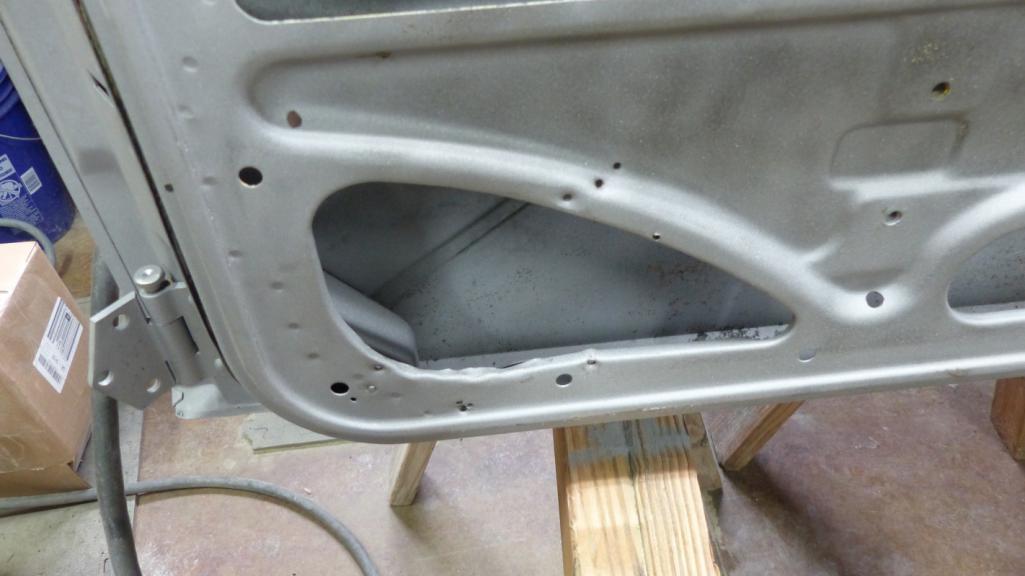 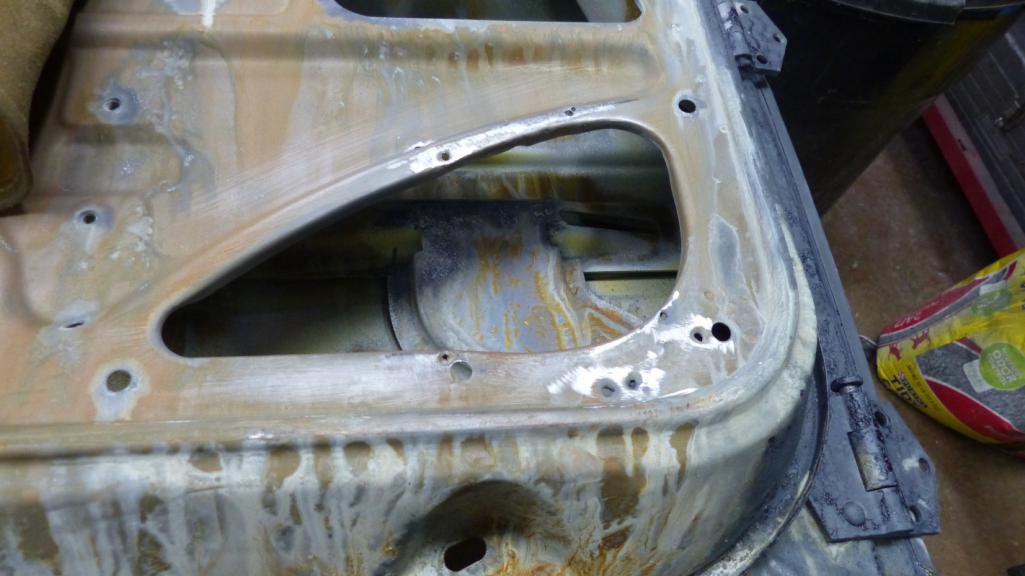 I straightened out the flanges with hammer and dolly and welded the holes shut. Again, straight to the finale.  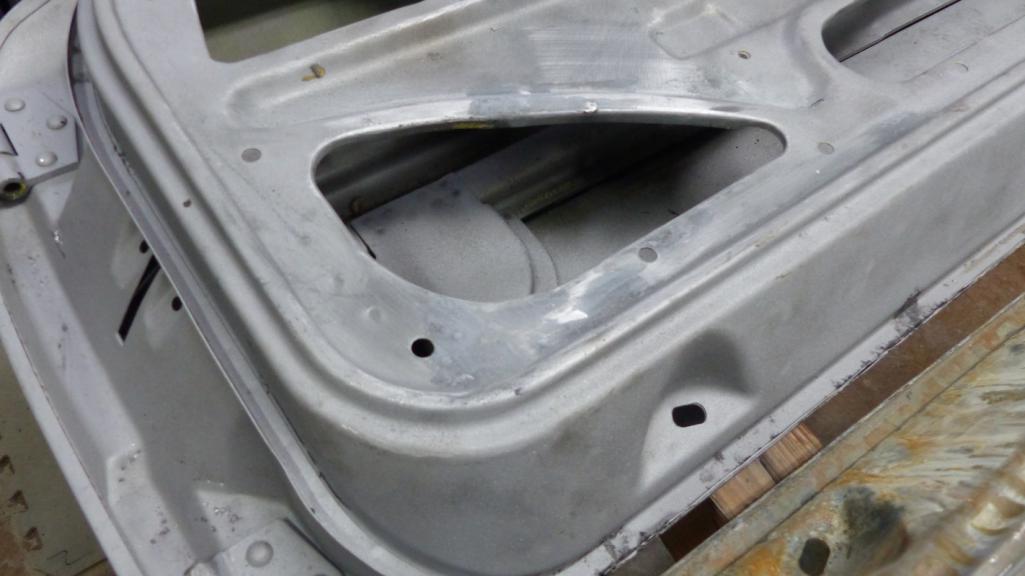 The driver's door had this nasty corrosion and split in the channel that needed to be fixed. 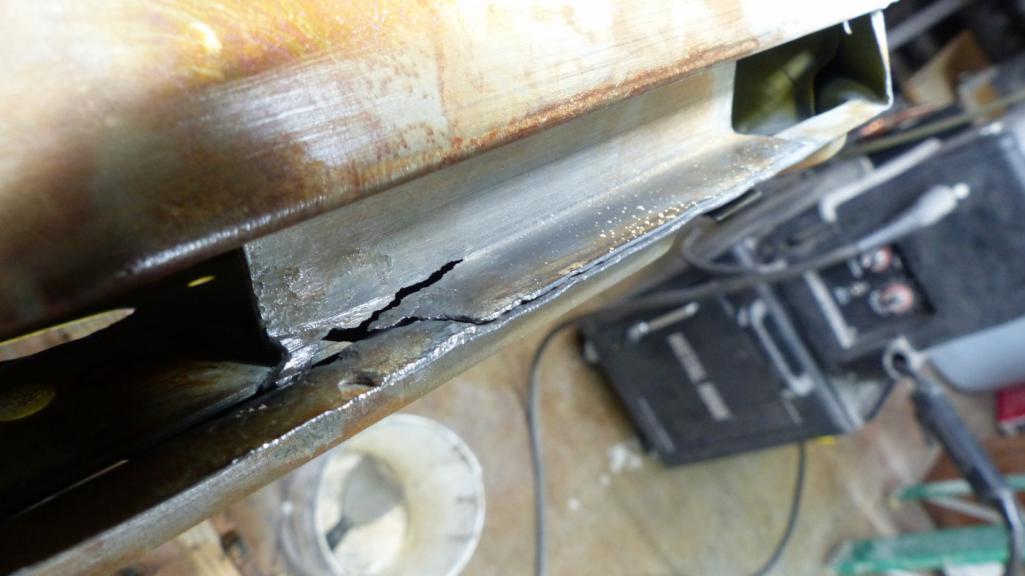 I decided to try just welding it shut. It is a PITA location that is tight and hard to position the welding nozzle, and I'm still a crappy welder, but I think I did a fair job of it. 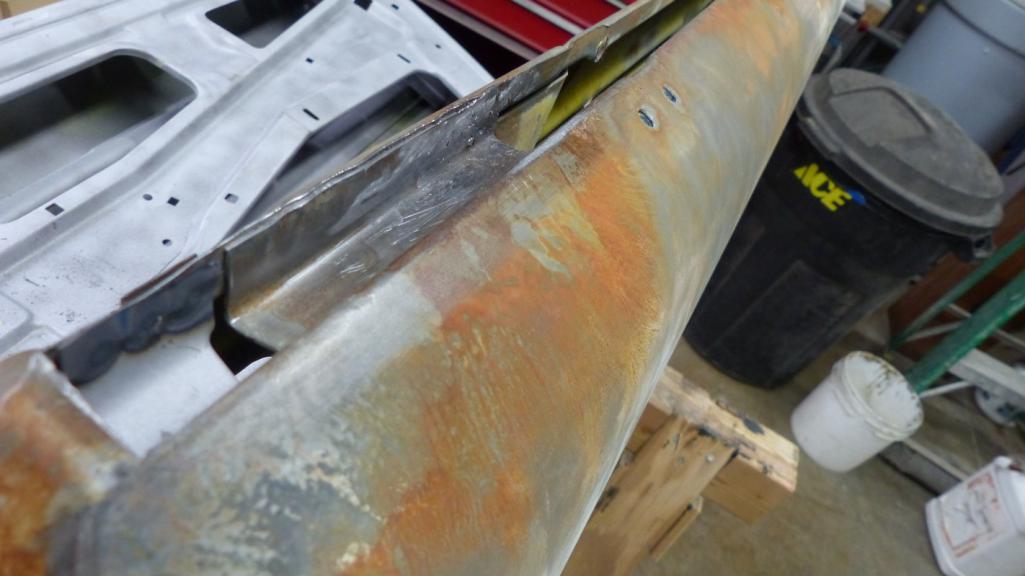 And finished with a little bit of reinforced filler. 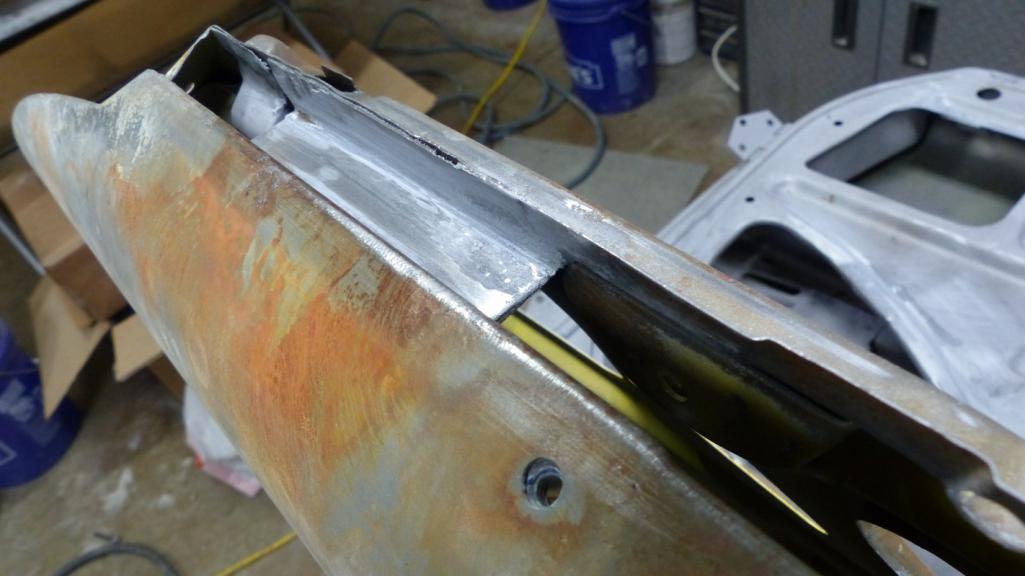 |
|
|
|
| bbrock |
Sep 7 2019, 11:00 PM
Post
#1229
|
|
914 Guru Group: Members Posts: 5,269 Joined: 17-February 17 From: Montana Member No.: 20,845 Region Association: Rocky Mountains |
Here was the most interesting part of the doors. Both my original and replacement donor doors are late style. Trust me, I have the hernia from lifting them to prove it. My original doors had these brackets with metal tabs bolted to them that were missing from replacements.
 IIRC, these help hold the wing seal in place. They also look like they provide some adjustment. Regardless, transferring them to the new doors was in order. Here are the brackets liberated from the old doors.  And welded into the new. I feel like the tabs want to be yellow chromate so they are in the plating bucket for the next batch. 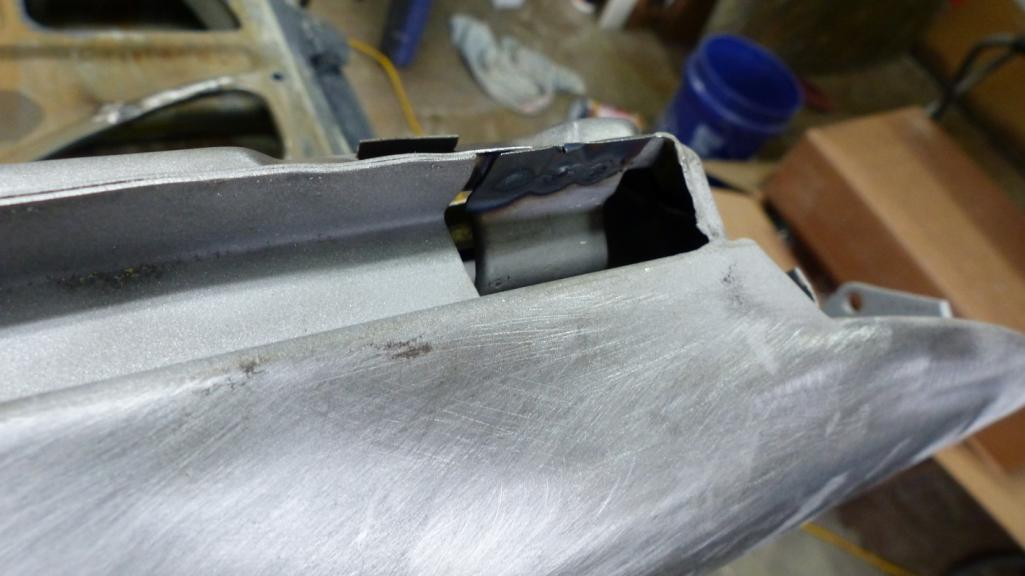 That's it for today. One more patch to weld on one of the doors tomorrow and they'll be ready for ospho and primer. |
|
|
|
| tygaboy |
Sep 8 2019, 05:43 AM
Post
#1230
|
|
914 Guru Group: Members Posts: 5,824 Joined: 6-October 15 From: Petaluma, CA Member No.: 19,241 Region Association: Northern California |
One of the best parts (for me) is seeing repairs like the one you did to correct the PO speaker install.
You're setting a great example by investing time and doing a wonderful job on a part of the car that will likely never be seen again. It's like the furniture maker who finishes the underside of the top of the dresser, all the while knowing no one will ever see it... But he knows it has received the same love and care as the rest of the piece. I love that about your work. |
|
|
|
| Dion |
Sep 8 2019, 07:05 AM
Post
#1231
|
|
RN Group: Members Posts: 2,926 Joined: 16-September 04 From: Audubon,PA Member No.: 2,766 Region Association: MidAtlantic Region |
QUOTE(tygaboy @ Sep 8 2019, 03:43 AM) One of the best parts (for me) is seeing repairs like the one you did to correct the PO speaker install. You're setting a great example by investing time and doing a wonderful job on a part of the car that will likely never be seen again. It's like the furniture maker who finishes the underside of the top of the dresser, all the while knowing no one will ever see it... But he knows it has received the same love and care as the rest of the piece. I love that about your work. (IMG:style_emoticons/default/agree.gif) Chris you described exactly as I see all of Brent’s adventure here. You worded it perfectly. (IMG:style_emoticons/default/beerchug.gif) |
|
|
|
| bbrock |
Sep 17 2019, 07:59 PM
Post
#1232
|
|
914 Guru Group: Members Posts: 5,269 Joined: 17-February 17 From: Montana Member No.: 20,845 Region Association: Rocky Mountains |
QUOTE(tygaboy @ Sep 8 2019, 05:43 AM) One of the best parts (for me) is seeing repairs like the one you did to correct the PO speaker install. You're setting a great example by investing time and doing a wonderful job on a part of the car that will likely never be seen again. It's like the furniture maker who finishes the underside of the top of the dresser, all the while knowing no one will ever see it... But he knows it has received the same love and care as the rest of the piece. I love that about your work. I never thought of it like that, but now that you mention it, it's kind of funny. I've made quite a bit of furniture before fiddling with this car and all I can say is... Yep. (IMG:style_emoticons/default/biggrin.gif) |
|
|
|
| bbrock |
Sep 17 2019, 08:28 PM
Post
#1233
|
|
914 Guru Group: Members Posts: 5,269 Joined: 17-February 17 From: Montana Member No.: 20,845 Region Association: Rocky Mountains |
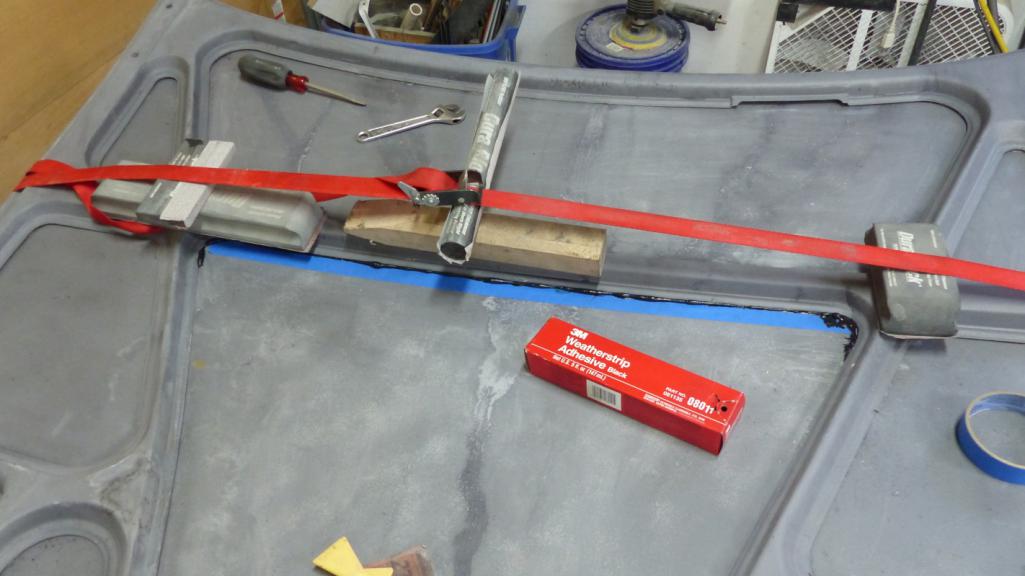
Well I guess this is project update day and I'm a little behind. Spent a lot of time getting deck lids and doors ready for primer. I think I started a mild controversy saying I was going to glue the frame to the hood skin on another thread. In reality, I was just trying to replicate what the factory did. They just glued down the central cross member what looked to be butyl caulk. 3M Weatherstrip Adhesive has very similar, if not identical properties. Plenty of stretch to allow the panel to move as needed.
 Then I coated all the internals with Eastwood Internal Frame Coating. 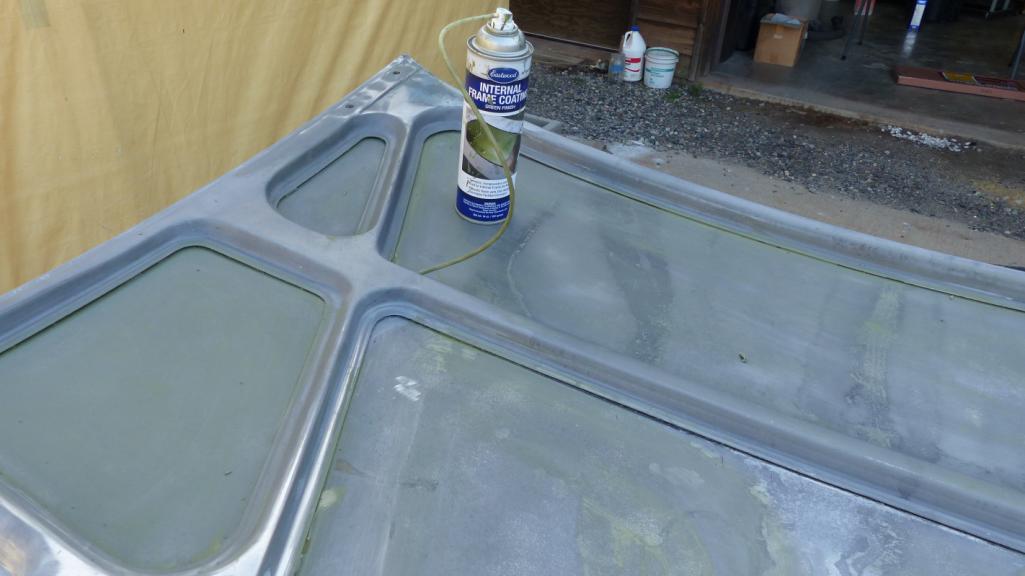 Here's a tip when using this stuff, wipe up runs and drips right away. It does not sand easily. It's like sanding gummy bears. 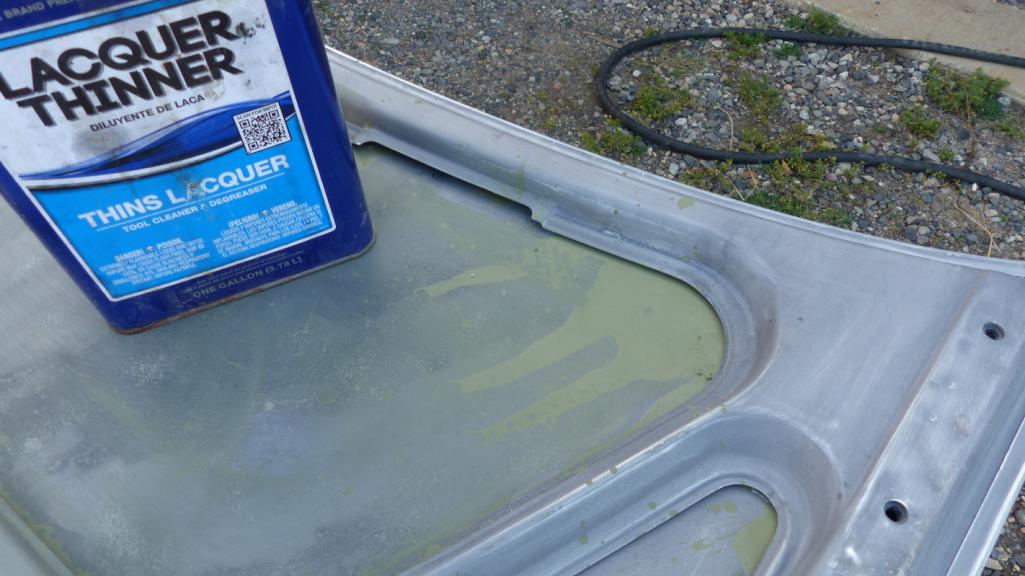 I spent all day Saturday re-configuring for paint. I hosed down the inside of the tent and gave the shop a thorough cleaning and reorganization. Plating buckets were temporarily stored out of sight, and painting materials took their place.  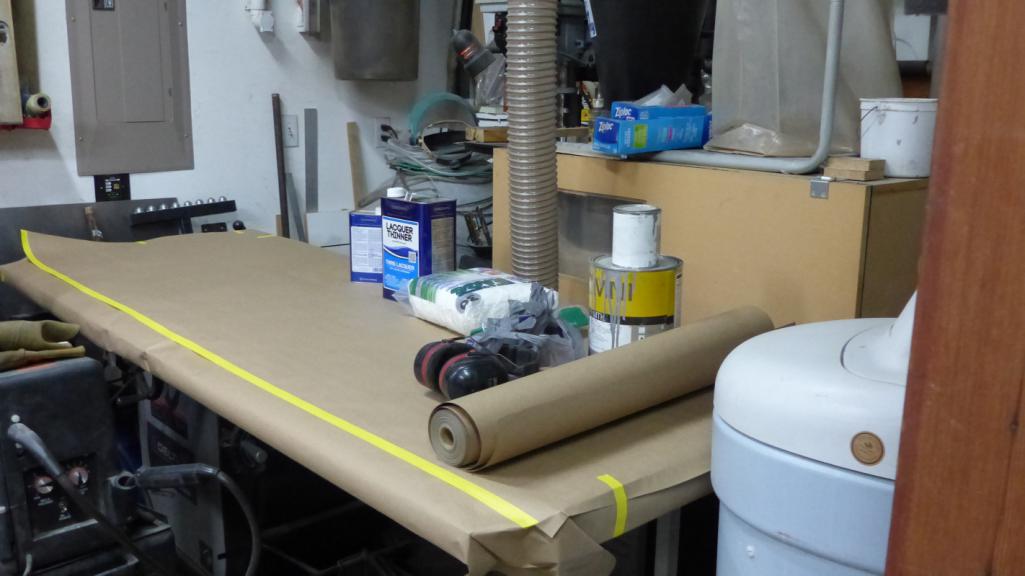 By the end of the day, I was able to stow panels in the tent ready for final cleaning. 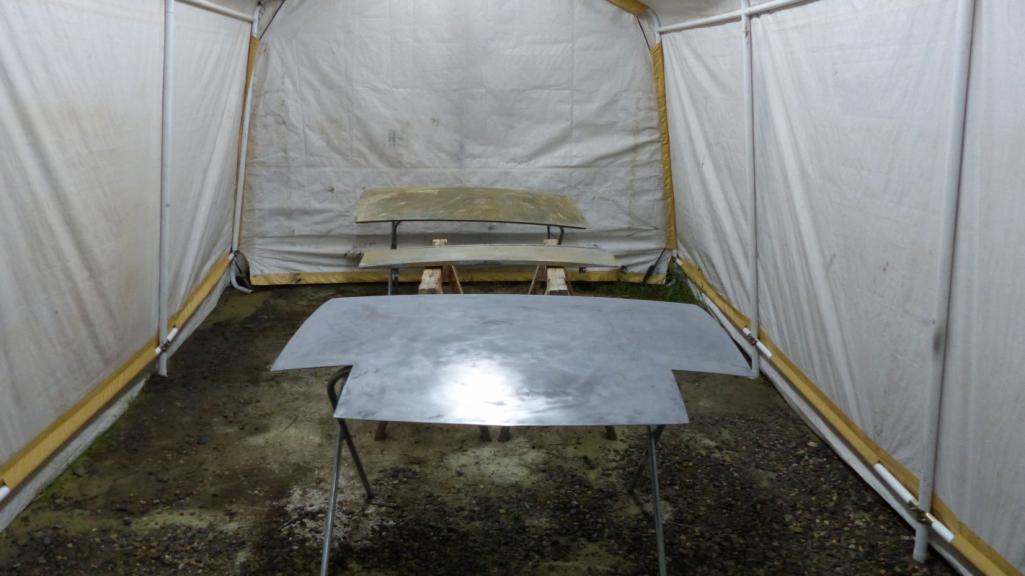 Got the panels cleaned and hung on Sunday with the hope of spraying primer after work on Monday, but the weather turned to shit and I didn't want to spray while it was raining. Today was cloudy and cool but around noon, temps crept into the 60s, so I knocked off work early and shot the panels. With the cool temps, I doubled induction and flash times. 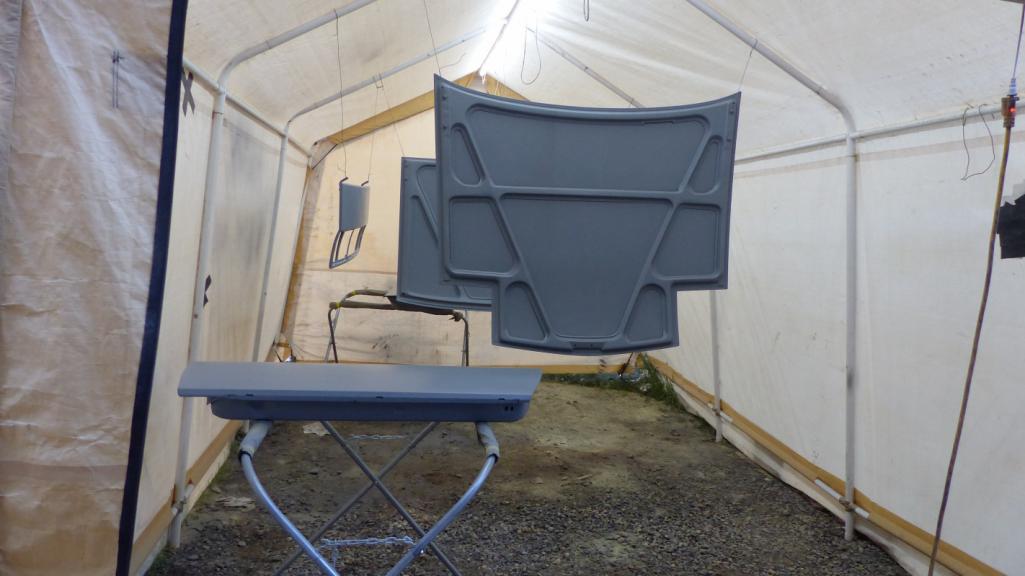 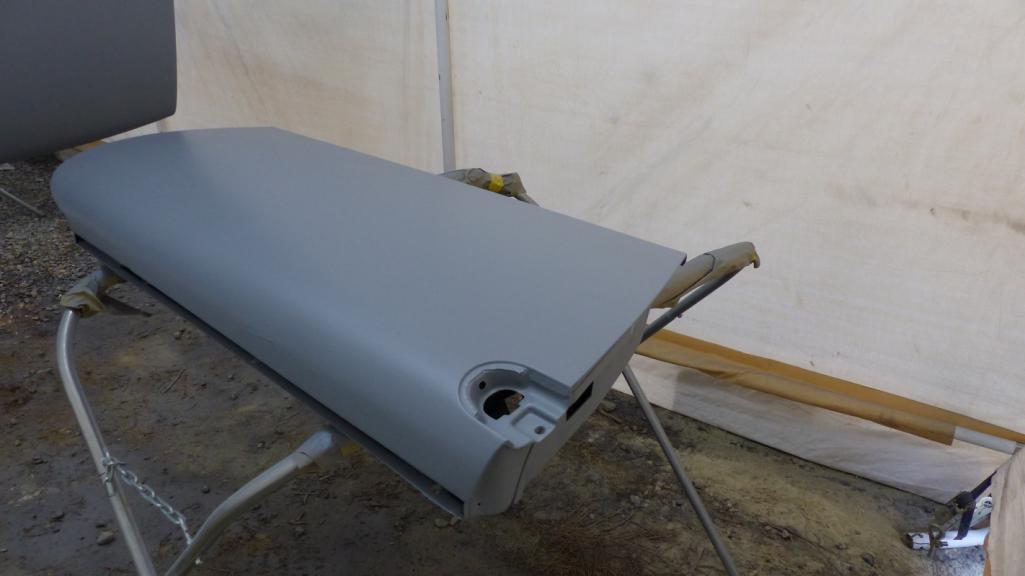 Tomorrow is supposed to be sunny and warmer so the paint should cure nicely before skim coating with filler to block them straight. |
|
|
|
| bbrock |
Sep 24 2019, 09:16 PM
Post
#1234
|
|
914 Guru Group: Members Posts: 5,269 Joined: 17-February 17 From: Montana Member No.: 20,845 Region Association: Rocky Mountains |
Holy smokes! I feel like I've been running consecutive marathons since last Tuesday. Trying to make the most of a few good weather days. Sadly, I neglected to take a lot of pics I should have but I'll get sort of caught up here.
After getting the doors in primer, I applied some Noico sound deadener to the insides where the factory had sprayed tar stuff. I added some to the top too because, you know, those doors aren't heavy enough (IMG:style_emoticons/default/huh.gif) It makes a huge difference in silencing those doors though. 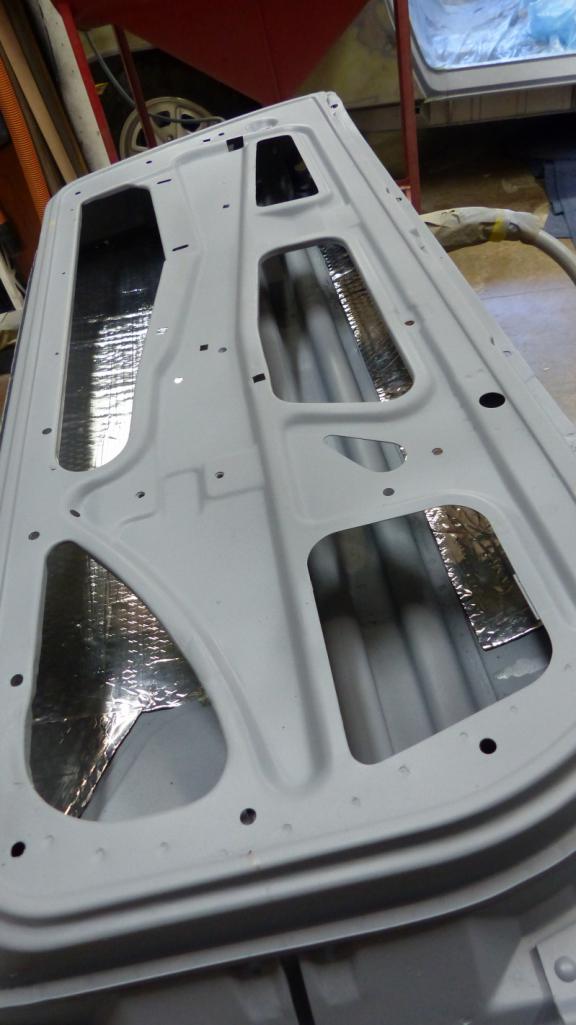 Then I skim coated the outer skins with filler and block sanded them flat. Here they are ready for final epoxy primer. 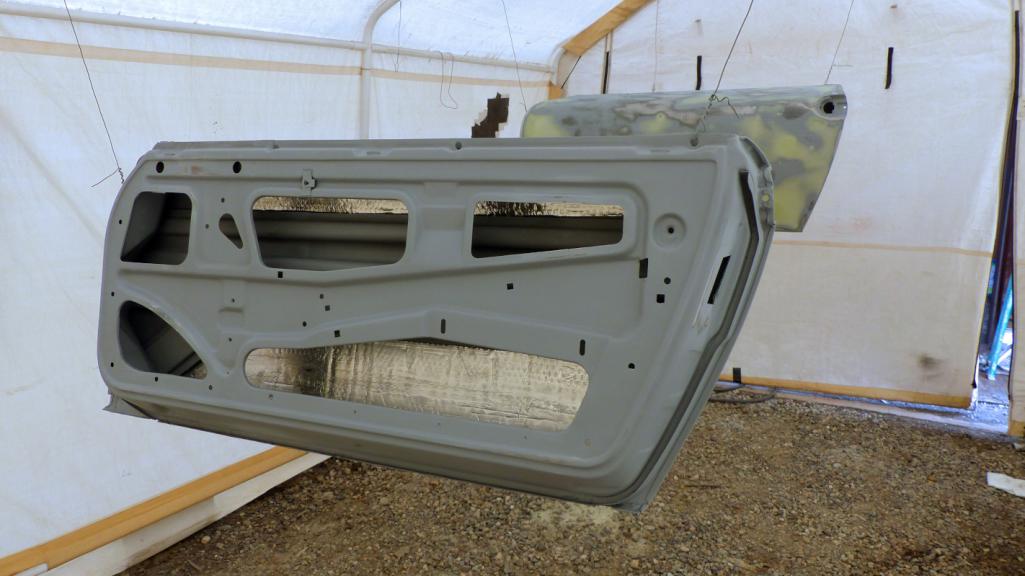 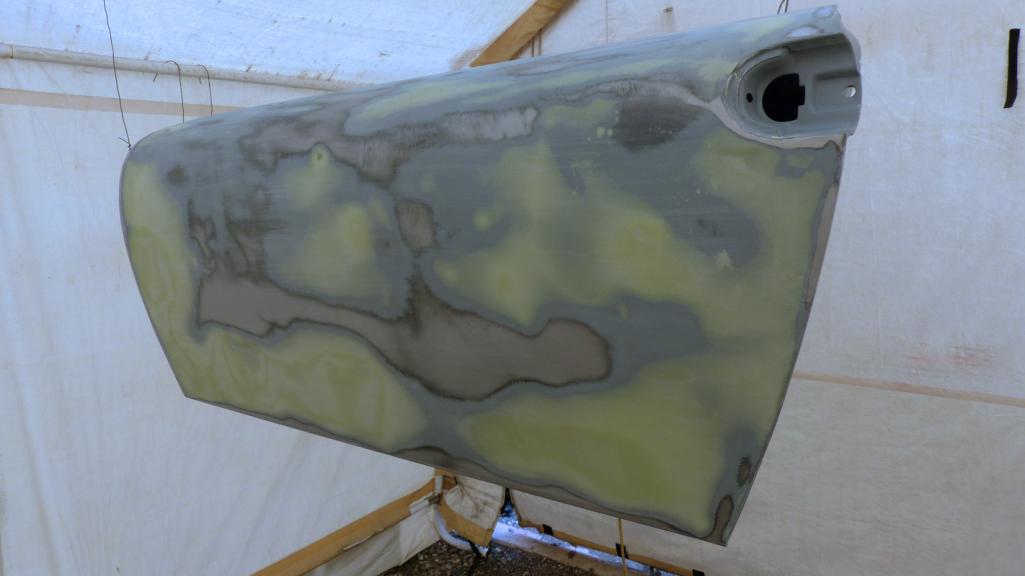 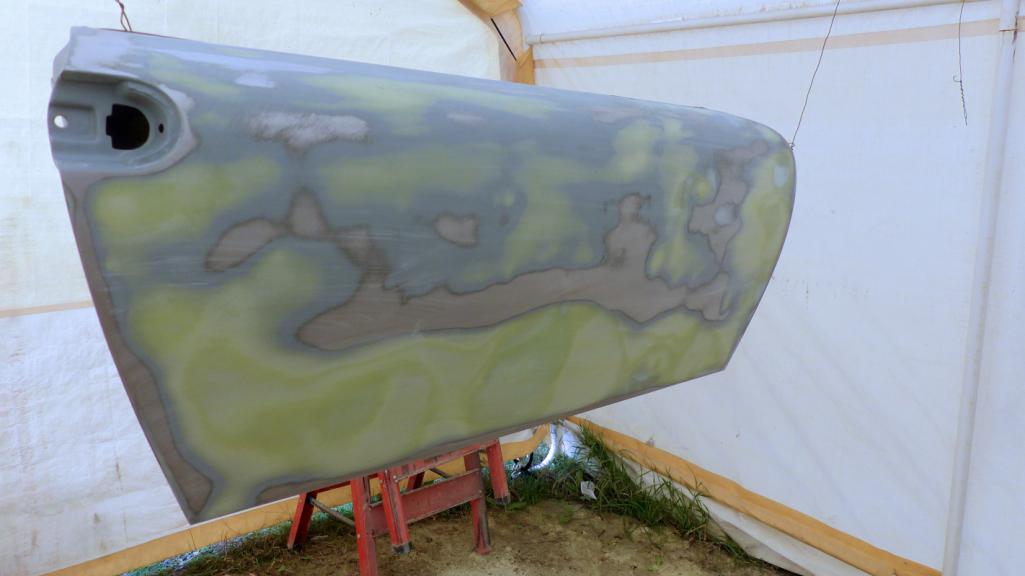  Then it was short work to shoot primer. No shiny tin foil inside these doors. 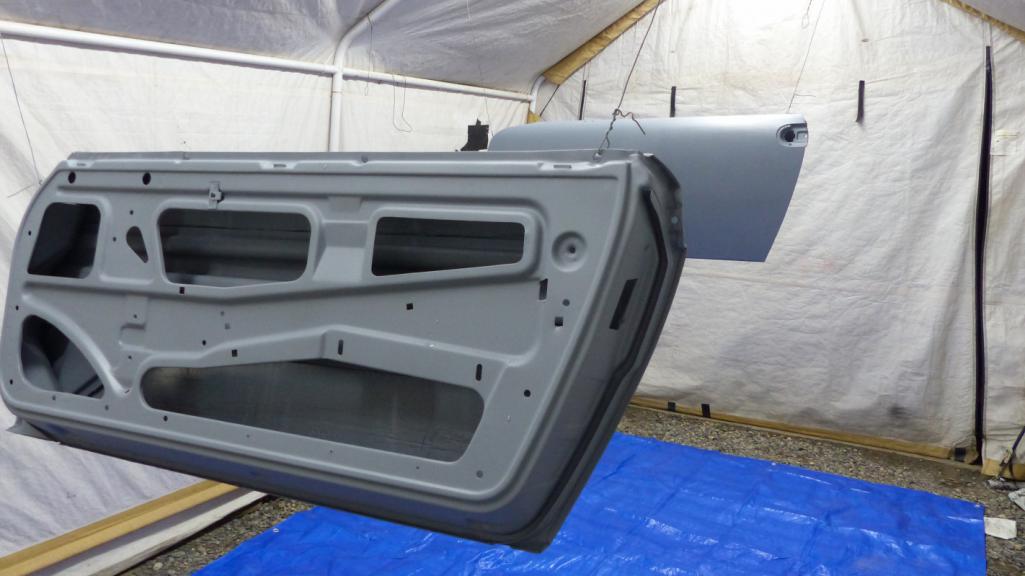 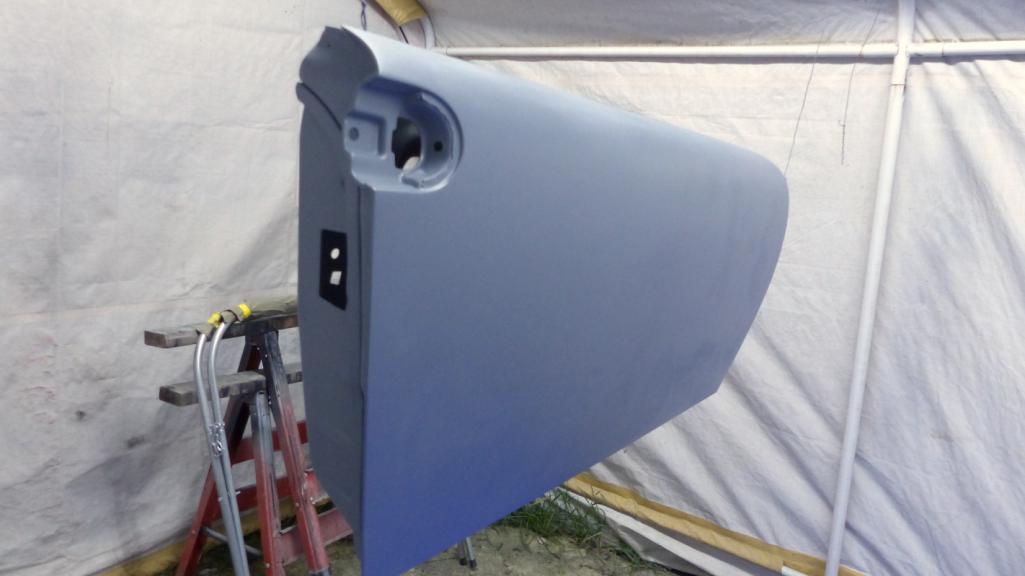 I found a spot with a few 80 grit scratches I missed. I guess I'll fill those with a spot of glazin putty before shooting surfacer. 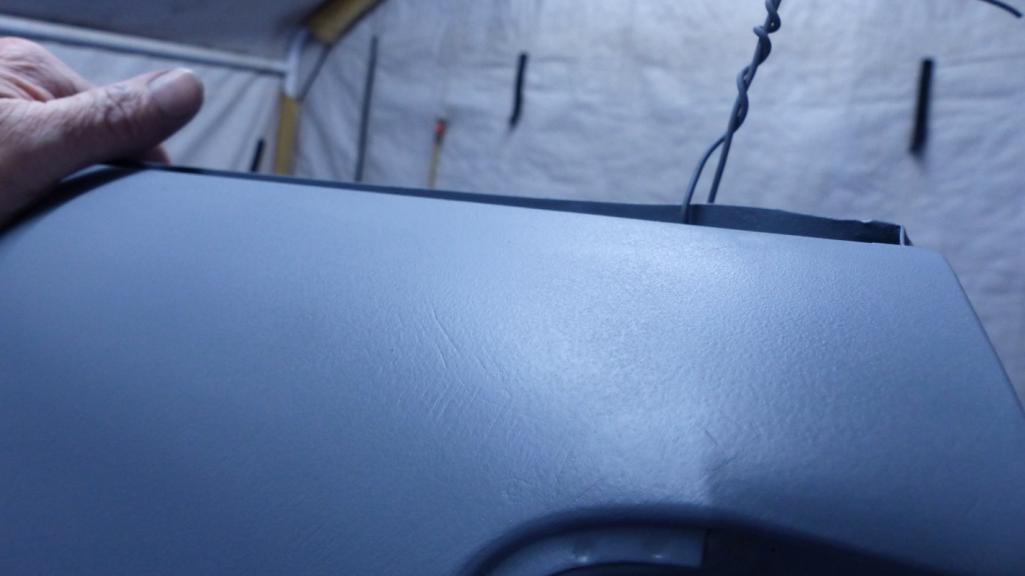 Next, the chassis got a very careful inspection to tidy up any pinholes, scratches, imperfections, and those plug welds you all complained about. This took a LOT of time but paid off. After primer, I've found just a couple of spots that will need glaze but that will wait for another post. Here she is yesterday, several hours after primer. I'll take a better shot later. In case you are wondering about that gravel floor, that will be covered and sealed before spraying color. 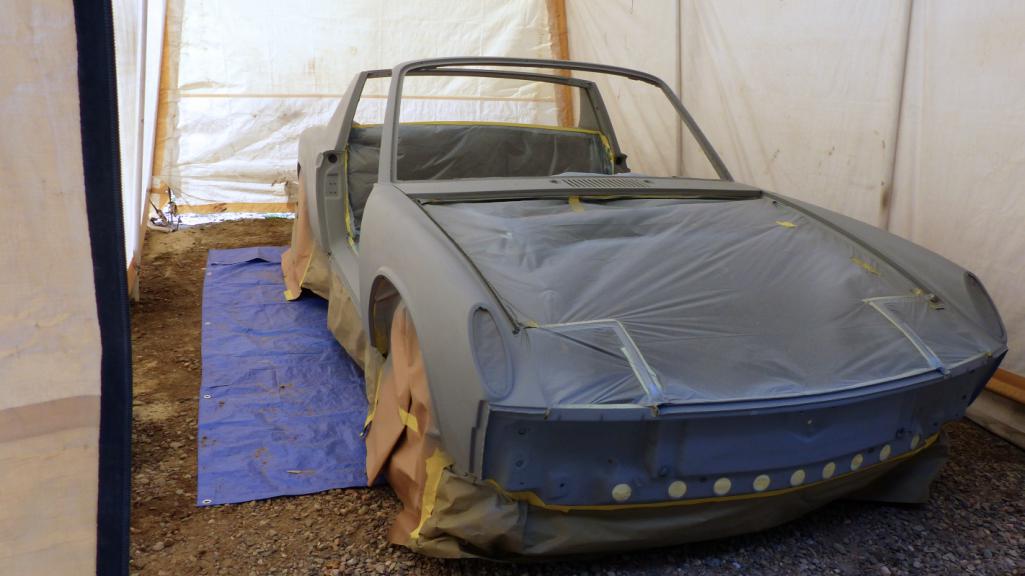 I got the shit scared out of me when I walked by the zipped shut tent and this popped out. 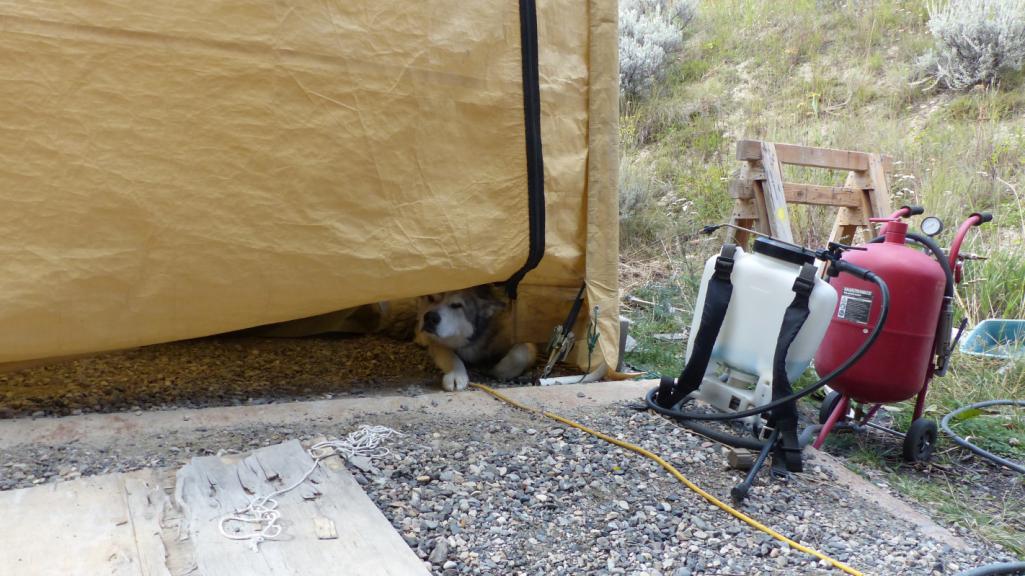 That's where I stopped clicking pics. I got both deck lids skim coated and blocked down to 320 grit last night and around mid-morning today, I reshot them with primer. Spent tonight adding additional masking in prep for surfacer. The weather forecast is giving me two more partly sunny days in the upper 60s. I'm hoping to get surfacer applied by the end of Thursday. Our first winter storm is predicted to start on Sunday. If I can get the surfacer on this week, I can use the bad weather time to prep the tent for the grand finale while the surfacer rests, then block the whole car down to a perfect surface, and hope I get another window of good weather to finish this job. (IMG:style_emoticons/default/unsure.gif) |
|
|
|
| dr.tim |
Sep 25 2019, 05:50 AM
Post
#1235
|
|
Member Group: Members Posts: 101 Joined: 17-December 11 From: Butte, America Member No.: 13,907 Region Association: Rocky Mountains |
GOOOOOOOOO BRENT! (IMG:style_emoticons/default/cheer.gif)
|
|
|
|
| bbrock |
Sep 25 2019, 09:01 AM
Post
#1236
|
|
914 Guru Group: Members Posts: 5,269 Joined: 17-February 17 From: Montana Member No.: 20,845 Region Association: Rocky Mountains |
GAME OVER!!!!
First thing this morning, I was setting up to spray surfacer on body panels. Air compressor kicked in and has been taking a ridiculous amount of time to recover pressure. I figured yet another set of teflon rings in this crappy oiless compressor were worn again but this time, just at the end of the cycle, there was a loud clunk followed by a clatter. I shut the damn thing off and tore it open to find this.  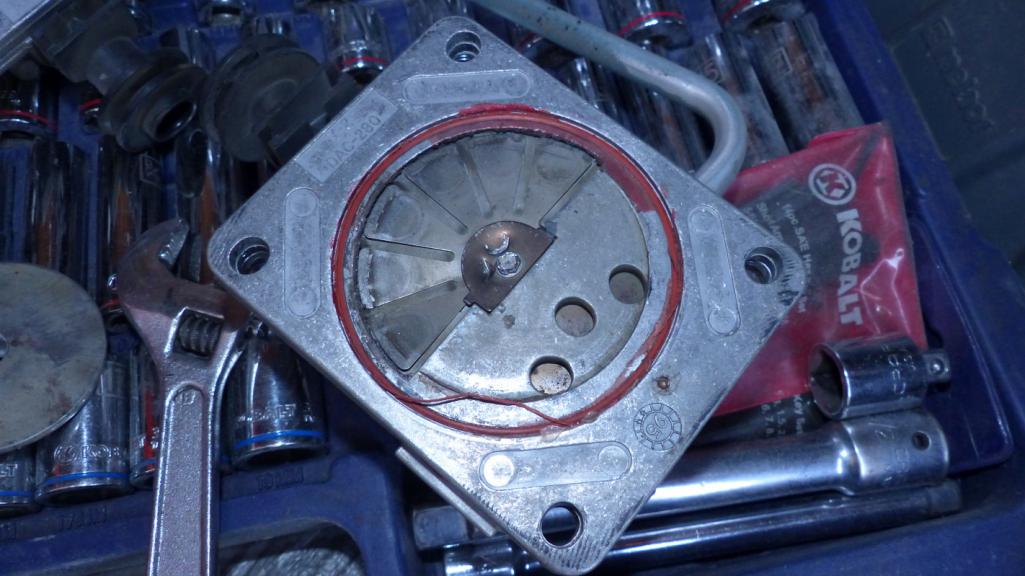 Piston rod is trashed and head needs rebuilt. It looks like the undersized screw that holds this piston cap on sheered off to start the catastrophic failure.  It gets better. It looks like that connecting rod was a standard replacement item which says a lot about the quality of this piece of crap, but that part is NLA. I managed to find one on ebay but to replace everything needed for a complete repair will cost somewhere around $250 in parts alone and even after that, it will still be a piece of shit. I can't over state how much of a piece of shit this compressor is. Had I known when I bought it that Devilbiss compressors are just rebranded Porter-Cable, I would have never bought it because every Porter-Cable tool I've owned has been complete shit that broke prematurely. So... I think I'll see if I can find a decent compressor unit to mate to this motor and mount on this tank. That is going to take time though so I guess I'm going shopping for compressors today. Fuch! Looks like I'm going to miss this weather window and chances for getting the car painted before winter are looking slim. I wish there was a place I could rent time in a spray booth but I sure don't know of any options around here. Oh well, that's life... (IMG:style_emoticons/default/wacko.gif) |
|
|
|
| mepstein |
Sep 25 2019, 09:58 AM
Post
#1237
|
|
914-6 GT in waiting Group: Members Posts: 20,685 Joined: 19-September 09 From: Landenberg, PA/Wilmington, DE Member No.: 10,825 Region Association: MidAtlantic Region |
If you can't rent a booth, can you rent a compressor. The commercial ones are so much better.
|
 |
|
| mepstein |
Sep 25 2019, 10:06 AM
Post
#1238
|
|
914-6 GT in waiting Group: Members Posts: 20,685 Joined: 19-September 09 From: Landenberg, PA/Wilmington, DE Member No.: 10,825 Region Association: MidAtlantic Region |
DP
|
|
|
|
| bbrock |
Sep 25 2019, 10:07 AM
Post
#1239
|
|
914 Guru Group: Members Posts: 5,269 Joined: 17-February 17 From: Montana Member No.: 20,845 Region Association: Rocky Mountains |
QUOTE(mepstein @ Sep 25 2019, 09:58 AM) If you can't rent a booth, can you rent a compressor. The commercial ones are so much better. That's a thought. I'll look into it. Biggest problem is working around Mother Nature's schedule this time of year. There's a nice 2-stage compressor on Craigslist I have left a message on. Alternative would be to pick up a $500 compressor at Home Depot that is comparable to the old Cambpell-Hausfeld I had for many years and sold with our last house. It wasn't a commercial compressor but did everything I asked of it and never gave me a problem. |
|
|
|
| JOEPROPER |
Sep 25 2019, 10:19 AM
Post
#1240
|
|
The answer is "no" unless you ask... Group: Members Posts: 1,209 Joined: 21-November 15 From: White Plains New York Member No.: 19,387 Region Association: North East States |
After all this work... Go buy a compressor before it gets too cold out there. I know this sucks, but keep it moving forward. Good Luck! (IMG:style_emoticons/default/flag.gif)
|
|
|
|
|
1 User(s) are reading this topic (1 Guests and 0 Anonymous Users)
0 Members:

|
Lo-Fi Version | Time is now: 12th May 2026 - 03:55 PM |
Invision Power Board
v9.1.4 © 2026 IPS, Inc.