|
|
|
Porsche, and the Porsche crest are registered trademarks of Dr. Ing. h.c. F. Porsche AG.
This site is not affiliated with Porsche in any way. Its only purpose is to provide an online forum for car enthusiasts. All other trademarks are property of their respective owners. |
|
|

  |

| Superhawk996 |
 Nov 8 2019, 07:23 PM Nov 8 2019, 07:23 PM
Post
#1301
|
|
914 Guru  Group: Members Posts: 7,839 Joined: 25-August 18 From: Woods of N. Idaho Member No.: 22,428 Region Association: Galt's Gulch |
Brent you’ve set a high bar by working with silver metallic. It is notoriously hard to do spot fixes and blending on metallics and even more so on silver.
If you want perfection you likely need to take it back and respray the base coat. However from what I can see in the photos I’d leave it. Given that you’re on a dirt road the first stone chip will cause more grief and trauma if you achieve perfection. If you already have a flaw or two, you’ll feel much more at ease actually driving it. (IMG:style_emoticons/default/smile.gif) And wasn’t the goal really to drive and enjoy it? Just food for thought. You’ve made great progress in saving a bad situation. That alone is a reason to stand tall! Keep at it! (IMG:style_emoticons/default/cheer.gif) |
   |

 
|
| bbrock |
Nov 8 2019, 09:28 PM
Post
#1302
|
|
914 Guru Group: Members Posts: 5,269 Joined: 17-February 17 From: Montana Member No.: 20,845 Region Association: Rocky Mountains |
QUOTE(Superhawk996 @ Nov 8 2019, 06:23 PM)  Brent you’ve set a high bar by working with silver metallic. It is notoriously hard to do spot fixes and blending on metallics and even more so on silver. If you want perfection you likely need to take it back and respray the base coat. However from what I can see in the photos I’d leave it. Given that you’re on a dirt road the first stone chip will cause more grief and trauma if you achieve perfection. If you already have a flaw or two, you’ll feel much more at ease actually driving it. (IMG:style_emoticons/default/smile.gif) And wasn’t the goal really to drive and enjoy it? Just food for thought. You’ve made great progress in saving a bad situation. That alone is a reason to stand tall! Keep at it! (IMG:style_emoticons/default/cheer.gif) Ha! Don't worry, perfection is not an option. It's hard to photograph but those flecks really are distracting. Worse than a stone chip will look. There are a few somewhat similar flecks on the car, that don't bother me. The hood is kind of the focal point of the car though and those flaws really scream at you. Surprisingly, I'm not too worried about matching the silver. First, this wouldn't be quite a "spot fix" but a respray of two panels. But here's the thing, spraying that stuff was actually quite easy. Maybe it was because I spent so much time watching Youtubes of spraying silver and knew what to avoid. The first coat goes on mottled and tiger striped, but by the second coat, everything looks nice and even. A third coat to make sure nothing is missed and two drop coats to finish the job. In the course of painting this, I sprayed the engine lid, headlight covers, and blinders off the car. They are a dead match to the other paint. I also made about a dozen spot repairs during the course of laying base coat. The worst were two hose touches that wiped the base off down to the sealer, and one attempt to pick a piece of trash out that went bad and required sanding back a six inch diameter area to smooth things out and spotting in the base. After dusting over the repairs the last time, I defy anyone to find where those repairs were made. I actually regret not being a bit more bold about making repairs before spraying clear. Upshot is, after all the worry and hand ringing of not being able to lay the silver consistently, it turned out not to be much of a problem This DBC was way easier to spray than the cheaper Omni single stage. There's more than a good chance I'll be breaking out the silver tomorrow. (IMG:style_emoticons/default/beerchug.gif) |
|
|
|
| sixnotfour |
Nov 9 2019, 08:24 AM
Post
#1303
|
|
914 Wizard Group: Members Posts: 11,242 Joined: 12-September 04 Member No.: 2,744 Region Association: NineFourteenerVille |
there is always the SEMA option ... (IMG:style_emoticons/default/blink.gif)
Attached image(s) 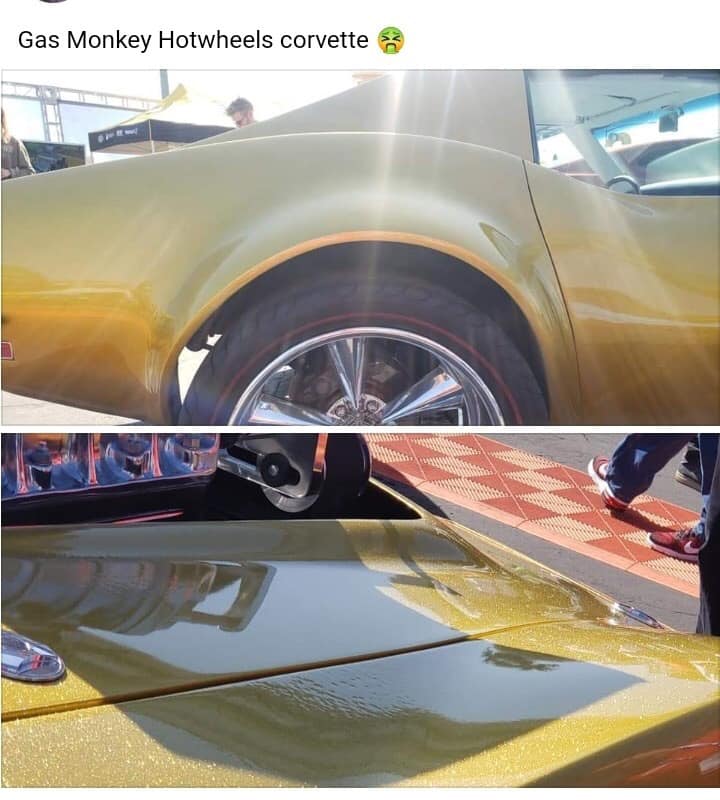
|
 |
|
| PCA7GGR |
Nov 9 2019, 08:26 AM
Post
#1304
|
|
Member Group: Members Posts: 258 Joined: 3-October 03 From: Dublin, CA Member No.: 1,219 |
Hand woven Persian rugs are always made with a flaw. Making it perfect would be an affront to Allah - ;>)
|
|
|
|
| bbrock |
Nov 11 2019, 07:46 PM
Post
#1305
|
|
914 Guru Group: Members Posts: 5,269 Joined: 17-February 17 From: Montana Member No.: 20,845 Region Association: Rocky Mountains |
 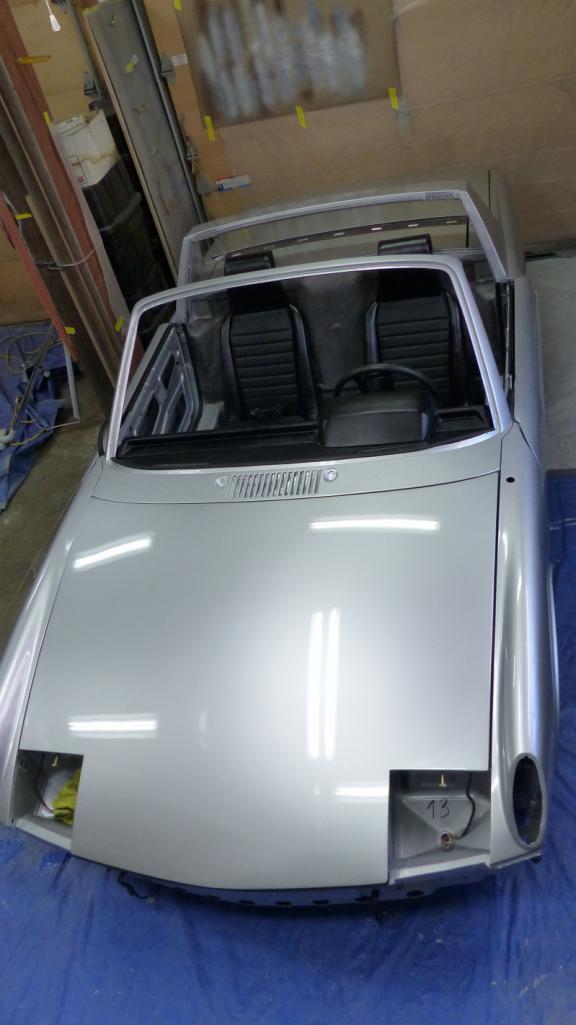 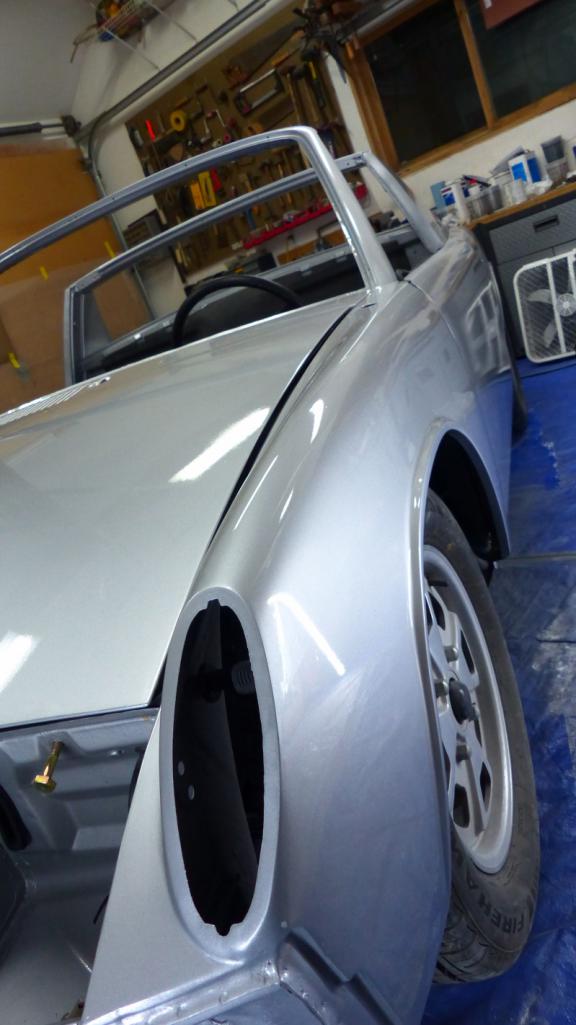 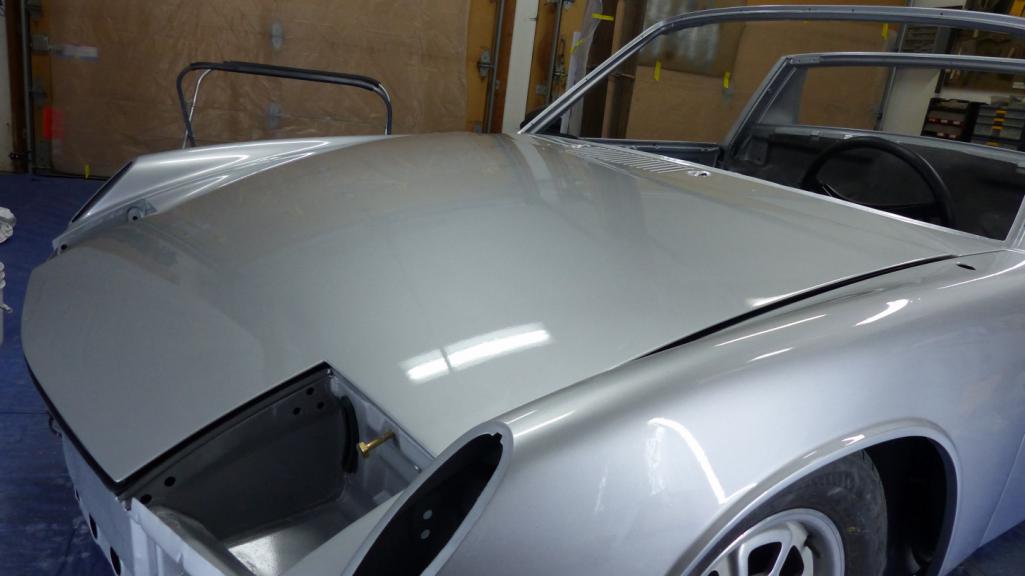  The hood is just resting on a new 914Rubber seal without hinges or latch. That's why it looks misaligned. Spent Saturday finishing the sanding, then cleaning, masking and prepping. I reshot the hood, cowl, and windshield frame with silver base followed by one wet coat of clear. Then I unmasked the left fender and shot two more wet coats. I did it that way because there was still a good amount of clear left on the fender after sanding, so I guessed it was about one coat's worth and made up the difference. I'm not sure these are in focus, but here's a couple shots after reshooting base before the clear went on. 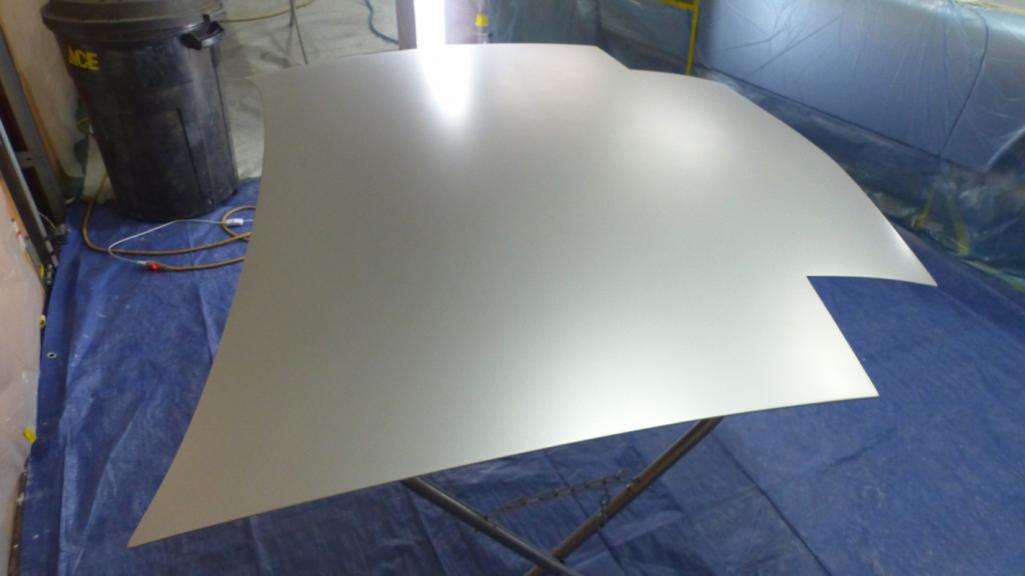 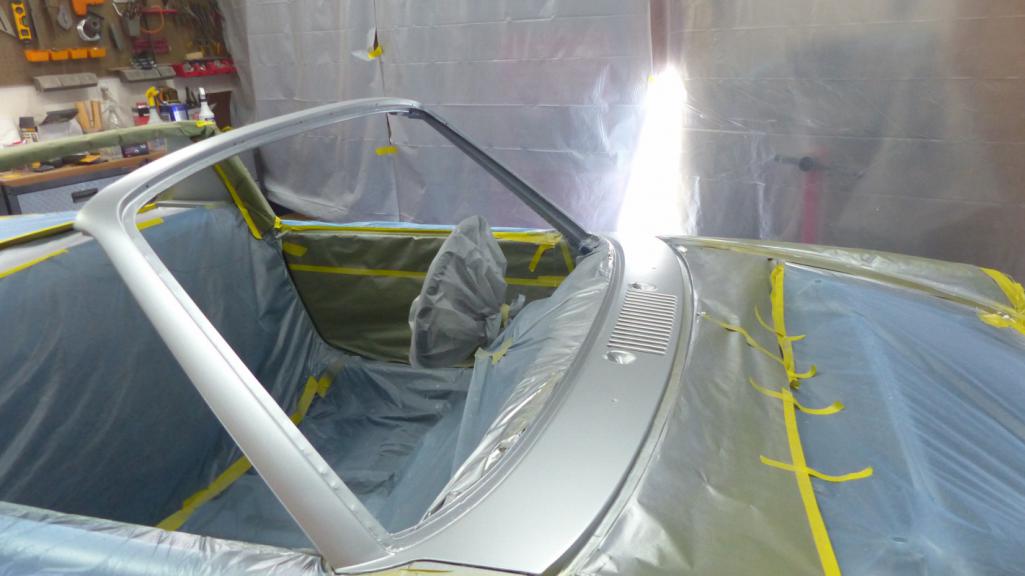 I know the flaws in the paint looked kind of minor in the pics, but trust me, they weren't. You could easily tell it was an amateur paint job from 10 feet away because of all the trash on the hood and cowl. I'll follow up with more about that, but I didn't spend the last two and a half years putting the body back together to settle for a half-assed paint job. There's no chance that Allah will be offended, but I'm MUCH happier now. I'm actually glad I spilled the paint because it force me to fix what would have been a very disappointing paint job. I still have some spots that got dry overspray in the chaos following the spill, and there are plenty of dust nibs. Yesterday I ordered this kit to correct those issues. (IMG:http://www.914world.com/bbs2/uploads_offsite/images-na.ssl-images-amazon.com-20845-1573523184.1.jpg) |
|
|
|
| Superhawk996 |
Nov 11 2019, 07:56 PM
Post
#1306
|
|
914 Guru Group: Members Posts: 7,839 Joined: 25-August 18 From: Woods of N. Idaho Member No.: 22,428 Region Association: Galt's Gulch |
Well done! (IMG:style_emoticons/default/pray.gif) That looks great.
|
|
|
|
| doug_b_928 |
Nov 11 2019, 08:41 PM
Post
#1307
|
|
Senior Member Group: Members Posts: 730 Joined: 17-January 13 From: Winnipeg Member No.: 15,382 Region Association: Canada |
It looks incredible...well done!
|
|
|
|
| defianty |
Nov 12 2019, 04:15 AM
Post
#1308
|
|
Senior Member Group: Members Posts: 659 Joined: 9-August 06 From: Essex, UK Member No.: 6,621 Region Association: None |
Looks great Brent!
|
|
|
|
| Dion |
Nov 12 2019, 06:32 AM
Post
#1309
|
|
RN Group: Members Posts: 2,926 Joined: 16-September 04 From: Audubon,PA Member No.: 2,766 Region Association: MidAtlantic Region |
Fantastic!
|
|
|
|
| BeatNavy |
Nov 12 2019, 06:55 AM
Post
#1310
|
|
Certified Professional Scapegoat Group: Members Posts: 2,963 Joined: 26-February 14 From: Easton, MD Member No.: 17,042 Region Association: MidAtlantic Region |
QUOTE(bbrock @ Nov 11 2019, 08:46 PM) I didn't spend the last two and a half years putting the body back together to settle for a half-assed paint job. Brent, this has been and continues to be an epic thread (complete with wildlife!). Congratulations for making it to this point -- what a job (IMG:style_emoticons/default/smilie_pokal.gif) |
|
|
|
| altitude411 |
Nov 12 2019, 07:34 AM
Post
#1311
|
|
I drove my 6 into a tree Group: Members Posts: 1,306 Joined: 21-September 14 From: montana Member No.: 17,932 Region Association: Rocky Mountains |
(IMG:style_emoticons/default/cheer.gif) Absolutely fantastic job man! Way to stick with it. It looks bad ass and after a cut and buff you may hear thunder.... (IMG:style_emoticons/default/blink.gif)
You should be very proud Mr. Brent. I hope to see you cruising southwest Montana this summer. Enjoy the fun part of the build and thanks for your time on this thread. (IMG:style_emoticons/default/beerchug.gif) |
|
|
|
| bbrock |
Nov 17 2019, 11:43 PM
Post
#1312
|
|
914 Guru Group: Members Posts: 5,269 Joined: 17-February 17 From: Montana Member No.: 20,845 Region Association: Rocky Mountains |
Thanks for the compliments everyone. It really means a lot. The wife approved too. After seeing the paint, she started talking about how fun these cars are to drive. Quite a departure from the ridicule or quiet suffering of this project.
I was asked to share some details on the paint correction (a.k.a. fiasco recovery). I've also had a couple people mention they follow this thread for guidance on their own builds. Seems crazy but maybe most valuable as a guide of what not to do. So here are just a few details on the correction and then a couple other lessons learned the hard way. There's not that much to say about the correction. I simply wet sanded all the pools, runs, and slobber off using a durablock. I started with 800 grit which seemed like a good grit for bringing the surface flat again. If I were going to just sand and then cut and buff, I would have stopped when there were just shallow low spots left and switched to 1500 grit and progress to 3000 before buffing. In reality, I probably could have just sanded and buffed my way out of my mess, but there were other problems with the paint to correct. Once I decided I would respray base on the hood and cowl, I switched to 600 grit to speed up the job of flattening the surface. At that point, I wasn't worried about going through the clear as long as I didn't sand through the primer. I did sand through the clear in a couple places but have to say it took a LOT of sanding to get there. Pretty much had to do it on purpose. 600 grit was fine enough for respraying base so I left it at that. On the fender, I stuck with 800 grit since I was only going to respray clear there. Again, that was fine enough so I didn't do anything more than flatten out the runs and sags from the spill, and scuff the whole surface of the panel. I only did one thing special during the respray. I masked off the whole car, including the left fender that would get clear. I sprayed base and one coat of clear on the hood and cowl (including windshield frame). Oh yeah, I also taped the f-ing lid on the sprayer cup this time (IMG:style_emoticons/default/wacko.gif) After the coat of clear, I pulled the masking off the fender and shot two more coats of clear on all the panels. I just guessed that I had left about 1 full coat of clear on most of the fender, so shooting one less coat there would give me about 3 full wet coats on everything. PPG says to spray 2 coats but since I planned to cut and buff, I sprayed an extra for sanding. That's pretty much it on the correction. Just a lot of work but nothing fancy. A couple other tips: Beware of this masking plastic. I loved it for fast masking and it worked great for primer, but sealer and base coat did not stick to it at all. That blew paint flakes all over the shop and a lot of them wound up in the paint. I was able to deal with it mostly but there are a few flecks here and there that aren't too noticeable. If I do this again, this shit will be banned for the final spray. (IMG:http://www.914world.com/bbs2/uploads_offsite/images-na.ssl-images-amazon.com-20845-1574055829.1.jpg) And another 3M product that pissed me off. I f-ing hate this foam tape. I think I just bought the wrong stuff for what I was doing but it was nothing but an expensive PITA. The adhesive is very weak so I would spend hours masking and sealing all my door and deck lid gaps only to find the tape had fallen off an hour later. I even had a piece lying on a horizontal surface that unglued itself overnight and rolled away. I have nothing good to say about this crap. Like I said, I probably just bought the wrong stuff. There are lots of different foam tapes available. (IMG:http://www.914world.com/bbs2/uploads_offsite/images-na.ssl-images-amazon.com-20845-1574055830.2.jpg) Last tip specific to spraying metallic. It is imperative to have the right vibrations in the air for the flakes to lay properly. You need to play period correct tunes and play them loud. For my 73, I went with tunes from the late 60s through 73 which includes some of the best damn music ever created. And no Bee Gees dammit. Don't be a dick. These aren't disco cars. Disco sucks. A few sentimental pop hits are okay between coats, but you want good classic rock buzzing those flakes into place. Here's a small sample of what was in the air when I sprayed my car. 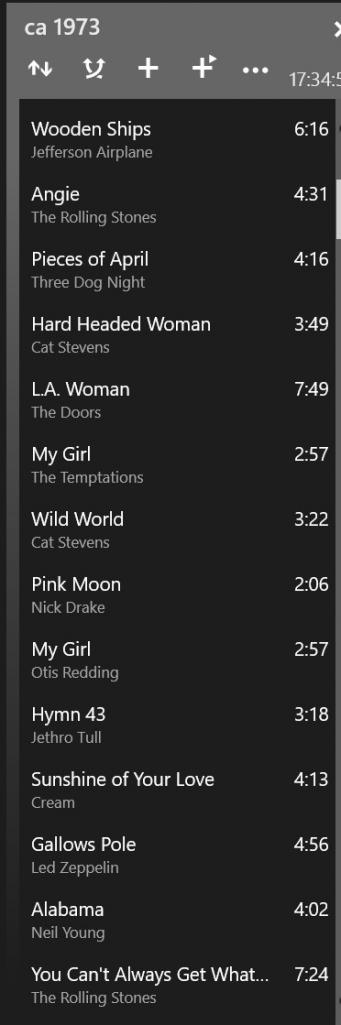 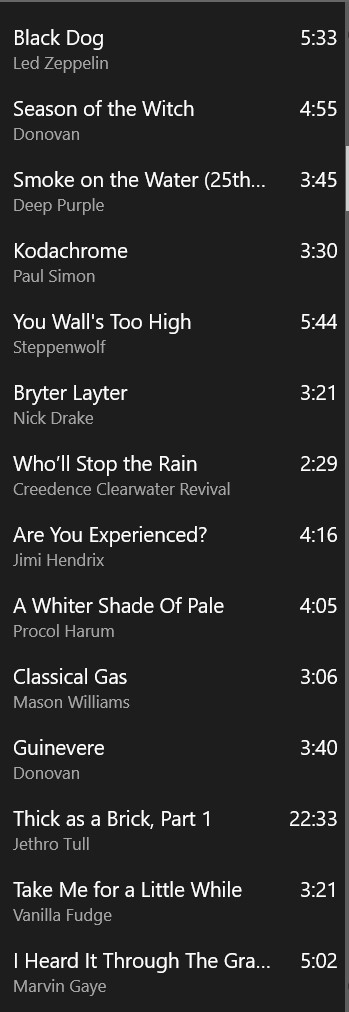   |
|
|
|
| bbrock |
Nov 18 2019, 12:23 AM
Post
#1313
|
|
914 Guru Group: Members Posts: 5,269 Joined: 17-February 17 From: Montana Member No.: 20,845 Region Association: Rocky Mountains |
Okay, back to business. After the paint, I was eager to clear all the crap piled up in the family room out so that dictated what I did next which was to put the dash and seats in the car. Yes, the seats will come out again to install carpet, but at least they are out of the way for now.
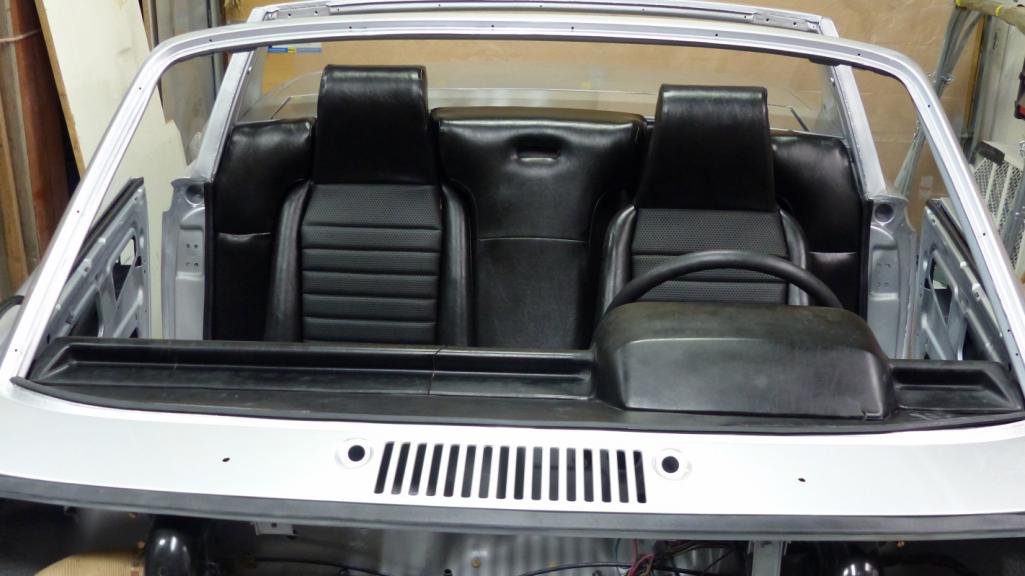 I also loose fit the carpet but no pic yet. I did glue one piece down up front though. 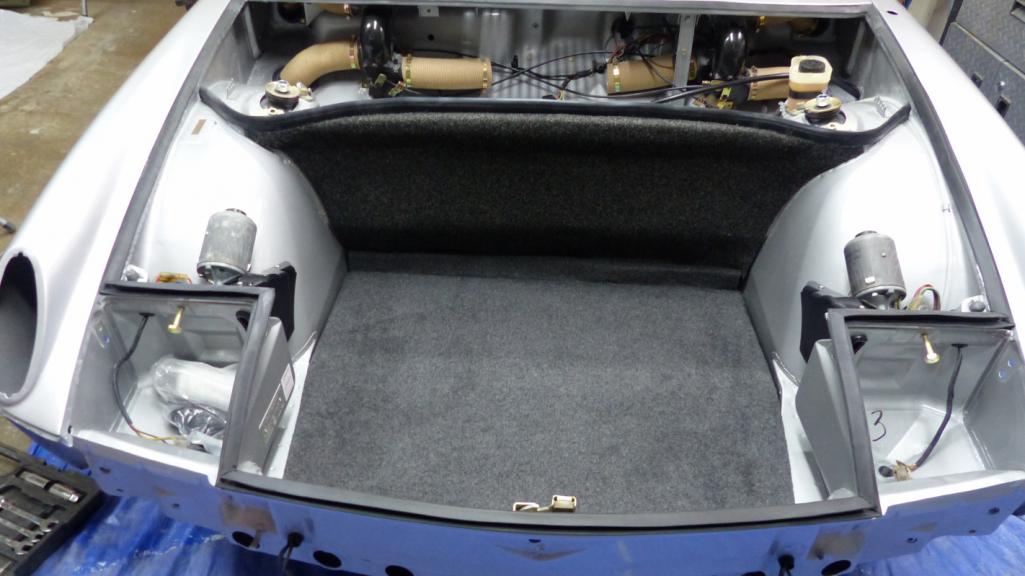 Next was the wiper rack.  I painted and installed the headlight mechanisms complete with the correct zip tie. 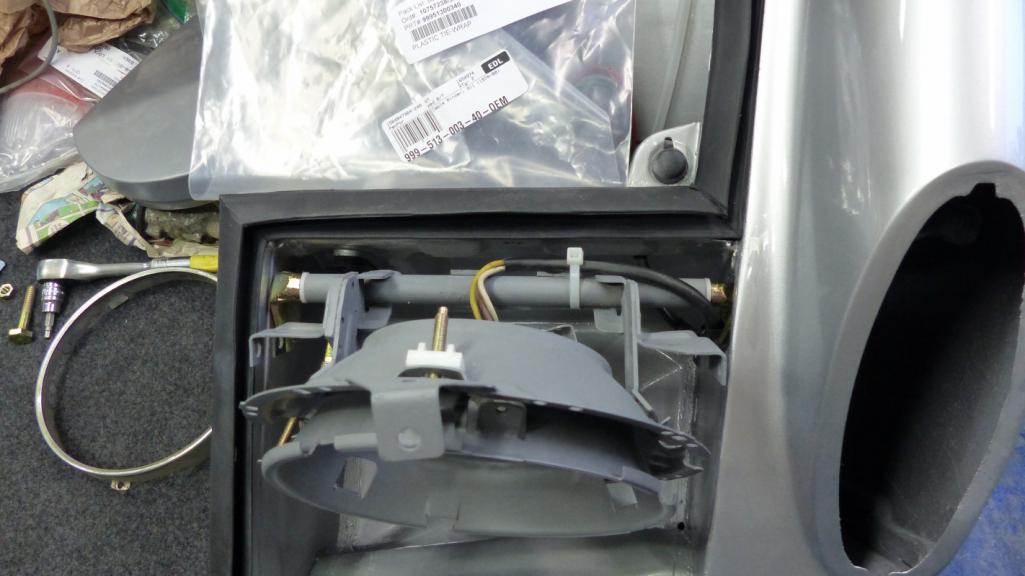 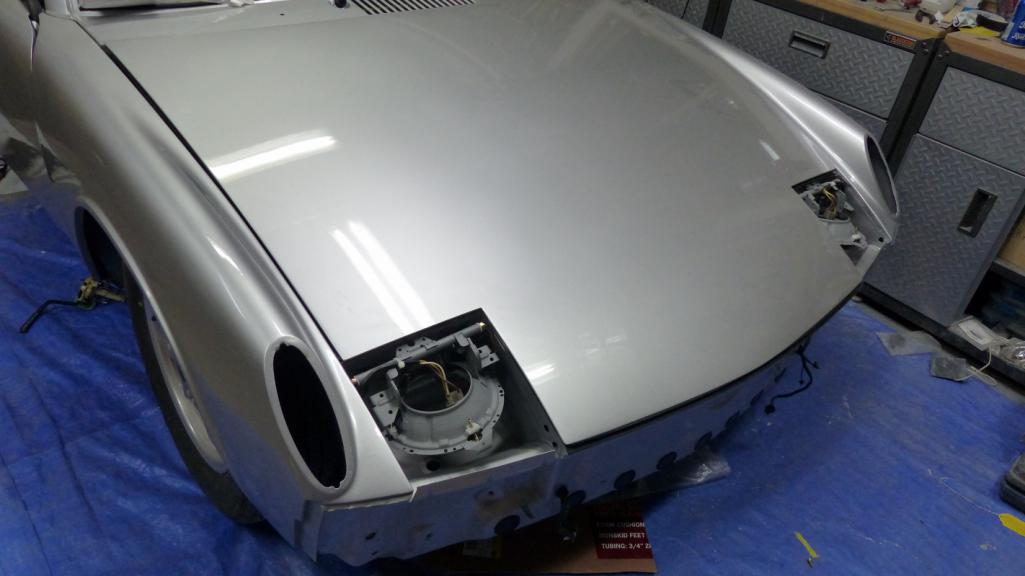 I should have spent the weekend color sanding the body but just wasn't in the mood. Instead, I worked on wiring. Got the lower dash wiring done yesterday without much issue. Today, I figured I'd quickly wire up the instruments and maybe glue in carpet. Nope. Wiring instruments took a lot longer than expected. I'm pretty good at reading wiring diagrams but the factory diagrams are a little cryptic when it comes to the instruments. Also, here's a couple tips. Wire the instruments BEFORE installing the steering column if you can. It gives more room to work. I'm stupid, so did it the other way. Also, completely remove the background light harness. Then attach all the instrument wires. Then wire the background lights at the end. That keeps you from getting things tangled up and makes it easier to know which bulbs to put where so everything reaches. No, I was not smart enough to do it that way the first time. Biggest problem I ran into is that the 914Rubber instrument grommets simply did not work. The silicone rubber is too soft and the fit is too loose. Two of my guages simply fell out from gravity and would not stay in. The speedo barely stayed in but as soon as I hooked up the speedo cable, it popped out. I wound up chipping the paint on two instrument bezels swapping back to my original grommets. My originals are a little ragged, but not noticeable when installed. Most important, they hold the gauges firmly in place. Luckily, I did not crimp my instrument bezels down after replacing the lenses so they won't be too hard to pull off to repaint. Other problems were a couple space connectors that were brittle and got missed during the harness resto. A little awkward crimping in new ones with the harness partially installed. I also am missing one instrument bulb holder and a connector fell off another during install. I'll have to order replacements. With all the wiring done, it was time to have some fun. I don't have a battery yet, but I have this.  And that led to this. 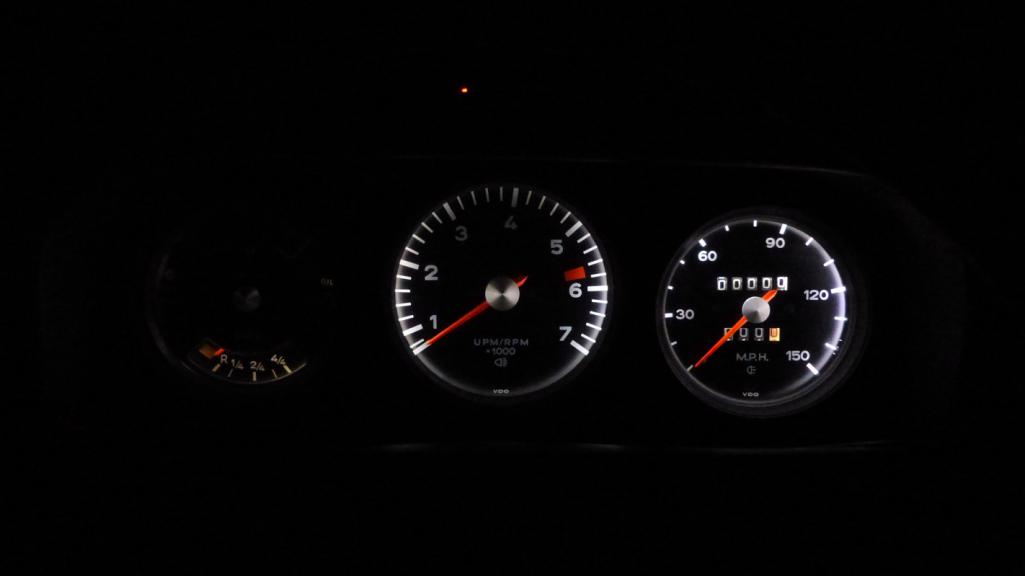 I also tested the wipers and discovered I have a bad switch. I had bench tested the motor and knew it was good, but when I tested, I was getting intermittent at the intermittent and off positions. Slow speed where it should have been, and off with the switch in high position. I rewired the motor to by-pass the intermittent relay to rule out a problem there and found off and slow worked fine, but no high speed. Pulled the switch and discovered the high speed contact was broken out of its mooring and not making contact. 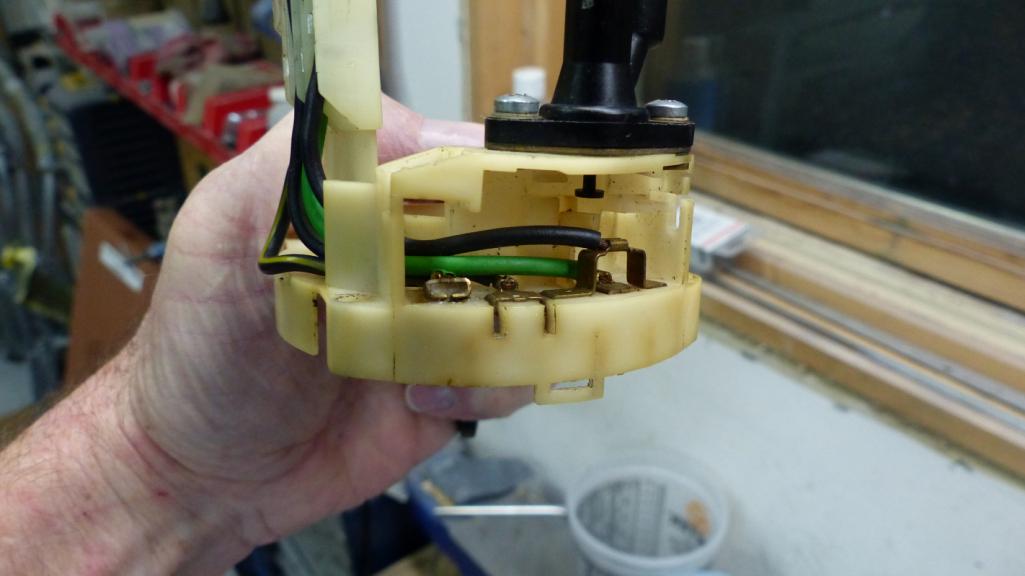 I spent a lot of time fixing this, and I managed to get it working properly, but the switch is in really bad shape and putting it back together will requires a weirdly shaped rivet or suitable substitute. I think I'm going to call it a loss and try to source another one. Finally, The Terminator popped his eyes open under its own power for the first time in over 30 years! I thought about making a video but it seemed like too much work. 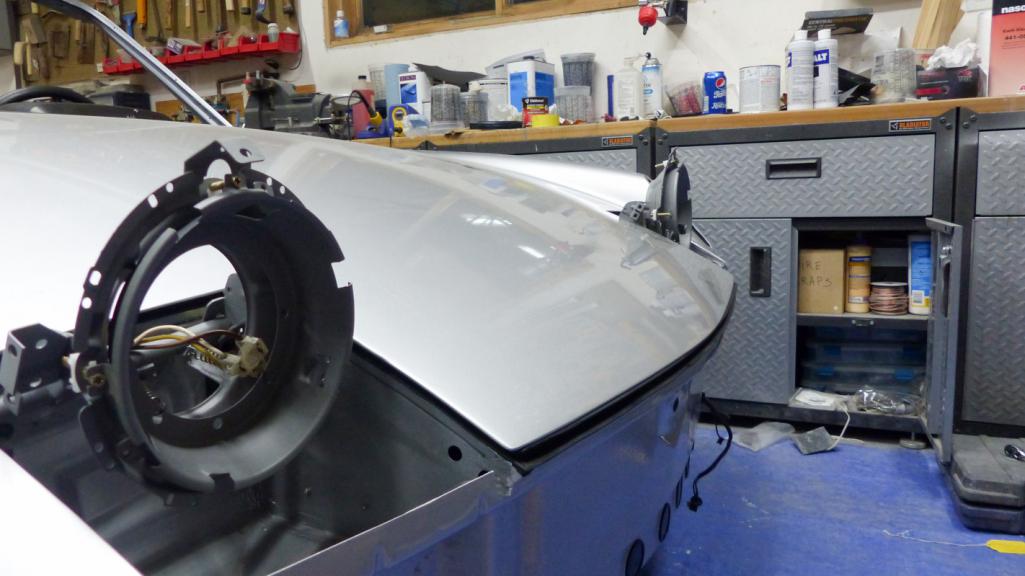 "I'll be back..." |
|
|
|
| andrewb |
Nov 18 2019, 02:26 AM
Post
#1314
|
|
Member Group: Members Posts: 114 Joined: 25-May 10 From: UK Member No.: 11,762 Region Association: None |
Great stuff Brent - keep it coming. A really inspiring build.
Good point about the music - you can't beat The Stones. Perhaps a bit of George Thorogood tho ....? |
|
|
|
| bbrock |
Nov 18 2019, 10:49 AM
Post
#1315
|
|
914 Guru Group: Members Posts: 5,269 Joined: 17-February 17 From: Montana Member No.: 20,845 Region Association: Rocky Mountains |
QUOTE(andrewb @ Nov 18 2019, 01:26 AM) Great stuff Brent - keep it coming. A really inspiring build. Good point about the music - you can't beat The Stones. Perhaps a bit of George Thorogood tho ....? Ha! For some reason, I never could get into Thorogood, but coincidentally, when my wife saw the Stones back in the late 70s, Thorogood was the opening act. She likes him. He was post 73 though so not appropriate for my car (IMG:style_emoticons/default/rolleyes.gif) |
|
|
|
| rhodyguy |
Nov 18 2019, 11:06 AM
Post
#1316
|
|
Chimp Sanctuary NW. Check it out. Group: Members Posts: 22,252 Joined: 2-March 03 From: Orion's Bell. The BELL! Member No.: 378 Region Association: Galt's Gulch |
The Blasters would have had you shaking like crazy. I love silver.
|
|
|
|
| Cairo94507 |
Nov 18 2019, 11:12 AM
Post
#1317
|
|
Michael Group: Members Posts: 10,628 Joined: 1-November 08 From: Auburn, CA Member No.: 9,712 Region Association: Northern California |
Great progress Brent. Your car is looking really nice. Silver is a great 914 color for sure. (IMG:style_emoticons/default/beerchug.gif)
|
|
|
|
| dr.tim |
Nov 18 2019, 04:24 PM
Post
#1318
|
|
Member Group: Members Posts: 101 Joined: 17-December 11 From: Butte, America Member No.: 13,907 Region Association: Rocky Mountains |
QUOTE(bbrock @ Nov 17 2019, 10:43 PM) For my 73, I went with tunes from the late 60s through 73 which includes some of the best damn music ever created. That's funny. I always leave my friend's satellite radio on the Elvis channel when I drive his '69 BMW 2002. The car looks great Brent. You'll have it done in time for.. staring at it in the garage for 5 months. (IMG:style_emoticons/default/sad2.gif) |
|
|
|
| bbrock |
Nov 18 2019, 04:49 PM
Post
#1319
|
|
914 Guru Group: Members Posts: 5,269 Joined: 17-February 17 From: Montana Member No.: 20,845 Region Association: Rocky Mountains |
QUOTE(dr.tim @ Nov 18 2019, 03:24 PM) The car looks great Brent. You'll have it done in time for.. staring at it in the garage for 5 months. (IMG:style_emoticons/default/sad2.gif) (IMG:style_emoticons/default/av-943.gif) You have no idea how many times I though of that. Luckily, a lot of work still ahead, so hopefully my just staring at it time will be shortened. |
|
|
|
| doug_b_928 |
Nov 18 2019, 05:11 PM
Post
#1320
|
|
Senior Member Group: Members Posts: 730 Joined: 17-January 13 From: Winnipeg Member No.: 15,382 Region Association: Canada |
The reflections in your paint look good and you haven't even cut and buffed yet!
|
|
|
|
|
1 User(s) are reading this topic (1 Guests and 0 Anonymous Users)
0 Members:

|
Lo-Fi Version | Time is now: 12th May 2026 - 03:55 PM |
Invision Power Board
v9.1.4 © 2026 IPS, Inc.