|
|
|
Porsche, and the Porsche crest are registered trademarks of Dr. Ing. h.c. F. Porsche AG.
This site is not affiliated with Porsche in any way. Its only purpose is to provide an online forum for car enthusiasts. All other trademarks are property of their respective owners. |
|
|

  |

| FlacaProductions |
 Nov 18 2019, 07:25 PM Nov 18 2019, 07:25 PM
Post
#1321
|
|
Advanced Member  Group: Members Posts: 2,198 Joined: 24-November 17 From: LA Member No.: 21,628 Region Association: Southern California |
Sh!t's gettin' real now.....
|
   |

 
|
| bigkensteele |
Nov 18 2019, 07:36 PM
Post
#1322
|
|
Major Member Group: Members Posts: 2,200 Joined: 30-August 04 From: Cincinnati, OH Member No.: 2,660 Region Association: South East States |
The paint looks great! I just hope that it holds up even though no Allman Brothers vibes were introduced in the spray area.
(IMG:style_emoticons/default/poke.gif) |
|
|
|
| Superhawk996 |
Nov 18 2019, 07:36 PM
Post
#1323
|
|
914 Guru Group: Members Posts: 7,839 Joined: 25-August 18 From: Woods of N. Idaho Member No.: 22,428 Region Association: Galt's Gulch |
Stand tall my friend. Great job.
Especially love the power supply in there instead of the battery. That is actually a great way to do it since you can do current limiting and prevent any serious Fryage. This is coming together nicely. (IMG:style_emoticons/default/piratenanner.gif) |
|
|
|
| bbrock |
Nov 18 2019, 09:42 PM
Post
#1324
|
|
914 Guru Group: Members Posts: 5,269 Joined: 17-February 17 From: Montana Member No.: 20,845 Region Association: Rocky Mountains |
Thanks all. Totally agree about the Allman Brothers. What I posted is only about 10% of what was on the playlist that day, but sadly, I am missing Allman Brothers from the library and have been thinking I need to remedy that. I noticed that Janis doesn't appear on the sample list, but rest assured, she and her flower-power 356 were with me that day. I believe Cry Baby was playing when "the incident" happened. (IMG:style_emoticons/default/hissyfit.gif)
I thought you might like the power supply @Superhawk996 . Seemed like a good way to contain the magic smoke in case something got wired cross-wise. Shit is for sure gettin' real (IMG:style_emoticons/default/smile.gif) |
|
|
|
| brcacti |
Nov 19 2019, 04:05 PM
Post
#1325
|
|
1974 914 1.8 Group: Members Posts: 674 Joined: 17-July 19 From: PHX AZ 60 miles south Member No.: 23,302 Region Association: Southwest Region |
Great story, welcome to 914 world (IMG:style_emoticons/default/driving-girl.gif) (IMG:style_emoticons/default/welcome.png)
|
|
|
|
| Tdskip |
Nov 19 2019, 09:06 PM
Post
#1326
|
|
Advanced Member Group: Members Posts: 3,780 Joined: 1-December 17 From: soCal Member No.: 21,666 Region Association: None |
This whole thread has just been fantastic - thanks for the updates.
|
|
|
|
| TravisNeff |
Nov 19 2019, 10:10 PM
Post
#1327
|
|
914 Guru Group: Members Posts: 5,082 Joined: 20-March 03 From: Mesa, AZ Member No.: 447 Region Association: Southwest Region |
Muy, Muy Bueno!
|
|
|
|
| bbrock |
Nov 19 2019, 10:27 PM
Post
#1328
|
|
914 Guru Group: Members Posts: 5,269 Joined: 17-February 17 From: Montana Member No.: 20,845 Region Association: Rocky Mountains |
Stealing small bits of time here and there to continue work, so small projects continuing with wiring and assembly. Got the ventilation control panel installed. Had to guess on where to put the fan bulb. There are four bulb sockets but only three bulbs. Two back lights go in the lower corners, but for the light that comes on when the fan is on, you have a choice of red on the left, or blue on the right. Blue made more sense both for color, and because it is on the side with the fan contacts. Anyone know if this is how the factory did it?
Looks great, don't it? 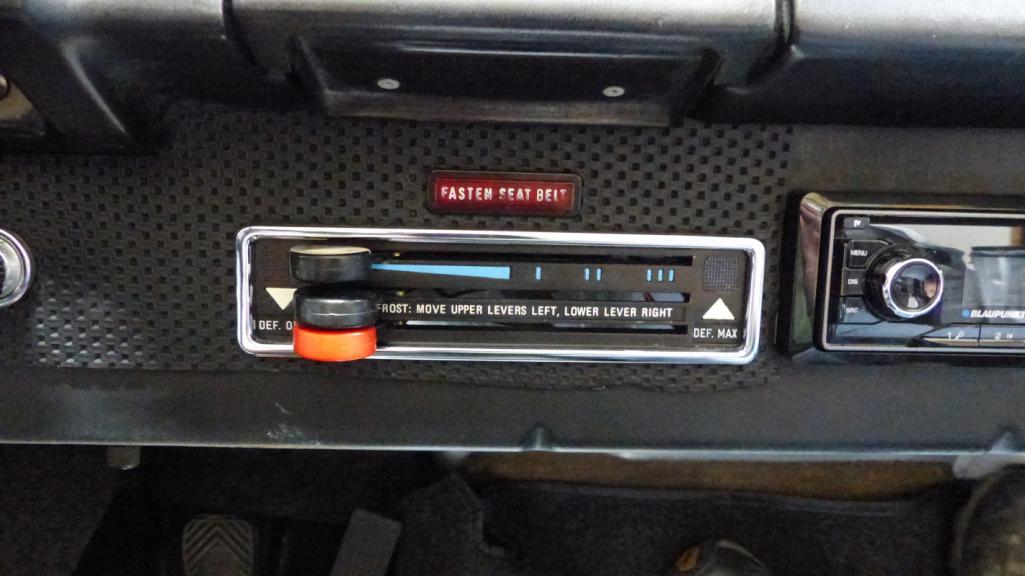 Then I turned on the lights and it looks like (IMG:style_emoticons/default/burro.gif) 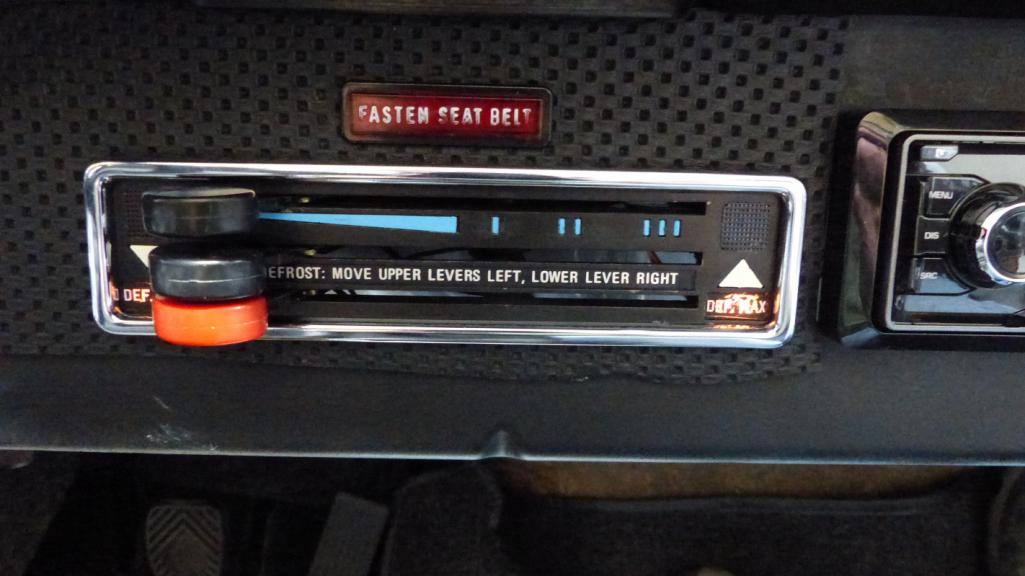 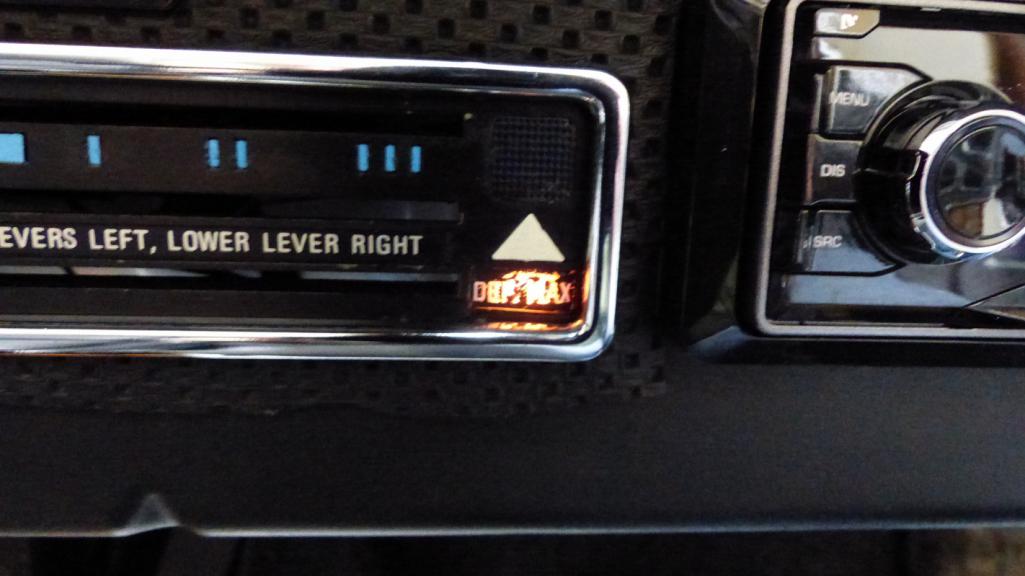 Well that's an unfortunate surprise. Wish I could have seen that before installing. I guess I'll get a detail brush and magnifier for a bit of touch up. Can't be driving around at night with that monstrosity staring at me. (IMG:style_emoticons/default/barf.gif) Next was a bit of self-dicovery of my insanity. I wired the door switches for the interior light and buzzer. Such a lovely sound, that buzzer. I told my wife it sounds like a German lullaby. The switch right door switch was a bit worn and wouldn't make contact on one switch leg unless it was depressed slightly. I wired it so the light was on the good leg and buzzer on the jinky one. Having the light work but not the buzzer should have been a good thing, but knowing something wasn't working properly was bugging the shit out of me. Turns out, my OCD is bad enough that I'd rather endure the annoying buzzer than suffer knowing something wasn't working. Then I remembered I bought a bag of switches from @raynekat in his end of project sale. Sure enough, a couple of nice 4-terminal switches. So I switched the bum switch out and wallah! German lullaby (IMG:style_emoticons/default/yellowsleep[1].gif) 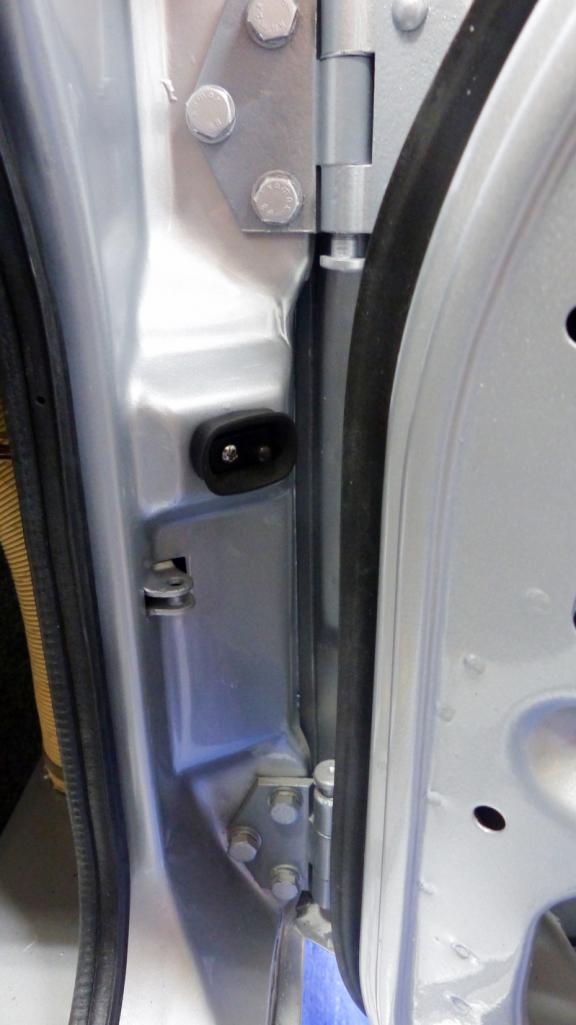 |
|
|
|
| sixnotfour |
Nov 19 2019, 11:04 PM
Post
#1329
|
|
914 Wizard Group: Members Posts: 11,242 Joined: 12-September 04 Member No.: 2,744 Region Association: NineFourteenerVille |
who was that other guy from Montana ? (IMG:style_emoticons/default/idea.gif)
rock on..gonna be quite an accomplishment. (IMG:style_emoticons/default/driving.gif) |
 |
|
| horizontally-opposed |
Nov 19 2019, 11:14 PM
Post
#1330
|
|
Advanced Member Group: Members Posts: 3,456 Joined: 12-May 04 From: San Francisco Member No.: 2,058 Region Association: None |
High compliments—car looks GREAT and I admire your commitment to it. Every mile is gonna mean that much more...
(IMG:style_emoticons/default/smilie_pokal.gif) (IMG:style_emoticons/default/smilie_pokal.gif) (IMG:style_emoticons/default/smilie_pokal.gif) |
|
|
|
| raynekat |
Nov 19 2019, 11:24 PM
Post
#1331
|
|
Advanced Member Group: Members Posts: 2,171 Joined: 30-December 14 From: Coeur d'Alene, Idaho Member No.: 18,263 Region Association: Pacific Northwest |
QUOTE(bbrock @ Nov 19 2019, 08:27 PM)  Brent, I see you haven't gotten to installing the infamous door stay yet. I'm waiting to see how you "engineer" the squeaks, groans and snaps out of yours. I'll be starting on the tuning process of mine, and it might get ugly. The 914Rubber supplied parts are too big (specifically the pin) to easily slide into place. Either the stay anchor in the doorway will need to be reamed out a bit or some other bit of magic will be needed. Also the profile (curvature) of the aluminum stay arm will need some tweaking. When I open and close my door, it sounds like a band of raccoons getting into the garbage cans at night. Not a winner yet. That silver car is looking better and better each and every day. Keep swinging. |
|
|
|
| FlacaProductions |
Nov 19 2019, 11:43 PM
Post
#1332
|
|
Advanced Member Group: Members Posts: 2,198 Joined: 24-November 17 From: LA Member No.: 21,628 Region Association: Southern California |
1/4” reamer run in by hand from below worked for me. Found one that a very small open ended wrench fit on and you just go a quarter turn at a time. Apply pressure from the bottom til it grabs but then it pulls itself thru pretty quickly.
|
|
|
|
| 914_7T3 |
Nov 19 2019, 11:59 PM
Post
#1333
|
|
Please forgive me, I'm new to all of this! Group: Members Posts: 1,898 Joined: 3-April 17 From: Los Angeles, CA Member No.: 20,991 Region Association: Southern California |
QUOTE(bbrock @ Nov 19 2019, 08:27 PM) Stealing small bits of time here and there to continue work, so small projects continuing with wiring and assembly. Got the ventilation control panel installed. Had to guess on where to put the fan bulb. There are four bulb sockets but only three bulbs. Two back lights go in the lower corners, but for the light that comes on when the fan is on, you have a choice of red on the left, or blue on the right. Blue made more sense both for color, and because it is on the side with the fan contacts. Anyone know if this is how the factory did it? Looks great, don't it? Then I turned on the lights and it looks like (IMG:style_emoticons/default/burro.gif) Well that's an unfortunate surprise. Wish I could have seen that before installing. I guess I'll get a detail brush and magnifier for a bit of touch up. Can't be driving around at night with that monstrosity staring at me. (IMG:style_emoticons/default/barf.gif) Next was a bit of self-dicovery of my insanity. I wired the door switches for the interior light and buzzer. Such a lovely sound, that buzzer. I told my wife it sounds like a German lullaby. The switch right door switch was a bit worn and wouldn't make contact on one switch leg unless it was depressed slightly. I wired it so the light was on the good leg and buzzer on the jinky one. Having the light work but not the buzzer should have been a good thing, but knowing something wasn't working properly was bugging the shit out of me. Turns out, my OCD is bad enough that I'd rather endure the annoying buzzer than suffer knowing something wasn't working. Then I remembered I bought a bag of switches from @raynekat in his end of project sale. Sure enough, a couple of nice 4-terminal switches. So I switched the bum switch out and wallah! German lullaby (IMG:style_emoticons/default/yellowsleep[1].gif) Amazed at how fast you work, such great progress! (IMG:style_emoticons/default/smash.gif) Hey is that one of those correct paper air hoses on the left side of the last photo? (IMG:style_emoticons/default/laugh.gif) |
|
|
|
| bbrock |
Nov 24 2019, 02:04 PM
Post
#1334
|
|
914 Guru Group: Members Posts: 5,269 Joined: 17-February 17 From: Montana Member No.: 20,845 Region Association: Rocky Mountains |
I just finished with the first round of cut and buff. Can't say it's fun and I learned that I suck at it. I started with the headlight covers and blinders because those were the cheapest and easiest to fix if I screwed up and went through the clear. Indeed, I did sand through the clear on an edge of one blinder (those things are a PITA because they are all edges. Not a big deal though because I still need to spray the trunk/frunk hinges and trunk torsion bars. I realize this is expensive paint for such things but I figure the expensive paint that I already have will still cost less than the cheap paint I don't. Anyway, I'll respray that blinder when I do the hinges.
Okay, so how did I do? My small part test taught me how difficult it is to sand . The metallic silver hides its scratches well and it is damn hard to tell when you have sanded all the previous grit scratches out. I switched sanding direction between grits to make it easier to see, but even after careful inspection and not seeing any remaining scratches, I'd have scratches reappear after the first polish. On top of that is the paranoia of sanding too much. Eventually, I got the small parts to a satisfactory stage. Here's a pick of a head light cover after the first cut of polish on top of the uncut hood. You can see that it crisps up the reflection but the roughness of the cut causes a spectrum shift. In other words, not a mirror finish yet. 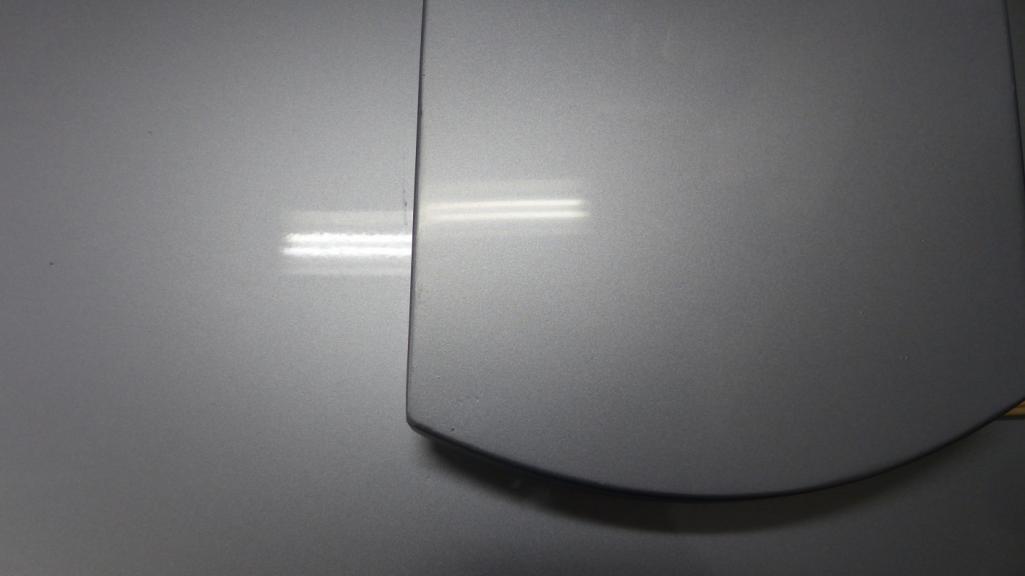 And here's the final. 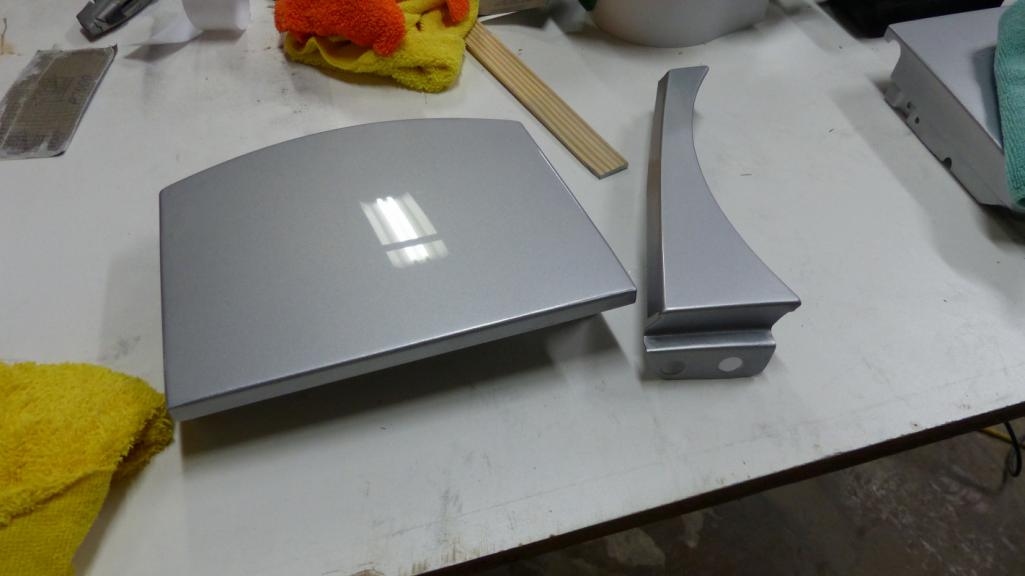 That looks pretty good so moving on to the hood. I didn't take progress pics. There are plenty of Youtube vids showing that process. I started with 1000 grit to knock most of the orange peel and nibs down, then went to flat with 1500, followed by 200, and finally 3000. Looked great and then I buffed with Chemical Guys 32 compound (the coarsest in my kit) and up came thos f-ing scratches. (IMG:style_emoticons/default/mad.gif) I tried to buff them out but no luck. So, I went back to 1500 in those areas and worked back up which add a couple hours to the project. Nothing like starting over again. Let's just fast forward to the end. No, I'm not happy. As the polishing got finer, here came those goddam scratches again. (IMG:style_emoticons/default/headbang.gif) Okay, you have to squint and look really hard to find them, but Fuchs sake what does it take? This silver sure hides its secrets. Alright, here's the finished product. 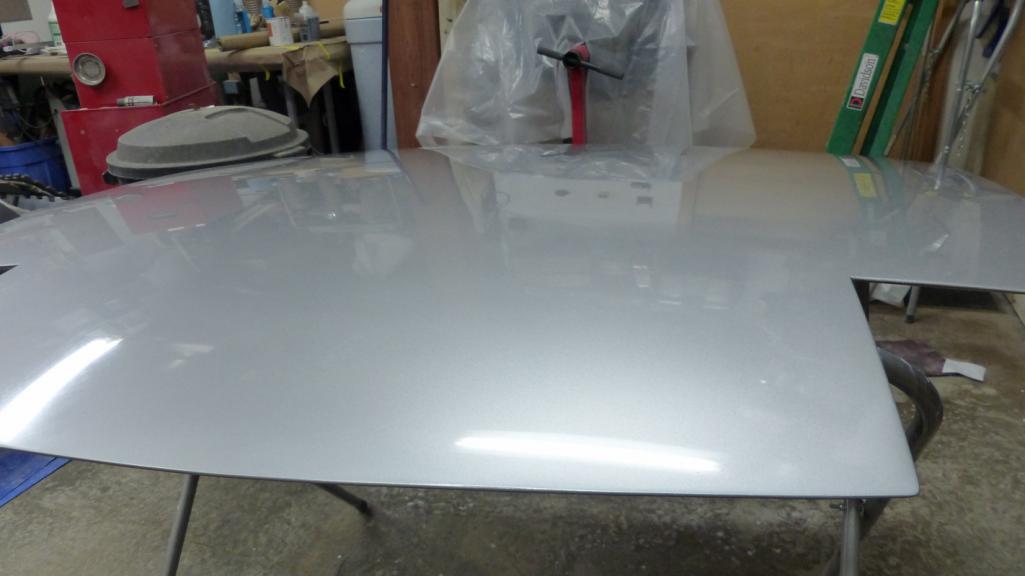 I'd like to take it outside for pics, but we have average wind speeds of 30 mph right now (which is why I'm in a horrible mood today). The reflection of the shop window with dirty screen will have to substitute. 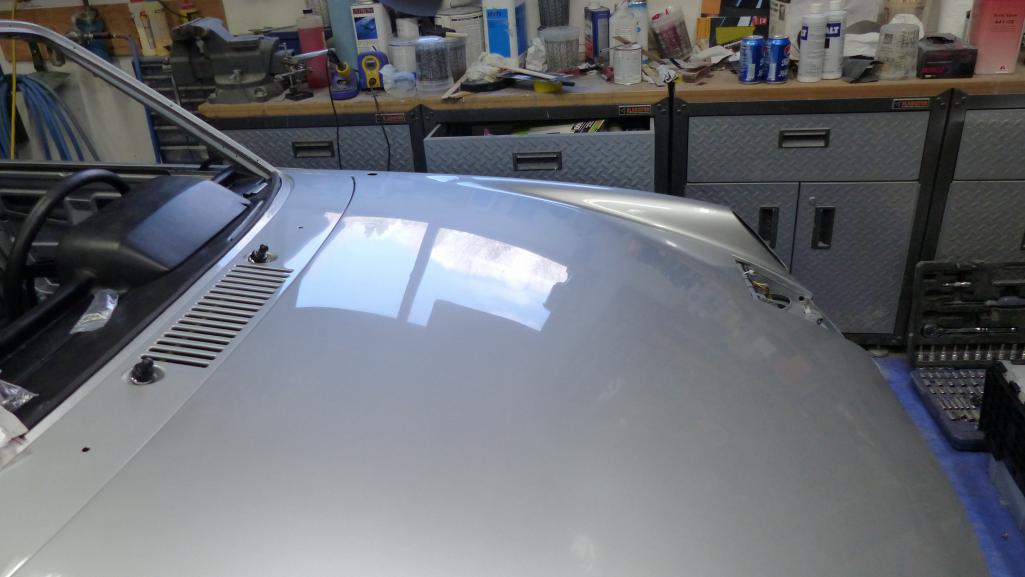 Is it worth the work? Of course. It's way better than before the cut and polish. You have to look hard for the scratches but they do impact the clarity of the finish. And yes, I realize that the paint will accumulate chips and pits as the car is driven, but that's not really the point. I'll just try to improve as I work on the rest of the car. And don't worry, I'm happy with the result so no pep talks necessary, I'm just not completely happy and never will be. (IMG:style_emoticons/default/rolleyes.gif) Here's a shot showing the difference between the hood and uncut cowl. Attached thumbnail(s) 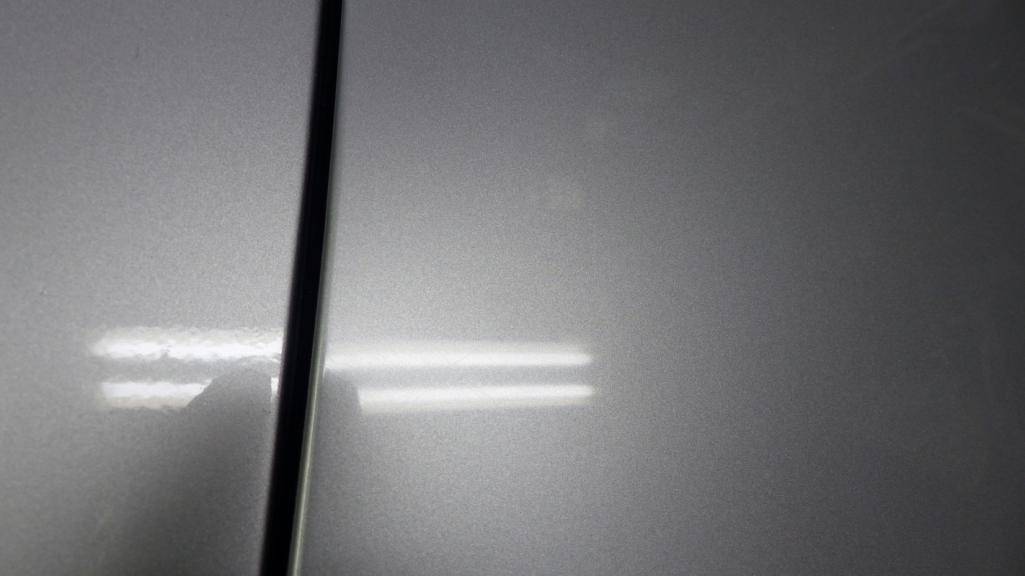
|
|
|
|
| bbrock |
Nov 24 2019, 03:03 PM
Post
#1335
|
|
914 Guru Group: Members Posts: 5,269 Joined: 17-February 17 From: Montana Member No.: 20,845 Region Association: Rocky Mountains |
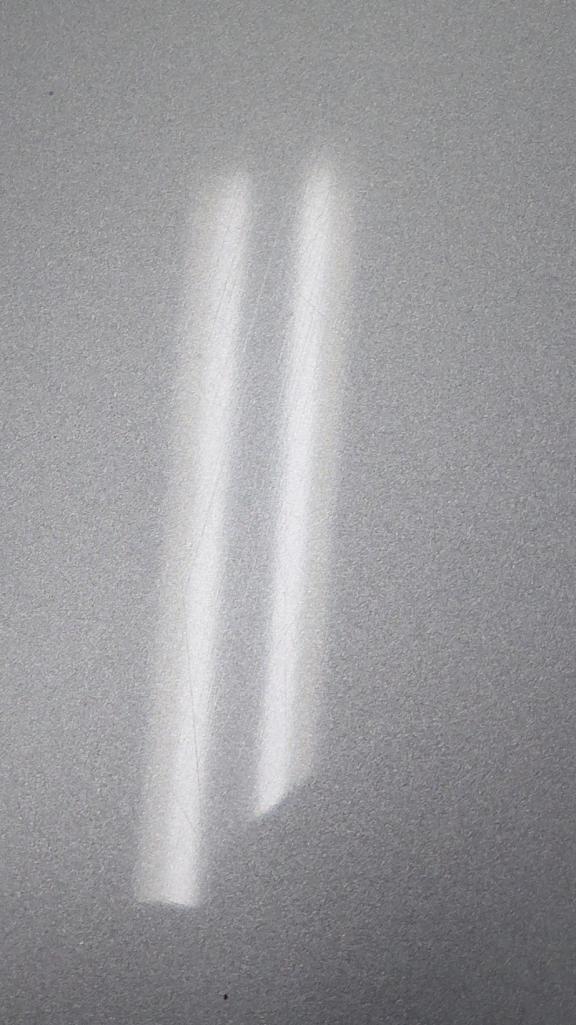
After more inspection, this hood is not acceptable. Pretty big scratches remain and will have to be sanded out. It's looks like I may have gotten some contamination in my sandpaper which is not a surprise considering the filthy condition of the show due to having to park our DD in it after being driven on snowy roads. Not a big deal to fix if I can just figure out a better way to know when I've removed all the previous grit scratches.
 I almost forgot about the other nice surprise I got yesterday. I noticed the brake reservoir supply lines were different colors thank to one of them being empty. Looked under the car to find a nice puddle of brake fluid. Probably one of those f-ing grommet connection but won't be as much fund to deal with now that the car is on the ground.  Oh well, such is life. |
|
|
|
| tygaboy |
Nov 24 2019, 03:18 PM
Post
#1336
|
|
914 Guru Group: Members Posts: 5,824 Joined: 6-October 15 From: Petaluma, CA Member No.: 19,241 Region Association: Northern California |
Brent - your paint looks so nice. How about I put you and your wife up here in the wine country and you can paint my car! (we need a "Painter" emoji, which I'd insert here...)
|
|
|
|
| KELTY360 |
Nov 24 2019, 03:55 PM
Post
#1337
|
|
914 Neferati Group: Members Posts: 5,189 Joined: 31-December 05 From: Pt. Townsend, WA Member No.: 5,344 Region Association: Pacific Northwest |
Face it, you’re just going to have to stand next to the car at shows with a magnifier so you can point out the scratches. (IMG:style_emoticons/default/poke.gif) Or, never drive below 30 and only park in you garage. (IMG:style_emoticons/default/shades.gif)
|
|
|
|
| bbrock |
Nov 24 2019, 04:11 PM
Post
#1338
|
|
914 Guru Group: Members Posts: 5,269 Joined: 17-February 17 From: Montana Member No.: 20,845 Region Association: Rocky Mountains |
QUOTE(tygaboy @ Nov 24 2019, 02:18 PM) Brent - your paint looks so nice. How about I put you and your wife up here in the wine country and you can paint my car! (we need a "Painter" emoji, which I'd insert here...) Ha! (IMG:style_emoticons/default/lol-2.gif) i will say it once again, the camera is kind to paint. Note the black dot in the lower part of the last pic I posted. Yep, that's in the paint. In all honesty, I will say that for a guy with practically NO experience painting a car and working in the crappy conditions I had to work with, the end result is going to be remarkable. But in no way does my paint job compare to what a skilled and experienced painter can accomplish in a proper spray booth. I'll also say that on a fun scale of 0-10, I'd put painting at about minus 2. It isn't that I don't enjoy painting, but the price of these paint materials is well beyond my income bracket and that adds way too much stress. Add to that the frustration of trying to achieve perfection under hillbilly conditions, and the fun factor disappears rapidly. But... this is where I can save serious $$ on this resto to keep it within my budget. I'd say what I've pulled off here is a level above what I've seen the average Joe do in their garage, but definitely a notch or two below what you get from someone who really knows what they are doing. That said, my car is going to be gorgeous and people will have to seek out the flaws to see notice them. I have a lot of satisfaction from doing it myself and am glad that I did. But let's not fool ourselves about what it is. |
|
|
|
| Superhawk996 |
Nov 24 2019, 04:21 PM
Post
#1339
|
|
914 Guru Group: Members Posts: 7,839 Joined: 25-August 18 From: Woods of N. Idaho Member No.: 22,428 Region Association: Galt's Gulch |
Won't be able to see any of the flaws under the dust and the bug debris by the time you get to town. Just don't wash it once you get there. (IMG:style_emoticons/default/beerchug.gif)
|
|
|
|
| bbrock |
Nov 24 2019, 04:21 PM
Post
#1340
|
|
914 Guru Group: Members Posts: 5,269 Joined: 17-February 17 From: Montana Member No.: 20,845 Region Association: Rocky Mountains |
QUOTE(KELTY360 @ Nov 24 2019, 02:55 PM) Face it, you’re just going to have to stand next to the car at shows with a magnifier so you can point out the scratches. (IMG:style_emoticons/default/poke.gif) Or, never drive below 30 and only park in you garage. (IMG:style_emoticons/default/shades.gif) Yeah, yeah. (IMG:style_emoticons/default/smile.gif) Again, the camera is kind... Those scratches will be obvious when the car is in the sun. Won't be that hard to fix either, but I need to improve my technique to make sure I am sanding all the scratches out BEFORE I start polishing. Funny thing is that I don't really worry about minor scratches, nicks and chips accumulating through use. Believe it or not, those things really don't bother me. That doesn't mean I want to start off with them. Going for a "new car experience" here. That means starting with a pristine car and watching it age. (IMG:style_emoticons/default/bye1.gif) |
|
|
|
|
1 User(s) are reading this topic (1 Guests and 0 Anonymous Users)
0 Members:

|
Lo-Fi Version | Time is now: 12th May 2026 - 04:02 PM |
Invision Power Board
v9.1.4 © 2026 IPS, Inc.