|
|
|
Porsche, and the Porsche crest are registered trademarks of Dr. Ing. h.c. F. Porsche AG.
This site is not affiliated with Porsche in any way. Its only purpose is to provide an online forum for car enthusiasts. All other trademarks are property of their respective owners. |
|
|

  |

| bbrock |
 Dec 16 2019, 08:36 PM Dec 16 2019, 08:36 PM
Post
#1361
|
|
914 Guru  Group: Members Posts: 5,269 Joined: 17-February 17 From: Montana Member No.: 20,845 Region Association: Rocky Mountains |
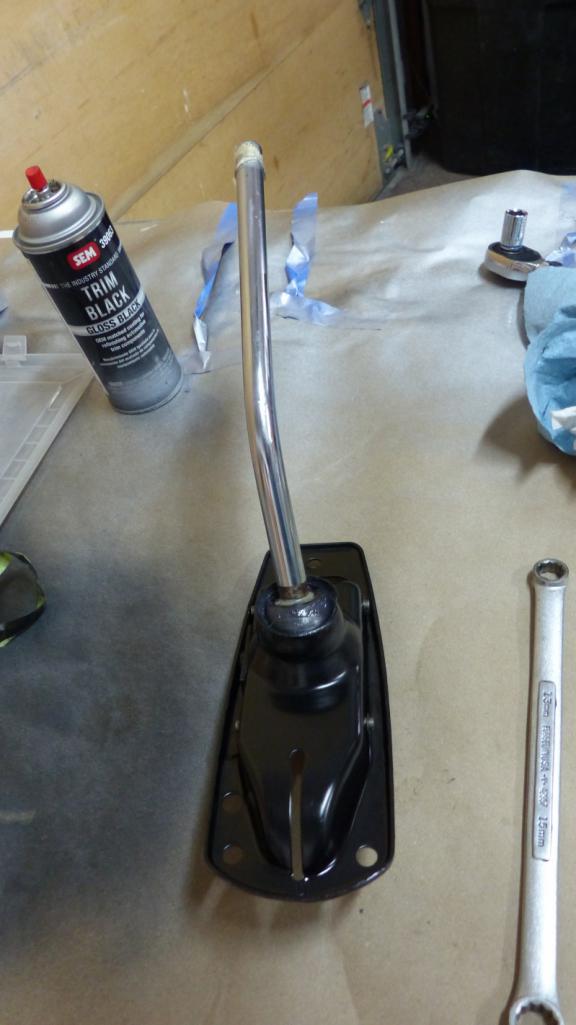
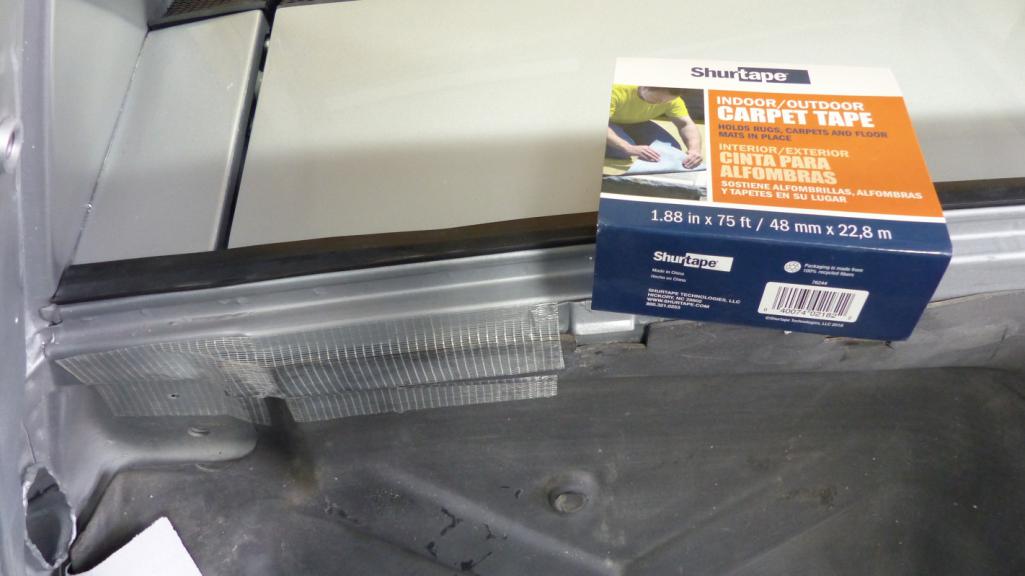
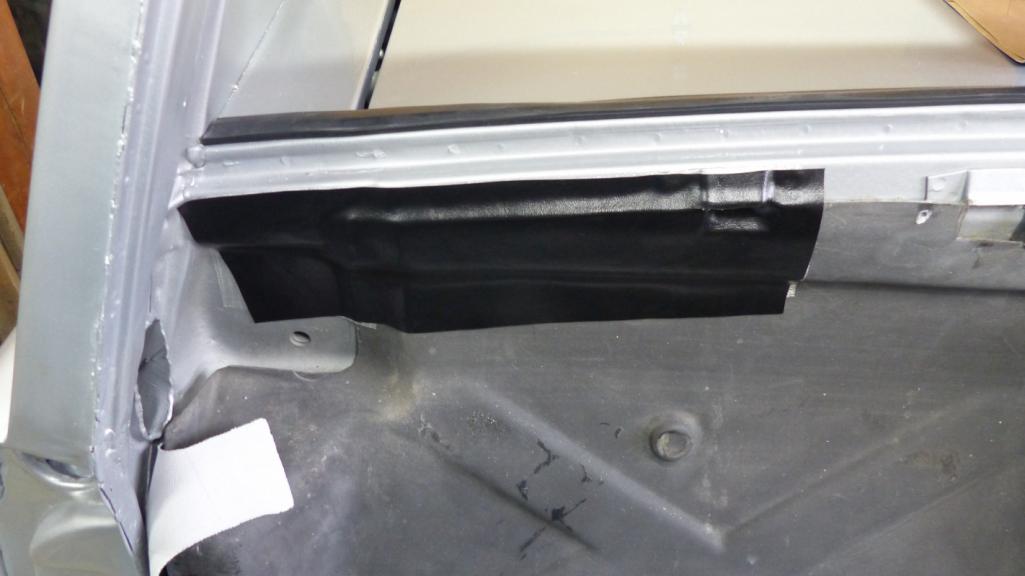
Put the upper and lower front targa seals in today. That sure is a treat of a job!!! Instructions would be nice. Even scouring old threads for nuggets of info left a lot of question. I had to slice slots into the upper corners to slide the aluminum tabs on the windshield frame tracks into. A little guidance on that would have been helpful, or just something saying it needed to be done. There was no other way though. Same goes for trimming the bottoms. For now, I just cut off enough for the door to clear. It looks like they need to be trimmed to mate with the triangle window seal when installed. Anyway, the car is starting to have a finished appearance with raw metal edge wrapped in new rubber. Never drove one without a torn up targa seal I don't think.
  Did the passenger side first and managed to get it in without screwing anything up. Decided to play it safe on the driver's side and protect the frame paint and track with blue painter's tape. Wouldn't you know it, the tape lifted off some of my new trim paint. (IMG:style_emoticons/default/sad.gif) Now I get to mask that all off to touch it up. No way am I pulling that seal out again! 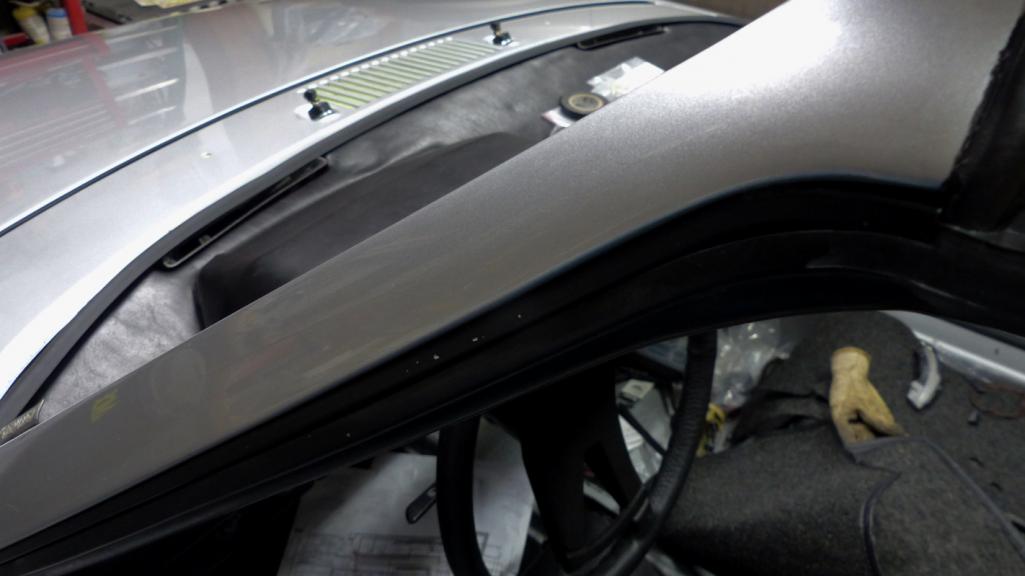 I used a bit of weatherstrip adhesive on the corners to make sure I get a good seal with no leaks. The driver's side is wanting to roll just a little even after screwing the corner block in place. Hopefully a little clamp pressure overnight will let the adhesive set to hold it in place. Thought about putting the roof on to use as a clamp but this seemed easier. 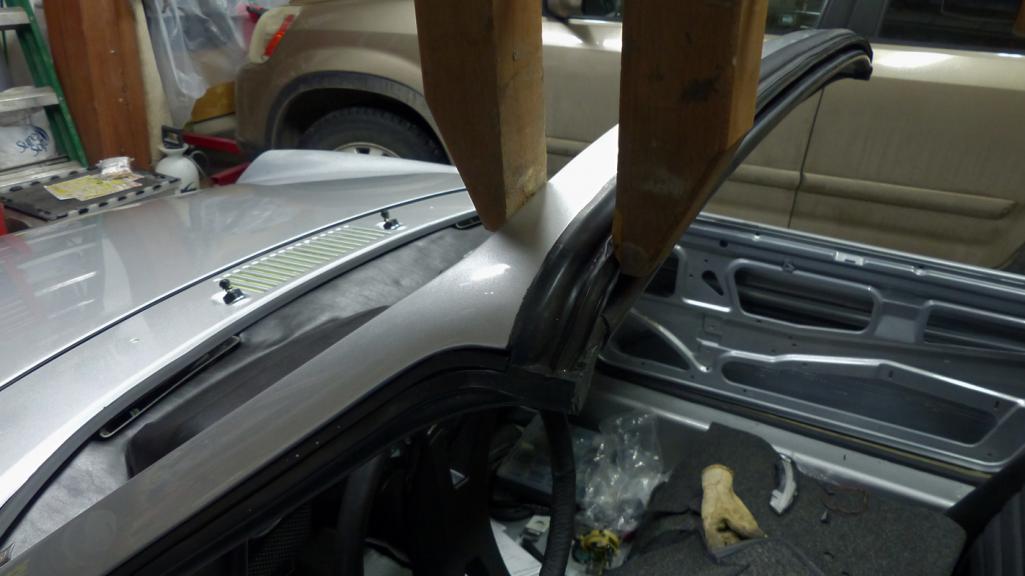 Got a little OCD trimming the union of the lower seal to the upper. 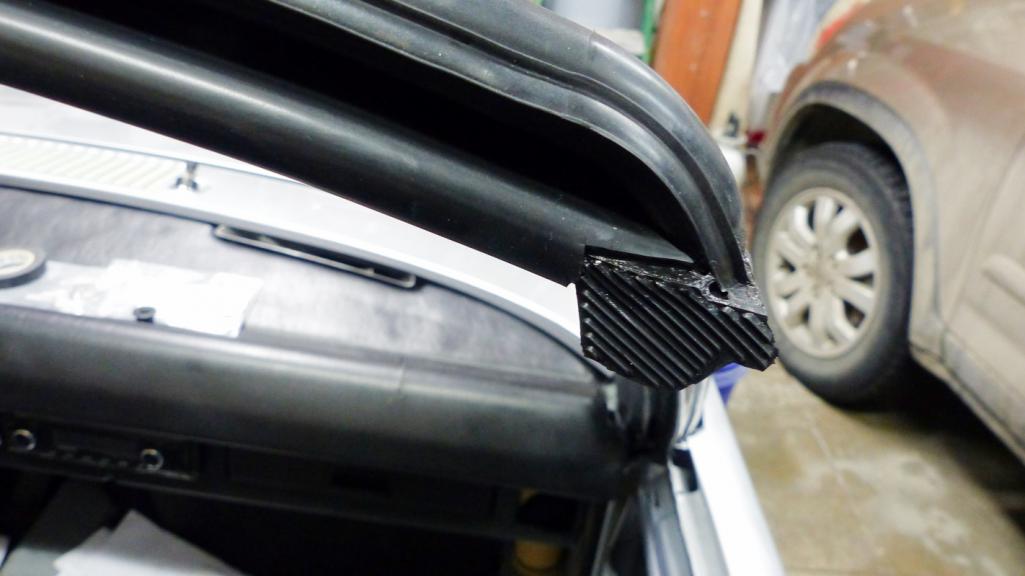 |
   |

 
|
| bbrock |
Jan 7 2020, 07:00 PM
Post
#1362
|
|
914 Guru Group: Members Posts: 5,269 Joined: 17-February 17 From: Montana Member No.: 20,845 Region Association: Rocky Mountains |
I have to get this out of the way. This post is off topic and not fun so feel free to skip it.
To say last few weeks have been hard for me is an understatement. The Friday before Christmas was my wife's birthday, but rather than a day of celebration, it was the day we suddenly and unexpectedly lost our dog and my best friend. Niaquq was the third Alaskan malamute we've had in addition to a wolf who made his appearance earlier in this thread. Malamutes have big personalities and all of ours have been wonderful dogs, but Niaquq was that next level companion we are lucky to have once in a lifetime. There have been few hours over the last 8+ years we were apart as he accompanied me almost everywhere I went, be it for work or play. He made many friends and became something of a minor celebrity around town. He was a favorite among tourists and wound up in the family vacation photos of strangers from around the globe. Once in Bryce Canyon, tourists actually formed a line to have their pictures taken with our big ham. Malamutes always tend to attract attention, but none of our previous dogs were as magnetic as Niaquq. He just had an indescribable essence that made people want to be his friend. The morning of Friday the 20th was not particularly unusual. Niaquq had been feeling a little "off" and had skipped a meal here and there over the previous few days. We attributed to the deer carcass he had been feasting on for over a week - probably stolen from a mountain lion which was his typical M.O. He wasn't getting better so I took him to our vet just to be safe. I have no interest in reliving that horrible day, but by early evening, he was in surgery to attempt to remove a large tumor from his abdomen. It turned out to be inoperable and the prognosis was the worst possible. We made the crushing decision not to wake him from anesthesia to save him the suffering of spending his last few days of life recovering from surgery only to succumb to cancer. I had been feeling increasingly guilty about the amount of time I've been spending on the car instead of taking my friend hiking, camping, and canoeing. I knew he was approaching the age where he would begin to age. I justified it by thinking of all the epic voyages we would have in the car. Our first malamute LOVED this 914 and I wanted Niaquq to experience that same joy of open top touring. It drove me to work harder on the car to finish it sooner. That was a bad gamble and now I regret my obsession. Ironically, working on the car is the only thing that keeps my mind occupied as I work through my grief. A lot of progress has been made and updates will follow. There will be a fourth mal but there will never be another Niaquq. Goodbye to the best goddam friend a guy could ever have. 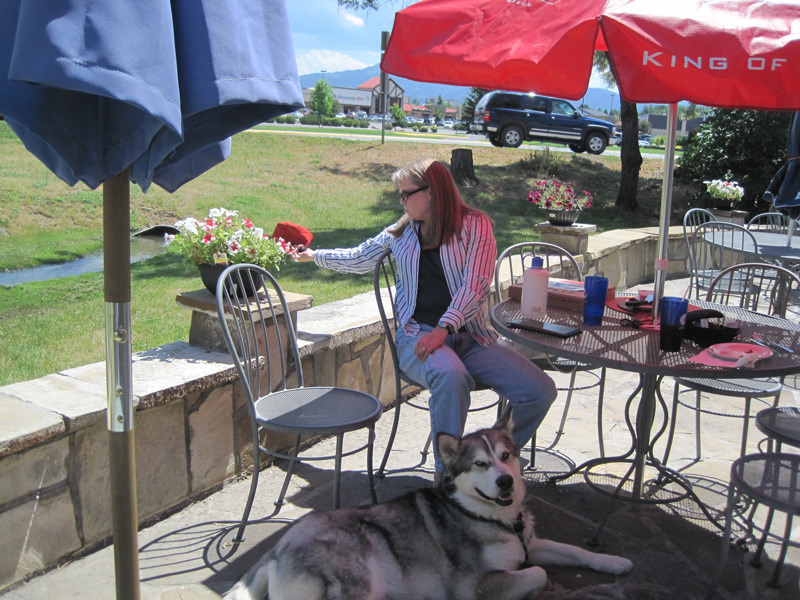 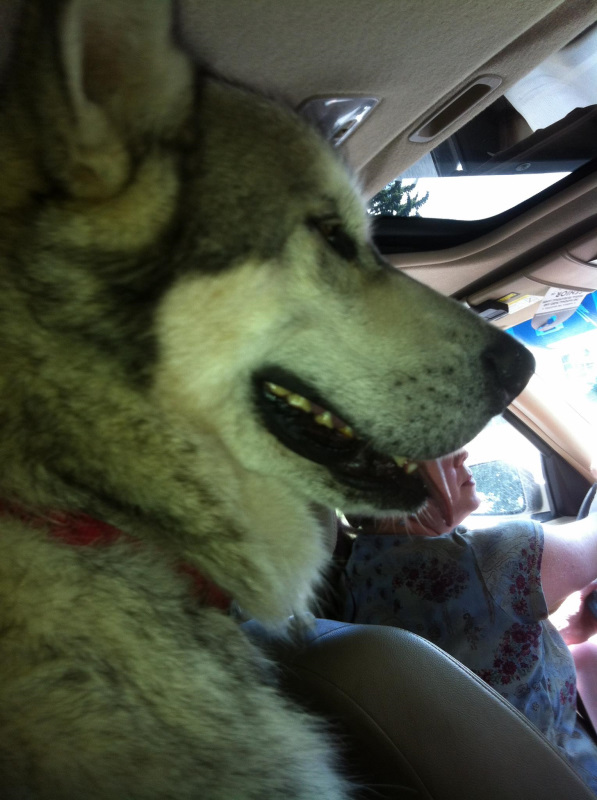 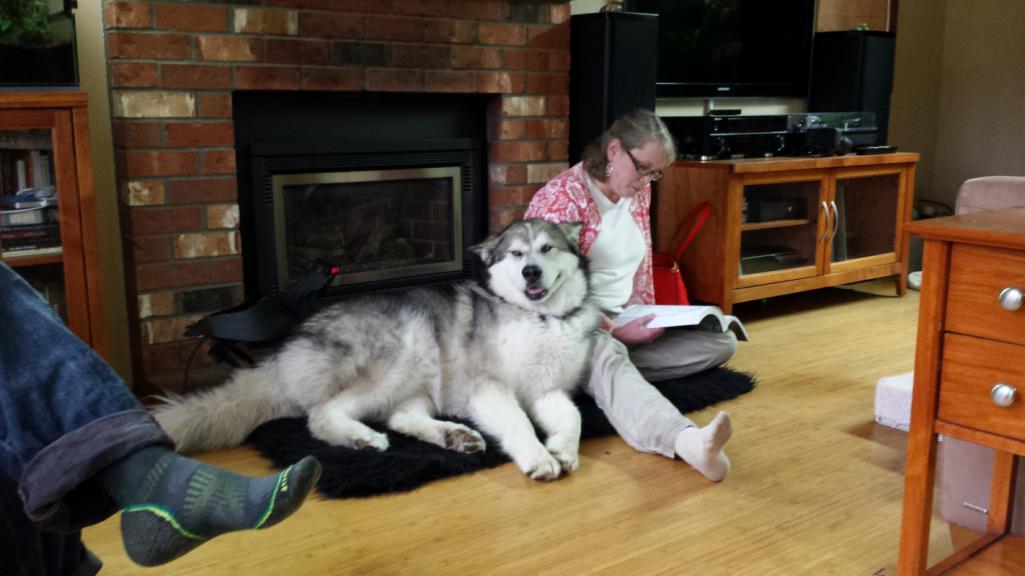 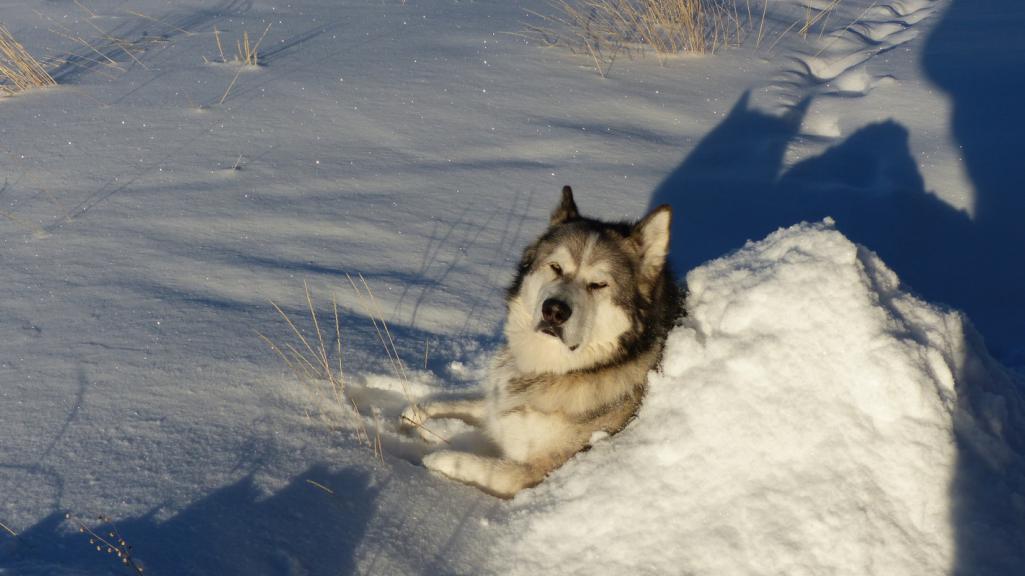 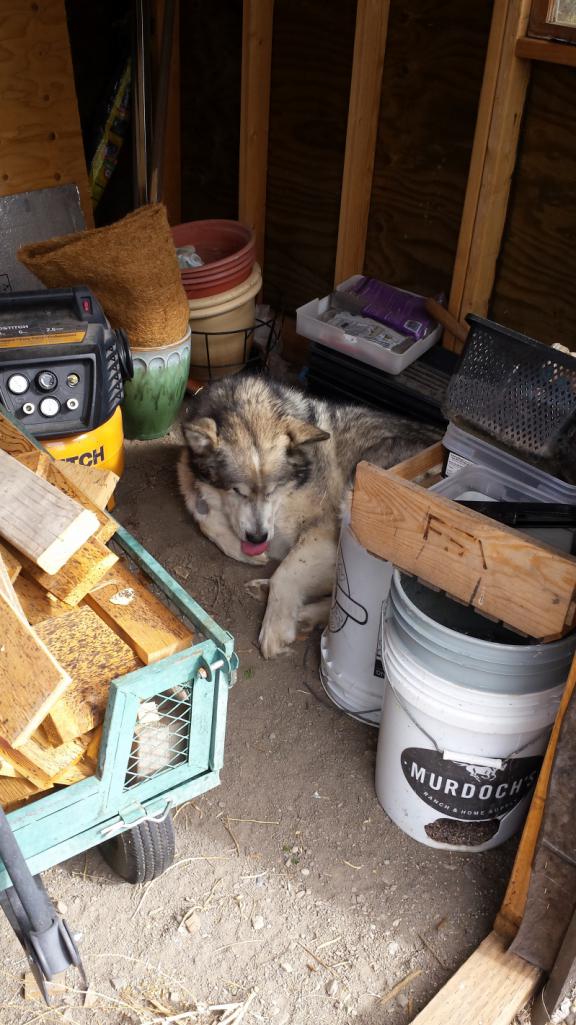 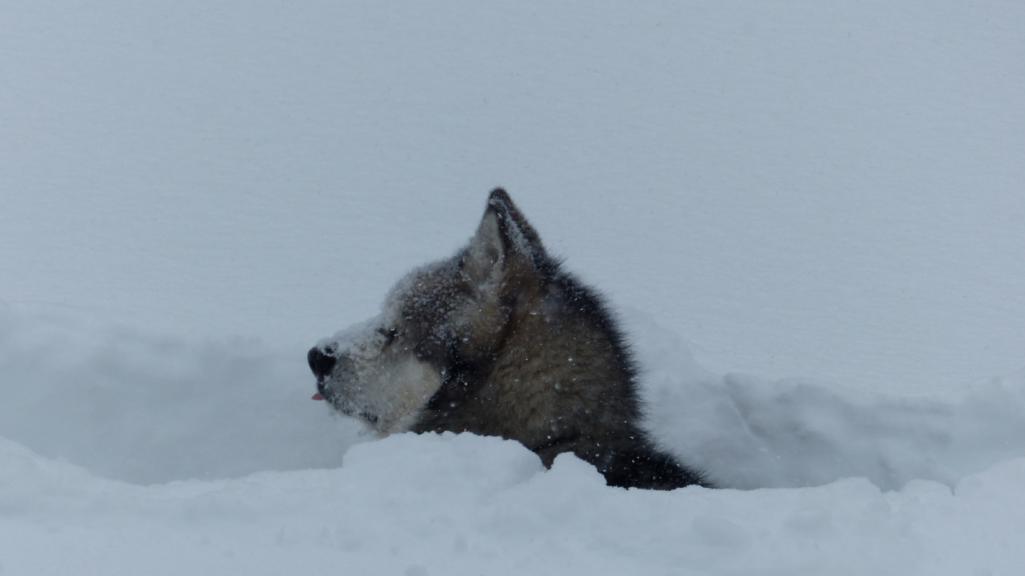 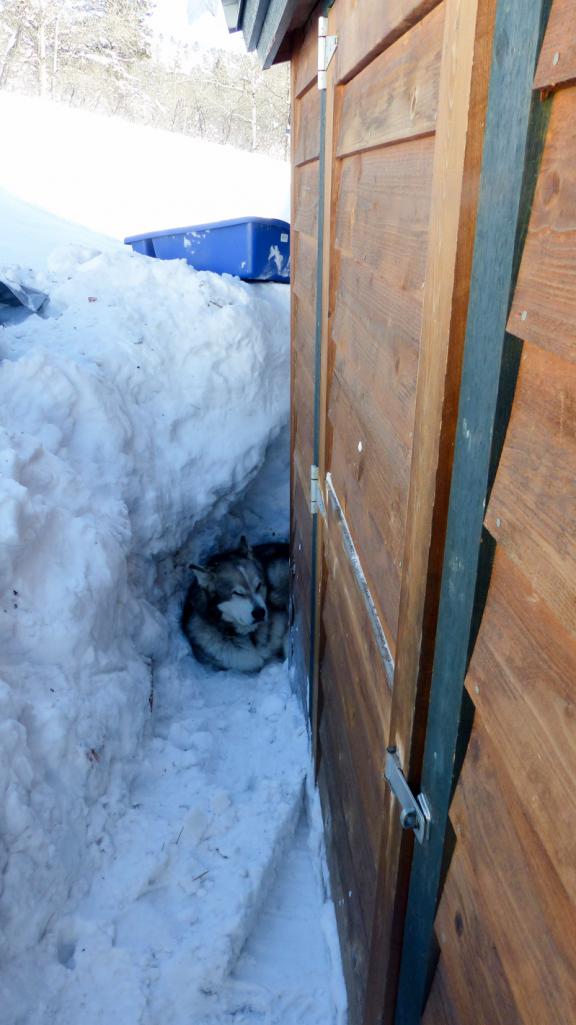 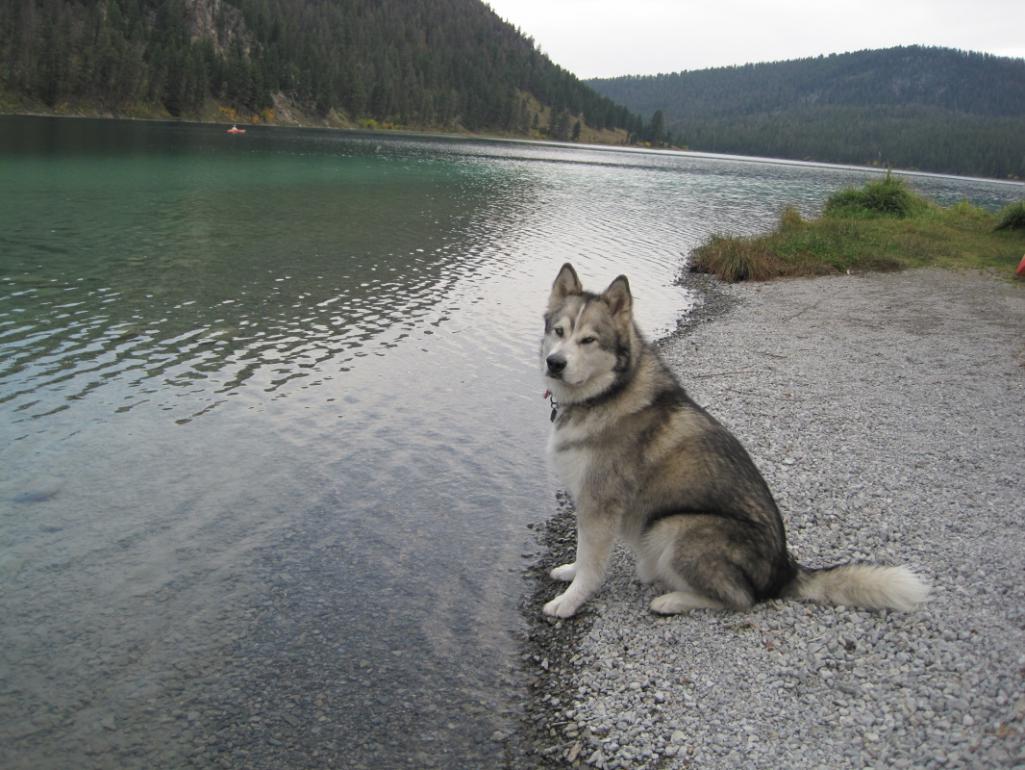 Safe travels buddy... 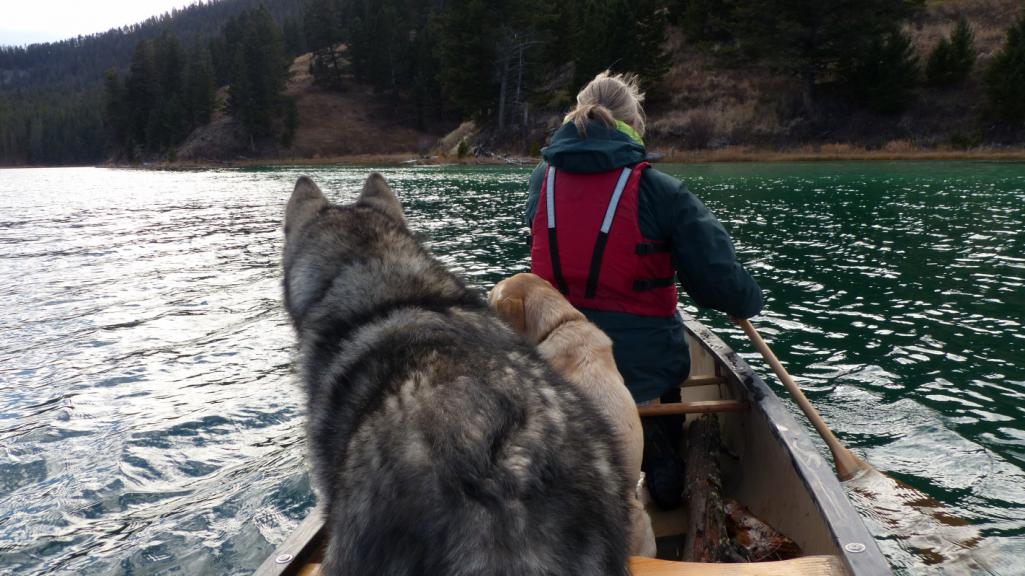 |
|
|
|
| AKFish |
Jan 7 2020, 07:18 PM
Post
#1363
|
|
Newbie Group: Members Posts: 29 Joined: 10-December 18 From: Nampa, Idaho Member No.: 22,714 Region Association: Rocky Mountains |
We lost our best friend recently as well. Deepest condolences.
|
|
|
|
| mepstein |
Jan 7 2020, 07:34 PM
Post
#1364
|
|
914-6 GT in waiting Group: Members Posts: 20,685 Joined: 19-September 09 From: Landenberg, PA/Wilmington, DE Member No.: 10,825 Region Association: MidAtlantic Region |
I've been there. I feel for you. (IMG:style_emoticons/default/sad.gif)
|
 |
|
| mb911 |
Jan 7 2020, 07:38 PM
Post
#1365
|
|
914 Guru Group: Members Posts: 7,764 Joined: 2-January 09 From: Burlington wi Member No.: 9,892 Region Association: Upper MidWest |
I am so sorry for your loss.. Our animal's are such a huge part of our family and lives..
|
|
|
|
| doug_b_928 |
Jan 7 2020, 07:56 PM
Post
#1366
|
|
Senior Member Group: Members Posts: 730 Joined: 17-January 13 From: Winnipeg Member No.: 15,382 Region Association: Canada |
Condolences on the loss of your friend, Brent. He was beautiful.
|
|
|
|
| bigkensteele |
Jan 7 2020, 08:10 PM
Post
#1367
|
|
Major Member Group: Members Posts: 2,200 Joined: 30-August 04 From: Cincinnati, OH Member No.: 2,660 Region Association: South East States |
So sorry to hear this. I don't believe you have lived until you have had a really great dog. My thoughts are with you and your wife.
|
|
|
|
| Dion |
Jan 7 2020, 08:11 PM
Post
#1368
|
|
RN Group: Members Posts: 2,926 Joined: 16-September 04 From: Audubon,PA Member No.: 2,766 Region Association: MidAtlantic Region |
Brent so sorry to read of the loss of Niaquq. Always enjoyed the stories
you shared of him. Condolences buddy. Hope the great memories you have of him help ease the pain a little. They are certainly family. |
|
|
|
| fiacra |
Jan 7 2020, 08:18 PM
Post
#1369
|
|
Person.Woman.Man.Camera.TV. = MCI Group: Members Posts: 726 Joined: 1-March 19 From: East Bay Region - California Member No.: 22,920 Region Association: Northern California |
I'm so sorry to hear this. It is sometimes hard for people to understand that our dogs are our family, and we grieve for them as though we have lost a family member. Words of condolence don't do justice to the grief we feel. Just as you gave him a good life, you gave him a good death and spared him from the suffering that was sure to come. It is fortunate we have that privilege with our canine family members. Celebrate his life, don't regret any opportunities you missed to spend more time with him. You can't go back and nobody who loves us would want their passing to cause us grief or unnecessary regret. Thank you for posting your tribute to him.
|
|
|
|
| Aerostatwv |
Jan 7 2020, 08:20 PM
Post
#1370
|
|
Member Group: Members Posts: 151 Joined: 13-July 11 From: WV Member No.: 13,315 Region Association: MidAtlantic Region |
So sorry for your loss. I lost my fuzzy buddy last year....He obviously had a great set of parents that cared greatly for him.
|
|
|
|
| altitude411 |
Jan 7 2020, 08:33 PM
Post
#1371
|
|
I drove my 6 into a tree Group: Members Posts: 1,306 Joined: 21-September 14 From: montana Member No.: 17,932 Region Association: Rocky Mountains |
So so sorry Brent (IMG:style_emoticons/default/sad2.gif)
|
|
|
|
| KELTY360 |
Jan 7 2020, 09:20 PM
Post
#1372
|
|
914 Neferati Group: Members Posts: 5,189 Joined: 31-December 05 From: Pt. Townsend, WA Member No.: 5,344 Region Association: Pacific Northwest |
So sorry to hear this Brent. I can attest to what a great pooch he was. When I met him he kind of demanded we be friends....which was great with me. He obviously ruled his domain and kept you around so you could serve him. (IMG:style_emoticons/default/biggrin.gif)
Good luck working through your loss. RIP |
|
|
|
| bbrock |
Jan 7 2020, 10:12 PM
Post
#1373
|
|
914 Guru Group: Members Posts: 5,269 Joined: 17-February 17 From: Montana Member No.: 20,845 Region Association: Rocky Mountains |
Thanks everyone. This one will take more time to get over than usual, but let's move on with the project.
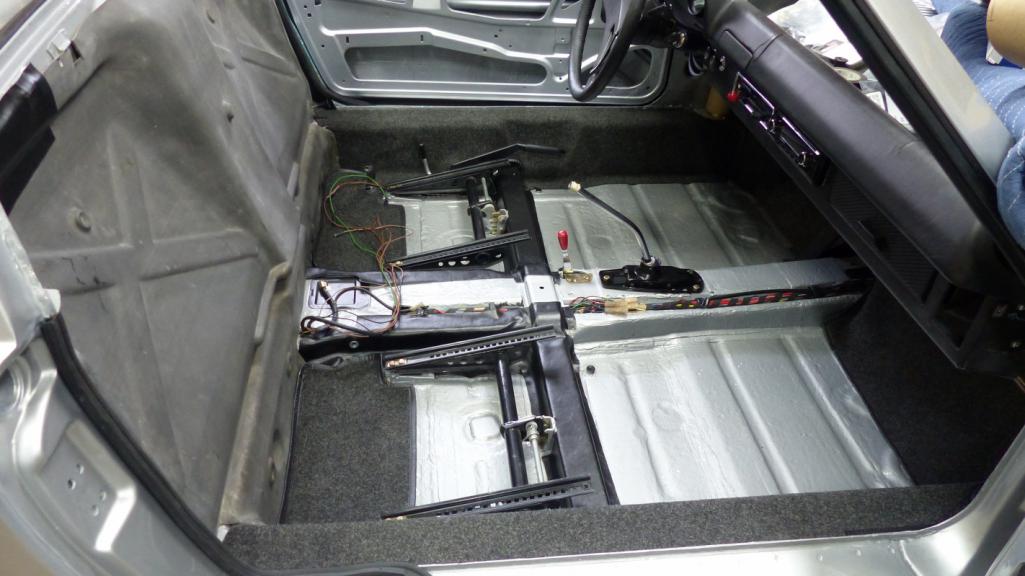
  The dreaded fresh air box actually turned out to be quite easy thanks to Ian's video of @914_7T3 's install. Don't hate me, but it only took about 30 minutes doing ot solo. Then I took it out and did it again. Piece of cake (IMG:style_emoticons/default/shades.gif) 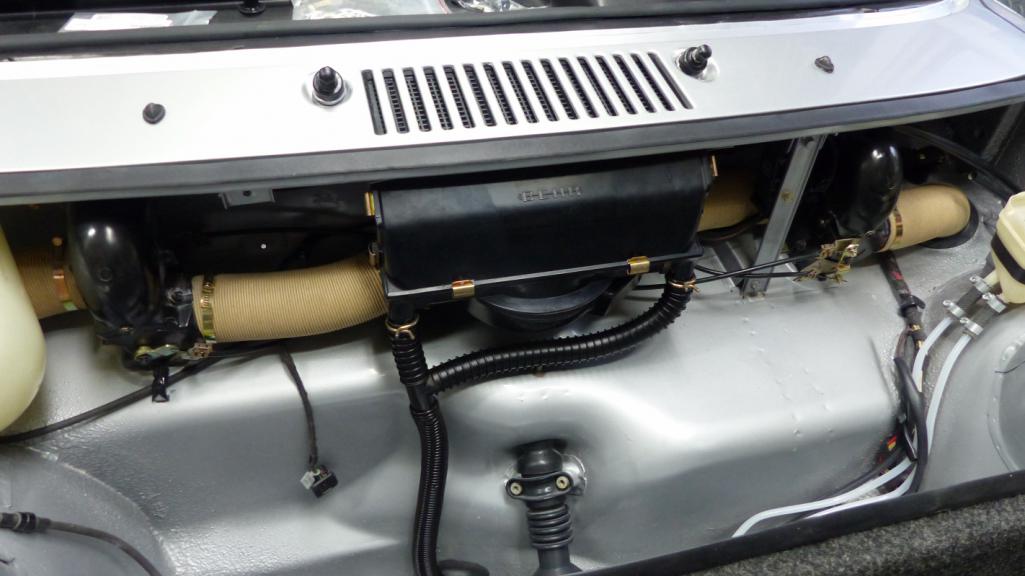 Next up was fixing the sand-thrus on the paint. The air brush was a mixed bag but got the job done. Here's the sand-thru on the roll bar. 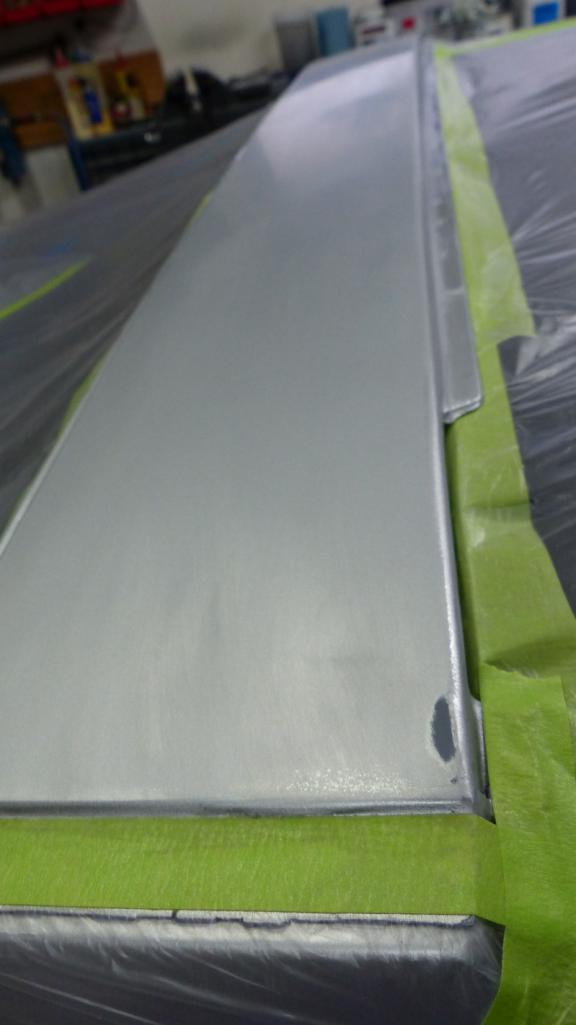 I barely got the base sprayed on this spot before the air brush clogged up. I think it was the metallics. Still, it got the job done. You can still see it if you look hard in the right light, but not bad. 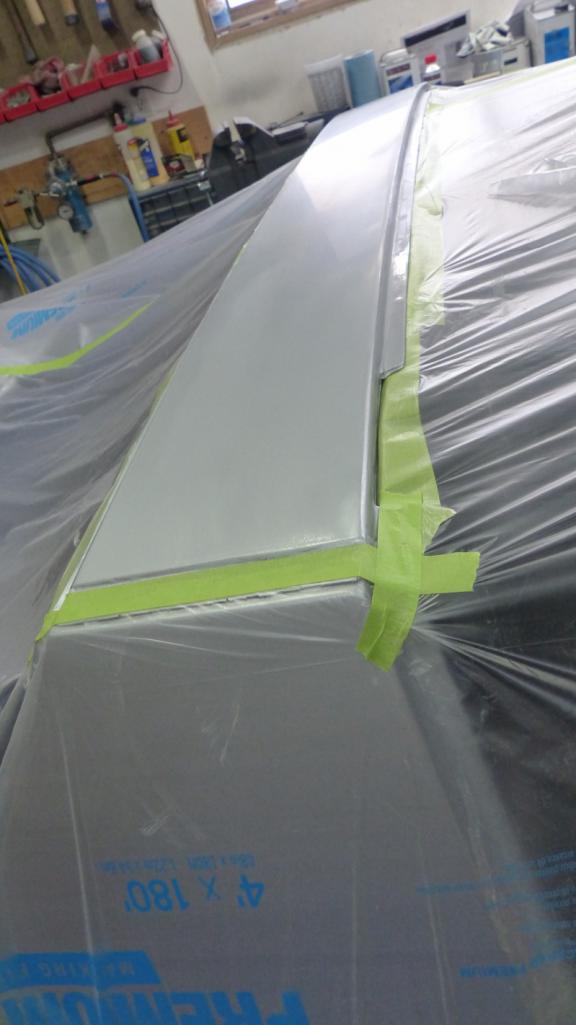 I decided to do a full reshoot on the door and fender. I had the paint and it gave me another chance to get it right... which I did. 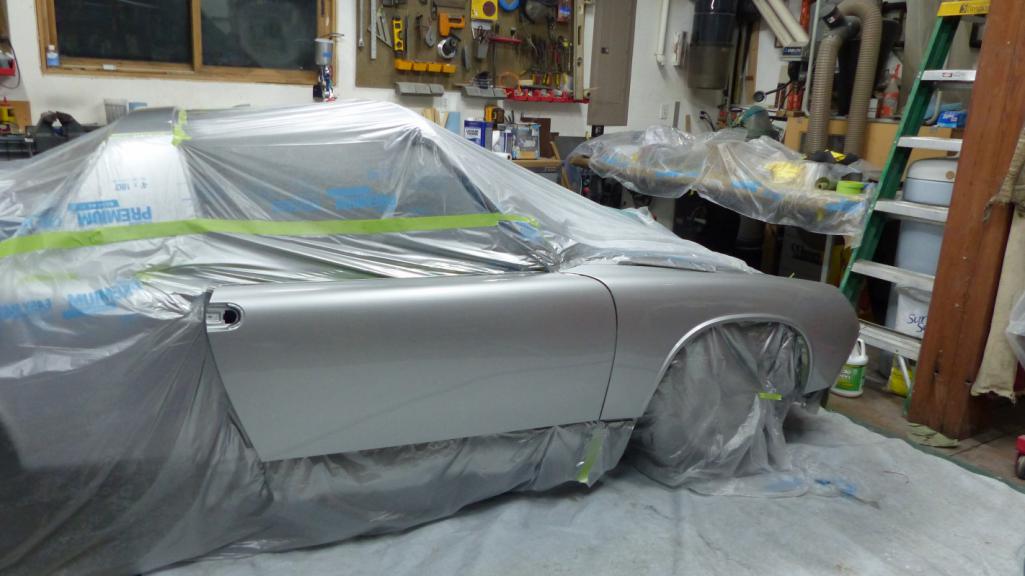 I also sprayed the last of the hardware. I also resprayed both headlight blinders. 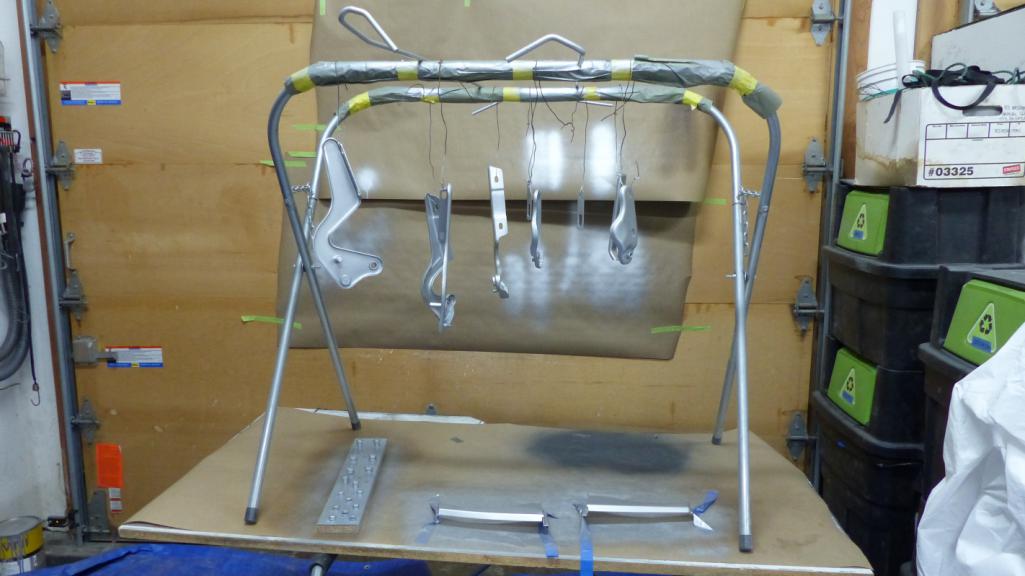 Of course I couldn't get through a day of painting without a fuch up. When I pulled the masking plastic off, I found the clear coat had dissolved the plastic and glued plastic, clearcoat, and base coat to the hood. (IMG:style_emoticons/default/headbang.gif) 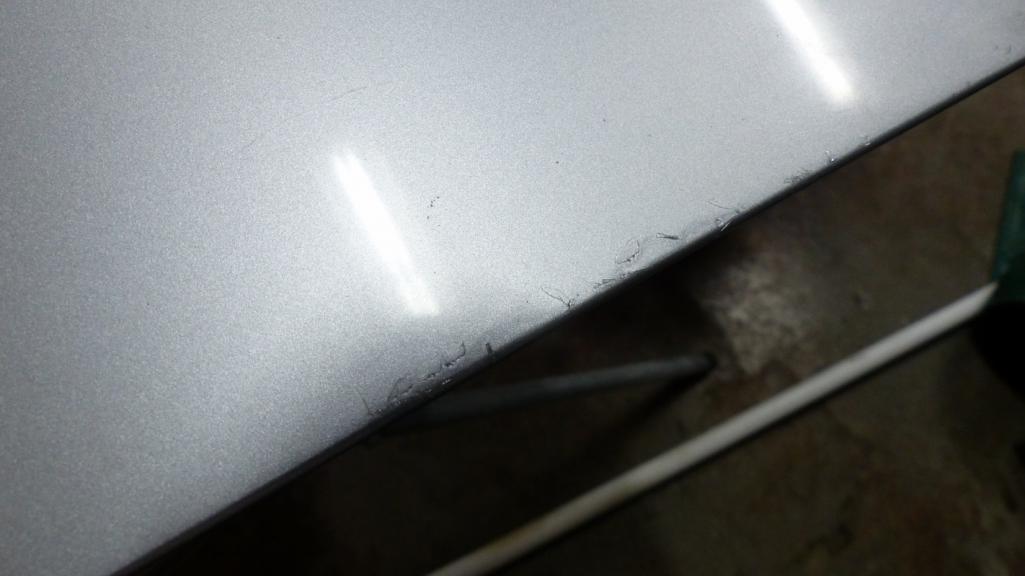 Luckily it sanded out but was nerve wracking because I had to sand through the base coat that got stuck on top - hoping that's what it was and not the final base coat under the clear. After polishing, you can't tell it happened. 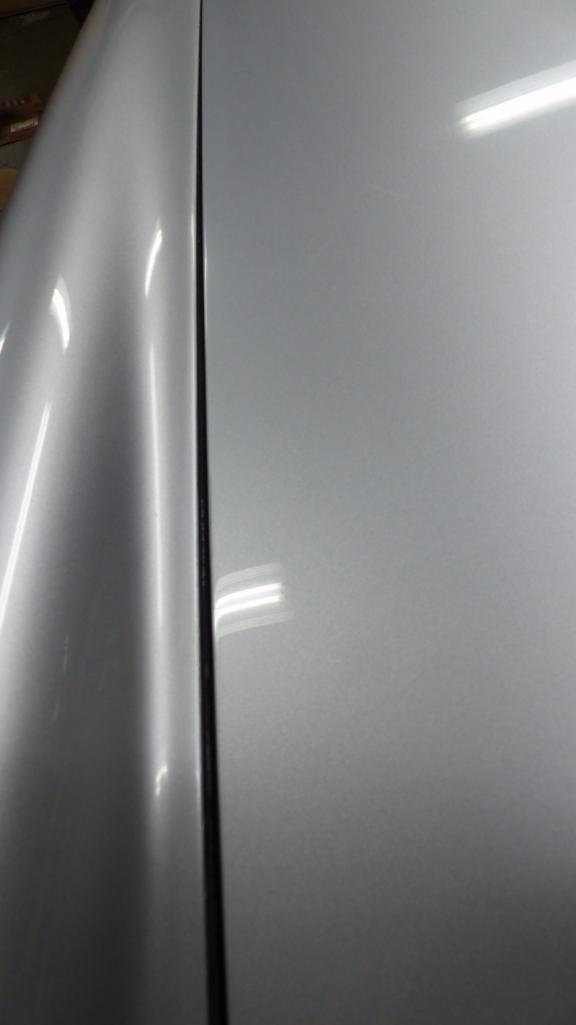 Now I have a paint job I can almost be proud of. The rear deck lid still has a bit more crap in it than I would like, but not bad. 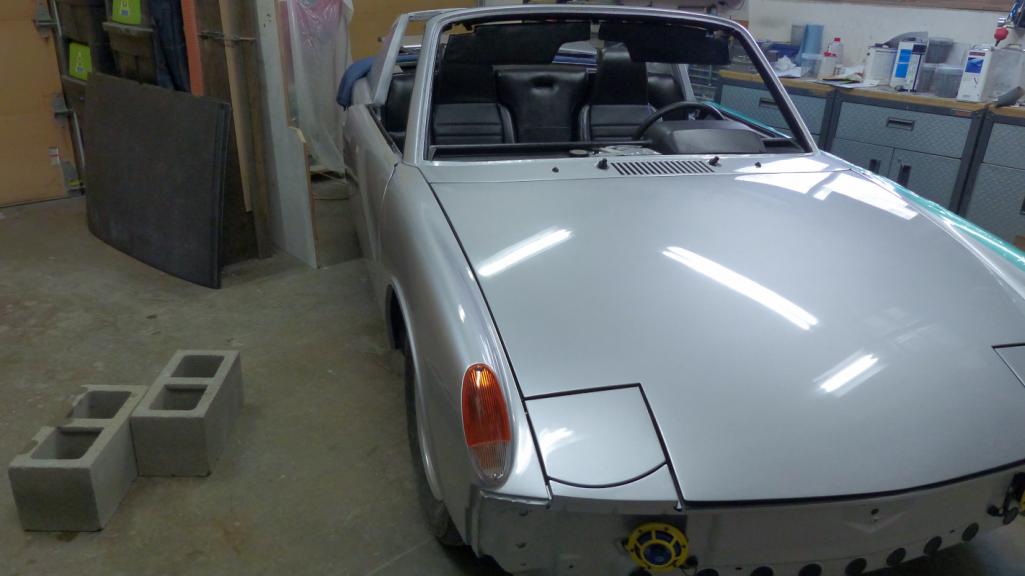 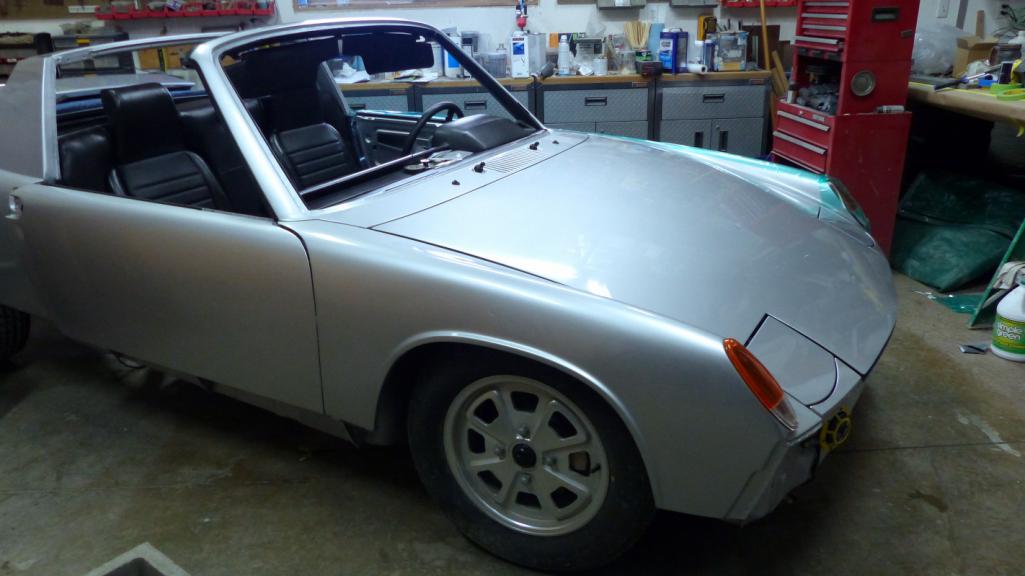 |
|
|
|
| KELTY360 |
Jan 7 2020, 10:23 PM
Post
#1374
|
|
914 Neferati Group: Members Posts: 5,189 Joined: 31-December 05 From: Pt. Townsend, WA Member No.: 5,344 Region Association: Pacific Northwest |
(IMG:style_emoticons/default/piratenanner.gif) You can definitely be proud of that paint job...with no apologies! Incredible work. The front fender looks so good without the wart. Do you have a target for first drive yet? (IMG:style_emoticons/default/shades.gif)
|
|
|
|
| bbrock |
Jan 7 2020, 10:38 PM
Post
#1375
|
|
914 Guru Group: Members Posts: 5,269 Joined: 17-February 17 From: Montana Member No.: 20,845 Region Association: Rocky Mountains |
I've been told you can't install trunk lids by yourself but I've done it over a dozen times now without a scratch. The trick is to carefully place the lid in the gasketed opening, then fold up some soft towels and place them slightly under the rear corners of the lid to pad the paint. Then you can lift the lid so the corners rest on the padding and use your head and shoulder to prop up the lid while you line up the lower bolt hole with your hands. Once you have a bolt loosely threaded into the first lower hole, move to the other corner and insert the lower bolt finger tight. Then the upper bolt and finally move back to the other side and finish. I'm not saying it is easy, but like I said, I've had these lids on and off at least a dozen times without a scratch.
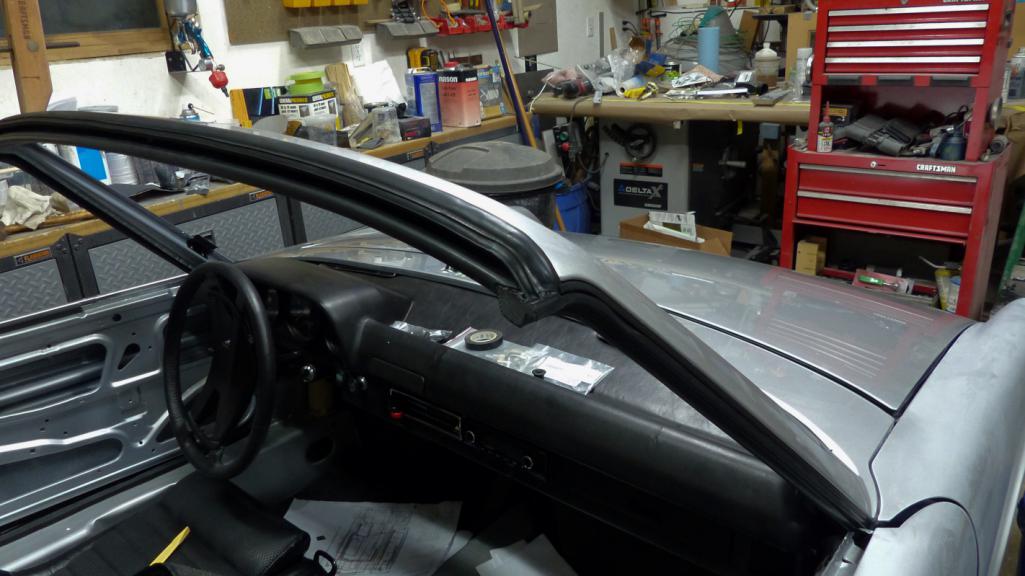
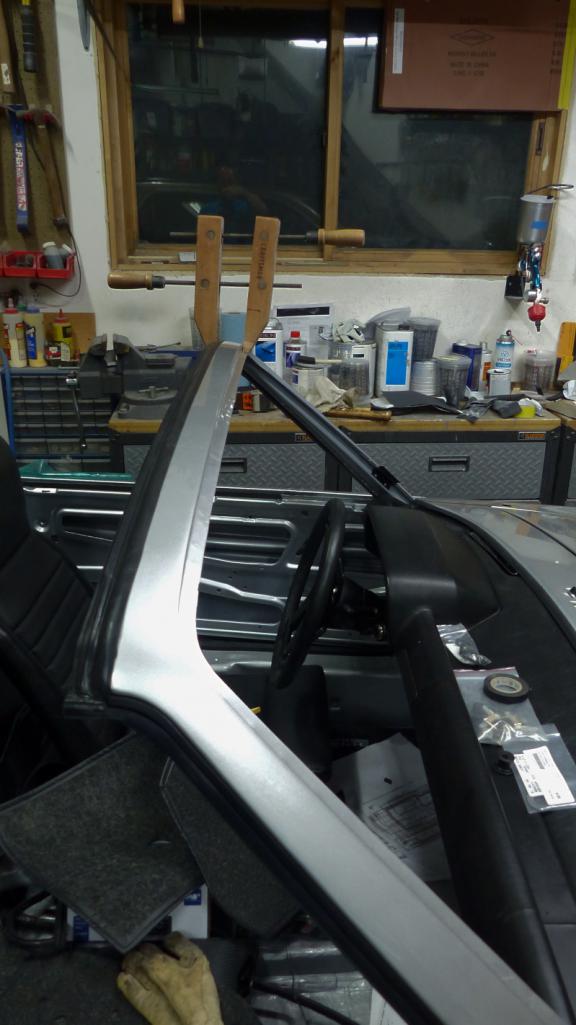
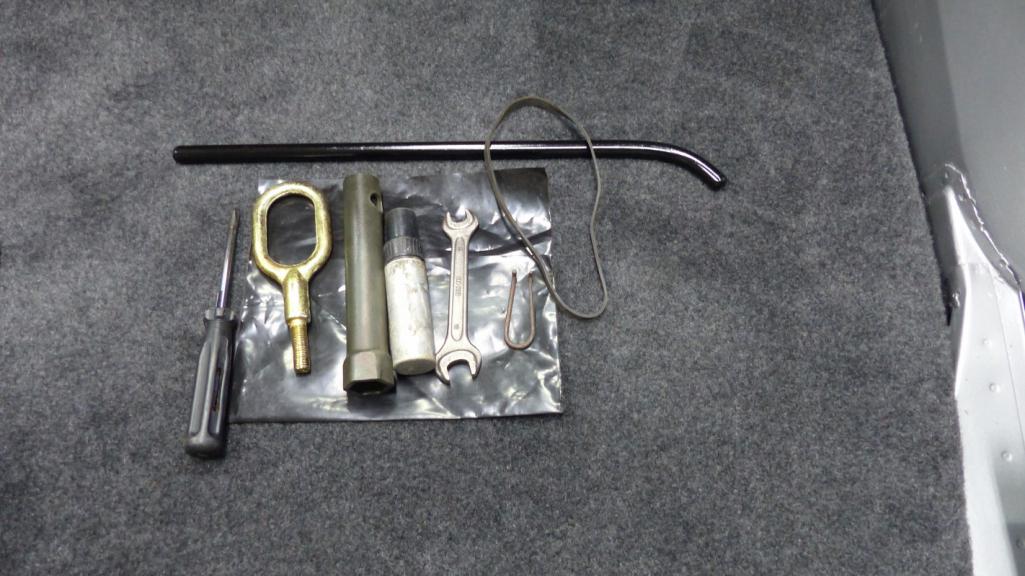
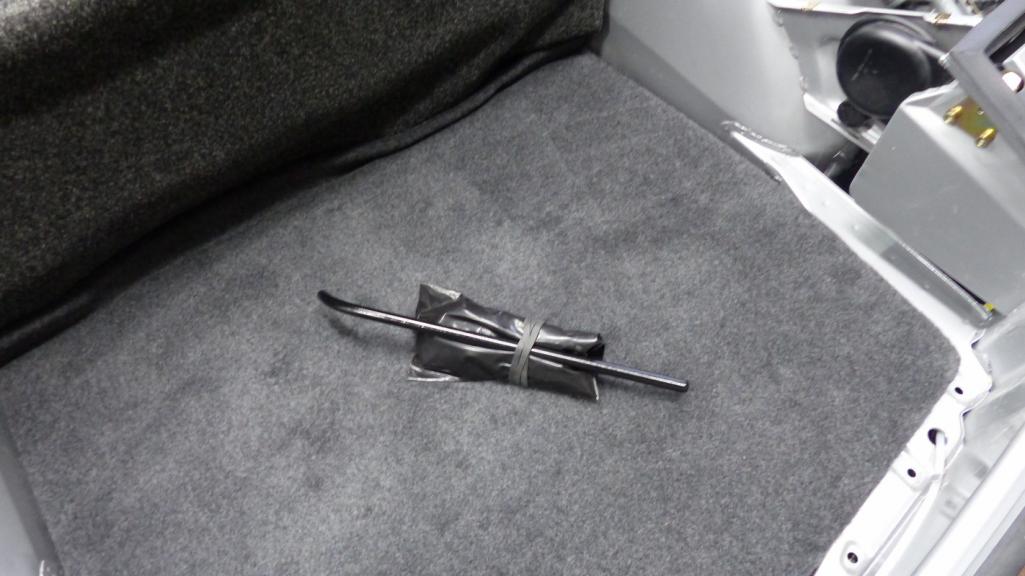
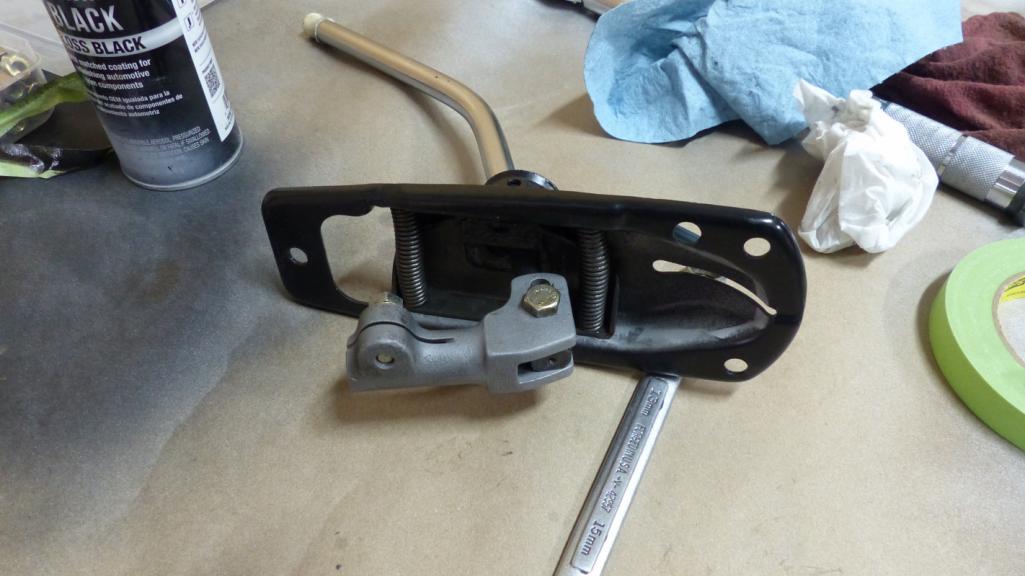
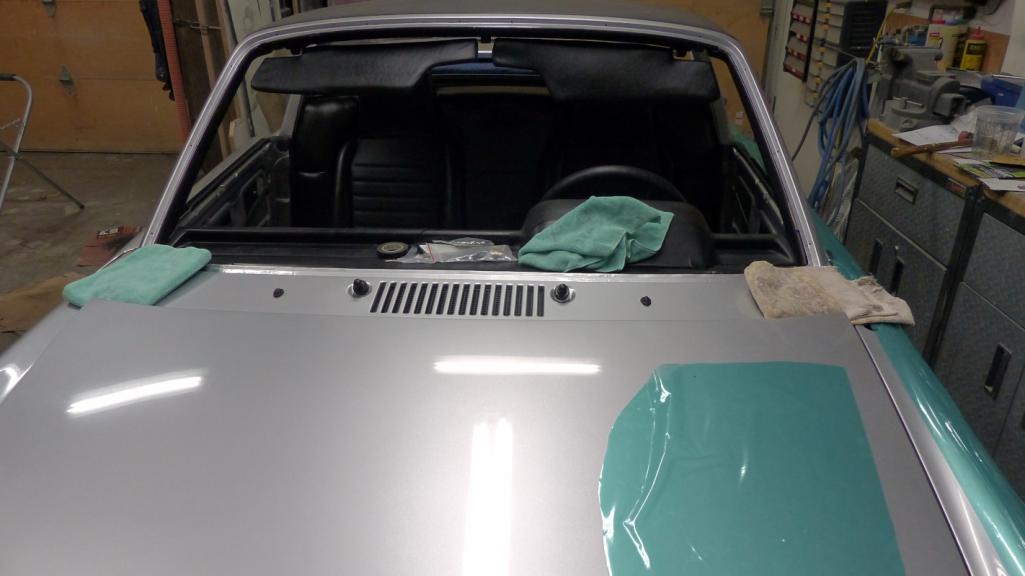 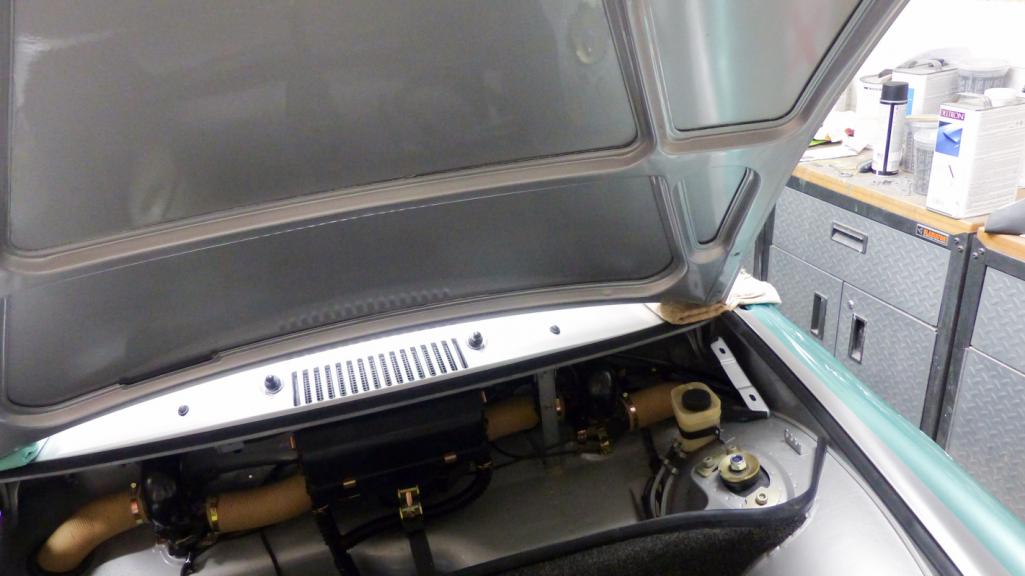 Final install of the rear lid is a bit trickier because it has to be done with torsion springs installed so the hinges are point up. Same drill though except you have to muscle the lid over the hinges and then down behind to rest on the towel padding. Installing the springs was much easier using McMark's Original Customs torsion bar tool. No broken thumbs! 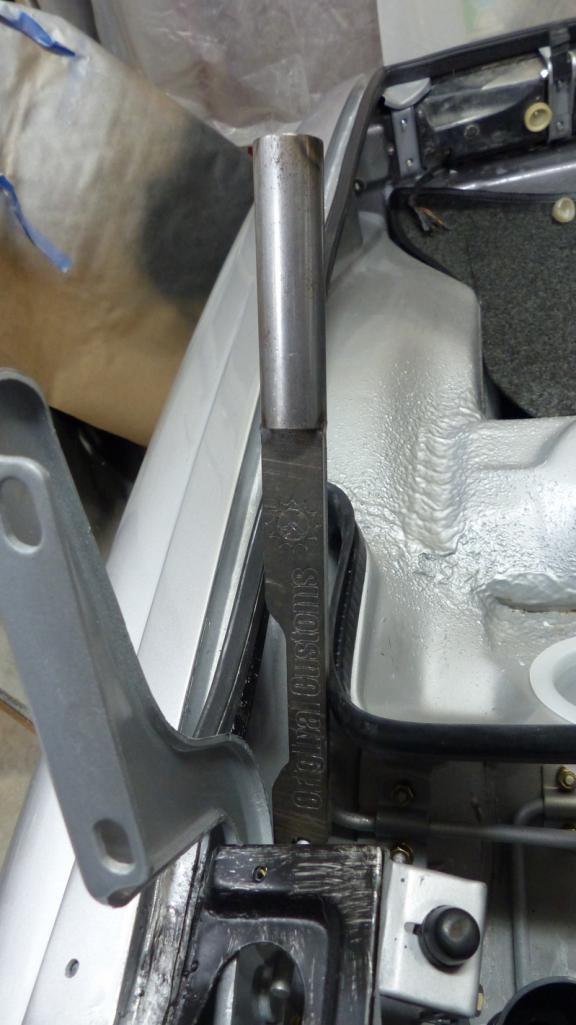 Now my trunk lid stays open of it's own will. 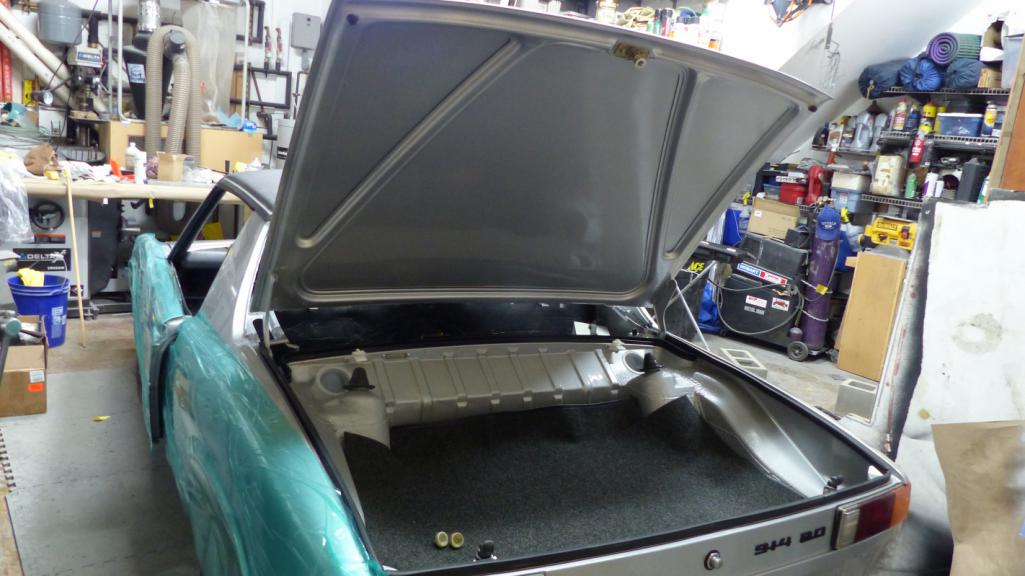 Now here's something that takes either huge balls or small brains. I test fit the targa top and found a problem. It's a little hard to see, but the overhang is greater on one side and a tad too shallow on the other. 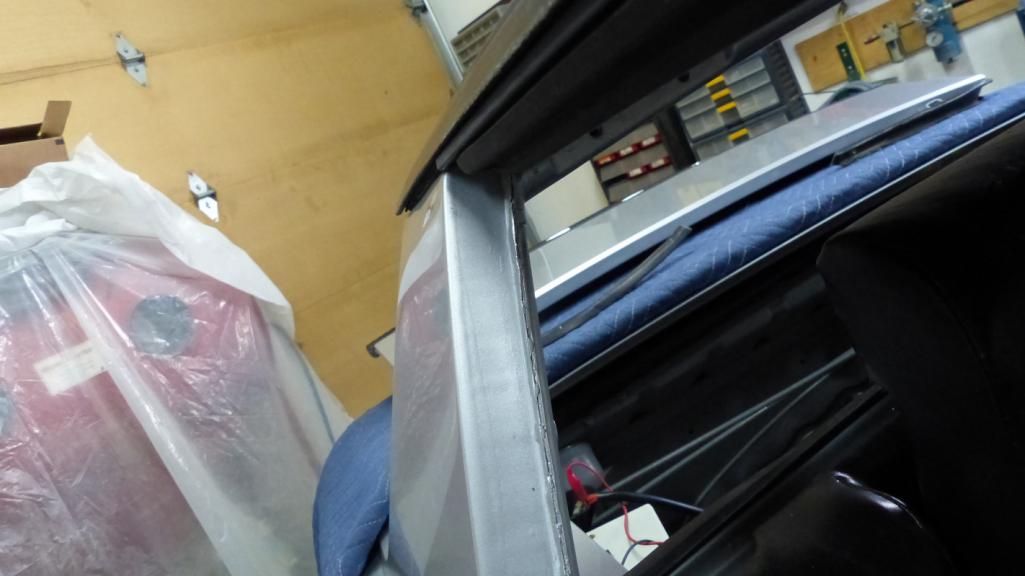 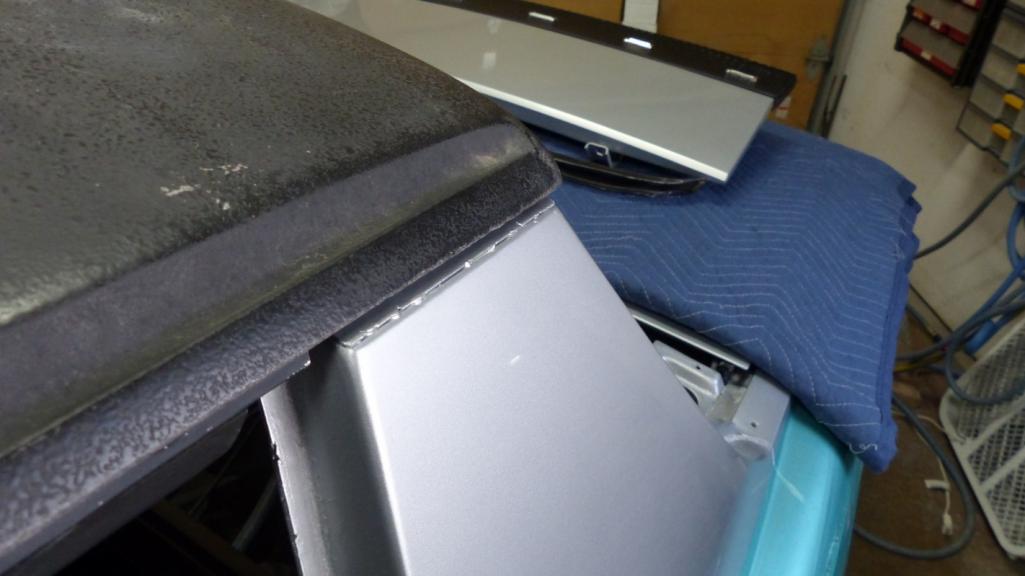 After puzzling over it a bit, I deduced this was caused by many years of pulling on the windshield frame getting in and out of the car which tweaked the frame slightly. Indeed, just tugging on the frame a little corrected the targa overhang. Of course it sprang right back when released so drastic measures were in order. Enter the big ass ratchet strap and timber frame post. 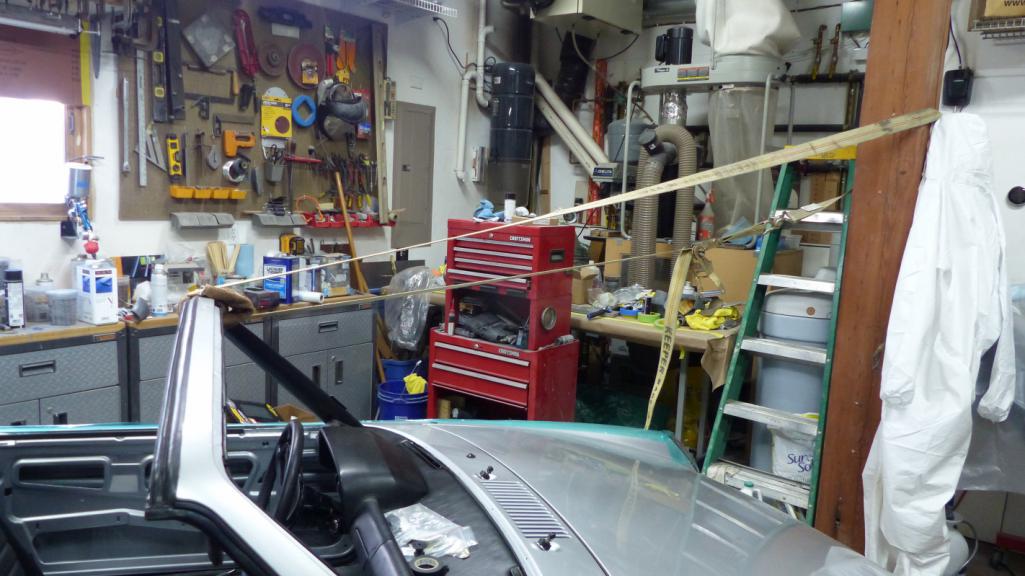 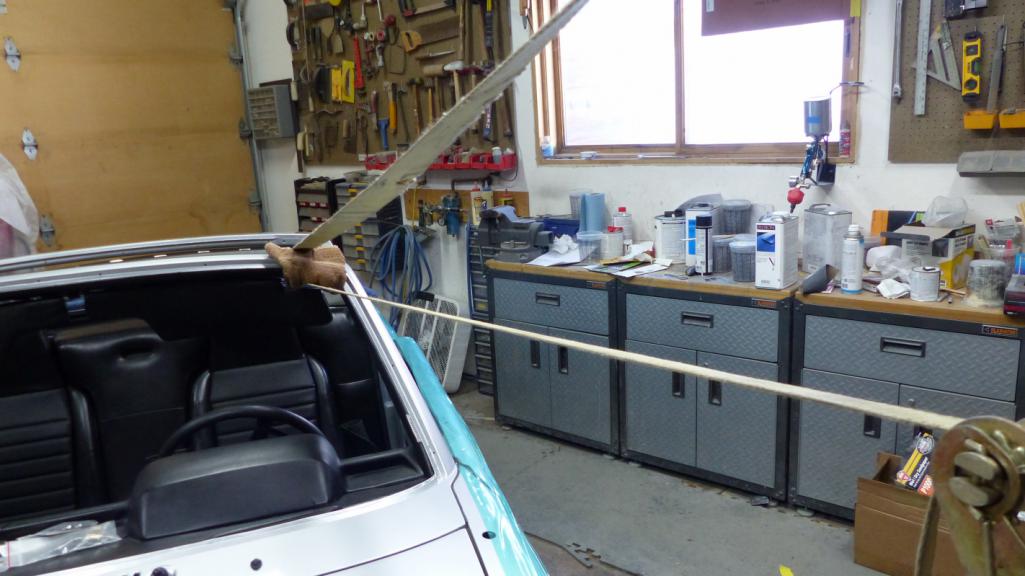 Just a little at a time, then remove strap and test. It only took a couple pulls and all was straight. |
|
|
|
| bbrock |
Jan 7 2020, 11:01 PM
Post
#1376
|
|
914 Guru Group: Members Posts: 5,269 Joined: 17-February 17 From: Montana Member No.: 20,845 Region Association: Rocky Mountains |
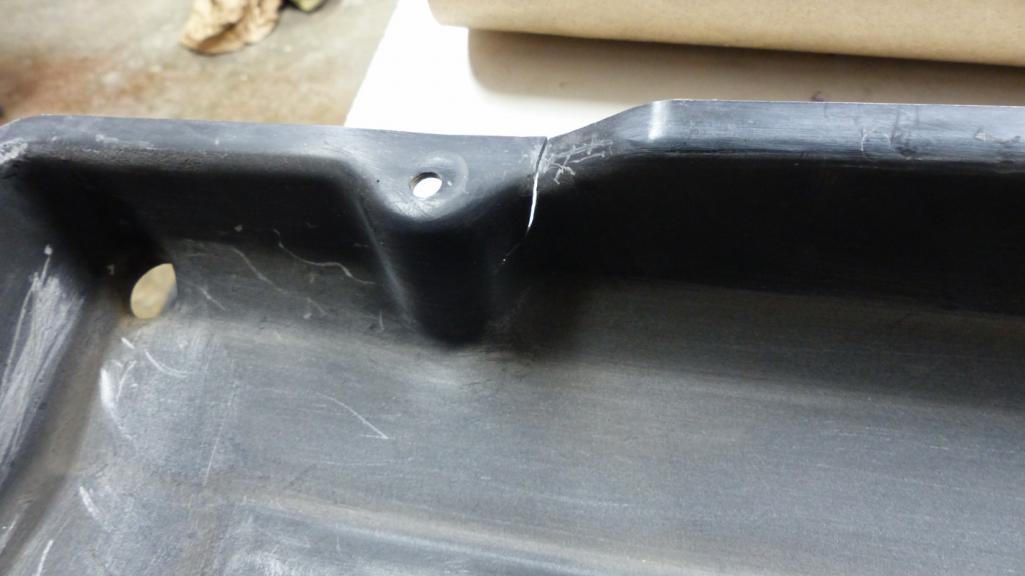
Next up was assembling the engine lid. I found this task pretty fun as it's a pretty complicated piece. The rain tray was in great shape except some overspray from the old paint job and on crack at a rear mount point.
 I originally planned to buy a plastic welder but the CSOB in me kicked in and decided that was an unnecessary expense. Instead, I used the hot knife I already have and a black zip tie to weld the crack shut. 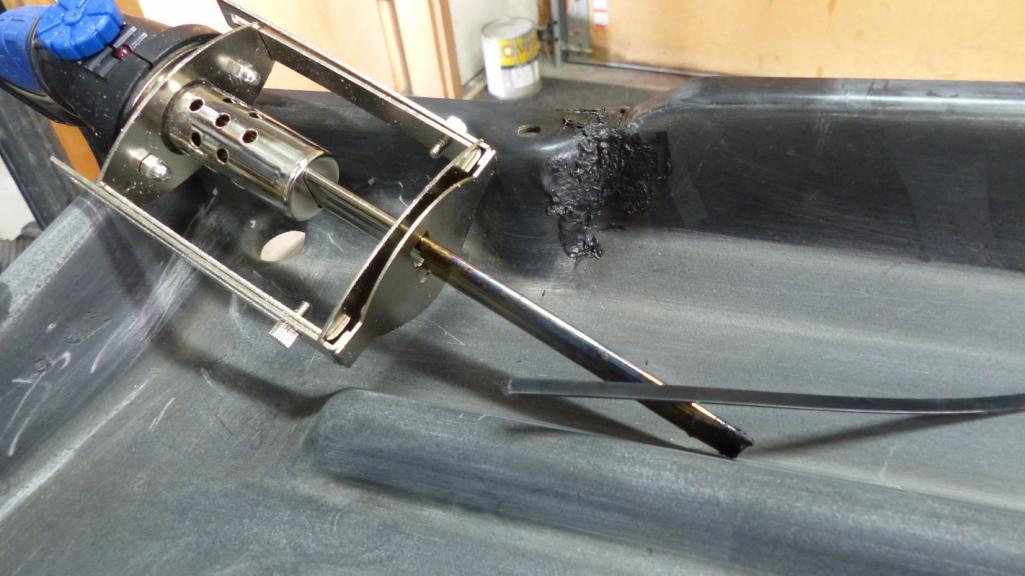 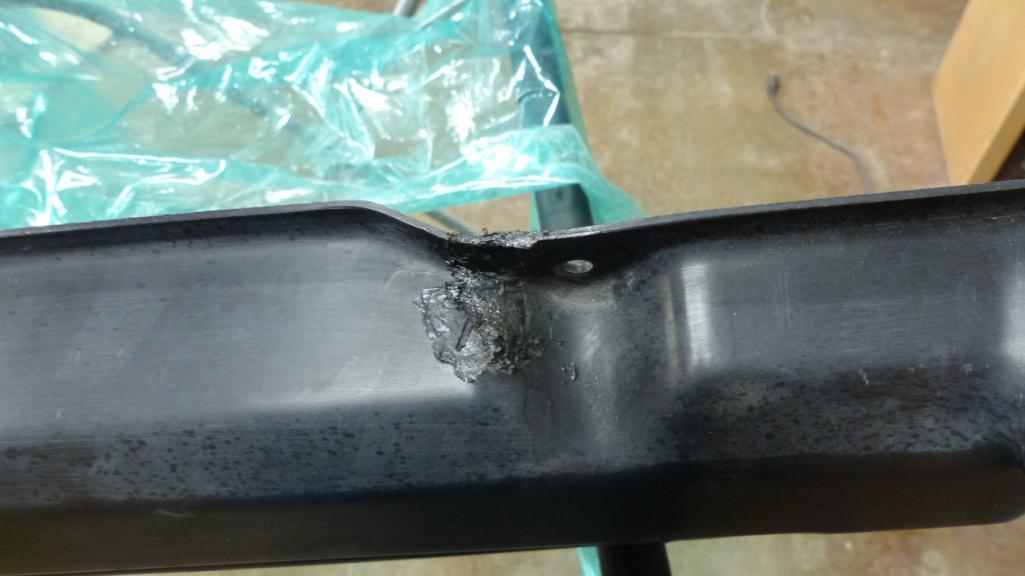 After sanding down to 2000 grit, the repair blends pretty well. I could have spent more time and gotten a perfectly invisible repair but frankly, it wasn't worth it. 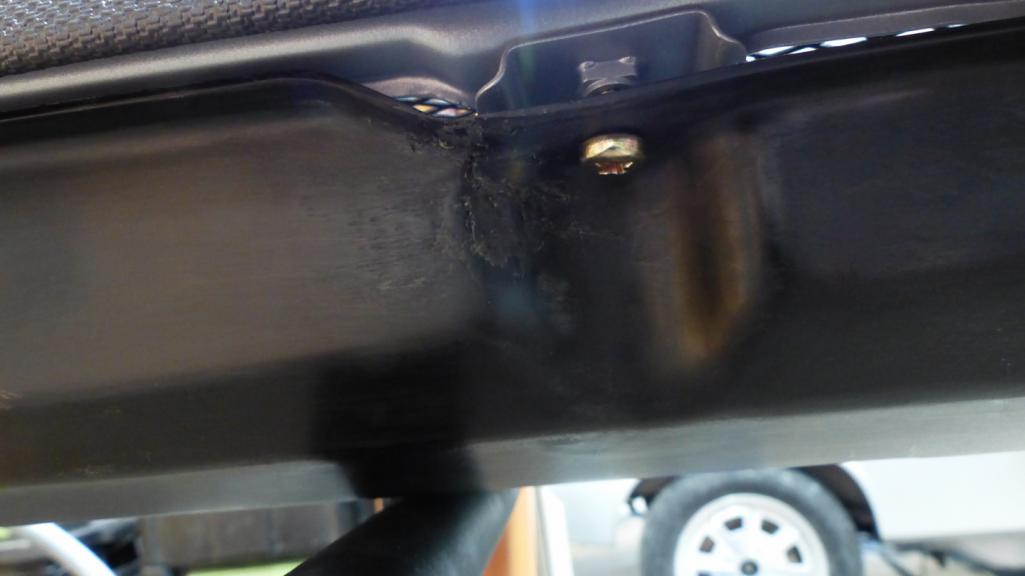 This little rubber sleeve is still available from Porsche. 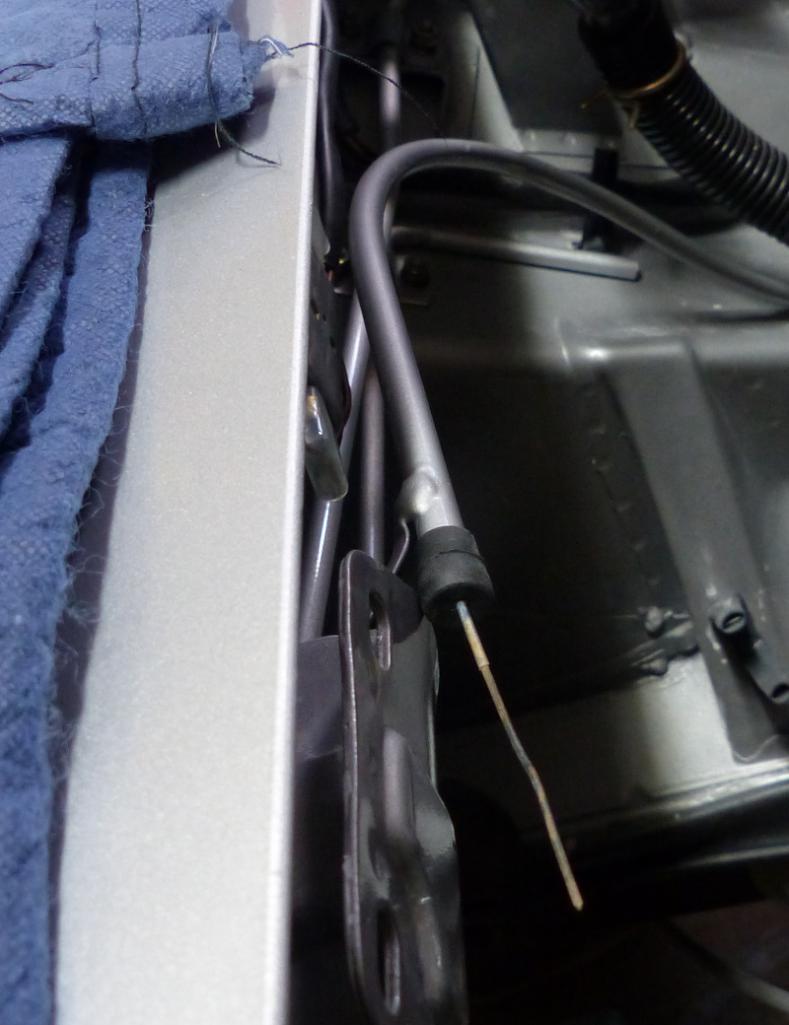 Thanks @914_7T3 for sharing your experience assembling the lid. Learning from you, I decided to install the letter on the grill BEFORE installing the grill in the frame. That gave me clear access to the letter posts. It also helped that the speed nuts have been superceded by a new part# and the new parts are easier to install. The are filled with a putty caulk and have a hex head that can be twisted on with a socket. Easy does it though. I just tightened until the caulk smooched out and the letter was held firm. 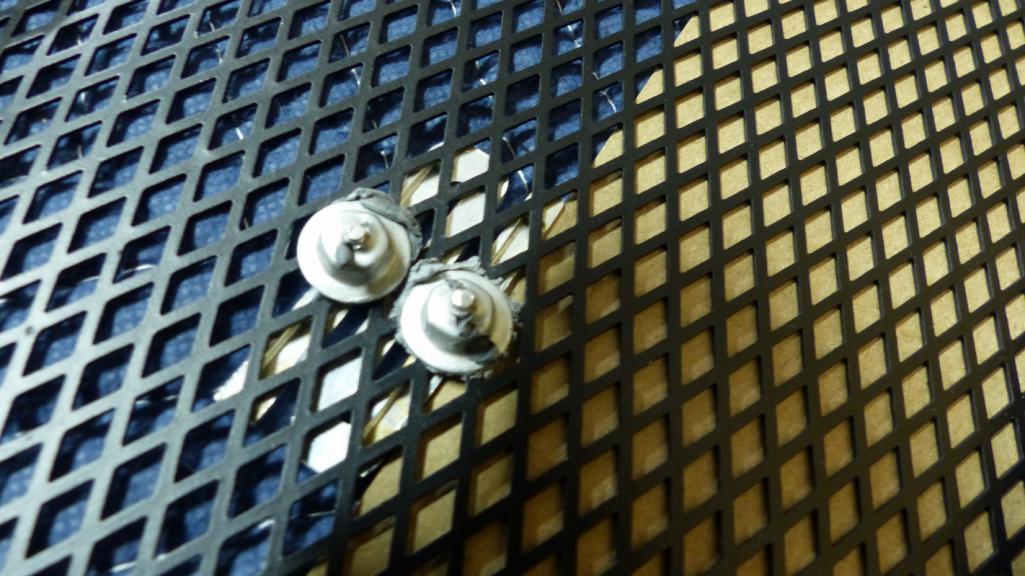 Despite being careful, the nut twisted the tip off one of the "P" posts. It was already weakened by removal of the old nuts. There was still enough post to bite into and I added a drop of JB Weld just to make sure it stays in place. The poor bastard who has remove this will be cussing me, but I'll probably be in the grave by then. 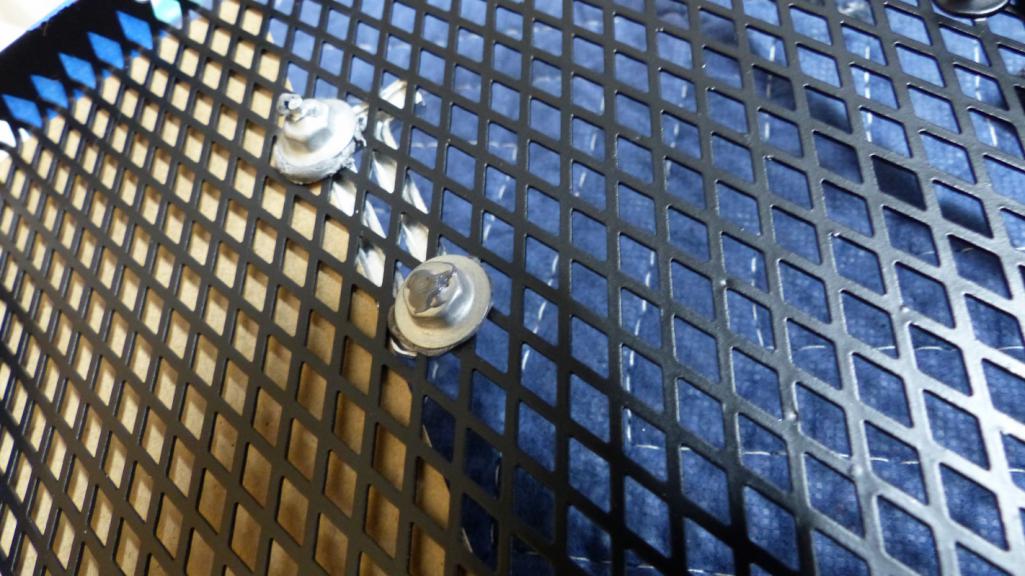 |
|
|
|
| bbrock |
Jan 7 2020, 11:13 PM
Post
#1377
|
|
914 Guru Group: Members Posts: 5,269 Joined: 17-February 17 From: Montana Member No.: 20,845 Region Association: Rocky Mountains |
The new all plastic nuts for the grill are also easier to work with than the originals. I found this tool or a 7mm deep well socket ideal for pushing them on.
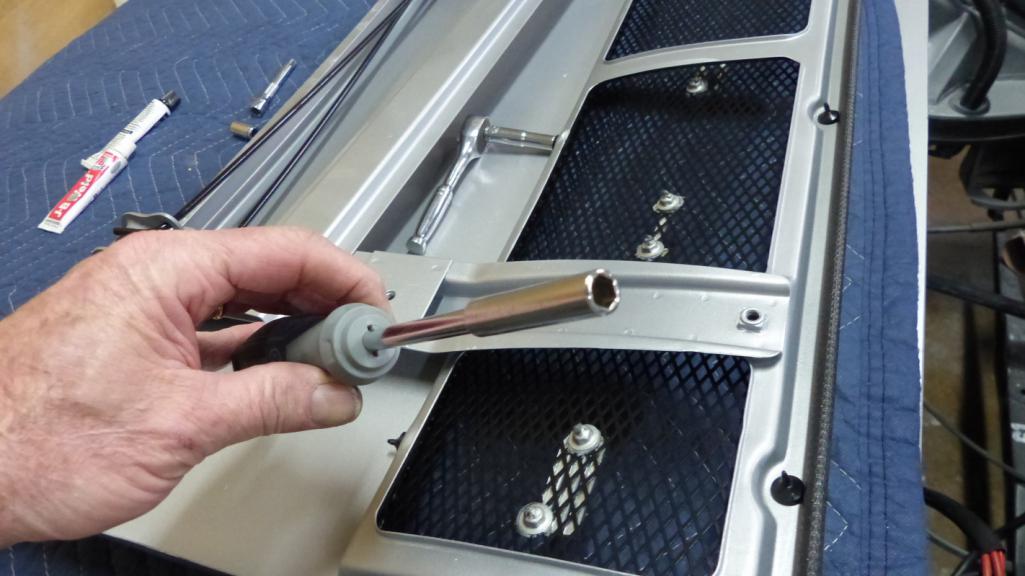  I had to get a little creative to push on the nuts that were hard to access because of the bracing. 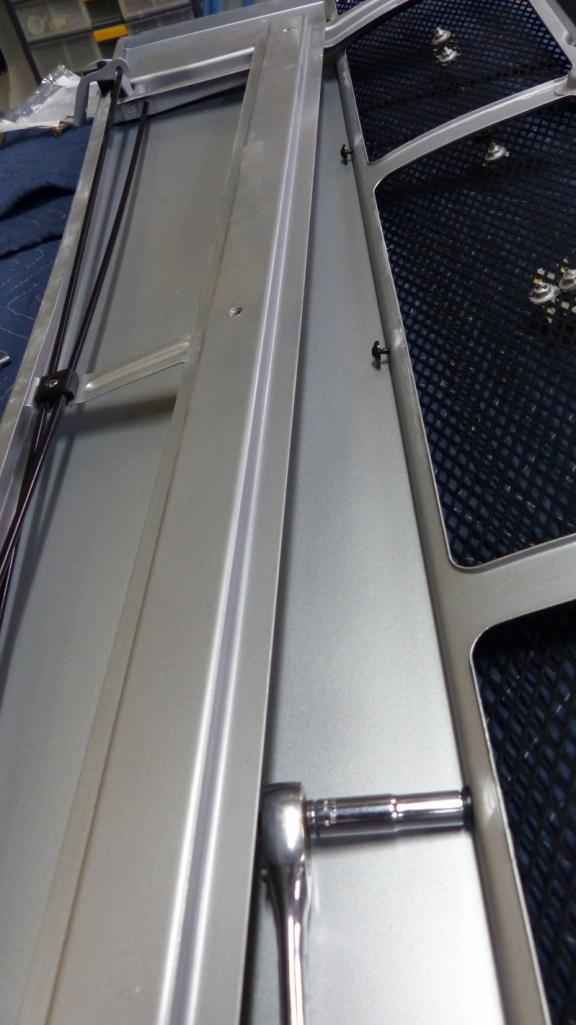 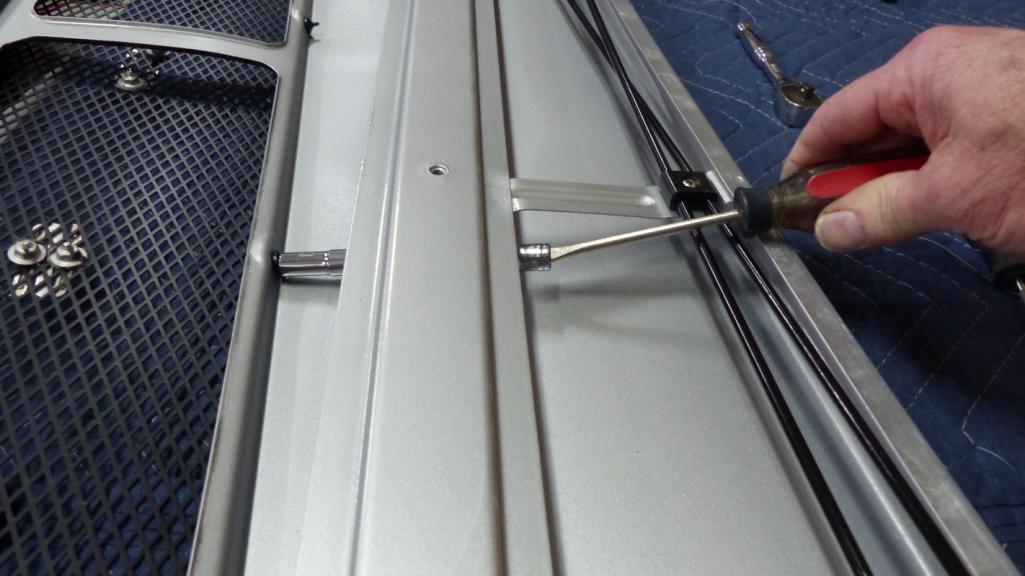 Here's the assembled lid from the bottom sans rain tray. 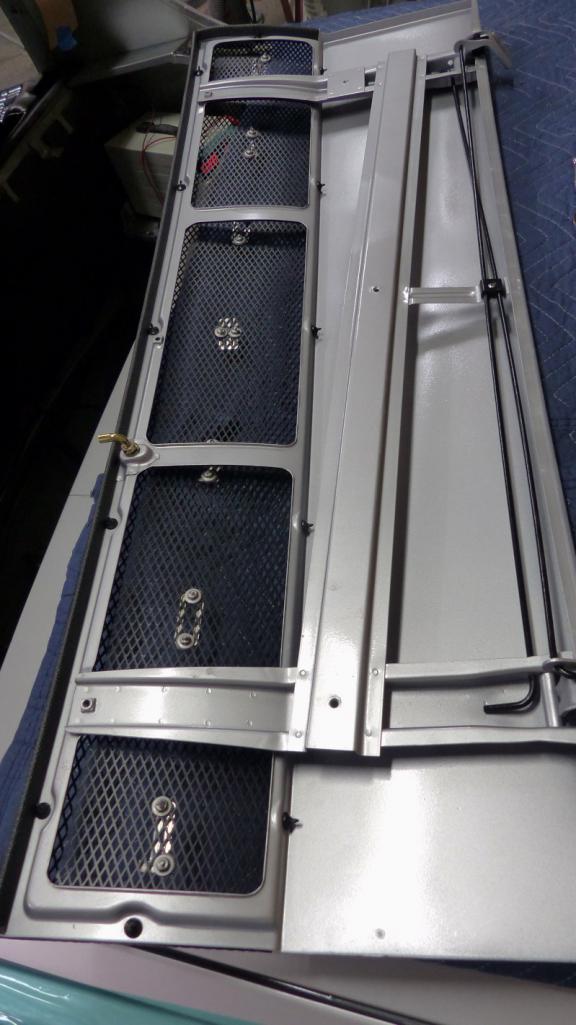 This little bushing is the reason my rain tray was cracked. It was missing and is a spacer that prevents over tightening and stressing the tray. The part is NLA but I picked up a 5mm deep with 6mm hole black nylon bushing at the local Ace Hardware that fits perfectly. 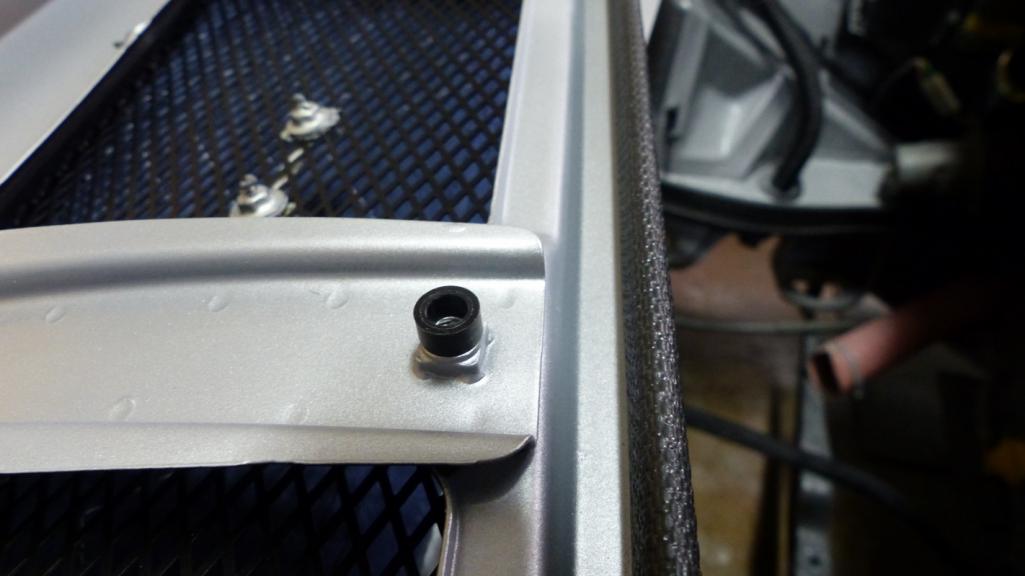 And the rain tray installed. Anyone know the point of the L-shaped bumper on the rear? I figured it could be adjust to catch on the front edge of the trunk lid when the lid was release to prevent it slamming up and stressing the hinges. But there is no way to adjust it out far enough to do that. 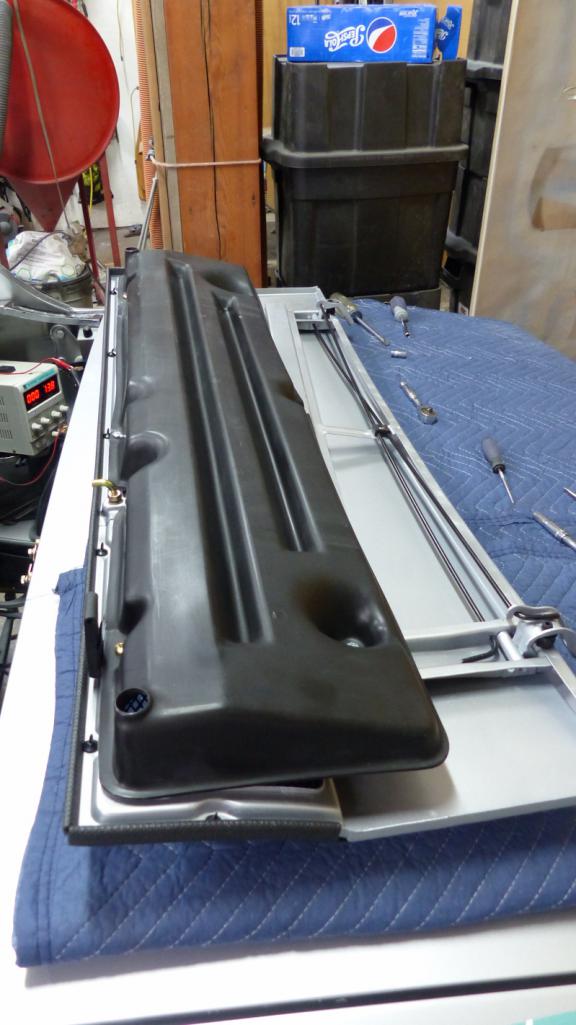 Lid installed. That doesn't look too bad. Only thing I don't like is that the 914Rubber edge welting is deeper than the original so the top edges show when the lid is closed. I might see how well my originals clean up and switch back if they pass inspection. 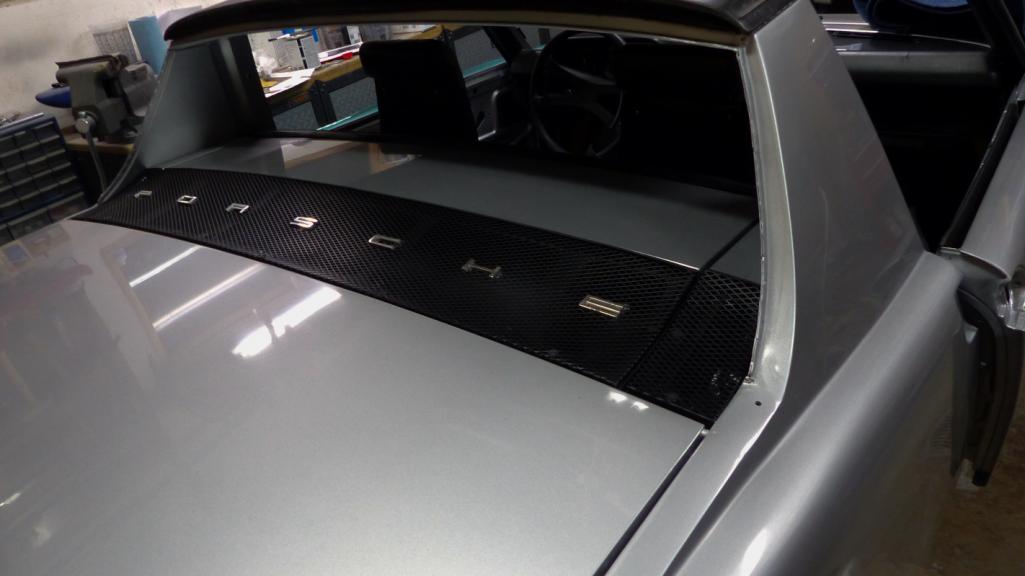 |
|
|
|
| bbrock |
Jan 7 2020, 11:36 PM
Post
#1378
|
|
914 Guru Group: Members Posts: 5,269 Joined: 17-February 17 From: Montana Member No.: 20,845 Region Association: Rocky Mountains |
Last post for now. This will be mostly pictures.
     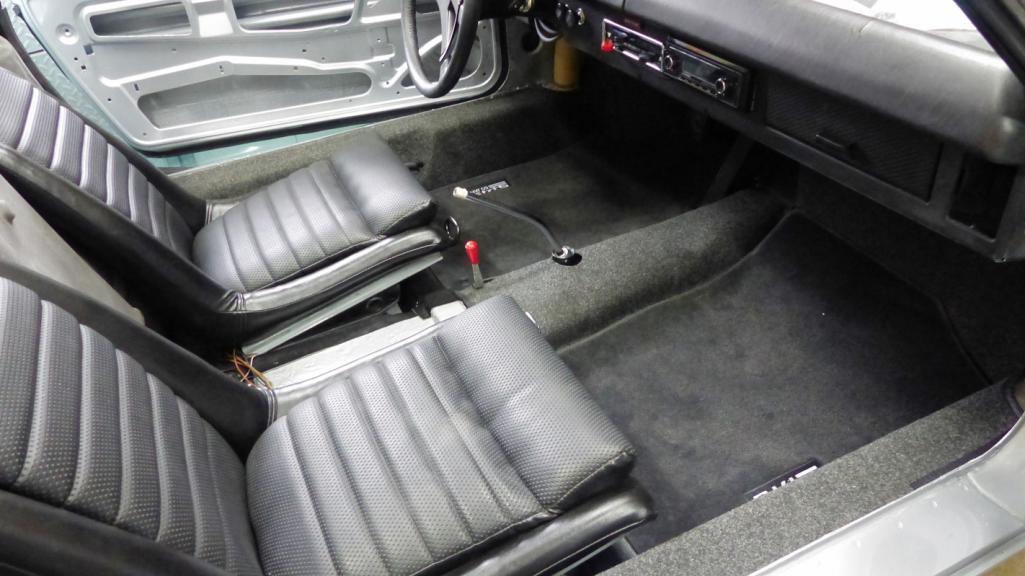 Starting to look like a car. Obviously that center console cushion has to be replaced. Anyone know where to get the best cover? The only recover kit I found is through AA. Not my first choice of vendor. Anyone know if it is any good? 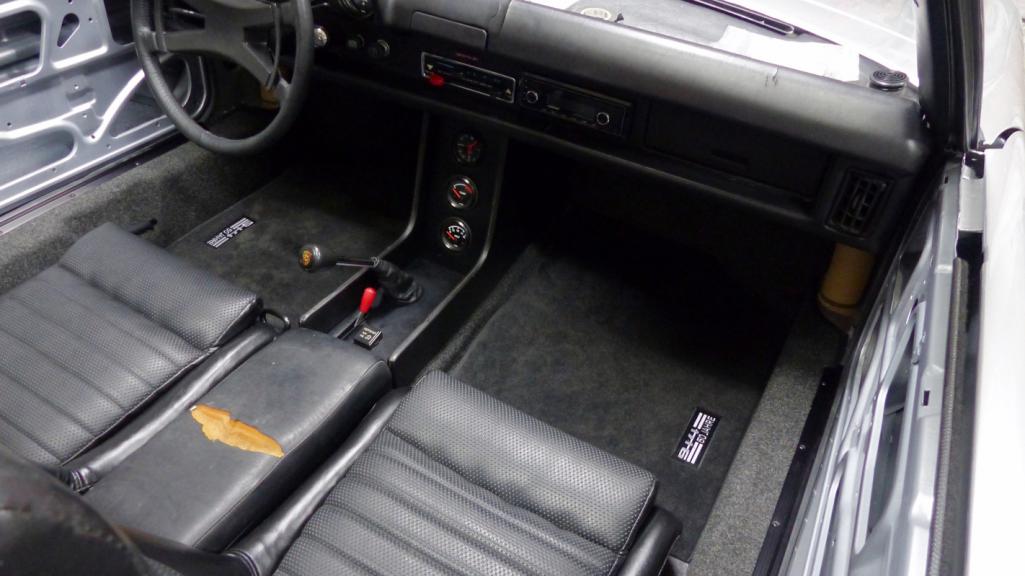 |
|
|
|
| bbrock |
Jan 7 2020, 11:39 PM
Post
#1379
|
|
914 Guru Group: Members Posts: 5,269 Joined: 17-February 17 From: Montana Member No.: 20,845 Region Association: Rocky Mountains |
QUOTE(KELTY360 @ Jan 7 2020, 09:23 PM)  (IMG:style_emoticons/default/piratenanner.gif) You can definitely be proud of that paint job...with no apologies! Incredible work. The front fender looks so good without the wart. Do you have a target for first drive yet? (IMG:style_emoticons/default/shades.gif) No definite target, but we are planning to drive out to Iowa for my niece's graduation in May. If we don't have a dog by then, I'm entertaining the idea of driving the Porsche. Taht would mean first drive would need to be early to mid April to allow for shakedown. Not sure that is realistic but we'll see. |
|
|
|
| euro911 |
Jan 8 2020, 02:44 AM
Post
#1380
|
|
Retired & living the dream. God help me if I wake up! Group: Members Posts: 8,937 Joined: 2-December 06 From: So.Cal. & No.AZ (USA) Member No.: 7,300 Region Association: Southern California |
Sorry to hear you guys lost your pup, Brent (IMG:style_emoticons/default/sad.gif)
We lost one of ours the day before New Years Eve, so we know the hurt. Remember and cherish all the good times you shared. |
|
|
|
|
3 User(s) are reading this topic (2 Guests and 0 Anonymous Users)
1 Members: 930cabman

|
Lo-Fi Version | Time is now: 12th May 2026 - 04:13 PM |
Invision Power Board
v9.1.4 © 2026 IPS, Inc.