|
|
|
Porsche, and the Porsche crest are registered trademarks of Dr. Ing. h.c. F. Porsche AG.
This site is not affiliated with Porsche in any way. Its only purpose is to provide an online forum for car enthusiasts. All other trademarks are property of their respective owners. |
|
|

  |

| defianty |
 Mar 7 2020, 01:34 AM Mar 7 2020, 01:34 AM
Post
#1461
|
|
Senior Member  Group: Members Posts: 659 Joined: 9-August 06 From: Essex, UK Member No.: 6,621 Region Association: None |
Looks a beauty Brent!
|
   |

 
|
| tygaboy |
Mar 7 2020, 08:12 AM
Post
#1462
|
|
914 Guru Group: Members Posts: 5,824 Joined: 6-October 15 From: Petaluma, CA Member No.: 19,241 Region Association: Northern California |
Brent - Remember, you see your car everyday and because of that, it's wonderfulness can be come "common" to you. If you're like me, it can be easy to lose sight of just how much you've done and, in your case, how great it's turned out.
Plus, you also seem to suffer from the dreaded "Hmmm, I coulda done that better"-itis. And likely zero in on (mostly) those areas that bother you. (IMG:style_emoticons/default/happy11.gif) Me? I'm going to focus on the 99.99% of awsomeness you've created and say: Holy Jeebus! That there is one beautiful 914! (IMG:style_emoticons/default/wub.gif) (IMG:style_emoticons/default/pray.gif) Now go finish it and drive it to 2020 WCR in Petaluma. I want a ride! |
|
|
|
| bbrock |
Mar 7 2020, 09:15 AM
Post
#1463
|
|
914 Guru Group: Members Posts: 5,269 Joined: 17-February 17 From: Montana Member No.: 20,845 Region Association: Rocky Mountains |
QUOTE(tygaboy @ Mar 7 2020, 07:12 AM)  Brent - Remember, you see your car everyday and because of that, it's wonderfulness can be come "common" to you. If you're like me, it can be easy to lose sight of just how much you've done and, in your case, how great it's turned out. Plus, you also seem to suffer from the dreaded "Hmmm, I coulda done that better"-itis. And likely zero in on (mostly) those areas that bother you. (IMG:style_emoticons/default/happy11.gif) Me? I'm going to focus on the 99.99% of awsomeness you've created and say: Holy Jeebus! That there is one beautiful 914! (IMG:style_emoticons/default/wub.gif) (IMG:style_emoticons/default/pray.gif) Now go finish it and drive it to 2020 WCR in Petaluma. I want a ride! Thanks again guys. Believe it or not, I really am VERY pleased with how this car turned out. Sometimes I look at it and thing, Jeez, did I do that?! But trust me, you'd see the camera is being kind to those headlight gaps. They aren't horrible, but the left headlight is literally hanging loose. The assembly missing a mounting plate on the fender side and the threaded holes on the inner bracket got roached by the plater and need to have helicoils inserted so I can tighten them up. In one of the shots I just posted, you can kind of see the left cover lying at a lower plane than the hood. The other side needs a little adjustment too, but it is mounted solid and the gaps are pretty close to where they will finally land. There is one flaw that was really disappointing. I mentioned earlier there is a little scuff in the base coat at the right rear corner where something (probably the air hose) brushed against the paint when it was wet. It is so subtle that I didn't notice it until days after painting. I had even kind of forgotten about it until I rolled the car into the bright sun yesterday and it caught the light in the most horrific way. It doesn't show in the pics because the cloud cover softened the light and made it disappear. It sucks but I'll live with it... for now. |
|
|
|
| Superhawk996 |
Mar 7 2020, 09:20 AM
Post
#1464
|
|
914 Guru Group: Members Posts: 7,839 Joined: 25-August 18 From: Woods of N. Idaho Member No.: 22,428 Region Association: Galt's Gulch |
Only one solution . . . . strip it back to metal and start over. (IMG:style_emoticons/default/chair.gif)
Brent it looks great and I fully agree that pictures never tell the story the same way as seeing in person. However, you've done miraculous things with this car that simply serve to inspire the rest of us. Great job! Forge ahead proudly. I want to see this thing running by June when I make my trek to Idaho this summer. Now get to work! |
|
|
|
| Tdskip |
Mar 7 2020, 09:34 AM
Post
#1465
|
|
Advanced Member Group: Members Posts: 3,780 Joined: 1-December 17 From: soCal Member No.: 21,666 Region Association: None |
Thanks for the ongoing updates
|
|
|
|
| burton73 |
Mar 7 2020, 12:01 PM
Post
#1466
|
|
Senior member, and old dude Group: Members Posts: 4,008 Joined: 2-January 07 From: Los Angeles Member No.: 7,414 Region Association: Southern California |
Brent buddie,
You have developed a great skill set working on your car and it looks fantastic. The only problem is your eye will always go to that one flaw spot. I know all of them on my cars. It is a problem with people of a certain personality. I am just like you. No one may notice it. The car looks super in the photos. This was an incredible save of a very rusty car at one point. Now it is well, a super restoration of a 914 that is well documented Bob B (IMG:style_emoticons/default/aktion035.gif) |
 |
|
| horizontally-opposed |
Mar 7 2020, 12:22 PM
Post
#1467
|
|
Advanced Member Group: Members Posts: 3,456 Joined: 12-May 04 From: San Francisco Member No.: 2,058 Region Association: None |
Brent, your car looks gorgeous! And even the nicest 914s have their flaws (that only the owner tends to know/see).
I'm really thankful for you taking the time to document how to polish out the side glass. I've had a pair of extras for a long time, and they're imperfect for sure but the best I could find after working through what must have been 200 door windows. Now I know how to make them "good enough" and then some. Your glass polish posts would make a great "Classic" thread. Thank you, again! |
|
|
|
| mtn flyr |
Mar 7 2020, 07:04 PM
Post
#1468
|
|
Member Group: Members Posts: 235 Joined: 20-December 07 From: Bozeman Mt Member No.: 8,491 Region Association: Rocky Mountains |
Brent,
That looks so good!! I love silver! Hope to connect some day... (IMG:style_emoticons/default/beerchug.gif) |
|
|
|
| bbrock |
Mar 8 2020, 09:58 PM
Post
#1469
|
|
914 Guru Group: Members Posts: 5,269 Joined: 17-February 17 From: Montana Member No.: 20,845 Region Association: Rocky Mountains |
Got the passenger window in today. Fought the little F'er quarter window all day yesterday with no progress. Used up all my best curse words too. Started fresh this morning and figured out my mistake, I was following the installation instructions in the factory shop manual. Don't do that. What you want to do is install the quarter glaas into the gasket and press into the support BEFORE putting it in the door. Make sure you have that top cap installed. If you don't the assembly will spit the glass out when you set the gasket.
 Then you slide the whole assembly in. Set the gasket into the door with a hammer and wooden wedge, then install the adjuster bolt before bolting the support in. After a lot of adjusting and tweaking, it's a good fit. 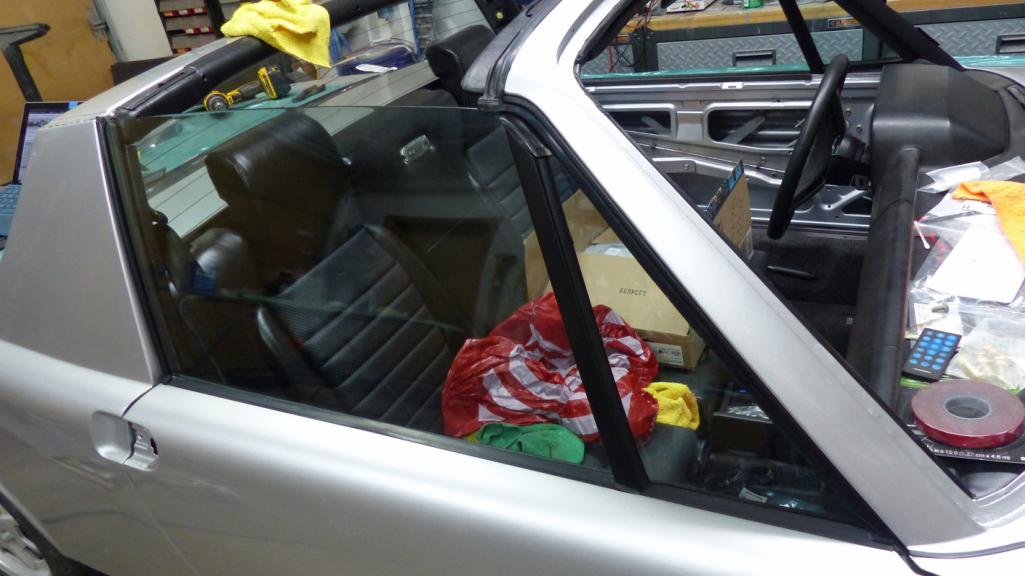 There is a problem though. The 914Rubber early outer window scraper was binding badly when the window was rolled down. So bad I'm sure it would have broken the window regulator or torn the aluminum weatherstrip track off after just a few cycles. After waxing the window, it is better, but still not great. The scraper still rolls down into the window track when the window is rolled down. I'm afraid it will start binding again if the wax wears off, or scratch the glass if it is rolled down after mud splashes on the scraper. The rubber seems like it is too soft and sticky for this application. Anyone know if there is a fix for this, or if there is a better outer scraper option? I know they just "upgraded" the late style scrapers with a fuzzy strip to make the glide better, but I'll be honest, I think having a fuzzy strip that will absorb and hold water on the outside of the glass is a bad idea.  |
|
|
|
| 914_7T3 |
Mar 8 2020, 10:22 PM
Post
#1470
|
|
Please forgive me, I'm new to all of this! Group: Members Posts: 1,898 Joined: 3-April 17 From: Los Angeles, CA Member No.: 20,991 Region Association: Southern California |
QUOTE(bbrock @ Mar 8 2020, 08:58 PM) Got the passenger window today. Fought the little F'er quarter window all day yesterday with no progress. Used up all my best curse words too. Started fresh this morning and figured out my mistake, I was following the installation instructions in the factory shop manual. Don't do that. What you want to do is install the quarter glas into the gasket and press into the support BEFORE putting it in the door. Make sure you have that top cap installed. If you don't the assembly will spit the glass out when you set the gasket. You forgot the part about the sharp edge slicing a 1" gash across your wrist if you don't have the top cap installed. Oh wait , that was me (IMG:style_emoticons/default/laugh.gif) |
|
|
|
| BPic |
Mar 9 2020, 04:35 AM
Post
#1471
|
|
Member Group: Members Posts: 343 Joined: 5-February 18 From: Miami, Florida Member No.: 21,864 Region Association: South East States |
@bbrock l had the same issue with the window seal and the thought about the fuzzy seal. I ordered the new fuzzy seat from 914 Rubber and was actually surprised. It’s not a lot of fuzzy and I don’t think it will be an issue. I kept the old style just in case. But with the slight fuzzy edge, problem solved.
|
|
|
|
| bbrock |
Mar 9 2020, 07:44 AM
Post
#1472
|
|
914 Guru Group: Members Posts: 5,269 Joined: 17-February 17 From: Montana Member No.: 20,845 Region Association: Rocky Mountains |
QUOTE(BPic @ Mar 9 2020, 03:35 AM) @bbrock l had the same issue with the window seal and the thought about the fuzzy seal. I ordered the new fuzzy seat from 914 Rubber and was actually surprised. It’s not a lot of fuzzy and I don’t think it will be an issue. I kept the old style just in case. But with the slight fuzzy edge, problem solved. @BPic Thanks Brad. My car came original with the early stye scrapers and I'd prefer to stick with them if possible. It will be interesting to see how those new seals perform after people use them in the rain. I'm not willing to be the guinea pig with them. I'm just afraid they are going to give water a path to run down that outside of the glass and inside the door cavity. That defeats the purpose of the seal. Bottom line is the factory seals worked without needing any fuzzy strip so the modification is, at best, a kludge to compensate for something else - probably the rubber compound. IIRC, the factory used natural rubber and most of the 914Rubber seals are silicone. Silicone is probably an improvement for most of the seals but maybe not so much for something that needs to act as a squeegee? (IMG:style_emoticons/default/confused24.gif) In the mean time, the windows roll up and down pretty smoothly with a fresh coat of wax on them. I'll probably just see how they work over time. I'm hoping after a little time in the sun, they stiffen up enough that they don't grab and roll. I'm also thinking about trying to rub a little graphite on them to see if I can get it impregnated in the rubber to act more like a wiper blade. |
|
|
|
| falcor75 |
Mar 9 2020, 08:00 AM
Post
#1473
|
|
Senior Member Group: Members Posts: 1,579 Joined: 22-November 12 From: Sweden Member No.: 15,176 Region Association: Scandinavia |
Mine wanted to curl too when they were new and freshly installed, just lubricated them with water and rolled the window up and down a few times over a period of time and they kinda "wore in" No issues after that.
|
|
|
|
| bbrock |
Mar 9 2020, 08:09 AM
Post
#1474
|
|
914 Guru Group: Members Posts: 5,269 Joined: 17-February 17 From: Montana Member No.: 20,845 Region Association: Rocky Mountains |
QUOTE(falcor75 @ Mar 9 2020, 07:00 AM) Mine wanted to curl too when they were new and freshly installed, just lubricated them with water and rolled the window up and down a few times over a period of time and they kinda "wore in" No issues after that. Cool! Exactly what I was hoping to hear! Thanks! |
|
|
|
| bbrock |
Mar 17 2020, 08:26 PM
Post
#1475
|
|
914 Guru Group: Members Posts: 5,269 Joined: 17-February 17 From: Montana Member No.: 20,845 Region Association: Rocky Mountains |
Several tasks in the works lately.
One nice thing about having black targa trim is that it opens more options for restoring. One of these had the ubiquitous hole drilled in the base to replace the special mounting plate with a screw. I had just enough of the fiber reinforced filler to patch these up and a little glazing compound to smooth things over. 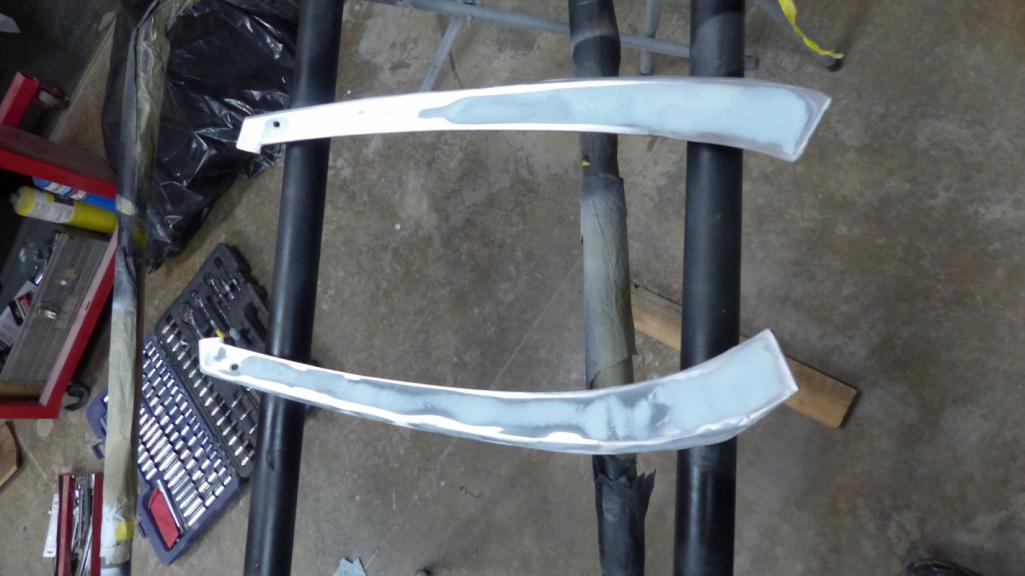 Mounting these things is no treat. That little 5mm stud for the base bracket is WAY up there in the fender. 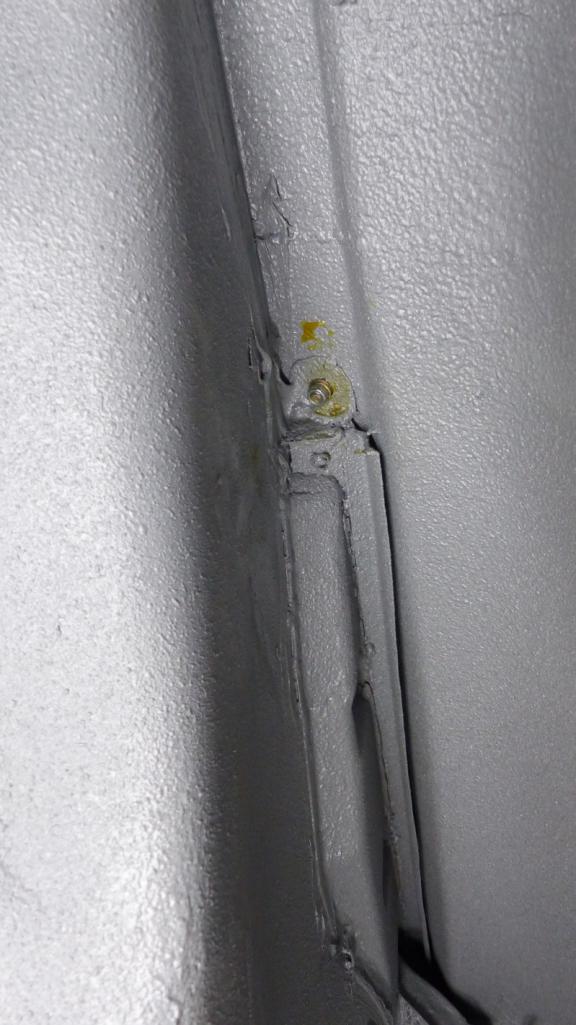 While I was in there, I had to admire the jewel-like look of the door striker mounting plate from inside the fender. A shame nobody will see it and it will never look like this again. 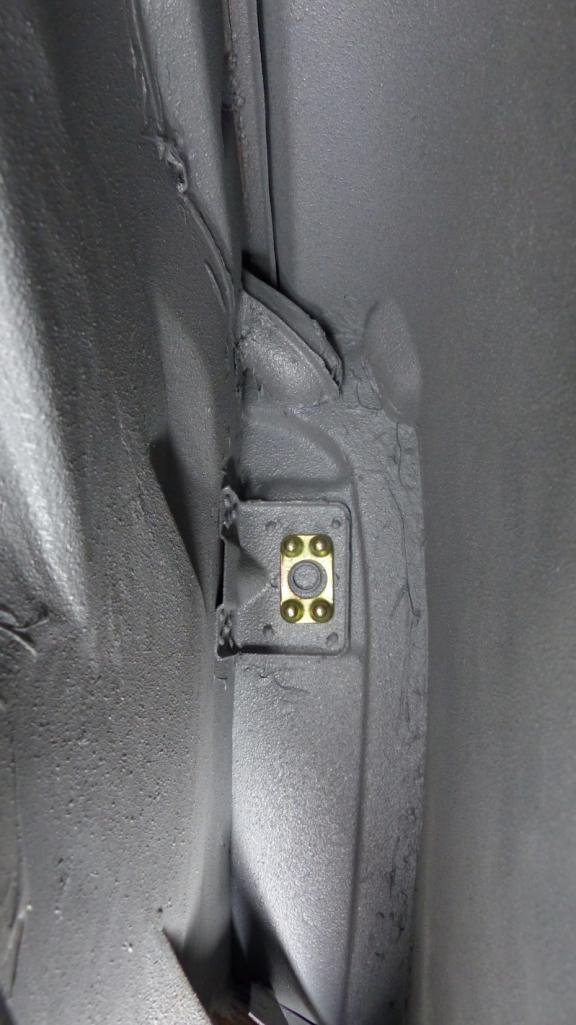 While the wheel was off, I installed the cotters in the axle castle nuts. 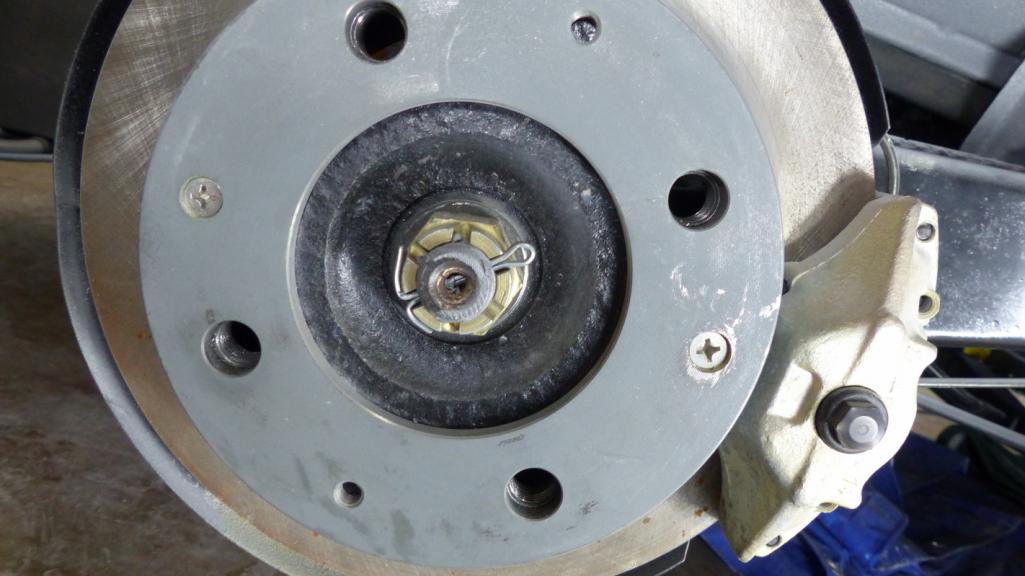 After a LOT of cussing, I figure out the best way to go at it is to put the bracket on without the trim and just get that little bastard of a nut started so the bracket is loose. Then slide the trim carefully onto the bracket. It isn't without risk though. For some reason the edge of the driver's side trim where the bracket slides in was thin as foil and tore open. (IMG:style_emoticons/default/headbang.gif) 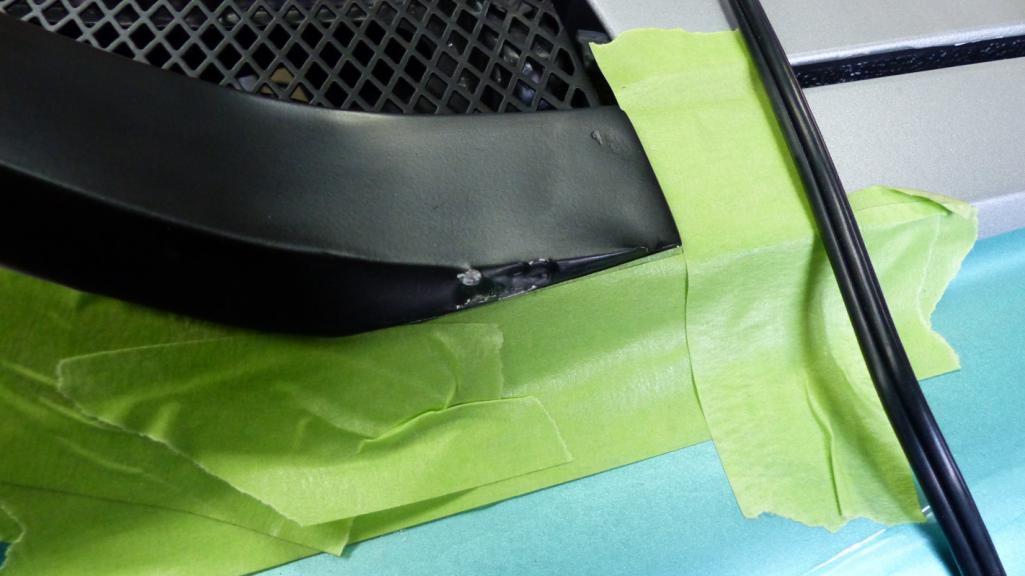 That required a bit of in situ repair. Again, I couldn't get away with this with bright work. 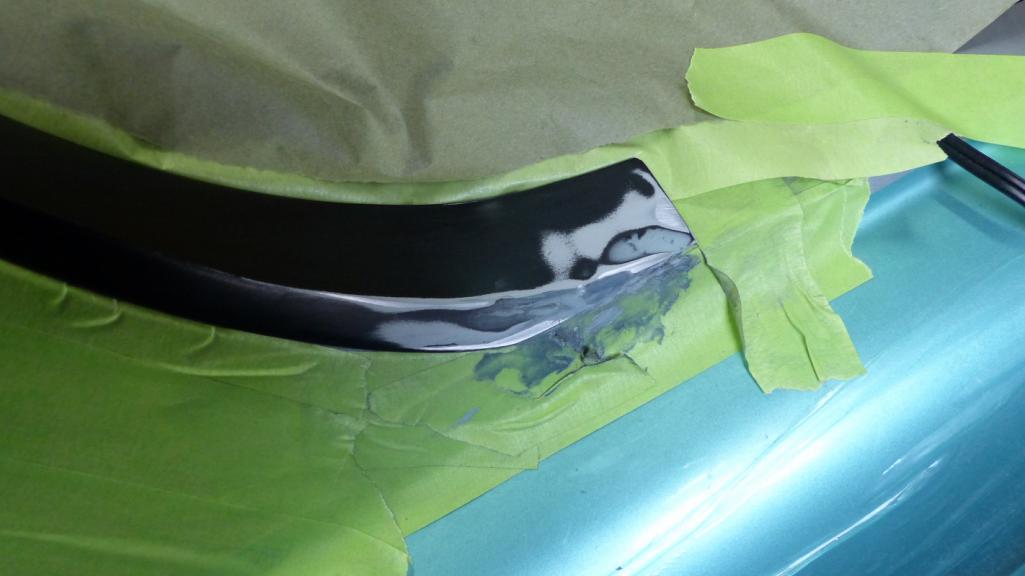 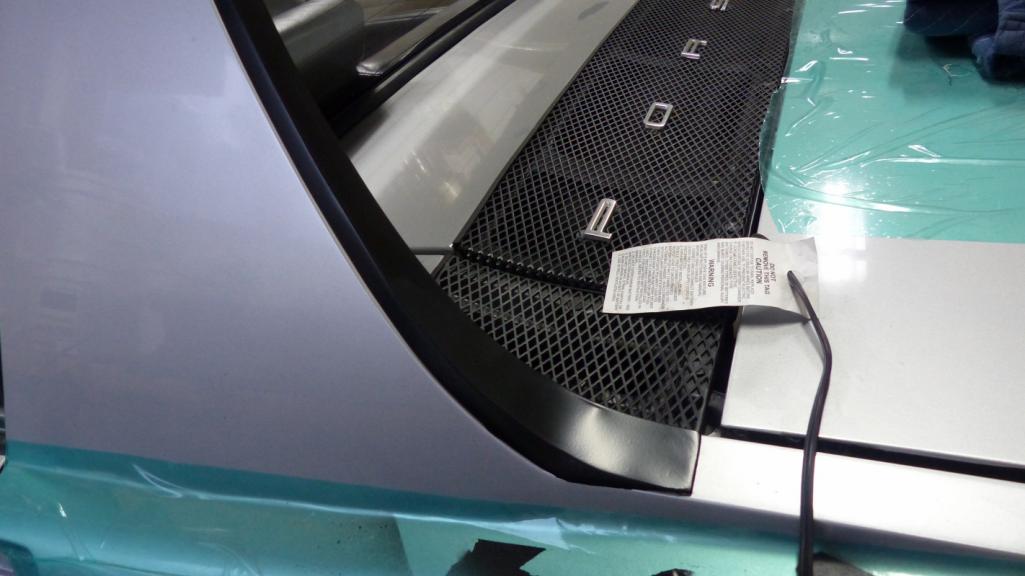 And an overview of this masterpiece. 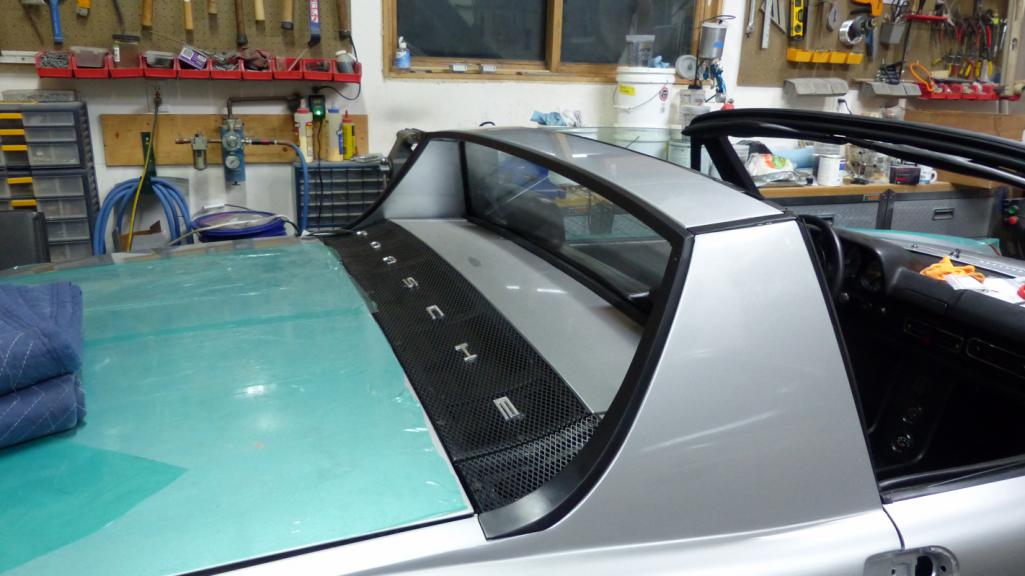 |
|
|
|
| tygaboy |
Mar 17 2020, 08:47 PM
Post
#1476
|
|
914 Guru Group: Members Posts: 5,824 Joined: 6-October 15 From: Petaluma, CA Member No.: 19,241 Region Association: Northern California |
Your black trim looks very nice. And I usually don't like it blacked out but yours really sets off nicely against that wonderful silver paint.
(IMG:style_emoticons/default/smilie_pokal.gif) |
|
|
|
| bbrock |
Mar 17 2020, 08:49 PM
Post
#1477
|
|
914 Guru Group: Members Posts: 5,269 Joined: 17-February 17 From: Montana Member No.: 20,845 Region Association: Rocky Mountains |
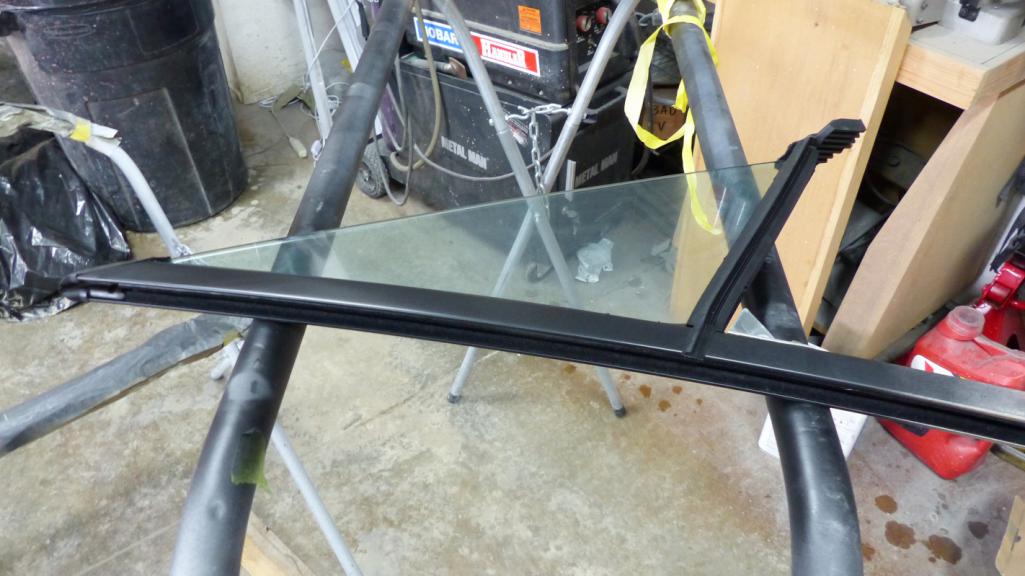
Next item, the driver's window. This one was in a lot better shape than the passenger window, but still needed some help. There were a lot of deep scratches along the top of the glass. There were also several long scratches in the middle of the view field from rolling the window with gritty shit on the scrapers. Couldn't get the long scratches to show in photos but they were pretty nasty. Here are the scratches along the top.
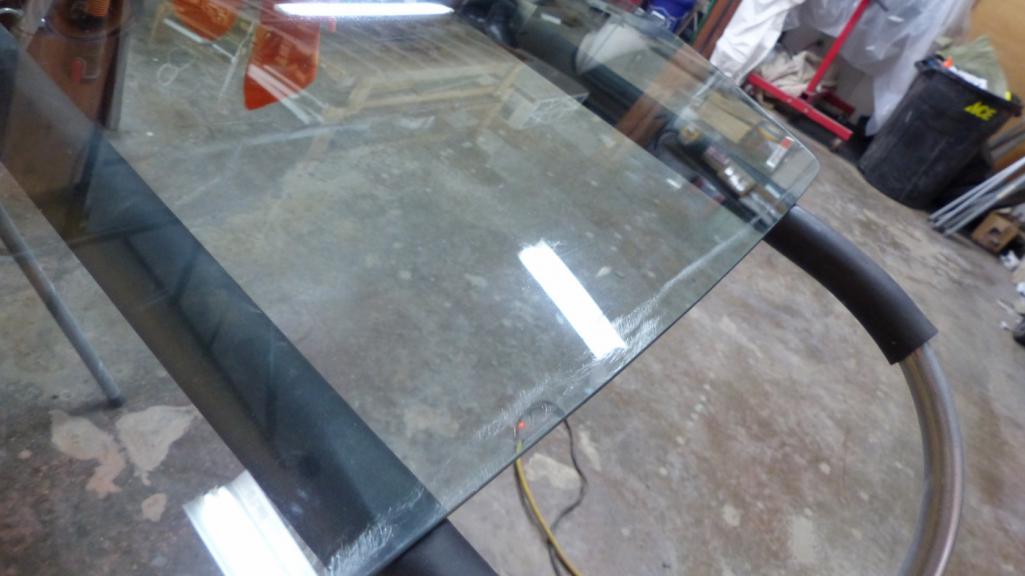 I went through the same drill as before but less of it. Luckily, the inside of the glass was pretty clean so it just got polished and not ground. I also discovered that after grinding with the fine discs, I could go straight to polishing with cerillic oxide and skip the two grades of Chemical Guys polish. Here's a shot showing the difference between medium and fine grind. 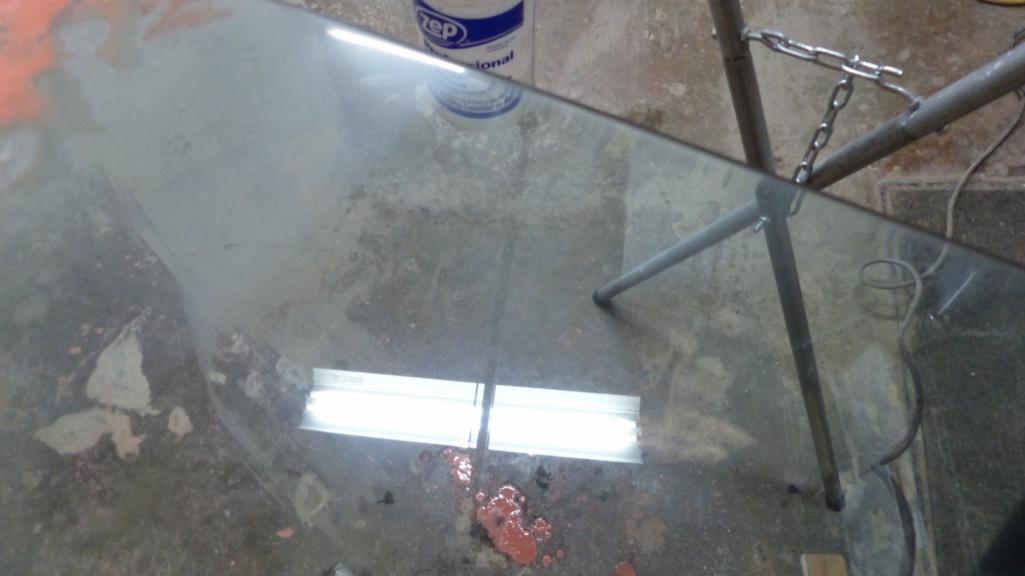 Cussed the hell out of installing the quarter glass and window again. I'm glad that PITA job is done! Look closely. You are looking through the freshly ground and polished window (IMG:style_emoticons/default/shades.gif) 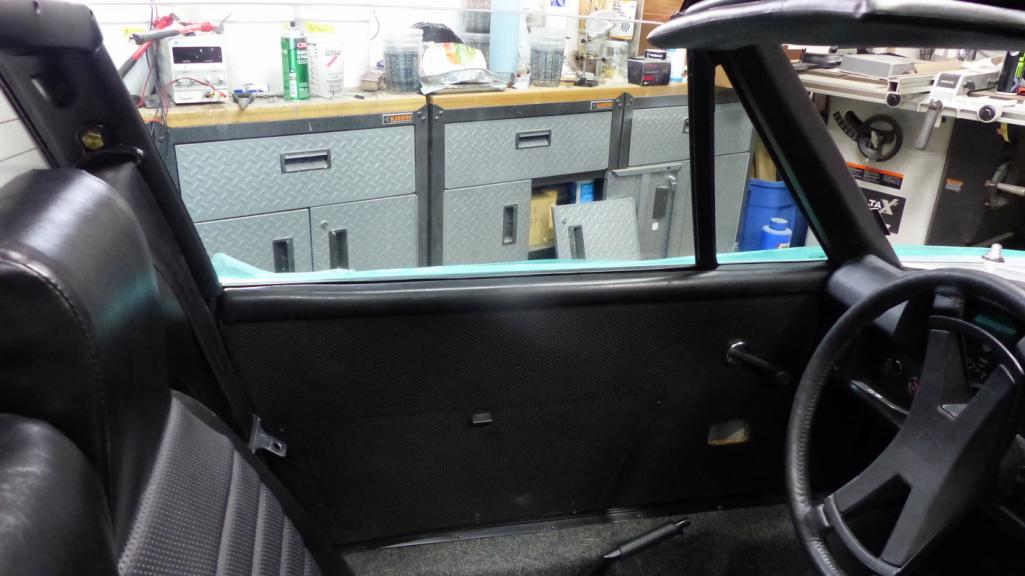 Proof there is a window there. 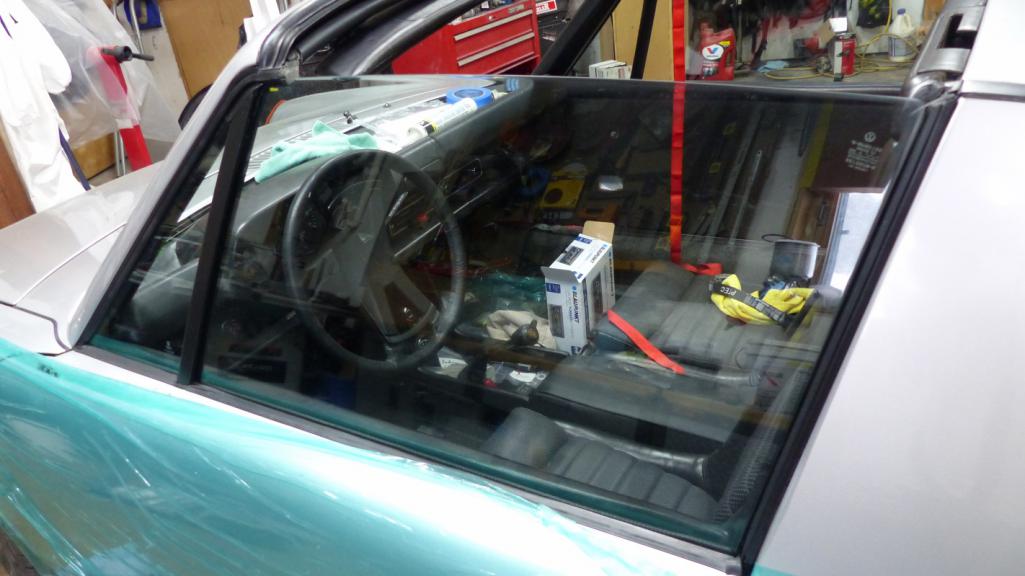 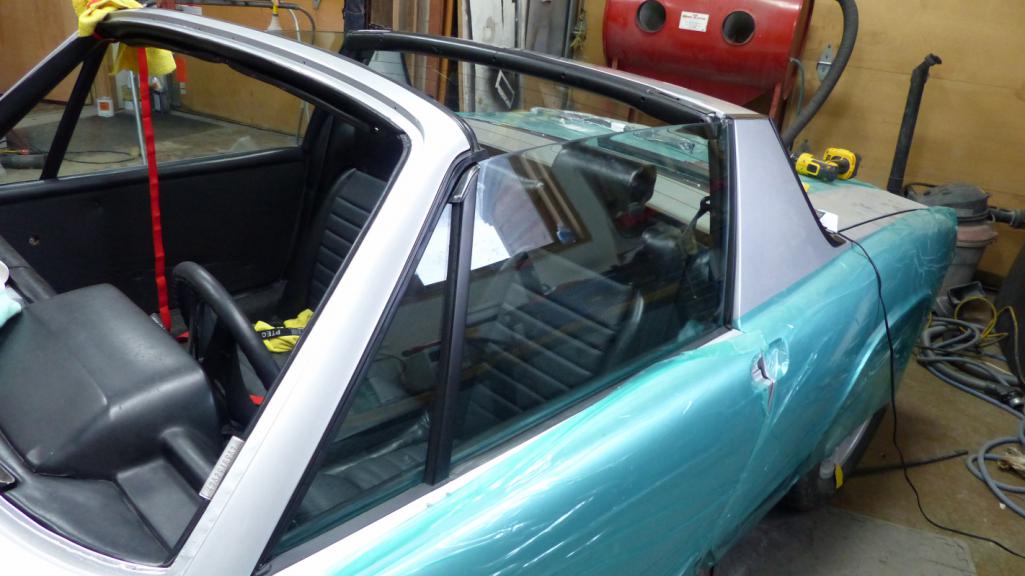 BTW, it took about eight hours for each side to adjust those windows, but they mate with the seals PERFECT. Couldn't be happier about that because I hate leaks and wind whistle. Here's another little item. I mentioned earlier that I'd say more about the fresh air outlet vents in the doors. Lesson learned the HARD way. When you install the RD door jambs, you REALLY need to fit those vent covers BEFORE painting the car. I discovered the lips needed to be hammered back to adjust the opening so the plastic vents would fit. There was not way to do that without damaging the paint. Here's the worst of them. At this point I have coated most of the damage with epoxy primer but remembered to grab the camera to show the chip flaked off that extends beyond the vent cover. 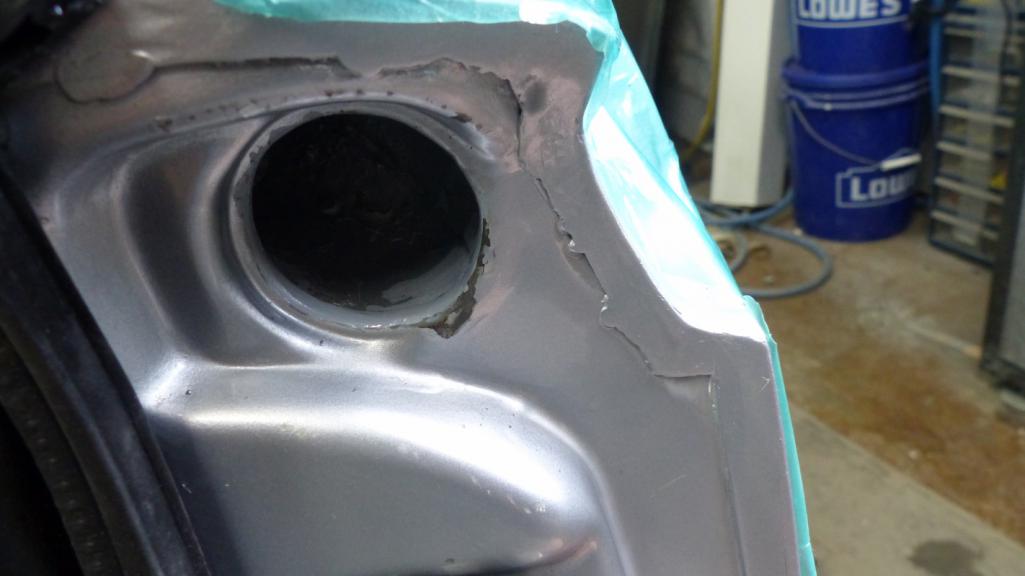 I used a touch-up brush to dab on some base coat over the primer, followed by clear. 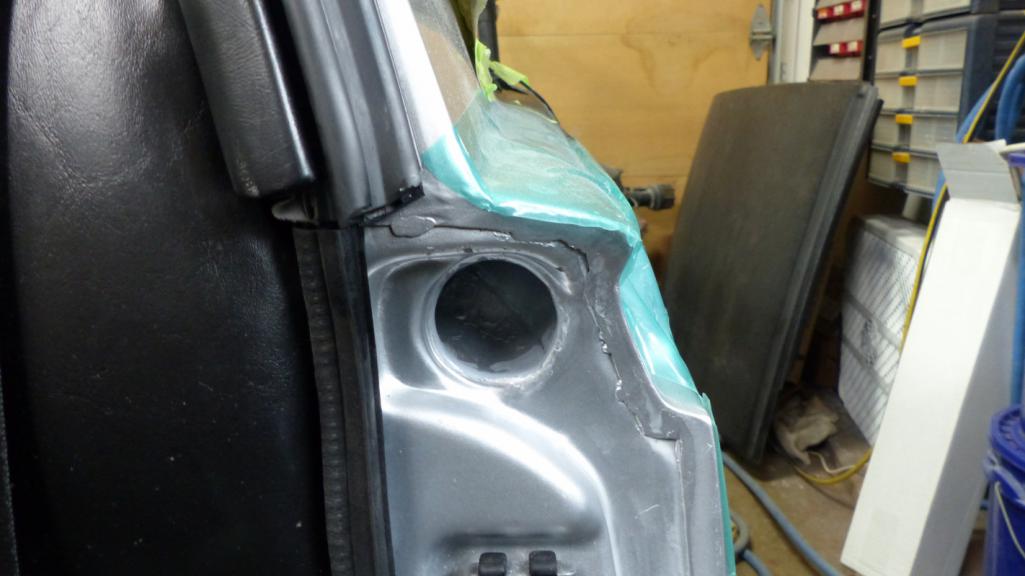 Then the cover pops on. Sure, you can still see it if you look for it, but it won't be noticeable, and if anybody does, I'm going to call them a dick. 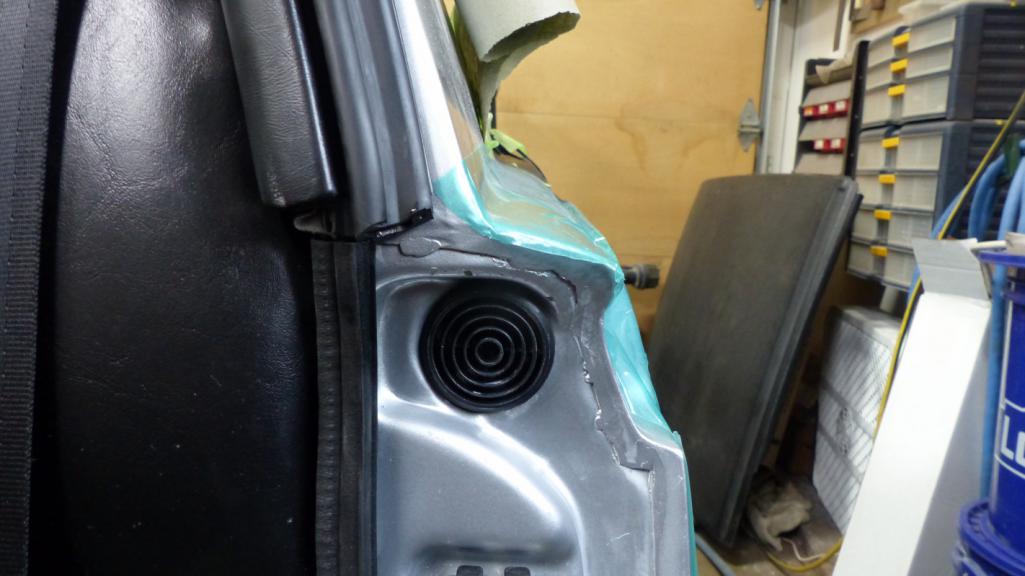 |
|
|
|
| bkrantz |
Mar 17 2020, 08:53 PM
Post
#1478
|
|
914 Guru Group: Members Posts: 8,689 Joined: 3-August 19 From: SW Colorado Member No.: 23,343 Region Association: Rocky Mountains |
Your black trim looks very good indeed. But it reminds me that I will be undoing blackened trim on mine in a few months.
|
|
|
|
| bbrock |
Mar 17 2020, 09:12 PM
Post
#1479
|
|
914 Guru Group: Members Posts: 5,269 Joined: 17-February 17 From: Montana Member No.: 20,845 Region Association: Rocky Mountains |
Last one for this update. Needed to do something about this cushion.
(IMG:http://www.914world.com/bbs2/uploads/post-20845-1578461718_thumb.jpg) The only cushion recover kit I could find was through AA. I had reservations but ordered it anyway. It's not like me to be nit picky (IMG:style_emoticons/default/lol-2.gif) but this thing was a bit of a disappointment. It's actually good quality and well made, but the vinyl doesn't match OEM. The vinyl that 914Rubber uses is a dead on replica of OEM and it is hard to tell the difference with them side by side. This cushion fabric has a noticeably flatter finish that stands out against the glossier original material. Hard to see in the photo, but it is quite noticeable. 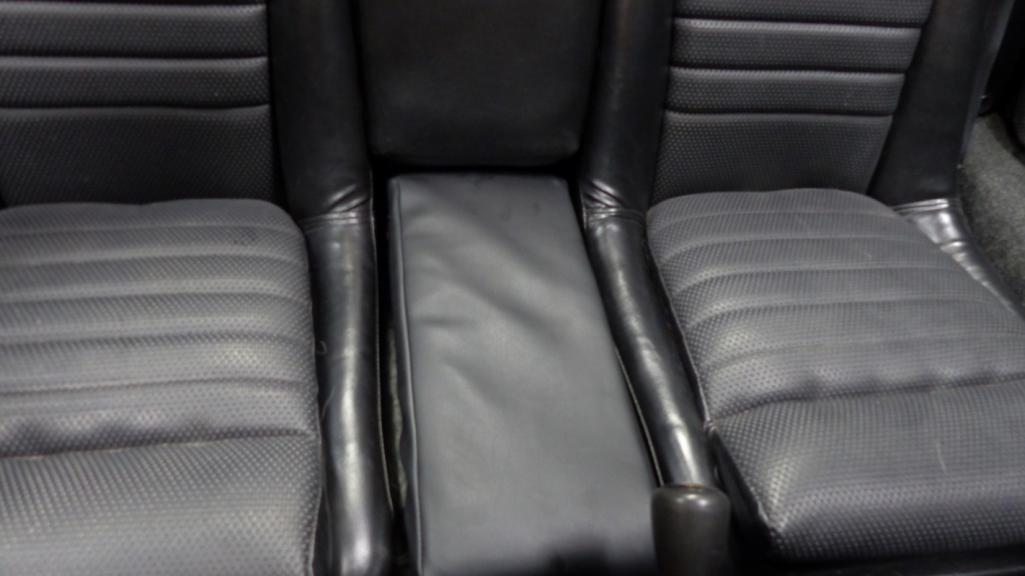 That really wasn't going to do so it was time to improvise. Seems like I've been polishing everything lately so why not try polishing vinyl? (IMG:style_emoticons/default/confused24.gif) I sprayed the fabric down with 303 Protectant and then ran my DA polisher over it with Chemical Guys finest #38 polish and a fine polish pad. That helped quite a bit but still doesn't quite have the sheen of the OEM material. I not a fan of "good enough" products. The 303 hadn't completely dried in this shot so it looks better here than after it dried. 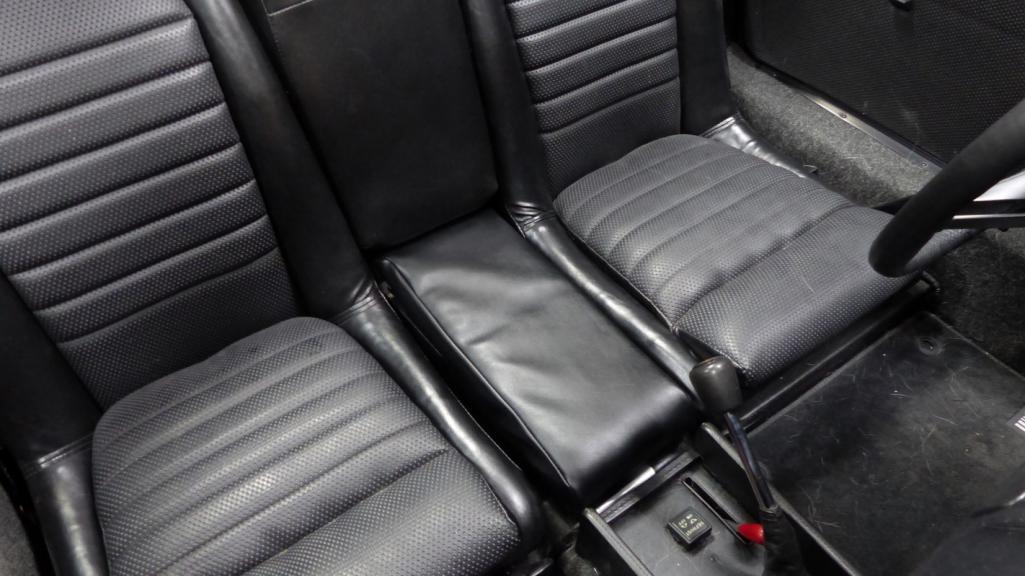 I was hoping the sheen might improve after stretching the vinyl on and a good steaming. First, I needed to replacy that split foam. 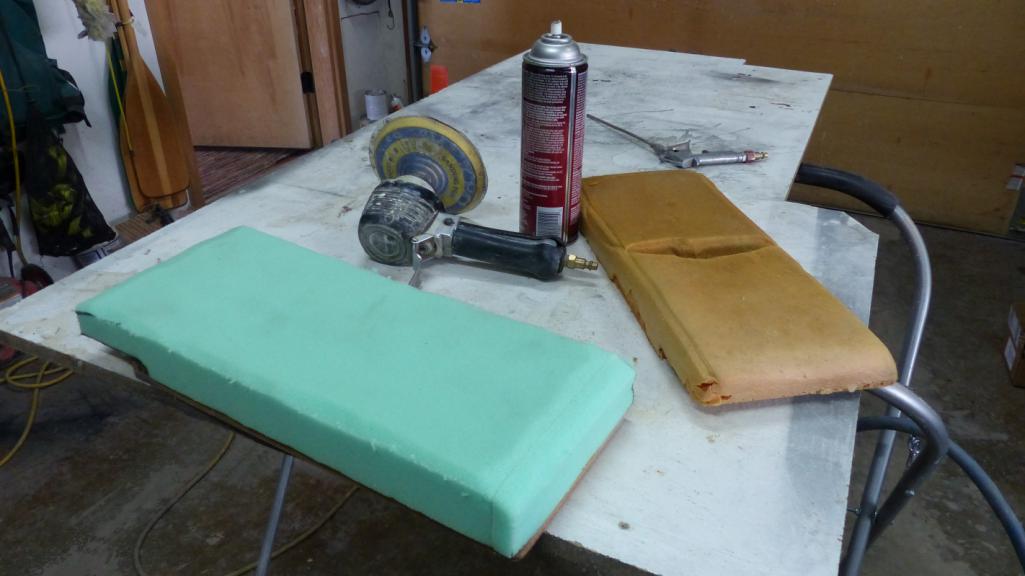 I found a treasure in the map pocket. A photo of Elizabeth's grandmother taken not long before she died. We must have driven the Porsche the last time we visited her and slipped the photo in the pocket and forgot about it.  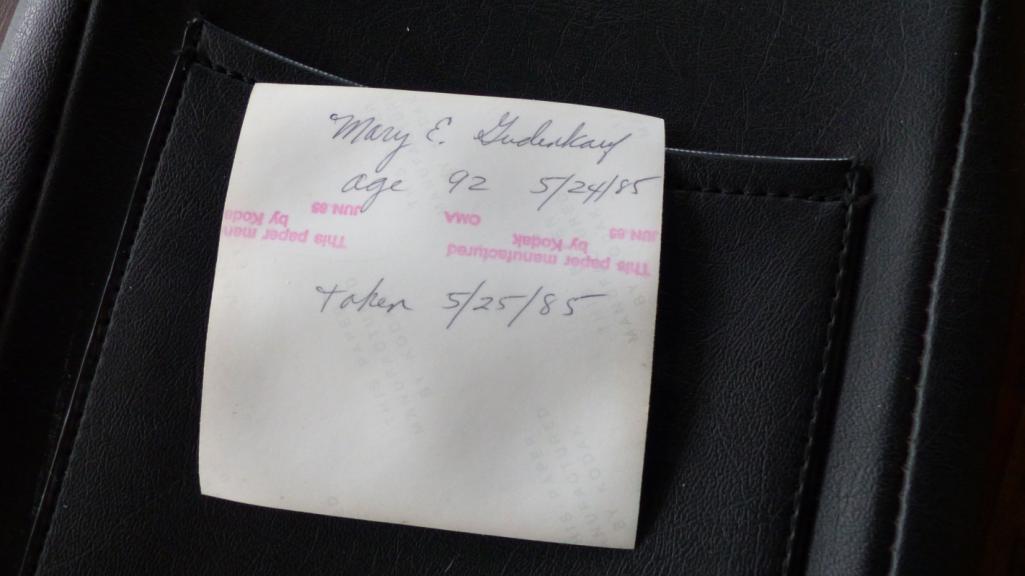 I'm happy to report that stretching the vinyl on followed but shrinking with the steam iron did improve the sheen. It still isn't a perfect match like the 914Rubber fabric but you have to look really close to tell it. The interior is beginning to look respectable. 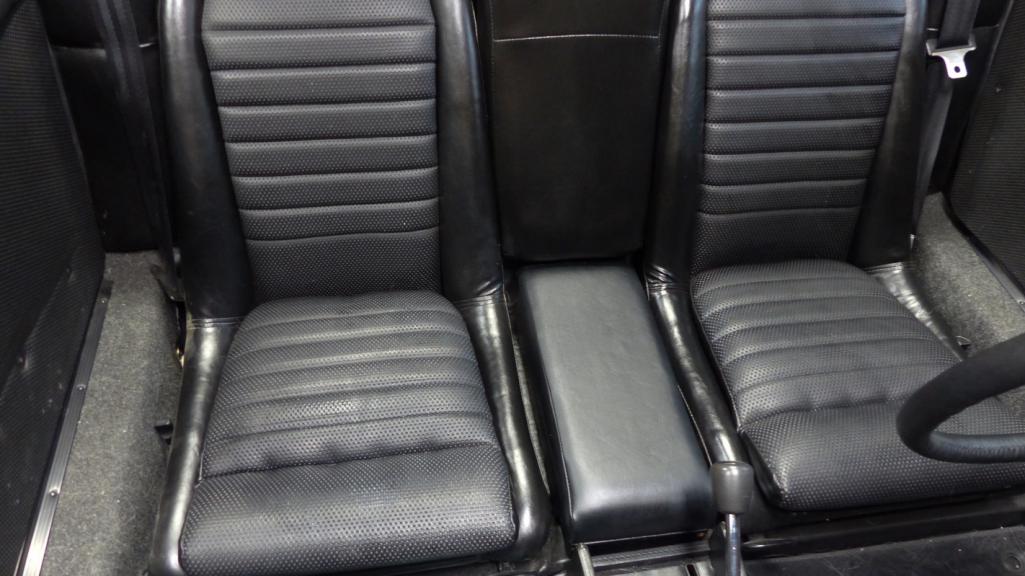 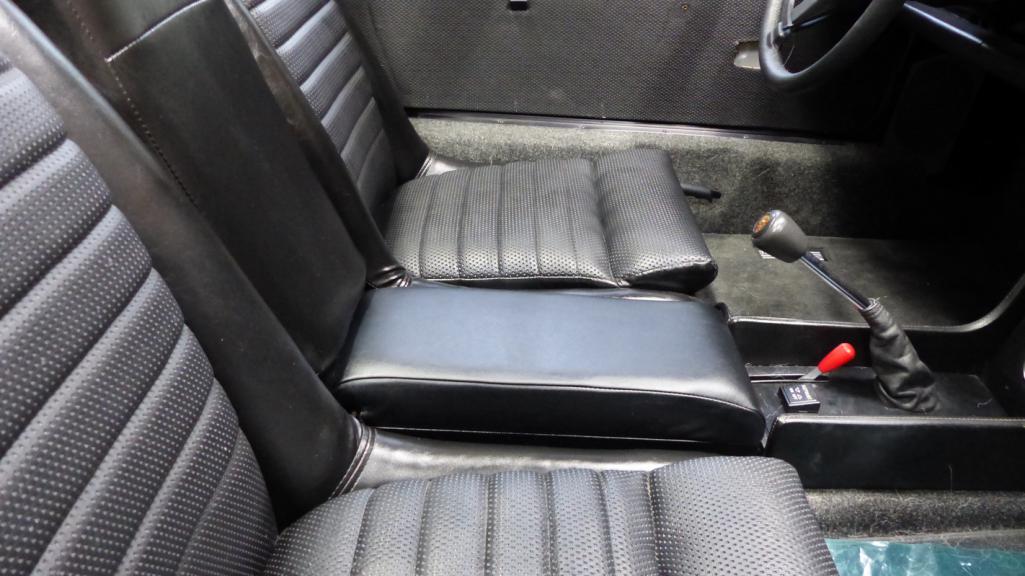 |
|
|
|
| bbrock |
Mar 17 2020, 09:19 PM
Post
#1480
|
|
914 Guru Group: Members Posts: 5,269 Joined: 17-February 17 From: Montana Member No.: 20,845 Region Association: Rocky Mountains |
QUOTE(tygaboy @ Mar 17 2020, 07:47 PM) Your black trim looks very nice. And I usually don't like it blacked out but yours really sets off nicely against that wonderful silver paint. (IMG:style_emoticons/default/smilie_pokal.gif) QUOTE(bkrantz @ Mar 17 2020, 07:53 PM) Your black trim looks very good indeed. But it reminds me that I will be undoing blackened trim on mine in a few months. Thanks guys. I do like the black against the silver. It's funny how the bright work looks better on most 914 colors but there are those few where the black looks really nice. I think Olympic blue is a color that shows either trim finish well. |
|
|
|
|
3 User(s) are reading this topic (3 Guests and 0 Anonymous Users)
0 Members:

|
Lo-Fi Version | Time is now: 12th May 2026 - 04:30 PM |
Invision Power Board
v9.1.4 © 2026 IPS, Inc.