|
|
|
Porsche, and the Porsche crest are registered trademarks of Dr. Ing. h.c. F. Porsche AG.
This site is not affiliated with Porsche in any way. Its only purpose is to provide an online forum for car enthusiasts. All other trademarks are property of their respective owners. |
|
|

  |

| euro911 |
 Apr 5 2020, 01:49 PM Apr 5 2020, 01:49 PM
Post
#1521
|
|
Retired & living the dream. God help me if I wake up!  Group: Members Posts: 8,937 Joined: 2-December 06 From: So.Cal. & No.AZ (USA) Member No.: 7,300 Region Association: Southern California |
I don't stop in here every day, but when I do, get to see a lot of progress and interesting new processes. Great work, and your car is looking spectacular (IMG:style_emoticons/default/beerchug.gif)
|
   |

 
|
| bbrock |
Apr 5 2020, 10:07 PM
Post
#1522
|
|
914 Guru Group: Members Posts: 5,269 Joined: 17-February 17 From: Montana Member No.: 20,845 Region Association: Rocky Mountains |
The Thrill of Victory and Agony of Defeat
As the title says, today was a day of progress and setbacks. A few weeks ago I was acused of nit picking on my car when I said the hood gaps didn't deserve the praise I was getting. That's because the headlight covers were flopping loose. The threads on the outer pivot pins got roached by the plater. In a case of perfect timing, somebody posted on another thread not to send the cast pins for plating for that reason, but it was posted WHILE mine were at the plating shop. Also, one of the plates that goes inside the fender for the pivot pin bolts went missing. First the plate. they are 14g which turned out to be a hard thickness to find in small quantities. Then I discovered that most Simpson Strong Tie fasteners for construction framing are 14g so I picked up the cheapest appropriate size plate for 76 cents. I went ahead and cut two plates. It doesn't hurt to have an extra. 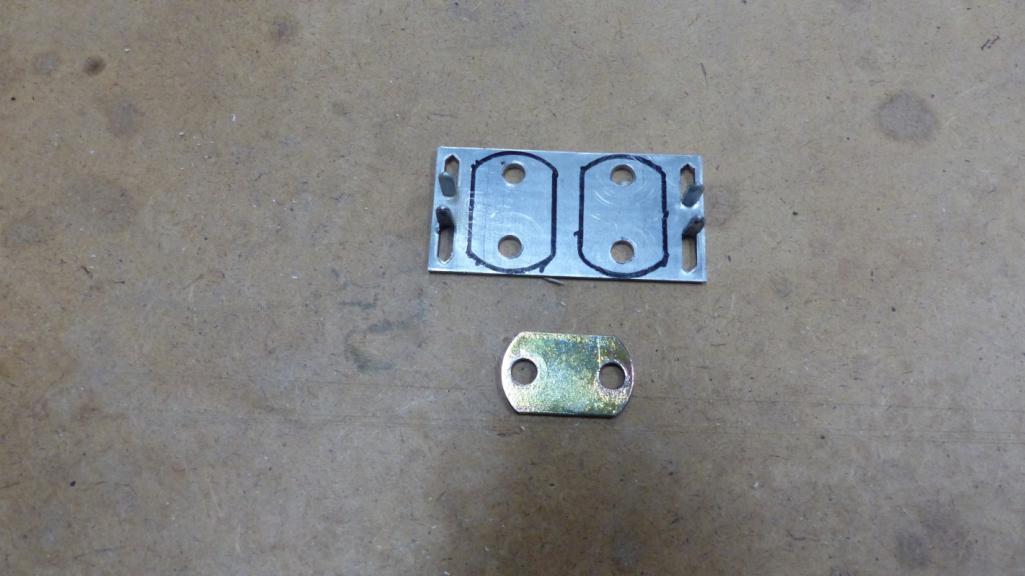 Then I plated them yesterday along with a few other parts. This may be my last zinc plating adventure. Something has gone bad with my plating bath and it is darn near impossible to plate parts now. I was lucky to get these done and they aren't my best work. 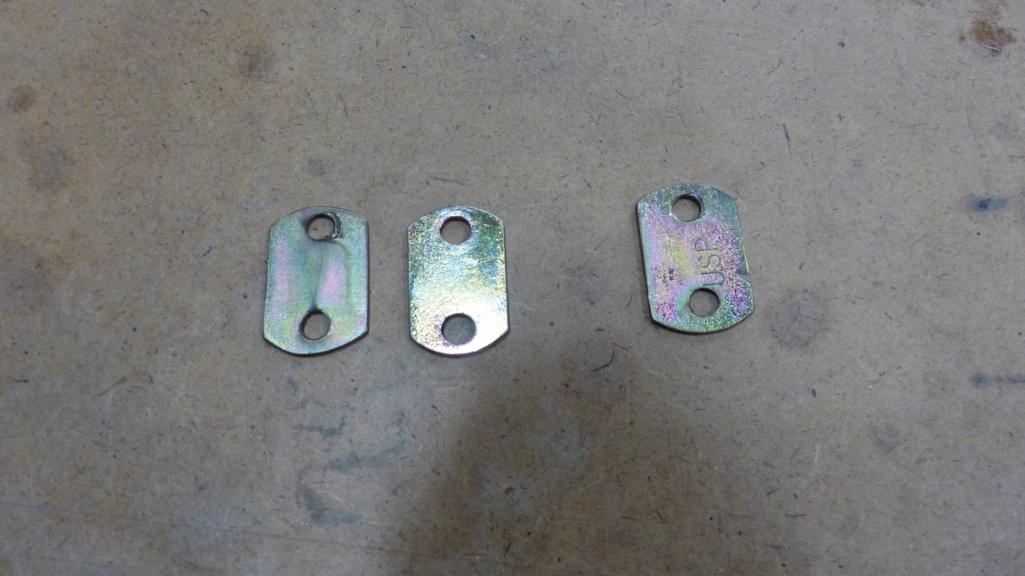 Next up was drilling out the dooshed-up pivots and inserting Helicoils. 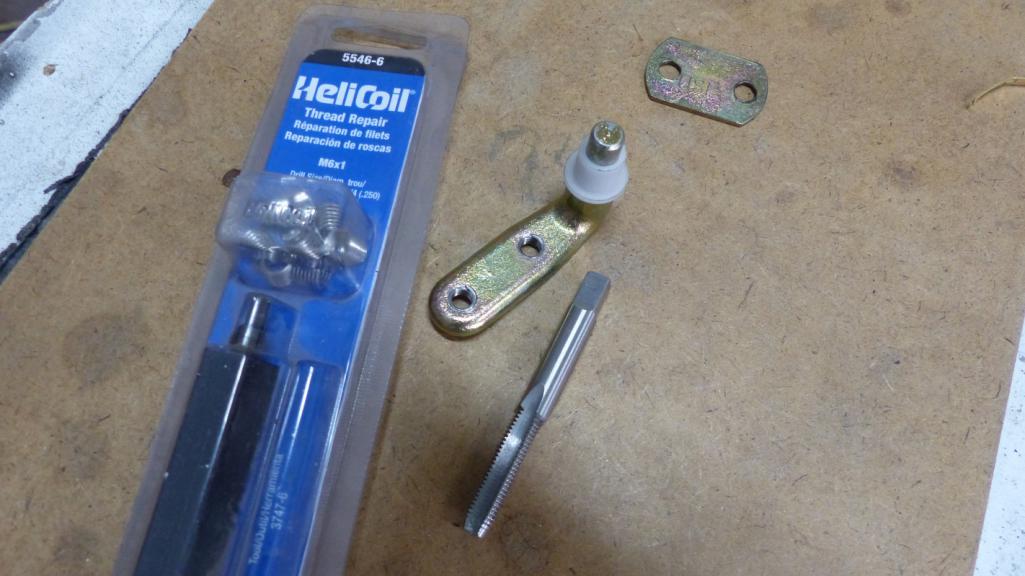 And after putting everything back together... NOW you may marvel at those gaps. (IMG:style_emoticons/default/shades.gif) 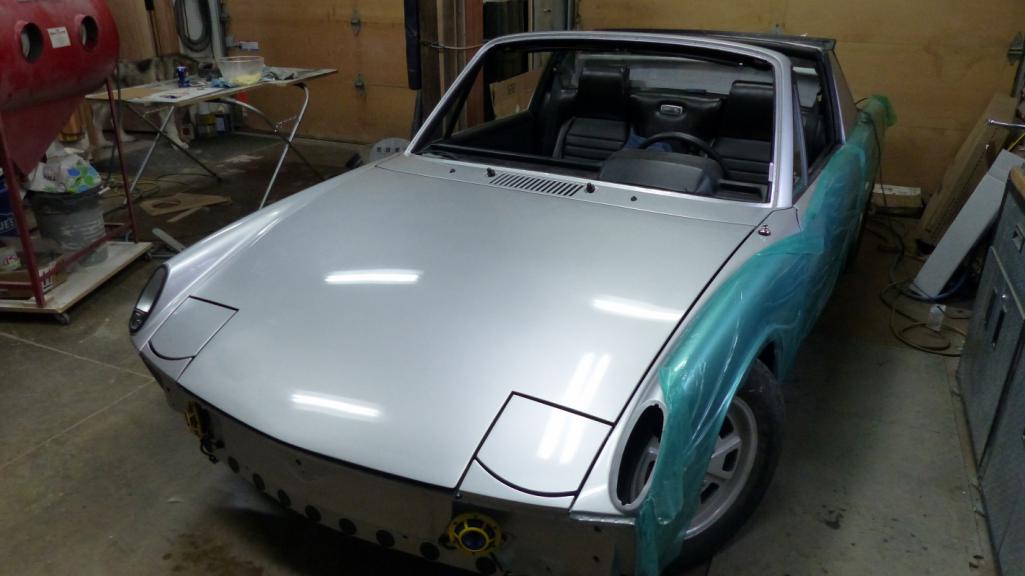 |
|
|
|
| bbrock |
Apr 5 2020, 10:42 PM
Post
#1523
|
|
914 Guru Group: Members Posts: 5,269 Joined: 17-February 17 From: Montana Member No.: 20,845 Region Association: Rocky Mountains |
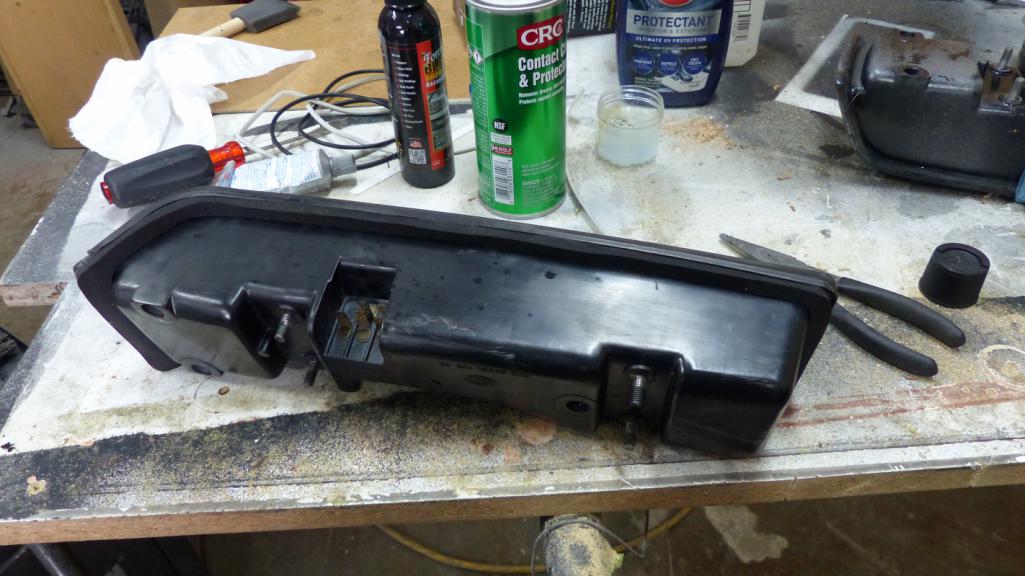
Now the main event for the day. I actually started this almost two months ago. The front signal buckets needed some love.
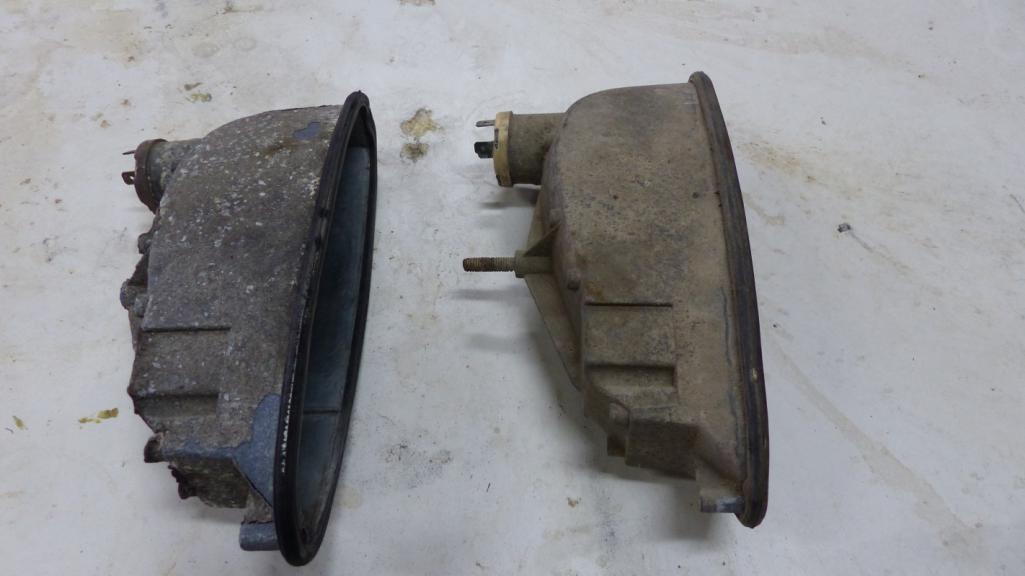  After bead blasting, wire wheeling, and spraying the interior with Spaz Stix Mirror Chrome, they don't look half bad. The Spaz Stix was the best stuff for restoring the reflectors I could find. There are good Youtube vides on it. The right way to used it is to first spray a high gloss black background and then spray the mirror on top. You get a near mirror reflective surface that way. I just cleaned the interior with alcohol and sprayed it directly over the dulled original surface. Works good enough for me.  At this point, the plan was to buy a DIY Euro turn signal conversion kit form Martin Baker but he didn't reply to my PMs so I finally decided to DIY from scratch. It's probably for the best because I have a feeling this virus is going to hit me in the wallet a few months from now, so probably better to watch my spending. This route only cost me time, but lots of it. First was making a cardboard pattern trying to fit the contour of the lens. 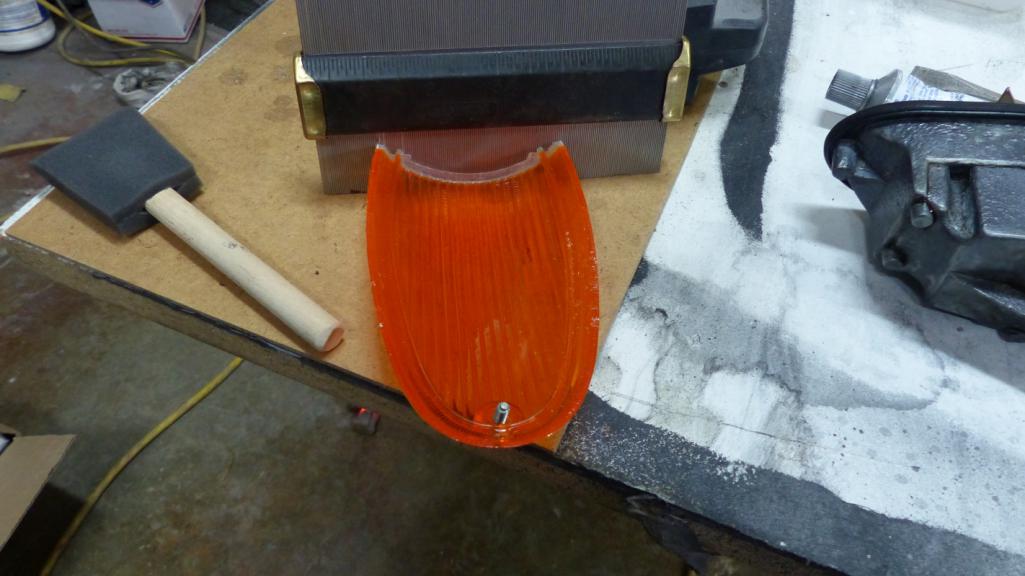 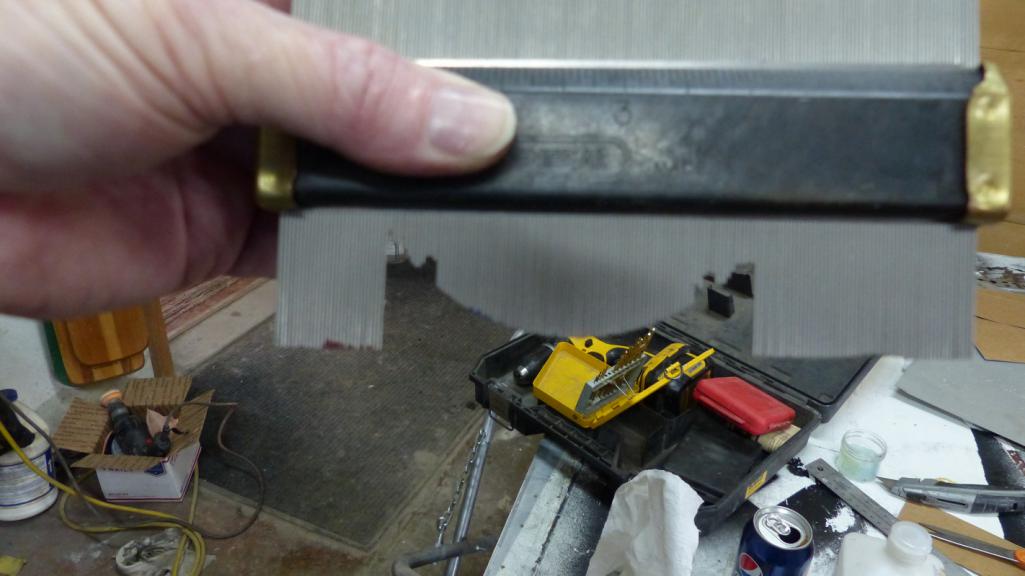 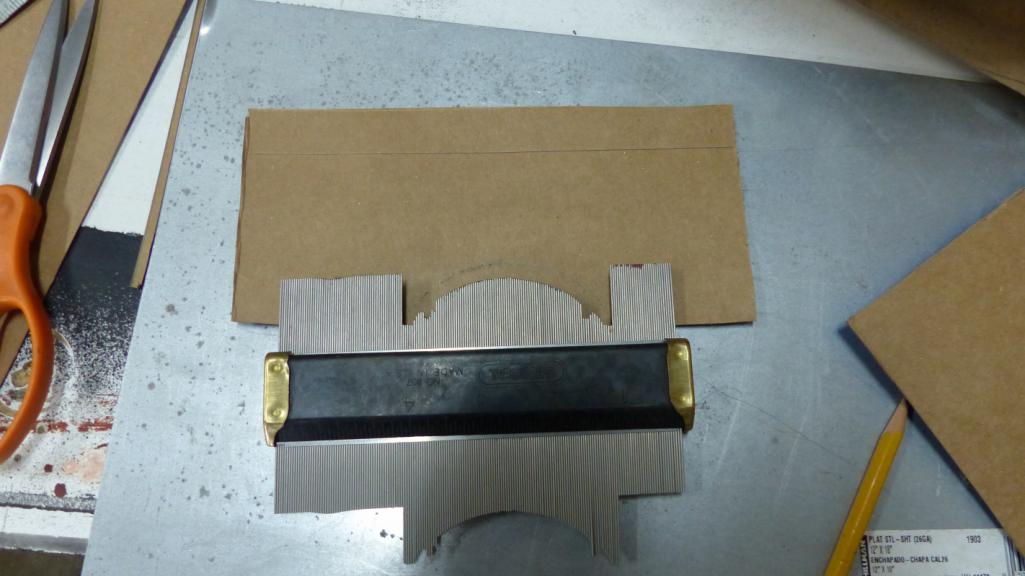 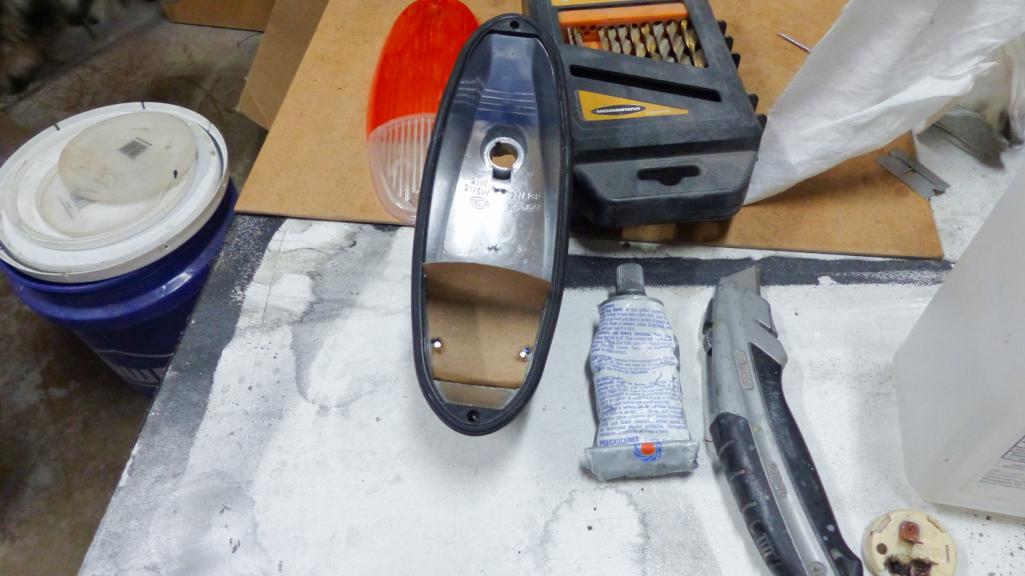 After a few tries, I got two decent brackets made out of 26g sheet. These were zinc plated later.  Next is making the little reflector thingies. I happened to have some mirrored aluminum sheet that has been laying around the shop for over a decade. Made a crude hammer form. This was version 1. I forgot to snap a pic of the version I used in action. 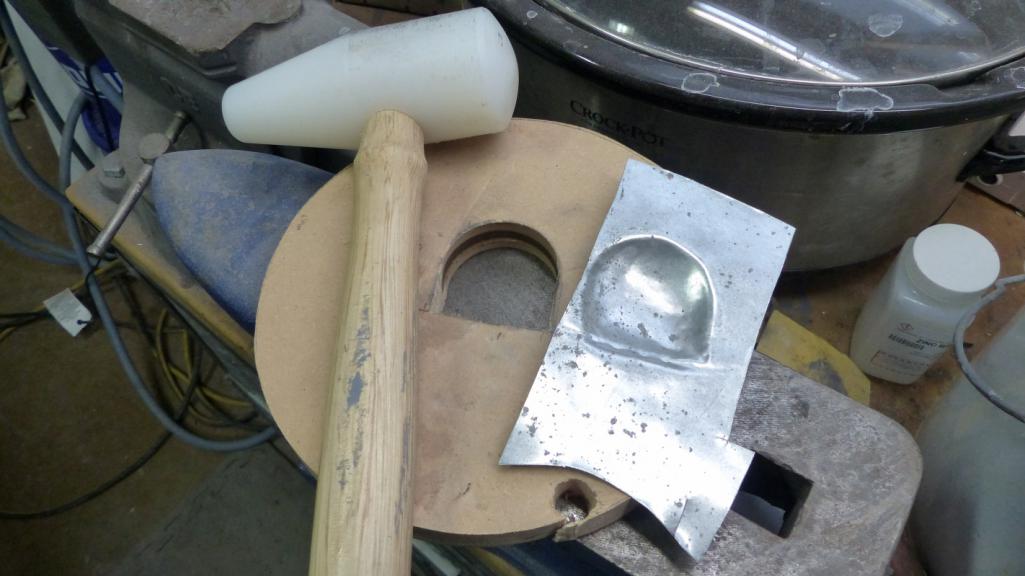 After much fiddling, I had all the parts ready to assemble. Boy, with all those failed versions lined up in front of the Masonite, this is starting to look like a Chris Baker film ( @tygaboy ) (IMG:style_emoticons/default/av-943.gif) 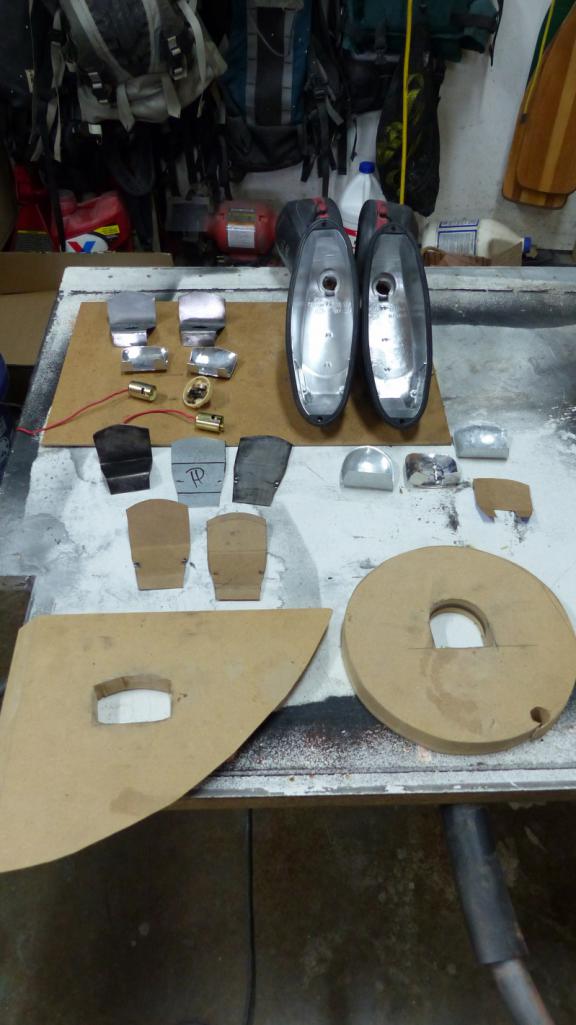 This is a shitty pic, but in the interest of making mods reversible, I disabled the original parking light by putting a double layer of insulating shrink wrap on the contacts. It didn't really matter for this one because that contact is about to break off anyway. But there it is.  |
|
|
|
| bbrock |
Apr 5 2020, 10:56 PM
Post
#1524
|
|
914 Guru Group: Members Posts: 5,269 Joined: 17-February 17 From: Montana Member No.: 20,845 Region Association: Rocky Mountains |
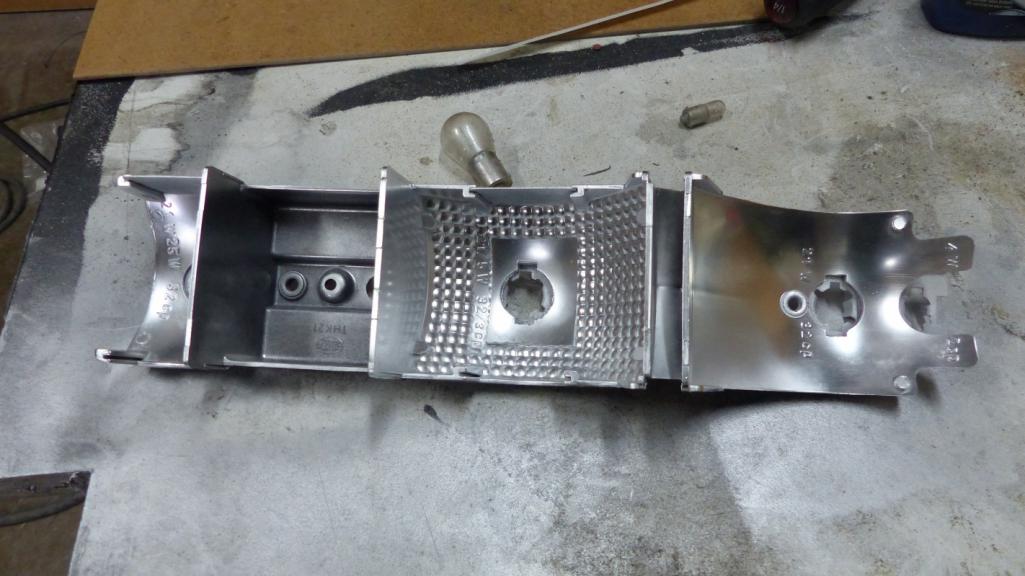
The pigtails on the sockets I bought were a tad too short so I had to splice on longer tails. I decided to hide the splices under the sockets. Pics of OEM Euro lights I've seen used white wire. The closes I had of the correct guage was white with yellow stripe. Close enough.
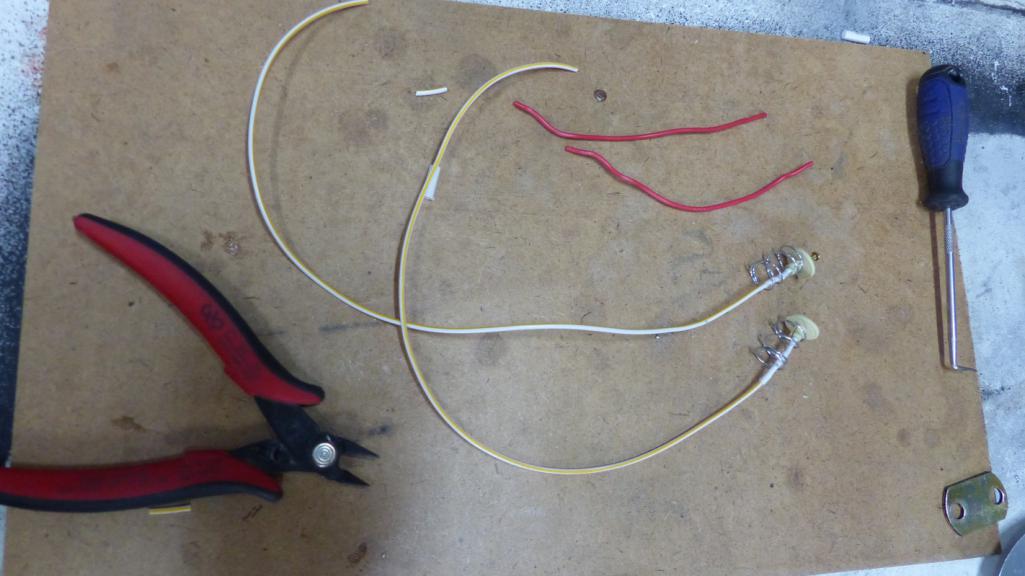 I forgot to take a pic of the sockets soldered in place. My plan was to solder on the reflectors too and I'm embarrassed to say I didn't know you couldn't solder aluminum. Now I do. (IMG:style_emoticons/default/blush.gif) So out came the pop riveter and again, I forgot to snap a pic. Again in the interest of reversible mods, I crimped a piggyback connector to the pigtails so it becomes plug and play with no soldering. 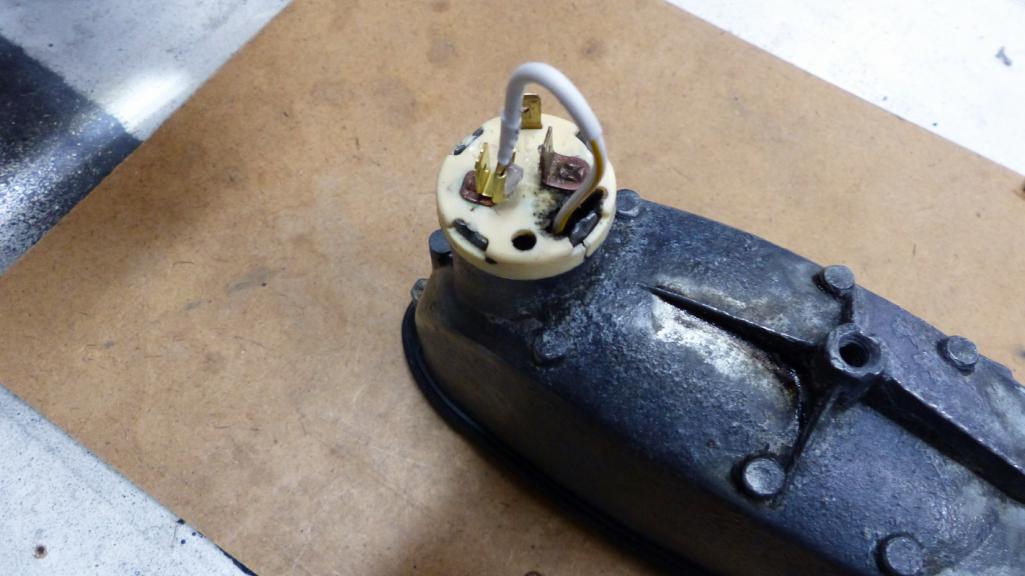 Here's the finished setup... almost. That isn't the correct bulb in there but it works for testing. You don't have to look hard to see these are homemade, but I'm not going to take the lenses off just so someone can make fun of me. If they ask me to, I'll call them a dick. 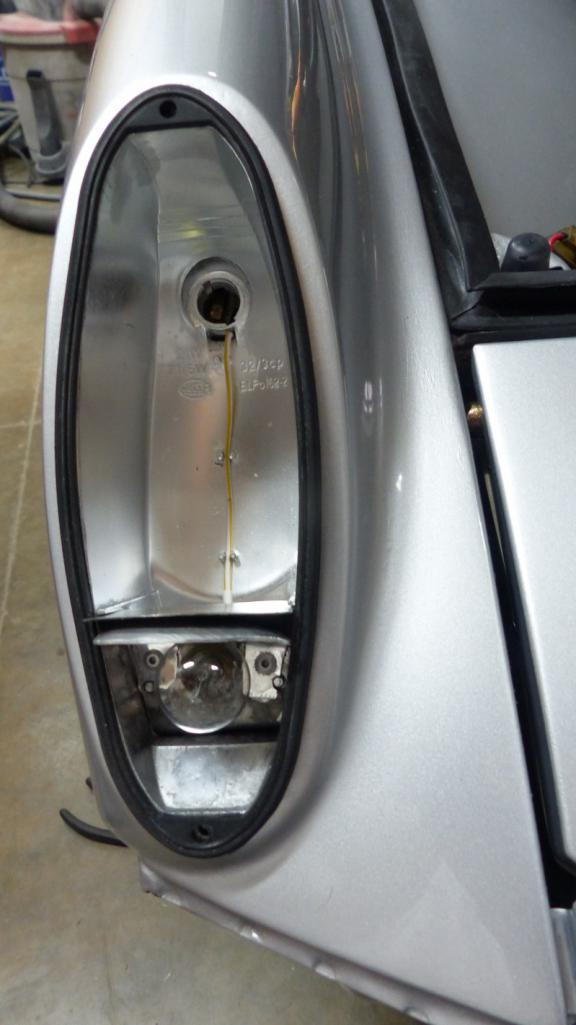 Okay, after wrestling to get the wires hooked up and the boot on the back, the bucket is remounted with hardware for the first time in three decades. Just need to screw the lens on. A few light turns of the screw driver and... *tink* DOH! (IMG:style_emoticons/default/headbang.gif) 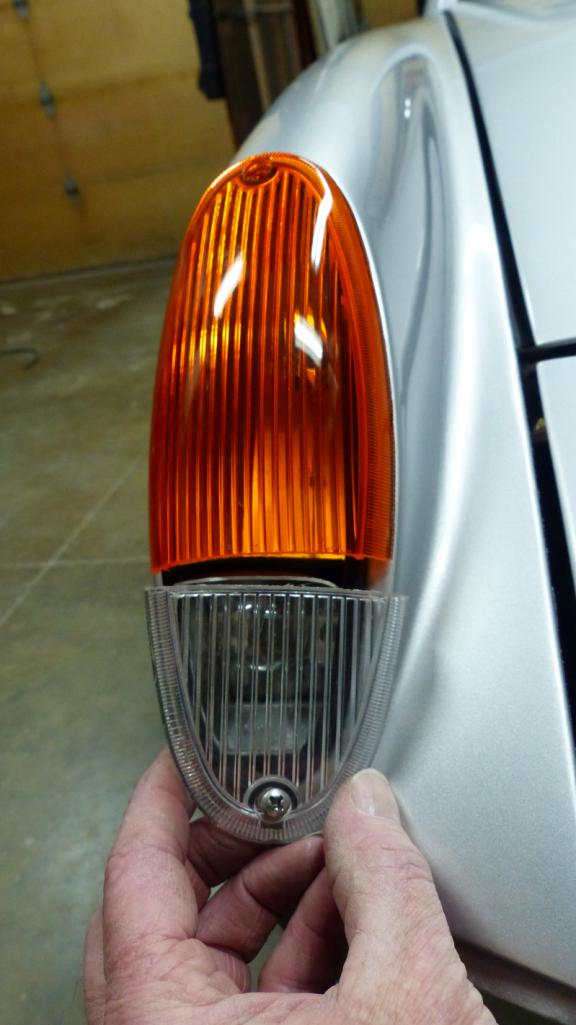 Turns out that I got the back of these things just a scooch too high and snapped the lens right at the seam. It's not as bad as it looks. These are 914Rubber repros and I have the proper solvent to fuse them back together. I'm a little concerned at how little pressure it took to break them apart though and wonder how long the other lens will last. At any rate, I have some more filing to do but that's where I left things tonight. You can't win 'em all. (IMG:style_emoticons/default/beer3.gif) |
|
|
|
| preach |
Apr 6 2020, 03:03 AM
Post
#1525
|
|
Ridge Runner Group: Members Posts: 1,100 Joined: 27-March 10 From: Live Free or Die Member No.: 11,513 Region Association: North East States |
Beautiful gaps man!
|
|
|
|
| defianty |
Apr 6 2020, 03:36 AM
Post
#1526
|
|
Senior Member Group: Members Posts: 659 Joined: 9-August 06 From: Essex, UK Member No.: 6,621 Region Association: None |
Top work Brent! Love the gaps (IMG:style_emoticons/default/clap56.gif)
|
|
|
|
| Superhawk996 |
Apr 6 2020, 06:06 AM
Post
#1527
|
|
914 Guru Group: Members Posts: 7,839 Joined: 25-August 18 From: Woods of N. Idaho Member No.: 22,428 Region Association: Galt's Gulch |
Love the hammer form work to make the reflectors to add 2nd euro bulb. (IMG:style_emoticons/default/beerchug.gif)
|
|
|
|
| mbseto |
Apr 6 2020, 07:23 AM
Post
#1528
|
|
Senior Member Group: Members Posts: 1,257 Joined: 6-August 14 From: Cincy Member No.: 17,743 Region Association: North East States |
Nice work!
|
|
|
|
| Cairo94507 |
Apr 6 2020, 08:00 AM
Post
#1529
|
|
Michael Group: Members Posts: 10,628 Joined: 1-November 08 From: Auburn, CA Member No.: 9,712 Region Association: Northern California |
Amazing gaps for sure. I love your euro-light conversion work. Looking forward to the picture of them illuminated. (IMG:style_emoticons/default/beerchug.gif)
|
|
|
|
| UROpartsman |
Apr 6 2020, 01:23 PM
Post
#1530
|
|
Member Group: Members Posts: 301 Joined: 22-October 15 From: Simi Valley, CA Member No.: 19,288 Region Association: None |
It's not original at all, but some restoration guys say if you're trying to maximize the light output of old tail lights or turn signals, spray painting the inside of the reflector white provides more output than using rattle can silver or chrome.
Just depends if you're trying to achieve originality or safety. |
|
|
|
| bbrock |
Apr 6 2020, 01:48 PM
Post
#1531
|
|
914 Guru Group: Members Posts: 5,269 Joined: 17-February 17 From: Montana Member No.: 20,845 Region Association: Rocky Mountains |
QUOTE(UROpartsman @ Apr 6 2020, 12:23 PM)  It's not original at all, but some restoration guys say if you're trying to maximize the light output of old tail lights or turn signals, spray painting the inside of the reflector white provides more output than using rattle can silver or chrome. Just depends if you're trying to achieve originality or safety. Yes! There is actually a lot of data on that from the horticulture world. That's why I didn't worry about trying to get a mirror finish. Mirrors are for focusing light but for reflecting and scattering light, flat white is king. Flat silver comes very close. What I did sort of splits the baby between originality and efficiency. |
|
|
|
| tygaboy |
Apr 6 2020, 02:08 PM
Post
#1532
|
|
914 Guru Group: Members Posts: 5,824 Joined: 6-October 15 From: Petaluma, CA Member No.: 19,241 Region Association: Northern California |
Attached image(s) 
|
 |
|
| KELTY360 |
Apr 6 2020, 02:31 PM
Post
#1533
|
|
914 Neferati Group: Members Posts: 5,189 Joined: 31-December 05 From: Pt. Townsend, WA Member No.: 5,344 Region Association: Pacific Northwest |
It used to be that the highest praise around here was to be called an asshat....now it’s getting Brent to call you a dick.
I think I have a new purpose in life! (IMG:style_emoticons/default/cheer.gif) |
|
|
|
| tygaboy |
Apr 6 2020, 04:07 PM
Post
#1534
|
|
914 Guru Group: Members Posts: 5,824 Joined: 6-October 15 From: Petaluma, CA Member No.: 19,241 Region Association: Northern California |
QUOTE(bbrock @ Apr 5 2020, 09:42 PM) After much fiddling, I had all the parts ready to assemble. Boy, with all those failed versions lined up in front of the Masonite, this is starting to look like a Chris Baker film ( @tygaboy ) (IMG:style_emoticons/default/av-943.gif) https://www.youtube.com/watch?v=j1wjvP-raOI |
|
|
|
| raynekat |
Apr 6 2020, 08:44 PM
Post
#1535
|
|
Advanced Member Group: Members Posts: 2,171 Joined: 30-December 14 From: Coeur d'Alene, Idaho Member No.: 18,263 Region Association: Pacific Northwest |
"Okay, after wrestling to get the wires hooked up and the boot on the back, the bucket is remounted with hardware for the first time in three decades. Just need to screw the lens on. A few light turns of the screw driver and... *tink* "
DOH! (IMG:style_emoticons/default/headbang.gif) Brent, if I were you, I'd just go ahead and break the other lense right now and get it out of your system. Then you won't have to worry about it needlessly at at a later time. (IMG:style_emoticons/default/smile.gif) (IMG:style_emoticons/default/lol-2.gif) Everything looks great as usual you mad scientist. (IMG:style_emoticons/default/w00t.gif) |
|
|
|
| bbrock |
Apr 6 2020, 10:24 PM
Post
#1536
|
|
914 Guru Group: Members Posts: 5,269 Joined: 17-February 17 From: Montana Member No.: 20,845 Region Association: Rocky Mountains |
You guys are hilarious (IMG:style_emoticons/default/av-943.gif)
After doing a bit of filing, the other lens fits fine (no "tink"). Figured I'd better take one last pic before I preemptively break it. (IMG:style_emoticons/default/smile.gif) When I get the correct bulbs, I'll take a pic of them lit up. I did test them, but I'm afraid these bulbs will melt the lens. 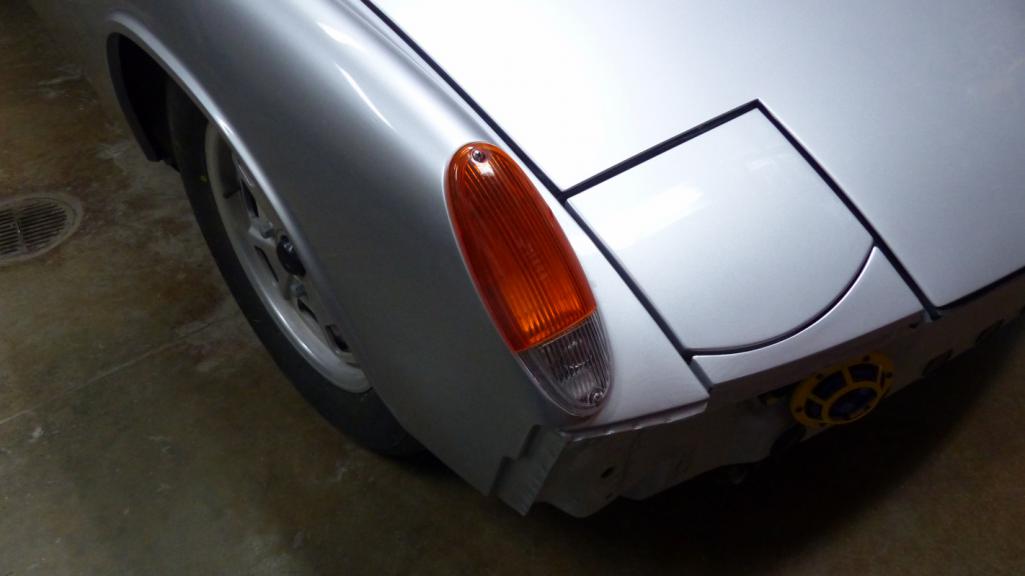 Now for the tail lights. To call this overspray ios an understatement. It looked more like just spray. 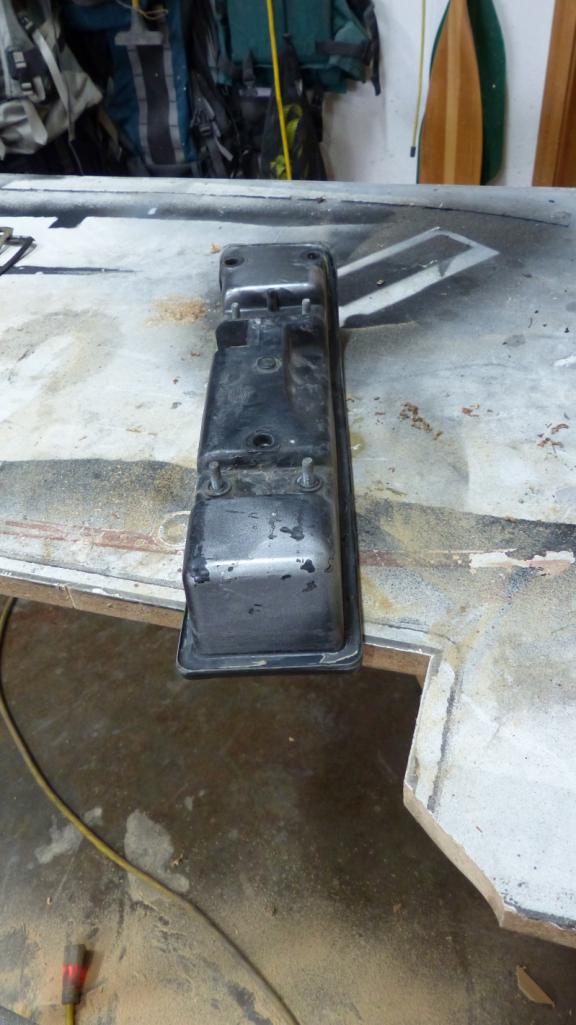 I know people hate to use it, but I prefer brake fluid for getting paint off the plastic. Everything else I've tried tends to attack the plastic. It takes a long time, but it does work. 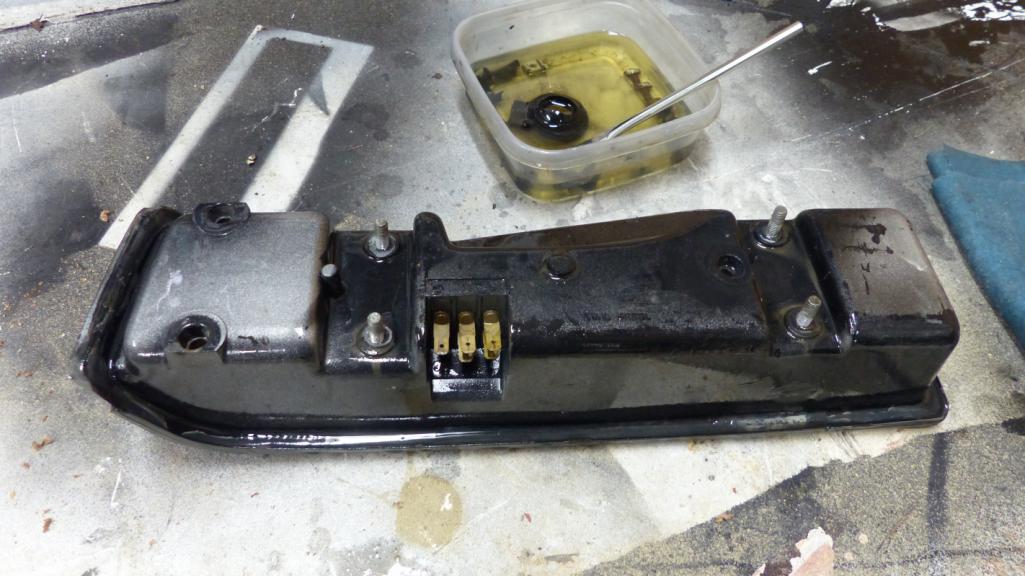 Getting the reflectors out took some work. The bulb receptacles just snap in but they are stiff and being almost 50 years old, I was being extra careful. They all came out just fine though. 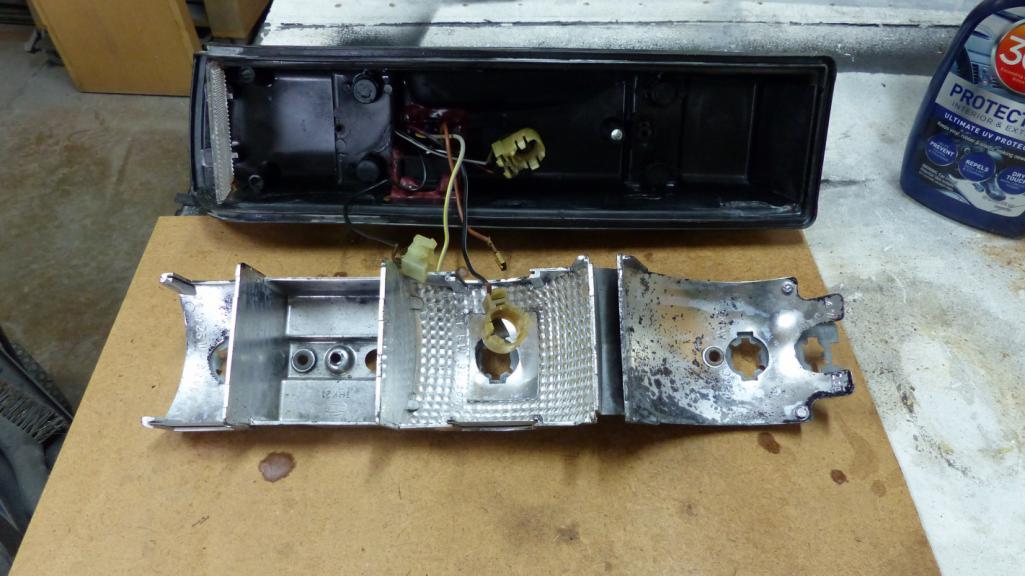 And after a few light coats of Spaz Stix. 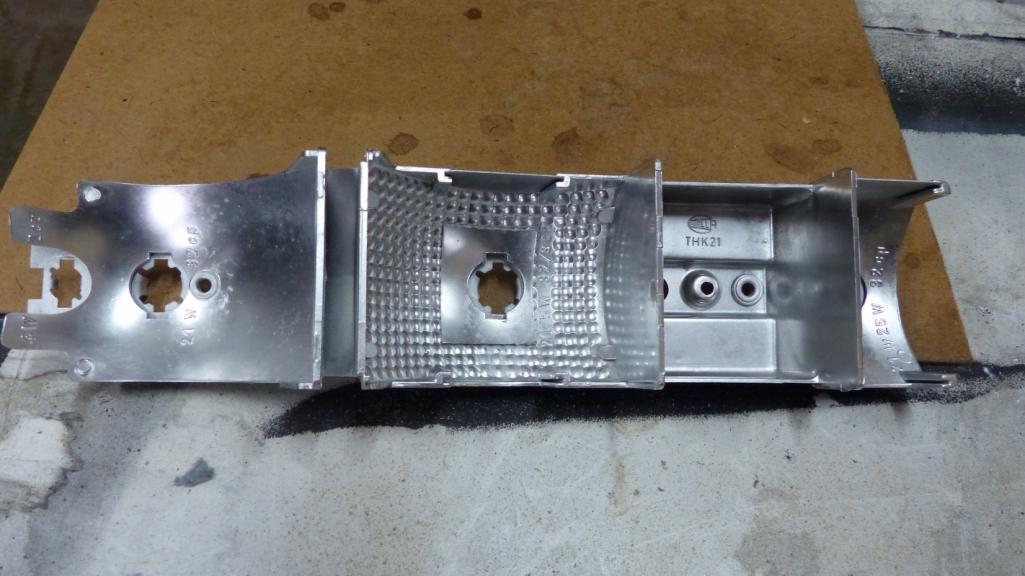 Now here was a dissapointment. The 914Rubber tail lens gasket material is shockingly unacceptable. To start, they are black where the originals are white and that does show through the lenses. Original: 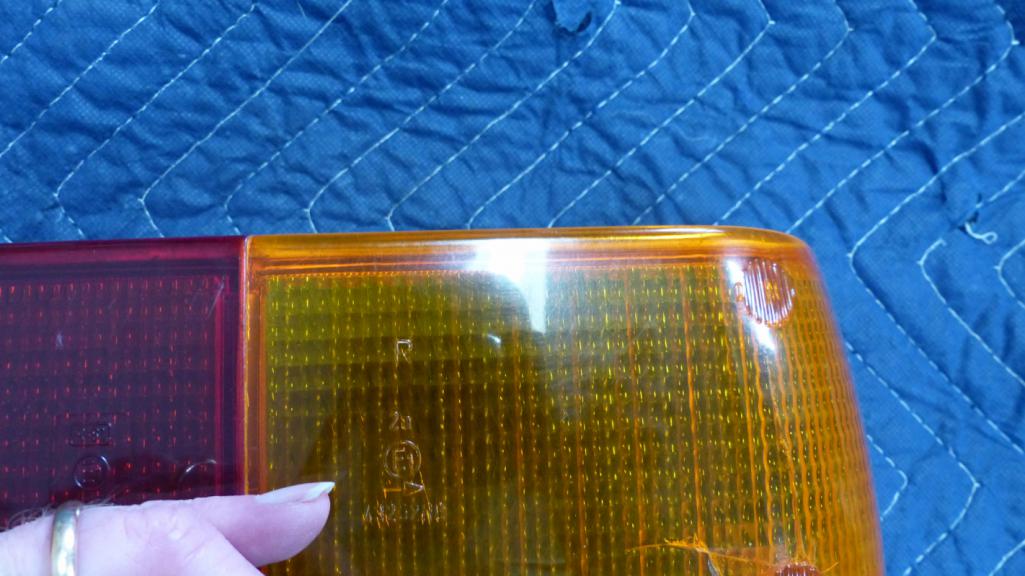 914Rubber: 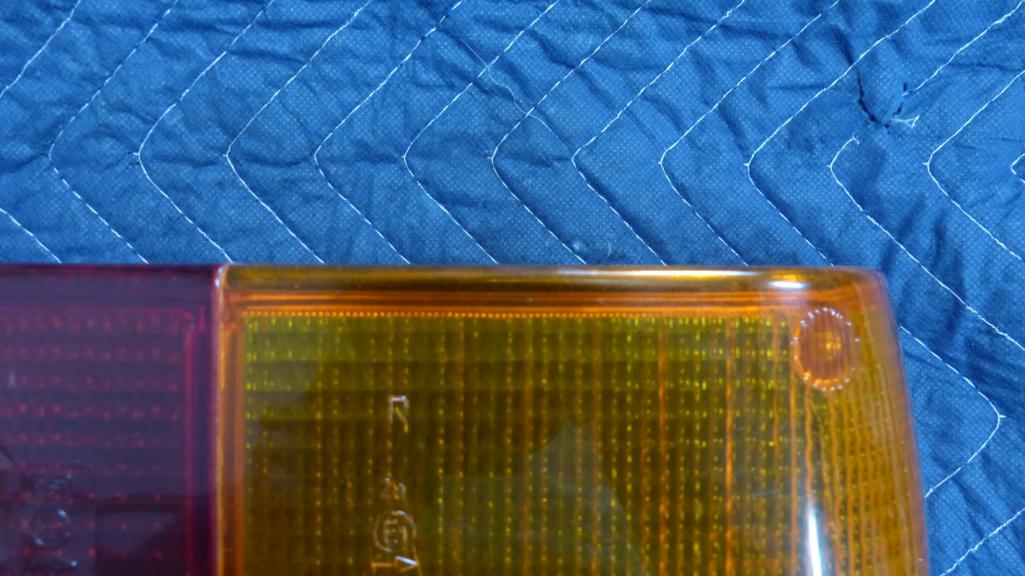 Yes, that is nit picking and I could have lived with that, but it is worse. The replacement material is both harder and smaller diameter than original. So much smaller in diameter that they fall out of the grooves were the originals are a snug fit. 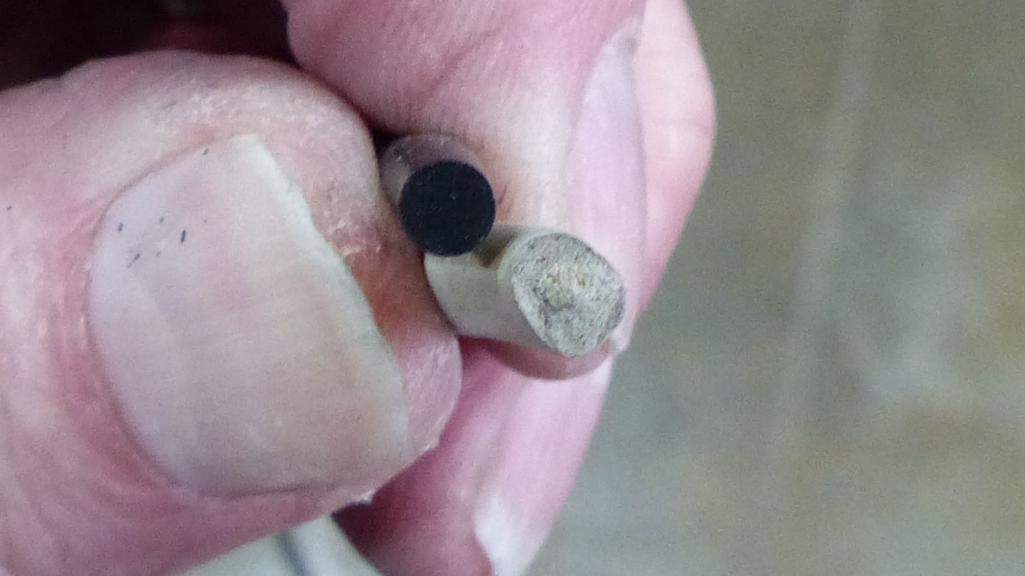 On top of that, they cut the damn things way too short! |
|
|
|
| bbrock |
Apr 6 2020, 10:26 PM
Post
#1537
|
|
914 Guru Group: Members Posts: 5,269 Joined: 17-February 17 From: Montana Member No.: 20,845 Region Association: Rocky Mountains |
Here's how the originals line up.
 And you can see the replacements are over an inch short. 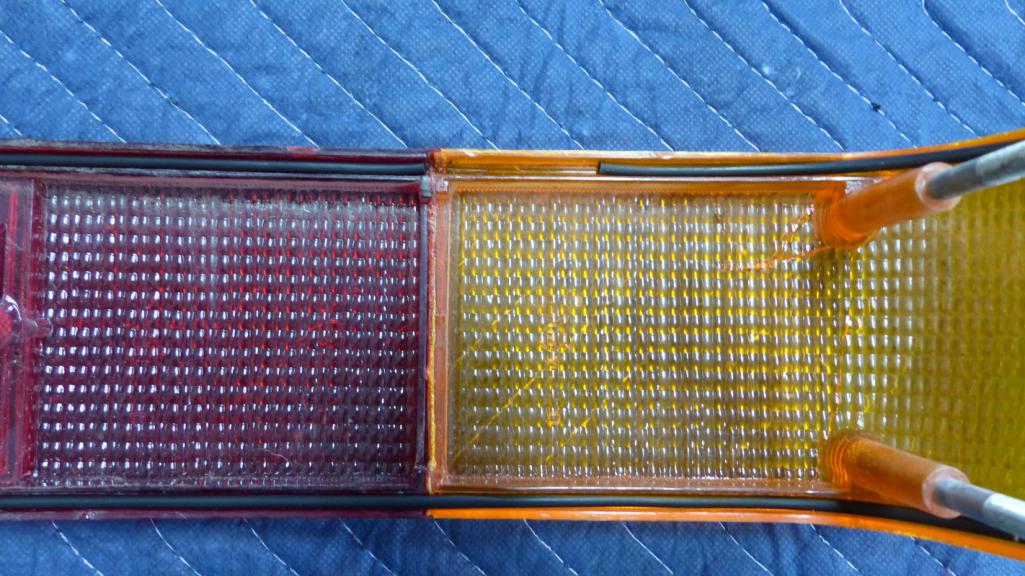 I love 914Rubber, but these are not even close to being usable. I'm going to give the AA gaskets a try. |
|
|
|
| bbrock |
Apr 6 2020, 10:32 PM
Post
#1538
|
|
914 Guru Group: Members Posts: 5,269 Joined: 17-February 17 From: Montana Member No.: 20,845 Region Association: Rocky Mountains |
Housings and reflectors spiffed up.
  And installed. 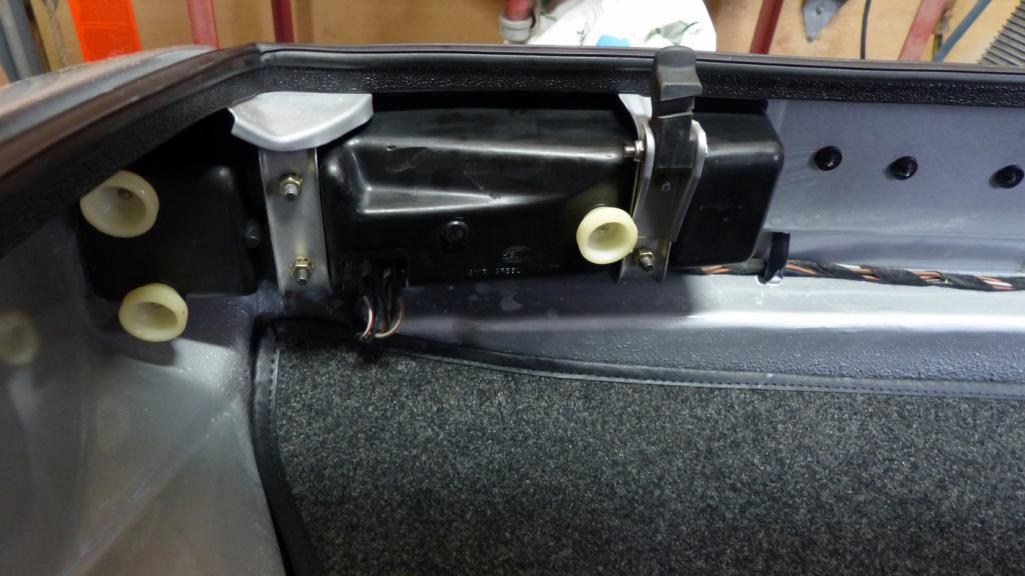 The PET shows rubber washers between the housings and brackets and the yellow tag reminds me to install them when they arrive. 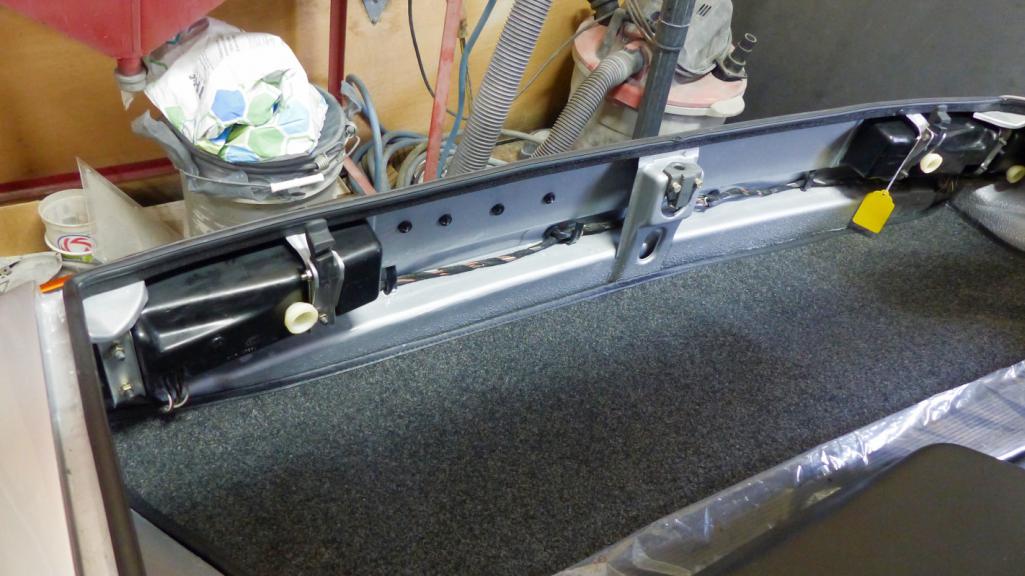 And the money shot. 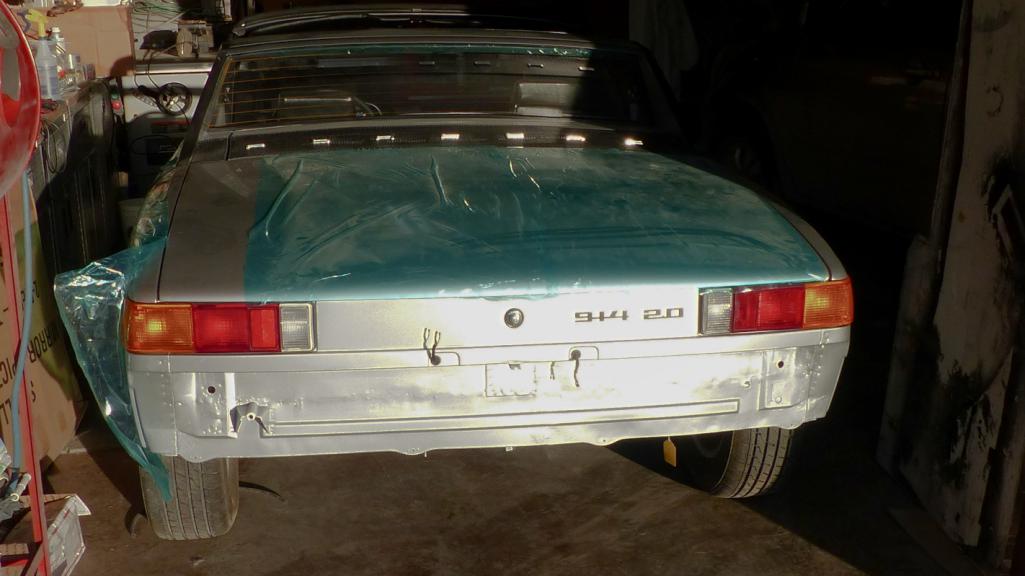 |
|
|
|
| 914_7T3 |
Apr 6 2020, 10:36 PM
Post
#1539
|
|
Please forgive me, I'm new to all of this! Group: Members Posts: 1,898 Joined: 3-April 17 From: Los Angeles, CA Member No.: 20,991 Region Association: Southern California |
QUOTE(bbrock @ Apr 6 2020, 09:26 PM) I love 914Rubber, but these are not even close to being usable. I'm going to give the AA gaskets a try. Looking good! The AA ones fit really well and work great as a replacement. |
|
|
|
| bbrock |
Apr 6 2020, 10:45 PM
Post
#1540
|
|
914 Guru Group: Members Posts: 5,269 Joined: 17-February 17 From: Montana Member No.: 20,845 Region Association: Rocky Mountains |
QUOTE(914_7T3 @ Apr 6 2020, 09:36 PM) QUOTE(bbrock @ Apr 6 2020, 09:26 PM) I love 914Rubber, but these are not even close to being usable. I'm going to give the AA gaskets a try. Looking good! The AA ones fit really well and work great as a replacement. Good to know. Thanks! (IMG:style_emoticons/default/thumb3d.gif) BTW, I'm not convinced I have the right flasher. I need to get a full set of bulbs and do some testing. |
|
|
|
|
2 User(s) are reading this topic (2 Guests and 0 Anonymous Users)
0 Members:

|
Lo-Fi Version | Time is now: 12th May 2026 - 04:45 PM |
Invision Power Board
v9.1.4 © 2026 IPS, Inc.