|
|
|
Porsche, and the Porsche crest are registered trademarks of Dr. Ing. h.c. F. Porsche AG.
This site is not affiliated with Porsche in any way. Its only purpose is to provide an online forum for car enthusiasts. All other trademarks are property of their respective owners. |
|
|

  |

| andrewb |
 Jun 24 2020, 03:40 PM Jun 24 2020, 03:40 PM
Post
#1641
|
|
Member  Group: Members Posts: 114 Joined: 25-May 10 From: UK Member No.: 11,762 Region Association: None |
Missing the updates. Where are you Brent ?
The clue is in the second verse. https://www.youtube.com/watch?v=vneYZMjtYZk |
   |

 
|
| raynekat |
Jun 24 2020, 05:31 PM
Post
#1642
|
|
Advanced Member Group: Members Posts: 2,171 Joined: 30-December 14 From: Coeur d'Alene, Idaho Member No.: 18,263 Region Association: Pacific Northwest |
That Brent guy? Huh...must be hunting season in big sky or something? Or he's nursing a family of wolves back to health. Brent...he's that kind of guy.
|
|
|
|
| Dion |
Jun 24 2020, 06:19 PM
Post
#1643
|
|
RN Group: Members Posts: 2,926 Joined: 16-September 04 From: Audubon,PA Member No.: 2,766 Region Association: MidAtlantic Region |
He’s good, talked with him last nite. He finally had to do his real job.
Which I thought was teaching us how to restore cars, apparently he gets paid to do some other important things. (IMG:style_emoticons/default/laugh.gif) |
|
|
|
| bbrock |
Jun 24 2020, 06:45 PM
Post
#1644
|
|
914 Guru Group: Members Posts: 5,269 Joined: 17-February 17 From: Montana Member No.: 20,845 Region Association: Rocky Mountains |
https://www.youtube.com/watch?v=uBxMPqxJGqI You guys crack me up. Yes, I'm still ticking. Nothing as exciting as bears or wolves but I did almost step on a moose on our property the other day. Yes, I know that sounds impossible but it really did happen. The truth is mundane. Like Dion said, I've been buried with a contract job that had me working late and through weekends. I've been picking away at the car but nothing very newsworthy. @Superhawk996 stopped by for a long chat last night. I kept him here way too late yacking about cars and solving the world's problems, but I'm glad he took the time to stop. I didn't even have to call him a dick! I did get the bumpers media blasted but weather hasn't been cooperative enough to get the rocker covers and valances done. I've been working on straightening the bumpers to prep for paint. Windshield is on order. The glass shop isn't charging me shipping if I have it sent with one of their regular orders but COVID has slowed things down so orders are less frequent. I called last week and he said he was "getting close." I also ordered some black gel coat to refinish the targa top. Going to try McMark's method on that. I've got a few other projects in the works I think you'll like but not ready to report. That's it. Hoping to get back to work in earnest. Thanks for the concern. It makes me feel special. |
|
|
|
| Superhawk996 |
Jun 24 2020, 09:41 PM
Post
#1645
|
|
914 Guru Group: Members Posts: 7,839 Joined: 25-August 18 From: Woods of N. Idaho Member No.: 22,428 Region Association: Galt's Gulch |
Brent and his wife are always such gracious hosts. Thank you. (IMG:style_emoticons/default/beerchug.gif)
Brent’s car looks even better in person and has come so far since last year! You can totally tell that his paying work is getting in the way of his teaching about the finer points of 914 restoration (IMG:style_emoticons/default/biggrin.gif) Got’s his priorities all messed up. (IMG:style_emoticons/default/screwy.gif) So many little details that are well done that I have no intention of trying to duplicate on my jalopy. I even managed to get back to MI by sunset tonight even though I stayed far too late enjoying Brents company: Time flies with great company! (IMG:style_emoticons/default/driving.gif) |
|
|
|
| bbrock |
Jun 24 2020, 10:10 PM
Post
#1646
|
|
914 Guru Group: Members Posts: 5,269 Joined: 17-February 17 From: Montana Member No.: 20,845 Region Association: Rocky Mountains |
Glad you are home safe and thanks for the visit. You are most welcome anytime! (IMG:style_emoticons/default/beerchug.gif)
|
|
|
|
| sixnotfour |
Jun 25 2020, 12:41 AM
Post
#1647
|
|
914 Wizard Group: Members Posts: 11,242 Joined: 12-September 04 Member No.: 2,744 Region Association: NineFourteenerVille |
QUOTE So many little details that are well done that I have no intention of trying to duplicate on my jalopy. that is exactly why my fav. of my 914s is redrum.. Nice Visit...I got to get out more.... |
 |
|
| bbrock |
Jul 15 2020, 09:39 PM
Post
#1648
|
|
914 Guru Group: Members Posts: 5,269 Joined: 17-February 17 From: Montana Member No.: 20,845 Region Association: Rocky Mountains |
Okey Dokey, let's kick this thing up again. Life's been hectic but I've been making progress and actually finished (almost) a project so that will be our Top story of the night.
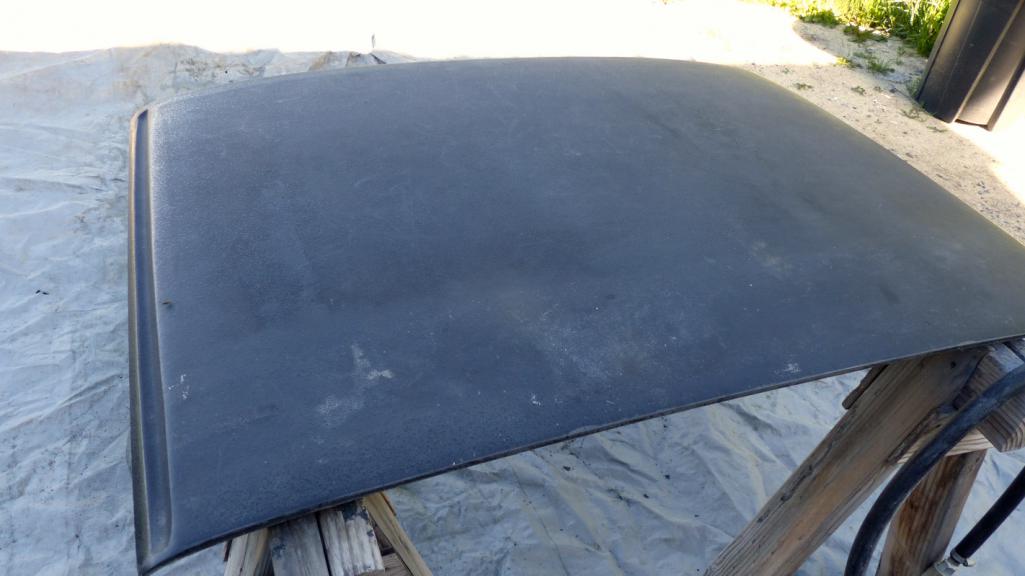 Now, I know about the body schutz treatment to restore the texture of the targa top, but after I saw McMark's method using gelcoat, I though, "hey, that looks like a lot more work. I think I'll do that!" Okay, there's more to it. No offense to those who use body schutz. I'm sure it looks fine, but that strikes me more as creating a faux finish than a faithful restoration of the top. So... I set about learning how to spray gelcoat. But first, I had to prep the top with a thorough scrubbing with Dawn dish soap followed by 2-3 wipe downs with dewaxer and silicone remover. Then I broke out the DA. 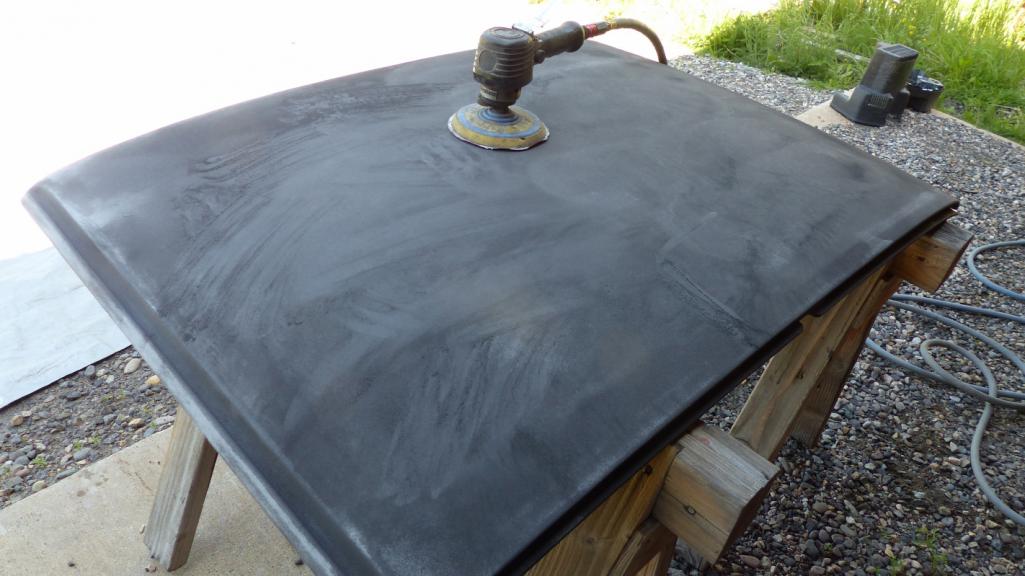 After sanding, I filled a few hairline cracks around the edges with 2K glazing compound. If there was larger damage, I would have used reinforced filler but I think I'll be fine. Here it is ready for gelcoat and here's my kit: 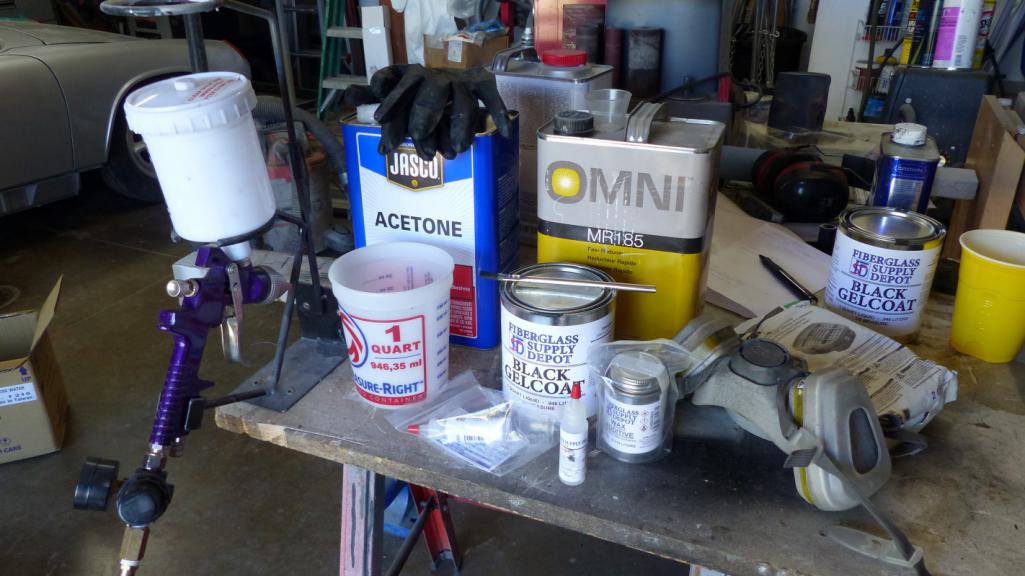 It includes the gelcoat, MEKP hardener, 2K urethane reducer left over from painting the car (MEK can be used as reducer but several forums said urethane reducer was better), wax additive for the final coat (that seals the coat from air so it cures hard), and acetone for cleanup. Mark mention flattening agent in his post but couldn't remember what he used when I asked. All I could find online was hella expensive and I could find no info on mix ratios. My local auto paint shop just gave me a blank stare when I asked. Forums said you could use talcum powder so I gave it a try. Testing was done WITHOUT hardener so I didn't waste anymore product than necessary and easier cleanup. Three things I needed to experiment with; sheen, thinning, and texture. For the spray gun, I drilled out my cheap HF gun to 2.0mm following this vid. It worked great but when I sprayed my first test on cardboard, I wasn't getting the size of droplets I wanted and it was spraying on too smooth. I decided to try drilling out the gun just a little more. That was the perfect solution.... for ruining the gun (IMG:style_emoticons/default/dry.gif) Yes, there is a limit to how big you can go. I was about to run into town to buy another cheap gun when I remembered my old ancient pressure pot gun that had gathered dust for 35 years. Why buy a new gun when I could ruin another? I stuck to the 2mm size this time and it worked. I still wasn't getting the texture I wanted on the cardboard. Turned out the problem was the cardboard that soaks up the gelcoat and flattens it out. The secret to the texture was to have the pressure as low as you can go and still push the mix out the nozzle, and hold the gun back farther than normal. I experimented with a couple mixes with talcum powder to flatten the sheen but in the end, the sheen straight out of the can looked closest to the original. Just to be sure, I mixed a couple slugs with hardener to test if it hardened with the same sheen. Unflattened is on the left. 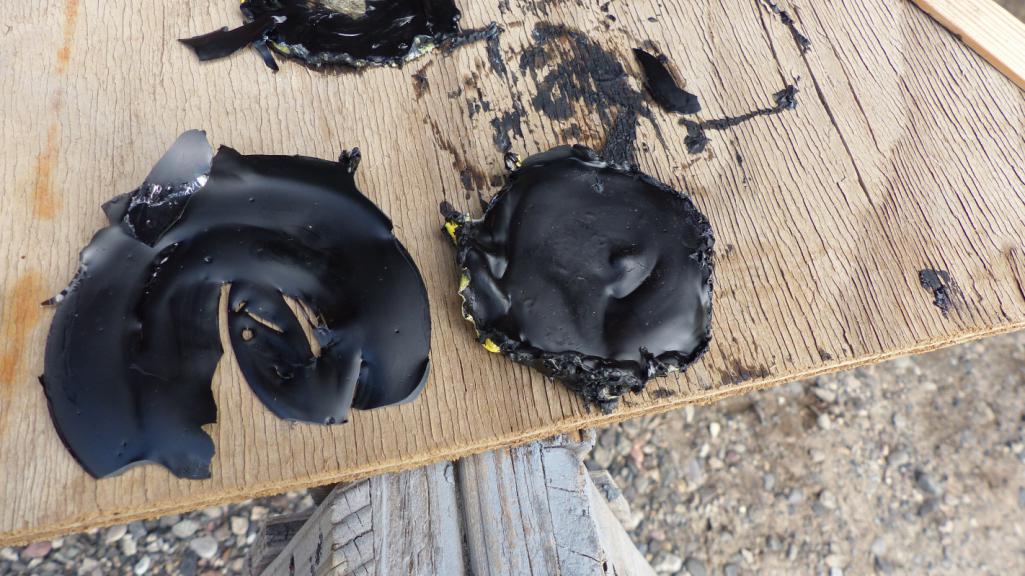 I sprayed two coats thinned about 10% to get base cover and then quit for the day because too many bugs were landing in the wet gelcoat. Better to spray in the morning when it was too cool for most of them. After calling it quits, the wife caught me napping. 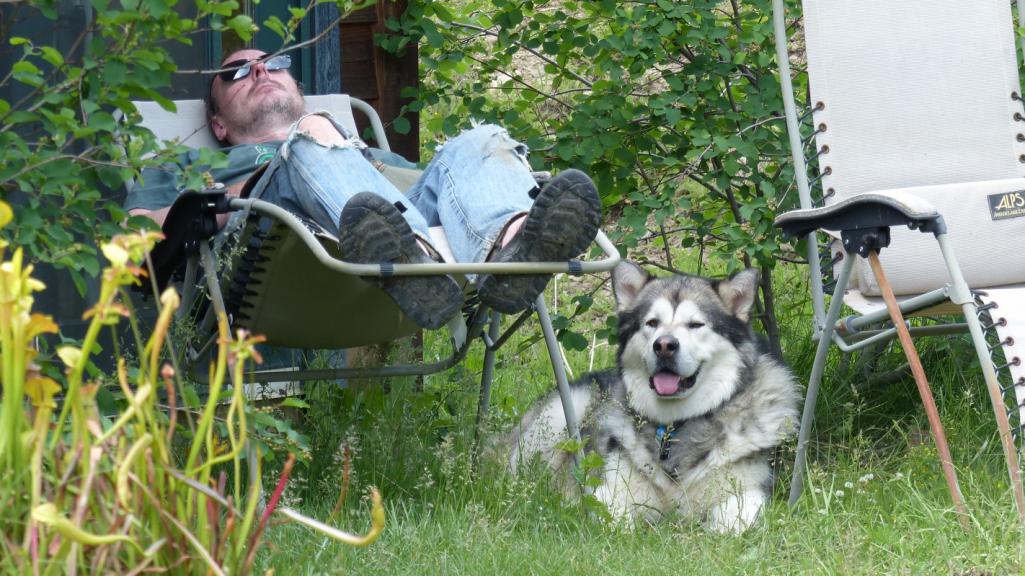 Next morning I finished the spray and let it bake in the sun for the afternoon. Again, the final coat got wax added to seal out oxygen which inhibits hardening. I thinned the texture coats about 8% but should have stuck with 10. When the gun spit big drops, they didn't flatten out and had to be sanded off after things had set. I started with very light sanding with 400 and worked to 1500. Overall, I'm happy with the texture. I think it is just a little tighter than the original but I think most people would have to see it side-by-side with another top to notice. Be my guest, but I'll call you a dick (IMG:style_emoticons/default/rolleyes.gif) 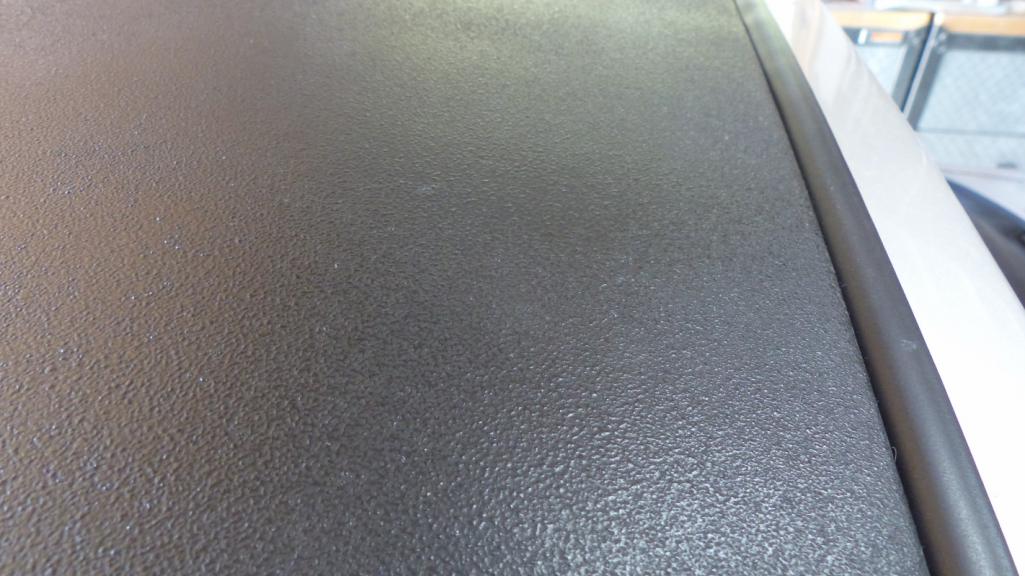 I think I'm going to do just a bit more block sanding to knock those big drops down a little more. They stand a little proud of the rest of the surface enough you can feel them and they catch the light. Other than that, I'm pretty happy.  I think this is a better way to restore the top than body schutz and also happens to be cheaper if you use Wurth, and especially if you have to buy a schutz gun. Would I do it again? Probably not. The reason is because now that I've spray Upol Raptor and gelcoat in different applications, I can tell you that the surfaces are indistinguishable in terms of hardness and feel. I think you have more control over the texture with the Raptor gun also. I'm pretty positive you could get the exact same result spraying Raptor but the Raptor is easier and about the same cost. I think it would be the best of both worlds. The ease of schutz with the finish of gelcoat. Next installment will be refurbishing the other side of the top. It's done... almost. I'm just too tired to post tonight. |
|
|
|
| KELTY360 |
Jul 15 2020, 09:52 PM
Post
#1649
|
|
914 Neferati Group: Members Posts: 5,189 Joined: 31-December 05 From: Pt. Townsend, WA Member No.: 5,344 Region Association: Pacific Northwest |
Nice result. But, you should show us how it looks in it’s normal setting.......the trunk!
|
|
|
|
| dr.tim |
Jul 16 2020, 06:58 AM
Post
#1650
|
|
Member Group: Members Posts: 101 Joined: 17-December 11 From: Butte, America Member No.: 13,907 Region Association: Rocky Mountains |
Glad to see you're back on it. There's still a few weeks of summer left, so hope remains that field trials can commence this year.
|
|
|
|
| Superhawk996 |
Jul 16 2020, 07:28 AM
Post
#1651
|
|
914 Guru Group: Members Posts: 7,839 Joined: 25-August 18 From: Woods of N. Idaho Member No.: 22,428 Region Association: Galt's Gulch |
(IMG:style_emoticons/default/smilie_pokal.gif)
Looking great! Jealous that you're in the reclining chair, with the pooch, and enjoying the fresh mountain air. The midwest humidity is oppressive as usual. I run a window A/C in my garage and it can't keep up in the mid day heat. You're living the dream! |
|
|
|
| Dion |
Jul 16 2020, 03:04 PM
Post
#1652
|
|
RN Group: Members Posts: 2,926 Joined: 16-September 04 From: Audubon,PA Member No.: 2,766 Region Association: MidAtlantic Region |
|
|
|
|
| bbrock |
Jul 16 2020, 03:34 PM
Post
#1653
|
|
914 Guru Group: Members Posts: 5,269 Joined: 17-February 17 From: Montana Member No.: 20,845 Region Association: Rocky Mountains |
Dudes! It is hot here too. The thermometer at the house is reading 80F today which is our record high for the year and no humidity to moisturize the skin!!! (IMG:style_emoticons/default/poke.gif) (IMG:style_emoticons/default/happy11.gif)
Oh how I do NOT miss the Midwest... |
|
|
|
| bbrock |
Aug 9 2020, 07:50 PM
Post
#1654
|
|
914 Guru Group: Members Posts: 5,269 Joined: 17-February 17 From: Montana Member No.: 20,845 Region Association: Rocky Mountains |
Alright folks. Sorry for leaving on a cliffhanger. Right after my last post, the screen on my personal computer took a (IMG:style_emoticons/default/stromberg.gif) which made dealing with photos and posting updates too much of a PITA. Wound up buying a new computer and finally have it set up so good to go.
I left off promising an update on refurbing the bottom side of the targa so here we go. First was installing the Perlon headliner. None of the three 914s I've owned still had their headliners so this is super cool to me. I have always assumed it was the lack of headliners that kept my teeners from riding quiet as a Caddy (IMG:style_emoticons/default/lol-2.gif) Next was the rear targa seal. Some of the screw holes in the targa top were wallowed out so I filled them with JB Weld and redrilled them before the install. There is a trick to installing the 914Rubber piece. The original seals have metal strips embedded in the sides. The 914Rubber piece doesn't. 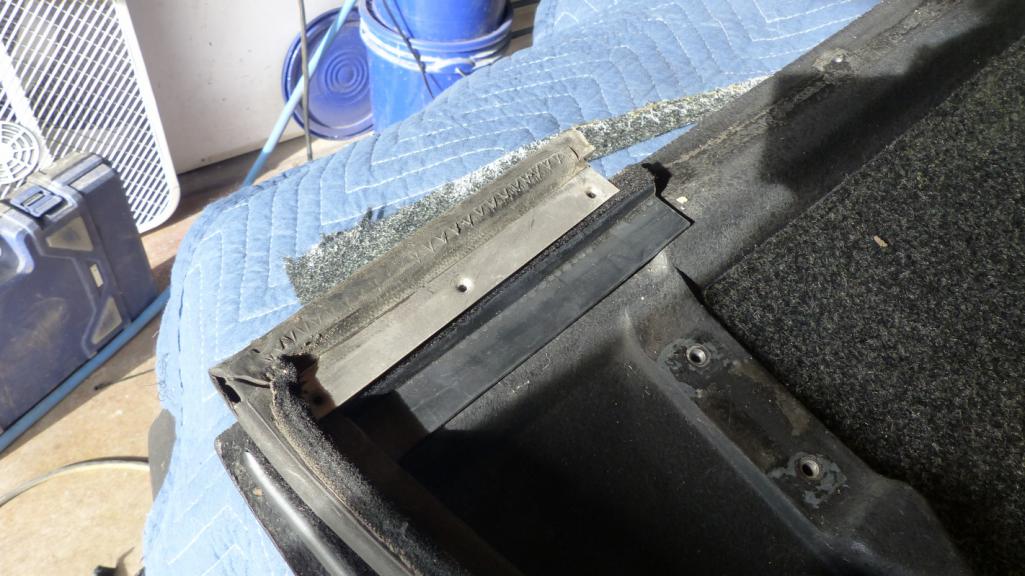 You have to cut the strip off your old seal and use it to clamp down the new one. Honestly, it would be nice if new strips were included with the replacement seal because they are sharp as shit when you cut them off. 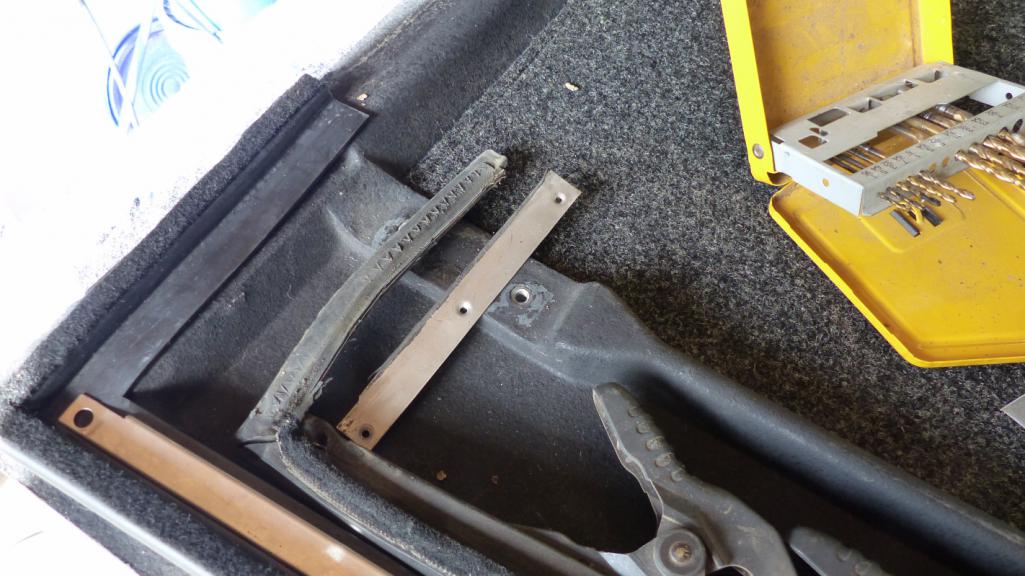 After a trial fit, I removed it to apply a good bead of 3M Weatherstrip adhesive. 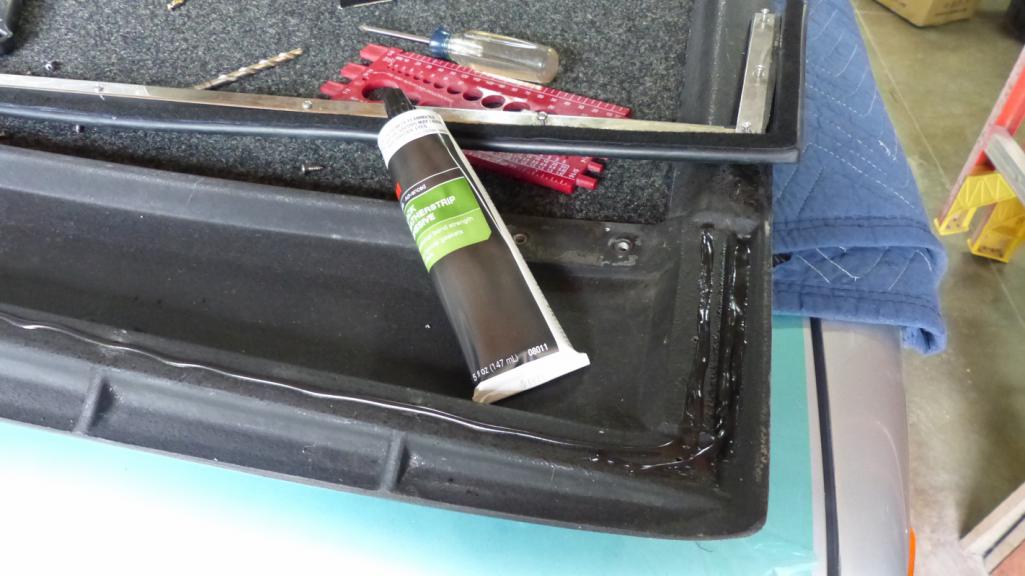 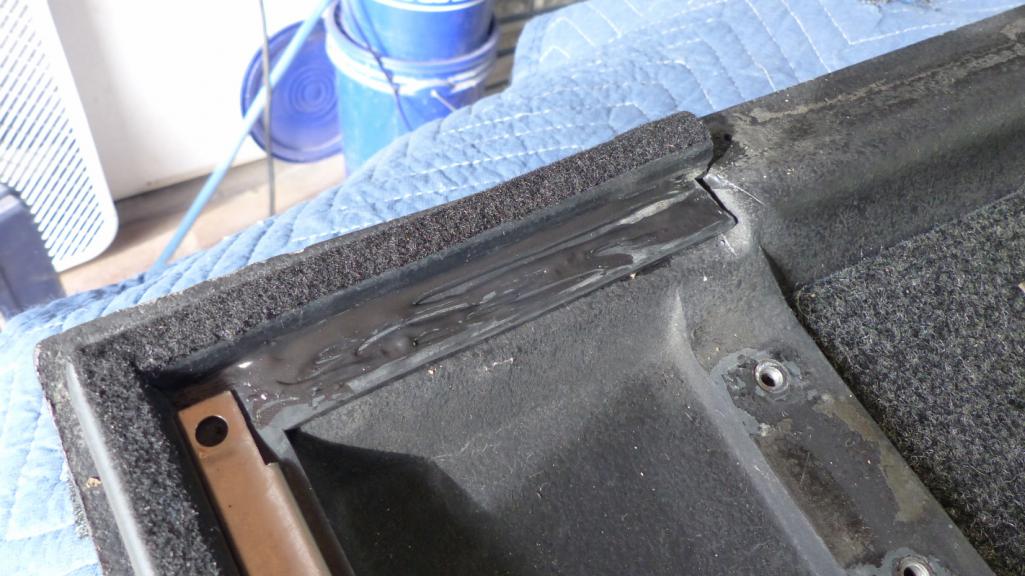 And here's what the strip/clamp looks like installed. 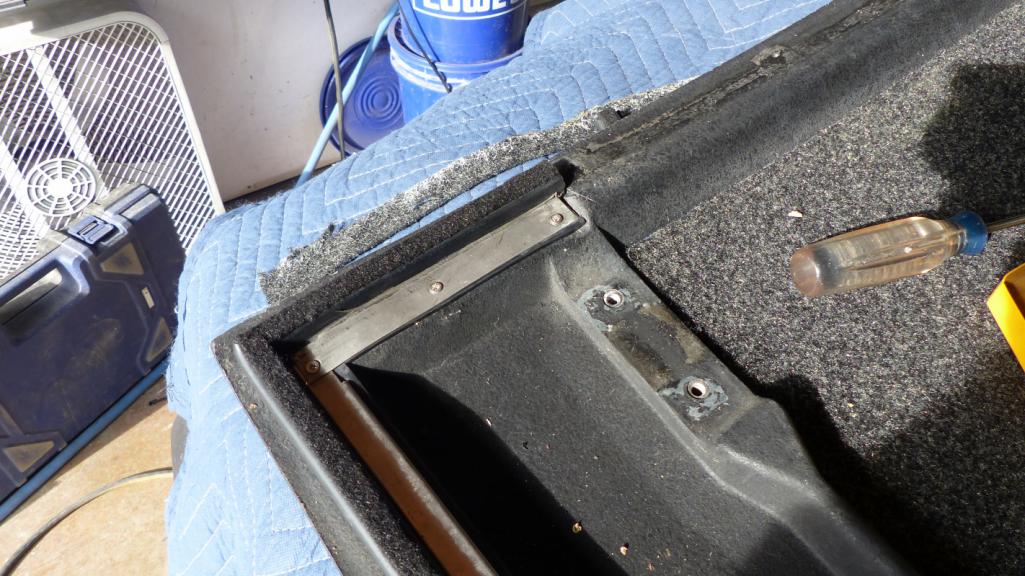 Next was installing the side seals. I used a lotta glycerine lube and pulled the seals through the channels using needle-nose pliers to get a grip. Here's a shot with all the seals and refurbished latches and latch blocks attached. 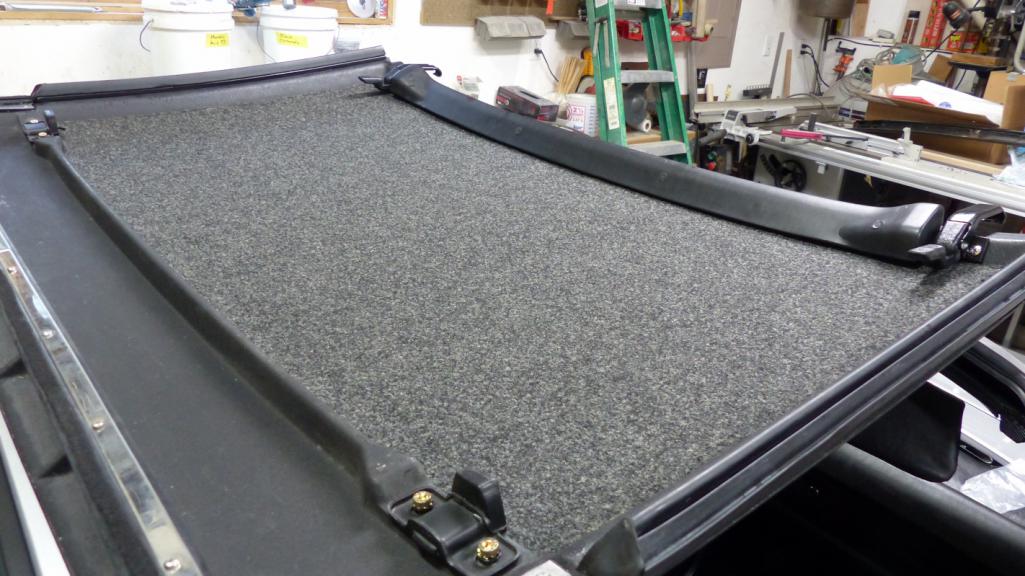 |
|
|
|
| bbrock |
Aug 9 2020, 08:13 PM
Post
#1655
|
|
914 Guru Group: Members Posts: 5,269 Joined: 17-February 17 From: Montana Member No.: 20,845 Region Association: Rocky Mountains |
Of course, none of this does any good without a way to latch down the top. So the rear latches got a makeover. My quirky car has what appears to be one early and one late style rear latch. That seems to be a theme with this car and I kinda love it.
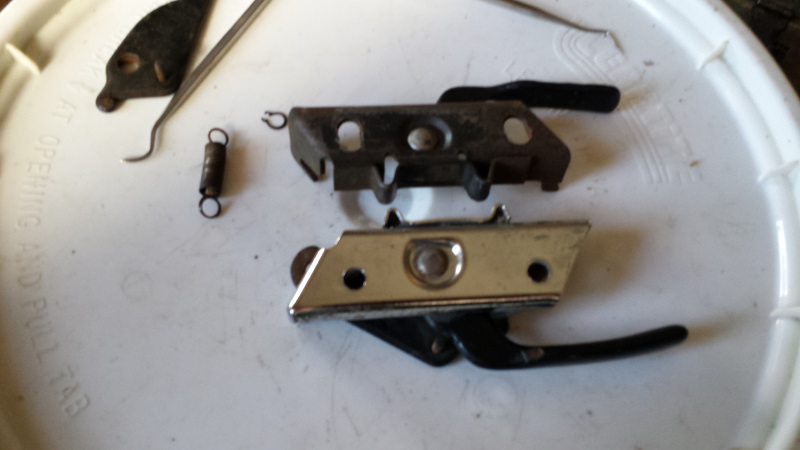 I'm sure I have a bunch of pics of refurbing these but basicall, they were disassembled, the chrome latch got a cleaning and the other got bead blasted and repainted. The latch hooks appeared to have some kind of plastic coating so I did my best to replicate. 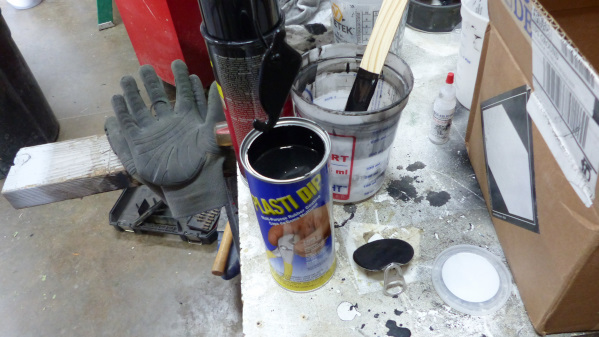 I also cleaned up the rear roll bar pad and filled the cracks with black silicone. Someday I may try to repair the cracks properly with urethane patch and reskin the pad with fresh vinyl. For now, this will have to do if I want this project to end sometime soon. In the process of installing the pad, I discovered the tabs on both ends of the rear defrost has pulled off. That explains why it wasn't working. They were still soldered to the conductor strip, but the strip had detached from the glass. 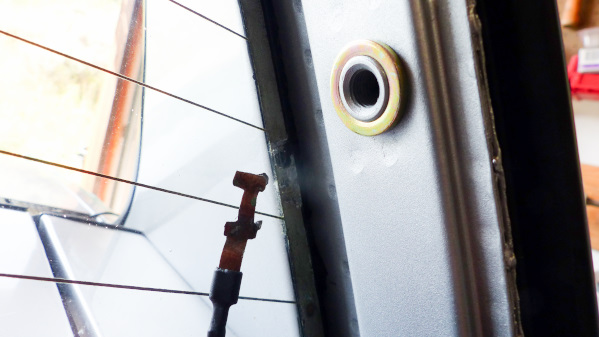 After a bit of research, I learned that this is the kit to use for such a repair. It is more expensive than kits usually sold at the FLAPS, but lots of reviews say those don't last and this one does. 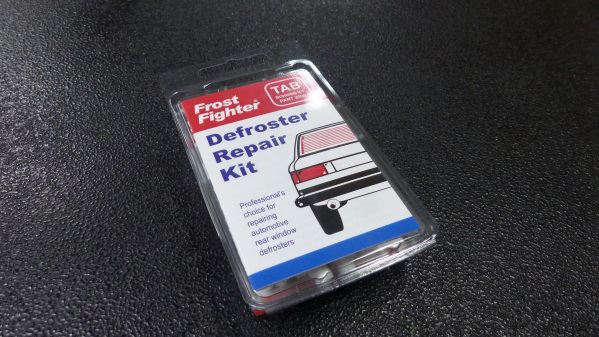 Of course, I failed to get a pic of the finished result. You would have a hard time telling it was repaired though and now I get proper voltage across the defrost grid. Okay, let's see how the top fits. This looks pretty nice. 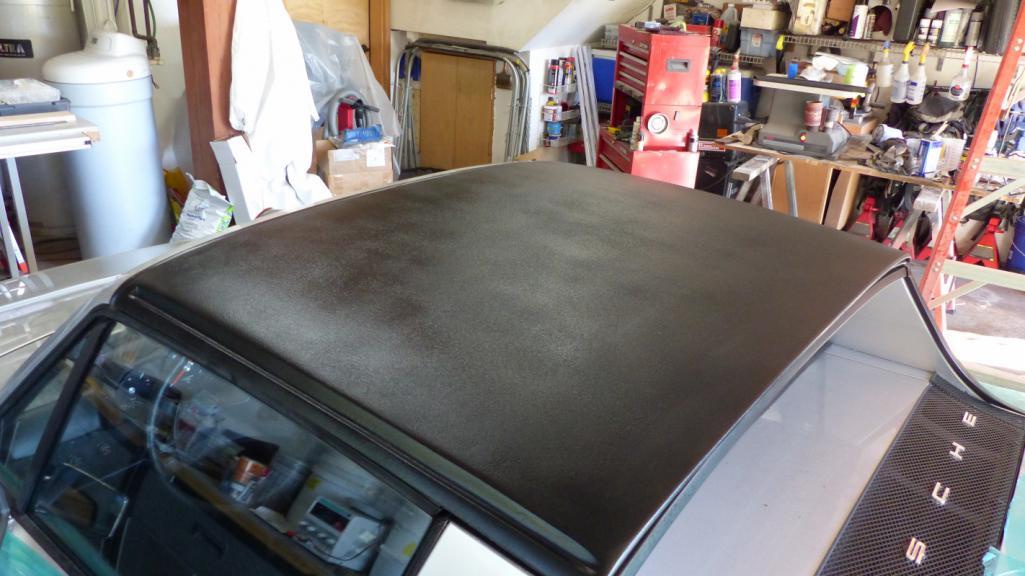 Oh! I really like this. 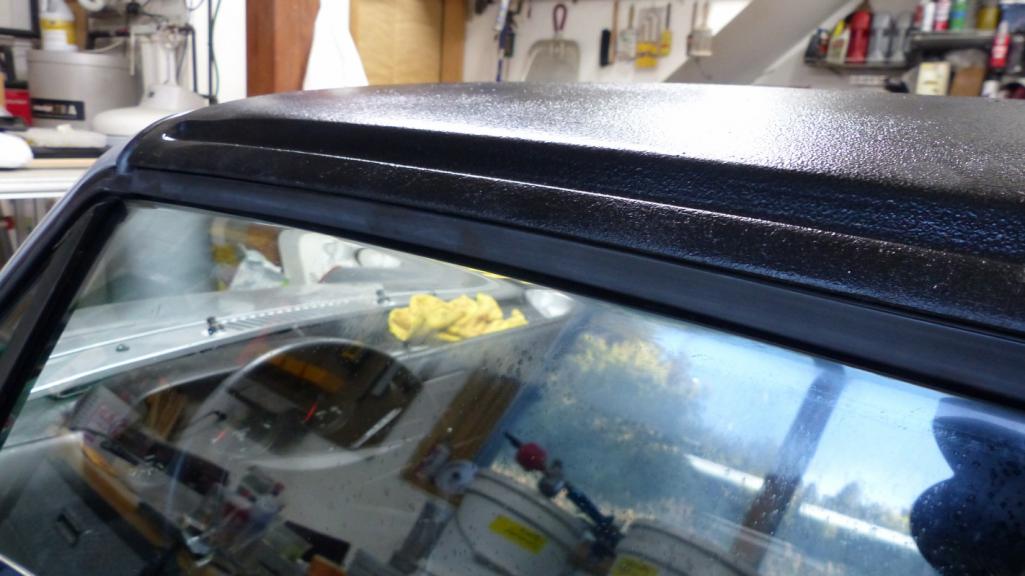 Let's see how it fits at the rear (IMG:style_emoticons/default/popcorn[1].gif) 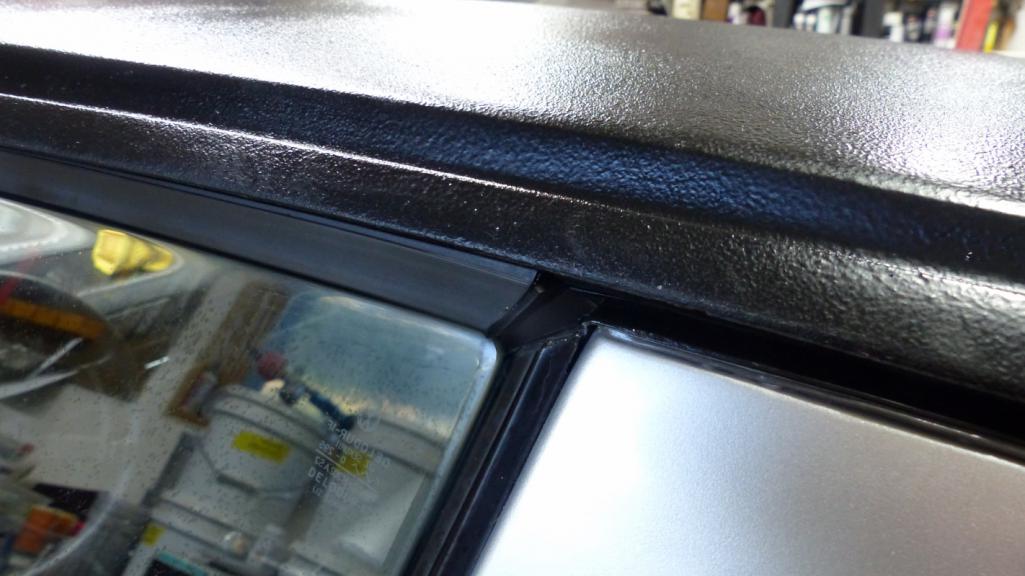 Doh! Fuched it up! (IMG:style_emoticons/default/headbang.gif) The 914Rubber seals come long and have to be trimmed to size. Clearly my method for doing so sucked. Time to order replacements.... |
|
|
|
| bbrock |
Aug 9 2020, 09:07 PM
Post
#1656
|
|
914 Guru Group: Members Posts: 5,269 Joined: 17-February 17 From: Montana Member No.: 20,845 Region Association: Rocky Mountains |
So the side seal incident was a wake-up call that I've been half-assing this project all this time. It was time for a little OCD to FINALLY kick in so here we go...
First was a new method to trim the length. This time I trimmed them BEFORE installing in the tracks by latching down the targa top WITHOUT the side tracks installed, and jamming the rear wedge end of the seal into the rear seal so the two angled seals compressed a bit. Then I marked the front edges about 3mm longer than where they met the front seal on the windshield frame. I really should have tried to get a picture but the operation took both hands and also, I suck. After cutting the seals to length while my ass was puckered, I installed the seal tracks with a bead of weatherstrip adhesive under them. Note there is some adjustment side to side which is important for a good seal to the tops of the windows. I screwed the track on except for the forward most hole. The location of that hole got marked so I could find it after the seal was installed. More on that later. 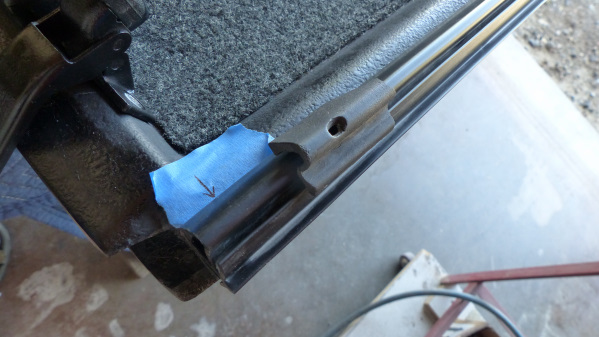 Then I lubed and pulled the side seals into place, making sure to locate the rear ends properly. I massaged the fronts back into the track as much as possible to relieve the stretch and let them set for a couple days to relax more before doing anything else. After they were given a chance to rest, I started the LONG process final fit. I latched the top down and noted the fit. I massaged the seal forward or back to get good compression with the mating seal at the rear, but not too much. After that was right, I moved to the front and marked it for trimming. Remember I had cut it just slightly long. The plan now was to sneak up on the perfect fit with compression against the mating seal at the front, but not so much that it buckled or distorted the seal. It took probably a half dozen passes of putting the top on, marking, taking the top off to trim, and again, and again. Once I was happy with that, I adjusted the side windows for fit. One side was dead on right out of the box. The passenger side required adjustment which meant pulling the interior panel off to make adjustments. The adjustments themselves were easy enough but the compression of the door and glass against the seals caused the door latch to be too tight. Tight enough the flimsy flapper handle would likely fatigue. So lots more time get that adjusted right. All told, I had about 12 hours into getting those side seals just right. But wait, I'm not done. Remember that missing screw? Well here's how the original seal was attached. There was an oval hole in the seal over that front screw and the screw went through the rubber and track into the targa top to sandwich the front end of the seal and secure it with a washer.  Seems like a good idea so let's add more work to the project. To make the holes, I heated up a scratch awl cherry red and melted the hole out using my taped mark as a guide. Then I drilled a small hole through the back of the seal at the mount hole location, lifted the front of the seal out of the track and wallowed out that hole slightly with the heated awl. Now I used tweezers to feed the screw with washer through the open front of the seal and screw it down through the oval hole. Nice! Now the front of the seals are secure and creep proof just like factory! (IMG:style_emoticons/default/piratenanner.gif) But wait. Still not finished. The original seals had rubber plugs glued in at the fronts to close them off. Seemed like a good idea to me. 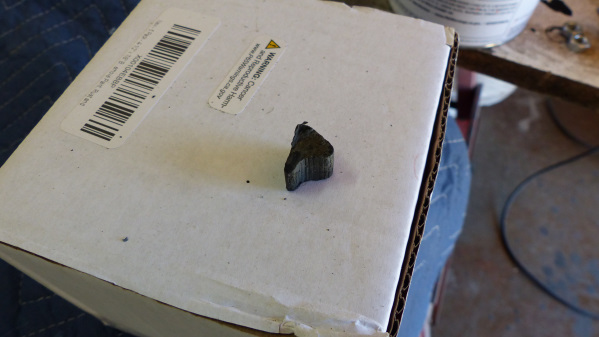 I thought about just plugging them with silicone but noticed the seal opened fatter than the profile of the plug. I was worried that just squirting in silicone would prevent the seal from squishing in properly against the window. That could cause distortion and a leak - or worse - a whistle. 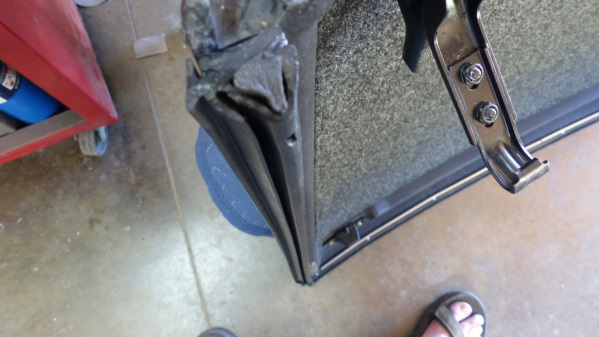 I could use the original plug to form the contour but I only had one of them. My solution was to cut it in half. 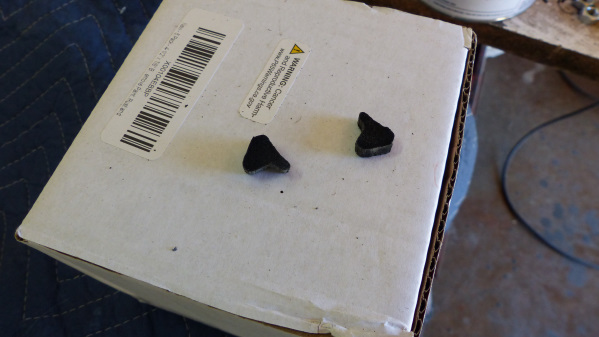 Then squirt a plug of black silicone into the opening. 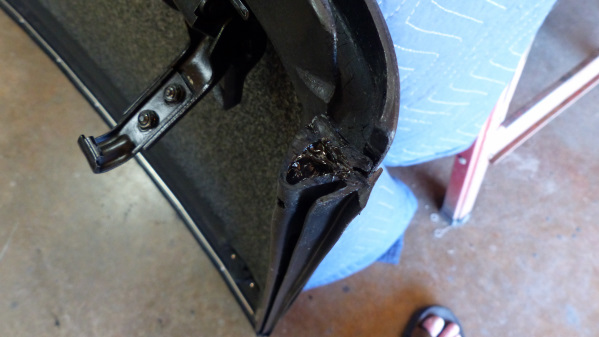 Shove the plug in and clamp it to hold the shape while the silicone set. I used this super sophisticated specialty clamp cut from a piece of cardboard. 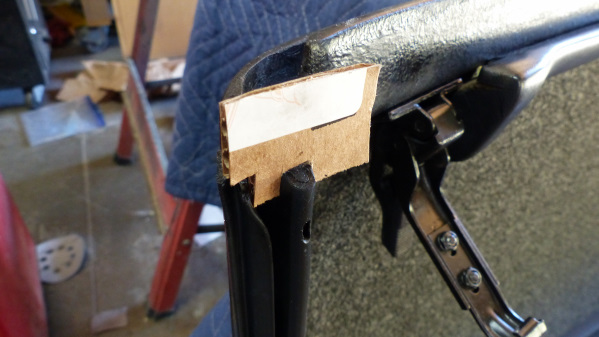 And here's the final product. You have no idea how satisfying it is to sit inside the car and see that neat oval hole in the seal just like factory. (IMG:style_emoticons/default/screwy.gif) 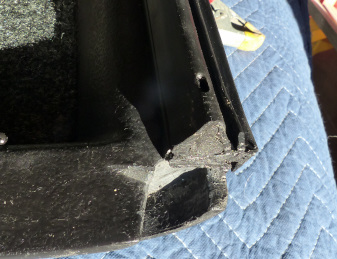 Okay, so the top is all done. How did we do? Hermetic fuching perfection! (IMG:style_emoticons/default/aktion035.gif) (IMG:style_emoticons/default/shades.gif) 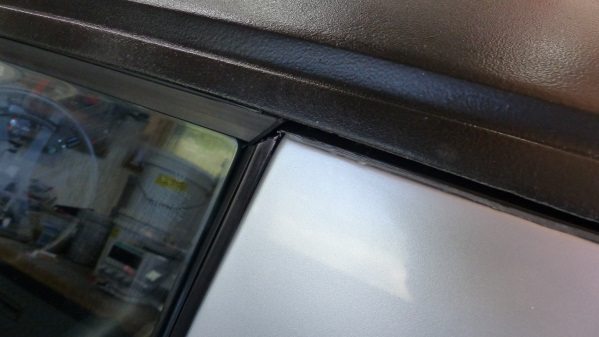 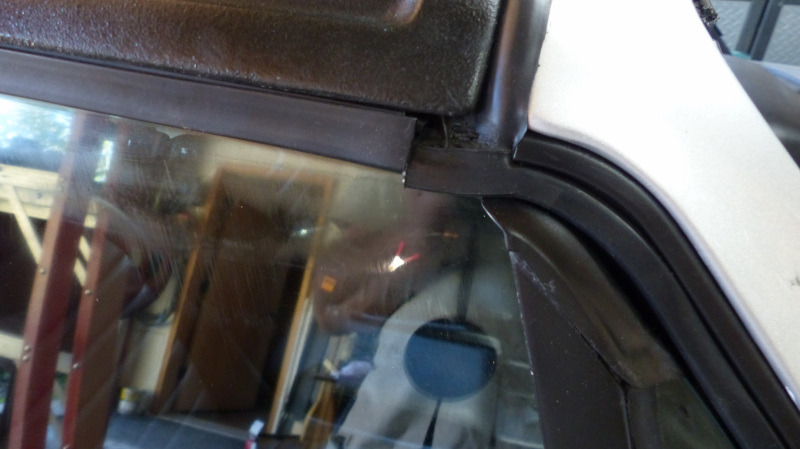 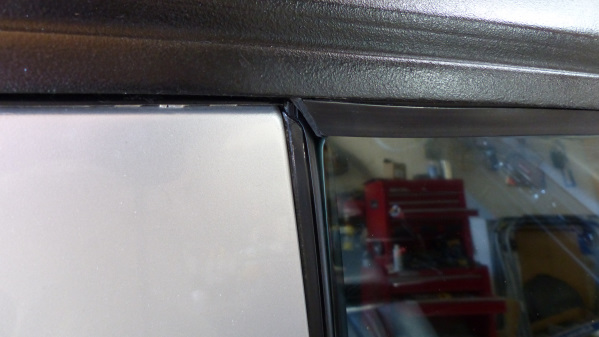 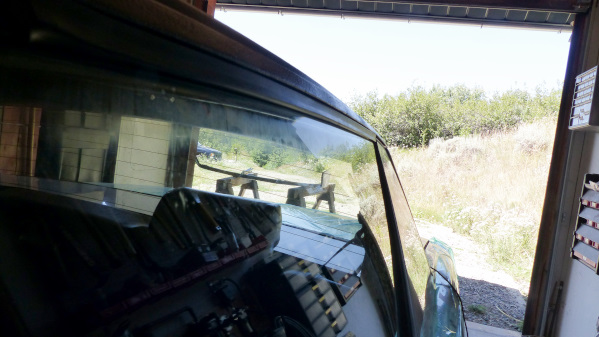 How can this car not be quiet as a Caddy? And I have to tell you, the sound of closing these doors with the top on and windows up makes me positively randy. (IMG:style_emoticons/default/wub.gif) |
|
|
|
| bbrock |
Aug 9 2020, 10:23 PM
Post
#1657
|
|
914 Guru Group: Members Posts: 5,269 Joined: 17-February 17 From: Montana Member No.: 20,845 Region Association: Rocky Mountains |
One more quick update before calling it lights out.
These arrived a couple weeks ago. 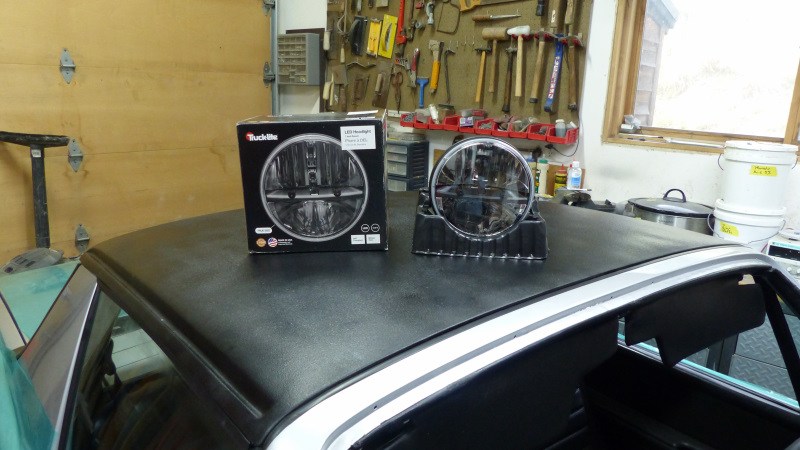 I think the GE Nighthawk lights were these re-branded. It's a lot to spend on headlights, but we have a deer or two around here that are actually the least of the worries. I frequently drive on roads you have to worry about smacking into buffalo at night! Completely plug and play. Took about 15 minutes to install. No point trying to aim them until the power train is in and alignment is done. 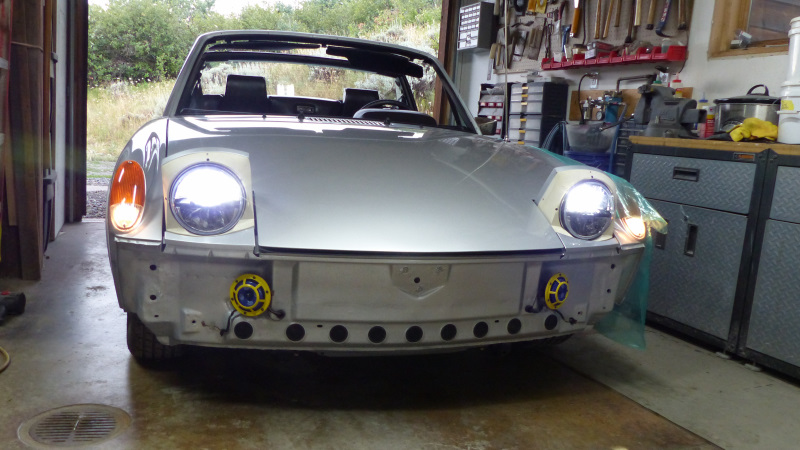 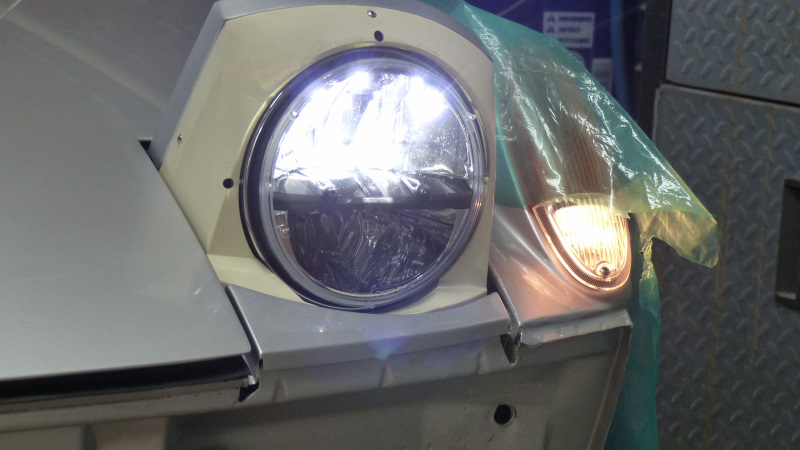 |
|
|
|
| BeatNavy |
Aug 10 2020, 05:16 AM
Post
#1658
|
|
Certified Professional Scapegoat Group: Members Posts: 2,963 Joined: 26-February 14 From: Easton, MD Member No.: 17,042 Region Association: MidAtlantic Region |
QUOTE(bbrock @ Aug 9 2020, 11:07 PM)  So the side seal incident was a wake-up call that I've been half-assing this project all this time. Yeah, Brent, this project has been a hack all the way through (IMG:style_emoticons/default/happy11.gif) I covet your window gaps. They are magnificent and will keep out the driving snow (which you're probably going to be getting in a week or two now that it's August). |
|
|
|
| Dion |
Aug 10 2020, 05:30 AM
Post
#1659
|
|
RN Group: Members Posts: 2,926 Joined: 16-September 04 From: Audubon,PA Member No.: 2,766 Region Association: MidAtlantic Region |
Fantastic work on the targa. So now that you have that all sussed out I think I’ll just send mine out to you. Seems like a good business opportunity. (IMG:style_emoticons/default/biggrin.gif) Seriously, great work on what seems like a simple structure. I know i had cleaned the latches and dressed the rubber on mine but you have me thinking there’s more to be had for better weather proofing. Lights look good too. Improvement over the H4’s smart move.
Like Rob said get ready for that snow! (IMG:style_emoticons/default/beerchug.gif) |
|
|
|
| Superhawk996 |
Aug 10 2020, 06:03 AM
Post
#1660
|
|
914 Guru Group: Members Posts: 7,839 Joined: 25-August 18 From: Woods of N. Idaho Member No.: 22,428 Region Association: Galt's Gulch |
Coming together nicely. Always love the attention to detail. Especially on the seal fit. Those window seals are total 1970's affairs and would never pass muster with modern NVH and water leak targets but your's certainly fit as good as or better than they ever left the factory.
Keep hammering on it. (IMG:style_emoticons/default/smash.gif) (IMG:style_emoticons/default/drooley.gif) |
|
|
|
|
1 User(s) are reading this topic (1 Guests and 0 Anonymous Users)
0 Members:

|
Lo-Fi Version | Time is now: 12th May 2026 - 05:09 PM |
Invision Power Board
v9.1.4 © 2026 IPS, Inc.