|
|
|
Porsche, and the Porsche crest are registered trademarks of Dr. Ing. h.c. F. Porsche AG.
This site is not affiliated with Porsche in any way. Its only purpose is to provide an online forum for car enthusiasts. All other trademarks are property of their respective owners. |
|
|

  |

| bbrock |
 Dec 19 2017, 10:38 AM Dec 19 2017, 10:38 AM
Post
#181
|
|
914 Guru  Group: Members Posts: 5,269 Joined: 17-February 17 From: Montana Member No.: 20,845 Region Association: Rocky Mountains |
QUOTE(tygaboy @ Dec 19 2017, 09:10 AM)  I'm right there with you on the pucker factor when trying to get the car high enough to be rotisseried. I'm thinking a nice mid rise lift might be justified! Your car is coming right along. (and yes, I'll get that window to you soon...) MerryHappy! (IMG:style_emoticons/default/santa_smiley.gif) I looked hard at rotisserie designs with built-in lifts. Of course, hydraulic rams can be used but I really liked designs that had a worm-drive winch in each end because it would be cheap. There were some really nice web sits out there but photobucket has F'd them up. (IMG:style_emoticons/default/sad.gif) And I just now thought of this.. I'll bet I could have gotten my neighbor to put forks on his skid steer and lift this sucker. (IMG:http://www.914world.com/bbs2/uploads_offsite/i.imgur.com-20845-1513701480.1.png) No rush on the window. As you can see, I'm nowhere close to putting glass in. (IMG:style_emoticons/default/wreath.gif) |
   |

 
|
| bbrock |
Dec 22 2017, 02:26 PM
Post
#182
|
|
914 Guru Group: Members Posts: 5,269 Joined: 17-February 17 From: Montana Member No.: 20,845 Region Association: Rocky Mountains |
The Seamy Underbelly
Got a good start on pulling the old rusty floor off. Of course, I made a mistake. I had saved my last Rotabroach cutter and pilot bit for this task; thinking it would get me through the project since this is the last set of spot welds I'll need to cut. I grossly underestimated the number of spot welds in the floor. I babied the cutter as best I could, dipping the cutter in Blair's special wax-based lubricant after each weld, and keeping the drill speed nice and low. Still, after 60-80 spot welds, it went dull. I pulled out my last HF POS spot weld cutter to finish the section I was trying to remove. After about a dozen welds, the piece of (IMG:style_emoticons/default/stromberg.gif) shattered. I flipped the cutter over and got another half dozen spots cut before the piece of (IMG:style_emoticons/default/stromberg.gif) shattered on the other side. But it was just enough to pull a section off and reveal all the crud in the tunnel. 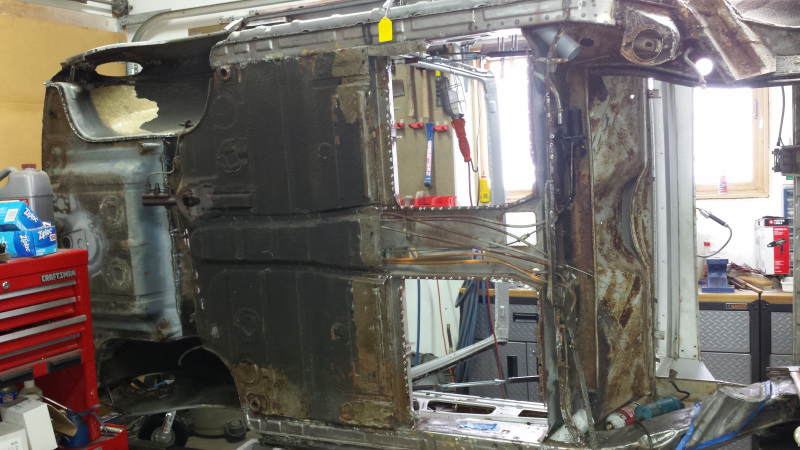 Checked to see if I could pick up some Rotabroach locally. No luck, closest dealer is in Billings (150 miles). Ordered a new set from Amazon. With holidays, they won't be here until Wednesday. No biggie, there is plenty to do to keep me busy. But I couldn't resist clamping up the replacement to see how it looks. 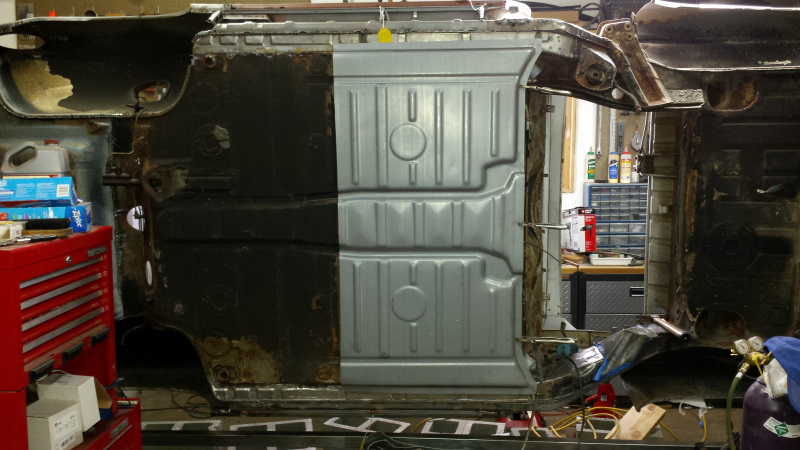 Flanges on the RD panel are wider than stock, which is probably good, but will need to be trimmed. Looks nice though. (IMG:style_emoticons/default/smile.gif) BTW, I'm really digging the 4-bolt brake system on the rotisserie. With all 4 bolts tightened down, you can't budge the tub. To spin the tub, you open both bolts on one end all the way, then loosen the other two just enough that you have to use a bit of muscle to spin. It provides the perfect friction to position it just where you want it without worrying it is going to get away from you. Let go, and it just stays. I can't take credit, this is Rich Casto's design. And for those who are snow deprived for the holidays, maybe a couple winter shots. Here's a pair of pine grosbeaks on our feeder just now. 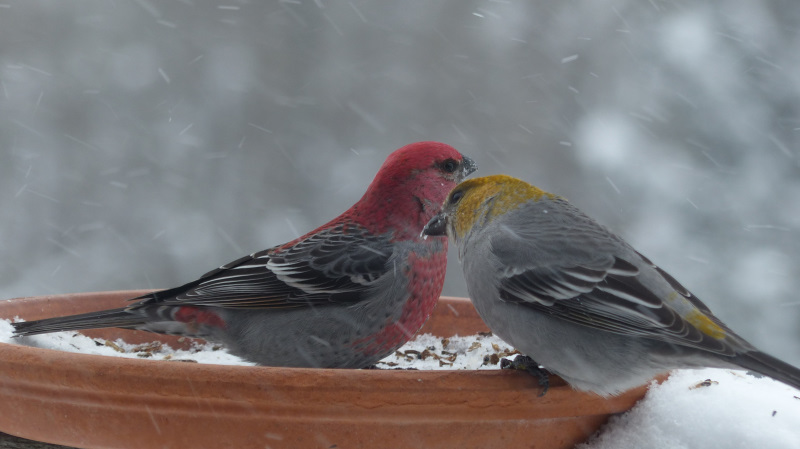 and a fox from our front window a couple weeks ago. 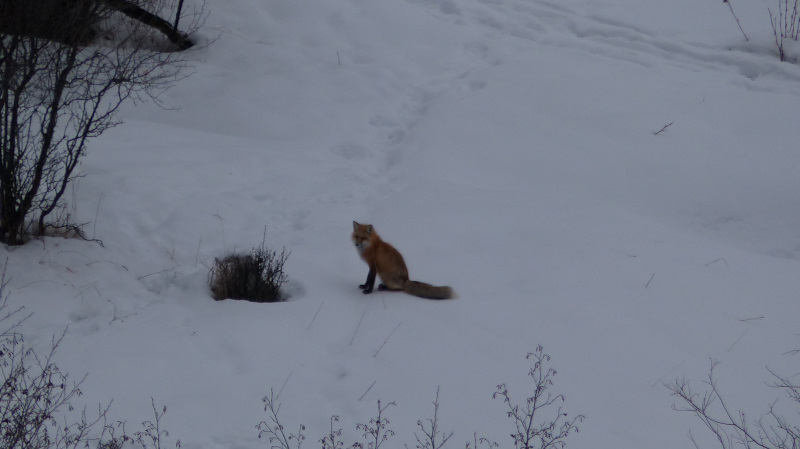 (IMG:style_emoticons/default/wreath.gif) |
|
|
|
| tygaboy |
Dec 22 2017, 02:29 PM
Post
#183
|
|
914 Guru Group: Members Posts: 5,810 Joined: 6-October 15 From: Petaluma, CA Member No.: 19,241 Region Association: Northern California |
|
 |
|
| bbrock |
Dec 22 2017, 02:31 PM
Post
#184
|
|
914 Guru Group: Members Posts: 5,269 Joined: 17-February 17 From: Montana Member No.: 20,845 Region Association: Rocky Mountains |
QUOTE(tygaboy @ Dec 22 2017, 01:29 PM) Right back at you! (IMG:style_emoticons/default/santa_smiley.gif) |
|
|
|
| mb911 |
Dec 22 2017, 03:04 PM
Post
#185
|
|
914 Guru Group: Members Posts: 7,742 Joined: 2-January 09 From: Burlington wi Member No.: 9,892 Region Association: Upper MidWest |
The flange is longer then stock on the floor pans.. I figured when I spray seam sealer it would not be noticed.
|
|
|
|
| burton73 |
Dec 22 2017, 03:09 PM
Post
#186
|
|
Senior member, and old dude Group: Members Posts: 3,994 Joined: 2-January 07 From: Los Angeles Member No.: 7,414 Region Association: Southern California |
Brent,
You really showed your fine talents on how to put a car back in proper restoration. Next year should find you with a finished very nice 73 that will be as good or better than it was the day you got married. I mite say stay thirsty my friend but I think I will say, stay warm my friend. Happy holidays to you, yours and Montana. Bob B |
|
|
|
| bbrock |
Dec 22 2017, 03:30 PM
Post
#187
|
|
914 Guru Group: Members Posts: 5,269 Joined: 17-February 17 From: Montana Member No.: 20,845 Region Association: Rocky Mountains |
QUOTE(mb911 @ Dec 22 2017, 02:04 PM) The flange is longer then stock on the floor pans.. I figured when I spray seam sealer it would not be noticed. On mine, the flanges are a bit wider than the recess in the bottom the longs. Trimming will be needed to make it fit nice and tight. Otherwise, I'd do exactly the same as you. |
|
|
|
| bbrock |
Dec 22 2017, 03:36 PM
Post
#188
|
|
914 Guru Group: Members Posts: 5,269 Joined: 17-February 17 From: Montana Member No.: 20,845 Region Association: Rocky Mountains |
QUOTE(burton73 @ Dec 22 2017, 02:09 PM) Brent, You really showed your fine talents on how to put a car back in proper restoration. Next year should find you with a finished very nice 73 that will be as good or better than it was the day you got married. I mite say stay thirsty my friend but I think I will say, stay warm my friend. Happy holidays to you, yours and Montana. Bob B Thanks Bob! I'll take your advice as I head out to plow the driveway in a few. Happy holidays to you and yours as well! |
|
|
|
| mb911 |
Dec 22 2017, 05:44 PM
Post
#189
|
|
914 Guru Group: Members Posts: 7,742 Joined: 2-January 09 From: Burlington wi Member No.: 9,892 Region Association: Upper MidWest |
QUOTE(bbrock @ Dec 22 2017, 01:30 PM) QUOTE(mb911 @ Dec 22 2017, 02:04 PM) The flange is longer then stock on the floor pans.. I figured when I spray seam sealer it would not be noticed. On mine, the flanges are a bit wider than the recess in the bottom the longs. Trimming will be needed to make it fit nice and tight. Otherwise, I'd do exactly the same as you. With the indents in the long.??? |
|
|
|
| bbrock |
Dec 22 2017, 06:46 PM
Post
#190
|
|
914 Guru Group: Members Posts: 5,269 Joined: 17-February 17 From: Montana Member No.: 20,845 Region Association: Rocky Mountains |
QUOTE(mb911 @ Dec 22 2017, 04:44 PM) QUOTE(bbrock @ Dec 22 2017, 01:30 PM) QUOTE(mb911 @ Dec 22 2017, 02:04 PM) The flange is longer then stock on the floor pans.. I figured when I spray seam sealer it would not be noticed. On mine, the flanges are a bit wider than the recess in the bottom the longs. Trimming will be needed to make it fit nice and tight. Otherwise, I'd do exactly the same as you. With the indents in the long.??? Yep. Here are a couple of pics of it. Measured the original floor and the flanges are 1.5cm wide where the RD flanges are 2.5cm. I'll just trim 1cm off and everything should be good. 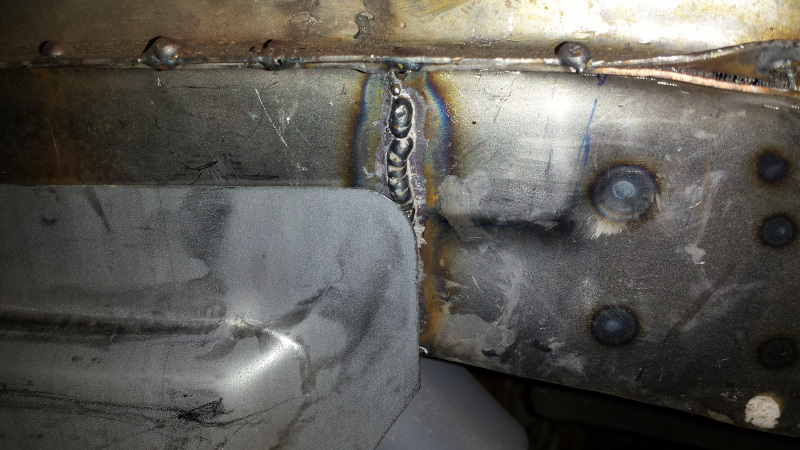 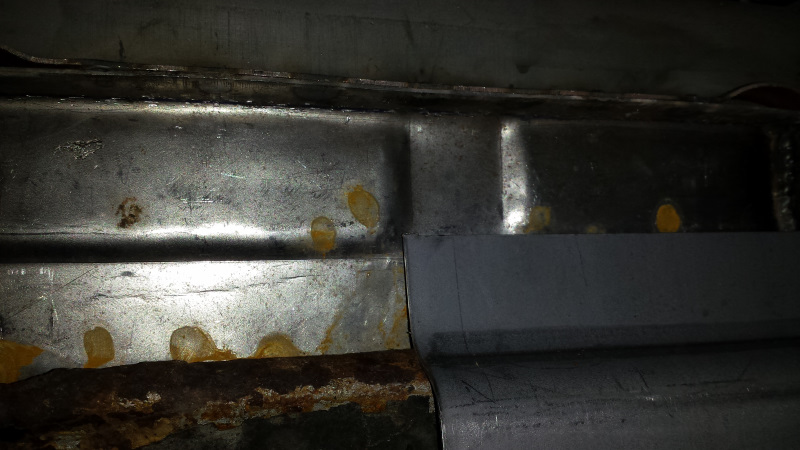 |
|
|
|
| tygaboy |
Dec 22 2017, 08:07 PM
Post
#191
|
|
914 Guru Group: Members Posts: 5,810 Joined: 6-October 15 From: Petaluma, CA Member No.: 19,241 Region Association: Northern California |
FWIW, I needed to trim my RD rear floor exactly that same way.
|
|
|
|
| mb911 |
Dec 23 2017, 06:16 AM
Post
#192
|
|
914 Guru Group: Members Posts: 7,742 Joined: 2-January 09 From: Burlington wi Member No.: 9,892 Region Association: Upper MidWest |
Oh makes sense
|
|
|
|
| bbrock |
Dec 23 2017, 09:12 PM
Post
#193
|
|
914 Guru Group: Members Posts: 5,269 Joined: 17-February 17 From: Montana Member No.: 20,845 Region Association: Rocky Mountains |
A Good Stiff Member
I can't cut any more of the floor pan off until my new Rotabroaches arrive, so I got bored and decided to play with my member... I mean... the center member across the floor pan (IMG:style_emoticons/default/blush.gif) It had rusted away around the e-brake switch. 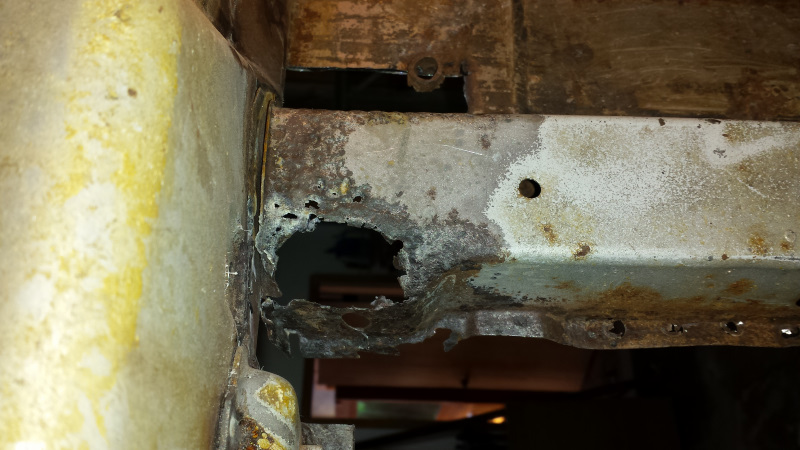 But before I could get very far, I had an unpleasant task to complete. A few days ago, my air compressor started leaking. I tracked it down to a stuck check valve but the valve wouldn't budge, so I left it to soak with penetrating oil for a couple days. So, this morning I went out to the unheated shed that contains the compressor and went to work. It was 5 degrees F, that's -15C for those of you who live in first world countries. A.K.A. "cold as shit." Fingers froze pretty quick but I managed to get the check valve out. It was packed with fuzz and stuck open. A frickin' mouse had crawled inside the compressor housing and made a nest. Somehow, that shit got sucked through the cylinder and into the check valve. It has an air filter to supposedly prevent such things, but it obviously didn't work. Shitty design. Of course, that meant I had to tear the think apart to clean out all the crap. With the cold temps, I had to warm up the plastic shroud with a heat gun so it didn't just shatter when I unsnapped it. Got all the crap cleaned out and put back together. It wasn't too bad except a couple of itty bitty screws that were a bear to get in with frozen fingers. But I got the job done and hands warmed up. I'll need to do some rodent proofing of that shed, but not today. So back to work on the rusty old member. Fabbed a new end for it. 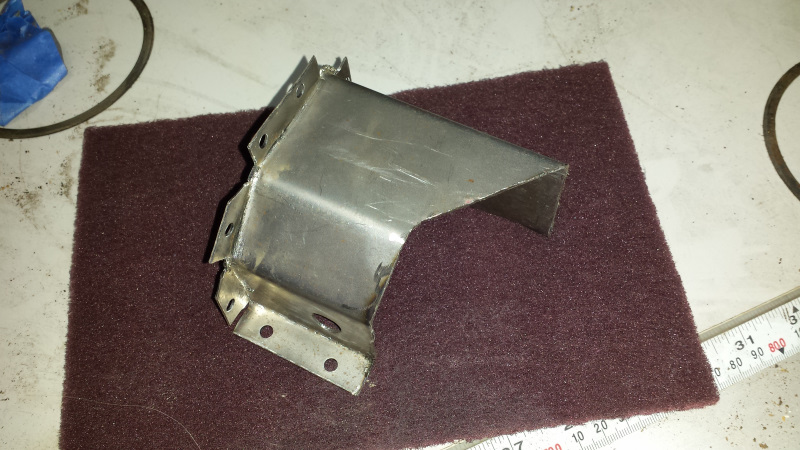 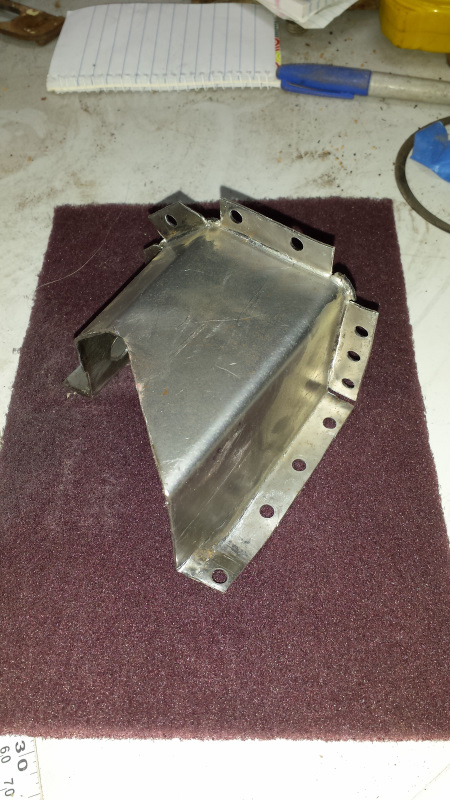 Turned out pretty good. I'll need to cut out a hole for the e-brake switch but there wasn'e enough left of the old piece to provide a location guide, and the switch disentegrated. Thought about using one of the door switches as a guide but decided to just wait until I have a new switch in hand to make sure it is located correctly. Next was the long process of prepping the member and trimming a little at a time to sneak up on a good fit. 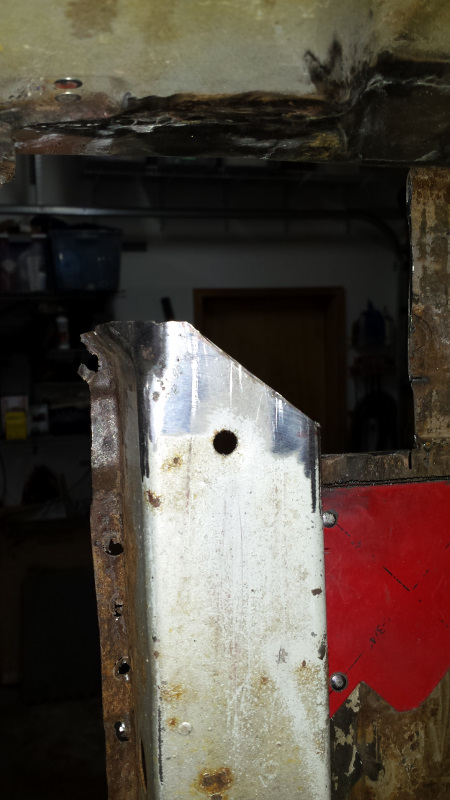 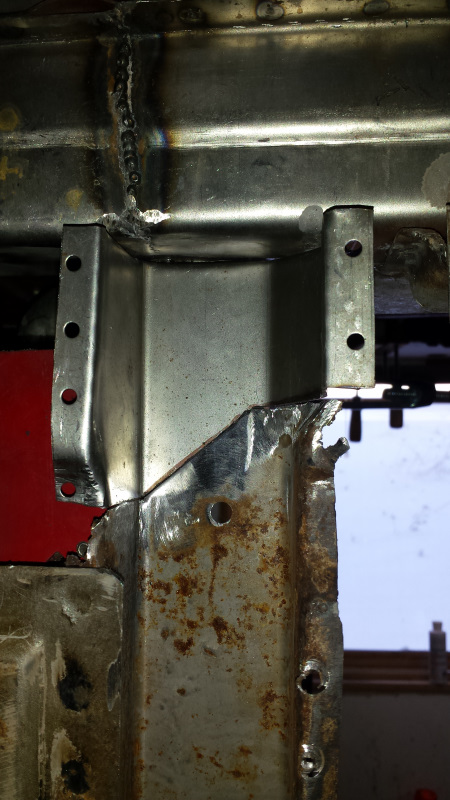 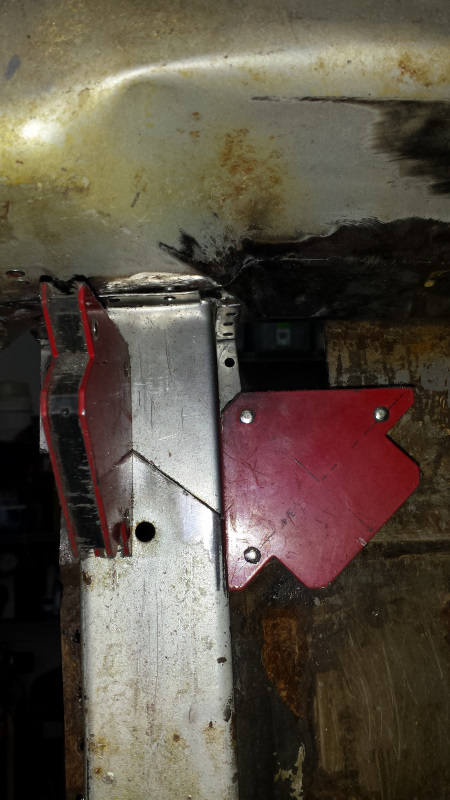 That'll do. Welded it in place. 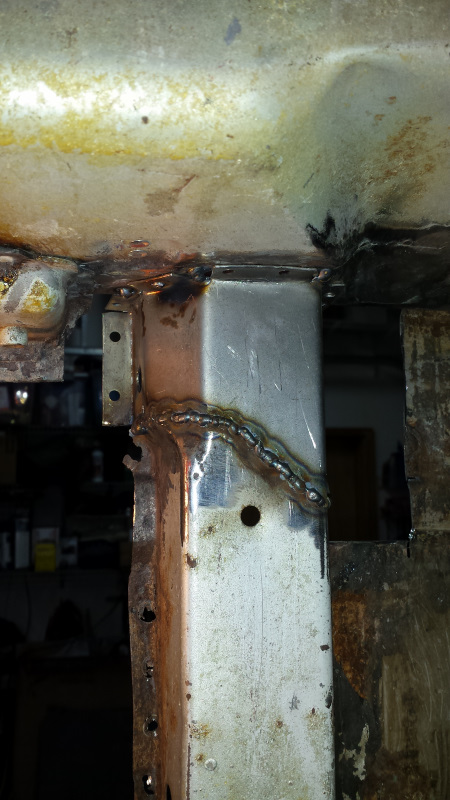 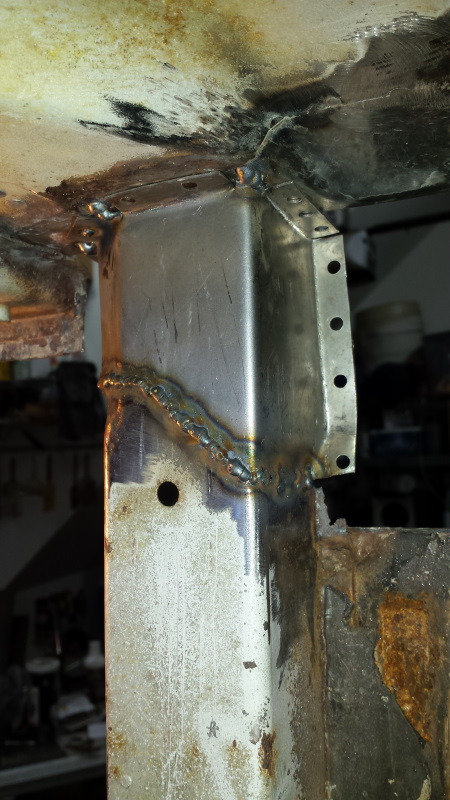 And smooth it down. 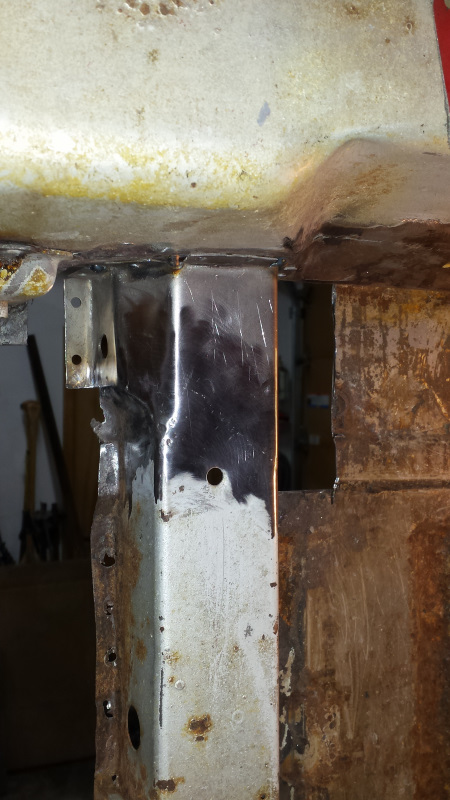 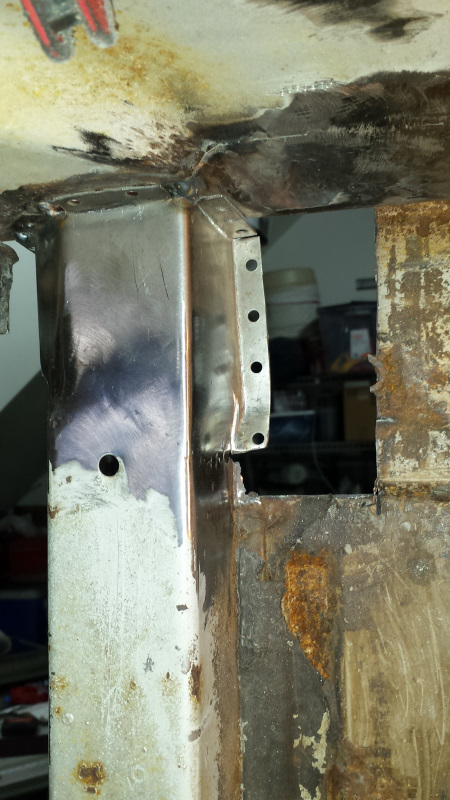 Seems like I'm getting a lot less shrink since I changed the diodes in the welder. (IMG:style_emoticons/default/cool_shades.gif) I left the plug welds on the longitude flanges for later. No reason to weld overhead when the car is on a whirly-gig thingy. That took most of the day. We have company coming tomorrow so I needed to knock off a little early to do some major cleaning since the project has spread from the garage and into the house. (IMG:style_emoticons/default/beer3.gif) |
|
|
|
| euro911 |
Dec 23 2017, 11:17 PM
Post
#194
|
|
Retired & living the dream. God help me if I wake up! Group: Members Posts: 8,937 Joined: 2-December 06 From: So.Cal. & No.AZ (USA) Member No.: 7,300 Region Association: Southern California |
Man, you're doing a magnificent job on every aspect of the restoration, Brent (IMG:style_emoticons/default/aktion035.gif)
|
|
|
|
| tygaboy |
Dec 24 2017, 08:32 AM
Post
#195
|
|
914 Guru Group: Members Posts: 5,810 Joined: 6-October 15 From: Petaluma, CA Member No.: 19,241 Region Association: Northern California |
Really nice fab/welding - a job well done! You're doing a great job on your build.
Brent + (IMG:style_emoticons/default/sawzall-smiley.gif) + (IMG:style_emoticons/default/welder.gif) = (IMG:style_emoticons/default/smilie_pokal.gif) |
|
|
|
| bbrock |
Dec 29 2017, 05:42 PM
Post
#196
|
|
914 Guru Group: Members Posts: 5,269 Joined: 17-February 17 From: Montana Member No.: 20,845 Region Association: Rocky Mountains |
Back in Hell
I went a little A.D.D on Christmas day. Started out planning to work on repairing the lower inner firewall. It only took about 30 minutes to have a good start on a fabricated patch. 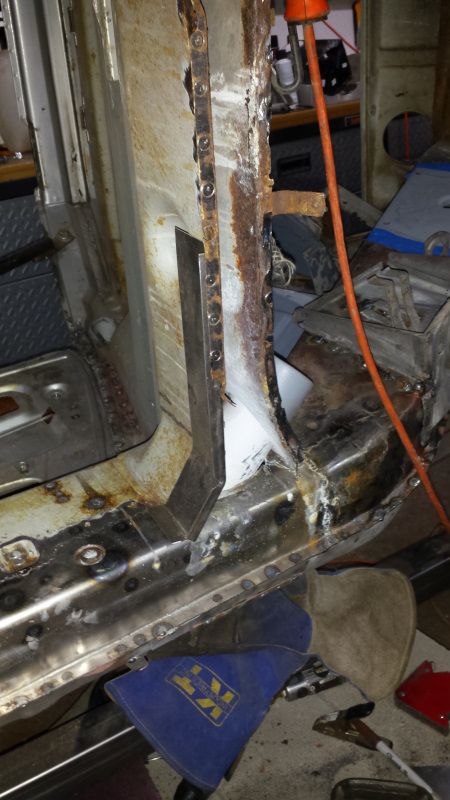 But after moving the outer engine mount piece out of my way for the fifth time, I decided, dammit, I'm going to get that out of my way for good. You might recall that I mentioned the section of my fabricated inner long under the outer mount not mating perfectly. I had skipped welding that bit until I could flip the car up for better access to address the issue. 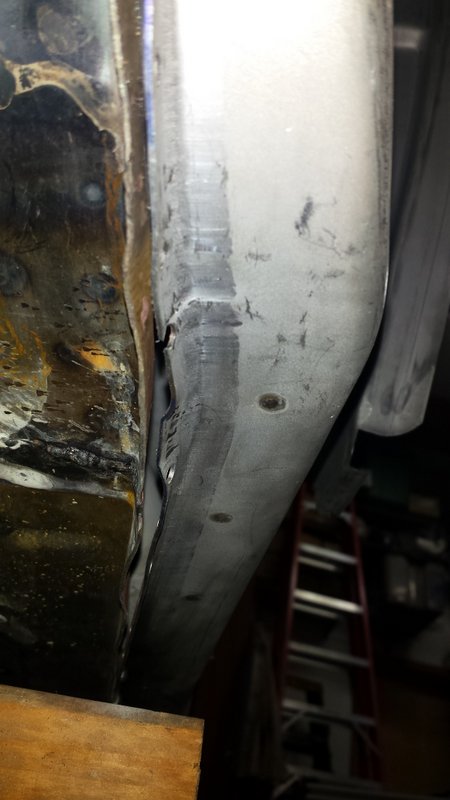 That also caused the mount to fit poorly. I was hoping I could just chase that flange into place with a hammer, but the double-walled construction locks things together very stiffly and it wouldn't budge. So I cut out the divot I had banged into the inner long to fit the mount to relieve stress, and now I see I didn't get a pic of it opened up. But it was a bit of a shock to open up the frame and find nothing but clean, solid steel and epoxy primer. Just doing that brought the clam shells together so it just took a little hammer and dolly to bring the inner to mate perfectly with the outer. I must have built up some stress welding in the inner wall on the first round. This pic doesn't look great because I left the fabricated flange long and ragged so I could trim it back flush with the RD piece after everything was together. But the two pieces now fit perfectly together. 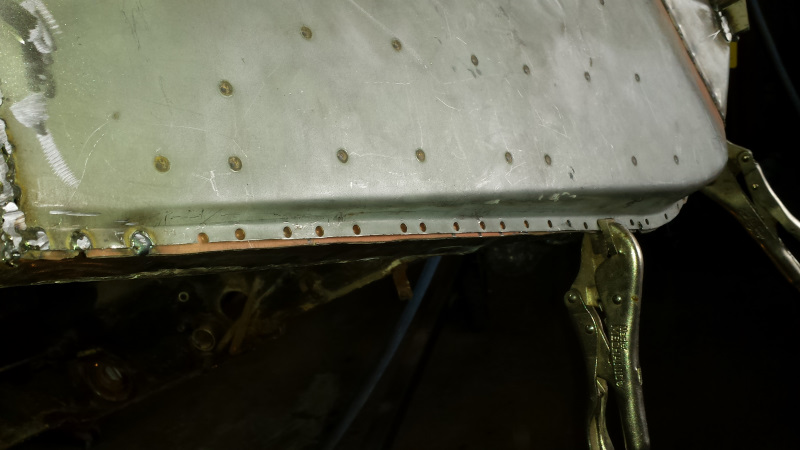 I finished plug welding that section but forgot to snap a pic. Next was the job of patching that hole. I needed to make two patches with that indent for the engine mount nested to form the double wall. I've been wanting to buy a metal shaping shot bag for just this sort of thing, but never did. So, it was time to improvise. I snooped around and found an old, partially used bag of mortar mix and a freebie tarp from HF. 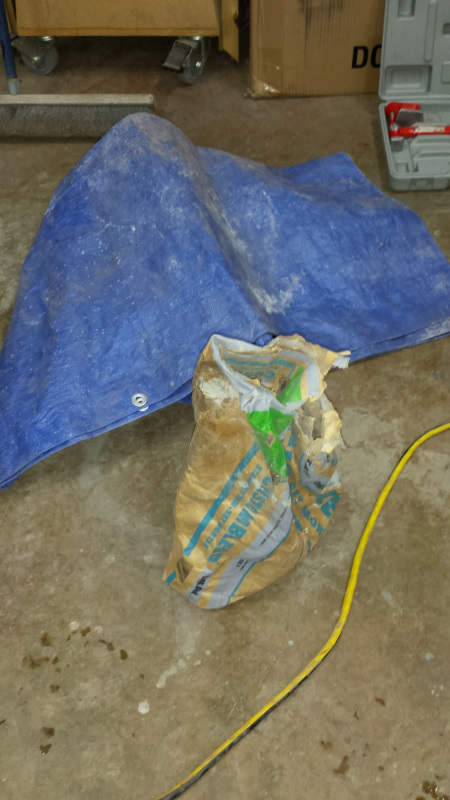 I wrapped the mortar in the tarp and, walla! Redneck Shot Bag (IMG:style_emoticons/default/tooth.gif) I alternated between banging on the hillbilly bag and the anvil, intermingled with a few tweaks on the stretcher until I had something close to the shape I was after. 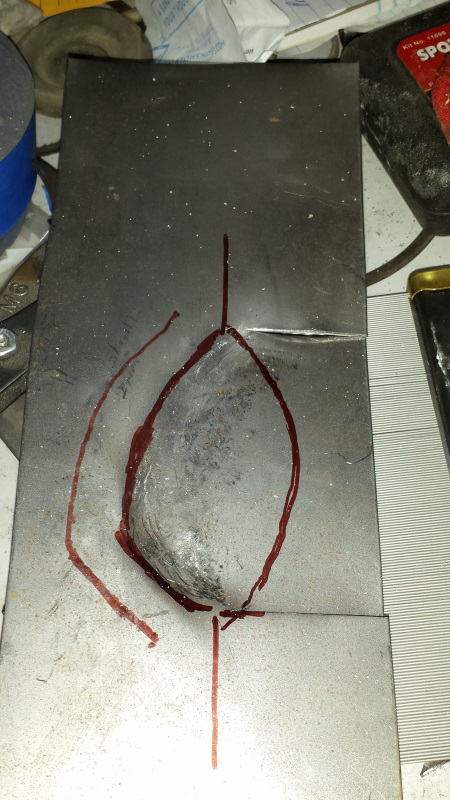 At that point, I was able to use the mount itself as a hammer form for final adjustment. Light taps only so as not to ding up the mount. 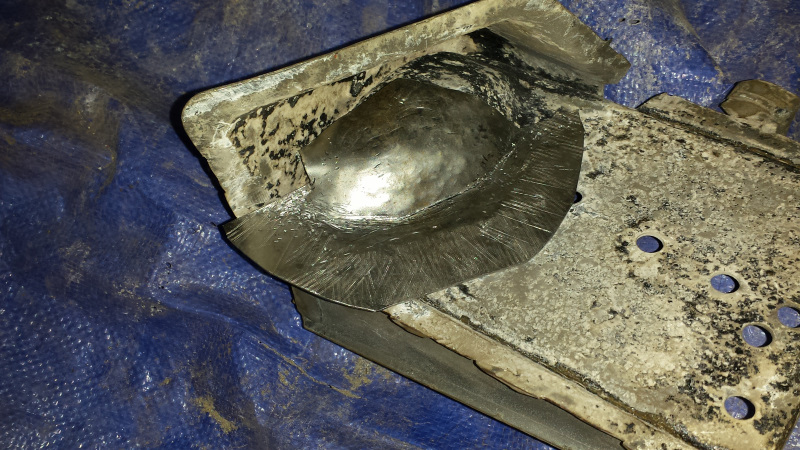 Then I repeated this to make another piece that nested inside the first. Got too busy for pics. Next, I did a little surgery to cut the outer skin wider than the inner so I could stagger the welds between layers. Hey! There's that pic of the open hole. 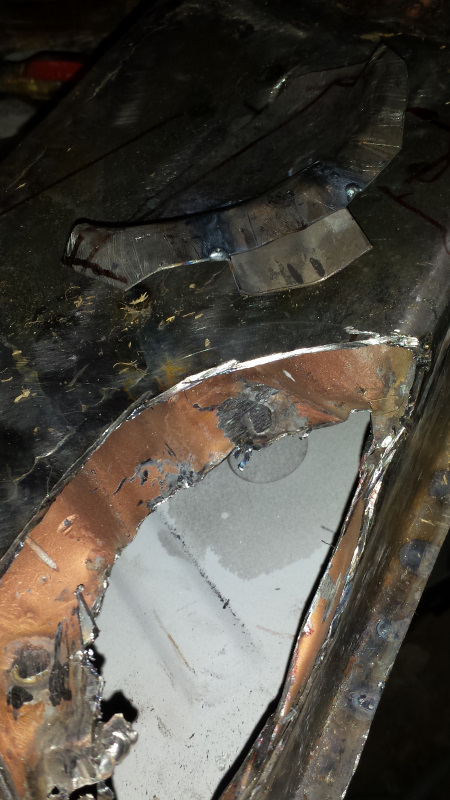 I needed to match the patch to the channel bead in the original. I cheated by forming a little scrap to the profile of the channel and welding it to the patch. 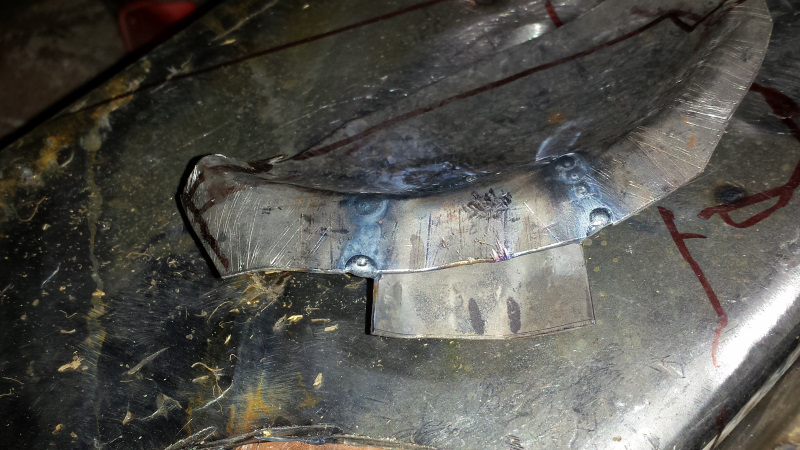 After welding the patch to the inner wall, I ground out the material over the scrap to reveal the channel. The next couple pics are disappointing because I had to use a flash which distorted the perspective and makes things look horrible. It isn't beautiful, but it doesn't look THIS bad. Anyway, it is strong and I'll probably be dead before anyone ever sees it again. 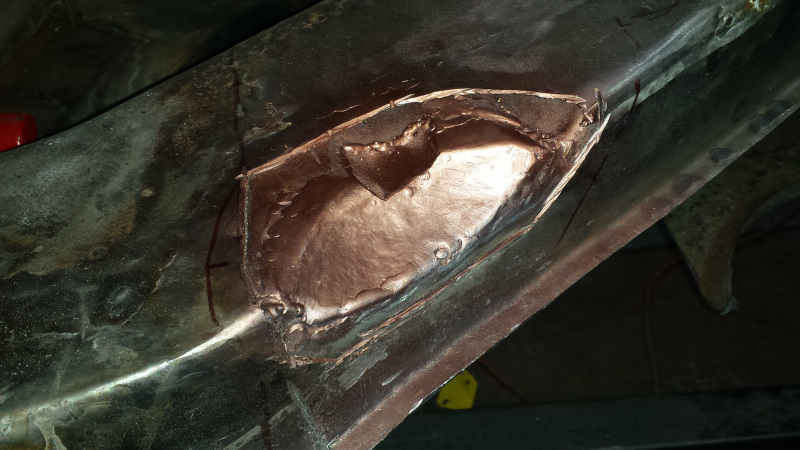 And here's a pic with the outer skin laid in place. Again, the flash messes things up. To my brain, this pic looks like up is down and down is up. I left the outer edge ragged so I could cut it flush with another piece welded to the bottom. 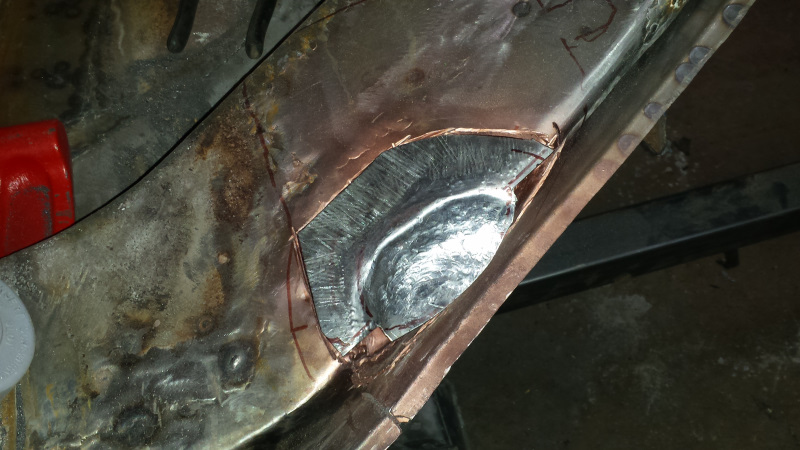 That's where I left it on Christmas. Wednesday, I welded up the outer patch and mixed up 3 tablespoons of DP50 epoxy primer to paint the inner long and inside of the mount. Here it is almost ready to weld. After this pic, I sanded off the epoxy from the areas that would be plug welded and sprayed with U-Pol copper. 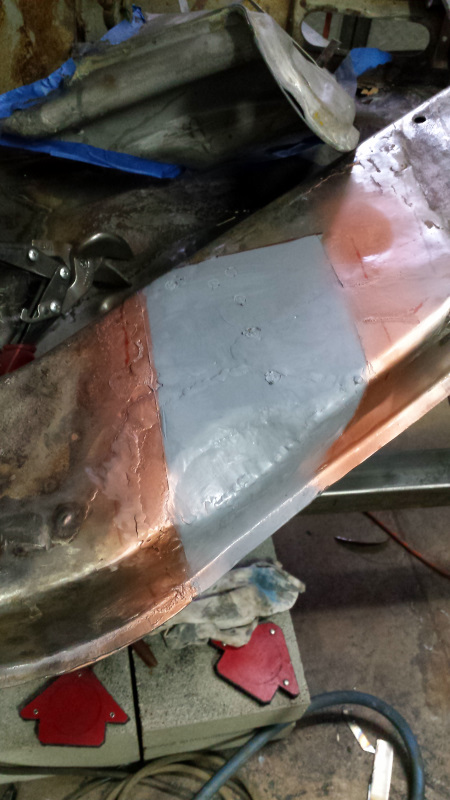 And here's the mount in place and before cleaning up any of the welds. 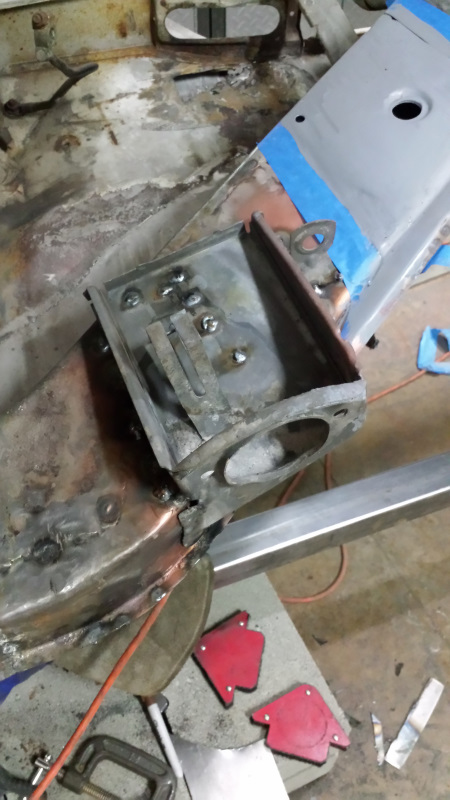 My new rotabroaches arrived a day early, but I haven't had time to use them yet. I'll probably cut out some spot welds tonight before sitting down for movie night. |
|
|
|
| bbrock |
Dec 30 2017, 06:50 PM
Post
#197
|
|
914 Guru Group: Members Posts: 5,269 Joined: 17-February 17 From: Montana Member No.: 20,845 Region Association: Rocky Mountains |
Flo No Mo
  |
|
|
|
| mb911 |
Dec 30 2017, 07:56 PM
Post
#198
|
|
914 Guru Group: Members Posts: 7,742 Joined: 2-January 09 From: Burlington wi Member No.: 9,892 Region Association: Upper MidWest |
Looking good.. Your catching up to me.. I better get mine in gear.
|
|
|
|
| andrewb |
Dec 31 2017, 01:09 AM
Post
#199
|
|
Member Group: Members Posts: 114 Joined: 25-May 10 From: UK Member No.: 11,762 Region Association: None |
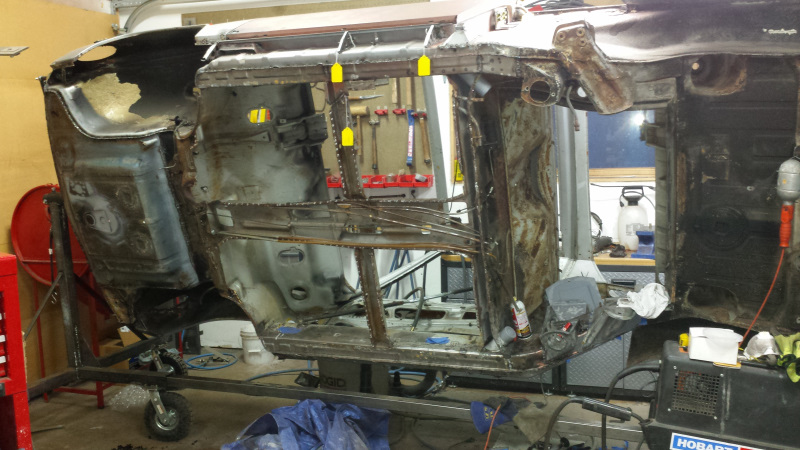
What are the little yellow tags you've left hanging on the car ?
I just know there'll be a good reason and I want to copy it (IMG:style_emoticons/default/smile.gif) |
|
|
|
| bbrock |
Dec 31 2017, 09:50 AM
Post
#200
|
|
914 Guru Group: Members Posts: 5,269 Joined: 17-February 17 From: Montana Member No.: 20,845 Region Association: Rocky Mountains |
QUOTE(andrewb @ Dec 31 2017, 12:09 AM) What are the little yellow tags you've left hanging on the car ? I just know there'll be a good reason and I want to copy it (IMG:style_emoticons/default/smile.gif) Those are my to-do reminders; mostly for tasks that were left undone because they would be easier when the car was repositioned on the rotisserie, or have to wait until some other task is completed. Picked a pack of these tags up at Staples and figured bright yellow dangly things would be hard to ignore. 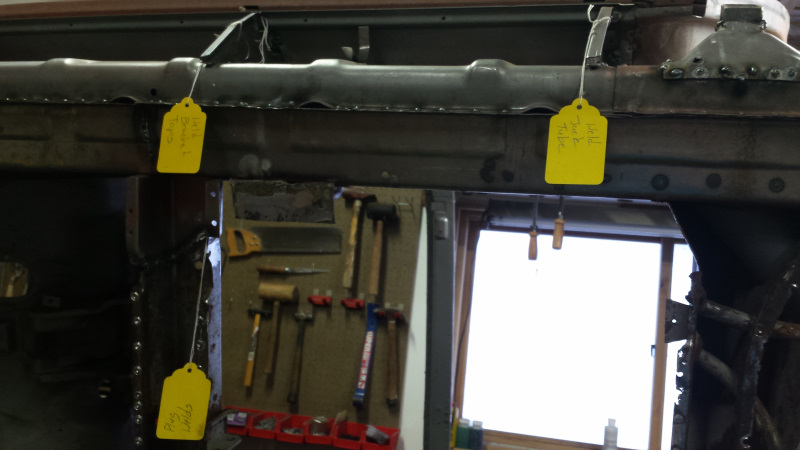 |
|
|
|
|
2 User(s) are reading this topic (2 Guests and 0 Anonymous Users)
0 Members:

|
Lo-Fi Version | Time is now: 18th April 2026 - 03:07 PM |
Invision Power Board
v9.1.4 © 2026 IPS, Inc.