|
|
|
Porsche, and the Porsche crest are registered trademarks of Dr. Ing. h.c. F. Porsche AG.
This site is not affiliated with Porsche in any way. Its only purpose is to provide an online forum for car enthusiasts. All other trademarks are property of their respective owners. |
|
|

  |

| bbrock |
 Mar 8 2018, 01:05 PM Mar 8 2018, 01:05 PM
Post
#301
|
|
914 Guru  Group: Members Posts: 5,269 Joined: 17-February 17 From: Montana Member No.: 20,845 Region Association: Rocky Mountains |
QUOTE(76-914 @ Mar 8 2018, 11:06 AM)  That sounds like weak glue. What are your shop temps. Most glues like to see temps > 60F. Question: do those dimples on the back side play a role in assemble or just molding marks? I did it in the house. Temps were 68F (shop temps run 64-66). I wish I had taken more pics of the process. I wouldn't say it was weak. It still takes a lot of effort to peel the vinyl off the plastic even with the general purpose 3M. But the way I stretched the vinyl the first time left more tension than the adhesive could hold. It was a little like stretching a skin on a drum and then trying to stick it to the bottom. It just pops back up. More than anything, I think it was my ignorance rather than problems with the glue or plastic. But I'll bet if it was fiber board like the original material, my first technique would have worked. Good question on the dimples. I pondered them because they look like they could be drill guides for the clips and screw holes. They were close, but didn't exactly line up with my original card, so I ignored them. |
   |

 
|
| cary |
Mar 9 2018, 09:49 AM
Post
#302
|
|
Advanced Member Group: Members Posts: 3,900 Joined: 26-January 04 From: Sherwood Oregon Member No.: 1,608 Region Association: Pacific Northwest |
Brent I did the same repair on Doug's door.
http://www.914world.com/bbs2/index.php?s=&...t&p=2444021 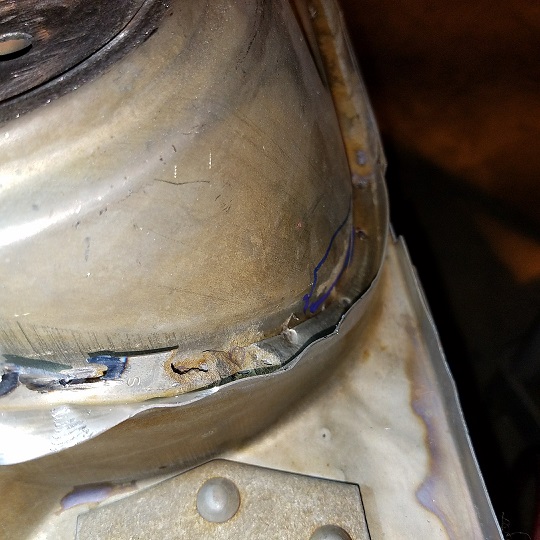 I cut the roller coaster channel off of a spare parts door. http://www.914world.com/bbs2/index.php?s=&...t&p=2495185 I just couldn't create sometime that I was happy with. Too many twists and turns. |
|
|
|
| bbrock |
Mar 9 2018, 10:57 AM
Post
#303
|
|
914 Guru Group: Members Posts: 5,269 Joined: 17-February 17 From: Montana Member No.: 20,845 Region Association: Rocky Mountains |
QUOTE(cary @ Mar 9 2018, 08:49 AM) I cut the roller coaster channel off of a spare parts door. http://www.914world.com/bbs2/index.php?s=&...t&p=2495185 I just couldn't create sometime that I was happy with. Too many twists and turns. Thanks Cary, I've read every word of Doug's thread but had forgotten about this. I hadn't looked close enough to think about that front lower corner being a 3-dimensional bend (roller coaster is the perfect term). I wonder if I could get somebody to chop the channels off a donor. That would sure save on shipping and make it economical. Funny how that little strip of angled metal complicates what would otherwise be fairly simple patches. |
|
|
|
| bbrock |
Mar 11 2018, 11:17 PM
Post
#304
|
|
914 Guru Group: Members Posts: 5,269 Joined: 17-February 17 From: Montana Member No.: 20,845 Region Association: Rocky Mountains |
Finally got a day to work on the car. I have to admit, the crowded shop situation is wearing on me. But I spent the day working on my Porsche which means I have no reason to whine.
Just did some niggly stuff today, getting closer to putting the sail panels on. There was still some rot on the middle wall of the passenger B-pillar that needed to be addressed. 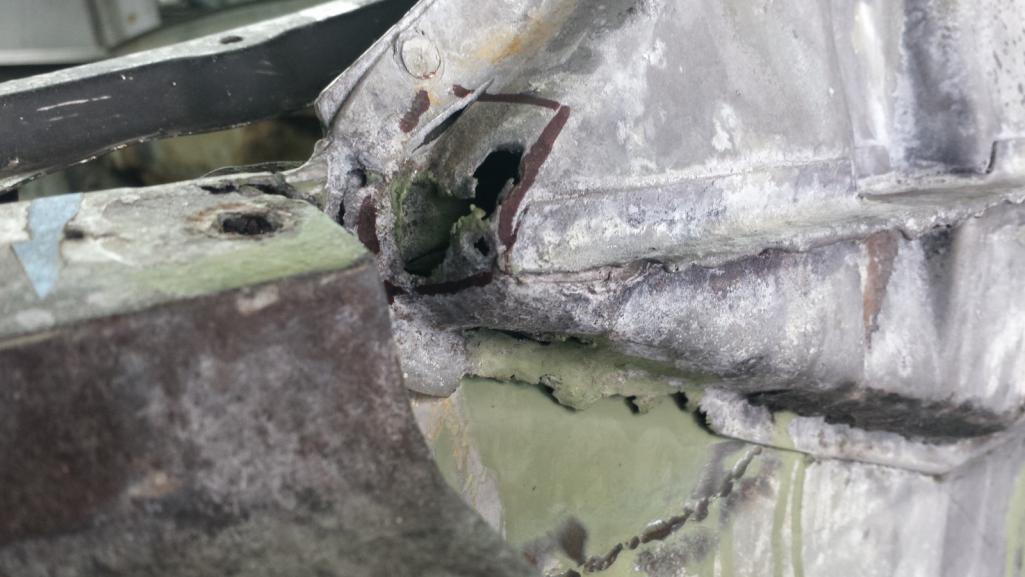 Patched up the holes and repaired the flange. This was taken before grinding was complete.  Then I rebuilt the little shelf dealy and spent a lot of time grinding and dressing all of the patch welds on the inner wheel house. 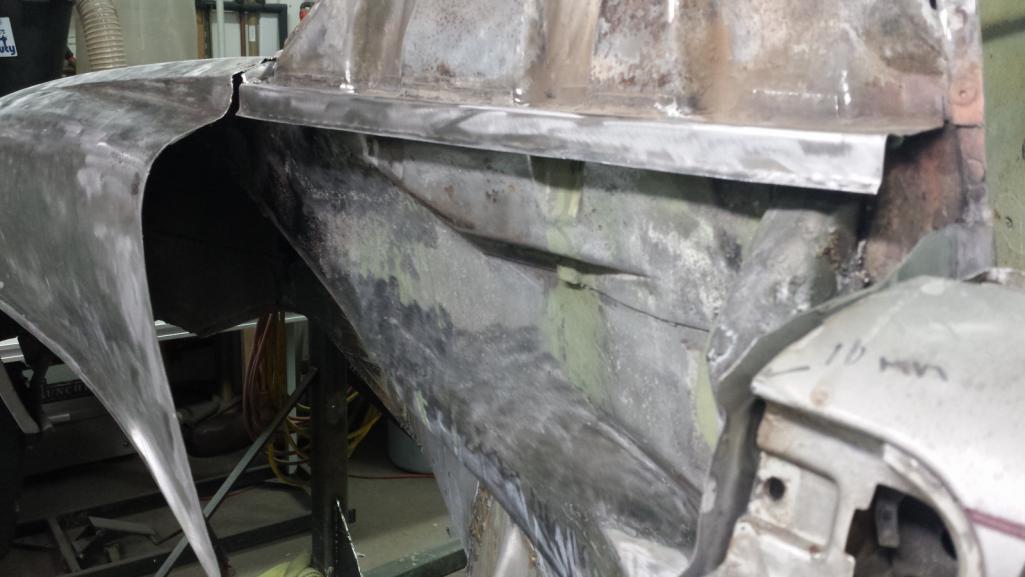 I'll treat this with Ospho again and then give it a couple coats of epoxy primer. I'm also going to lay down some seam sealer over that shelf and contour it so it sheds any moisture that drips down in there. Then I'll be ready to put the sail panels on. QUOTE(andrewb @ Mar 8 2018, 09:38 AM) (Apols to Tygaboy (IMG:style_emoticons/default/biggrin.gif) ) Mmmmm, nice b..b...b...b....bison. But you know what critter I really want to see..... ? (IMG:style_emoticons/default/biggrin.gif) Okay Andrew, I'll take a guess. Would it look something like this? 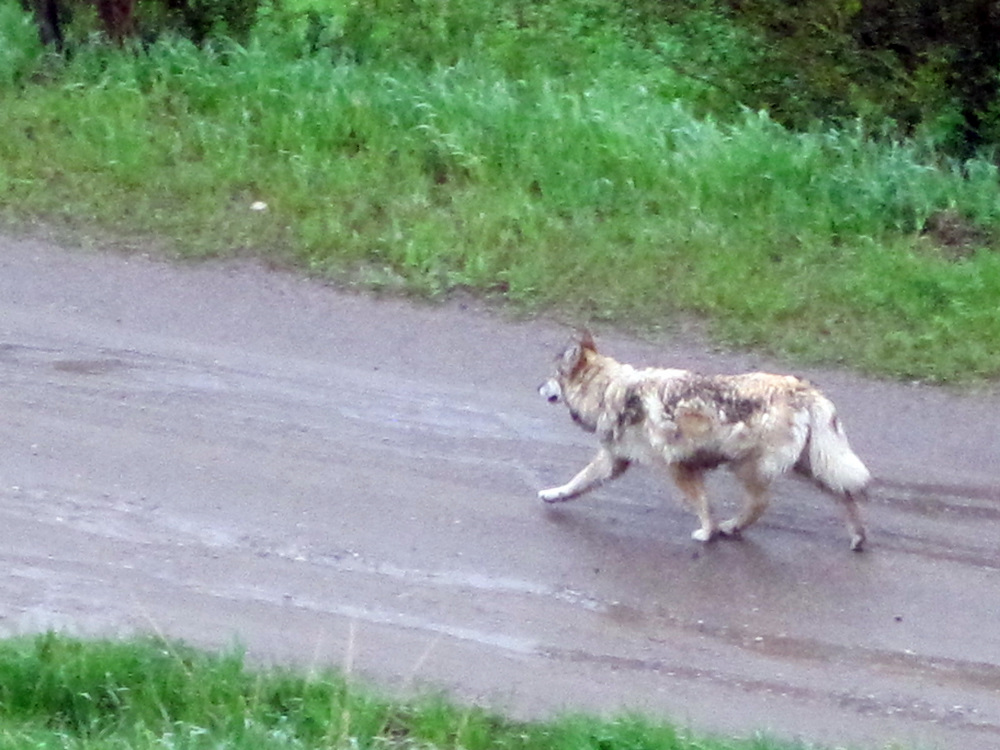 I am not positive that is what I think it is. It was walking down the road in front of our house one morning. Showed the pic to a room full of fellow wildlife biologists, including a couple who were on the Interagency Wolf Study Team that did the science before wolves were reintroduced to Yellowstone. All of them think it probably is, but can't be certain.... but this one definately is - not exactly National Geographic quality, but it's the first wolf I ever saw in the wild. 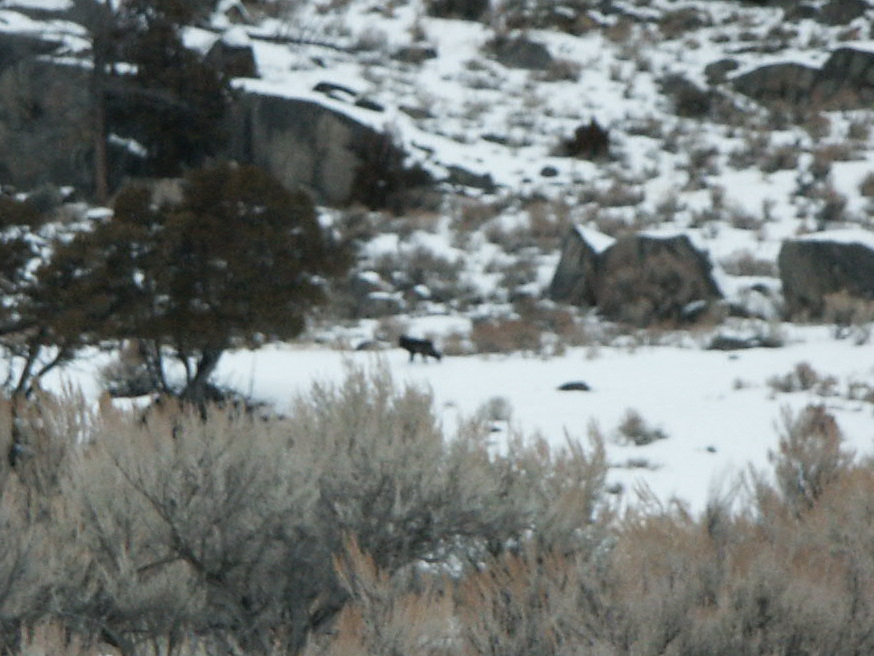 If that's not the critter you wanted, I have another guess. |
|
|
|
| bbrock |
Mar 16 2018, 11:17 PM
Post
#305
|
|
914 Guru Group: Members Posts: 5,269 Joined: 17-February 17 From: Montana Member No.: 20,845 Region Association: Rocky Mountains |
Good Progress
Been a busy week. Didn't receive data from a client when I had hoped, which left me with an unplanned fun day to work on the car. The extra day set me up for steady progress all week. First was trimming the sail panels for final fit. Once they were fit and clamped in place, I noticed they had some slight bulges from the stamping. I decided to shrink as much of those out before spraying primer. Doing it later would risk burning off primer inside the cavity where it couldn't be touched up. This is after 3-4 passes with the shrinking disc. You can see the high spots. At this stage, they've already shrunk out quite a bit. 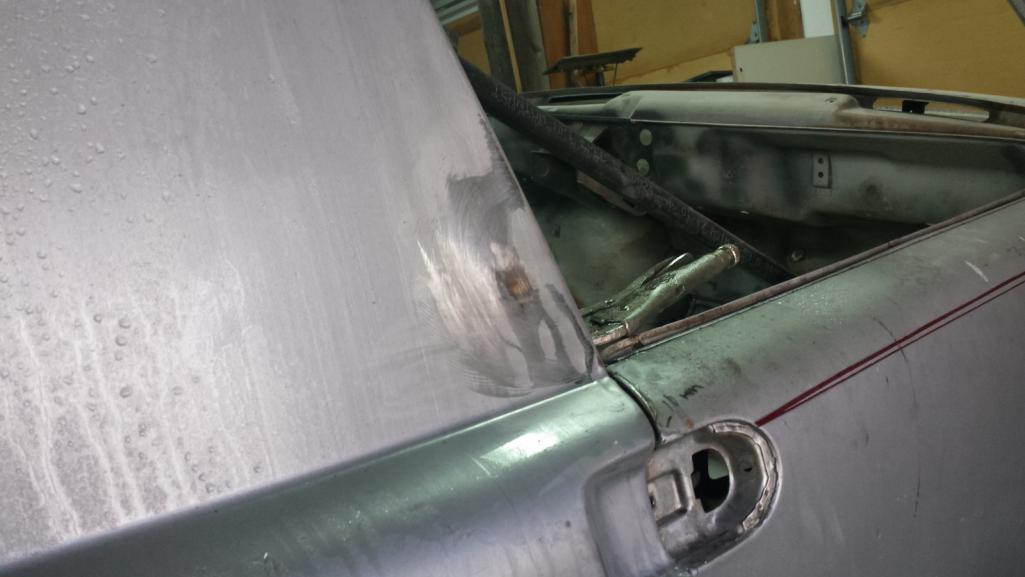 After about 45 minutes of working the shrinking disc countless times, the main high spot has shrunk down flat. There are still a few ripples in the front corner that will need some work and maybe a bit of filler, but much less than without the shrinker. In hind sight, I probably should have used hammer and dolly to flatten those ripples, but I was afraid of stretching the metal and introducing new warps into the panels that would affect the fit. 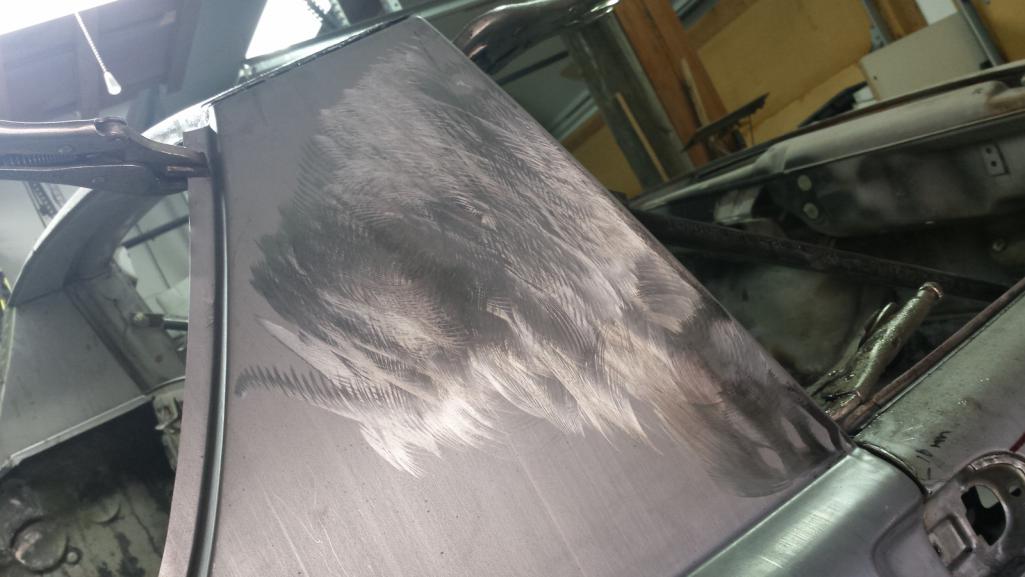 Now I was ready to shoot some primer. Put a couple medium coats of PPG DP LF epoxy on all cavity surfaces and down quite a ways under the quarter panel. 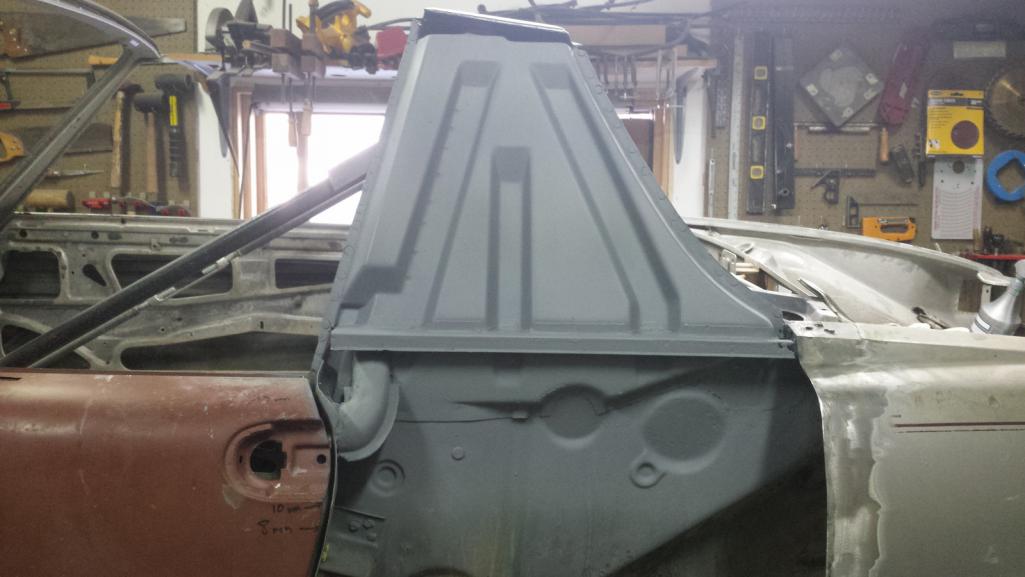 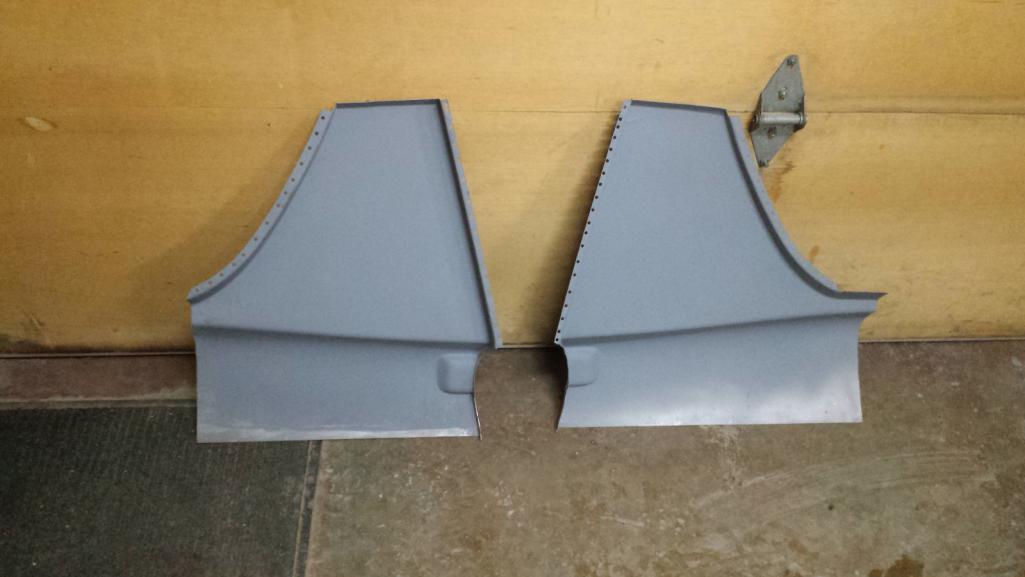 Having a full day to get the paint on set me up to make steady progress over lunch and evenings during the week. I started by doing the plug welds on both sail panels. That went smoothly. Now for the welds I've been practicing for With the plug welds done, I loaded a spool of EZ Grind wire for the butt welds. I don't know if it will make any difference. Some people say there is no benefit, others say it hammers out better than normal wire. I figured I could use every bit of help to achieve those invisible welds on these panels. Here's the passenger side clamped and tacked. 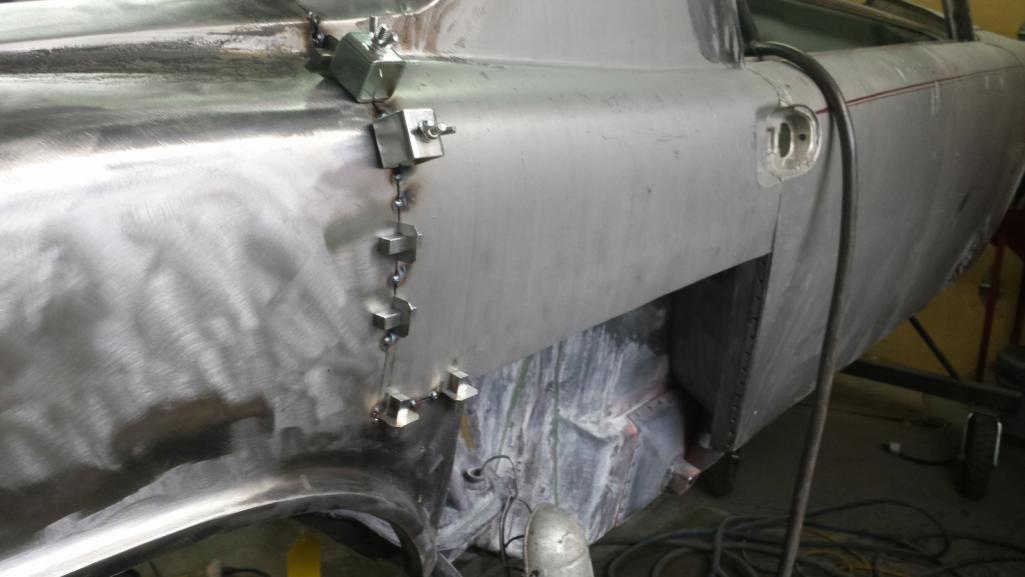 About 3 hours later, I had the butt welds complete and rough ground with 36 grit just to take the weld down just proud of the parent material. I'll come back and grind a little more, work it with heat, hammer and dolly, and more grinding and blending later. 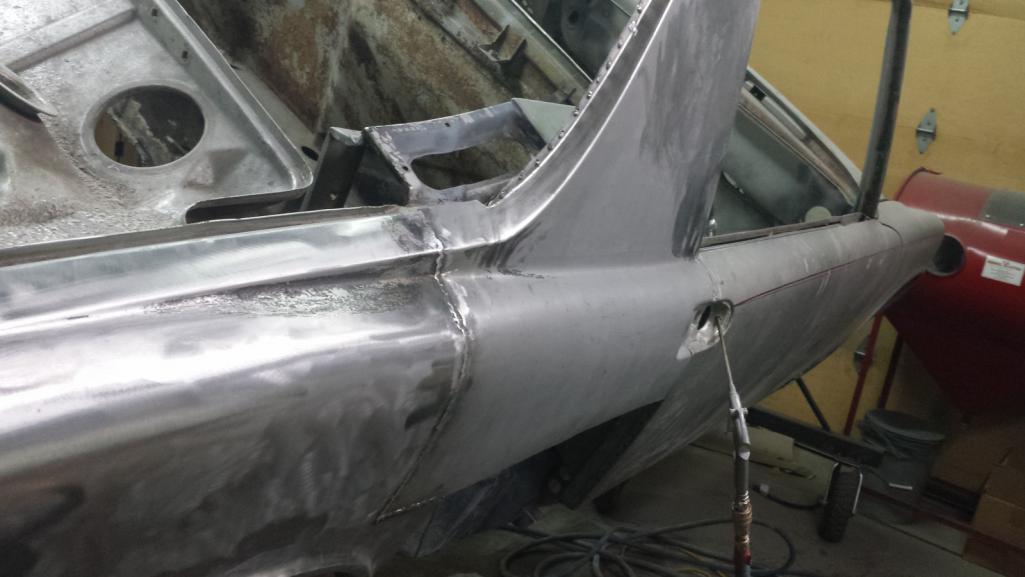 On the driver's side, I had to use a little different approach. The lower edge of the sail panel had a bit of a wave in it. To avoid winding up with an oil can welded in, I trimmed, fit, and clamped the lower section of the quarter panel at the same time. I removed a couple clamps before remembering to snap a picture, but here it is tacked in with most of the clamps still in place. 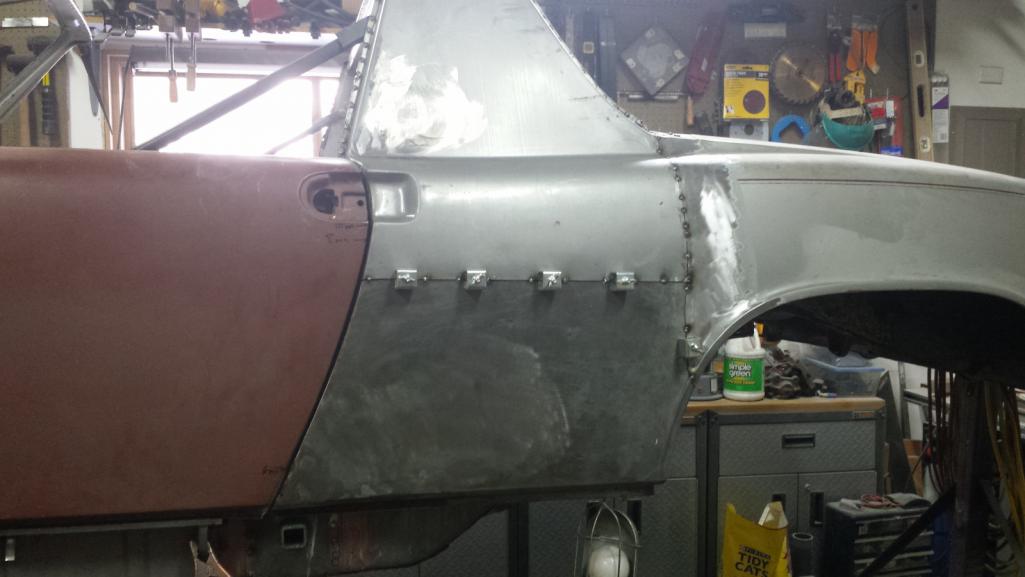 Then the long, slow process of zapping the butt welds shut. Another 3 hours for this. I came very close to getting 'er done before shutting down to go for a walk with the wife and dog and then movie night. 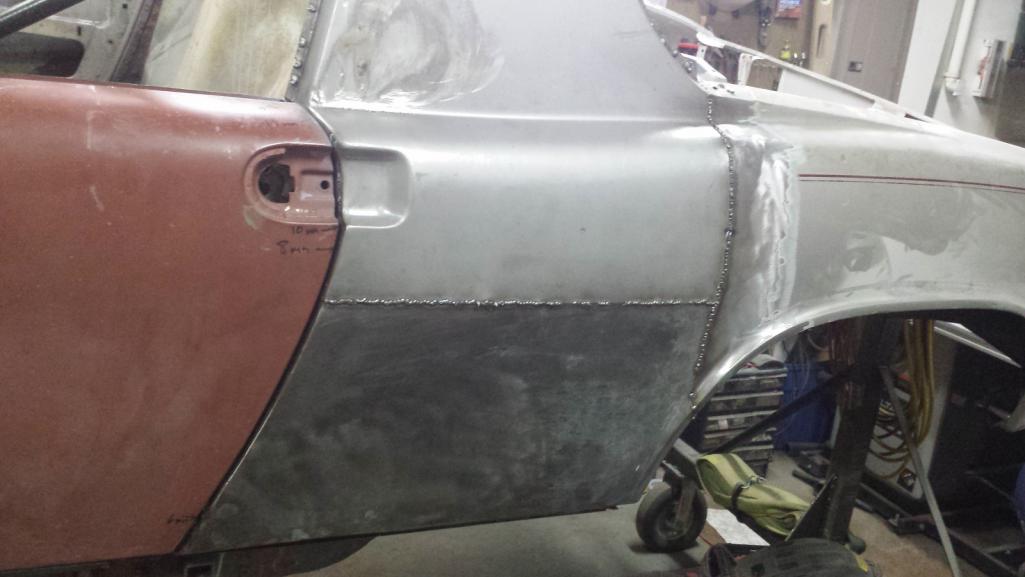 I did not expect to start the weekend this far along. Should easily get the lower quarter on the passenger side welded in the morning and then work on grinding, hammering, and blending. Really hoping to get those invisible welds on this! |
|
|
|
| andrewb |
Mar 17 2018, 02:15 AM
Post
#306
|
|
Member Group: Members Posts: 114 Joined: 25-May 10 From: UK Member No.: 11,762 Region Association: None |
Sorry Brent - I'm being too obscure. I just wanted to repeat one of my favourite lines from Leslie Nielsen https://www.youtube.com/watch?v=wS3LWOTCW4A . (IMG:style_emoticons/default/biggrin.gif)
As for your repairing/welding - it's really opened my eyes to what is possible when it comes to cutting and then refitting panels. I've always tried to unpick whole panels rather than cut across them but now that you've shown what's possible I might be a bit braver. I certainly couldn't replicate those butt welds just yet - mucho practice required ! Thanks for the inspiration. |
|
|
|
| defianty |
Mar 17 2018, 04:05 AM
Post
#307
|
|
Senior Member Group: Members Posts: 659 Joined: 9-August 06 From: Essex, UK Member No.: 6,621 Region Association: None |
Nice work Brent - you're catching me up!
|
|
|
|
| 76-914 |
Mar 17 2018, 09:08 AM
Post
#308
|
|
Repeat Offender & Resident Subaru Antagonist Group: Members Posts: 13,878 Joined: 23-January 09 From: Temecula, CA Member No.: 9,964 Region Association: Southern California |
|
|
|
|
| ablesnead |
Mar 17 2018, 12:06 PM
Post
#309
|
|
Member Group: Members Posts: 157 Joined: 16-September 13 From: United States Member No.: 16,395 Region Association: None |
...well you gotta pay some attention to the dog...wife too I guess...but you are now responsible for the emotional travels of all of us that would never do what you are doing , and satisfying that experience vicariously through yours...WE JUST CANNOT BE LEFT HANGING !...Please dont quit on this project , its all about your fans....
|
|
|
|
| Dion |
Mar 17 2018, 09:02 PM
Post
#310
|
|
RN Group: Members Posts: 2,926 Joined: 16-September 04 From: Audubon,PA Member No.: 2,766 Region Association: MidAtlantic Region |
(IMG:style_emoticons/default/pray.gif) (IMG:style_emoticons/default/welder.gif) love the work Brent.
Also enjoying all the wildlife keep it all coming! Glad to see your eyes are better and back in the swing of things. |
|
|
|
| bbrock |
Mar 17 2018, 10:00 PM
Post
#311
|
|
914 Guru Group: Members Posts: 5,269 Joined: 17-February 17 From: Montana Member No.: 20,845 Region Association: Rocky Mountains |
You guys are too kind. I've been cracking up about that Leslie Nielsen clip all day. So as not to leave anyone hanging, here's today's progress.
First I lowered the skirt on the passenger's side. It was a bitch getting that panel fit and clamped in place, but I persevered. 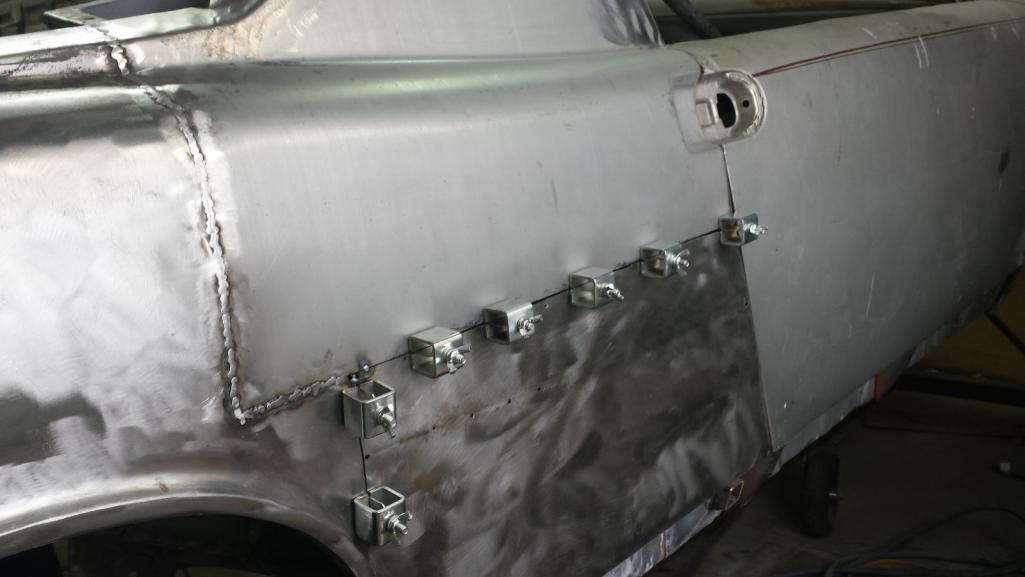 Then a couple hours of slow welding and it was in. Those zits in the middle were from filling in the holes left from the PO's body work. 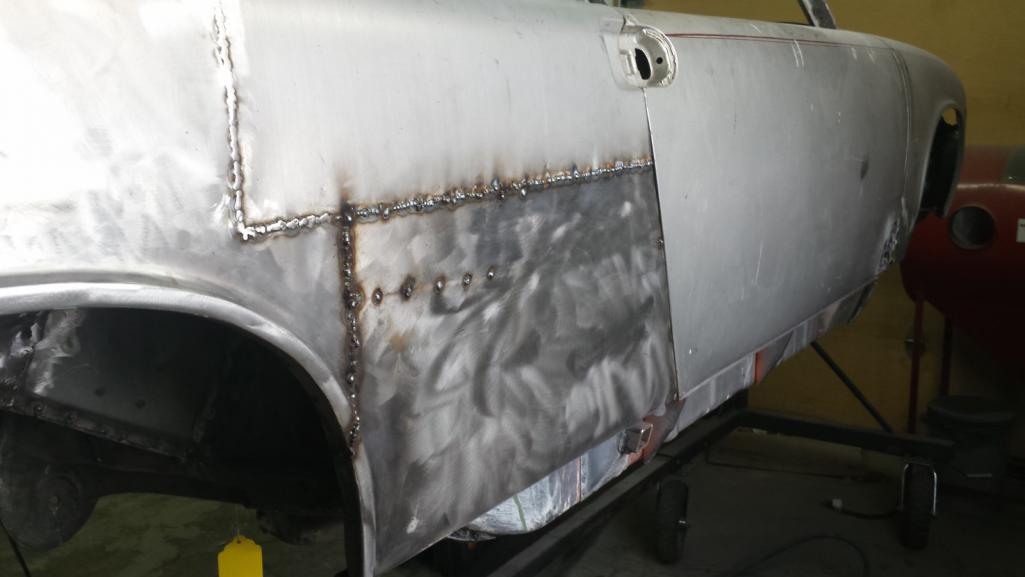 Attempting the vanishing act Now to get serious about grinding and see if I can make those welds disappear, but first, a word about safety. 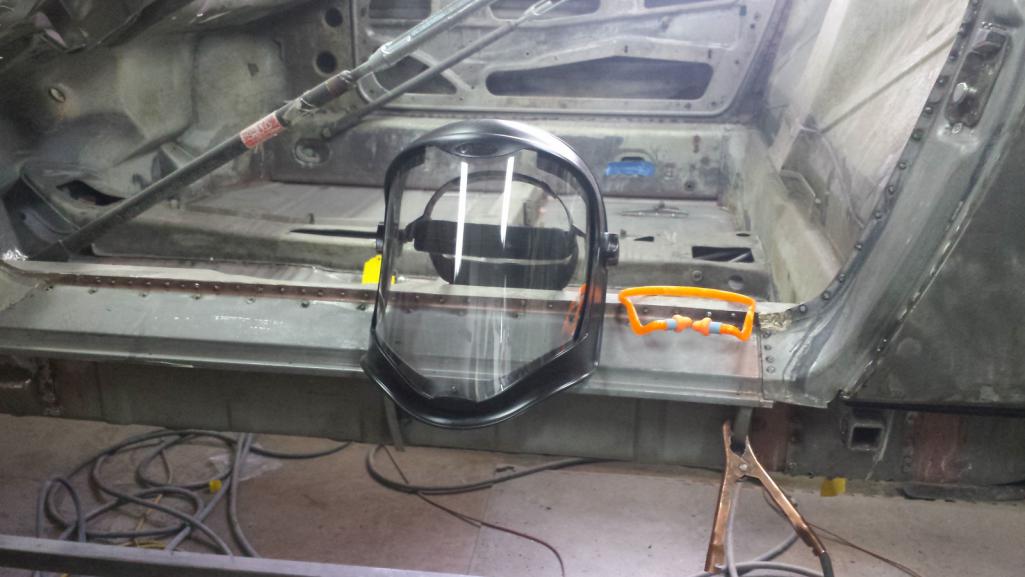 We'll see if this keeps the shit out of my eyes. (IMG:style_emoticons/default/laugh.gif) Grinding, grinding, and more grinding. Hours later, here we are. 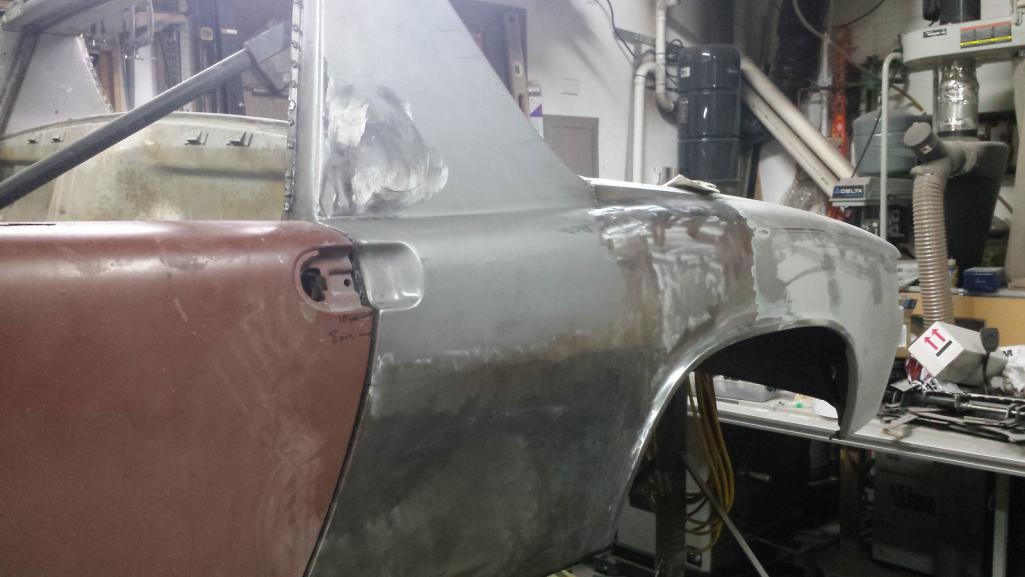 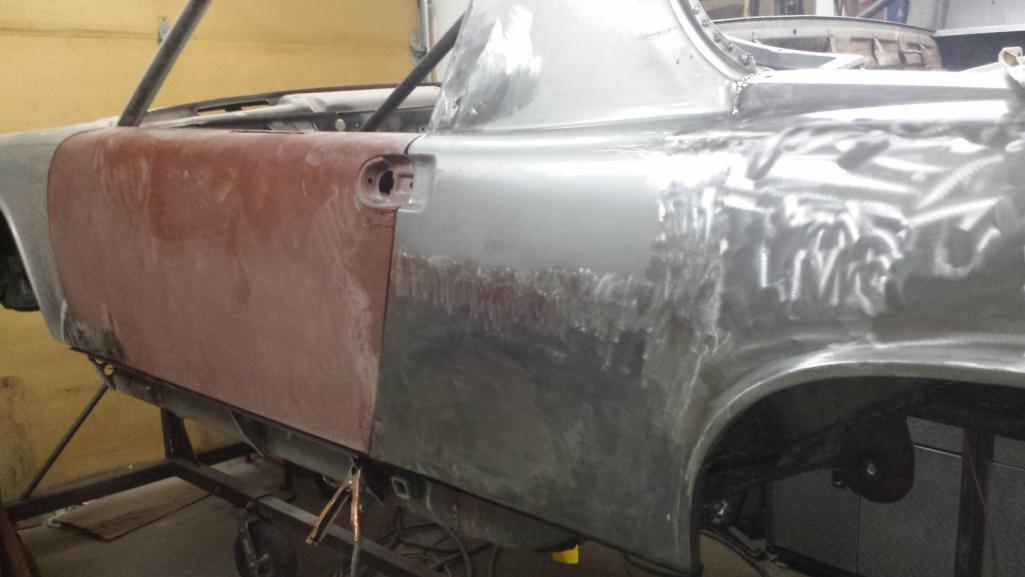 Not invisible yet, but it's looking promising. There are a few pinholes to fill, but not too many. Hopefully with hammer and dolly and judicious use of the torch, I can make even these remaining googes disappear. 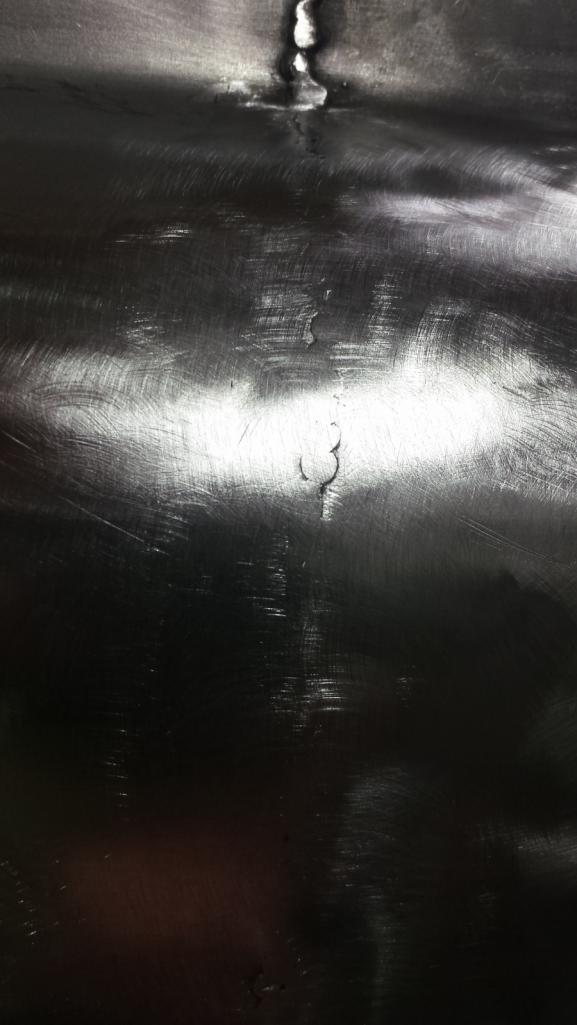 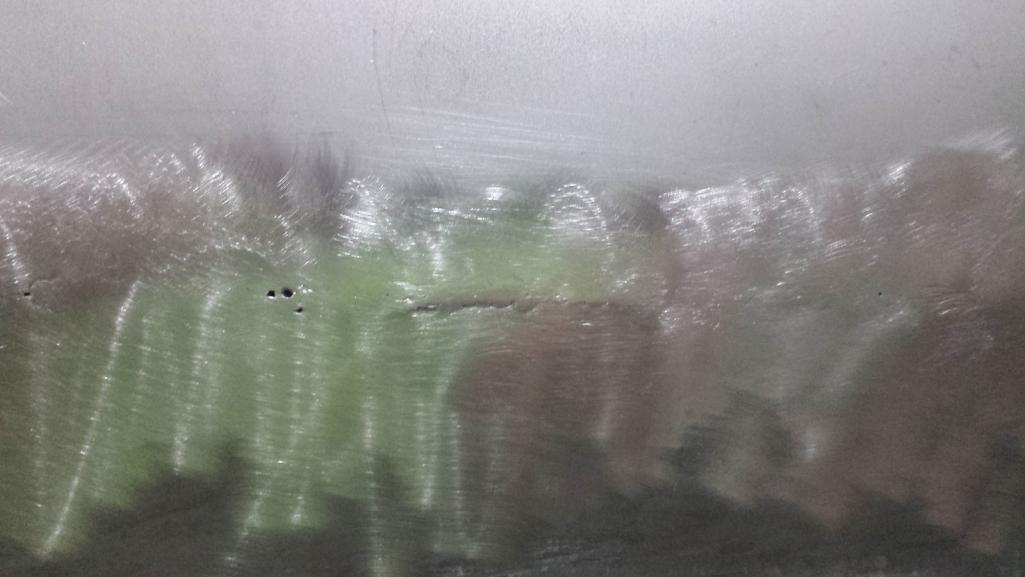 Now for the important stuff. Despite living within eyesight of a chain of beaver ponds, they have so far eluded my haphazard attempts to capture on camera, so no beaver shots today. (IMG:style_emoticons/default/av-943.gif) I've managed to snap shots of ripples on water just after they dove, and once got a fantastic shot of a beaver dam a split second after the beaver jumped off. So, the best I can do is a shot of one of the ponds. 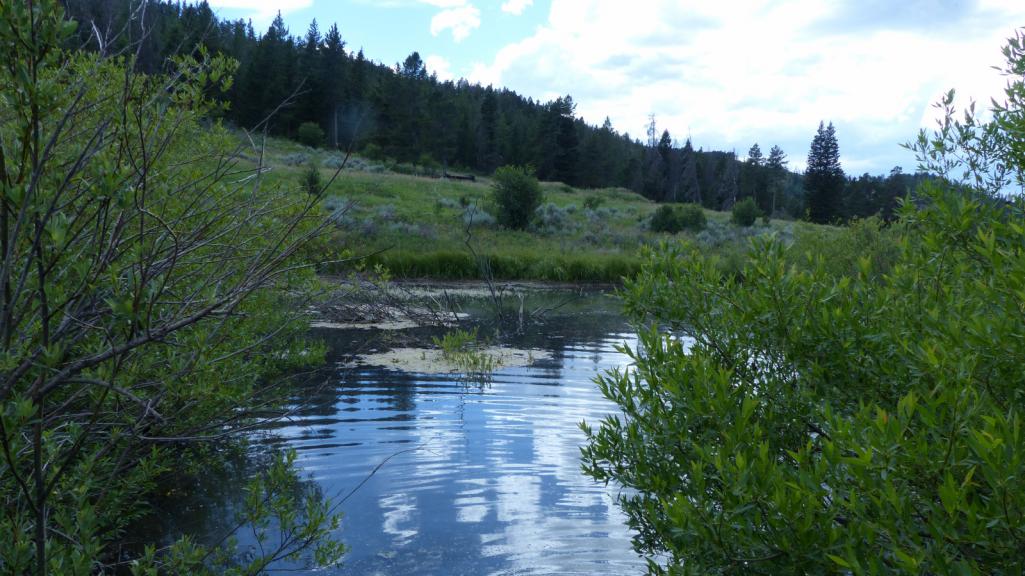 And a muskrat swimming in it. 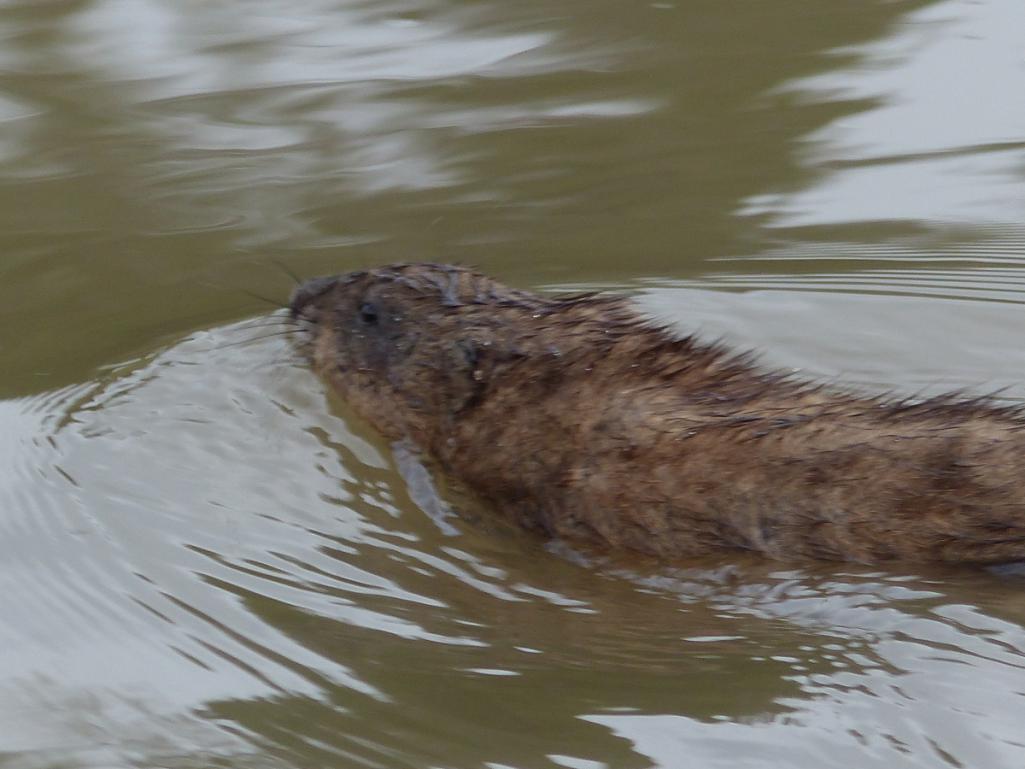 |
|
|
|
| andrewb |
Mar 18 2018, 12:40 AM
Post
#312
|
|
Member Group: Members Posts: 114 Joined: 25-May 10 From: UK Member No.: 11,762 Region Association: None |
QUOTE(bbrock @ Mar 18 2018, 06:00 AM) no beaver shots today. (IMG:style_emoticons/default/av-943.gif) (IMG:style_emoticons/default/biggrin.gif) Ah well - there's always the sandbox. On less important matters - what worries me about the welding/grinding thing - with my rubbish welding - is that I never know how much thickness of weld is left after I've ground the top off. Lots of practice required on bits of scrap I guess. Keep going with the master class. |
|
|
|
| Cairo94507 |
Mar 18 2018, 06:09 AM
Post
#313
|
|
Michael Group: Members Posts: 10,612 Joined: 1-November 08 From: Auburn, CA Member No.: 9,712 Region Association: Northern California |
Really nice work. (IMG:style_emoticons/default/beerchug.gif)
I really would like to see a beaver in the wild though..... but I appreciate the Muskrat. |
|
|
|
| tygaboy |
Mar 18 2018, 07:43 AM
Post
#314
|
|
914 Guru Group: Members Posts: 5,810 Joined: 6-October 15 From: Petaluma, CA Member No.: 19,241 Region Association: Northern California |
"The ever elusive Beaver..." Reminds me of my college days.
Brent - Glad to hear your eyes are all good. Great work on those fenders! There's a part of me that almost wants to leave the weld lines visible and go with a Frankenstein theme... OK, maybe not. Here's hoping that getting the fenders back on is one of those points in time when you can step back, feel it's all worth it, and appreciate just how far you've come. We sure do! (IMG:style_emoticons/default/beerchug.gif) Again, great work and thanks for taking us along with you on your rebuild/rebirth journey. Keep it coming and best to you, my friend. Chris |
|
|
|
| mb911 |
Mar 18 2018, 07:47 AM
Post
#315
|
|
914 Guru Group: Members Posts: 7,742 Joined: 2-January 09 From: Burlington wi Member No.: 9,892 Region Association: Upper MidWest |
Looks great.. Someday I get that far grinding. Not at that stage yet..
|
|
|
|
| bbrock |
Mar 18 2018, 08:19 AM
Post
#316
|
|
914 Guru Group: Members Posts: 5,269 Joined: 17-February 17 From: Montana Member No.: 20,845 Region Association: Rocky Mountains |
I like this crowd (IMG:style_emoticons/default/beerchug.gif) OT warning: Quick beaver diversion. Years ago when the beaver moved into the valley, the dam caused some minor road flooding during spring snow melt (which always happened but had become worse because of the dam). The then chairman of our road maintenance committee took it upon himself to whack a chunk out of the beaver dam with a backhoe in November just before winter freeze. That left the beaver lodge high and dry, which left the little buggers no choice but to burrow into the bank for shelter - in this case, the bank being under the road. Of course, the road collapsed. The next road meeting was all about what to do about "the beaver problem." Most were concerned for preserving the beaver, including the land owner where the pond was built. I stood up and explained why whacking the dam caused the worse problem of burrowing under the road, and offered up a device called the "Beaver Deceiver" as a solution that would let the beaver stay but also maintain the water level where we wanted it. I also rattled off some facts about how beaver are good for our wells and had built a very nice fire protection pond for free. Immediately people in the crowd started calling me "Beaver Man" to which I responded that I didn't think my wife would care for that nickname at all. Stone silence from the crowd. It's nice to be in a group that appreciates good beaver humor.
BTW, we never needed the Beaver Deceiver. By that time, the beavers were well on their way to building a chain of dams that slows down the snow melt and the road hasn't flooded in years because of them. As usual, beaver is the solution, not the problem. Now back to the regularly scheduled program. |
|
|
|
| mb911 |
Mar 18 2018, 08:33 AM
Post
#317
|
|
914 Guru Group: Members Posts: 7,742 Joined: 2-January 09 From: Burlington wi Member No.: 9,892 Region Association: Upper MidWest |
Lol that is hilarious.. Love it..
|
|
|
|
| bbrock |
Mar 18 2018, 09:06 AM
Post
#318
|
|
914 Guru Group: Members Posts: 5,269 Joined: 17-February 17 From: Montana Member No.: 20,845 Region Association: Rocky Mountains |
QUOTE(andrewb @ Mar 18 2018, 12:40 AM) On less important matters - what worries me about the welding/grinding thing - with my rubbish welding - is that I never know how much thickness of weld is left after I've ground the top off. Lots of practice required on bits of scrap I guess. Keep going with the master class. Okay, back OT. This has been my nemesis from the start. It took me awhile to figure out how much harder the weld filler was than the surrounding material, and that the weld usually winds up in a little valley thanks to the shrink. Ben's tutelage has been a huge help understanding this. Being able to scrutinize and copy the work of Ben, Stephen, Chris, and others has also been important. And then there is the work Kent is doing on Michael's car which I think is the gold standard and provides a, perhaps unattainable, goal to chase. And of course, lots of practice that you get plenty of working on a project like this. The EZ Grind wire is interesting. It's a bit of a misnomer. It isn't that much easier to grind. But it does make a softer weld that grinds flatter to the parent material and also seems to lay a bit flatter in the joint. I was happy to see that once I ground down to the level of the parent material, much more of the weld had disapeared than with the regular wire. I've read claims that it also hammers out easier to let you restretch the shrink. Hopefully I'll find out today. In general, I think experience would trump any advantage of the softer wire, but for a bumbling idiot like me, I do think it has helped. I'm not claiming victory here yet, but I'm not defeated either! BTW, it is amazing how much your mind wanders during the slow process of welding and grinding. It can almost be hallucinogenic. This weekend, Sebastian Cabot has popped into my head a few times. (IMG:style_emoticons/default/WTF.gif) Anyone remember him? Man, that dates back older than my car. |
|
|
|
| altitude411 |
Mar 18 2018, 09:39 AM
Post
#319
|
|
I drove my 6 into a tree Group: Members Posts: 1,306 Joined: 21-September 14 From: montana Member No.: 17,932 Region Association: Rocky Mountains |
QUOTE(bbrock @ Mar 18 2018, 08:06 AM) This weekend, Sebastian Cabot has popped into my head a few times. (IMG:style_emoticons/default/WTF.gif) Anyone remember him? Man, that dates back older than my car. (IMG:style_emoticons/default/blink.gif) The butler from family affair? Uh... startin to worry about you brother. It's that time of year here in Montana... cabin fever? or in your case garage fever?!? Go outside and take some deep breaths man, go for a long walk. your not getting your drinking water from the beaver pond are you? (IMG:style_emoticons/default/drunk.gif) Seriously, your doing a really fantastic job. I should see you cruising your ride in Southwest Montana this summer. Thanks for the thread! |
|
|
|
| bbrock |
Mar 18 2018, 01:54 PM
Post
#320
|
|
914 Guru Group: Members Posts: 5,269 Joined: 17-February 17 From: Montana Member No.: 20,845 Region Association: Rocky Mountains |
QUOTE(altitude411 @ Mar 18 2018, 09:39 AM) QUOTE(bbrock @ Mar 18 2018, 08:06 AM) This weekend, Sebastian Cabot has popped into my head a few times. (IMG:style_emoticons/default/WTF.gif) Anyone remember him? Man, that dates back older than my car. (IMG:style_emoticons/default/blink.gif) The butler from family affair? Uh... startin to worry about you brother. It's that time of year here in Montana... cabin fever? or in your case garage fever?!? Go outside and take some deep breaths man, go for a long walk. your not getting your drinking water from the beaver pond are you? (IMG:style_emoticons/default/drunk.gif) I know, right? (IMG:style_emoticons/default/screwy.gif) (IMG:style_emoticons/default/lol-2.gif) I wish I could blame it on flashbacks, but I think I was the only kid in school not dropping acid. And yes, we are talking about the one and only Mr. French. How random is that? Now how about a mid-day update? More on the driver's quarter - knowing when to quit? Started this morning grinding the backsides of the welds in prep for plannishing with hammer and dolly. We never get to see the seamy underbelly of these patches, so here it is before grinding. 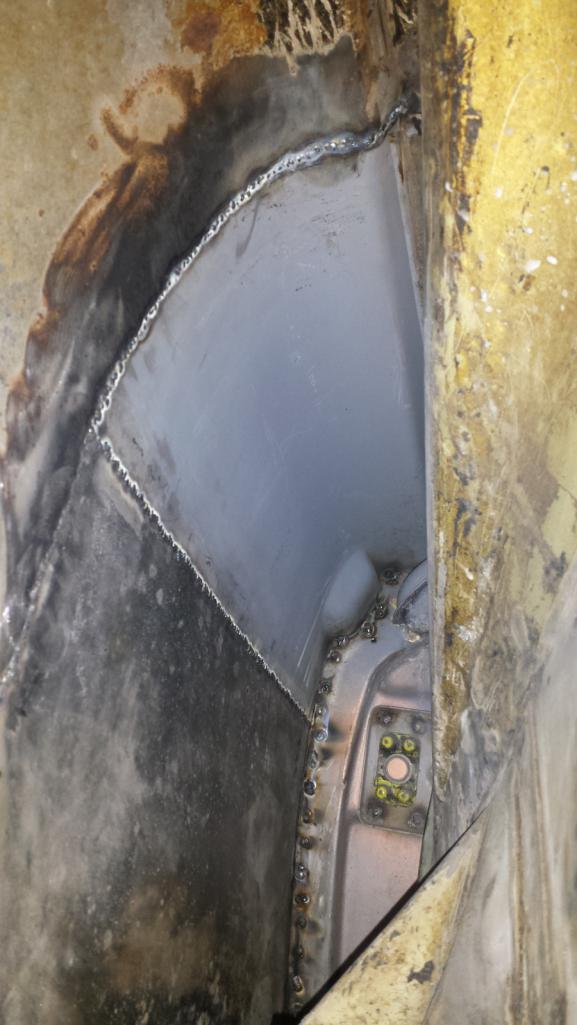 Notice the plug welds inside the door jamb? Those were a PITA but I did it that way to leave nice, factory looking spots on the front. I think they look good anyway. (IMG:style_emoticons/default/shades.gif) This pic also shows an example of what I meant a few posts back when I said I needed to be careful not to get excited and skip a step. The step I skipped was trimming the weld flange on the RD sail panel to match the factory quarter. Would have been easy before the part was welded in, not it will require some delicate surgery with the Dremel. (IMG:style_emoticons/default/blink.gif) I'll weld that seam between flanges after the surgery. 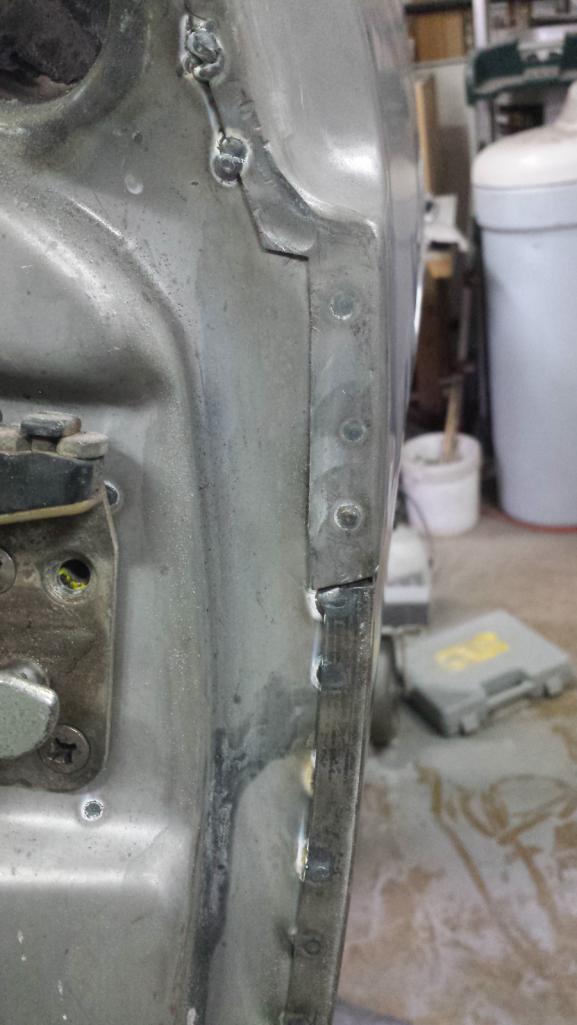 After grinding the backs of the welds and plannishing with hammer and dolly followed by just a touch of grinding with an 80 grit disc, I had the welds 98% invisible (sorry, forgot to snap a pic). Then I needed to fill pin holes. Zapped them with very quick bursts to keep the heat down. 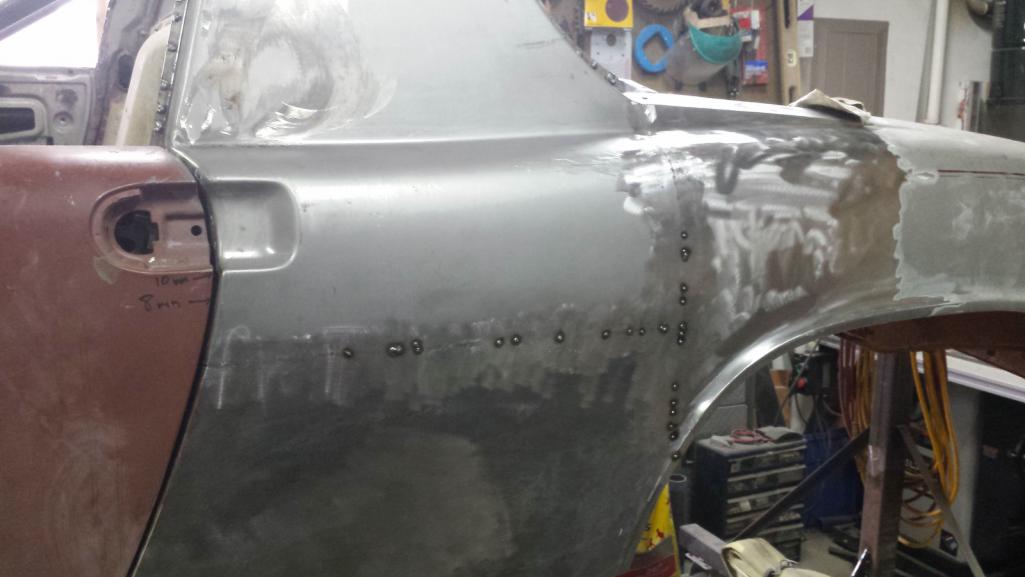 But dang if those didn't create a few boogers that don't seem to want to hammer and grind out. When cold hammering didn't work, I tried heating them to dull cherry with a MAP torch and hammering. It sort of worked, but I was stretching metal in areas I didn't want in addition to the booger spots. I don't know if it is because the MAP flame heats a wider area compared with O/A, or maybe I don't know what I'm doing. Anyway, if you run your hand along the seam, it feels like it has been hit by a bunch of golf balls. I think the magic shrinking disc will pull a lot of that out, and more hammer and dolly work will probably finish it up, but there is a good chance I'll need a thin skim of filler over the joints. Still, I'm pretty happy with where I left it. 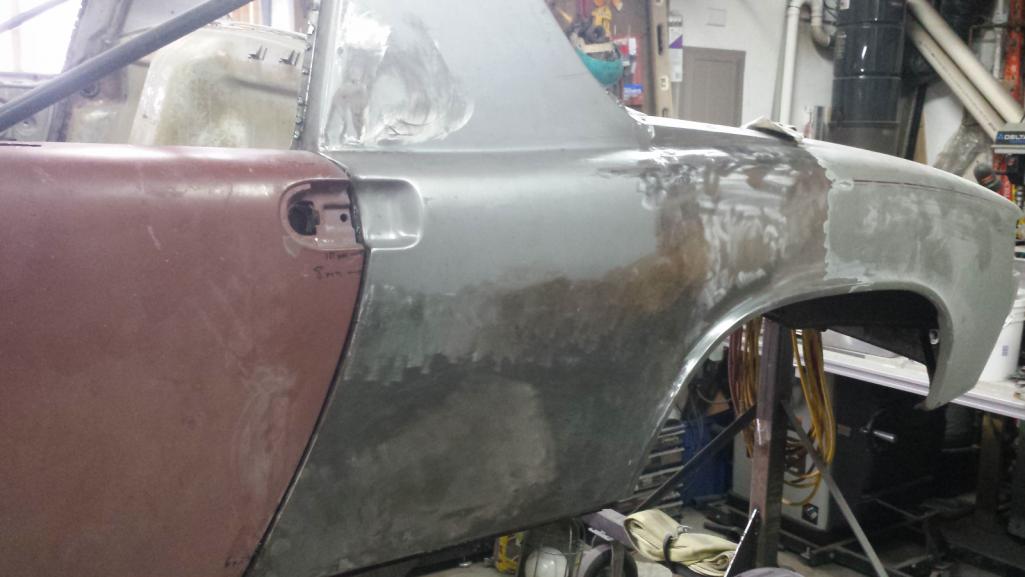 Now back to the shop to work on the passenger's side. |
|
|
|
|
4 User(s) are reading this topic (4 Guests and 0 Anonymous Users)
0 Members:

|
Lo-Fi Version | Time is now: 18th April 2026 - 10:30 PM |
Invision Power Board
v9.1.4 © 2026 IPS, Inc.